< P4U2R
No edit summary |
Scatteraxis (talk | contribs) |
||
| (33 intermediate revisions by 13 users not shown) | |||
| Line 1: | Line 1: | ||
{{ | {{P4U2R/CharacterLinks}} | ||
===== | ==Overview== | ||
{{Overview | <div id="home-content" class="home-grid"> | ||
| | {{card|width=4 | ||
|header=Overview | |||
|content=WATCHA! '''Chie Satonaka''' is a '''Martial-Artist rushdown''' character that uses her speed and pressure tools to overwhelm her opponent's defenses. With high mobility, good pressure, and terrifyingly high damage potential, Chie has everything an aggressive player needs to rush their opponents into oblivion. | |||
When the opponents are stuffed into the corner, Chie excels. Her suite of fast normals like {{clr|1|5A}} (which is 5f) and {{clr|2|5B}} help keep her opponents sitting still in pressure, while Chie's {{clr|4|D}} normals keep them blocking on wakeup. Chie's pressure is lengthy and has a good number of frame-traps and safe ending points, while her mixup potential is quite strong with {{clr|4|5DD}} > IAD {{clr|2|j.BB}}/{{clr|1|2A}}. Once she cracks her opponents open, Chie has access to decent damage potential, good meter building and great corner carry, allowing her to drag her opponents to the corner and set up for mixups or pressure. | |||
| | |||
| | If Chie has meter though, her power level jumps. Chie has access to a number of '''incredible metered options''' for increasing her damage potential. Every single one of her supers either hits like a truck or enables her to hit like a truck- {{MiniMoveCard|input=236236C|label=God's Hand}} and {{MiniMoveCard|input=214214C|label=Agneyastra}} have exceptionally high base damage, while {{MiniMoveCard|input=236236A|label=Power Charge}} lets Chie burn 50 meter for a damage buff. While in Power Charge, '''many of Chie's moves become Fatal Starters''' (depending on the version used), allowing her damage potential to skyrocket even further. Her Shadow version, in particular, highly benefits from this playstyle. Chie loves meter, and meter loves Chie. | ||
| | |||
| pros = | Chie isn't without her flaws, though. Her short normals tend to make her struggle in neutral against longer pokes. She will often have to play carefully around her opponents, waiting for the right time to jump in and strike. As well, Chie really relies heavily on meter for outputting meaningful damage. Her meterless routes tend to leave a lot to be desired in terms of damage, but their aforementioned qualities tend to make up for it. All-in-all, Chie is perfect for players who want to feel the rush of high-speed decision making and strong pressure. | ||
}} | |||
{{P4U2R/infobox | |||
|fastestAttack = {{clr|1|5A}} (5F) | |||
|reversalType = Counter | |||
|fatalStarter = {{clr|3|214C}}/{{clr|4|D}} <br> All Skills & SP Skills during {{clr|1|236236A}} <br> All moves during {{clr|2|236236B}} | |||
|fatalRecovery = {{clr|2|B}}+{{clr|4|D}} (whiffed catch), {{clr|3|236236C}}/{{clr|4|D}} | |||
}} | |||
{{ProsAndCons | |||
|intro = is a fast-moving rushdown character with a notable focus on huge damage conversions with meter. | |||
|pros = | |||
*'''High Speed:''' Chie has fast movement and fast normals, lending her a surprisingly decent neutral game and excellent pressure. | *'''High Speed:''' Chie has fast movement and fast normals, lending her a surprisingly decent neutral game and excellent pressure. | ||
*'''Flexible Pressure:''' Chie has a number of great pressure options. She can set up okizeme with {{clr|4|5DD}} and go for an IAD mixup, or engage in tricky and safe pressure with her {{clr|1|A}} normals. | |||
*'''ToD Potential:''' Her damage with meter is easily some of the highest in the game, especially in the corner and with her Shadow version. | *'''ToD Potential:''' Her damage with meter is easily some of the highest in the game, especially in the corner and with her Shadow version. | ||
*'''Excellent Supers:''' Chie has very useful Supers for resetting pressure or extending combos and is good at spending meter in general. | *'''Excellent Supers:''' Chie has very useful Supers for resetting pressure or extending combos and is good at spending meter in general. In particular, {{MiniMoveCard|input=236236A|label=Power Charge}} lets Chie burn her meter and skyrocket her damage potential off of nearly any exchange. | ||
*'''Functional without Persona:''' Chie's basic pressure and neutral, while certainly weakened, are fairly functional even when Persona Broken or silenced, and her combos can stall for full Persona Break recovery. | *'''Functional without Persona:''' Chie's basic pressure and neutral, while certainly weakened, are fairly functional even when Persona Broken or silenced, and her long combos can stall for full Persona Break recovery. | ||
| cons = | |cons = | ||
*'''Universal DP:''' Her universal DP is a below-average counter. Her ability to convert resources into damage, however, can make DP conversions hurt when they do work | *'''Universal DP:''' Her universal DP is a below-average counter. Her ability to convert resources into damage, however, can make DP conversions hurt when they do work. | ||
*'''Resourceless Damage:''' Chie's meterless mid screen damage is pretty lacking and her damage without meter in general is below average. | *'''Resourceless Damage:''' Chie's meterless mid screen damage is pretty lacking and her damage without meter in general is below average. | ||
*'''Short Normals:''' The speed of her normals is offset by her overall stubby reach. | *'''Short Normals:''' The speed of her normals is offset by her overall stubby reach. | ||
| | }} | ||
| | </div> | ||
===Unique Mechanics=== | |||
{{card| | |||
|header=[[File:P4U2R_Power_Charge_Icon.png|link=P4U2R/Chie_Satonaka#Power Charge]] Power Charge | |||
|content=Many characters have unique mechanics to play around, like {{Character Label|P4U2R|Tohru Adachi}}'s Magatsu Mandala or {{Character Label|P4U2R|Teddie}} and {{Character Label|P4U2R|Marie}}'s item toss. Chie's mechanic is that she can smash your face in really, ''really'' hard. | |||
'''Power Charge''' is a stackable super that allows Chie to dramatically increase her damage potential at the cost of meter. Each time Chie uses Power Charge, she gains a certain amount of stacks. These stacks increase the power of: | '''Power Charge''' is a stackable super that allows Chie to dramatically increase her damage potential at the cost of meter. Each time Chie uses Power Charge, she gains a certain amount of stacks. These stacks increase the power of: | ||
* her {{clr|1|A}} and {{clr|2|B}} normals, | *her {{clr|1|A}} and {{clr|2|B}} normals, | ||
* all supers and special moves, | *all supers and special moves, | ||
* All out Attack and Sweep, | *All out Attack and Sweep, | ||
* autocombo attacks | *autocombo attacks | ||
Each stack raises the base damage of these moves dramatically and makes ''every single one of those moves a Fatal Starter''. The more charges Chie has access to, the more damage she will be able to output. Stacks are removed upon successful hits. More information on this super can be found further down the page. | Each stack raises the base damage of these moves dramatically and makes ''every single one of those moves a Fatal Starter''. The more charges Chie has access to, the more damage she will be able to output. Stacks are removed upon successful hits. More information on this super can be found further down the page. | ||
}} | }} | ||
{{ | ==Starter Guide== | ||
{{card|width=4 | |||
|header=Starter Guide | |||
|content={{Centerdiv}}<div class="fpvideo">{{#ev:youtube|O38QElcbaS4|450}}{{Closediv}}{{Closediv}} | |content={{Centerdiv}}<div class="fpvideo">{{#ev:youtube|O38QElcbaS4|450}}{{Closediv}}{{Closediv}} | ||
}} | }} | ||
==Normal Attacks== | ==Normal Attacks== | ||
| Line 45: | Line 59: | ||
</div> | </div> | ||
<div id="movelist-1" class="movelist"> | <div id="movelist-1" class="movelist"> | ||
{{P4U2R Move Card | |||
|input=5A,5AA Normal,5AAA Normal|versioned=yes | |||
|description= | |||
;{{clr|1|5A}} | |||
{{#invoke:FrameChart|drawFrameData | |||
|startup = 5 | |||
|active = 3 | |||
|recovery = 8 | |||
{{ | |||
| | |||
| | |||
| | |||
{{ | |||
{{# | |||
| | |||
| | |||
| | |||
}} | }} | ||
*Notably short reach. | |||
*Amazing pressure tool. | |||
*Gatlings into itself 3 times (but may not reach if delayed). | |||
* Notably short reach. | *Hold [4] to prevent gatlings into {{clr|1|5AA}}. | ||
* Amazing pressure tool. | |||
* Gatlings into itself 3 times (but may not reach if delayed). | |||
* Hold [4] to prevent gatlings into {{clr|1|5AA}}. | |||
This move is godlike for pressure because it recovers so fast. It's only very slightly minus, so microdashes afterwards can be safe to opponents mashing. Anyone with a 7f jab or slower will have an incredibly difficult time trying to mash out of Chie's {{clr|1|5A}} stagger pressure. | This move is godlike for pressure because it recovers so fast. It's only very slightly minus, so microdashes afterwards can be safe to opponents mashing. Anyone with a 7f jab or slower will have an incredibly difficult time trying to mash out of Chie's {{clr|1|5A}} stagger pressure. | ||
----- | ----- | ||
;{{clr|1|5AA}} | ;{{clr|1|5AA}} | ||
* Hits twice. | {{#invoke:FrameChart|drawFrameData | ||
* Vacuums on hit and block. | |startup = 7 | ||
|active = 3 | |||
|inactive2 = 3 | |||
|active3 = 6 | |||
|recovery = 11 | |||
}} | |||
*Hits twice. | |||
*Vacuums on hit and block. | |||
Another great pressure reset point, as it's very safe, has plenty of gatling options, and pulls opponents back towards Chie. Great for hitconfirming {{clr|1|5A}} and stabilizing air confirms | Another great pressure reset point, as it's very safe, has plenty of gatling options, and pulls opponents back towards Chie. Great for hitconfirming {{clr|1|5A}} and stabilizing air confirms | ||
---- | ---- | ||
;{{clr|1|5AAA}} | ;{{clr|1|5AAA}} | ||
* Wallbounces on hit. | {{#invoke:FrameChart|drawFrameData | ||
|startup = 10 | |||
|active = 2 | |||
|inactive2 = 12 | |||
|active3 = 3 | |||
|inactive4 = 10 | |||
|active5 = 3 | |||
|recovery = 19 | |||
}} | |||
*Wallbounces on hit. | |||
Combos into {{clr|2|236B}}, which allows Chie to greatly extend midscreen autocombos for excellent corner carry unlike her Shadow version. Also links into microdash {{clr|1|5A}}, although that's of less utility in this version due to the aforementioned {{clr|1|5AAA}} > {{clr|2|236B}} combo. | Combos into {{clr|2|236B}}, which allows Chie to greatly extend midscreen autocombos for excellent corner carry unlike her Shadow version. Also links into microdash {{clr|1|5A}}, although that's of less utility in this version due to the aforementioned {{clr|1|5AAA}} > {{clr|2|236B}} combo. | ||
}} | |||
</div> | </div> | ||
<div id="movelist-2" class="movelist"> | <div id="movelist-2" class="movelist"> | ||
{{P4U2R Move Card | |||
|input=5A,5AA Shadow,5AAA Shadow|versioned=yes | |||
|description= | |||
;{{clr|1|5A}} | |||
{{#invoke:FrameChart|drawFrameData | |||
|startup = 5 | |||
|active = 3 | |||
|recovery = 8 | |||
{{ | |||
| | |||
| | |||
| | |||
{{ | |||
{{# | |||
| | |||
| | |||
| | |||
}} | }} | ||
*Notably short reach. | |||
*Amazing pressure tool. | |||
*Gatlings into itself 3 times (but may not reach if delayed). | |||
* Notably short reach. | *Hold [4] to prevent gatlings into {{clr|1|5AA}}. | ||
* Amazing pressure tool. | |||
* Gatlings into itself 3 times (but may not reach if delayed). | |||
* Hold [4] to prevent gatlings into {{clr|1|5AA}}. | |||
This move is godlike for pressure because it recovers so fast. It's only very slightly minus, so microdashes afterwards can be safe to opponents mashing. Anyone with a 7f jab or slower will have an incredibly difficult time trying to mash out of Chie's {{clr|1|5A}} stagger pressure. | This move is godlike for pressure because it recovers so fast. It's only very slightly minus, so microdashes afterwards can be safe to opponents mashing. Anyone with a 7f jab or slower will have an incredibly difficult time trying to mash out of Chie's {{clr|1|5A}} stagger pressure. | ||
---- | ---- | ||
;{{clr|1|5AA}} | ;{{clr|1|5AA}} | ||
* Unsafe on block. | {{#invoke:FrameChart|drawFrameData | ||
* Autocombo will drop if full attack animation of {{clr|1|5AA}} goes through; it must be canceled early into {{clr|1|5AAA}} | |startup = 9 | ||
|active = 2 | |||
|inactive2 = 4 | |||
|active3 = 2 | |||
|inactive4 = 4 | |||
|active5 = 2 | |||
|inactive6 = 4 | |||
|active7 = 2 | |||
|inactive8 = 4 | |||
|active9 = 2 | |||
|inactive10 = 4 | |||
|active11 = 2 | |||
|recovery = 19 | |||
}} | |||
*Unsafe on block. | |||
*Autocombo will drop if full attack animation of {{clr|1|5AA}} goes through; it must be canceled early into {{clr|1|5AAA}} | |||
*Jump cancelable on block | |||
A very awkward comboing tool due to awkward knockback and hitstun on intermediate hits. Doesn't see much use except in autocomboing, and doesn't even do a particularly good job there. | A very awkward comboing tool due to awkward knockback and hitstun on intermediate hits. Doesn't see much use except in autocomboing, and doesn't even do a particularly good job there. | ||
---- | ---- | ||
;{{clr|1|5AAA}} | ;{{clr|1|5AAA}} | ||
* Notably short reach. | {{#invoke:FrameChart|drawFrameData | ||
* Vacuums on hit and block. | |startup = 5 | ||
|active = 6 | |||
|recovery = 15 | |||
}} | |||
*Notably short reach. | |||
*Vacuums on hit and block. | |||
*Jump cancelable on block | |||
Doesn't see much use outside autocomboing for meter. Does not automatically go into {{clr|1|236A}} unlike previous versions. | Doesn't see much use outside autocomboing for meter. Does not automatically go into {{clr|1|236A}} unlike previous versions. | ||
</div> | </div> | ||
}} | |||
===<big>{{clr|1|2A}}</big>=== | ===<big>{{clr|1|2A}}</big>=== | ||
{{P4U2R Move Card | |||
|input=2A | |||
|description= | |||
{{#invoke:FrameChart|drawFrameData | |||
|startup = 7 | |||
|active = 2 | |||
|recovery = 12 | |||
{{# | |||
| | |||
| | |||
| | |||
}} | }} | ||
*Gatlings into itself 3 times. | |||
*Gatlings into itself on whiff. | |||
* Gatlings into itself 3 times. | |||
* Gatlings into itself on whiff. | |||
Crouching, low-hitting kick. It's arguably Chie's best poke, as it low profiles several other pokes and jumpins and has better range than {{clr|2|5B}}. Additionally, it's Chie's most important low: it's used often in stagger pressure and it's the low used in her mixups. | Crouching, low-hitting kick. It's arguably Chie's best poke, as it low profiles several other pokes and jumpins and has better range than {{clr|2|5B}}. Additionally, it's Chie's most important low: it's used often in stagger pressure and it's the low used in her mixups. | ||
}} | |||
===<big>{{clr|2|5B}}</big>=== | ===<big>{{clr|2|5B}}</big>=== | ||
{{P4U2R Move Card | |||
|input=5B | |||
|description= | |||
{{#invoke:FrameChart|drawFrameData | |||
|startup = 7 | |||
|active = 4 | |||
|recovery = 18 | |||
{{# | |||
| | |||
| | |||
| | |||
}} | }} | ||
*Dash Cancel is -5 on block | *Dash Cancel is -5 on block | ||
*Backdash Cancel is -4 on block | *Backdash Cancel is -4 on block | ||
Quick high heel kick. Great starter, leads to some of Chie's most damaging combos; also a reasonable poke at closer ranges, though it has less range than {{clr|1|2A}}. | Quick high heel kick. Great starter, leads to some of Chie's most damaging combos; also a reasonable poke at closer ranges, though it has less range than {{clr|1|2A}}. | ||
}} | |||
===<big>{{clr|2|2B}}</big>=== | ===<big>{{clr|2|2B}}</big>=== | ||
{{P4U2R Move Card | |||
|input=2B | |||
|description= | |||
{{#invoke:FrameChart|drawFrameData | |||
|startup = 10 | |||
|active = 2 | |||
|recovery = 30 | |||
{{# | |||
| | |||
| | |||
| | |||
}} | }} | ||
*Dash Cancel is -5 on block | *Dash Cancel is -5 on block | ||
*Backdash Cancel is -4 on block | *Backdash Cancel is -4 on block | ||
High vertical anti-air kick. Air unblockable. On hit forces stand against crouching opponents. Moves Chie forward substantially and maintains dash momentum. | High vertical anti-air kick. Air unblockable. On hit forces stand against crouching opponents. Moves Chie forward substantially and maintains dash momentum. | ||
}} | |||
===<big>{{clr|1|j.A}}</big>=== | ===<big>{{clr|1|j.A}}</big>=== | ||
{{P4U2R Move Card | |||
|input=j.A | |||
|description= | |||
{{#invoke:FrameChart|drawFrameData | |||
|startup = 5 | |||
|active = 4 | |||
|recovery = 10 | |||
{{# | |||
| | |||
| | |||
| | |||
}} | }} | ||
*Gatlings into itself. | |||
*Has a hitbox behind Chie, but isn't useful for crossups. | |||
* Gatlings into itself. | |||
* Has a hitbox behind Chie, but isn't useful for crossups. | |||
Quick aerial palm strike. Situational air to air. Hits overhead, but small hitbox and low hitsun makes it not as favored as {{clr|2|j.B}}. The 3f less startup can come in handy occasionally though<!-- Instant airturn airbackdash {{clr|1|j.A}} being 3f faster than {{clr|2|j.B}} gives it some utility, although the hitstun on standing opponents makes it really difficult to combo after --> | Quick aerial palm strike. Situational air to air. Hits overhead, but small hitbox and low hitsun makes it not as favored as {{clr|2|j.B}}. The 3f less startup can come in handy occasionally though<!-- Instant airturn airbackdash {{clr|1|j.A}} being 3f faster than {{clr|2|j.B}} gives it some utility, although the hitstun on standing opponents makes it really difficult to combo after --> | ||
}} | |||
===<big>{{clr|2|j.B}}</big>=== | ===<big>{{clr|2|j.B}}</big>=== | ||
{{P4U2R Move Card | |||
|input=j.B | |||
|description= | |||
{{#invoke:FrameChart|drawFrameData | |||
|startup = 8 | |||
|active = 3 | |||
|recovery = 13 | |||
{{# | |||
| | |||
| | |||
| | |||
}} | }} | ||
*Very short total duration. | |||
* Very short total duration. | |||
Quick jump kick that hits overhead. | Quick jump kick that hits overhead. | ||
}} | |||
===<big>{{clr|2|j.2B}} and {{clr|2|j.BB}}</big>=== | ===<big>{{clr|2|j.2B}} and {{clr|2|j.BB}}</big>=== | ||
{{P4U2R Move Card | |||
|input=j.BB,j.2B|versioned=yes | |||
|description= | |||
;{{clr|2|j.BB}} | |||
{{#invoke:FrameChart|drawFrameData | |||
|startup = 7 | |||
|active = 3 | |||
|recovery = 15 | |||
{{ | |||
{{# | |||
| | |||
| | |||
| | |||
}} | }} | ||
{{clr|2|j.BB}} is mostly used in low to the ground air dash {{clr|2|j.BB}} mixups from a {{clr|4|5DD}}/{{clr|4|2DD}} setup in the corner. Also combo filler in air-to-airs to adjust vertical spacing | {{clr|2|j.BB}} is mostly used in low to the ground air dash {{clr|2|j.BB}} mixups from a {{clr|4|5DD}}/{{clr|4|2DD}} setup in the corner. Also combo filler in air-to-airs to adjust vertical spacing | ||
---- | ---- | ||
;{{clr|2|j.2B}} | ;{{clr|2|j.2B}} | ||
{{#invoke:FrameChart|drawFrameData | |||
|startup = 9 | |||
|active = 3 | |||
|recovery = 12 | |||
}} | |||
{{clr|2|j.2B}} is a command normal version of {{clr|2|j.BB}}. Mostly used in aerial combos before going into an air Rampage, or safejumps for more blockstun than {{clr|2|j.B}}. Also hits overhead. | {{clr|2|j.2B}} is a command normal version of {{clr|2|j.BB}}. Mostly used in aerial combos before going into an air Rampage, or safejumps for more blockstun than {{clr|2|j.B}}. Also hits overhead. | ||
}} | }} | ||
==Persona Attacks== | ==Persona Attacks== | ||
===<big>{{clr|3|5C}}</big>=== | ===<big>{{clr|3|5C}}</big>=== | ||
{{P4U2R Move Card | |||
|input=5C | |||
|description= | |||
{{#invoke:FrameChart|drawFrameData | |||
|startup = 12 | |||
|active = 3 | |||
|recovery = 31 | |||
{{# | |||
| | |||
| | |||
| | |||
}} | }} | ||
*Dash Cancel is -3 on block. | |||
*Can be displaced. | |||
* Dash Cancel is -3 on block. | |||
* Can be displaced. | |||
Decent mid-range poke for Chie. Useful in corner pressure since it can be dash/jump canceled. Can be used to trade favorably with certain long-range pokes, but it shouldn't be relied on too heavily. | Decent mid-range poke for Chie. Useful in corner pressure since it can be dash/jump canceled. Can be used to trade favorably with certain long-range pokes, but it shouldn't be relied on too heavily. | ||
}} | |||
===<big>{{clr|3|2C}}</big>=== | ===<big>{{clr|3|2C}}</big>=== | ||
{{P4U2R Move Card | |||
|input=2C | |||
|description= | |||
{{#invoke:FrameChart|drawFrameData | |||
|startup = 19 | |||
|active = 3 | |||
|inactive2= 7 | |||
|active3 = 2 | |||
|recovery = 20 | |||
{{# | |||
| | |||
| | |||
| | |||
}} | }} | ||
*Dash Cancel is -3 on block. | |||
*Applies Freeze on the first hit. | |||
* Dash Cancel is -3 on block. | |||
* Applies Freeze on the first hit. | |||
Mostly used in some of Chie's higher damaging combos due to the freeze effect giving more time to follow up with stuff you normally wouldn't be able to. As a poke, it's safe on block, and can be awkward to punish on whiff for some characters, but probably shouldn't be overused. | Mostly used in some of Chie's higher damaging combos due to the freeze effect giving more time to follow up with stuff you normally wouldn't be able to. As a poke, it's safe on block, and can be awkward to punish on whiff for some characters, but probably shouldn't be overused. | ||
}} | |||
===<big>{{clr|4|5D}}</big>=== | ===<big>{{clr|4|5D}}</big>=== | ||
{{P4U2R Move Card | |||
|input=5D,5DD|versioned=yes | |||
|description= | |||
;{{clr|4|5D}} | |||
{{#invoke:FrameChart|drawFrameData | |||
|startup = 39 | |||
|active = 2 | |||
|inactive2 = 3 | |||
{{ | |active3 = 2 | ||
|inactive4 = 6 | |||
{{# | |active5 = 2 | ||
| | |inactive6 = 11 | ||
| | |active7 = 3 | ||
| | |||
| | |||
}} | }} | ||
*Not used often by itself. | |||
* Not used often by itself. | |||
Very slow spear attack. Last hit causes launch, but is not incredibly useful, as the startup makes it very difficult to combo into. Almost exclusively canceled into {{clr|4|5DD}} oki for certain corner okizeme setups | Very slow spear attack. Last hit causes launch, but is not incredibly useful, as the startup makes it very difficult to combo into. Almost exclusively canceled into {{clr|4|5DD}} oki for certain corner okizeme setups | ||
---- | ---- | ||
;{{clr|4|5DD}} | ;{{clr|4|5DD}} | ||
* More advantageous oki tool than {{clr|4|2DD}}, but the slower startup allows it to be challenged in certain setups | {{#invoke:FrameChart|drawFrameData | ||
|startup = 39 | |||
|active = 2 | |||
|inactive2 = 3 | |||
|active3 = 2 | |||
|inactive4 = 6 | |||
|active5 = 2 | |||
|inactive6 = 7 | |||
|active7 = 30 | |||
|inactive8 = 9 | |||
|active9 = 3 | |||
}} | |||
*More advantageous oki tool than {{clr|4|2DD}}, but the slower startup allows it to be challenged in certain setups | |||
Standing version is slower but makes Tomoe move forward. Using this after knocking the opponent down will force them to block, leaving Chie free to go for a mixup or other setups. Tomoe can be hit if the opponent wakes up at the correct time or if they use their Furious Action. | Standing version is slower but makes Tomoe move forward. Using this after knocking the opponent down will force them to block, leaving Chie free to go for a mixup or other setups. Tomoe can be hit if the opponent wakes up at the correct time or if they use their Furious Action. | ||
Note that the 2nd {{clr|4|D}} can be delayed slightly to get a few more (3 max?) frames of advantage but it's a bit tricky so it's not critical to go for. | Note that the 2nd {{clr|4|D}} can be delayed slightly to get a few more (3 max?) frames of advantage but it's a bit tricky so it's not critical to go for. | ||
}} | |||
===<big>{{clr|4|2D}}</big>=== | ===<big>{{clr|4|2D}}</big>=== | ||
{{P4U2R Move Card | |||
|input=2D,2DD|versioned=yes | |||
|description= | |||
{{#invoke:FrameChart|drawFrameData | |||
|startup = 26 | |||
|active = 7 | |||
|inactive2 = 11 | |||
|active3 = 3 | |||
|recovery = 10 | |||
{{# | |||
| | |||
| | |||
| | |||
| | |||
}} | }} | ||
;{{clr|4|2D}} | ;{{clr|4|2D}} | ||
* Not used often by itself. | *Not used often by itself. | ||
Fairly slow spear attack. Last hit causes wallbounce launch, which plays a role in a few situational corner confirms. Generally canceled into {{clr|4|2DD}} for combos or oki for certain okizeme setups | Fairly slow spear attack. Last hit causes wallbounce launch, which plays a role in a few situational corner confirms. Generally canceled into {{clr|4|2DD}} for combos or oki for certain okizeme setups | ||
---- | ---- | ||
;{{clr|4|2DD}} | ;{{clr|4|2DD}} | ||
* More reliable, but less advantageous oki tool than {{clr|4|5DD}} | {{#invoke:FrameChart|drawFrameData | ||
* Good confirm off CH {{clr|2|5B}}. | |startup = 26 | ||
|active = 7 | |||
|inactive2 = 11 | |||
|active3 = 30 | |||
|inactive4 = 9 | |||
|active5 = 3 | |||
}} | |||
*More reliable, but less advantageous oki tool than {{clr|4|5DD}} | |||
*Good confirm off CH {{clr|2|5B}}. | |||
Starts-up immediately but Tomoe will stay in place. Using this after knocking the opponent down will force them to block, leaving Chie free to go for a mixup or other setups. Tomoe can be hit if the opponent wakes up at the correct time or if they use their Furious Action. | Starts-up immediately but Tomoe will stay in place. Using this after knocking the opponent down will force them to block, leaving Chie free to go for a mixup or other setups. Tomoe can be hit if the opponent wakes up at the correct time or if they use their Furious Action. | ||
Note that the 2nd {{clr|4|D}} can be delayed slightly to get a few more (2 max?) frames of advantage but it's a bit tricky so it's not critical to go for. | Note that the 2nd {{clr|4|D}} can be delayed slightly to get a few more (2 max?) frames of advantage but it's a bit tricky so it's not critical to go for. | ||
}} | |||
===<big>{{clr|3|j.C}}</big>=== | ===<big>{{clr|3|j.C}}</big>=== | ||
{{P4U2R Move Card | |||
|input=j.C | |||
|description= | |||
{{#invoke:FrameChart|drawFrameData | |||
|startup = 11 | |||
|active = 4 | |||
|recovery = 11 | |||
{{# | |||
| | |||
| | |||
| | |||
}} | }} | ||
*''Does not have the Head property,'' making it beat anti-airs consistently. | |||
*Does not hit overhead. | |||
* ''Does not have the Head property,'' making it beat anti-airs consistently. | *Can be displaced. | ||
* Does not hit overhead. | *0 on block if not canceled into landing or anything else. | ||
* Can be displaced. | |||
* 0 on block if not canceled into landing or anything else. | |||
Tomoe slashes in midair. A move with a surprising amount of utility. Respectable in air-to-air situations, leading to good damage on counter hit. Also has a slight reverse hitbox and low vertical hitbox, which can lead to ambiguous crossups against grounded opponents with IADs or airturns. Halts Chie's downward momentum which can sometimes cause AA's to whiff. Instant {{clr|3|j.C}} also sees utility against grounded throw tech or low hitbox moves. The Persona displacement can let you be obnoxious in the corner. Honestly, not enough can be said about this move as it's arguably one of Chie's top 3 best normals. | Tomoe slashes in midair. A move with a surprising amount of utility. Respectable in air-to-air situations, leading to good damage on counter hit. Also has a slight reverse hitbox and low vertical hitbox, which can lead to ambiguous crossups against grounded opponents with IADs or airturns. Halts Chie's downward momentum which can sometimes cause AA's to whiff. Instant {{clr|3|j.C}} also sees utility against grounded throw tech or low hitbox moves. The Persona displacement can let you be obnoxious in the corner. Honestly, not enough can be said about this move as it's arguably one of Chie's top 3 best normals. | ||
}} | |||
===<big>{{clr|4|j.D}}</big>=== | ===<big>{{clr|4|j.D}}</big>=== | ||
{{P4U2R Move Card | |||
|input=j.D | |||
|description= | |||
{{#invoke:FrameChart|drawFrameData | |||
|startup = 24 | |||
|active = 24 | |||
|inactive2 = 13 | |||
|active3 = 3 | |||
{{# | |||
| | |||
| | |||
| | |||
}} | }} | ||
*Holding 4, 8, or 2 with {{clr|4|j.D}} changes where Tomoe appears. | |||
**5 sends Tomoe mainly forward (6 is identical to 5) | |||
* Holding 4, 8, or 2 with {{clr|4|j.D}} changes where Tomoe appears. | **8 sends Tomoe high and a bit forward (9 is identical to 8) | ||
** 5 sends Tomoe mainly forward (6 is identical to 5) | **4 sends Tomoe only slightly forward and slightly downward (7 and 1 are identical to 4) | ||
** 8 sends Tomoe high and a bit forward (9 is identical to 8) | **2 sends Tomoe more forward and more downward (3 is identical to 2) | ||
** 4 sends Tomoe only slightly forward and slightly downward (7 and 1 are identical to 4) | *Combo extender and situational combo ender. | ||
** 2 sends Tomoe more forward and more downward (3 is identical to 2) | |||
* Combo extender and situational combo ender. | |||
Tomoe leaps up and spins her spear, followed by a downward thrust which causes knockdown. Primarily used in combos, but {{clr|4|j.2D}} and {{clr|4|j.5D}} can be useful for covering your approach or retreat. At certain heights, Chie can combo into {{clr|4|j.8D}}, land, and pick up with {{clr|1|5A}}/{{clr|2|5B}} into an extended combo. | Tomoe leaps up and spins her spear, followed by a downward thrust which causes knockdown. Primarily used in combos, but {{clr|4|j.2D}} and {{clr|4|j.5D}} can be useful for covering your approach or retreat. At certain heights, Chie can combo into {{clr|4|j.8D}}, land, and pick up with {{clr|1|5A}}/{{clr|2|5B}} into an extended combo. | ||
}} | |||
==Universal Mechanics== | ==Universal Mechanics== | ||
===<big>[[P4U2R/Mechanics#All_Out_Attack|All Out Attack]]</big>=== | |||
{{InputBadge|{{clr|1|5A}}+{{clr|2|B}}}} | |||
{{P4U2R Move Card | |||
|input=5AB | |||
|description= | |||
{{#invoke:FrameChart|drawFrameData | |||
|startup = 26 | |||
|active = 1 | |||
|recovery = 32 | |||
}} | |||
*Airborne frames 9-25 | |||
Chie does a front flip before slamming her heel down on her opponent. Mainly used as a corner combo ender after the opponent is frozen. The airborne frames let this move be a cheeky throw bait, although it loses to some throw tech OSes. Really funny way to punish Elizabeth/Margaret Furious Action | |||
}} | |||
===<big>Sweep</big>=== | |||
{{InputBadge|{{clr|1|2A}}+{{clr|2|B}}}} | |||
{{P4U2R Move Card | |||
|input=2AB | |||
|description= | |||
{{#invoke:FrameChart|drawFrameData | |||
|startup = 9 | |||
|active = 3 | |||
|recovery = 20 | |||
}} | |||
Good combo ender for setting up safe jumps. With resources becomes a valuable launcher in Chie's midscreen combo game, typically via {{clr|1|2A}}+{{clr|2|B}} > {{clr|1|214A}} > {{clr|4|214D}} > {{clr|1|236236A}} > {{clr|3|5C}}. | |||
}} | |||
===<big>Ground Throw</big>=== | ===<big>Ground Throw</big>=== | ||
{{InputBadge|{{clr|3|C}}+{{clr|4|D}}}} | |||
{{P4U2R Move Card | |||
|input=CD | |||
|description= | |||
{{#invoke:FrameChart|drawFrameData | |||
|startup = 5 | |||
|active = 3 | |||
|recovery = 23 | |||
{{# | |||
| | |||
| | |||
| | |||
}} | }} | ||
*Combos with Shadow Frenzy or OMC or supers when she hits the ground. | |||
*Inputting as {{clr|3|4C}}+{{clr|4|D}} stays same side. | |||
* Combos with Shadow Frenzy or OMC or supers when she hits the ground. | **{{clr|3|4C}}+{{clr|4|D}} swaps sides if cancelled with one of the above. | ||
* Inputting as {{clr|3|4C}}+{{clr|4|D}} stays same side. | |||
** {{clr|3|4C}}+{{clr|4|D}} swaps sides if cancelled with one of the above. | |||
Chie's throw is important to her stagger pressure as it gives another incentive for her opponent to mash. As of 2.0 only combos with resource usage, but can be canceled into A Power Charge for simple followups | Chie's throw is important to her stagger pressure as it gives another incentive for her opponent to mash. As of 2.0 only combos with resource usage, but can be canceled into A Power Charge for simple followups | ||
}} | |||
===<big>Air Throw</big>=== | ===<big>Air Throw</big>=== | ||
{{InputBadge|{{clr|3|j.C}}+{{clr|4|D}}}} | |||
{{P4U2R Move Card | |||
|input=j.CD | |||
|description= | |||
{{#invoke:FrameChart|drawFrameData | |||
|startup = 4 | |||
|active = 3 | |||
|recovery = 12 | |||
{{# | |||
| | |||
| | |||
| | |||
}} | }} | ||
*Chie falls with the opponent, so followup pressure/combos are consistent. | |||
* Chie falls with the opponent, so followup pressure/combos are consistent. | |||
An air throw that ends with Chie slamming them directly down into the ground, giving good positioning to start pressure. You can OMC and convert it into a combo if you have meter. | An air throw that ends with Chie slamming them directly down into the ground, giving good positioning to start pressure. You can OMC and convert it into a combo if you have meter. | ||
}} | |||
===<big>Counter</big>=== | ===<big>Counter</big>=== | ||
{{InputBadge|{{clr|2|B}}+{{clr|4|D}} (Air OK)}} | |||
{{P4U2R Move Card | |||
|input=BD Catch,BD Attack,j.BD|versioned=yes | |||
|description= | |||
;{{clr|2|B}}+{{clr|4|D}} | |||
{{#invoke:FrameChart|drawFrameData | |||
|startup = 7 | |||
|active = 2 | |||
|inactive2 = 10 | |||
{| | |active3 = 2 | ||
{{ | |inactive4 = 6 | ||
|active5 = 2 | |||
{{# | |inactive6 = 6 | ||
| | |active7 = 2 | ||
| | |inactive8 = 6 | ||
| | |active9 = 2 | ||
| | |recovery = 18 | ||
|specialRecovery = 15 | |||
}} | }} | ||
*Counter Furious Action. | |||
**Counters throws. | |||
**Super cancelable on successful counter until landing (Can super cancel the first hit grounded and the subsequent aerial hits into Agneyastra) | |||
* Counter Furious Action. | **First hit is a low. | ||
** Counters throws. | *Fatal Recovery during catch (normal counterhit recovery if followup kicks get blocked) | ||
** Super cancelable on successful counter until landing (Can super cancel the first hit grounded and the subsequent aerial hits into Agneyastra) | |||
** First hit is a low. | |||
* Fatal Recovery during catch (normal counterhit recovery if followup kicks get blocked) | |||
Chie summons a shield, and if hit or grabbed she'll kick in the air diagonally upward. Starts up and recovers quickly, but the counter isn't active for long. This makes it harder to time than most other Furious Actions. Can be spammed to force awakening, giving Chie 50 SP and access to Agneyastra. Keep in mind that Chie is in Fatal Recovery state during recovery. | Chie summons a shield, and if hit or grabbed she'll kick in the air diagonally upward. Starts up and recovers quickly, but the counter isn't active for long. This makes it harder to time than most other Furious Actions. Can be spammed to force awakening, giving Chie 50 SP and access to Agneyastra. Keep in mind that Chie is in Fatal Recovery state during recovery. | ||
---- | ---- | ||
;{{clr|2|j.B}}+{{clr|4|D}} | ;{{clr|2|j.B}}+{{clr|4|D}} | ||
* Skips straight to the kicks. | {{#invoke:FrameChart|drawFrameData | ||
* Does not knock down. | |startup = 6 | ||
|active = 2 | |||
|inactive2 = 6 | |||
|active3 = 2 | |||
|inactive4 = 6 | |||
|active5 = 2 | |||
|inactive6 = 6 | |||
|active7 = 2 | |||
|specialRecovery = 15 | |||
}} | |||
*Skips straight to the kicks. | |||
*Does not knock down. | |||
Air version does the kicks immediately, and has full invincibility on startup. | Air version does the kicks immediately, and has full invincibility on startup. | ||
}} | |||
===<big>[[P4U2R/ | ===<big>[[P4U2R/Mechanics#Guard_Cancel_Attack|Guard Cancel Attack]]</big>=== | ||
{{InputBadge|{{clr|1|6A}}+{{clr|2|B}} while blocking}} | |||
{{P4U2R Move Card | |||
|input=6AB | |||
|description= | |||
{{#invoke:FrameChart|drawFrameData | |||
|startup = 15 | |||
|active = 6 | |||
|recovery = 30 | |||
{{# | |||
| | |||
| | |||
| | |||
}} | }} | ||
Chie's Guard Cancel Attack. It utilizes Chie's {{clr|2|5B}} animation, and knocks the opponent away on hit. It has limited practicality due to its awful range. | Chie's Guard Cancel Attack. It utilizes Chie's {{clr|2|5B}} animation, and knocks the opponent away on hit. It has limited practicality due to its awful range. | ||
}} | |||
==[[P4U2R/ | ==[[P4U2R/Mechanics#Skills|Skill Attacks]]== | ||
===<big>Rampage</big>=== | ===<big>Rampage</big>=== | ||
{{InputBadge|{{clr|1|236A}}/{{clr|2|B}} (Air OK)}} | |||
{{P4U2R Move Card | |||
|input=236A,j.236A,236B,j.236B,236AB,j.236AB|versioned=yes | |||
|description= | |||
{{ | |||
| | |||
| | |||
| | |||
A short flurry of jump kicks; Mostly used in combos. Causes fatal counter while power charged | A short flurry of jump kicks; Mostly used in combos. Causes fatal counter while power charged | ||
---- | ---- | ||
;{{clr|1|A}} Version | ;{{clr|1|A}} Version | ||
{{#invoke:FrameChart|drawFrameData | |||
|startup = 11 | |||
|active = 2 | |||
|inactive2 = 6 | |||
|active3 = 3 | |||
|inactive4 = 6 | |||
|active5 = 3 | |||
|recovery = 3 | |||
|specialRecovery = 17 | |||
}} | |||
Main corner combo extender, {{clr|1|236A}}~{{clr|1|236A}} gives a launch that links into {{clr|2|5B}} from any ground normal starter except {{clr|1|2A}}. Repeatedly pops airborne opponents up and out of its hits, so avoid using on launched opponents. | Main corner combo extender, {{clr|1|236A}}~{{clr|1|236A}} gives a launch that links into {{clr|2|5B}} from any ground normal starter except {{clr|1|2A}}. Repeatedly pops airborne opponents up and out of its hits, so avoid using on launched opponents. | ||
---- | ---- | ||
;{{clr|2|B}} Version | ;{{clr|2|B}} Version | ||
{{#invoke:FrameChart|drawFrameData | |||
|startup = 19 | |||
|active = 2 | |||
|inactive2 = 6 | |||
|active3 = 3 | |||
|inactive4 = 6 | |||
|active5 = 3 | |||
|inactive6 = 6 | |||
|active7 = 3 | |||
|inactive8 = 6 | |||
|active9 = 3 | |||
|recovery = 1 | |||
|specialRecovery = 13 | |||
}} | |||
Useful as a crouch confirm early in combos or as a combo ender later in combos. Combos more reliably on airborne opponents than {{clr|1|236A}}. | Useful as a crouch confirm early in combos or as a combo ender later in combos. Combos more reliably on airborne opponents than {{clr|1|236A}}. | ||
---- | ---- | ||
;SB Version | ;SB Version | ||
SB has the startup of {{clr|1|A}} Rampage with the damage of B Rampage, plus extra kicks. Can link {{clr|1|5A}} after. Very plus on block, nice tool to reset pressure. Holding a direction | {{#invoke:FrameChart|drawFrameData | ||
|startup = 12 | |||
|active = 2 | |||
|inactive2 = 4 | |||
|active3 = 2 | |||
|inactive4 = 4 | |||
|active5 = 2 | |||
|inactive6 = 4 | |||
|active7 = 2 | |||
|inactive8 = 4 | |||
|active9 = 2 | |||
|inactive10 = 4 | |||
|active11 = 2 | |||
|specialRecovery = 11 | |||
}} | |||
SB has the startup of {{clr|1|A}} Rampage with the damage of B Rampage, plus extra kicks. Can link {{clr|1|5A}} after. Very plus on block, nice tool to reset pressure. Holding a direction will adjust Chie's trajectory slightly. Air version maintains Chie's air momentum which means low to the ground it'll immediately end and be cancelable into Skull Cracker for an "instant" overhead | |||
}} | |||
===<big>Skull Cracker</big>=== | ===<big>Skull Cracker</big>=== | ||
{{InputBadge|{{clr|1|236A}}/{{clr|2|B}} after Rampage}} | |||
{{P4U2R Move Card | |||
|input=Rampage > 236A,Rampage > 236B,Rampage > 236AB|versioned=yes | |||
|description= | |||
*First hit is an overhead, second hit is low. | |||
*Cancels into {{clr|1|214A}}/{{clr|2|B}}/{{clr|1|A}}+{{clr|2|B}}, {{clr|3|214C}}/{{clr|4|D}}/{{clr|3|C}}+{{clr|4|D}}, and {{clr|3|236C}}/{{clr|4|D}}/{{clr|3|C}}+{{clr|4|D}}. | |||
{{ | |||
| | |||
| | |||
| | |||
* First hit is an overhead, second hit is low. | |||
* Cancels into {{clr|1|214A}}/{{clr|2|B}}/{{clr|1|A}}+{{clr|2|B}}, {{clr|3|214C}}/{{clr|4|D}}/{{clr|3|C}}+{{clr|4|D}}, and {{clr|3|236C}}/{{clr|4|D}}/{{clr|3|C}}+{{clr|4|D}}. | |||
A key launcher in Chie's combo toolkit. In a blockstring, Skull Cracker can be used as a high option from Rampage, but the low option (Rampage OMC {{clr|1|2A}}) requires 50 meter to be truly ambiguous. | A key launcher in Chie's combo toolkit. In a blockstring, Skull Cracker can be used as a high option from Rampage, but the low option (Rampage OMC {{clr|1|2A}}) requires 50 meter to be truly ambiguous. | ||
---- | ---- | ||
;{{clr|1|A}} Version | ;{{clr|1|A}} Version | ||
{{#invoke:FrameChart|drawFrameData | |||
|startup = 6 | |||
|active = 2 | |||
|inactive2 = 9 | |||
|active3 = 3 | |||
|recovery = 26 | |||
}} | |||
The {{clr|1|A}} version mainly sees use as a followup to {{clr|1|A}} Rampage on standing opponents as a launcher, which really opens up a lot of corner combo routing.<!-- Editing note: There are some very situational combos where {{clr|2|j.236B}}~{{clr|2|236B}} won't combo but {{clr|2|j.236B}}~{{clr|1|236A}} will, but it's hard to identify those and react accordingly so it doesn't feel worth mentioning here --> | The {{clr|1|A}} version mainly sees use as a followup to {{clr|1|A}} Rampage on standing opponents as a launcher, which really opens up a lot of corner combo routing.<!-- Editing note: There are some very situational combos where {{clr|2|j.236B}}~{{clr|2|236B}} won't combo but {{clr|2|j.236B}}~{{clr|1|236A}} will, but it's hard to identify those and react accordingly so it doesn't feel worth mentioning here --> | ||
---- | ---- | ||
;{{clr|2|B}} Version | ;{{clr|2|B}} Version | ||
{{#invoke:FrameChart|drawFrameData | |||
|startup = 10 | |||
|active = 2 | |||
|inactive2 = 9 | |||
|active3 = 3 | |||
|recovery = 21 | |||
}} | |||
{{clr|2|B}} version better for combos due to higher float, better recovery, and longer hitstun leading to better extensions. Doesn't combo after {{clr|1|A}} version of Rampage on standing opponents (except on CH {{clr|1|A}} Rampage starter or Fatal Counter), allowing for a reset. | {{clr|2|B}} version better for combos due to higher float, better recovery, and longer hitstun leading to better extensions. Doesn't combo after {{clr|1|A}} version of Rampage on standing opponents (except on CH {{clr|1|A}} Rampage starter or Fatal Counter), allowing for a reset. | ||
---- | ---- | ||
;SB Version | ;SB Version | ||
{{#invoke:FrameChart|drawFrameData | |||
|startup = 5 | |||
|active = 2 | |||
|inactive2 = 9 | |||
|active3 = 3 | |||
|recovery = 21 | |||
}} | |||
SB is mostly not used unless you have meter to burn to add damage to a combo. It's the only one that's frametight after {{clr|1|A}} Rampage, but that aspect rarely comes into play. | SB is mostly not used unless you have meter to burn to add damage to a combo. It's the only one that's frametight after {{clr|1|A}} Rampage, but that aspect rarely comes into play. | ||
}} | |||
===<big>Dragon Kick</big>=== | ===<big>Dragon Kick</big>=== | ||
{{PersonaRequired}} | {{PersonaRequired}} {{InputBadge|{{clr|3|236C}}/{{clr|4|D}} (Air OK)}} | ||
{{P4U2R Move Card | |||
|input=236C,j.236C,236D,j.236D,236CD,j.236CD|versioned=yes | |||
|description= | |||
{{#invoke:FrameChart|drawFrameData | |||
|startup = 18 | |||
|active = 12 | |||
|recovery = 23 | |||
|specialRecovery = 15 | |||
}} | |||
{{#invoke:FrameChart|drawFrameData | |||
{{# | |startup = 30 | ||
| | |active = 18 | ||
| | |recovery = 23 | ||
| | |specialRecovery = 15 | ||
| | }} | ||
{{#invoke:FrameChart|drawFrameData | |||
|startup = 30 | |||
|active = 12 | |||
|recovery = 9 | |||
|specialRecovery = 9 | |||
}} | }} | ||
*Extreme damage. | |||
*{{clr|3|C}} version wallbounces everywhere. {{clr|4|D}} version launches far horizontally and only wallbounces in the corner | |||
* Extreme damage. | *SB version launches straight up and Chie recovers in the air, allowing for another Dragon Kick. | ||
* {{clr|3|C}} version wallbounces everywhere. {{clr|4|D}} version launches far horizontally and only wallbounces in the corner | |||
* SB version launches straight up and Chie recovers in the air, allowing for another Dragon Kick. | |||
Tomoe launches Chie in the air for a flying kick. High damage, usually used as a combo ender. Occasionally useful as a surprise, a method to punish unsafe moves in the air, or a desperate-and-not-ideal corner escape option (mainly {{clr|3|j.236C}}+{{clr|4|D}}). Can follow up with another Dragon Kick in the air after using SB version. In the corner can be canceled into OMB to squeeze out a bit more damage in a combo (SB version can be reliably OMBed anywhere) | Tomoe launches Chie in the air for a flying kick. High damage, usually used as a combo ender. Occasionally useful as a surprise, a method to punish unsafe moves in the air, or a desperate-and-not-ideal corner escape option (mainly {{clr|3|j.236C}}+{{clr|4|D}}). Can follow up with another Dragon Kick in the air after using SB version. In the corner can be canceled into OMB to squeeze out a bit more damage in a combo (SB version can be reliably OMBed anywhere) | ||
}} | |||
===<big>Herculean Strike</big>=== | ===<big>Herculean Strike</big>=== | ||
{{InputBadge|{{clr|1|214A}}/{{clr|2|B}}}} | |||
{{P4U2R Move Card | |||
|input=214A,214B,214AB|versioned=yes | |||
|description= | |||
*Cancels into {{clr|3|214C}}/{{clr|4|D}}/{{clr|3|C}}+{{clr|4|D}}, and {{clr|3|236C}}/{{clr|4|D}}/{{clr|3|C}}+{{clr|4|D}}. | |||
*{{clr|2|B}} and SB versions are throw invuln starting from frame 1 through a good chunk of the startup (although not through to active frames) | |||
{{ | |||
| | |||
| | |||
| | |||
* Cancels into {{clr|3|214C}}/{{clr|4|D}}/{{clr|3|C}}+{{clr|4|D}}, and {{clr|3|236C}}/{{clr|4|D}}/{{clr|3|C}}+{{clr|4|D}}. | |||
* {{clr|2|B}} and SB versions are throw invuln starting from frame 1 through a good chunk of the startup (although not through to active frames) | |||
{{clr|1|A}} forward lunging palm strike. {{clr|2|B}} and SB versions travel backwards first. | {{clr|1|A}} forward lunging palm strike. {{clr|2|B}} and SB versions travel backwards first. | ||
---- | ---- | ||
;{{clr|1|A}} Version | ;{{clr|1|A}} Version | ||
{{#invoke:FrameChart|drawFrameData | |||
|startup = 11 | |||
|active = 6 | |||
|recovery = 23 | |||
}} | |||
Typically used as a combo ender midscreen for Chie's smaller and simpler combos. Leads to easy safejumps with {{clr|2|9j.B}} (whiff) > {{clr|2|j.2B}}. | Typically used as a combo ender midscreen for Chie's smaller and simpler combos. Leads to easy safejumps with {{clr|2|9j.B}} (whiff) > {{clr|2|j.2B}}. | ||
---- | ---- | ||
;{{clr|2|B}} Version | ;{{clr|2|B}} Version | ||
{{#invoke:FrameChart|drawFrameData | |||
|startup = 25 | |||
|active = 9 | |||
|recovery = 21 | |||
}} | |||
Combo extender after Skull Cracker in the corner. Launches high enough for {{clr|3|5C}} to link after in the corner and combos can be extended from there. | Combo extender after Skull Cracker in the corner. Launches high enough for {{clr|3|5C}} to link after in the corner and combos can be extended from there. | ||
---- | ---- | ||
;SB Version | ;SB Version | ||
{{#invoke:FrameChart|drawFrameData | |||
|startup = 17 | |||
|active = 11 | |||
|recovery = 15 | |||
}} | |||
Plus on block, making it a valid means to reset pressure. It's somewhat better for this than SB Rampage because the single, quick hit isn't as easy a point to guard cancel out of as Rampage, as well as properly leading to combos on airborne opponents. For example, {{clr|1|2A}}+{{clr|2|B}} > {{clr|1|214A}}+{{clr|2|B}} is a common string to reset pressure on block and combo on hit. Note that {{clr|1|2A}}+{{clr|2|B}} > {{clr|1|214A}}+{{clr|2|B}} only works with sweep starter, with dash momentum in a short string, or on Kanji. It's also projectile invul starting on frame 7 and going through active frames, which makes it an anti-zoning tool that must be considered by the opponent | Plus on block, making it a valid means to reset pressure. It's somewhat better for this than SB Rampage because the single, quick hit isn't as easy a point to guard cancel out of as Rampage, as well as properly leading to combos on airborne opponents. For example, {{clr|1|2A}}+{{clr|2|B}} > {{clr|1|214A}}+{{clr|2|B}} is a common string to reset pressure on block and combo on hit. Note that {{clr|1|2A}}+{{clr|2|B}} > {{clr|1|214A}}+{{clr|2|B}} only works with sweep starter, with dash momentum in a short string, or on Kanji. It's also projectile invul starting on frame 7 and going through active frames, which makes it an anti-zoning tool that must be considered by the opponent | ||
}} | |||
===<big>Black Spot</big>=== | ===<big>Black Spot</big>=== | ||
{{PersonaRequired}} | {{PersonaRequired}} {{InputBadge|{{clr|3|214C}}/{{clr|4|D}}}} | ||
{{P4U2R Move Card | |||
|input=214C,214D,214[D],214CD|versioned=yes | |||
|description= | |||
{{#invoke:FrameChart|drawFrameData | |||
|startup = 13 | |||
|active = 12 | |||
|recovery = 24 | |||
}} | |||
{{#invoke:FrameChart|drawFrameData | |||
|startup = 26 | |||
{{# | |active = 12 | ||
| | |recovery = 18 | ||
| | }} | ||
| | {{#invoke:FrameChart|drawFrameData | ||
| | |startup = 21 | ||
|active = 12 | |||
|recovery = 15 | |||
}} | }} | ||
* '''Forces Fatal Counter on Counter Hit | |||
*Attack is based on Tomoe's position and will not autocorrect direction (Tomoe will Black Spot away from the opponent if on the other side) | *Attack is based on Tomoe's position and will not autocorrect direction (Tomoe will Black Spot away from the opponent if on the other side) | ||
*{{clr|3|C}} and {{clr|4|D}} versions are slightly faster if canceled into from other specials | *{{clr|3|C}} and {{clr|4|D}} versions are slightly faster if canceled into from other specials | ||
| Line 762: | Line 677: | ||
*{{clr|4|D}} version gains charged property after additional 9 frames of charging (35 [31] frames) and can be charged to a max of 55 [51] frames | *{{clr|4|D}} version gains charged property after additional 9 frames of charging (35 [31] frames) and can be charged to a max of 55 [51] frames | ||
Chie and her Persona do a double palm attack | Chie and her Persona do a double palm attack. SB version has super armor on frames 9~32, shielding Chie from attacks. In combos, can be canceled into A Power Charge into {{clr|3|5C}} for common metered combo extensions. Nice move to throw into corner pressure sometimes if you think you can get a FC off of it, and is very good at covering lots of space (vertical space in particular) in neutral. Chie's best combo starter in certain situations or with lots of meter to spend. | ||
}} | |||
==[[P4U2R/ | ==[[P4U2R/Mechanics#SP_Skill_Attack|SP Skill Attacks]]== | ||
===<big>Power Charge</big>=== | ===<big>Power Charge</big>=== | ||
{{InputBadge|{{clr|1|236236A}}/{{clr|2|B}}}} | |||
{{P4U2R Move Card | |||
|input=236236A,236236B,236236AB|versioned=yes | |||
|description= | |||
*Each level of Power Charge has a certain number of charges, as well as a damage boost. | |||
*Charges are consumed by special moves, supers, {{clr|1|5AA}}, {{clr|1|5AAA}}, AoA, Sweep, and all {{clr|2|B}} normals (multihit moves only consume 1 charge). | |||
{{ | |||
| | |||
| | |||
| | |||
* Each level of Power Charge has a certain number of charges, as well as a damage boost. | |||
* Charges are consumed by special moves, supers, {{clr|1|5AA}}, {{clr|1|5AAA}}, AoA, Sweep, and all {{clr|2|B}} normals (multihit moves only consume 1 charge). | |||
Chie charges up, boosting the damage of the aforementioned moves and adding 25% chip damage to all affected moves. Each usage sets the charge count to the max of that level (so going to Level 3 with more than 5 charges will lose you charges). Using God's Hand or Agneyastra consumes all remaining charges. | Chie charges up, boosting the damage of the aforementioned moves and adding 25% chip damage to all affected moves. Each usage sets the charge count to the max of that level (so going to Level 3 with more than 5 charges will lose you charges). Using God's Hand or Agneyastra consumes all remaining charges. | ||
---- | ---- | ||
| Line 794: | Line 693: | ||
Adds 1 level of Power Charge. Useful in combos or pressure as a sort of "extra" OMC, since it can be canceled into from virtually anything and has only 5 total frames. In addition, it freezes the screen, so you can use it when you are disoriented to get your bearings, or to tell if you have clearance to go for a throw/punish a move with long startup/etc. Very useful. | Adds 1 level of Power Charge. Useful in combos or pressure as a sort of "extra" OMC, since it can be canceled into from virtually anything and has only 5 total frames. In addition, it freezes the screen, so you can use it when you are disoriented to get your bearings, or to tell if you have clearance to go for a throw/punish a move with long startup/etc. Very useful. | ||
;Power Charge Level 1 | ;Power Charge Level 1 | ||
* 1.2x damage boost | *1.2x damage boost | ||
* 9 Charges max | *9 Charges max | ||
* Specials and supers gain Fatal Starter property | *Specials and supers gain Fatal Starter property | ||
---- | ---- | ||
;{{clr|2|B}} Version | ;{{clr|2|B}} Version | ||
Adds 2 levels of Power Charge. Similar to the {{clr|1|A}} version, but the additional level adds even more damage, and is critical for most damage routes to have enough meter to use a Level 3 charged super. Has longer recovery time so it is usually used during combos; the invuln time isn't worth relying on. | Adds 2 levels of Power Charge. Similar to the {{clr|1|A}} version, but the additional level adds even more damage, and is critical for most damage routes to have enough meter to use a Level 3 charged super. Has longer recovery time so it is usually used during combos; the invuln time isn't worth relying on. | ||
;Power Charge Level 2 | ;Power Charge Level 2 | ||
* 1.4x damage boost | *1.4x damage boost | ||
* 9 Charges max | *9 Charges max | ||
* All affected moves gain Fatal Starter property | *All affected moves gain Fatal Starter property | ||
---- | ---- | ||
;SB Version | ;SB Version | ||
Adds 3 levels of Power Charge, which makes the multiplier jump up drastically. Due to the long recovery time, it's rarely used outside of specific combos/setups. | Adds 3 levels of Power Charge, which makes the multiplier jump up drastically. Due to the long recovery time, it's rarely used outside of specific combos/setups. | ||
;Power Charge Level 3 | ;Power Charge Level 3 | ||
* 2.0x damage boost | *2.0x damage boost | ||
* 5 Charges max | *5 Charges max | ||
}} | |||
===<big>God's Hand</big>=== | ===<big>God's Hand</big>=== | ||
{{PersonaRequired}} | {{PersonaRequired}} {{InputBadge|{{clr|3|236236C}}/{{clr|4|D}}}} | ||
{{P4U2R Move Card | |||
|input=236236C,236236D,236236CD|versioned=yes | |||
|description= | |||
{{ | |||
| | |||
| | |||
| | |||
Tomoe summons a giant golden fist from the heavens that slams down onto the opponent. This is one of Chie's best combo enders when going for damage. Hits overhead for some reason. | Tomoe summons a giant golden fist from the heavens that slams down onto the opponent. This is one of Chie's best combo enders when going for damage. Hits overhead for some reason. | ||
---- | ---- | ||
;{{clr|3|C}} Version | ;{{clr|3|C}} Version | ||
{{#invoke:FrameChart|drawFrameData | |||
|startup = 14 | |||
|active = 6 | |||
|recovery = 42 | |||
}} | |||
Faster than the {{clr|4|D}} version and puts the fist in front of Chie; Can also be used as a strong reversal. | Faster than the {{clr|4|D}} version and puts the fist in front of Chie; Can also be used as a strong reversal. | ||
---- | ---- | ||
;{{clr|4|D}} Version | ;{{clr|4|D}} Version | ||
{{#invoke:FrameChart|drawFrameData | |||
|startup = 22 | |||
|active = 6 | |||
|recovery = 42 | |||
}} | |||
Puts the fist mid screen and adds more damage. | Puts the fist mid screen and adds more damage. | ||
---- | ---- | ||
;SB Version | ;SB Version | ||
{{#invoke:FrameChart|drawFrameData | |||
|startup = 22 | |||
|active = 6 | |||
|inactive2 = 27 | |||
|active3 = 6 | |||
|recovery = 42 | |||
}} | |||
SB God's Hand causes 2 fists to come down, one after the other to add a bit more damage. With 125 meter or Shadow Frenzy active, can be OMCed for a high/low unblockable ({{clr|3|236236C}}+{{clr|4|D}}(1) > OMC > {{clr|1|5A}} > {{clr|1|2A}}+{{clr|2|B}}) | SB God's Hand causes 2 fists to come down, one after the other to add a bit more damage. With 125 meter or Shadow Frenzy active, can be OMCed for a high/low unblockable ({{clr|3|236236C}}+{{clr|4|D}}(1) > OMC > {{clr|1|5A}} > {{clr|1|2A}}+{{clr|2|B}}) | ||
}} | |||
==[[P4U2R/Damage#Awakening|Awakened]] SP Skill Attacks== | ==[[P4U2R/Damage#Awakening|Awakened]] SP Skill Attacks== | ||
===<big>Agneyastra</big>=== | ===<big>Agneyastra</big>=== | ||
{{PersonaRequired}} | {{PersonaRequired}} {{InputBadge|{{clr|3|214214C}}/{{clr|4|D}} (Air OK)}} | ||
{{P4U2R Move Card | |||
|input=214214C,214214D,214214CD|versioned=yes | |||
|description= | |||
*Agneyastra instantly ends if Chie/Tomoe gets hit. | |||
*{{clr|3|C}} Version puts meteors close to Chie. | |||
*{{clr|4|D}} Version makes the meteors come down at a full screen distance away. | |||
*SB Version has the meteor raining down towards Chie. | |||
*Distance and orientation is actually based on Tomoe's position, but this rarely comes into play | |||
{{ | |||
| | |||
| | |||
* Agneyastra instantly ends if Chie/Tomoe gets hit. | |||
* {{clr|3|C}} Version puts meteors close to Chie. | |||
* {{clr|4|D}} Version makes the meteors come down at a full screen distance away. | |||
* SB Version has the meteor raining down towards Chie. | |||
* Distance and orientation is actually based on Tomoe's position, but this rarely comes into play | |||
Tomoe causes a large swarm of Meteors to rain from the sky. If you're using it as a projectile to cover your approach, usually you'll have to use Agneyastra twice due to its relatively short duration. Agneyastra is commonly used as a means to boost the damage on midscreen combos since it's air OK unlike God Hand. {{clr|4|236D}} > {{clr|3|j.214214C}} deals very high damage, especially when combined with Power Charge. | Tomoe causes a large swarm of Meteors to rain from the sky. If you're using it as a projectile to cover your approach, usually you'll have to use Agneyastra twice due to its relatively short duration. Agneyastra is commonly used as a means to boost the damage on midscreen combos since it's air OK unlike God Hand. {{clr|4|236D}} > {{clr|3|j.214214C}} deals very high damage, especially when combined with Power Charge. | ||
Particularly useful for Shadow Chie, as most of her combos will build the 50 meter required to use this. If she hasn't used {{clr|3|2C}} in the combo, she can combo into it from Agneyastra use the Freeze to restand the opponent into {{clr|4|5DD}}. This functionally loops into itself because Shadows build so much meter. | Particularly useful for Shadow Chie, as most of her combos will build the 50 meter required to use this. If she hasn't used {{clr|3|2C}} in the combo, she can combo into it from Agneyastra use the Freeze to restand the opponent into {{clr|4|5DD}}. This functionally loops into itself because Shadows build so much meter. | ||
}} | |||
==[[P4U2R/ | ==[[P4U2R/Mechanics#Instant_Kill|Instant Kill]]== | ||
===<big>Galactic Punt</big>=== | ===<big>Galactic Punt</big>=== | ||
{{PersonaRequired}} | {{PersonaRequired}} {{InputBadge|{{clr|3|222C}}+{{clr|4|D}} when [[P4U2R/Mechanics#Instant Kill|IK Conditions]] are met}} | ||
{{P4U2R Move Card | |||
|input=222CD | |||
|description= | |||
{{#invoke:FrameChart|drawFrameData | |||
|startup = 64 | |||
|active = 15 | |||
|recovery = 73 | |||
}} | |||
Tomoe summons a large stream of energy to knock her opponent airborne. On the way down, Chie then raises her power level over 9000 to deliver a powerful kick that launches the opponent into outer space! She then quotes Bruce Lee and the battle is over. As with all IK's it's not overly useful outside of niche scenarios such as punishing Akihiko's Maziodyne or Aigis' Missiles. | |||
{{# | |||
| | |||
| | |||
| | |||
}} | }} | ||
== | ==Colors== | ||
{{P4U2RColors | |||
|Size=180 | |||
|Character=Chie Satonaka | |||
|reference9=[https://megamitensei.fandom.com/wiki/Yukari_Takeba ''Yukari Takeba (P3)''] | |||
|P_reference9=[https://megamitensei.fandom.com/wiki/Yukari_Takeba ''Yukari Takeba (P3)''] | |||
|reference10={{Character Label|BBCF|Makoto Nanaya|size=42px}} | |||
|P_reference10={{Character Label|BBCF|Makoto Nanaya|size=42px}} | |||
|reference11={{Character Label|GGACR|Jam Kuradoberi|size=42px}} | |||
|P_reference11={{Character Label|GGACR|Jam Kuradoberi|size=42px}} | |||
|reference15=[https://megamitensei.fandom.com/wiki/Fuuka_Yamagishi ''Fuuka Yamagishi (P3)''] | |||
|P_reference15=[https://megamitensei.fandom.com/wiki/Fuuka_Yamagishi ''Fuuka Yamagishi (P3)''] | |||
|reference22=[https://megamitensei.fandom.com/wiki/Tomoe ''Tomoe (P4)''] | |||
|P_reference22={{Character Label|P4U2R|Chie Satonaka|size=42px}} | |||
|reference23=''Velvet Room Attendant'' | |||
|P_reference23=''Velvet Room Attendant'' | |||
|reference25=''Christmas'' | |||
|P_reference25=''Christmas'' | |||
|reference27=''Dengeki'' | |||
|P_reference27=''Dengeki'' | |||
|reference28={{Character Label|P4U2R|Marie|size=42px}} | |||
|P_reference28={{Character Label|P4U2R|Marie|size=42px}} | |||
}} | |||
==Navigation== | ==Navigation== | ||
<center>{{Character Label|P4U2R|Chie Satonaka|36px | <center>{{Character Label|P4U2R|Chie Satonaka|size=36px}}</center> | ||
{{#lst:P4U2R/Chie Satonaka/Data|Links}} | {{#lst:P4U2R/Chie Satonaka/Data|Links}} | ||
{{notice|To edit frame data, edit values in [[{{PAGENAME}}/Data]].}} | {{notice|To edit frame data, edit values in [[{{PAGENAME}}/Data]].}} | ||
{{#lst:P4U2R/Navigation}} | {{#lst:P4U2R/Navigation}} | ||
[[Category:Unga]] | [[Category:Unga]] | ||
Latest revision as of 14:22, 2 April 2024
Overview
Overview
WATCHA! Chie Satonaka is a Martial-Artist rushdown character that uses her speed and pressure tools to overwhelm her opponent's defenses. With high mobility, good pressure, and terrifyingly high damage potential, Chie has everything an aggressive player needs to rush their opponents into oblivion.
When the opponents are stuffed into the corner, Chie excels. Her suite of fast normals like 5A (which is 5f) and 5B help keep her opponents sitting still in pressure, while Chie's D normals keep them blocking on wakeup. Chie's pressure is lengthy and has a good number of frame-traps and safe ending points, while her mixup potential is quite strong with 5DD > IAD j.BB/2A. Once she cracks her opponents open, Chie has access to decent damage potential, good meter building and great corner carry, allowing her to drag her opponents to the corner and set up for mixups or pressure.
If Chie has meter though, her power level jumps. Chie has access to a number of incredible metered options for increasing her damage potential. Every single one of her supers either hits like a truck or enables her to hit like a truck- God's Hand GuardHighStartup4+(50 Flash)+10RecoveryTotal 61Advantage-16 and Agneyastra
 GuardAllStartup11+(40 Flash)+9~RecoveryTotal 35Advantage- have exceptionally high base damage, while Power Charge
 GuardStartupRecoveryTotal 5+(50 Flash)+0Advantage- lets Chie burn 50 meter for a damage buff. While in Power Charge, many of Chie's moves become Fatal Starters (depending on the version used), allowing her damage potential to skyrocket even further. Her Shadow version, in particular, highly benefits from this playstyle. Chie loves meter, and meter loves Chie.

 |
| Health |
| 9,500 |
| Backdash |
| 19F (1~6F Inv All) |
| Persona Cards |
| 3 |
| Combo Rate |
| 60% |
| Fastest Attack |
| 5A (5F) |
| Reversal Type |
| Counter |
| Fatal Starters |
| 214C/D All Skills & SP Skills during 236236A All moves during 236236B |
| Fatal RecoveryAny moves that put this character in a state where any Counter Hit will force a Fatal Counter. |
| B+D (whiffed catch), 236236C/D |
![]() Chie Satonaka is a fast-moving rushdown character with a notable focus on huge damage conversions with meter.
Chie Satonaka is a fast-moving rushdown character with a notable focus on huge damage conversions with meter.
Pros
Cons
- High Speed: Chie has fast movement and fast normals, lending her a surprisingly decent neutral game and excellent pressure.
- Flexible Pressure: Chie has a number of great pressure options. She can set up okizeme with 5DD and go for an IAD mixup, or engage in tricky and safe pressure with her A normals.
- ToD Potential: Her damage with meter is easily some of the highest in the game, especially in the corner and with her Shadow version.
- Excellent Supers: Chie has very useful Supers for resetting pressure or extending combos and is good at spending meter in general. In particular, Power Charge
 GuardStartupRecoveryTotal 5+(50 Flash)+0Advantage- lets Chie burn her meter and skyrocket her damage potential off of nearly any exchange.
 - Functional without Persona: Chie's basic pressure and neutral, while certainly weakened, are fairly functional even when Persona Broken or silenced, and her long combos can stall for full Persona Break recovery.
- Universal DP: Her universal DP is a below-average counter. Her ability to convert resources into damage, however, can make DP conversions hurt when they do work.
- Resourceless Damage: Chie's meterless mid screen damage is pretty lacking and her damage without meter in general is below average.
- Short Normals: The speed of her normals is offset by her overall stubby reach.
Unique Mechanics
Many characters have unique mechanics to play around, like ![]() Tohru Adachi's Magatsu Mandala or
Tohru Adachi's Magatsu Mandala or ![]() Teddie and
Teddie and ![]() Marie's item toss. Chie's mechanic is that she can smash your face in really, really hard.
Marie's item toss. Chie's mechanic is that she can smash your face in really, really hard.
Power Charge is a stackable super that allows Chie to dramatically increase her damage potential at the cost of meter. Each time Chie uses Power Charge, she gains a certain amount of stacks. These stacks increase the power of:
- her A and B normals,
- all supers and special moves,
- All out Attack and Sweep,
- autocombo attacks
Starter Guide
Starter Guide
Normal Attacks
5A
Normal
Shadow


- 5A
Total: 15
- Notably short reach.
- Amazing pressure tool.
- Gatlings into itself 3 times (but may not reach if delayed).
- Hold [4] to prevent gatlings into 5AA.
This move is godlike for pressure because it recovers so fast. It's only very slightly minus, so microdashes afterwards can be safe to opponents mashing. Anyone with a 7f jab or slower will have an incredibly difficult time trying to mash out of Chie's 5A stagger pressure.
- 5AA
Total: 29
- Hits twice.
- Vacuums on hit and block.
Another great pressure reset point, as it's very safe, has plenty of gatling options, and pulls opponents back towards Chie. Great for hitconfirming 5A and stabilizing air confirms
- 5AAA
Total: 58
- Wallbounces on hit.
Combos into 236B, which allows Chie to greatly extend midscreen autocombos for excellent corner carry unlike her Shadow version. Also links into microdash 5A, although that's of less utility in this version due to the aforementioned 5AAA > 236B combo.
5AAA Normal:
- On third hit, opponent experiences only 3F hitstop on hit/counter hit


| Version | DamageThe raw damage value(s) of the listed move that the game's combo system calculates combo damage from. | GuardHow this attack can be guarded. All non-throws can be air blocked unless otherwise stated, and all "Air Unblockable" moves can be blocked in either grounded stance unless otherwise stated. Throw-type moves will have their ranges listed instead, and other cases will be explicitly noted. |
StartupNumber of frames for this move to reach the first active frame (includes the first active frame). | ActiveNumber of active frames in this attack. Values in () are for gaps between hits of an attack. | RecoveryNumber of frames this move is in a recovery state before returning to neutral. "Total (x)" indicates this for moves where the attacker has inactionable animation independent of active frames (i.e. projectiles and some Persona attacks). |
Frame AdvThe difference between the attacker's recovery and the period that the opponent is in blockstun. This frame advantage value is based off the fact that the very first active frame touches the opponent. | AttributeSome attacks are invulnerable to attacks with specific attributes. This notes what attributes each attack possesses. H - Head B - Body C - Chest F - Foot P - Projectile. Independent Projectiles will have their Durability level listed. For example a projectile that his Durability level 2 will show P2 T - Throw |
Inv.Attribute and Hitbox Invincibility information that will be notated via abbreviation or other indicators. Guard - Move autoguards against the attacks instead of making them whiff. Strike - Invulnerable to all attributes except for Throws, and SP Skills. Low Profile - Character's hurtbox shrinks to go under many attacks. Persona - Only the Persona carries this invulnerability. |
|---|---|---|---|---|---|---|---|---|
| 5A | 180 | All | 5 | 3 | 8 | -1 | Body | |
| 5AA Shadow | 250×6 | All | 9 | 2(4)2(4)2(4)2(4)2(4)2 | 21 | -8 | Body | |
| 5AAA Shadow | 600×2 | All | 5 | 3, 3 | 15 | -3 | Body |
- 5A
Total: 15
- Notably short reach.
- Amazing pressure tool.
- Gatlings into itself 3 times (but may not reach if delayed).
- Hold [4] to prevent gatlings into 5AA.
This move is godlike for pressure because it recovers so fast. It's only very slightly minus, so microdashes afterwards can be safe to opponents mashing. Anyone with a 7f jab or slower will have an incredibly difficult time trying to mash out of Chie's 5A stagger pressure.
- 5AA
Total: 59
- Unsafe on block.
- Autocombo will drop if full attack animation of 5AA goes through; it must be canceled early into 5AAA
- Jump cancelable on block
A very awkward comboing tool due to awkward knockback and hitstun on intermediate hits. Doesn't see much use except in autocomboing, and doesn't even do a particularly good job there.
- 5AAA
Total: 25
- Notably short reach.
- Vacuums on hit and block.
- Jump cancelable on block
Doesn't see much use outside autocomboing for meter. Does not automatically go into 236A unlike previous versions.
| Version | P1Also known as the starter proration. If this move starts a combo, this value will be added to the Proration Tally on top of P2's addition (P1 + P2). | P2Also known as the mid-combo proration. If this move is used at all in a combo, this value will be added to the Proration Tally. | SMPShorthand for "Same Move Proration". If this move is used more than once in a combo, this value will be added to the Proration Tally on top of P2's addition (P2 + SMP). | Level
| ||||||||||||||||||||||||||||||||||||
|---|---|---|---|---|---|---|---|---|---|---|---|---|---|---|---|---|---|---|---|---|---|---|---|---|---|---|---|---|---|---|---|---|---|---|---|---|---|---|---|---|
| 5A | 400 | 200 | 50 | 2 | ||||||||||||||||||||||||||||||||||||
| 5AA Shadow | 0 | 100 | 50 | 3 | ||||||||||||||||||||||||||||||||||||
| 5AAA Shadow | 200 | 200 | 50 | 3 |
2A


| DamageThe raw damage value(s) of the listed move that the game's combo system calculates combo damage from. | GuardHow this attack can be guarded. All non-throws can be air blocked unless otherwise stated, and all "Air Unblockable" moves can be blocked in either grounded stance unless otherwise stated. Throw-type moves will have their ranges listed instead, and other cases will be explicitly noted. |
StartupNumber of frames for this move to reach the first active frame (includes the first active frame). | ActiveNumber of active frames in this attack. Values in () are for gaps between hits of an attack. | RecoveryNumber of frames this move is in a recovery state before returning to neutral. "Total (x)" indicates this for moves where the attacker has inactionable animation independent of active frames (i.e. projectiles and some Persona attacks). |
Frame AdvThe difference between the attacker's recovery and the period that the opponent is in blockstun. This frame advantage value is based off the fact that the very first active frame touches the opponent. | AttributeSome attacks are invulnerable to attacks with specific attributes. This notes what attributes each attack possesses. H - Head B - Body C - Chest F - Foot P - Projectile. Independent Projectiles will have their Durability level listed. For example a projectile that his Durability level 2 will show P2 T - Throw |
Inv.Attribute and Hitbox Invincibility information that will be notated via abbreviation or other indicators. Guard - Move autoguards against the attacks instead of making them whiff. Strike - Invulnerable to all attributes except for Throws, and SP Skills. Low Profile - Character's hurtbox shrinks to go under many attacks. Persona - Only the Persona carries this invulnerability. |
|---|---|---|---|---|---|---|---|
| 200 | Low | 7 | 2 | 12 | -3 | Foot |
Total: 20
- Gatlings into itself 3 times.
- Gatlings into itself on whiff.
Crouching, low-hitting kick. It's arguably Chie's best poke, as it low profiles several other pokes and jumpins and has better range than 5B. Additionally, it's Chie's most important low: it's used often in stagger pressure and it's the low used in her mixups.
| P1Also known as the starter proration. If this move starts a combo, this value will be added to the Proration Tally on top of P2's addition (P1 + P2). | P2Also known as the mid-combo proration. If this move is used at all in a combo, this value will be added to the Proration Tally. | SMPShorthand for "Same Move Proration". If this move is used more than once in a combo, this value will be added to the Proration Tally on top of P2's addition (P2 + SMP). | Level
| ||||||||||||||||||||||||||||||||||||
|---|---|---|---|---|---|---|---|---|---|---|---|---|---|---|---|---|---|---|---|---|---|---|---|---|---|---|---|---|---|---|---|---|---|---|---|---|---|---|---|
| 500 | 100 | 50 | 1 |
5B


| DamageThe raw damage value(s) of the listed move that the game's combo system calculates combo damage from. | GuardHow this attack can be guarded. All non-throws can be air blocked unless otherwise stated, and all "Air Unblockable" moves can be blocked in either grounded stance unless otherwise stated. Throw-type moves will have their ranges listed instead, and other cases will be explicitly noted. |
StartupNumber of frames for this move to reach the first active frame (includes the first active frame). | ActiveNumber of active frames in this attack. Values in () are for gaps between hits of an attack. | RecoveryNumber of frames this move is in a recovery state before returning to neutral. "Total (x)" indicates this for moves where the attacker has inactionable animation independent of active frames (i.e. projectiles and some Persona attacks). |
Frame AdvThe difference between the attacker's recovery and the period that the opponent is in blockstun. This frame advantage value is based off the fact that the very first active frame touches the opponent. | AttributeSome attacks are invulnerable to attacks with specific attributes. This notes what attributes each attack possesses. H - Head B - Body C - Chest F - Foot P - Projectile. Independent Projectiles will have their Durability level listed. For example a projectile that his Durability level 2 will show P2 T - Throw |
Inv.Attribute and Hitbox Invincibility information that will be notated via abbreviation or other indicators. Guard - Move autoguards against the attacks instead of making them whiff. Strike - Invulnerable to all attributes except for Throws, and SP Skills. Low Profile - Character's hurtbox shrinks to go under many attacks. Persona - Only the Persona carries this invulnerability. |
|---|---|---|---|---|---|---|---|
| 550 | All | 7 | 4 | 18 | -7 | Body |
Total: 28
- Dash Cancel is -5 on block
- Backdash Cancel is -4 on block
Quick high heel kick. Great starter, leads to some of Chie's most damaging combos; also a reasonable poke at closer ranges, though it has less range than 2A.
| P1Also known as the starter proration. If this move starts a combo, this value will be added to the Proration Tally on top of P2's addition (P1 + P2). | P2Also known as the mid-combo proration. If this move is used at all in a combo, this value will be added to the Proration Tally. | SMPShorthand for "Same Move Proration". If this move is used more than once in a combo, this value will be added to the Proration Tally on top of P2's addition (P2 + SMP). | Level
| ||||||||||||||||||||||||||||||||||||
|---|---|---|---|---|---|---|---|---|---|---|---|---|---|---|---|---|---|---|---|---|---|---|---|---|---|---|---|---|---|---|---|---|---|---|---|---|---|---|---|
| 200 | 100 | 50 | 3 |
- Dash Cancel is -5 on block
- Backdash Cancel is -4 on block
2B


| DamageThe raw damage value(s) of the listed move that the game's combo system calculates combo damage from. | GuardHow this attack can be guarded. All non-throws can be air blocked unless otherwise stated, and all "Air Unblockable" moves can be blocked in either grounded stance unless otherwise stated. Throw-type moves will have their ranges listed instead, and other cases will be explicitly noted. |
StartupNumber of frames for this move to reach the first active frame (includes the first active frame). | ActiveNumber of active frames in this attack. Values in () are for gaps between hits of an attack. | RecoveryNumber of frames this move is in a recovery state before returning to neutral. "Total (x)" indicates this for moves where the attacker has inactionable animation independent of active frames (i.e. projectiles and some Persona attacks). |
Frame AdvThe difference between the attacker's recovery and the period that the opponent is in blockstun. This frame advantage value is based off the fact that the very first active frame touches the opponent. | AttributeSome attacks are invulnerable to attacks with specific attributes. This notes what attributes each attack possesses. H - Head B - Body C - Chest F - Foot P - Projectile. Independent Projectiles will have their Durability level listed. For example a projectile that his Durability level 2 will show P2 T - Throw |
Inv.Attribute and Hitbox Invincibility information that will be notated via abbreviation or other indicators. Guard - Move autoguards against the attacks instead of making them whiff. Strike - Invulnerable to all attributes except for Throws, and SP Skills. Low Profile - Character's hurtbox shrinks to go under many attacks. Persona - Only the Persona carries this invulnerability. |
|---|---|---|---|---|---|---|---|
| 400 | Air Unblockable | 10 | 2 | 30 | -17 | Body | 8~11 H |
Total: 41
- Dash Cancel is -5 on block
- Backdash Cancel is -4 on block
High vertical anti-air kick. Air unblockable. On hit forces stand against crouching opponents. Moves Chie forward substantially and maintains dash momentum.
| P1Also known as the starter proration. If this move starts a combo, this value will be added to the Proration Tally on top of P2's addition (P1 + P2). | P2Also known as the mid-combo proration. If this move is used at all in a combo, this value will be added to the Proration Tally. | SMPShorthand for "Same Move Proration". If this move is used more than once in a combo, this value will be added to the Proration Tally on top of P2's addition (P2 + SMP). | Level
| ||||||||||||||||||||||||||||||||||||
|---|---|---|---|---|---|---|---|---|---|---|---|---|---|---|---|---|---|---|---|---|---|---|---|---|---|---|---|---|---|---|---|---|---|---|---|---|---|---|---|
| 200 | 100 | 50 | 3 |
- Dash Cancel is -5 on block
- Backdash Cancel is -4 on block
j.A


| DamageThe raw damage value(s) of the listed move that the game's combo system calculates combo damage from. | GuardHow this attack can be guarded. All non-throws can be air blocked unless otherwise stated, and all "Air Unblockable" moves can be blocked in either grounded stance unless otherwise stated. Throw-type moves will have their ranges listed instead, and other cases will be explicitly noted. |
StartupNumber of frames for this move to reach the first active frame (includes the first active frame). | ActiveNumber of active frames in this attack. Values in () are for gaps between hits of an attack. | RecoveryNumber of frames this move is in a recovery state before returning to neutral. "Total (x)" indicates this for moves where the attacker has inactionable animation independent of active frames (i.e. projectiles and some Persona attacks). |
Frame AdvThe difference between the attacker's recovery and the period that the opponent is in blockstun. This frame advantage value is based off the fact that the very first active frame touches the opponent. | AttributeSome attacks are invulnerable to attacks with specific attributes. This notes what attributes each attack possesses. H - Head B - Body C - Chest F - Foot P - Projectile. Independent Projectiles will have their Durability level listed. For example a projectile that his Durability level 2 will show P2 T - Throw |
Inv.Attribute and Hitbox Invincibility information that will be notated via abbreviation or other indicators. Guard - Move autoguards against the attacks instead of making them whiff. Strike - Invulnerable to all attributes except for Throws, and SP Skills. Low Profile - Character's hurtbox shrinks to go under many attacks. Persona - Only the Persona carries this invulnerability. |
|---|---|---|---|---|---|---|---|
| 300 | High | 5 | 4 | 10 | Head |
Total: 18
- Gatlings into itself.
- Has a hitbox behind Chie, but isn't useful for crossups.
Quick aerial palm strike. Situational air to air. Hits overhead, but small hitbox and low hitsun makes it not as favored as j.B. The 3f less startup can come in handy occasionally though
| P1Also known as the starter proration. If this move starts a combo, this value will be added to the Proration Tally on top of P2's addition (P1 + P2). | P2Also known as the mid-combo proration. If this move is used at all in a combo, this value will be added to the Proration Tally. | SMPShorthand for "Same Move Proration". If this move is used more than once in a combo, this value will be added to the Proration Tally on top of P2's addition (P2 + SMP). | Level
| ||||||||||||||||||||||||||||||||||||
|---|---|---|---|---|---|---|---|---|---|---|---|---|---|---|---|---|---|---|---|---|---|---|---|---|---|---|---|---|---|---|---|---|---|---|---|---|---|---|---|
| 200 | 100 | 50 | 1 |
j.B


| DamageThe raw damage value(s) of the listed move that the game's combo system calculates combo damage from. | GuardHow this attack can be guarded. All non-throws can be air blocked unless otherwise stated, and all "Air Unblockable" moves can be blocked in either grounded stance unless otherwise stated. Throw-type moves will have their ranges listed instead, and other cases will be explicitly noted. |
StartupNumber of frames for this move to reach the first active frame (includes the first active frame). | ActiveNumber of active frames in this attack. Values in () are for gaps between hits of an attack. | RecoveryNumber of frames this move is in a recovery state before returning to neutral. "Total (x)" indicates this for moves where the attacker has inactionable animation independent of active frames (i.e. projectiles and some Persona attacks). |
Frame AdvThe difference between the attacker's recovery and the period that the opponent is in blockstun. This frame advantage value is based off the fact that the very first active frame touches the opponent. | AttributeSome attacks are invulnerable to attacks with specific attributes. This notes what attributes each attack possesses. H - Head B - Body C - Chest F - Foot P - Projectile. Independent Projectiles will have their Durability level listed. For example a projectile that his Durability level 2 will show P2 T - Throw |
Inv.Attribute and Hitbox Invincibility information that will be notated via abbreviation or other indicators. Guard - Move autoguards against the attacks instead of making them whiff. Strike - Invulnerable to all attributes except for Throws, and SP Skills. Low Profile - Character's hurtbox shrinks to go under many attacks. Persona - Only the Persona carries this invulnerability. |
|---|---|---|---|---|---|---|---|
| 400 | High | 8 | 3 | 13 | Head |
Total: 23
- Very short total duration.
Quick jump kick that hits overhead.
| P1Also known as the starter proration. If this move starts a combo, this value will be added to the Proration Tally on top of P2's addition (P1 + P2). | P2Also known as the mid-combo proration. If this move is used at all in a combo, this value will be added to the Proration Tally. | SMPShorthand for "Same Move Proration". If this move is used more than once in a combo, this value will be added to the Proration Tally on top of P2's addition (P2 + SMP). | Level
| ||||||||||||||||||||||||||||||||||||
|---|---|---|---|---|---|---|---|---|---|---|---|---|---|---|---|---|---|---|---|---|---|---|---|---|---|---|---|---|---|---|---|---|---|---|---|---|---|---|---|
| 200 | 100 | 50 | 2 |
j.2B and j.BB


| Version | DamageThe raw damage value(s) of the listed move that the game's combo system calculates combo damage from. | GuardHow this attack can be guarded. All non-throws can be air blocked unless otherwise stated, and all "Air Unblockable" moves can be blocked in either grounded stance unless otherwise stated. Throw-type moves will have their ranges listed instead, and other cases will be explicitly noted. |
StartupNumber of frames for this move to reach the first active frame (includes the first active frame). | ActiveNumber of active frames in this attack. Values in () are for gaps between hits of an attack. | RecoveryNumber of frames this move is in a recovery state before returning to neutral. "Total (x)" indicates this for moves where the attacker has inactionable animation independent of active frames (i.e. projectiles and some Persona attacks). |
Frame AdvThe difference between the attacker's recovery and the period that the opponent is in blockstun. This frame advantage value is based off the fact that the very first active frame touches the opponent. | AttributeSome attacks are invulnerable to attacks with specific attributes. This notes what attributes each attack possesses. H - Head B - Body C - Chest F - Foot P - Projectile. Independent Projectiles will have their Durability level listed. For example a projectile that his Durability level 2 will show P2 T - Throw |
Inv.Attribute and Hitbox Invincibility information that will be notated via abbreviation or other indicators. Guard - Move autoguards against the attacks instead of making them whiff. Strike - Invulnerable to all attributes except for Throws, and SP Skills. Low Profile - Character's hurtbox shrinks to go under many attacks. Persona - Only the Persona carries this invulnerability. |
|---|---|---|---|---|---|---|---|---|
| j.BB | 600 | High | 7 | 3 | 15 | Head | ||
| j.2B | 600 | High | 9 | 3 | 12 | Head |
- j.BB
Total: 24
j.BB is mostly used in low to the ground air dash j.BB mixups from a 5DD/2DD setup in the corner. Also combo filler in air-to-airs to adjust vertical spacing
- j.2B
Total: 23
j.2B is a command normal version of j.BB. Mostly used in aerial combos before going into an air Rampage, or safejumps for more blockstun than j.B. Also hits overhead.
| Version | P1Also known as the starter proration. If this move starts a combo, this value will be added to the Proration Tally on top of P2's addition (P1 + P2). | P2Also known as the mid-combo proration. If this move is used at all in a combo, this value will be added to the Proration Tally. | SMPShorthand for "Same Move Proration". If this move is used more than once in a combo, this value will be added to the Proration Tally on top of P2's addition (P2 + SMP). | Level
| ||||||||||||||||||||||||||||||||||||
|---|---|---|---|---|---|---|---|---|---|---|---|---|---|---|---|---|---|---|---|---|---|---|---|---|---|---|---|---|---|---|---|---|---|---|---|---|---|---|---|---|
| j.BB | 200 | 100 | 50 | 3 | ||||||||||||||||||||||||||||||||||||
| j.2B | 200 | 100 | 50 | 3 |
Persona Attacks
5C


| DamageThe raw damage value(s) of the listed move that the game's combo system calculates combo damage from. | GuardHow this attack can be guarded. All non-throws can be air blocked unless otherwise stated, and all "Air Unblockable" moves can be blocked in either grounded stance unless otherwise stated. Throw-type moves will have their ranges listed instead, and other cases will be explicitly noted. |
StartupNumber of frames for this move to reach the first active frame (includes the first active frame). | ActiveNumber of active frames in this attack. Values in () are for gaps between hits of an attack. | RecoveryNumber of frames this move is in a recovery state before returning to neutral. "Total (x)" indicates this for moves where the attacker has inactionable animation independent of active frames (i.e. projectiles and some Persona attacks). |
Frame AdvThe difference between the attacker's recovery and the period that the opponent is in blockstun. This frame advantage value is based off the fact that the very first active frame touches the opponent. | AttributeSome attacks are invulnerable to attacks with specific attributes. This notes what attributes each attack possesses. H - Head B - Body C - Chest F - Foot P - Projectile. Independent Projectiles will have their Durability level listed. For example a projectile that his Durability level 2 will show P2 T - Throw |
Inv.Attribute and Hitbox Invincibility information that will be notated via abbreviation or other indicators. Guard - Move autoguards against the attacks instead of making them whiff. Strike - Invulnerable to all attributes except for Throws, and SP Skills. Low Profile - Character's hurtbox shrinks to go under many attacks. Persona - Only the Persona carries this invulnerability. |
|---|---|---|---|---|---|---|---|
| 800 | All | 12 | 3 | 31 | -16 | Body | Persona 1~Until Active All |
Total: 45
- Dash Cancel is -3 on block.
- Can be displaced.
Decent mid-range poke for Chie. Useful in corner pressure since it can be dash/jump canceled. Can be used to trade favorably with certain long-range pokes, but it shouldn't be relied on too heavily.
| P1Also known as the starter proration. If this move starts a combo, this value will be added to the Proration Tally on top of P2's addition (P1 + P2). | P2Also known as the mid-combo proration. If this move is used at all in a combo, this value will be added to the Proration Tally. | SMPShorthand for "Same Move Proration". If this move is used more than once in a combo, this value will be added to the Proration Tally on top of P2's addition (P2 + SMP). | Level
| ||||||||||||||||||||||||||||||||||||
|---|---|---|---|---|---|---|---|---|---|---|---|---|---|---|---|---|---|---|---|---|---|---|---|---|---|---|---|---|---|---|---|---|---|---|---|---|---|---|---|
| 200 | 100 | 50 | 4 |
- Dash Cancel is -3 on block
2C


| DamageThe raw damage value(s) of the listed move that the game's combo system calculates combo damage from. | GuardHow this attack can be guarded. All non-throws can be air blocked unless otherwise stated, and all "Air Unblockable" moves can be blocked in either grounded stance unless otherwise stated. Throw-type moves will have their ranges listed instead, and other cases will be explicitly noted. |
StartupNumber of frames for this move to reach the first active frame (includes the first active frame). | ActiveNumber of active frames in this attack. Values in () are for gaps between hits of an attack. | RecoveryNumber of frames this move is in a recovery state before returning to neutral. "Total (x)" indicates this for moves where the attacker has inactionable animation independent of active frames (i.e. projectiles and some Persona attacks). |
Frame AdvThe difference between the attacker's recovery and the period that the opponent is in blockstun. This frame advantage value is based off the fact that the very first active frame touches the opponent. | AttributeSome attacks are invulnerable to attacks with specific attributes. This notes what attributes each attack possesses. H - Head B - Body C - Chest F - Foot P - Projectile. Independent Projectiles will have their Durability level listed. For example a projectile that his Durability level 2 will show P2 T - Throw |
Inv.Attribute and Hitbox Invincibility information that will be notated via abbreviation or other indicators. Guard - Move autoguards against the attacks instead of making them whiff. Strike - Invulnerable to all attributes except for Throws, and SP Skills. Low Profile - Character's hurtbox shrinks to go under many attacks. Persona - Only the Persona carries this invulnerability. |
|---|---|---|---|---|---|---|---|
| 600×2 | All | 19 | 3(7)2 | 20 | -5 | Body | Persona 1~Until Active All |
Total: 50
- Dash Cancel is -3 on block.
- Applies Freeze on the first hit.
Mostly used in some of Chie's higher damaging combos due to the freeze effect giving more time to follow up with stuff you normally wouldn't be able to. As a poke, it's safe on block, and can be awkward to punish on whiff for some characters, but probably shouldn't be overused.
| P1Also known as the starter proration. If this move starts a combo, this value will be added to the Proration Tally on top of P2's addition (P1 + P2). | P2Also known as the mid-combo proration. If this move is used at all in a combo, this value will be added to the Proration Tally. | SMPShorthand for "Same Move Proration". If this move is used more than once in a combo, this value will be added to the Proration Tally on top of P2's addition (P2 + SMP). | Level
| ||||||||||||||||||||||||||||||||||||
|---|---|---|---|---|---|---|---|---|---|---|---|---|---|---|---|---|---|---|---|---|---|---|---|---|---|---|---|---|---|---|---|---|---|---|---|---|---|---|---|
| 300 | 300 | 1000 | 4 |
- Dash Cancel is -3 on block
- First hit Freezes opponent for 40F on hit
5D


| Version | DamageThe raw damage value(s) of the listed move that the game's combo system calculates combo damage from. | GuardHow this attack can be guarded. All non-throws can be air blocked unless otherwise stated, and all "Air Unblockable" moves can be blocked in either grounded stance unless otherwise stated. Throw-type moves will have their ranges listed instead, and other cases will be explicitly noted. |
StartupNumber of frames for this move to reach the first active frame (includes the first active frame). | ActiveNumber of active frames in this attack. Values in () are for gaps between hits of an attack. | RecoveryNumber of frames this move is in a recovery state before returning to neutral. "Total (x)" indicates this for moves where the attacker has inactionable animation independent of active frames (i.e. projectiles and some Persona attacks). |
Frame AdvThe difference between the attacker's recovery and the period that the opponent is in blockstun. This frame advantage value is based off the fact that the very first active frame touches the opponent. | AttributeSome attacks are invulnerable to attacks with specific attributes. This notes what attributes each attack possesses. H - Head B - Body C - Chest F - Foot P - Projectile. Independent Projectiles will have their Durability level listed. For example a projectile that his Durability level 2 will show P2 T - Throw |
Inv.Attribute and Hitbox Invincibility information that will be notated via abbreviation or other indicators. Guard - Move autoguards against the attacks instead of making them whiff. Strike - Invulnerable to all attributes except for Throws, and SP Skills. Low Profile - Character's hurtbox shrinks to go under many attacks. Persona - Only the Persona carries this invulnerability. |
|---|---|---|---|---|---|---|---|---|
| 5D | 50x3, 1150 | All | 39 | 2(3)2(6)2(11)3 | Total 61 | +20 | Body | |
| 5DD | 50×3, 50×15, 200 | All | 39 | 2(3)2(6)2(7)2×15(9)3 | Total 61 | +63 | Body |
- 5D
Total: 67
- Not used often by itself.
Very slow spear attack. Last hit causes launch, but is not incredibly useful, as the startup makes it very difficult to combo into. Almost exclusively canceled into 5DD oki for certain corner okizeme setups
- 5DD
Total: 102
- More advantageous oki tool than 2DD, but the slower startup allows it to be challenged in certain setups
Standing version is slower but makes Tomoe move forward. Using this after knocking the opponent down will force them to block, leaving Chie free to go for a mixup or other setups. Tomoe can be hit if the opponent wakes up at the correct time or if they use their Furious Action.
Note that the 2nd D can be delayed slightly to get a few more (3 max?) frames of advantage but it's a bit tricky so it's not critical to go for.
| Version | P1Also known as the starter proration. If this move starts a combo, this value will be added to the Proration Tally on top of P2's addition (P1 + P2). | P2Also known as the mid-combo proration. If this move is used at all in a combo, this value will be added to the Proration Tally. | SMPShorthand for "Same Move Proration". If this move is used more than once in a combo, this value will be added to the Proration Tally on top of P2's addition (P2 + SMP). | Level
| ||||||||||||||||||||||||||||||||||||
|---|---|---|---|---|---|---|---|---|---|---|---|---|---|---|---|---|---|---|---|---|---|---|---|---|---|---|---|---|---|---|---|---|---|---|---|---|---|---|---|---|
| 5D | 400 | 100 | 1000 | 4 | ||||||||||||||||||||||||||||||||||||
| 5DD | 400 | 100 | 1000 | 4 |
2D


| Version | DamageThe raw damage value(s) of the listed move that the game's combo system calculates combo damage from. | GuardHow this attack can be guarded. All non-throws can be air blocked unless otherwise stated, and all "Air Unblockable" moves can be blocked in either grounded stance unless otherwise stated. Throw-type moves will have their ranges listed instead, and other cases will be explicitly noted. |
StartupNumber of frames for this move to reach the first active frame (includes the first active frame). | ActiveNumber of active frames in this attack. Values in () are for gaps between hits of an attack. | RecoveryNumber of frames this move is in a recovery state before returning to neutral. "Total (x)" indicates this for moves where the attacker has inactionable animation independent of active frames (i.e. projectiles and some Persona attacks). |
Frame AdvThe difference between the attacker's recovery and the period that the opponent is in blockstun. This frame advantage value is based off the fact that the very first active frame touches the opponent. | AttributeSome attacks are invulnerable to attacks with specific attributes. This notes what attributes each attack possesses. H - Head B - Body C - Chest F - Foot P - Projectile. Independent Projectiles will have their Durability level listed. For example a projectile that his Durability level 2 will show P2 T - Throw |
Inv.Attribute and Hitbox Invincibility information that will be notated via abbreviation or other indicators. Guard - Move autoguards against the attacks instead of making them whiff. Strike - Invulnerable to all attributes except for Throws, and SP Skills. Low Profile - Character's hurtbox shrinks to go under many attacks. Persona - Only the Persona carries this invulnerability. |
|---|---|---|---|---|---|---|---|---|
| 2D | 50, 1050 | All | 26 | 7(11)3 | Total 56 | +8 | Body | |
| 2DD | 50, 50×15, 200 | All | 26 | 2(7)2×15(9)3 | Total 56 | +40 | Body |
Total: 56
- 2D
- Not used often by itself.
Fairly slow spear attack. Last hit causes wallbounce launch, which plays a role in a few situational corner confirms. Generally canceled into 2DD for combos or oki for certain okizeme setups
- 2DD
Total: 85
- More reliable, but less advantageous oki tool than 5DD
- Good confirm off CH 5B.
Starts-up immediately but Tomoe will stay in place. Using this after knocking the opponent down will force them to block, leaving Chie free to go for a mixup or other setups. Tomoe can be hit if the opponent wakes up at the correct time or if they use their Furious Action.
Note that the 2nd D can be delayed slightly to get a few more (2 max?) frames of advantage but it's a bit tricky so it's not critical to go for.
| Version | P1Also known as the starter proration. If this move starts a combo, this value will be added to the Proration Tally on top of P2's addition (P1 + P2). | P2Also known as the mid-combo proration. If this move is used at all in a combo, this value will be added to the Proration Tally. | SMPShorthand for "Same Move Proration". If this move is used more than once in a combo, this value will be added to the Proration Tally on top of P2's addition (P2 + SMP). | Level
| ||||||||||||||||||||||||||||||||||||
|---|---|---|---|---|---|---|---|---|---|---|---|---|---|---|---|---|---|---|---|---|---|---|---|---|---|---|---|---|---|---|---|---|---|---|---|---|---|---|---|---|
| 2D | 400 | 100 | 1000 | 4 | ||||||||||||||||||||||||||||||||||||
| 2DD | 400 | 100 | 1000 | 4 |
j.C


| DamageThe raw damage value(s) of the listed move that the game's combo system calculates combo damage from. | GuardHow this attack can be guarded. All non-throws can be air blocked unless otherwise stated, and all "Air Unblockable" moves can be blocked in either grounded stance unless otherwise stated. Throw-type moves will have their ranges listed instead, and other cases will be explicitly noted. |
StartupNumber of frames for this move to reach the first active frame (includes the first active frame). | ActiveNumber of active frames in this attack. Values in () are for gaps between hits of an attack. | RecoveryNumber of frames this move is in a recovery state before returning to neutral. "Total (x)" indicates this for moves where the attacker has inactionable animation independent of active frames (i.e. projectiles and some Persona attacks). |
Frame AdvThe difference between the attacker's recovery and the period that the opponent is in blockstun. This frame advantage value is based off the fact that the very first active frame touches the opponent. | AttributeSome attacks are invulnerable to attacks with specific attributes. This notes what attributes each attack possesses. H - Head B - Body C - Chest F - Foot P - Projectile. Independent Projectiles will have their Durability level listed. For example a projectile that his Durability level 2 will show P2 T - Throw |
Inv.Attribute and Hitbox Invincibility information that will be notated via abbreviation or other indicators. Guard - Move autoguards against the attacks instead of making them whiff. Strike - Invulnerable to all attributes except for Throws, and SP Skills. Low Profile - Character's hurtbox shrinks to go under many attacks. Persona - Only the Persona carries this invulnerability. |
|---|---|---|---|---|---|---|---|
| 700 | All | 11 | 4 | 11 | Body | Persona 1~Until Active All |
Total: 25
- Does not have the Head property, making it beat anti-airs consistently.
- Does not hit overhead.
- Can be displaced.
- 0 on block if not canceled into landing or anything else.
Tomoe slashes in midair. A move with a surprising amount of utility. Respectable in air-to-air situations, leading to good damage on counter hit. Also has a slight reverse hitbox and low vertical hitbox, which can lead to ambiguous crossups against grounded opponents with IADs or airturns. Halts Chie's downward momentum which can sometimes cause AA's to whiff. Instant j.C also sees utility against grounded throw tech or low hitbox moves. The Persona displacement can let you be obnoxious in the corner. Honestly, not enough can be said about this move as it's arguably one of Chie's top 3 best normals.
| P1Also known as the starter proration. If this move starts a combo, this value will be added to the Proration Tally on top of P2's addition (P1 + P2). | P2Also known as the mid-combo proration. If this move is used at all in a combo, this value will be added to the Proration Tally. | SMPShorthand for "Same Move Proration". If this move is used more than once in a combo, this value will be added to the Proration Tally on top of P2's addition (P2 + SMP). | Level
| ||||||||||||||||||||||||||||||||||||
|---|---|---|---|---|---|---|---|---|---|---|---|---|---|---|---|---|---|---|---|---|---|---|---|---|---|---|---|---|---|---|---|---|---|---|---|---|---|---|---|
| 200 | 100 | 300 | 3 |
j.D


| DamageThe raw damage value(s) of the listed move that the game's combo system calculates combo damage from. | GuardHow this attack can be guarded. All non-throws can be air blocked unless otherwise stated, and all "Air Unblockable" moves can be blocked in either grounded stance unless otherwise stated. Throw-type moves will have their ranges listed instead, and other cases will be explicitly noted. |
StartupNumber of frames for this move to reach the first active frame (includes the first active frame). | ActiveNumber of active frames in this attack. Values in () are for gaps between hits of an attack. | RecoveryNumber of frames this move is in a recovery state before returning to neutral. "Total (x)" indicates this for moves where the attacker has inactionable animation independent of active frames (i.e. projectiles and some Persona attacks). |
Frame AdvThe difference between the attacker's recovery and the period that the opponent is in blockstun. This frame advantage value is based off the fact that the very first active frame touches the opponent. | AttributeSome attacks are invulnerable to attacks with specific attributes. This notes what attributes each attack possesses. H - Head B - Body C - Chest F - Foot P - Projectile. Independent Projectiles will have their Durability level listed. For example a projectile that his Durability level 2 will show P2 T - Throw |
Inv.Attribute and Hitbox Invincibility information that will be notated via abbreviation or other indicators. Guard - Move autoguards against the attacks instead of making them whiff. Strike - Invulnerable to all attributes except for Throws, and SP Skills. Low Profile - Character's hurtbox shrinks to go under many attacks. Persona - Only the Persona carries this invulnerability. |
|---|---|---|---|---|---|---|---|
| 100×12, 450 | All | 24 | 2×12(13)3 | Total 52 | Head |
Total: 63
- Holding 4, 8, or 2 with j.D changes where Tomoe appears.
- 5 sends Tomoe mainly forward (6 is identical to 5)
- 8 sends Tomoe high and a bit forward (9 is identical to 8)
- 4 sends Tomoe only slightly forward and slightly downward (7 and 1 are identical to 4)
- 2 sends Tomoe more forward and more downward (3 is identical to 2)
- Combo extender and situational combo ender.
Tomoe leaps up and spins her spear, followed by a downward thrust which causes knockdown. Primarily used in combos, but j.2D and j.5D can be useful for covering your approach or retreat. At certain heights, Chie can combo into j.8D, land, and pick up with 5A/5B into an extended combo.
| P1Also known as the starter proration. If this move starts a combo, this value will be added to the Proration Tally on top of P2's addition (P1 + P2). | P2Also known as the mid-combo proration. If this move is used at all in a combo, this value will be added to the Proration Tally. | SMPShorthand for "Same Move Proration". If this move is used more than once in a combo, this value will be added to the Proration Tally on top of P2's addition (P2 + SMP). | Level
| ||||||||||||||||||||||||||||||||||||
|---|---|---|---|---|---|---|---|---|---|---|---|---|---|---|---|---|---|---|---|---|---|---|---|---|---|---|---|---|---|---|---|---|---|---|---|---|---|---|---|
| 500* | 100* | 50 | 3×12, 4 |
- P1 = 0 if aimed upward
- P2 = 600 if aimed upward
Universal Mechanics
All Out Attack
5A+B


| DamageThe raw damage value(s) of the listed move that the game's combo system calculates combo damage from. | GuardHow this attack can be guarded. All non-throws can be air blocked unless otherwise stated, and all "Air Unblockable" moves can be blocked in either grounded stance unless otherwise stated. Throw-type moves will have their ranges listed instead, and other cases will be explicitly noted. |
StartupNumber of frames for this move to reach the first active frame (includes the first active frame). | ActiveNumber of active frames in this attack. Values in () are for gaps between hits of an attack. | RecoveryNumber of frames this move is in a recovery state before returning to neutral. "Total (x)" indicates this for moves where the attacker has inactionable animation independent of active frames (i.e. projectiles and some Persona attacks). |
Frame AdvThe difference between the attacker's recovery and the period that the opponent is in blockstun. This frame advantage value is based off the fact that the very first active frame touches the opponent. | AttributeSome attacks are invulnerable to attacks with specific attributes. This notes what attributes each attack possesses. H - Head B - Body C - Chest F - Foot P - Projectile. Independent Projectiles will have their Durability level listed. For example a projectile that his Durability level 2 will show P2 T - Throw |
Inv.Attribute and Hitbox Invincibility information that will be notated via abbreviation or other indicators. Guard - Move autoguards against the attacks instead of making them whiff. Strike - Invulnerable to all attributes except for Throws, and SP Skills. Low Profile - Character's hurtbox shrinks to go under many attacks. Persona - Only the Persona carries this invulnerability. |
|---|---|---|---|---|---|---|---|
| 300 | H | 26 | 1 | 32 | -14 | Body | 10~26 Guard Strike |
Total: 58
- Airborne frames 9-25
Chie does a front flip before slamming her heel down on her opponent. Mainly used as a corner combo ender after the opponent is frozen. The airborne frames let this move be a cheeky throw bait, although it loses to some throw tech OSes. Really funny way to punish Elizabeth/Margaret Furious Action
| P1Also known as the starter proration. If this move starts a combo, this value will be added to the Proration Tally on top of P2's addition (P1 + P2). | P2Also known as the mid-combo proration. If this move is used at all in a combo, this value will be added to the Proration Tally. | SMPShorthand for "Same Move Proration". If this move is used more than once in a combo, this value will be added to the Proration Tally on top of P2's addition (P2 + SMP). | Level
| ||||||||||||||||||||||||||||||||||||
|---|---|---|---|---|---|---|---|---|---|---|---|---|---|---|---|---|---|---|---|---|---|---|---|---|---|---|---|---|---|---|---|---|---|---|---|---|---|---|---|
| 0 | 800 | 10000 | 5 |
- Airborne frames 9-25
Sweep
2A+B


| DamageThe raw damage value(s) of the listed move that the game's combo system calculates combo damage from. | GuardHow this attack can be guarded. All non-throws can be air blocked unless otherwise stated, and all "Air Unblockable" moves can be blocked in either grounded stance unless otherwise stated. Throw-type moves will have their ranges listed instead, and other cases will be explicitly noted. |
StartupNumber of frames for this move to reach the first active frame (includes the first active frame). | ActiveNumber of active frames in this attack. Values in () are for gaps between hits of an attack. | RecoveryNumber of frames this move is in a recovery state before returning to neutral. "Total (x)" indicates this for moves where the attacker has inactionable animation independent of active frames (i.e. projectiles and some Persona attacks). |
Frame AdvThe difference between the attacker's recovery and the period that the opponent is in blockstun. This frame advantage value is based off the fact that the very first active frame touches the opponent. | AttributeSome attacks are invulnerable to attacks with specific attributes. This notes what attributes each attack possesses. H - Head B - Body C - Chest F - Foot P - Projectile. Independent Projectiles will have their Durability level listed. For example a projectile that his Durability level 2 will show P2 T - Throw |
Inv.Attribute and Hitbox Invincibility information that will be notated via abbreviation or other indicators. Guard - Move autoguards against the attacks instead of making them whiff. Strike - Invulnerable to all attributes except for Throws, and SP Skills. Low Profile - Character's hurtbox shrinks to go under many attacks. Persona - Only the Persona carries this invulnerability. |
|---|---|---|---|---|---|---|---|
| 600 | Low | 9 | 3 | 20 | -8 | Foot | 4~11 C |
Total: 31
Good combo ender for setting up safe jumps. With resources becomes a valuable launcher in Chie's midscreen combo game, typically via 2A+B > 214A > 214D > 236236A > 5C.
| P1Also known as the starter proration. If this move starts a combo, this value will be added to the Proration Tally on top of P2's addition (P1 + P2). | P2Also known as the mid-combo proration. If this move is used at all in a combo, this value will be added to the Proration Tally. | SMPShorthand for "Same Move Proration". If this move is used more than once in a combo, this value will be added to the Proration Tally on top of P2's addition (P2 + SMP). | Level
| ||||||||||||||||||||||||||||||||||||
|---|---|---|---|---|---|---|---|---|---|---|---|---|---|---|---|---|---|---|---|---|---|---|---|---|---|---|---|---|---|---|---|---|---|---|---|---|---|---|---|
| 200 | 100 | 50 | 3 |
Ground Throw
C+D

| DamageThe raw damage value(s) of the listed move that the game's combo system calculates combo damage from. | GuardHow this attack can be guarded. All non-throws can be air blocked unless otherwise stated, and all "Air Unblockable" moves can be blocked in either grounded stance unless otherwise stated. Throw-type moves will have their ranges listed instead, and other cases will be explicitly noted. |
StartupNumber of frames for this move to reach the first active frame (includes the first active frame). | ActiveNumber of active frames in this attack. Values in () are for gaps between hits of an attack. | RecoveryNumber of frames this move is in a recovery state before returning to neutral. "Total (x)" indicates this for moves where the attacker has inactionable animation independent of active frames (i.e. projectiles and some Persona attacks). |
Frame AdvThe difference between the attacker's recovery and the period that the opponent is in blockstun. This frame advantage value is based off the fact that the very first active frame touches the opponent. | AttributeSome attacks are invulnerable to attacks with specific attributes. This notes what attributes each attack possesses. H - Head B - Body C - Chest F - Foot P - Projectile. Independent Projectiles will have their Durability level listed. For example a projectile that his Durability level 2 will show P2 T - Throw |
Inv.Attribute and Hitbox Invincibility information that will be notated via abbreviation or other indicators. Guard - Move autoguards against the attacks instead of making them whiff. Strike - Invulnerable to all attributes except for Throws, and SP Skills. Low Profile - Character's hurtbox shrinks to go under many attacks. Persona - Only the Persona carries this invulnerability. |
|---|---|---|---|---|---|---|---|
| 0,0,1400 | Throw | 5 | 3 | 23 | Throw |
Total: 30
- Combos with Shadow Frenzy or OMC or supers when she hits the ground.
- Inputting as 4C+D stays same side.
- 4C+D swaps sides if cancelled with one of the above.
Chie's throw is important to her stagger pressure as it gives another incentive for her opponent to mash. As of 2.0 only combos with resource usage, but can be canceled into A Power Charge for simple followups
| P1Also known as the starter proration. If this move starts a combo, this value will be added to the Proration Tally on top of P2's addition (P1 + P2). | P2Also known as the mid-combo proration. If this move is used at all in a combo, this value will be added to the Proration Tally. | SMPShorthand for "Same Move Proration". If this move is used more than once in a combo, this value will be added to the Proration Tally on top of P2's addition (P2 + SMP). | Level
| ||||||||||||||||||||||||||||||||||||
|---|---|---|---|---|---|---|---|---|---|---|---|---|---|---|---|---|---|---|---|---|---|---|---|---|---|---|---|---|---|---|---|---|---|---|---|---|---|---|---|
| 0 | 1000 | 50 | 0, 1, 4 |
Air Throw
j.C+D

| DamageThe raw damage value(s) of the listed move that the game's combo system calculates combo damage from. | GuardHow this attack can be guarded. All non-throws can be air blocked unless otherwise stated, and all "Air Unblockable" moves can be blocked in either grounded stance unless otherwise stated. Throw-type moves will have their ranges listed instead, and other cases will be explicitly noted. |
StartupNumber of frames for this move to reach the first active frame (includes the first active frame). | ActiveNumber of active frames in this attack. Values in () are for gaps between hits of an attack. | RecoveryNumber of frames this move is in a recovery state before returning to neutral. "Total (x)" indicates this for moves where the attacker has inactionable animation independent of active frames (i.e. projectiles and some Persona attacks). |
Frame AdvThe difference between the attacker's recovery and the period that the opponent is in blockstun. This frame advantage value is based off the fact that the very first active frame touches the opponent. | AttributeSome attacks are invulnerable to attacks with specific attributes. This notes what attributes each attack possesses. H - Head B - Body C - Chest F - Foot P - Projectile. Independent Projectiles will have their Durability level listed. For example a projectile that his Durability level 2 will show P2 T - Throw |
Inv.Attribute and Hitbox Invincibility information that will be notated via abbreviation or other indicators. Guard - Move autoguards against the attacks instead of making them whiff. Strike - Invulnerable to all attributes except for Throws, and SP Skills. Low Profile - Character's hurtbox shrinks to go under many attacks. Persona - Only the Persona carries this invulnerability. |
|---|---|---|---|---|---|---|---|
| 0,1600 | Throw | 4 | 3 | 12 | Throw |
Total: 18
- Chie falls with the opponent, so followup pressure/combos are consistent.
An air throw that ends with Chie slamming them directly down into the ground, giving good positioning to start pressure. You can OMC and convert it into a combo if you have meter.
| P1Also known as the starter proration. If this move starts a combo, this value will be added to the Proration Tally on top of P2's addition (P1 + P2). | P2Also known as the mid-combo proration. If this move is used at all in a combo, this value will be added to the Proration Tally. | SMPShorthand for "Same Move Proration". If this move is used more than once in a combo, this value will be added to the Proration Tally on top of P2's addition (P2 + SMP). | Level
| ||||||||||||||||||||||||||||||||||||
|---|---|---|---|---|---|---|---|---|---|---|---|---|---|---|---|---|---|---|---|---|---|---|---|---|---|---|---|---|---|---|---|---|---|---|---|---|---|---|---|
| 0 | 1200 | 50 | 0, 4 |
Counter
B+D (Air OK)


| Version | DamageThe raw damage value(s) of the listed move that the game's combo system calculates combo damage from. | GuardHow this attack can be guarded. All non-throws can be air blocked unless otherwise stated, and all "Air Unblockable" moves can be blocked in either grounded stance unless otherwise stated. Throw-type moves will have their ranges listed instead, and other cases will be explicitly noted. |
StartupNumber of frames for this move to reach the first active frame (includes the first active frame). | ActiveNumber of active frames in this attack. Values in () are for gaps between hits of an attack. | RecoveryNumber of frames this move is in a recovery state before returning to neutral. "Total (x)" indicates this for moves where the attacker has inactionable animation independent of active frames (i.e. projectiles and some Persona attacks). |
Frame AdvThe difference between the attacker's recovery and the period that the opponent is in blockstun. This frame advantage value is based off the fact that the very first active frame touches the opponent. | AttributeSome attacks are invulnerable to attacks with specific attributes. This notes what attributes each attack possesses. H - Head B - Body C - Chest F - Foot P - Projectile. Independent Projectiles will have their Durability level listed. For example a projectile that his Durability level 2 will show P2 T - Throw |
Inv.Attribute and Hitbox Invincibility information that will be notated via abbreviation or other indicators. Guard - Move autoguards against the attacks instead of making them whiff. Strike - Invulnerable to all attributes except for Throws, and SP Skills. Low Profile - Character's hurtbox shrinks to go under many attacks. Persona - Only the Persona carries this invulnerability. |
|---|---|---|---|---|---|---|---|---|
| BD Catch | Total 24 | 1~9 Guard All | ||||||
| BD Attack | 500, 300×4 | Low, All | 7 | 2(10)2(6)2(6)2(6)2 | 18+15L | -24 | Body | 1~19 All |
| j.BD | 320×4 | All | 6 | 2(6)2(6)2(6)2 | Until L+15 | Head | 1~7 All |
- B+D
Total: 77
- Counter Furious Action.
- Counters throws.
- Super cancelable on successful counter until landing (Can super cancel the first hit grounded and the subsequent aerial hits into Agneyastra)
- First hit is a low.
- Fatal Recovery during catch (normal counterhit recovery if followup kicks get blocked)
Chie summons a shield, and if hit or grabbed she'll kick in the air diagonally upward. Starts up and recovers quickly, but the counter isn't active for long. This makes it harder to time than most other Furious Actions. Can be spammed to force awakening, giving Chie 50 SP and access to Agneyastra. Keep in mind that Chie is in Fatal Recovery state during recovery.
- j.B+D
Total: 46
- Skips straight to the kicks.
- Does not knock down.
Air version does the kicks immediately, and has full invincibility on startup.
| Version | P1Also known as the starter proration. If this move starts a combo, this value will be added to the Proration Tally on top of P2's addition (P1 + P2). | P2Also known as the mid-combo proration. If this move is used at all in a combo, this value will be added to the Proration Tally. | SMPShorthand for "Same Move Proration". If this move is used more than once in a combo, this value will be added to the Proration Tally on top of P2's addition (P2 + SMP). | Level
| ||||||||||||||||||||||||||||||||||||
|---|---|---|---|---|---|---|---|---|---|---|---|---|---|---|---|---|---|---|---|---|---|---|---|---|---|---|---|---|---|---|---|---|---|---|---|---|---|---|---|---|
| BD Catch | ||||||||||||||||||||||||||||||||||||||||
| BD Attack | 1000 | 100 | 50 | 2, 4 | ||||||||||||||||||||||||||||||||||||
| j.BD | 1000 | 100 | 50 | 4 |
BD Catch:
- Fatal Recovery
Guard Cancel Attack
6A+B while blocking

Good luck actually getting out of pressure with this
| DamageThe raw damage value(s) of the listed move that the game's combo system calculates combo damage from. | GuardHow this attack can be guarded. All non-throws can be air blocked unless otherwise stated, and all "Air Unblockable" moves can be blocked in either grounded stance unless otherwise stated. Throw-type moves will have their ranges listed instead, and other cases will be explicitly noted. |
StartupNumber of frames for this move to reach the first active frame (includes the first active frame). | ActiveNumber of active frames in this attack. Values in () are for gaps between hits of an attack. | RecoveryNumber of frames this move is in a recovery state before returning to neutral. "Total (x)" indicates this for moves where the attacker has inactionable animation independent of active frames (i.e. projectiles and some Persona attacks). |
Frame AdvThe difference between the attacker's recovery and the period that the opponent is in blockstun. This frame advantage value is based off the fact that the very first active frame touches the opponent. | AttributeSome attacks are invulnerable to attacks with specific attributes. This notes what attributes each attack possesses. H - Head B - Body C - Chest F - Foot P - Projectile. Independent Projectiles will have their Durability level listed. For example a projectile that his Durability level 2 will show P2 T - Throw |
Inv.Attribute and Hitbox Invincibility information that will be notated via abbreviation or other indicators. Guard - Move autoguards against the attacks instead of making them whiff. Strike - Invulnerable to all attributes except for Throws, and SP Skills. Low Profile - Character's hurtbox shrinks to go under many attacks. Persona - Only the Persona carries this invulnerability. |
|---|---|---|---|---|---|---|---|
| 0 | All | 15 | 6 | 30 | -19 | Body | 1~?? Guard All |
Total: 50
Chie's Guard Cancel Attack. It utilizes Chie's 5B animation, and knocks the opponent away on hit. It has limited practicality due to its awful range.
| P1Also known as the starter proration. If this move starts a combo, this value will be added to the Proration Tally on top of P2's addition (P1 + P2). | P2Also known as the mid-combo proration. If this move is used at all in a combo, this value will be added to the Proration Tally. | SMPShorthand for "Same Move Proration". If this move is used more than once in a combo, this value will be added to the Proration Tally on top of P2's addition (P2 + SMP). | Level
| ||||||||||||||||||||||||||||||||||||
|---|---|---|---|---|---|---|---|---|---|---|---|---|---|---|---|---|---|---|---|---|---|---|---|---|---|---|---|---|---|---|---|---|---|---|---|---|---|---|---|
| 4 |
Skill Attacks
Rampage
236A/B (Air OK)


| Version | DamageThe raw damage value(s) of the listed move that the game's combo system calculates combo damage from. | GuardHow this attack can be guarded. All non-throws can be air blocked unless otherwise stated, and all "Air Unblockable" moves can be blocked in either grounded stance unless otherwise stated. Throw-type moves will have their ranges listed instead, and other cases will be explicitly noted. |
StartupNumber of frames for this move to reach the first active frame (includes the first active frame). | ActiveNumber of active frames in this attack. Values in () are for gaps between hits of an attack. | RecoveryNumber of frames this move is in a recovery state before returning to neutral. "Total (x)" indicates this for moves where the attacker has inactionable animation independent of active frames (i.e. projectiles and some Persona attacks). |
Frame AdvThe difference between the attacker's recovery and the period that the opponent is in blockstun. This frame advantage value is based off the fact that the very first active frame touches the opponent. | AttributeSome attacks are invulnerable to attacks with specific attributes. This notes what attributes each attack possesses. H - Head B - Body C - Chest F - Foot P - Projectile. Independent Projectiles will have their Durability level listed. For example a projectile that his Durability level 2 will show P2 T - Throw |
Inv.Attribute and Hitbox Invincibility information that will be notated via abbreviation or other indicators. Guard - Move autoguards against the attacks instead of making them whiff. Strike - Invulnerable to all attributes except for Throws, and SP Skills. Low Profile - Character's hurtbox shrinks to go under many attacks. Persona - Only the Persona carries this invulnerability. |
|---|---|---|---|---|---|---|---|---|
| 236A | 200×3 | All | 11 | 2(6)3(6)3 | 3+17L | -8 | Head | |
| j.236A | 200×N | All | 6 | 2(6)3(6)3... | 17L | -8 | Head | |
| 236B | 200×5 | All | 19 | 2(6)3(6)3(6)3(6)3 | 1+13L | +2 | Head | |
| j.236B | 200×N | All | 9 | 2(6)3(6)3... | 13L | Head | ||
| 236AB | 200×6 | All | 12 | 2(4)2(4)2(4)2(4)2(4)2 | 11L | +6 | Head | |
| j.236AB | 200×N | All | 7 | 2(4)2(4)2... | Until L+11 | Head |
A short flurry of jump kicks; Mostly used in combos. Causes fatal counter while power charged
- A Version
Total: 50
Main corner combo extender, 236A~236A gives a launch that links into 5B from any ground normal starter except 2A. Repeatedly pops airborne opponents up and out of its hits, so avoid using on launched opponents.
- B Version
Total: 70
Useful as a crouch confirm early in combos or as a combo ender later in combos. Combos more reliably on airborne opponents than 236A.
- SB Version
Total: 54
SB has the startup of A Rampage with the damage of B Rampage, plus extra kicks. Can link 5A after. Very plus on block, nice tool to reset pressure. Holding a direction will adjust Chie's trajectory slightly. Air version maintains Chie's air momentum which means low to the ground it'll immediately end and be cancelable into Skull Cracker for an "instant" overhead
| Version | P1Also known as the starter proration. If this move starts a combo, this value will be added to the Proration Tally on top of P2's addition (P1 + P2). | P2Also known as the mid-combo proration. If this move is used at all in a combo, this value will be added to the Proration Tally. | SMPShorthand for "Same Move Proration". If this move is used more than once in a combo, this value will be added to the Proration Tally on top of P2's addition (P2 + SMP). | Level
| ||||||||||||||||||||||||||||||||||||
|---|---|---|---|---|---|---|---|---|---|---|---|---|---|---|---|---|---|---|---|---|---|---|---|---|---|---|---|---|---|---|---|---|---|---|---|---|---|---|---|---|
| 236A | 100 | 300 | 50 | 3, 2×2 | ||||||||||||||||||||||||||||||||||||
| j.236A | 100 | 200 | 50 | 2 | ||||||||||||||||||||||||||||||||||||
| 236B | 100 | 300 | 50 | 4 | ||||||||||||||||||||||||||||||||||||
| j.236B | 100 | 300 | 50 | 2 | ||||||||||||||||||||||||||||||||||||
| 236AB | 100 | 300 | 500 | 4 | ||||||||||||||||||||||||||||||||||||
| j.236AB | 100 | 300 | 500 | 4 |
Skull Cracker
236A/B after Rampage


| Version | DamageThe raw damage value(s) of the listed move that the game's combo system calculates combo damage from. | GuardHow this attack can be guarded. All non-throws can be air blocked unless otherwise stated, and all "Air Unblockable" moves can be blocked in either grounded stance unless otherwise stated. Throw-type moves will have their ranges listed instead, and other cases will be explicitly noted. |
StartupNumber of frames for this move to reach the first active frame (includes the first active frame). | ActiveNumber of active frames in this attack. Values in () are for gaps between hits of an attack. | RecoveryNumber of frames this move is in a recovery state before returning to neutral. "Total (x)" indicates this for moves where the attacker has inactionable animation independent of active frames (i.e. projectiles and some Persona attacks). |
Frame AdvThe difference between the attacker's recovery and the period that the opponent is in blockstun. This frame advantage value is based off the fact that the very first active frame touches the opponent. | AttributeSome attacks are invulnerable to attacks with specific attributes. This notes what attributes each attack possesses. H - Head B - Body C - Chest F - Foot P - Projectile. Independent Projectiles will have their Durability level listed. For example a projectile that his Durability level 2 will show P2 T - Throw |
Inv.Attribute and Hitbox Invincibility information that will be notated via abbreviation or other indicators. Guard - Move autoguards against the attacks instead of making them whiff. Strike - Invulnerable to all attributes except for Throws, and SP Skills. Low Profile - Character's hurtbox shrinks to go under many attacks. Persona - Only the Persona carries this invulnerability. |
|---|---|---|---|---|---|---|---|---|
| Rampage > 236A | 400, 200 | High, Low | 6 | 2(9)3 | 26 | -12 | Body, Foot | |
| Rampage > 236B | 500, 300 | High ,Low | 10 | 2(9)3 | 21 | -7 | Body, Foot | |
| Rampage > 236AB | 500, 500 | High ,Low | 5 | 2(9)3 | 21 | -7 | Body, Foot |
- First hit is an overhead, second hit is low.
- Cancels into 214A/B/A+B, 214C/D/C+D, and 236C/D/C+D.
A key launcher in Chie's combo toolkit. In a blockstring, Skull Cracker can be used as a high option from Rampage, but the low option (Rampage OMC 2A) requires 50 meter to be truly ambiguous.
- A Version
Total: 45
The A version mainly sees use as a followup to A Rampage on standing opponents as a launcher, which really opens up a lot of corner combo routing.
- B Version
Total: 44
B version better for combos due to higher float, better recovery, and longer hitstun leading to better extensions. Doesn't combo after A version of Rampage on standing opponents (except on CH A Rampage starter or Fatal Counter), allowing for a reset.
- SB Version
Total: 39
SB is mostly not used unless you have meter to burn to add damage to a combo. It's the only one that's frametight after A Rampage, but that aspect rarely comes into play.
| Version | P1Also known as the starter proration. If this move starts a combo, this value will be added to the Proration Tally on top of P2's addition (P1 + P2). | P2Also known as the mid-combo proration. If this move is used at all in a combo, this value will be added to the Proration Tally. | SMPShorthand for "Same Move Proration". If this move is used more than once in a combo, this value will be added to the Proration Tally on top of P2's addition (P2 + SMP). | Level
| ||||||||||||||||||||||||||||||||||||
|---|---|---|---|---|---|---|---|---|---|---|---|---|---|---|---|---|---|---|---|---|---|---|---|---|---|---|---|---|---|---|---|---|---|---|---|---|---|---|---|---|
| Rampage > 236A | 300 | 100 | 200 | 4 | ||||||||||||||||||||||||||||||||||||
| Rampage > 236B | 300 | 100 | 200 | 4 | ||||||||||||||||||||||||||||||||||||
| Rampage > 236AB | 300 | 100 | 200 | 4 |
Dragon Kick
![]() 236C/D (Air OK)
236C/D (Air OK)


| Version | DamageThe raw damage value(s) of the listed move that the game's combo system calculates combo damage from. | GuardHow this attack can be guarded. All non-throws can be air blocked unless otherwise stated, and all "Air Unblockable" moves can be blocked in either grounded stance unless otherwise stated. Throw-type moves will have their ranges listed instead, and other cases will be explicitly noted. |
StartupNumber of frames for this move to reach the first active frame (includes the first active frame). | ActiveNumber of active frames in this attack. Values in () are for gaps between hits of an attack. | RecoveryNumber of frames this move is in a recovery state before returning to neutral. "Total (x)" indicates this for moves where the attacker has inactionable animation independent of active frames (i.e. projectiles and some Persona attacks). |
Frame AdvThe difference between the attacker's recovery and the period that the opponent is in blockstun. This frame advantage value is based off the fact that the very first active frame touches the opponent. | AttributeSome attacks are invulnerable to attacks with specific attributes. This notes what attributes each attack possesses. H - Head B - Body C - Chest F - Foot P - Projectile. Independent Projectiles will have their Durability level listed. For example a projectile that his Durability level 2 will show P2 T - Throw |
Inv.Attribute and Hitbox Invincibility information that will be notated via abbreviation or other indicators. Guard - Move autoguards against the attacks instead of making them whiff. Strike - Invulnerable to all attributes except for Throws, and SP Skills. Low Profile - Character's hurtbox shrinks to go under many attacks. Persona - Only the Persona carries this invulnerability. |
|---|---|---|---|---|---|---|---|---|
| 236C | 2000 | All | 18 | 12 | 23+15L | -35 | Head | |
| j.236C | 1600 | All | 14 | 12 | Until L+15 | Head | ||
| 236D | 2500 | All | 30 | 18 | 23+15 after landing | Head | ||
| j.236D | 2000 | All | 17 | 16 | 15L | Head | ||
| 236CD | 2500 | All | 30 | 12 | 9+9L | Head | ||
| j.236CD | 2000 | All | 13 | 12 | 9+9L | Head |
Total: 67
Total: 85
Total: 59
- Extreme damage.
- C version wallbounces everywhere. D version launches far horizontally and only wallbounces in the corner
- SB version launches straight up and Chie recovers in the air, allowing for another Dragon Kick.
Tomoe launches Chie in the air for a flying kick. High damage, usually used as a combo ender. Occasionally useful as a surprise, a method to punish unsafe moves in the air, or a desperate-and-not-ideal corner escape option (mainly j.236C+D). Can follow up with another Dragon Kick in the air after using SB version. In the corner can be canceled into OMB to squeeze out a bit more damage in a combo (SB version can be reliably OMBed anywhere)
| Version | P1Also known as the starter proration. If this move starts a combo, this value will be added to the Proration Tally on top of P2's addition (P1 + P2). | P2Also known as the mid-combo proration. If this move is used at all in a combo, this value will be added to the Proration Tally. | SMPShorthand for "Same Move Proration". If this move is used more than once in a combo, this value will be added to the Proration Tally on top of P2's addition (P2 + SMP). | Level
| ||||||||||||||||||||||||||||||||||||
|---|---|---|---|---|---|---|---|---|---|---|---|---|---|---|---|---|---|---|---|---|---|---|---|---|---|---|---|---|---|---|---|---|---|---|---|---|---|---|---|---|
| 236C | 800 | 300 | 50 | 5 | ||||||||||||||||||||||||||||||||||||
| j.236C | 800 | 300 | 50 | 5 | ||||||||||||||||||||||||||||||||||||
| 236D | 800 | 300 | 50 | 5 | ||||||||||||||||||||||||||||||||||||
| j.236D | 800 | 300 | 50 | 5 | ||||||||||||||||||||||||||||||||||||
| 236CD | 800 | 300 | 200 | 5 | ||||||||||||||||||||||||||||||||||||
| j.236CD | 800 | 300 | 200 | 5 |
Herculean Strike
214A/B


| Version | DamageThe raw damage value(s) of the listed move that the game's combo system calculates combo damage from. | GuardHow this attack can be guarded. All non-throws can be air blocked unless otherwise stated, and all "Air Unblockable" moves can be blocked in either grounded stance unless otherwise stated. Throw-type moves will have their ranges listed instead, and other cases will be explicitly noted. |
StartupNumber of frames for this move to reach the first active frame (includes the first active frame). | ActiveNumber of active frames in this attack. Values in () are for gaps between hits of an attack. | RecoveryNumber of frames this move is in a recovery state before returning to neutral. "Total (x)" indicates this for moves where the attacker has inactionable animation independent of active frames (i.e. projectiles and some Persona attacks). |
Frame AdvThe difference between the attacker's recovery and the period that the opponent is in blockstun. This frame advantage value is based off the fact that the very first active frame touches the opponent. | AttributeSome attacks are invulnerable to attacks with specific attributes. This notes what attributes each attack possesses. H - Head B - Body C - Chest F - Foot P - Projectile. Independent Projectiles will have their Durability level listed. For example a projectile that his Durability level 2 will show P2 T - Throw |
Inv.Attribute and Hitbox Invincibility information that will be notated via abbreviation or other indicators. Guard - Move autoguards against the attacks instead of making them whiff. Strike - Invulnerable to all attributes except for Throws, and SP Skills. Low Profile - Character's hurtbox shrinks to go under many attacks. Persona - Only the Persona carries this invulnerability. |
|---|---|---|---|---|---|---|---|---|
| 214A | 600 | All | 11 | 6 | 23 | -11 ~ -6 | Chest | |
| 214B | 1000 | All | 25 | 9 | 21 | -8 ~ +0 | Chest | 1~20 T |
| 214AB | 1000, 1100 | All | 17 | 10,1 | 15 | +3 | Chest | 7~27 P 1~14 T |
- Cancels into 214C/D/C+D, and 236C/D/C+D.
- B and SB versions are throw invuln starting from frame 1 through a good chunk of the startup (although not through to active frames)
A forward lunging palm strike. B and SB versions travel backwards first.
- A Version
Total: 39
Typically used as a combo ender midscreen for Chie's smaller and simpler combos. Leads to easy safejumps with 9j.B (whiff) > j.2B.
- B Version
Total: 54
Combo extender after Skull Cracker in the corner. Launches high enough for 5C to link after in the corner and combos can be extended from there.
- SB Version
Total: 42
Plus on block, making it a valid means to reset pressure. It's somewhat better for this than SB Rampage because the single, quick hit isn't as easy a point to guard cancel out of as Rampage, as well as properly leading to combos on airborne opponents. For example, 2A+B > 214A+B is a common string to reset pressure on block and combo on hit. Note that 2A+B > 214A+B only works with sweep starter, with dash momentum in a short string, or on Kanji. It's also projectile invul starting on frame 7 and going through active frames, which makes it an anti-zoning tool that must be considered by the opponent
| Version | P1Also known as the starter proration. If this move starts a combo, this value will be added to the Proration Tally on top of P2's addition (P1 + P2). | P2Also known as the mid-combo proration. If this move is used at all in a combo, this value will be added to the Proration Tally. | SMPShorthand for "Same Move Proration". If this move is used more than once in a combo, this value will be added to the Proration Tally on top of P2's addition (P2 + SMP). | Level
| ||||||||||||||||||||||||||||||||||||
|---|---|---|---|---|---|---|---|---|---|---|---|---|---|---|---|---|---|---|---|---|---|---|---|---|---|---|---|---|---|---|---|---|---|---|---|---|---|---|---|---|
| 214A | 300 | 100 | 50 | 3 | ||||||||||||||||||||||||||||||||||||
| 214B | 100 | 300 | 50 | 5 | ||||||||||||||||||||||||||||||||||||
| 214AB | 300 | 100 | 50 | 5 |
214AB:
- On hit, first hit launches opponent too far for second hit to connect generally
- On hit 13F hitstop
Black Spot
![]() 214C/D
214C/D


| Version | DamageThe raw damage value(s) of the listed move that the game's combo system calculates combo damage from. | GuardHow this attack can be guarded. All non-throws can be air blocked unless otherwise stated, and all "Air Unblockable" moves can be blocked in either grounded stance unless otherwise stated. Throw-type moves will have their ranges listed instead, and other cases will be explicitly noted. |
StartupNumber of frames for this move to reach the first active frame (includes the first active frame). | ActiveNumber of active frames in this attack. Values in () are for gaps between hits of an attack. | RecoveryNumber of frames this move is in a recovery state before returning to neutral. "Total (x)" indicates this for moves where the attacker has inactionable animation independent of active frames (i.e. projectiles and some Persona attacks). |
Frame AdvThe difference between the attacker's recovery and the period that the opponent is in blockstun. This frame advantage value is based off the fact that the very first active frame touches the opponent. | AttributeSome attacks are invulnerable to attacks with specific attributes. This notes what attributes each attack possesses. H - Head B - Body C - Chest F - Foot P - Projectile. Independent Projectiles will have their Durability level listed. For example a projectile that his Durability level 2 will show P2 T - Throw |
Inv.Attribute and Hitbox Invincibility information that will be notated via abbreviation or other indicators. Guard - Move autoguards against the attacks instead of making them whiff. Strike - Invulnerable to all attributes except for Throws, and SP Skills. Low Profile - Character's hurtbox shrinks to go under many attacks. Persona - Only the Persona carries this invulnerability. |
|---|---|---|---|---|---|---|---|---|
| 214C | 1000 | All | 13 [11] | 12 | 24 | -7 | Projectile+Chest | |
| 214D | 1200 | All | 26 [22] | 12 | 18 | +5 | Projectile+Chest | |
| 214[D] | 1200 | All | 55 [51] | 12 | 11 | +12 | Projectile+Chest | |
| 214CD | 1400 | All | 21 | 12 | 15 | +5 | Projectile+Chest | 9~32 Guard Strike |
Total: 48
Total: 55
Total: 47
- Forces Fatal Counter on Counter Hit
- Attack is based on Tomoe's position and will not autocorrect direction (Tomoe will Black Spot away from the opponent if on the other side)
- C and D versions are slightly faster if canceled into from other specials
- C version Dash Cancel is -6 on block
- D and SB version Dash Cancel is +0 on block
- Charged D version Dash Cancel is +7 on block
- D version gains charged property after additional 9 frames of charging (35 [31] frames) and can be charged to a max of 55 [51] frames
Chie and her Persona do a double palm attack. SB version has super armor on frames 9~32, shielding Chie from attacks. In combos, can be canceled into A Power Charge into 5C for common metered combo extensions. Nice move to throw into corner pressure sometimes if you think you can get a FC off of it, and is very good at covering lots of space (vertical space in particular) in neutral. Chie's best combo starter in certain situations or with lots of meter to spend.
| Version | P1Also known as the starter proration. If this move starts a combo, this value will be added to the Proration Tally on top of P2's addition (P1 + P2). | P2Also known as the mid-combo proration. If this move is used at all in a combo, this value will be added to the Proration Tally. | SMPShorthand for "Same Move Proration". If this move is used more than once in a combo, this value will be added to the Proration Tally on top of P2's addition (P2 + SMP). | Level
| ||||||||||||||||||||||||||||||||||||
|---|---|---|---|---|---|---|---|---|---|---|---|---|---|---|---|---|---|---|---|---|---|---|---|---|---|---|---|---|---|---|---|---|---|---|---|---|---|---|---|---|
| 214C | 0 | 100 | 50 | 4 | ||||||||||||||||||||||||||||||||||||
| 214D | 0* | 100 | 50 | 5 | ||||||||||||||||||||||||||||||||||||
| 214[D] | 0* | 100 | 50 | 5 | ||||||||||||||||||||||||||||||||||||
| 214CD | 0 | 100 | 50 | 5 |
214C:
- Dash Cancel is -6 on block
- Fatal Counter
- Values in [] are when canceled into from other special attacks
214D:
- Dash Cancel is +0 on block
- Fatal Counter
- P1 is 800 on Counter Hit
- Startup is 22 when canceled into from other special attacks
214[D]:
- Dash Cancel is +7 on block
- Fatal Counter
- P1 is 800 on Counter Hit
- Startup is 51 when canceled into from other special attacks
- Becomes fully charged after 35 [31] frames
214CD:
- Dash Cancel is +0 on block
- Fatal Counter
SP Skill Attacks
Power Charge
236236A/B
| Version | DamageThe raw damage value(s) of the listed move that the game's combo system calculates combo damage from. | GuardHow this attack can be guarded. All non-throws can be air blocked unless otherwise stated, and all "Air Unblockable" moves can be blocked in either grounded stance unless otherwise stated. Throw-type moves will have their ranges listed instead, and other cases will be explicitly noted. |
StartupNumber of frames for this move to reach the first active frame (includes the first active frame). | ActiveNumber of active frames in this attack. Values in () are for gaps between hits of an attack. | RecoveryNumber of frames this move is in a recovery state before returning to neutral. "Total (x)" indicates this for moves where the attacker has inactionable animation independent of active frames (i.e. projectiles and some Persona attacks). |
Frame AdvThe difference between the attacker's recovery and the period that the opponent is in blockstun. This frame advantage value is based off the fact that the very first active frame touches the opponent. | AttributeSome attacks are invulnerable to attacks with specific attributes. This notes what attributes each attack possesses. H - Head B - Body C - Chest F - Foot P - Projectile. Independent Projectiles will have their Durability level listed. For example a projectile that his Durability level 2 will show P2 T - Throw |
Inv.Attribute and Hitbox Invincibility information that will be notated via abbreviation or other indicators. Guard - Move autoguards against the attacks instead of making them whiff. Strike - Invulnerable to all attributes except for Throws, and SP Skills. Low Profile - Character's hurtbox shrinks to go under many attacks. Persona - Only the Persona carries this invulnerability. |
|---|---|---|---|---|---|---|---|---|
| 236236A | Total 5+(50 Flash)+0 | 5~5 All | ||||||
| 236236B | 5 | Total 5+(50 Flash)+20 | 1~5 All | |||||
| 236236AB | Total 5+(50 Flash)+30 | 1~5 All |
- Each level of Power Charge has a certain number of charges, as well as a damage boost.
- Charges are consumed by special moves, supers, 5AA, 5AAA, AoA, Sweep, and all B normals (multihit moves only consume 1 charge).
Chie charges up, boosting the damage of the aforementioned moves and adding 25% chip damage to all affected moves. Each usage sets the charge count to the max of that level (so going to Level 3 with more than 5 charges will lose you charges). Using God's Hand or Agneyastra consumes all remaining charges.
- A Version
Adds 1 level of Power Charge. Useful in combos or pressure as a sort of "extra" OMC, since it can be canceled into from virtually anything and has only 5 total frames. In addition, it freezes the screen, so you can use it when you are disoriented to get your bearings, or to tell if you have clearance to go for a throw/punish a move with long startup/etc. Very useful.
- Power Charge Level 1
- 1.2x damage boost
- 9 Charges max
- Specials and supers gain Fatal Starter property
- B Version
Adds 2 levels of Power Charge. Similar to the A version, but the additional level adds even more damage, and is critical for most damage routes to have enough meter to use a Level 3 charged super. Has longer recovery time so it is usually used during combos; the invuln time isn't worth relying on.
- Power Charge Level 2
- 1.4x damage boost
- 9 Charges max
- All affected moves gain Fatal Starter property
- SB Version
Adds 3 levels of Power Charge, which makes the multiplier jump up drastically. Due to the long recovery time, it's rarely used outside of specific combos/setups.
- Power Charge Level 3
- 2.0x damage boost
- 5 Charges max
| Version | P1Also known as the starter proration. If this move starts a combo, this value will be added to the Proration Tally on top of P2's addition (P1 + P2). | P2Also known as the mid-combo proration. If this move is used at all in a combo, this value will be added to the Proration Tally. | SMPShorthand for "Same Move Proration". If this move is used more than once in a combo, this value will be added to the Proration Tally on top of P2's addition (P2 + SMP). | Level
| ||||||||||||||||||||||||||||||||||||
|---|---|---|---|---|---|---|---|---|---|---|---|---|---|---|---|---|---|---|---|---|---|---|---|---|---|---|---|---|---|---|---|---|---|---|---|---|---|---|---|---|
| 236236A | ||||||||||||||||||||||||||||||||||||||||
| 236236B | ||||||||||||||||||||||||||||||||||||||||
| 236236AB |
236236A:
- Adds 1 level of Power Charge and replenishes charges to max
- Level 1 applies Fatal Counter property to all specials
- Power Charge itself adds a damage multiplier to all special moves, B normals, AoA, Sweep, 5AA, and 5AAA
- values are as follows: Lv.1 = 1.2, Lv.2 = 1.4, Lv.3 = 2.0
- Level 1 has 9 charges and each of the aforementioned moves uses 1 stock (even multihit moves)
- Using Agneyastra or God's Hand immediately consumes all charges
236236B:
- Adds 2 levels of Power Charge and replenishes charges to max
- Level 2 applies Fatal Counter property to all affected moves
- Power Charge itself adds a damage multiplier to all special moves, B normals, AoA, Sweep, 5AA, and 5AAA
- values are as follows: Lv.1 = 1.2, Lv.2 = 1.4, Lv.3 = 2.0
- Level 2 has 9 charges and each of the aforementioned moves uses 1 stock (even multihit moves)
- Using Agneyastra or God's Hand immediately consumes all charges
236236AB:
- Adds 3 levels of Power Charge and replenishes charges to max
- Level 3 applies Fatal Counter property to all affected moves
- Power Charge itself adds a damage multiplier to all special moves, B normals, AoA, Sweep, 5AA, and 5AAA
- values are as follows: Lv.1 = 1.2, Lv.2 = 1.4, Lv.3 = 2.0
- Level 3 has 5 charges and each of the aforementioned moves uses 1 stock (even multihit moves)
- Using Agneyastra or God's Hand immediately consumes all charges
God's Hand
![]() 236236C/D
236236C/D
| Version | DamageThe raw damage value(s) of the listed move that the game's combo system calculates combo damage from. | GuardHow this attack can be guarded. All non-throws can be air blocked unless otherwise stated, and all "Air Unblockable" moves can be blocked in either grounded stance unless otherwise stated. Throw-type moves will have their ranges listed instead, and other cases will be explicitly noted. |
StartupNumber of frames for this move to reach the first active frame (includes the first active frame). | ActiveNumber of active frames in this attack. Values in () are for gaps between hits of an attack. | RecoveryNumber of frames this move is in a recovery state before returning to neutral. "Total (x)" indicates this for moves where the attacker has inactionable animation independent of active frames (i.e. projectiles and some Persona attacks). |
Frame AdvThe difference between the attacker's recovery and the period that the opponent is in blockstun. This frame advantage value is based off the fact that the very first active frame touches the opponent. | AttributeSome attacks are invulnerable to attacks with specific attributes. This notes what attributes each attack possesses. H - Head B - Body C - Chest F - Foot P - Projectile. Independent Projectiles will have their Durability level listed. For example a projectile that his Durability level 2 will show P2 T - Throw |
Inv.Attribute and Hitbox Invincibility information that will be notated via abbreviation or other indicators. Guard - Move autoguards against the attacks instead of making them whiff. Strike - Invulnerable to all attributes except for Throws, and SP Skills. Low Profile - Character's hurtbox shrinks to go under many attacks. Persona - Only the Persona carries this invulnerability. |
|---|---|---|---|---|---|---|---|---|
| 236236C | 2500 | High | 4+(50 Flash)+10 | 6 | Total 61 | -16 | Body | 1~22 All |
| 236236D | 2800 | High | 4+(42 Flash)+18 | 6 | Total 69 | -16 | Body | 1~30 All |
| 236236CD | 2000, 800 | H | 4+(42 Flash)+18 | 6(27)6 | Total 102 | -16 | Body | 1~30 All |
Tomoe summons a giant golden fist from the heavens that slams down onto the opponent. This is one of Chie's best combo enders when going for damage. Hits overhead for some reason.
- C Version
Total: 61
Faster than the D version and puts the fist in front of Chie; Can also be used as a strong reversal.
- D Version
Total: 69
Puts the fist mid screen and adds more damage.
- SB Version
Total: 102
SB God's Hand causes 2 fists to come down, one after the other to add a bit more damage. With 125 meter or Shadow Frenzy active, can be OMCed for a high/low unblockable (236236C+D(1) > OMC > 5A > 2A+B)
| Version | P1Also known as the starter proration. If this move starts a combo, this value will be added to the Proration Tally on top of P2's addition (P1 + P2). | P2Also known as the mid-combo proration. If this move is used at all in a combo, this value will be added to the Proration Tally. | SMPShorthand for "Same Move Proration". If this move is used more than once in a combo, this value will be added to the Proration Tally on top of P2's addition (P2 + SMP). | Level
| ||||||||||||||||||||||||||||||||||||
|---|---|---|---|---|---|---|---|---|---|---|---|---|---|---|---|---|---|---|---|---|---|---|---|---|---|---|---|---|---|---|---|---|---|---|---|---|---|---|---|---|
| 236236C | 1000 | 100 | 50 | 5 | ||||||||||||||||||||||||||||||||||||
| 236236D | 1000 | 100 | 50 | 5 | ||||||||||||||||||||||||||||||||||||
| 236236CD | 1000, 1000 | 500?, 100 | 50, 50 | 5 |
236236C:
- Fatal Recovery
- Minimum Damage 1000
236236D:
- Fatal Recovery
- Minimum Damage 1120
236236CD:
- Fatal Recovery
- Minimum Damage 900, 360 (1260)
Awakened SP Skill Attacks
Agneyastra
![]() 214214C/D (Air OK)
214214C/D (Air OK)
| Version | DamageThe raw damage value(s) of the listed move that the game's combo system calculates combo damage from. | GuardHow this attack can be guarded. All non-throws can be air blocked unless otherwise stated, and all "Air Unblockable" moves can be blocked in either grounded stance unless otherwise stated. Throw-type moves will have their ranges listed instead, and other cases will be explicitly noted. |
StartupNumber of frames for this move to reach the first active frame (includes the first active frame). | ActiveNumber of active frames in this attack. Values in () are for gaps between hits of an attack. | RecoveryNumber of frames this move is in a recovery state before returning to neutral. "Total (x)" indicates this for moves where the attacker has inactionable animation independent of active frames (i.e. projectiles and some Persona attacks). |
Frame AdvThe difference between the attacker's recovery and the period that the opponent is in blockstun. This frame advantage value is based off the fact that the very first active frame touches the opponent. | AttributeSome attacks are invulnerable to attacks with specific attributes. This notes what attributes each attack possesses. H - Head B - Body C - Chest F - Foot P - Projectile. Independent Projectiles will have their Durability level listed. For example a projectile that his Durability level 2 will show P2 T - Throw |
Inv.Attribute and Hitbox Invincibility information that will be notated via abbreviation or other indicators. Guard - Move autoguards against the attacks instead of making them whiff. Strike - Invulnerable to all attributes except for Throws, and SP Skills. Low Profile - Character's hurtbox shrinks to go under many attacks. Persona - Only the Persona carries this invulnerability. |
|---|---|---|---|---|---|---|---|---|
| 214214C | 500×10 | All | 11+(40 Flash)+9~ | P(10)P(5)P(10)P(5)P(10)P(5)P(10)P(5)P(10)P | Total 35 | Projectile | 1~12 All | |
| 214214D | 500×10 | All | 11+(41 Flash)+15~ | P(10)P(5)P(10)P(5)P(10)P(5)P(10)P(5)P(10)P | Total 34 | Projectile | 1~11 All | |
| 214214CD | 500×12 | All | 15+(41 Flash)+7~ | P(5)P(5)P(10)P(5)P(10)P(5)P(10)P(5)P(5)P(10)P(5)P | 34 Total | Projectile | 1-11 All |
- Agneyastra instantly ends if Chie/Tomoe gets hit.
- C Version puts meteors close to Chie.
- D Version makes the meteors come down at a full screen distance away.
- SB Version has the meteor raining down towards Chie.
- Distance and orientation is actually based on Tomoe's position, but this rarely comes into play
Tomoe causes a large swarm of Meteors to rain from the sky. If you're using it as a projectile to cover your approach, usually you'll have to use Agneyastra twice due to its relatively short duration. Agneyastra is commonly used as a means to boost the damage on midscreen combos since it's air OK unlike God Hand. 236D > j.214214C deals very high damage, especially when combined with Power Charge.
Particularly useful for Shadow Chie, as most of her combos will build the 50 meter required to use this. If she hasn't used 2C in the combo, she can combo into it from Agneyastra use the Freeze to restand the opponent into 5DD. This functionally loops into itself because Shadows build so much meter.
| Version | P1Also known as the starter proration. If this move starts a combo, this value will be added to the Proration Tally on top of P2's addition (P1 + P2). | P2Also known as the mid-combo proration. If this move is used at all in a combo, this value will be added to the Proration Tally. | SMPShorthand for "Same Move Proration". If this move is used more than once in a combo, this value will be added to the Proration Tally on top of P2's addition (P2 + SMP). | Level
| ||||||||||||||||||||||||||||||||||||
|---|---|---|---|---|---|---|---|---|---|---|---|---|---|---|---|---|---|---|---|---|---|---|---|---|---|---|---|---|---|---|---|---|---|---|---|---|---|---|---|---|
| 214214C | 0 | 600 | 500 | 5 | ||||||||||||||||||||||||||||||||||||
| 214214D | 0 | 600 | 500 | 5 | ||||||||||||||||||||||||||||||||||||
| 214214CD | 0 | 600 | 500 | 5 |
214214C:
- Chie is is recovery until landing
- Each P in active frames represents a projectile spawned
- Minimum Damage 150×10 (1500)
214214D:
- Chie is is recovery until landing
- Each P in active frames represents a projectile spawned
- Minimum Damage 150×10 (1500)
214214CD:
- Chie is is recovery until landing
- Each P in active frames represents a projectile spawned
- Minimum Damage 150×12 (1800)
Instant Kill
Galactic Punt
![]() 222C+D when IK Conditions are met
222C+D when IK Conditions are met


| DamageThe raw damage value(s) of the listed move that the game's combo system calculates combo damage from. | GuardHow this attack can be guarded. All non-throws can be air blocked unless otherwise stated, and all "Air Unblockable" moves can be blocked in either grounded stance unless otherwise stated. Throw-type moves will have their ranges listed instead, and other cases will be explicitly noted. |
StartupNumber of frames for this move to reach the first active frame (includes the first active frame). | ActiveNumber of active frames in this attack. Values in () are for gaps between hits of an attack. | RecoveryNumber of frames this move is in a recovery state before returning to neutral. "Total (x)" indicates this for moves where the attacker has inactionable animation independent of active frames (i.e. projectiles and some Persona attacks). |
Frame AdvThe difference between the attacker's recovery and the period that the opponent is in blockstun. This frame advantage value is based off the fact that the very first active frame touches the opponent. | AttributeSome attacks are invulnerable to attacks with specific attributes. This notes what attributes each attack possesses. H - Head B - Body C - Chest F - Foot P - Projectile. Independent Projectiles will have their Durability level listed. For example a projectile that his Durability level 2 will show P2 T - Throw |
Inv.Attribute and Hitbox Invincibility information that will be notated via abbreviation or other indicators. Guard - Move autoguards against the attacks instead of making them whiff. Strike - Invulnerable to all attributes except for Throws, and SP Skills. Low Profile - Character's hurtbox shrinks to go under many attacks. Persona - Only the Persona carries this invulnerability. |
|---|---|---|---|---|---|---|---|
| K.O. | All | 13+(30 Flash)+51 | 15 | 73 | -62 | Projectile, Body | 1~89 All |
Total: 151
Tomoe summons a large stream of energy to knock her opponent airborne. On the way down, Chie then raises her power level over 9000 to deliver a powerful kick that launches the opponent into outer space! She then quotes Bruce Lee and the battle is over. As with all IK's it's not overly useful outside of niche scenarios such as punishing Akihiko's Maziodyne or Aigis' Missiles.
| P1Also known as the starter proration. If this move starts a combo, this value will be added to the Proration Tally on top of P2's addition (P1 + P2). | P2Also known as the mid-combo proration. If this move is used at all in a combo, this value will be added to the Proration Tally. | SMPShorthand for "Same Move Proration". If this move is used more than once in a combo, this value will be added to the Proration Tally on top of P2's addition (P2 + SMP). | Level
| ||||||||||||||||||||||||||||||||||||
|---|---|---|---|---|---|---|---|---|---|---|---|---|---|---|---|---|---|---|---|---|---|---|---|---|---|---|---|---|---|---|---|---|---|---|---|---|---|---|---|
| 0 | 100 | 50 | 5 |
Colors

Color 1

Color 2

Color 3

Color 4

Color 5

Color 6

Color 7

Color 8

Color 9
Yukari Takeba (P3)
Color 10
 Makoto Nanaya

Color 11
 Jam Kuradoberi

Color 12

Color 13

Color 14

Color 15
Fuuka Yamagishi (P3)
Color 16

Color 17

Color 18

Color 19

Color 20

Color 21

Color 22
Tomoe (P4)
Color 23
Velvet Room Attendant
Color 24

Color 25
Christmas
Color 26

Color 27
Dengeki
Color 28
 Marie
Marie

Color 30

Color 31


Color 1
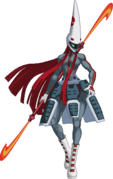
Color 2
Color 3

Color 4

Color 5

Color 6

Color 7

Color 8

Color 9
Yukari Takeba (P3)
Color 10
Makoto Nanaya
Color 11
Jam Kuradoberi
Color 12

Color 13

Color 14

Color 15
Fuuka Yamagishi (P3)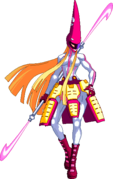
Color 16

Color 17

Color 18

Color 19

Color 20
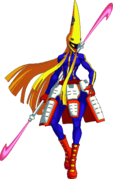
Color 21

Color 22
 Chie Satonaka

Color 23
Velvet Room Attendant
Color 24

Color 25
Christmas
Color 26

Color 27
Dengeki
Color 28
Marie

Color 30

Color 31


To edit frame data, edit values in P4U2R/Chie Satonaka/Data.
 Aigis[★]
 Akihiko Sanada[★]
- Chie Satonaka[★]
 Elizabeth[★]
 Junpei Iori[★]
 Kanji Tatsumi[★]
 Ken Amada[★]
 Labrys[★]
 Margaret[★]
 Marie[★]
 Minazuki[★]
 Mitsuru Kirijo[★]
 Naoto Shirogane[★]
 Rise Kujikawa[★]
 Shadow Labrys[★]
 Sho[★]
 Teddie[★]
 Tohru Adachi[★]
 Yosuke Hanamura[★]
 Yu Narukami[★]
 Yukari Takeba[★]
 Yukiko Amagi[★]
Click [★] for character's full frame data
System Explanations
Mechanics
Application & Advanced Information
Archived Information