No edit summary |
Robo-Kisequé (talk | contribs) m (→Navigation: frivolous category, removed: Category:BBCPE Character) |
||
| (15 intermediate revisions by 5 users not shown) | |||
| Line 1: | Line 1: | ||
{| | ==Overview== | ||
| | {{CharLinks | ||
|charMainPage=BBCPE/Nu-13 | |||
|- | |videos=http://horibuna.web.fc2.com/BBCP/BBCP_13.html | ||
| | |forums=http://www.dustloop.com/forums/index.php?/forums/forum/73-v-13/ | ||
[[File:BBCP_Nu_Portrait.png|350px | }} | ||
<div id="home-content" class="home-grid"> | |||
{{card|width=4 | |||
|content=After the events in Calamity Trigger following her battle with Ragna | |||
the Bloodedge, she was thought to have perished in the Cauldron alone. | |||
Nu is later revived by her own will to fuse with Ragna in a form | |||
referred to by Hazama as the “Sword of Hades”; though she retains her | |||
appearence and personality from the previous games. She is re-tuned by | |||
Hazama to stand in Ragna’s way once again. | |||
}} | |||
{{card|width=2|height=3 | |||
|header=Nu-13 | |||
|content=[[File:BBCP_Nu_Portrait.png|350px]] | |||
{{CharData-BBCPE | {{CharData-BBCPE | ||
|health=10,000 | |health=10,000 | ||
| Line 17: | Line 27: | ||
;Movement Options | ;Movement Options | ||
:Double Jump, 1 Airdash, Dash type: Run, Situational teleports | :Double Jump, 1 Airdash, Dash type: Run, Situational teleports | ||
}} | }} | ||
{{card|width=4 | |||
{{ | |header=Drive: Sword Summoner | ||
|content=Nu manifests sword-like projectiles which she can shoot off at | |||
different angles. All drive moves have a follow-up attack initiated by | |||
pressing D shortly after the attack connects. All of them can be canceled into her 44 or 66 Act Parser. | |||
|header2=Overdrive: Unlimited Drive | |||
|content2= | |||
*All Drive moves, including their follow-ups, summon two swords instead of one | |||
*4D's minimum distance requirement is removed | |||
Nu manifests sword-like projectiles which she can shoot off at | |||
different angles. All drive moves have a follow-up attack initiated by | |||
pressing D shortly after the attack connects. All of them can be canceled into her 44 or 66 Act Parser. | |||
*All Drive moves, including their follow-ups, summon two swords instead of one | |||
*4D's minimum distance requirement is removed | |||
*Crescent Saber groundbounces | *Crescent Saber groundbounces | ||
*Gravity Seed recharge rate is faster | *Gravity Seed recharge rate is faster | ||
| Line 54: | Line 43: | ||
*Legacy Edge lasts longer and does more hits | *Legacy Edge lasts longer and does more hits | ||
*Calamity Sword summons 4 swords in a wave motion instead of just one | *Calamity Sword summons 4 swords in a wave motion instead of just one | ||
}} | |||
= | {{ProsAndCons | ||
|intro= | |||
|pros= | |||
*Extremely strong zoning game gives her an amazing neutral game very few characters can challenge | *Extremely strong zoning game gives her an amazing neutral game very few characters can challenge | ||
*Amazing backdash | *Amazing backdash | ||
*Combos featuring her Drive moves are typically tough to burst properly. If someone bursts during the wrong time, Nu can easily pick up another combo | *Combos featuring her Drive moves are typically tough to burst properly. If someone bursts during the wrong time, Nu can easily pick up another combo | ||
|cons= | |||
*Low health | *Low health | ||
*Reliant on system mechanics to escape pressure | *Reliant on system mechanics to escape pressure | ||
*Needs match-up experience to know how to zone many characters and her gameplan is completely dependent on whichever character she is facing | *Needs match-up experience to know how to zone many characters and her gameplan is completely dependent on whichever character she is facing | ||
}} | |||
</div> | |||
<br clear=all/> | <br clear=all/> | ||
{| class="wikitable" style="text-align: center;" | {| class="wikitable" style="text-align: center;" | ||
| Line 77: | Line 69: | ||
==Normal Moves== | ==Normal Moves== | ||
====== < | ===<big>5A</big>=== | ||
<div class="attack-container"> | |||
<div class="attack-gallery"> | |||
<gallery widths="210px" heights="210px" mode="nolines"> | |||
| | BBCP_Nu_5A.png | | ||
| | </gallery> | ||
</div> | |||
<div class="attack-info"> | |||
{| class="wikitable attack-data" | |||
{{AttackDataHeader-BBCPE}} | |||
|- | |||
{{AttackData-BBCPE | |||
|header=no | |||
|damage=300 | |damage=300 | ||
|cancel=CSOJR | |cancel=CSOJR | ||
| Line 97: | Line 95: | ||
|attribute=B | |attribute=B | ||
|hitbox=nu/5A | |hitbox=nu/5A | ||
}} | |||
|} | |||
*Good anti-air due to its lengthy active frames. | *Good anti-air due to its lengthy active frames. | ||
*Useful for poking out of pressure | *Useful for poking out of pressure | ||
*Whiffs on some crouching opponents. | *Whiffs on some crouching opponents. | ||
</div> | |||
</div> | |||
===<big>5B</big>=== | |||
<div class="attack-container"> | |||
<div class="attack-gallery"> | |||
====== < | <gallery widths="210px" heights="210px" mode="nolines"> | ||
BBCP_Nu_5B.png | | |||
</gallery> | |||
</div> | |||
| | <div class="attack-info"> | ||
| | {| class="wikitable attack-data" | ||
{{AttackDataHeader-BBCPE}} | |||
|- | |||
{{AttackData-BBCPE | |||
|header=no | |||
|damage=410 | |damage=410 | ||
|cancel=SOJR | |cancel=SOJR | ||
| Line 125: | Line 129: | ||
|attribute=B | |attribute=B | ||
|hitbox=nu/5B | |hitbox=nu/5B | ||
}} | |||
|} | |||
*Good for pressure and has a lot of options off of it | *Good for pressure and has a lot of options off of it | ||
*Great OTG for combos. | *Great OTG for combos. | ||
*Jump Cancelable on hit and block | |||
</div> | |||
</div> | |||
===<big>5C</big>=== | |||
<div class="attack-container"> | |||
<div class="attack-gallery"> | |||
====== < | <gallery widths="210px" heights="210px" mode="nolines"> | ||
BBCP_Nu_5C.png | | |||
</gallery> | |||
</div> | |||
| | <div class="attack-info"> | ||
| | {| class="wikitable attack-data" | ||
{{AttackDataHeader-BBCPE}} | |||
|damage= | |- | ||
{{AttackData-BBCPE | |||
|header=no | |||
|damage=125×8 | |||
|cancel=SOR | |cancel=SOR | ||
|p1=100 | |p1=100 | ||
| Line 147: | Line 158: | ||
|guard=all | |guard=all | ||
|startup=16 | |startup=16 | ||
|active=4(1), | |active=4(1),4×7 | ||
|recovery=Total 72 | |recovery=Total 72 | ||
|frameAdv=-8 | |frameAdv=-8 | ||
|hitbox=nu/5C | |hitbox=nu/5C | ||
|attribute=BP | |attribute=BP | ||
}} | |||
|} | |||
*Is considered a projectile | *Is considered a projectile | ||
*Mainly used as combo filler or to punish DPs and DDs | *Mainly used as combo filler or to punish DPs and DDs | ||
</div> | |||
</div> | |||
====== < | ===<big>2A</big>=== | ||
<div class="attack-container"> | |||
<div class="attack-gallery"> | |||
<gallery widths="210px" heights="210px" mode="nolines"> | |||
| | BBCP_Nu_2A.png | | ||
| | </gallery> | ||
</div> | |||
<div class="attack-info"> | |||
{| class="wikitable attack-data" | |||
{{AttackDataHeader-BBCPE}} | |||
|- | |||
{{AttackData-BBCPE | |||
|header=no | |||
|damage=300 | |damage=300 | ||
|cancel=CSOR | |cancel=CSOR | ||
| Line 179: | Line 196: | ||
|frameAdv=-4 | |frameAdv=-4 | ||
|hitbox=nu/2A | |hitbox=nu/2A | ||
}} | |||
|} | |||
*Nothing too great or special about this move | *Nothing too great or special about this move | ||
*Used to poke out of pressure that 5A can't or to hitconfirm jump-ins | *Used to poke out of pressure that 5A can't or to hitconfirm jump-ins | ||
</div> | |||
</div> | |||
====== < | ===<big>2B</big>=== | ||
<div class="attack-container"> | |||
<div class="attack-gallery"> | |||
<gallery widths="210px" heights="210px" mode="nolines"> | |||
| | BBCP_Nu_2B.png | | ||
| | </gallery> | ||
</div> | |||
<div class="attack-info"> | |||
{| class="wikitable attack-data" | |||
{{AttackDataHeader-BBCPE}} | |||
|- | |||
{{AttackData-BBCPE | |||
|header=no | |||
|damage=380 | |damage=380 | ||
|cancel=SOR | |cancel=SOR | ||
| Line 204: | Line 228: | ||
|attribute=F | |attribute=F | ||
|hitbox=nu/2B | |hitbox=nu/2B | ||
}} | |||
|} | |||
*Great poke with great range for its start-up and recovery | *Great poke with great range for its start-up and recovery | ||
*Can be used to low profile pokes like Tsubaki's 5B | *Can be used to low profile pokes like Tsubaki's 5B | ||
*Even on block with lots of gatlings so it can be used to reset pressure | *Even on block with lots of gatlings so it can be used to reset pressure | ||
*Can be used to punish rolls | *Can be used to punish rolls | ||
</div> | |||
</div> | |||
====== < | ===<big>2C</big>=== | ||
<div class="attack-container"> | |||
<div class="attack-gallery"> | |||
<gallery widths="210px" heights="210px" mode="nolines"> | |||
| | BBCP_Nu_2C.png | | ||
| | </gallery> | ||
</div> | |||
|damage= | <div class="attack-info"> | ||
{| class="wikitable attack-data" | |||
{{AttackDataHeader-BBCPE}} | |||
|- | |||
{{AttackData-BBCPE | |||
|header=no | |||
|damage=112×8 | |||
|cancel=SOJR | |cancel=SOJR | ||
|p1=90 | |p1=90 | ||
| Line 226: | Line 257: | ||
|guard=HLx2,Ax6 | |guard=HLx2,Ax6 | ||
|startup=14 | |startup=14 | ||
|active= | |active=1×6,2×2 | ||
|recovery=24 | |recovery=24 | ||
|frameAdv=-9 | |frameAdv=-9 | ||
| Line 232: | Line 263: | ||
|invul=11-17H | |invul=11-17H | ||
|hitbox=nu/2C | |hitbox=nu/2C | ||
}} | |||
|} | |||
*Decent AA | *Decent AA | ||
*The head invul comes out late so it is difficult to time properly | *The head invul comes out late so it is difficult to time properly | ||
*Best used when the opponent is directly above you since the vertical hitbox is big | *Best used when the opponent is directly above you since the vertical hitbox is big | ||
*Can hit characters behind Nu | *Can hit characters behind Nu | ||
</div> | |||
</div> | |||
====== < | ===<big>6A</big>=== | ||
<div class="attack-container"> | |||
<div class="attack-gallery"> | |||
<gallery widths="210px" heights="210px" mode="nolines"> | |||
| | BBCP_Nu_6A.png | | ||
| | </gallery> | ||
</div> | |||
<div class="attack-info"> | |||
{| class="wikitable attack-data" | |||
{{AttackDataHeader-BBCPE}} | |||
|- | |||
{{AttackData-BBCPE | |||
|header=no | |||
|damage=620 | |damage=620 | ||
|cancel=SOJR | |cancel=SOJR | ||
| Line 260: | Line 298: | ||
|invul=5-13H | |invul=5-13H | ||
|hitbox=nu/6A | |hitbox=nu/6A | ||
}} | |||
|} | |||
*Main close range AA | *Main close range AA | ||
*Invul comes early so it is easier to cleanly AA someone compared to her other | *Invul comes early so it is easier to cleanly AA someone compared to her other | ||
options | options | ||
</div> | |||
</div> | |||
====== < | ===<big>6B</big>=== | ||
<div class="attack-container"> | |||
<div class="attack-gallery"> | |||
<gallery widths="210px" heights="210px" mode="nolines"> | |||
| | BBCP_Nu_6B.png | | ||
| | </gallery> | ||
</div> | |||
<div class="attack-info"> | |||
{| class="wikitable attack-data" | |||
{{AttackDataHeader-BBCPE}} | |||
|- | |||
{{AttackData-BBCPE | |||
|header=no | |||
|damage=640 | |damage=640 | ||
|cancel=SOJR | |cancel=SOJR | ||
| Line 287: | Line 332: | ||
|attribute=B | |attribute=B | ||
|hitbox=nu/6B | |hitbox=nu/6B | ||
}} | |||
|} | |||
*One of the best combo starters and the main punish move | *One of the best combo starters and the main punish move | ||
*Decent for pressure | *Decent for pressure | ||
</div> | |||
</div> | |||
====== < | ===<big>6C</big>=== | ||
<div class="attack-container"> | |||
<div class="attack-gallery"> | |||
<gallery widths="210px" heights="210px" mode="nolines"> | |||
| | BBCP_Nu_6C.png | | ||
| | </gallery> | ||
</div> | |||
|damage= | <div class="attack-info"> | ||
{| class="wikitable attack-data" | |||
{{AttackDataHeader-BBCPE}} | |||
|- | |||
{{AttackData-BBCPE | |||
|header=no | |||
|damage=125×8 | |||
|cancel=SOR | |cancel=SOR | ||
|p1=100 | |p1=100 | ||
| Line 308: | Line 360: | ||
|guard=HLx2,Ax6 | |guard=HLx2,Ax6 | ||
|startup=22 | |startup=22 | ||
|active= | |active=1×8 | ||
|recovery=24 | |recovery=24 | ||
|frameAdv=-3 | |frameAdv=-3 | ||
|attribute=B | |attribute=B | ||
|hitbox=nu/6C | |hitbox=nu/6C | ||
}} | |||
|} | |||
*Fatal Counter | *Fatal Counter | ||
*Has SMP | *Has SMP | ||
*Mainly used as combo filler | *Mainly used as combo filler | ||
*Can be used to push people away and cancel into 214X to start the drive pressure | *Can be used to push people away and cancel into 214X to start the drive pressure | ||
</div> | |||
</div> | |||
====== < | ===<big>3C</big>=== | ||
<div class="attack-container"> | |||
<div class="attack-gallery"> | |||
<gallery widths="210px" heights="210px" mode="nolines"> | |||
| | BBCP_Nu_3C.png | | ||
| | </gallery> | ||
</div> | |||
|damage= | <div class="attack-info"> | ||
{| class="wikitable attack-data" | |||
{{AttackDataHeader-BBCPE}} | |||
|- | |||
{{AttackData-BBCPE | |||
|header=no | |||
|damage=96×8 | |||
|cancel=SOR | |cancel=SOR | ||
|p1=90 | |p1=90 | ||
| Line 335: | Line 394: | ||
|guard=Lx3,Ax5 | |guard=Lx3,Ax5 | ||
|startup=11 | |startup=11 | ||
|active= | |active=1×7,2 | ||
|recovery=25 | |recovery=25 | ||
|frameAdv=-10 | |frameAdv=-10 | ||
|attribute=F | |attribute=F | ||
|hitbox=nu/3C | |hitbox=nu/3C | ||
}} | |||
|} | |||
*Great range | *Great range | ||
*Can be used to low profile pokes like Hakumen's 4C or Ragna's 5B | *Can be used to low profile pokes like Hakumen's 4C or Ragna's 5B | ||
*Avoid in close range as its cancel options are poor and can be punished or stuffed | *Avoid in close range as its cancel options are poor and can be punished or stuffed | ||
</div> | |||
</div> | |||
====== < | ===<big>j.A</big>=== | ||
<div class="attack-container"> | |||
<div class="attack-gallery"> | |||
<gallery widths="210px" heights="210px" mode="nolines"> | |||
| | BBCP_Nu_jA.png | | ||
| | </gallery> | ||
</div> | |||
<div class="attack-info"> | |||
{| class="wikitable attack-data" | |||
{{AttackDataHeader-BBCPE}} | |||
|- | |||
{{AttackData-BBCPE | |||
|header=no | |||
|damage=300 | |damage=300 | ||
|cancel=SOR | |cancel=SOR | ||
| Line 366: | Line 432: | ||
|frameAdv= | |frameAdv= | ||
|hitbox=nu/jA | |hitbox=nu/jA | ||
}} | |||
|} | |||
*Fastest air to air move Nu has | *Fastest air to air move Nu has | ||
*Can set up TRM situations with it against air opponents | *Can set up TRM situations with it against air opponents | ||
</div> | |||
</div> | |||
====== < | ===<big>j.B</big>=== | ||
<div class="attack-container"> | |||
<div class="attack-gallery"> | |||
<gallery widths="210px" heights="210px" mode="nolines"> | |||
| | BBCP_Nu_jB.png | | ||
| | </gallery> | ||
</div> | |||
<div class="attack-info"> | |||
{| class="wikitable attack-data" | |||
{{AttackDataHeader-BBCPE}} | |||
|- | |||
{{AttackData-BBCPE | |||
|header=no | |||
|damage=440 | |damage=440 | ||
|cancel=SOJR | |cancel=SOJR | ||
| Line 391: | Line 464: | ||
|frameAdv= | |frameAdv= | ||
|hitbox=nu/jB | |hitbox=nu/jB | ||
}} | |||
|} | |||
*Decent air to air or jump-in | *Decent air to air or jump-in | ||
*The area from Nu's knee to the tip of her foot has no hurtbox | *The area from Nu's knee to the tip of her foot has no hurtbox | ||
*Can clash or beat out certain AAs if spaced properly like Rachel's 6A | *Can clash or beat out certain AAs if spaced properly like Rachel's 6A | ||
</div> | |||
</div> | |||
====== < | ===<big>j.C</big>=== | ||
<div class="attack-container"> | |||
<div class="attack-gallery"> | |||
<gallery widths="210px" heights="210px" mode="nolines"> | |||
| | BBCP_Nu_jC.png | | ||
| | </gallery> | ||
</div> | |||
|damage= | <div class="attack-info"> | ||
{| class="wikitable attack-data" | |||
{{AttackDataHeader-BBCPE}} | |||
|- | |||
{{AttackData-BBCPE | |||
|header=no | |||
|damage=112×8 | |||
|cancel=SOJR | |cancel=SOJR | ||
|p1=90 | |p1=90 | ||
| Line 412: | Line 492: | ||
|guard=HA | |guard=HA | ||
|startup=11 | |startup=11 | ||
|active= | |active=1×2, 2×6 | ||
|recovery=25 | |recovery=25 | ||
|attribute=H | |attribute=H | ||
|frameAdv= | |frameAdv= | ||
|hitbox=nu/jC | |hitbox=nu/jC | ||
}} | |||
|} | |||
*Good horizontal range | *Good horizontal range | ||
*Hits behind Nu | *Hits behind Nu | ||
*Not a good jump-in due to short vertical range | *Not a good jump-in due to short vertical range | ||
</div> | |||
</div> | |||
====== < | ===<big>j.2C</big>=== | ||
<div class="attack-container"> | |||
<div class="attack-gallery"> | |||
<gallery widths="210px" heights="210px" mode="nolines"> | |||
| | BBCP_Nu_j2C.png | | ||
| | </gallery> | ||
</div> | |||
|damage= | <div class="attack-info"> | ||
{| class="wikitable attack-data" | |||
{{AttackDataHeader-BBCPE}} | |||
|- | |||
{{AttackData-BBCPE | |||
|header=no | |||
|damage=120×8 | |||
|cancel=SOJR | |cancel=SOJR | ||
|p1=90 | |p1=90 | ||
| Line 438: | Line 525: | ||
|guard=HAx2,Ax6 | |guard=HAx2,Ax6 | ||
|startup=15 | |startup=15 | ||
|active= | |active=1×8 | ||
|recovery=10 | |recovery=10 | ||
|frameAdv= | |frameAdv= | ||
|attribute=H | |attribute=H | ||
|hitbox=nu/j2C | |hitbox=nu/j2C | ||
}} | |||
|} | |||
*Massive vertical hitbox | *Massive vertical hitbox | ||
*Horizontal hitbox is small though | *Horizontal hitbox is small though | ||
*Extremely easy to hitconfirm | *Extremely easy to hitconfirm | ||
</div> | |||
</div> | |||
<br clear=all/> | <br clear=all/> | ||
| Line 462: | Line 550: | ||
*The air drive moves (j.D, j.6D and j.2D) can be chained up to 3 in a row | *The air drive moves (j.D, j.6D and j.2D) can be chained up to 3 in a row | ||
====== < | ===<big>5D</big>=== | ||
<div class="attack-container"> | |||
<div class="attack-gallery"> | |||
| | <gallery widths="210px" heights="210px" mode="nolines"> | ||
| | BBCP_Nu_5D.png | "Give'em the D" | ||
| | </gallery> | ||
</div> | |||
<div class="attack-info"> | |||
{| class="wikitable attack-data" | |||
{{AttackDataHeader-BBCPE|version=yes}} | |||
|- | |||
{{AttackData-BBCPE | {{AttackData-BBCPE | ||
|header=no | |||
|version=5D | |version=5D | ||
|damage=480 | |damage=480 | ||
| Line 483: | Line 577: | ||
|hitbox=nu/5D | |hitbox=nu/5D | ||
|attribute=HBFP* [HBFP*(2)] | |attribute=HBFP* [HBFP*(2)] | ||
}} | }} | ||
|- | |||
{{AttackData-BBCPE | {{AttackData-BBCPE | ||
|header=no | |header=no | ||
| Line 501: | Line 595: | ||
|attribute=HBFP* [HBFP*(2)] | |attribute=HBFP* [HBFP*(2)] | ||
|hitbox=nu/5DD | |hitbox=nu/5DD | ||
}} | }} | ||
|- | |||
{{AttackData-BBCPE | {{AttackData-BBCPE | ||
|header=no | |header=no | ||
|version=5D (Overdrive) | |version=5D (Overdrive) | ||
|damage= | |damage=300×2 | ||
|cancel=SJR [SR] | |cancel=SJR [SR] | ||
|p1=90 | |p1=90 | ||
| Line 514: | Line 608: | ||
|guard=all | |guard=all | ||
|startup=15 | |startup=15 | ||
|active= | |active=12×2 | ||
|recovery=48T | |recovery=48T | ||
|frameAdv=-11 | |frameAdv=-11 | ||
|attribute=HBFP*(2) | |attribute=HBFP*(2) | ||
|hitbox=nu/5D | |hitbox=nu/5D | ||
}} | }} | ||
|- | |||
{{AttackData-BBCPE | {{AttackData-BBCPE | ||
|header=no | |header=no | ||
|version=5DD (Overdrive) | |version=5DD (Overdrive) | ||
|damage= | |damage=200×2 | ||
|cancel=SR | |cancel=SR | ||
|p1=90 | |p1=90 | ||
| Line 532: | Line 626: | ||
|guard=all | |guard=all | ||
|startup=13 | |startup=13 | ||
|active= | |active=13×2 | ||
|recovery=48T | |recovery=48T | ||
|frameAdv=-15 | |frameAdv=-15 | ||
|attribute=HBFP*(2) | |attribute=HBFP*(2) | ||
|hitbox=nu/5DD | |hitbox=nu/5DD | ||
| | }} | ||
|} | |||
*Great ground poke | *Great ground poke | ||
*Goes full screen | *Goes full screen | ||
| Line 544: | Line 639: | ||
**Now goes full screen | **Now goes full screen | ||
**5D is no longer jump cancellable on block | **5D is no longer jump cancellable on block | ||
</div> | |||
</div> | |||
====== < | ===<big>2D</big>=== | ||
<div class="attack-container"> | |||
<div class="attack-gallery"> | |||
| | <gallery widths="210px" heights="210px" mode="nolines"> | ||
| | BBCP_Nu_2D.png | | ||
| | </gallery> | ||
</div> | |||
<div class="attack-info"> | |||
{| class="wikitable attack-data" | |||
{{AttackDataHeader-BBCPE|version=yes}} | |||
|- | |||
{{AttackData-BBCPE | {{AttackData-BBCPE | ||
|header=no | |||
|version=2D | |version=2D | ||
|damage=480 | |damage=480 | ||
| Line 567: | Line 668: | ||
|attribute=HBFP* [HBFP*(2)] | |attribute=HBFP* [HBFP*(2)] | ||
|hitbox=nu/2D | |hitbox=nu/2D | ||
}} | }} | ||
|- | |||
{{AttackData-BBCPE | {{AttackData-BBCPE | ||
|header=no | |header=no | ||
| Line 585: | Line 686: | ||
|attribute=HBFP* [HBFP*(2)] | |attribute=HBFP* [HBFP*(2)] | ||
|hitbox=nu/2DD | |hitbox=nu/2DD | ||
}} | }} | ||
|- | |||
{{AttackData-BBCPE | {{AttackData-BBCPE | ||
|header=no | |header=no | ||
|version=2D (Overdrive) | |version=2D (Overdrive) | ||
|damage= | |damage=300×2 | ||
|cancel=SJR | |cancel=SJR | ||
|p1=90 | |p1=90 | ||
| Line 598: | Line 699: | ||
|guard=all | |guard=all | ||
|startup=11 | |startup=11 | ||
|active= | |active=15×2 | ||
|recovery=45T | |recovery=45T | ||
|frameAdv=-16 | |frameAdv=-16 | ||
|attribute=HBFP*(2) | |attribute=HBFP*(2) | ||
|hitbox=nu/2D | |hitbox=nu/2D | ||
}} | }} | ||
|- | |||
{{AttackData-BBCPE | {{AttackData-BBCPE | ||
|header=no | |header=no | ||
|version=2DD (Overdrive) | |version=2DD (Overdrive) | ||
|damage= | |damage=200×2 | ||
|cancel=SJR | |cancel=SJR | ||
|p1=90 | |p1=90 | ||
| Line 616: | Line 717: | ||
|guard=all | |guard=all | ||
|startup=4 | |startup=4 | ||
|active= | |active=13×2 | ||
|recovery=48T | |recovery=48T | ||
|frameAdv=-13 | |frameAdv=-13 | ||
|attribute=HBFP*(2) | |attribute=HBFP*(2) | ||
|hitbox=nu/2DD | |hitbox=nu/2DD | ||
| | }} | ||
|} | |||
*Great AA for stopping people who double jump | *Great AA for stopping people who double jump | ||
<br/> | <br/> | ||
*Changes from previous BB games | *Changes from previous BB games | ||
**Can no longer be jump cancelled on block | **Can no longer be jump cancelled on block | ||
</div> | |||
</div> | |||
====== < | ===<big>6D</big>=== | ||
<div class="attack-container"> | |||
<div class="attack-gallery"> | |||
| | <gallery widths="210px" heights="210px" mode="nolines"> | ||
| | BBCP_Nu_6D.png | | ||
| | </gallery> | ||
</div> | |||
<div class="attack-info"> | |||
{| class="wikitable attack-data" | |||
{{AttackDataHeader-BBCPE|version=yes}} | |||
|- | |||
{{AttackData-BBCPE | {{AttackData-BBCPE | ||
|header=no | |||
|version=6D | |version=6D | ||
|damage=480 | |damage=480 | ||
| Line 649: | Line 757: | ||
|attribute=HBFP* [HBFP*(2)] | |attribute=HBFP* [HBFP*(2)] | ||
|hitbox=nu/6D | |hitbox=nu/6D | ||
}} | }} | ||
|- | |||
{{AttackData-BBCPE | {{AttackData-BBCPE | ||
|header=no | |header=no | ||
| Line 667: | Line 775: | ||
|attribute=HBFP* [HBFP*(2)] | |attribute=HBFP* [HBFP*(2)] | ||
|hitbox=nu/6DD | |hitbox=nu/6DD | ||
}} | }} | ||
|- | |||
{{AttackData-BBCPE | {{AttackData-BBCPE | ||
|header=no | |header=no | ||
|version=6D (Overdrive) | |version=6D (Overdrive) | ||
|damage= | |damage=300×2 | ||
|cancel=SJR | |cancel=SJR | ||
|p1=90 | |p1=90 | ||
| Line 680: | Line 788: | ||
|guard=all | |guard=all | ||
|startup=13 | |startup=13 | ||
|active= | |active=9×2 | ||
|recovery=45T | |recovery=45T | ||
|frameAdv=-10 | |frameAdv=-10 | ||
|attribute=HBFP*(2) | |attribute=HBFP*(2) | ||
|hitbox=nu/6D | |hitbox=nu/6D | ||
}} | }} | ||
|- | |||
{{AttackData-BBCPE | {{AttackData-BBCPE | ||
|header=no | |header=no | ||
|version=6DD (Overdrive) | |version=6DD (Overdrive) | ||
|damage= | |damage=200×2 | ||
|cancel=SJR | |cancel=SJR | ||
|p1=90 | |p1=90 | ||
| Line 698: | Line 806: | ||
|guard=all | |guard=all | ||
|startup=6 | |startup=6 | ||
|active= | |active=13×2 | ||
|recovery=60T | |recovery=60T | ||
|frameAdv=-30 | |frameAdv=-30 | ||
|attribute=HBFP*(2) | |attribute=HBFP*(2) | ||
|hitbox=nu/6DD | |hitbox=nu/6DD | ||
| | }} | ||
|} | |||
*Great AA against people who like to IAD | *Great AA against people who like to IAD | ||
*Can hit taller characters like Azrael, Tager and Hakumen while they are standing | *Can hit taller characters like Azrael, Tager and Hakumen while they are standing | ||
| Line 710: | Line 819: | ||
*Changes from previous BB games | *Changes from previous BB games | ||
**Can no longer be jump cancelled on block | **Can no longer be jump cancelled on block | ||
</div> | |||
</div> | |||
====== < | ===<big>4D</big>=== | ||
<div class="attack-container"> | |||
<div class="attack-gallery"> | |||
| | <gallery widths="210px" heights="210px" mode="nolines"> | ||
| | BBCP_Nu_4D.png | | ||
| | </gallery> | ||
</div> | |||
<div class="attack-info"> | |||
{| class="wikitable attack-data" | |||
{{AttackDataHeader-BBCPE|version=yes}} | |||
|- | |||
{{AttackData-BBCPE | {{AttackData-BBCPE | ||
|header=no | |||
|version=4D | |version=4D | ||
|damage=480 | |damage=480 | ||
| Line 733: | Line 848: | ||
|attribute=HBFP* [HBFP*(2)] | |attribute=HBFP* [HBFP*(2)] | ||
|hitbox=nu/4D | |hitbox=nu/4D | ||
}} | }} | ||
|- | |||
{{AttackData-BBCPE | {{AttackData-BBCPE | ||
|header=no | |header=no | ||
| Line 751: | Line 866: | ||
|attribute=HBFP* [HBFP*(2)] | |attribute=HBFP* [HBFP*(2)] | ||
|hitbox=nu/4DD | |hitbox=nu/4DD | ||
}} | }} | ||
|- | |||
{{AttackData-BBCPE | {{AttackData-BBCPE | ||
|header=no | |header=no | ||
|version=4D (Overdrive) | |version=4D (Overdrive) | ||
|damage= | |damage=300×2 | ||
|cancel=SJR | |cancel=SJR | ||
|p1=90 | |p1=90 | ||
| Line 764: | Line 879: | ||
|guard=HA | |guard=HA | ||
|startup=30 | |startup=30 | ||
|active= | |active=2×2 | ||
|recovery=57T | |recovery=57T | ||
|frameAdv=-6 | |frameAdv=-6 | ||
|attribute=HBFP*(2) | |attribute=HBFP*(2) | ||
|hitbox=nu/4D | |hitbox=nu/4D | ||
}} | }} | ||
|- | |||
{{AttackData-BBCPE | {{AttackData-BBCPE | ||
|header=no | |header=no | ||
|version=4DD (Overdrive) | |version=4DD (Overdrive) | ||
|damage= | |damage=200×2 | ||
|cancel=SJR | |cancel=SJR | ||
|p1=90 | |p1=90 | ||
| Line 782: | Line 897: | ||
|guard=all | |guard=all | ||
|startup=9 | |startup=9 | ||
|active= | |active=13×2 | ||
|recovery=50T | |recovery=50T | ||
|frameAdv=-20 | |frameAdv=-20 | ||
|attribute=HBFP*(2) | |attribute=HBFP*(2) | ||
|hitbox=nu/4DD | |hitbox=nu/4DD | ||
| | }} | ||
|} | |||
*Overhead | *Overhead | ||
*Appears where ever the opponent was when you inputted in the command | *Appears where ever the opponent was when you inputted in the command | ||
| Line 795: | Line 911: | ||
**Significantly faster now (24 frame start-up) | **Significantly faster now (24 frame start-up) | ||
**Gatlings into 5D now | **Gatlings into 5D now | ||
</div> | |||
</div> | |||
====== < | ===<big>j.D</big>=== | ||
<div class="attack-container"> | |||
<div class="attack-gallery"> | |||
| | <gallery widths="210px" heights="210px" mode="nolines"> | ||
| | BBCP_Nu_jD.png | | ||
| | </gallery> | ||
</div> | |||
<div class="attack-info"> | |||
{| class="wikitable attack-data" | |||
{{AttackDataHeader-BBCPE|version=yes}} | |||
|- | |||
{{AttackData-BBCPE | {{AttackData-BBCPE | ||
|header=no | |||
|version=j.D | |version=j.D | ||
|damage=480 | |damage=480 | ||
| Line 819: | Line 941: | ||
|frameAdv= | |frameAdv= | ||
|hitbox=nu/j.D | |hitbox=nu/j.D | ||
}} | }} | ||
|- | |||
{{AttackData-BBCPE | {{AttackData-BBCPE | ||
|header=no | |header=no | ||
| Line 837: | Line 959: | ||
|frameAdv= | |frameAdv= | ||
|hitbox=nu/j.DD | |hitbox=nu/j.DD | ||
}} | }} | ||
|- | |||
{{AttackData-BBCPE | {{AttackData-BBCPE | ||
|header=no | |header=no | ||
|version=j.D (Overdrive) | |version=j.D (Overdrive) | ||
|damage= | |damage=300×2 | ||
|cancel=SJR | |cancel=SJR | ||
|p1=90 | |p1=90 | ||
| Line 850: | Line 972: | ||
|guard=all | |guard=all | ||
|startup=13 | |startup=13 | ||
|active= | |active=8×2 | ||
|recovery=44+5LT | |recovery=44+5LT | ||
|frameAdv= | |frameAdv= | ||
|attribute=HBFP*(2) | |attribute=HBFP*(2) | ||
|hitbox=nu/j.D | |hitbox=nu/j.D | ||
}} | }} | ||
|- | |||
{{AttackData-BBCPE | {{AttackData-BBCPE | ||
|header=no | |header=no | ||
|version=j.DD (Overdrive) | |version=j.DD (Overdrive) | ||
|damage= | |damage=200×2 | ||
|cancel=S(J)R | |cancel=S(J)R | ||
|p1=90 | |p1=90 | ||
| Line 868: | Line 990: | ||
|guard=all | |guard=all | ||
|startup=4 | |startup=4 | ||
|active= | |active=13×2 | ||
|recovery=5L | |recovery=5L | ||
|frameAdv= | |frameAdv= | ||
|attribute=HBFP*(2) | |attribute=HBFP*(2) | ||
|hitbox=nu/j.DD | |hitbox=nu/j.DD | ||
| | }} | ||
|} | |||
*Decent move at stopping people from air dashing towards you if you are in the air | *Decent move at stopping people from air dashing towards you if you are in the air | ||
<br/> | <br/> | ||
*Changes from previous BB games | *Changes from previous BB games | ||
**Increased landing recovery | **Increased landing recovery | ||
</div> | |||
</div> | |||
====== < | ===<big>j.2D</big>=== | ||
<div class="attack-container"> | |||
<div class="attack-gallery"> | |||
| | <gallery widths="210px" heights="210px" mode="nolines"> | ||
| | BBCP_Nu_j2D.png | | ||
| | </gallery> | ||
</div> | |||
<div class="attack-info"> | |||
{| class="wikitable attack-data" | |||
{{AttackDataHeader-BBCPE|version=yes}} | |||
|- | |||
{{AttackData-BBCPE | {{AttackData-BBCPE | ||
|header=no | |||
|version=j.2D | |version=j.2D | ||
|damage=480 | |damage=480 | ||
| Line 901: | Line 1,030: | ||
|attribute=HBFP* [HBFP*(2)] | |attribute=HBFP* [HBFP*(2)] | ||
|hitbox=nu/j.2D | |hitbox=nu/j.2D | ||
}} | }} | ||
|- | |||
{{AttackData-BBCPE | {{AttackData-BBCPE | ||
|header=no | |header=no | ||
| Line 919: | Line 1,048: | ||
|attribute=HBFP* [HBFP*(2)] | |attribute=HBFP* [HBFP*(2)] | ||
|hitbox=nu/j.2DD | |hitbox=nu/j.2DD | ||
}} | }} | ||
|- | |||
{{AttackData-BBCPE | {{AttackData-BBCPE | ||
|header=no | |header=no | ||
|version=j.2D (Overdrive) | |version=j.2D (Overdrive) | ||
|damage= | |damage=300×2 | ||
|cancel=SR | |cancel=SR | ||
|p1=90 | |p1=90 | ||
| Line 932: | Line 1,061: | ||
|guard=all | |guard=all | ||
|startup=13 | |startup=13 | ||
|active= | |active=8×2 | ||
|recovery=44+5LT | |recovery=44+5LT | ||
|frameAdv= | |frameAdv= | ||
|attribute=HBFP*(2) | |attribute=HBFP*(2) | ||
|hitbox=nu/j.2D | |hitbox=nu/j.2D | ||
}} | }} | ||
|- | |||
{{AttackData-BBCPE | {{AttackData-BBCPE | ||
|header=no | |header=no | ||
|version=j.2DD (Overdrive) | |version=j.2DD (Overdrive) | ||
|damage= | |damage=200×2 | ||
|cancel=S(J)R | |cancel=S(J)R | ||
|p1=90 | |p1=90 | ||
| Line 950: | Line 1,079: | ||
|guard=all | |guard=all | ||
|startup=4 | |startup=4 | ||
|active= | |active=13×2 | ||
|recovery=5L | |recovery=5L | ||
|frameAdv= | |frameAdv= | ||
|attribute=HBFP*(2) | |attribute=HBFP*(2) | ||
|hitbox=nu/j.2DD | |hitbox=nu/j.2DD | ||
| | }} | ||
|} | |||
*Decent move to prevent people from running towards you | *Decent move to prevent people from running towards you | ||
*Can be used to bait AAs | *Can be used to bait AAs | ||
| Line 962: | Line 1,092: | ||
**The angle is now -45 degrees so the range is considerable shorter | **The angle is now -45 degrees so the range is considerable shorter | ||
**Increased landing recovery | **Increased landing recovery | ||
</div> | |||
</div> | |||
====== < | ===<big>j.6D</big>=== | ||
<div class="attack-container"> | |||
<div class="attack-gallery"> | |||
| | <gallery widths="210px" heights="210px" mode="nolines"> | ||
| | BBCP_Nu_j6D.png | | ||
| | </gallery> | ||
</div> | |||
<div class="attack-info"> | |||
{| class="wikitable attack-data" | |||
{{AttackDataHeader-BBCPE|version=yes}} | |||
|- | |||
{{AttackData-BBCPE | {{AttackData-BBCPE | ||
|header=no | |||
|version=j.6D | |version=j.6D | ||
|damage=480 | |damage=480 | ||
| Line 985: | Line 1,121: | ||
|frameAdv= | |frameAdv= | ||
|hitbox=nu/j.6D | |hitbox=nu/j.6D | ||
}} | }} | ||
|- | |||
{{AttackData-BBCPE | {{AttackData-BBCPE | ||
|header=no | |header=no | ||
| Line 1,003: | Line 1,139: | ||
|frameAdv= | |frameAdv= | ||
|hitbox=nu/j.6DD | |hitbox=nu/j.6DD | ||
}} | }} | ||
|- | |||
{{AttackData-BBCPE | {{AttackData-BBCPE | ||
|header=no | |header=no | ||
|version=j.6D (Overdrive) | |version=j.6D (Overdrive) | ||
|damage= | |damage=300×2 | ||
|cancel=SJR | |cancel=SJR | ||
|p1=90 | |p1=90 | ||
| Line 1,016: | Line 1,152: | ||
|guard=all | |guard=all | ||
|startup=13 | |startup=13 | ||
|active= | |active=8×2 | ||
|recovery=44+5LT | |recovery=44+5LT | ||
|frameAdv= | |frameAdv= | ||
|attribute=HBFP*(2) | |attribute=HBFP*(2) | ||
|hitbox=nu/j.6D | |hitbox=nu/j.6D | ||
}} | }} | ||
|- | |||
{{AttackData-BBCPE | {{AttackData-BBCPE | ||
|header=no | |header=no | ||
|version=j.6DD (Overdrive) | |version=j.6DD (Overdrive) | ||
|damage= | |damage=200×2 | ||
|cancel=S(J)R | |cancel=S(J)R | ||
|p1=90 | |p1=90 | ||
| Line 1,034: | Line 1,170: | ||
|guard=all | |guard=all | ||
|startup=4 | |startup=4 | ||
|active= | |active=13×2 | ||
|recovery=5L | |recovery=5L | ||
|frameAdv= | |frameAdv= | ||
|attribute=HBFP*(2) | |attribute=HBFP*(2) | ||
|hitbox=nu/j.6DD | |hitbox=nu/j.6DD | ||
| | }} | ||
|} | |||
*Decent move at stopping people from air dashing towards you if you are in the air | *Decent move at stopping people from air dashing towards you if you are in the air | ||
*Decent at stopping people from dashing towards you at further ranges | *Decent at stopping people from dashing towards you at further ranges | ||
| Line 1,046: | Line 1,183: | ||
**New move | **New move | ||
**Goes at a -15 degree angle | **Goes at a -15 degree angle | ||
</div> | |||
</div> | |||
==Universal Mechanics== | ==Universal Mechanics== | ||
====== < | ===<big>Ground Throw</big>=== | ||
<div class="attack-container"> | |||
<div class="attack-gallery"> | |||
| | <gallery widths="210px" heights="210px" mode="nolines"> | ||
BBCP_Nu_Throw.png |Forward/Back | |||
| | </gallery> | ||
| | </div> | ||
| | <div class="attack-info"> | ||
{| class="wikitable attack-data" | |||
{{AttackDataHeader-BBCPE|version=yes}} | |||
|- | |||
{{AttackData-BBCPE | {{AttackData-BBCPE | ||
|header=no | |||
|version=Forward Throw | |version=Forward Throw | ||
|damage=0,1400 | |damage=0,1400 | ||
| Line 1,073: | Line 1,214: | ||
|attribute=T | |attribute=T | ||
|hitbox=nu/groundThrow | |hitbox=nu/groundThrow | ||
}} | }} | ||
|- | |||
{{AttackData-BBCPE | {{AttackData-BBCPE | ||
|header=no | |header=no | ||
| Line 1,091: | Line 1,232: | ||
|attribute=T | |attribute=T | ||
|hitbox=nu/groundThrow | |hitbox=nu/groundThrow | ||
}} | }} | ||
|} | |||
*Minimum 100% damage | |||
*Ground grab is your typicall ground grab | |||
**Ground grab is now special cancellable | |||
</div> | |||
</div> | |||
===<big>Air Throw</big>=== | |||
<div class="attack-container"> | |||
<div class="attack-gallery"> | |||
<gallery widths="210px" heights="210px" mode="nolines"> | |||
BBCP_Nu_AThrow.png |Air | |||
</gallery> | |||
</div> | |||
<div class="attack-info"> | |||
{| class="wikitable attack-data" | |||
{{AttackDataHeader-BBCPE}} | |||
|- | |||
{{AttackData-BBCPE | {{AttackData-BBCPE | ||
|header=no | |header=no | ||
|damage=0,1400 | |damage=0,1400 | ||
|cancel=-, R | |cancel=-, R | ||
| Line 1,109: | Line 1,266: | ||
|attribute=T | |attribute=T | ||
|hitbox=nu/airThrow | |hitbox=nu/airThrow | ||
| | }} | ||
|} | |||
*Minimum 100% damage | *Minimum 100% damage | ||
*Air grab has ridiculous range compared to other characters and shrinks Nu's hurtbox | *Air grab has ridiculous range compared to other characters and shrinks Nu's hurtbox | ||
< | </div> | ||
</div> | |||
===<big>Counter Assault</big>=== | |||
<span class="input-badge">'''6A+B during blockstun'''</span> | |||
<div class="attack-container"> | |||
====== < | <div class="attack-gallery"> | ||
<gallery widths="210px" heights="210px" mode="nolines"> | |||
BBCP_Nu_6B.png | | |||
</gallery> | |||
| | </div> | ||
<div class="attack-info"> | |||
| | {| class="wikitable attack-data" | ||
{{AttackDataHeader-BBCPE}} | |||
|- | |||
{{AttackData-BBCPE | |||
|header=no | |||
|damage=0 | |damage=0 | ||
|cancel=R | |cancel=R | ||
| Line 1,140: | Line 1,300: | ||
|attribute=B | |attribute=B | ||
|invul=1-20 All | |invul=1-20 All | ||
}} | |||
|} | |||
*Hitbox is the same as her 6B | *Hitbox is the same as her 6B | ||
*Opponents can low profile it | *Opponents can low profile it | ||
*Opponent air techs on normal hit and can emergency tech on CH | *Opponent air techs on normal hit and can emergency tech on CH | ||
</div> | |||
</div> | |||
====== < | ===<big>Crush Trigger</big>=== | ||
<span class="input-badge">'''5A+B'''</span> | |||
<div class="attack-container"> | |||
<div class="attack-gallery"> | |||
| | <gallery widths="210px" heights="210px" mode="nolines"> | ||
BBCF_Nu_5AB_1.png | | |||
| | BBCP_Nu_CT_2.png | | ||
</gallery> | |||
</div> | |||
<div class="attack-info"> | |||
{| class="wikitable attack-data" | |||
{{AttackDataHeader-BBCPE}} | |||
|- | |||
{{AttackData-BBCPE | |||
|header=no | |||
|damage=1000 | |damage=1000 | ||
|cancel=R | |cancel=R | ||
| Line 1,167: | Line 1,335: | ||
|attribute=B | |attribute=B | ||
|hitbox= | |hitbox= | ||
| | }} | ||
|} | |||
*Breaks guard like other CTs | *Breaks guard like other CTs | ||
*Plus on block with decent pushback | *Plus on block with decent pushback | ||
*Wall bounce airborne opponents | *Wall bounce airborne opponents | ||
</div> | |||
</div> | |||
<br clear=all/> | <br clear=all/> | ||
==Specials== | ==Specials== | ||
====== < | ===<big>Spike Chaser</big>=== | ||
<span class="input-badge">'''214D(~C)'''</span> | |||
<div class="attack-container"> | |||
<div class="attack-gallery"> | |||
| | <gallery widths="210px" heights="210px" mode="nolines"> | ||
| | BBCP_Nu_SpikeChaser.png | | ||
| | </gallery> | ||
</div> | |||
<div class="attack-info"> | |||
{| class="wikitable attack-data" | |||
{{AttackDataHeader-BBCPE|version=yes}} | |||
|- | |||
{{AttackData-BBCPE | {{AttackData-BBCPE | ||
|header=no | |||
|version=214D | |version=214D | ||
|damage=1000 | |damage=1000 | ||
| Line 1,198: | Line 1,373: | ||
|attribute=HBFP* | |attribute=HBFP* | ||
|hitbox=nu/214D | |hitbox=nu/214D | ||
}} | }} | ||
|- | |||
{{AttackData-BBCPE | {{AttackData-BBCPE | ||
|header=no | |header=no | ||
| Line 1,215: | Line 1,390: | ||
|frameAdv=±0 | |frameAdv=±0 | ||
|hitbox=nu/214[D] | |hitbox=nu/214[D] | ||
| | }} | ||
|- | |||
{{AttackData-BBCPE | |||
|header=no | |header=no | ||
|version=214[D] | |version=214[D] | ||
| Line 1,232: | Line 1,408: | ||
|attribute=HBFP* | |attribute=HBFP* | ||
|hitbox=nu/214D | |hitbox=nu/214D | ||
| | }} | ||
|} | |||
*Is a projectile | *Is a projectile | ||
*Goes about 3/4 of the screen. | *Goes about 3/4 of the screen. | ||
| Line 1,247: | Line 1,424: | ||
**214[D] is the old 214D~C | **214[D] is the old 214D~C | ||
**Can cancel into gravity well on hit | **Can cancel into gravity well on hit | ||
</div> | |||
</div> | |||
====== < | ===<big>Sickle Storm</big>=== | ||
<span class="input-badge">'''236D(~C)'''</span> | |||
<div class="attack-container"> | |||
| | <div class="attack-gallery"> | ||
<gallery widths="210px" heights="210px" mode="nolines"> | |||
| | BBCP_Nu_SickleStormDia.png |Combo tool | ||
| | BBCP_Nu_SickleStormLuna.png |Charged version is a Fatal Counter | ||
| | </gallery> | ||
| | </div> | ||
<div class="attack-info"> | |||
{| class="wikitable attack-data" | |||
{{AttackDataHeader-BBCPE|version=yes}} | |||
|- | |||
{{AttackData-BBCPE | {{AttackData-BBCPE | ||
|header=no | |||
|version=236D | |version=236D | ||
|damage=900 | |damage=900 | ||
| Line 1,274: | Line 1,456: | ||
|attribute=HBFP* | |attribute=HBFP* | ||
|hitbox=nu/236D | |hitbox=nu/236D | ||
}} | }} | ||
|- | |||
{{AttackData-BBCPE | {{AttackData-BBCPE | ||
|header=no | |header=no | ||
| Line 1,292: | Line 1,474: | ||
|attribute=HBFP* | |attribute=HBFP* | ||
|hitbox=nu/236D | |hitbox=nu/236D | ||
}} | }} | ||
|- | |||
{{AttackData-BBCPE | {{AttackData-BBCPE | ||
|header=no | |header=no | ||
| Line 1,310: | Line 1,492: | ||
|attribute=HBFP* | |attribute=HBFP* | ||
|hitbox=nu/236D | |hitbox=nu/236D | ||
| | }} | ||
|} | |||
*Is a projectile | *Is a projectile | ||
*Travels full screen | *Travels full screen | ||
| Line 1,324: | Line 1,507: | ||
**New move: 236[D]. Slower start-up version of 236D that is plus on block and needs no resources to combo after | **New move: 236[D]. Slower start-up version of 236D that is plus on block and needs no resources to combo after | ||
**Can cancel into gravity well on hit | **Can cancel into gravity well on hit | ||
</div> | |||
</div> | |||
====== < | ===<big>Crescent Saber</big>=== | ||
<span class="input-badge">'''j.214D(~C)'''</span> | |||
<div class="attack-container"> | |||
<div class="attack-gallery"> | |||
| | <gallery widths="210px" heights="210px" mode="nolines"> | ||
| | BBCP_Nu_CrescentSaber.png | | ||
| | </gallery> | ||
</div> | |||
<div class="attack-info"> | |||
{| class="wikitable attack-data" | |||
{{AttackDataHeader-BBCPE|version=yes}} | |||
|- | |||
{{AttackData-BBCPE | {{AttackData-BBCPE | ||
|header=no | |||
|version=j.214D | |version=j.214D | ||
|damage=1000 | |damage=1000 | ||
| Line 1,349: | Line 1,538: | ||
|attribute=HBFP* | |attribute=HBFP* | ||
|hitbox=nu/j.214D | |hitbox=nu/j.214D | ||
}} | }} | ||
|- | |||
{{AttackData-BBCPE | {{AttackData-BBCPE | ||
|header=no | |header=no | ||
| Line 1,368: | Line 1,557: | ||
|hitbox=nu/j.214D | |hitbox=nu/j.214D | ||
}} | }} | ||
|- | |||
{{AttackData-BBCPE | {{AttackData-BBCPE | ||
|header=no | |header=no | ||
| Line 1,384: | Line 1,574: | ||
|attribute=HBFP* | |attribute=HBFP* | ||
|hitbox=nu/j.214D | |hitbox=nu/j.214D | ||
| | }} | ||
|} | |||
*Is a projectile | *Is a projectile | ||
*If C is pressed during startup, will not release the saber and recovers faster | *If C is pressed during startup, will not release the saber and recovers faster | ||
| Line 1,397: | Line 1,588: | ||
**New move: j.214[D]. Slower start-up version of j.214D that is plus on block and needs no resources to combo after | **New move: j.214[D]. Slower start-up version of j.214D that is plus on block and needs no resources to combo after | ||
**Cannot air dash after j214D~C | **Cannot air dash after j214D~C | ||
</div> | |||
</div> | |||
===<big>Act Parser</big>=== | |||
<span class="input-badge">'''66/44 after certain moves (Air OK)'''</span> | |||
<div class="attack-container"> | |||
<div class="attack-gallery"> | |||
| | <gallery widths="210px" heights="210px" mode="nolines"> | ||
| | BBCP_Nu_ActParser.png | | ||
| | </gallery> | ||
</div> | |||
<div class="attack-info"> | |||
{| class="wikitable attack-data" | |||
{{AttackDataHeader-BBCPE|version=yes}} | |||
|- | |||
{{AttackData-BBCPE | {{AttackData-BBCPE | ||
|header=no | |||
|version=66 | |version=66 | ||
|damage= | |damage= | ||
| Line 1,420: | Line 1,617: | ||
|frameAdv= | |frameAdv= | ||
|hitbox=nu/ActParser | |hitbox=nu/ActParser | ||
}} | }} | ||
|- | |||
{{AttackData-BBCPE | {{AttackData-BBCPE | ||
|header=no | |header=no | ||
| Line 1,437: | Line 1,634: | ||
|frameAdv= | |frameAdv= | ||
|hitbox=nu/ActParser | |hitbox=nu/ActParser | ||
}} | }} | ||
|- | |||
{{AttackData-BBCPE | {{AttackData-BBCPE | ||
|header=no | |header=no | ||
| Line 1,454: | Line 1,651: | ||
|frameAdv= | |frameAdv= | ||
|hitbox=nu/ActParser | |hitbox=nu/ActParser | ||
}} | }} | ||
|- | |||
{{AttackData-BBCPE | {{AttackData-BBCPE | ||
|header=no | |header=no | ||
| Line 1,471: | Line 1,668: | ||
|frameAdv= | |frameAdv= | ||
|hitbox=nu/ActParser | |hitbox=nu/ActParser | ||
| | }} | ||
|} | |||
*Forward parser is useful for escaping the corner as well as cross up and throw mix ups | *Forward parser is useful for escaping the corner as well as cross up and throw mix ups | ||
*Other ones aren't that useful | *Other ones aren't that useful | ||
| Line 1,477: | Line 1,675: | ||
*Changes from previous BB games | *Changes from previous BB games | ||
**Back ground parser puts you in the air now | **Back ground parser puts you in the air now | ||
</div> | |||
</div> | |||
====== < | ===<big>Gravity Seed</big>=== | ||
<span class="input-badge">'''214A/B/C'''</span> | |||
<div class="attack-container"> | |||
<div class="attack-gallery"> | |||
| | <gallery widths="210px" heights="210px" mode="nolines"> | ||
| | BBCP_Nu_GravitySeed.png | | ||
| | </gallery> | ||
</div> | |||
<div class="attack-info"> | |||
{| class="wikitable attack-data" | |||
{{AttackDataHeader-BBCPE|version=yes}} | |||
|- | |||
{{AttackData-BBCPE | {{AttackData-BBCPE | ||
|header=no | |||
|version=Gravity Seed | |version=Gravity Seed | ||
|damage= | |damage= | ||
| Line 1,501: | Line 1,705: | ||
|frameAdv= | |frameAdv= | ||
|hitbox=nu/214A | |hitbox=nu/214A | ||
}} | }} | ||
|- | |||
{{AttackData-BBCPE | {{AttackData-BBCPE | ||
|header=no | |header=no | ||
| Line 1,518: | Line 1,722: | ||
|frameAdv= | |frameAdv= | ||
|hitbox=nu/214A | |hitbox=nu/214A | ||
| | }} | ||
|} | |||
*Staple move for pressure, combos and zoning | *Staple move for pressure, combos and zoning | ||
*Can be cancelled into from any normal or drive on hit or block for pressure and zoning | *Can be cancelled into from any normal or drive on hit or block for pressure and zoning | ||
| Line 1,529: | Line 1,734: | ||
**Can be cancelled from significantly faster now | **Can be cancelled from significantly faster now | ||
**Can be cancelled into from special moves on hit now | **Can be cancelled into from special moves on hit now | ||
</div> | |||
</div> | |||
====== < | ===<big>Supra Rage</big>=== | ||
<span class="input-badge">'''623C/j.623C'''</span> | |||
<div class="attack-container"> | |||
<div class="attack-gallery"> | |||
| | <gallery widths="210px" heights="210px" mode="nolines"> | ||
| | BBCP_Nu_SupraRage.png | | ||
| | </gallery> | ||
</div> | |||
<div class="attack-info"> | |||
{| class="wikitable attack-data" | |||
{{AttackDataHeader-BBCPE|version=yes}} | |||
|- | |||
{{AttackData-BBCPE | {{AttackData-BBCPE | ||
|header=no | |||
|version=623C | |version=623C | ||
|damage= | |damage=140×8 | ||
|cancel=R | |cancel=R | ||
|p1=90 | |p1=90 | ||
| Line 1,549: | Line 1,760: | ||
|guard=HL | |guard=HL | ||
|startup=12 | |startup=12 | ||
|active= | |active=1×8 | ||
|recovery=37 | |recovery=37 | ||
|frameAdv=-21 | |frameAdv=-21 | ||
| Line 1,555: | Line 1,766: | ||
|invul=4-19H | |invul=4-19H | ||
|hitbox=nu/623C | |hitbox=nu/623C | ||
}} | }} | ||
|- | |||
{{AttackData-BBCPE | {{AttackData-BBCPE | ||
|header=no | |header=no | ||
|version=j.623C | |version=j.623C | ||
|damage= | |damage=140×8 | ||
|cancel=R | |cancel=R | ||
|p1=90 | |p1=90 | ||
| Line 1,568: | Line 1,779: | ||
|guard=HL | |guard=HL | ||
|startup=12 | |startup=12 | ||
|active= | |active=1×8 | ||
|recovery=32 | |recovery=32 | ||
|frameAdv=-16 | |frameAdv=-16 | ||
| Line 1,574: | Line 1,785: | ||
|attribute=B | |attribute=B | ||
|invul= | |invul= | ||
| | }} | ||
* | |} | ||
*Head invul starts fairly early in the move | *One of the best AAs in the game | ||
*Head invul starts fairly early in the move (estimated to start from 1~2f) | |||
*Has a large hitbox that also covers behind Nu | *Has a large hitbox that also covers behind Nu | ||
*Can easily combo from with CH or gravity cancel | *Can easily combo from with CH or gravity cancel | ||
| Line 1,583: | Line 1,795: | ||
**Can be cancelled with gravity well for easy combos on non-CH | **Can be cancelled with gravity well for easy combos on non-CH | ||
**No longer Fatal Counters | **No longer Fatal Counters | ||
</div> | |||
</div> | |||
==Distortion Drives== | ==Distortion Drives== | ||
====== < | ===<big>Legacy Edge</big>=== | ||
<span class="input-badge">'''236236D'''</span> | |||
<div class="attack-container"> | |||
<div class="attack-gallery"> | |||
| | <gallery widths="210px" heights="210px" mode="nolines"> | ||
| | BBCP_Nu_LegacyEdge.png | | ||
| | </gallery> | ||
</div> | |||
<div class="attack-info"> | |||
{| class="wikitable attack-data" | |||
{{AttackDataHeader-BBCPE|version=yes}} | |||
|- | |||
{{AttackData-BBCPE | {{AttackData-BBCPE | ||
|header=no | |||
|version=236236D | |version=236236D | ||
|damage= | |damage=93×23 | ||
|cancel=R | |cancel=R | ||
|p1=100 | |p1=100 | ||
| Line 1,609: | Line 1,827: | ||
|attribute=HBFP*(2) | |attribute=HBFP*(2) | ||
|hitbox=nu/236236D | |hitbox=nu/236236D | ||
}} | }} | ||
|- | |||
{{AttackData-BBCPE | {{AttackData-BBCPE | ||
|header=no | |header=no | ||
|version=236236D (Overdrive) | |version=236236D (Overdrive) | ||
|damage= | |damage=93×37 | ||
|cancel=R | |cancel=R | ||
|p1=100 | |p1=100 | ||
| Line 1,627: | Line 1,845: | ||
|attribute=HBFP*(2) | |attribute=HBFP*(2) | ||
|hitbox=nu/236236D | |hitbox=nu/236236D | ||
| | }} | ||
|} | |||
*Is a projectile | *Is a projectile | ||
*Goes full screen with a dead spot in front of Nu | *Goes full screen with a dead spot in front of Nu | ||
| Line 1,635: | Line 1,854: | ||
*If it is blocked, you have enough time to do some mix-up or just force more chip damage with your drives | *If it is blocked, you have enough time to do some mix-up or just force more chip damage with your drives | ||
*Can be used to cancel out other projectile supers such as Rachel's Tempest Dahlia or Tsubaki's Requiem Maledictus | *Can be used to cancel out other projectile supers such as Rachel's Tempest Dahlia or Tsubaki's Requiem Maledictus | ||
</div> | |||
</div> | |||
====== < | ===<big>Calamity Sword</big>=== | ||
<span class="input-badge">'''632146D/j.632146D'''</span> | |||
<div class="attack-container"> | |||
<div class="attack-gallery"> | |||
| | <gallery widths="210px" heights="210px" mode="nolines"> | ||
| | BBCP_Nu_CalamitySword.png | | ||
| | </gallery> | ||
</div> | |||
<div class="attack-info"> | |||
{| class="wikitable attack-data" | |||
{{AttackDataHeader-BBCPE|version=yes}} | |||
|- | |||
{{AttackData-BBCPE | {{AttackData-BBCPE | ||
|header=no | |||
|version=632146D | |version=632146D | ||
|damage=2000 | |damage=2000 | ||
| Line 1,661: | Line 1,886: | ||
|invul=1-11 All | |invul=1-11 All | ||
|hitbox=nu/632146D | |hitbox=nu/632146D | ||
}} | }} | ||
|- | |||
{{AttackData-BBCPE | {{AttackData-BBCPE | ||
|header=no | |header=no | ||
|version=632146D (Overdrive) | |version=632146D (Overdrive) | ||
|damage= | |damage=1250×4 | ||
|cancel=R | |cancel=R | ||
|p1=70 | |p1=70 | ||
|p2= | |p2=92×4 | ||
|smp= | |smp= | ||
|starter=N | |starter=N | ||
|guard= | |guard=H | ||
|startup=10+1 | |startup=10+1 | ||
|active=9(6)*4 | |active=9(6)*4 | ||
| Line 1,680: | Line 1,905: | ||
|invul=1-11 All | |invul=1-11 All | ||
|hitbox=nu/632146D | |hitbox=nu/632146D | ||
}} | }} | ||
|- | |||
{{AttackData-BBCPE | {{AttackData-BBCPE | ||
|header=no | |header=no | ||
| Line 1,698: | Line 1,923: | ||
|attribute=HBFP*(2) | |attribute=HBFP*(2) | ||
|hitbox=nu/j.632146D | |hitbox=nu/j.632146D | ||
}} | }} | ||
|- | |||
{{AttackData-BBCPE | {{AttackData-BBCPE | ||
|header=no | |header=no | ||
|version=j.632146D (Overdrive) | |version=j.632146D (Overdrive) | ||
|damage= | |damage=1250×4 | ||
|cancel=R | |cancel=R | ||
|p1=70 | |p1=70 | ||
|p2= | |p2=92×4 | ||
|smp= | |smp= | ||
|starter=N | |starter=N | ||
| Line 1,716: | Line 1,941: | ||
|attribute=HBFP*(2) | |attribute=HBFP*(2) | ||
|hitbox=nu/j.632146D | |hitbox=nu/j.632146D | ||
| | }} | ||
|} | |||
*Is a projectile | *Is a projectile | ||
*Main use is at the end of air combos to add damage (adds 1K minimum) | *Main use is at the end of air combos to add damage (adds 1K minimum) | ||
| Line 1,725: | Line 1,951: | ||
**No longer hits directly in front of Nu so it is not a reversal anymore outside of OD | **No longer hits directly in front of Nu so it is not a reversal anymore outside of OD | ||
**OD version now hits overhead | **OD version now hits overhead | ||
</div> | |||
</div> | |||
<br clear=all/> | <br clear=all/> | ||
==Astral Heat== | ==Astral Heat== | ||
===<big>Sword of Destruction</big>=== | |||
<span class="input-badge">'''214214D'''</span> | |||
| | <div class="attack-container"> | ||
| | <div class="attack-gallery"> | ||
<gallery widths="210px" heights="210px" mode="nolines"> | |||
| | BBCP_Nu_SwordofDestruction.png | | ||
BBCP_Nu_SwordofDestruction2.png | | |||
</gallery> | |||
</div> | |||
<div class="attack-info"> | |||
{| class="wikitable attack-data" | |||
{{AttackDataHeader-BBCPE}} | |||
|- | |||
{{AttackData-BBCPE | {{AttackData-BBCPE | ||
|header=no | |||
|damage=Death | |damage=Death | ||
|cancel= | |cancel= | ||
| Line 1,751: | Line 1,985: | ||
|invul=13-20 All | |invul=13-20 All | ||
|hitbox=nu/214214D | |hitbox=nu/214214D | ||
| | }} | ||
|} | |||
*Changes from previous BB games | *Changes from previous BB games | ||
**Considered a strike instead of a throw. | **Considered a strike instead of a throw. | ||
</div> | |||
</div> | |||
<br clear=all/> | <br clear=all/> | ||
| Line 1,767: | Line 2,002: | ||
<br clear=all/> | <br clear=all/> | ||
==Navigation== | |||
{{CharLinks | {{CharLinks | ||
|charMainPage=BBCPE/Nu-13 | |charMainPage=BBCPE/Nu-13 | ||
| Line 1,774: | Line 2,009: | ||
}} | }} | ||
{{Navbar-BBCPE}} | {{Navbar-BBCPE}} | ||
<templatestyles src="Template:Move Card/shared/styles.css" /> | |||
Latest revision as of 07:55, 28 December 2023
Overview
After the events in Calamity Trigger following her battle with Ragna the Bloodedge, she was thought to have perished in the Cauldron alone. Nu is later revived by her own will to fuse with Ragna in a form referred to by Hazama as the “Sword of Hades”; though she retains her appearence and personality from the previous games. She is re-tuned by
Hazama to stand in Ragna’s way once again.
Health: 10,000
Combo Rate: 70%
Jump Startup: 4
Backdash Time: 25
Backdash Invincibility: 1-5
Movement Options: Double Jump, 1 Airdash, Dash type: Run
- Movement Options
- Double Jump, 1 Airdash, Dash type: Run, Situational teleports
Nu manifests sword-like projectiles which she can shoot off at different angles. All drive moves have a follow-up attack initiated by
pressing D shortly after the attack connects. All of them can be canceled into her 44 or 66 Act Parser.- All Drive moves, including their follow-ups, summon two swords instead of one
- 4D's minimum distance requirement is removed
- Crescent Saber groundbounces
- Gravity Seed recharge rate is faster
- The default version of Spike Chaser reaches full screen, while the C version summons 4 spikes instead of 2
- Can cancel all her Special Moves into Act Parser on hit, block or whiff
- Legacy Edge lasts longer and does more hits
- Calamity Sword summons 4 swords in a wave motion instead of just one
- Extremely strong zoning game gives her an amazing neutral game very few characters can challenge
- Amazing backdash
- Combos featuring her Drive moves are typically tough to burst properly. If someone bursts during the wrong time, Nu can easily pick up another combo
- Low health
- Reliant on system mechanics to escape pressure
- Needs match-up experience to know how to zone many characters and her gameplan is completely dependent on whichever character she is facing
| Health | 100 - 90% | 89 - 80% | 79 - 70% | 69 - 60% | 59 - 50% | 49 - 40% | 39 - 30% | 29 - 20% | 19 - 10% | 9 - 0% |
|---|---|---|---|---|---|---|---|---|---|---|
| Overdrive | 180F | 210F | 240F | 270F | 300F | 420F | 480F | 540F | 600F | 720F |
| This data is all copied over from BBCP 1.1. Replace with 2.0 data as it becomes available (and delete this warning) |
Normal Moves
5A

5B

5C

2A

2B

| Damage | Cancel | Guard | Startup | Active | Recovery | Frame Adv | Attribute | Invul |
|---|---|---|---|---|---|---|---|---|
| 380 | SOR | L | 9 | 4 | 10 | ±0 | F | - |
- Great poke with great range for its start-up and recovery
- Can be used to low profile pokes like Tsubaki's 5B
- Even on block with lots of gatlings so it can be used to reset pressure
- Can be used to punish rolls
2C

| Damage | Cancel | Guard | Startup | Active | Recovery | Frame Adv | Attribute | Invul |
|---|---|---|---|---|---|---|---|---|
| 112×8 | SOJR | HLx2,Ax6 | 14 | 1×6,2×2 | 24 | -9 | B | 11-17H |
- Decent AA
- The head invul comes out late so it is difficult to time properly
- Best used when the opponent is directly above you since the vertical hitbox is big
- Can hit characters behind Nu
6A

6B

6C

3C

j.A

j.B

j.C

j.2C

Drive Moves
- All of Nu's drive moves are projectiles
- All of Nu's drive moves cause chip damage
- All of Nu's drive moves cannot be jump cancelled on block
- All of Nu's drive moves start at projectile level 1 and changes to level 2 after an unknown amount of active frames
- All of Nu's drive moves had a dead spot in front of Nu where they have no hitbox
- The ground drive moves (5D, 6D, 2D and 4D) can be chained up to 4 in a row
- For example 6DD > 5DD > 4DD > 5DD works fine but if you tried 6DD > 5DD > 4DD > 5DD > 4DD , the 4D would not come out
- This includes gravity cancels so while 4DD > 5DD > 4DD > 5DD works, 4DD > 214B > 4DD > 5DD > 4DD > 5DD will make 5D not come out.
- The air drive moves (j.D, j.6D and j.2D) can be chained up to 3 in a row
5D

"Give'em the D"

| Version | Damage | Cancel | Guard | Startup | Active | Recovery | Frame Adv | Attribute | Invul |
|---|---|---|---|---|---|---|---|---|---|
| 5D | 480 | SOJR [SOR] | all | 15 | 12 | 48T | -17 | HBFP* [HBFP*(2)] | - |
| 5DD | 200 | SOR | all | 13 | 13 | 48T | -12 | HBFP* [HBFP*(2)] | - |
| 5D (Overdrive) | 300×2 | SJR [SR] | all | 15 | 12×2 | 48T | -11 | HBFP*(2) | - |
| 5DD (Overdrive) | 200×2 | SR | all | 13 | 13×2 | 48T | -15 | HBFP*(2) | - |
- Great ground poke
- Goes full screen
- Changes from previous BB games
- Now goes full screen
- 5D is no longer jump cancellable on block
2D

| Version | Damage | Cancel | Guard | Startup | Active | Recovery | Frame Adv | Attribute | Invul |
|---|---|---|---|---|---|---|---|---|---|
| 2D | 480 | SJOR | all | 11 | 15 | 45T | -18 | HBFP* [HBFP*(2)] | - |
| 2DD | 200 | SOJR | all | 4 | 13 | 48T | -18 | HBFP* [HBFP*(2)] | - |
| 2D (Overdrive) | 300×2 | SJR | all | 11 | 15×2 | 45T | -16 | HBFP*(2) | - |
| 2DD (Overdrive) | 200×2 | SJR | all | 4 | 13×2 | 48T | -13 | HBFP*(2) | - |
- Great AA for stopping people who double jump
- Changes from previous BB games
- Can no longer be jump cancelled on block
6D

| Version | Damage | Cancel | Guard | Startup | Active | Recovery | Frame Adv | Attribute | Invul |
|---|---|---|---|---|---|---|---|---|---|
| 6D | 480 | SOJR | all | 13 | 9 | 45T | -16 | HBFP* [HBFP*(2)] | - |
| 6DD | 200 | SOJR | all | 6 | 13 | 60T | -28 | HBFP* [HBFP*(2)] | - |
| 6D (Overdrive) | 300×2 | SJR | all | 13 | 9×2 | 45T | -10 | HBFP*(2) | - |
| 6DD (Overdrive) | 200×2 | SJR | all | 6 | 13×2 | 60T | -30 | HBFP*(2) | - |
- Great AA against people who like to IAD
- Can hit taller characters like Azrael, Tager and Hakumen while they are standing
- Will whiff on shorter characters standing
- Changes from previous BB games
- Can no longer be jump cancelled on block
4D

| Version | Damage | Cancel | Guard | Startup | Active | Recovery | Frame Adv | Attribute | Invul |
|---|---|---|---|---|---|---|---|---|---|
| 4D | 480 | SOR | HA | 30 | 2 | 57T | -11 | HBFP* [HBFP*(2)] | - |
| 4DD | 200 | SOR | all | 9 | 13 | 50T | -18 | HBFP* [HBFP*(2)] | - |
| 4D (Overdrive) | 300×2 | SJR | HA | 30 | 2×2 | 57T | -6 | HBFP*(2) | - |
| 4DD (Overdrive) | 200×2 | SJR | all | 9 | 13×2 | 50T | -20 | HBFP*(2) | - |
- Overhead
- Appears where ever the opponent was when you inputted in the command
- Goes full screen, but there is a minimum distance requirement for it to hit (not in Overdrive)
- Changes from previous BB games
- Significantly faster now (24 frame start-up)
- Gatlings into 5D now
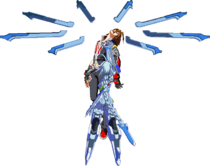
j.D

| Version | Damage | Cancel | Guard | Startup | Active | Recovery | Frame Adv | Attribute | Invul |
|---|---|---|---|---|---|---|---|---|---|
| j.D | 480 | SOR | all | 13 | 8 | 44+5LT | - | HBFP* [HBFP*(2)] | - |
| j.DD | 200 | SO(J)R | all | 4 | 13 | 5L | - | HBFP* [HBFP*(2)] | - |
| j.D (Overdrive) | 300×2 | SJR | all | 13 | 8×2 | 44+5LT | - | HBFP*(2) | - |
| j.DD (Overdrive) | 200×2 | S(J)R | all | 4 | 13×2 | 5L | - | HBFP*(2) | - |
- Decent move at stopping people from air dashing towards you if you are in the air
- Changes from previous BB games
- Increased landing recovery
j.2D

| Version | Damage | Cancel | Guard | Startup | Active | Recovery | Frame Adv | Attribute | Invul |
|---|---|---|---|---|---|---|---|---|---|
| j.2D | 480 | SOR | all | 13 | 8 | 44+5LT | - | HBFP* [HBFP*(2)] | - |
| j.2DD | 200 | SO(J)R | all | 4 | 13 | 5L | - | HBFP* [HBFP*(2)] | - |
| j.2D (Overdrive) | 300×2 | SR | all | 13 | 8×2 | 44+5LT | - | HBFP*(2) | - |
| j.2DD (Overdrive) | 200×2 | S(J)R | all | 4 | 13×2 | 5L | - | HBFP*(2) | - |
- Decent move to prevent people from running towards you
- Can be used to bait AAs
- Changes from previous BB games
- The angle is now -45 degrees so the range is considerable shorter
- Increased landing recovery
j.6D

| Version | Damage | Cancel | Guard | Startup | Active | Recovery | Frame Adv | Attribute | Invul |
|---|---|---|---|---|---|---|---|---|---|
| j.6D | 480 | SOR | all | 13 | 8 | 44+5LT | - | HBFP* [HBFP*(2)] | - |
| j.DD | 200 | SO(J)R | all | 4 | 13 | 5L | - | HBFP* [HBFP*(2)] | - |
| j.6D (Overdrive) | 300×2 | SJR | all | 13 | 8×2 | 44+5LT | - | HBFP*(2) | - |
| j.6DD (Overdrive) | 200×2 | S(J)R | all | 4 | 13×2 | 5L | - | HBFP*(2) | - |
- Decent move at stopping people from air dashing towards you if you are in the air
- Decent at stopping people from dashing towards you at further ranges
- Changes from previous BB games
- New move
- Goes at a -15 degree angle
Universal Mechanics
Ground Throw
Forward/Back

Air Throw

Air

Counter Assault
6A+B during blockstun
Crush Trigger
5A+B


Specials
Spike Chaser
214D(~C)

| Version | Damage | Cancel | Guard | Startup | Active | Recovery | Frame Adv | Attribute | Invul |
|---|---|---|---|---|---|---|---|---|---|
| 214D | 1000 | R | all | 35 | 45 | 75T | -7 | HBFP* | - |
| 214D~C | 800 | R | all | 31+32 | - | 76T | ±0 | - | - |
| 214[D] | 1200 | R | all | 35 | 45 | 75T | +20 | HBFP* | - |
- Is a projectile
- Goes about 3/4 of the screen.
- If C is pressed during startup, only 2 spikes will rise from the ground and has less range
- Can be charged by holding D. If charged, goes full screen.
- Each version has its own SMP
- Great at controlling the ground in front of Nu
- 214D~C can trade with people who IAD for an easy combo
- Easy to hitconfirm
- Changes from previous BB games
- New move: 214D~C. Is now a shorter version of the move.
- 214[D] is the old 214D~C
- Can cancel into gravity well on hit
Sickle Storm
236D(~C)

Combo tool

Charged version is a Fatal Counter


| Version | Damage | Cancel | Guard | Startup | Active | Recovery | Frame Adv | Attribute | Invul |
|---|---|---|---|---|---|---|---|---|---|
| 236D | 900 | R | LA | 17 | - | 62T | -18 | HBFP* | - |
| 236D~C | 980 | R | LA | 15+8 | - | 62T | -12 | HBFP* | - |
| 236[D] | 980 | R | all | 36 | 6(2)*5 | 54T | +50 | HBFP* | - |
- Is a projectile
- Travels full screen
- If C is pressed during startup, will appear from behind opponent and travel towards Nu
- Can be charged by holding D. If charged, becomes plus on block and wall sticks opponent on hit.
- Each version has its own SMP
- 236[D] is a Fatal Counter
- Low
- Used for Nu's full screen mix-up
- Changes from previous BB games
- New move: 236[D]. Slower start-up version of 236D that is plus on block and needs no resources to combo after
- Can cancel into gravity well on hit
Crescent Saber
j.214D(~C)

| Version | Damage | Cancel | Guard | Startup | Active | Recovery | Frame Adv | Attribute | Invul |
|---|---|---|---|---|---|---|---|---|---|
| j.214D | 1000 | R | HA | 17 | 4 | 57T | -10 | HBFP* | - |
| j.214D~C | - | - | - | - | - | 12+21T | - | HBFP* | - |
| j.214[D] | 1000 | R | HA | 17 | 4 | 57T | -10 | HBFP* | - |
- Is a projectile
- If C is pressed during startup, will not release the saber and recovers faster
- Can be charged by holding D. If charged, it comes out slower and is plus on block
- Each version has its own SMP
- Overhad
- Has a dead spot in front of Nu
- Both
- Changes from previous BB games
- New move: j.214[D]. Slower start-up version of j.214D that is plus on block and needs no resources to combo after
- Cannot air dash after j214D~C
Act Parser
66/44 after certain moves (Air OK)

| Version | Damage | Cancel | Guard | Startup | Active | Recovery | Frame Adv | Attribute | Invul |
|---|---|---|---|---|---|---|---|---|---|
| 66 | - | - | - | - | - | 41T | - | - | - |
| 44 | - | - | - | - | - | 33T | - | - | - |
| j.66 | - | - | - | - | - | 37T | - | - | - |
| j.44 | - | - | - | - | - | 37T | - | - | - |
- Forward parser is useful for escaping the corner as well as cross up and throw mix ups
- Other ones aren't that useful
- Changes from previous BB games
- Back ground parser puts you in the air now
Gravity Seed
214A/B/C

| Version | Damage | Cancel | Guard | Startup | Active | Recovery | Frame Adv | Attribute | Invul |
|---|---|---|---|---|---|---|---|---|---|
| Gravity Seed | - | - | - | - | - | 33T | - | - | - |
| Gravity Seed Field | - | - | - | 35 | 220 | - | - | - | - |
- Staple move for pressure, combos and zoning
- Can be cancelled into from any normal or drive on hit or block for pressure and zoning
- Can be cancelled into from any special on hit for easy mode combo confirms
- Allows you to reset drive pressure while locking down the opponent's movement
- Opponent's will only travel 30% of their normal distance while in the field
- Changes from previous BB games
- Recovers significantly faster
- Can be cancelled from significantly faster now
- Can be cancelled into from special moves on hit now
Supra Rage
623C/j.623C

| Version | Damage | Cancel | Guard | Startup | Active | Recovery | Frame Adv | Attribute | Invul |
|---|---|---|---|---|---|---|---|---|---|
| 623C | 140×8 | R | HL | 12 | 1×8 | 37 | -21 | B | 4-19H |
| j.623C | 140×8 | R | HL | 12 | 1×8 | 32 | -16 | B | - |
- One of the best AAs in the game
- Head invul starts fairly early in the move (estimated to start from 1~2f)
- Has a large hitbox that also covers behind Nu
- Can easily combo from with CH or gravity cancel
- Changes from previous BB games
- Can be cancelled with gravity well for easy combos on non-CH
- No longer Fatal Counters
Distortion Drives
Legacy Edge
236236D

| Version | Damage | Cancel | Guard | Startup | Active | Recovery | Frame Adv | Attribute | Invul |
|---|---|---|---|---|---|---|---|---|---|
| 236236D | 93×23 | R | all | 16+10 | - | 57T | +73 | HBFP*(2) | - |
| 236236D (Overdrive) | 93×37 | R | all | 16+10 | - | 57T | +133 | HBFP*(2) | - |
- Is a projectile
- Goes full screen with a dead spot in front of Nu
- Hugely plus on hit or block
- Has some projectile invul on startup
- If it hits, you can dash towards the opponent to force them into the corner and end with a combo
- If it is blocked, you have enough time to do some mix-up or just force more chip damage with your drives
- Can be used to cancel out other projectile supers such as Rachel's Tempest Dahlia or Tsubaki's Requiem Maledictus
Calamity Sword
632146D/j.632146D

| Version | Damage | Cancel | Guard | Startup | Active | Recovery | Frame Adv | Attribute | Invul |
|---|---|---|---|---|---|---|---|---|---|
| 632146D | 2000 | R | H | 10+1 | 9 | 68T | -27 | HBFP*(2) | 1-11 All |
| 632146D (Overdrive) | 1250×4 | R | H | 10+1 | 9(6)*4 | 68T | +7 | HBFP*(2) | 1-11 All |
| j.632146D | 2600 | R | HA | 8+5 | 9 | till L+5 | - | HBFP*(2) | - |
| j.632146D (Overdrive) | 1250×4 | R | all | 8+5 | 9(6)*4 | till L+5 | ±0 | HBFP*(2) | - |
- Is a projectile
- Main use is at the end of air combos to add damage (adds 1K minimum)
- Hits overhead
- OD version is plus on block, hits overhead 4 times and can lead to an unblockable if you RC it.
- Changes from previous BB games
- No longer hits directly in front of Nu so it is not a reversal anymore outside of OD
- OD version now hits overhead
Astral Heat
Sword of Destruction
214214D


External References
- Japanese Name: ニュー·サーティーン
- Japanese Wiki
- Japanese BBS
- Arcade Profile Dan Rankings
- Character Video Thread