Overview
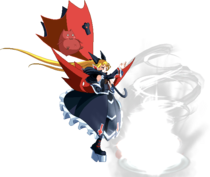
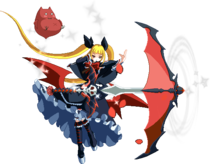
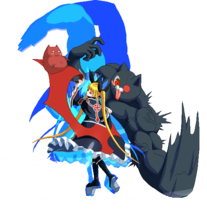
Head of the infamous Alucard vampire family, Rachel has spent countless years watching as the world repeated the same 100 years over and over. However, the world has finally broken free of the bonds that held it for so long, and Rachel is determined to put an end to Terumi with her own hands.
In the BlazBlue universe, Rachel is an extremely powerful individual, controlling wind and lightning. While she will rarely directly interfere with the events that surround Kagutsuchi, her primary goal is as an observer, and gently (or less so) nudges the pieces into their places. She has several servants under her command; Nago, a cat familiar, and Gii, a bat familiar, which serve as her weapons, furniture, and anger relief. Her butler, Valkenhayn R. Hellsing, is also notable for being a werewolf, as well as one of the Six Heroes.- Movement Options
- Wind, Double Jump, 1 Airdash, Dash type: Run
- Sylpheed gauge recovers faster.
- Rachel can jump cancel all of her normals and her throw.
- Distortion Drives gain additional animations and properties:
- Baden Baden Lily raw and minimum damage increased on body and poles.
- Baden Baden Lily poles do bonus prorate.
- Tempest Dahlia summons additional projectiles.
- Great control over neutral; excellent zoning tools
- Very good pressure and lockdown
- Scary mix-up game
- Very strong okizeme
- Excellent anti-air options
- Poor defensive options on wake-up
- Difficult match-ups
- Extremely reliant on wind
- Thrives on momentum
- High skill ceiling
| Health | 100 - 90% | 89 - 80% | 79 - 70% | 69 - 60% | 59 - 50% | 49 - 40% | 39 - 30% | 29 - 20% | 19 - 10% | 9 - 0% |
|---|---|---|---|---|---|---|---|---|---|---|
| Overdrive | 180F | 210F | 240F | 270F | 300F | 390F | 420F | 450F | 480F | 600F |
| Only damage values and move descriptions have been updated. Frame data is incomplete and mostly copied from BBCP 1.1. |
Normal Moves
5A
| Damage | Cancel | Guard | Startup | Active | Recovery | Frame Adv | Attribute | Invul |
|---|---|---|---|---|---|---|---|---|
| 300×2 | CSOJR | all | 6 | 2(6)3 | 11 | -2 | B | - |
Two hit jab that hits crouchers. Slow on whiff. Can gatling/special/jump cancel the first or second hit. 5A is primarily used to extend blockstrings or combos, but can also be used as part of her 50/50 mix up.
5B
| Damage | Cancel | Guard | Startup | Active | Recovery | Frame Adv | Attribute | Invul |
|---|---|---|---|---|---|---|---|---|
| 550 | SOJR | HL | 8 | 6 | 19 | -8 | BP | - |
5B Covers a decent amount of space which makes it decent in short-ranged poking. It's also one of Rachel's two primary starters for punish combos. It hits all the way to the ground, which make it useful for OTGing and hitting low-profile characters. It's projectile property is both a plus and a minus. You can use it to stop slow projectiles, but you can also easily be punished by characters who have projectile invulnerable attacks. A change from BBCP is that 5B can now only gatling into 2B once per string. 5B is also now a level 2 move so 5B 2D jc j.A is no longer gapless.
5C
| Damage | Cancel | Guard | Startup | Active | Recovery | Frame Adv | Attribute | Invul |
|---|---|---|---|---|---|---|---|---|
| 750 | SOR | HL | 13 | 4 | 32 | -17 | B | - |
- Spin down on ground Fatal Counter
One of Rachel's two Fatal Counter moves. If 5C fatals on ground hit, it will cause a spin down effect which gives Rachel much more time to follow up with other attacks. 5C is typically used in combos, but is also an excellent starter for a punish combo. Because of it's relatively short range, wind is often used to push Rachel forward so it will combo. In BBCPE, it's start up has been sped up to allow for new combo paths.
5CC
| Damage | Cancel | Guard | Startup | Active | Recovery | Frame Adv | Attribute | Invul |
|---|---|---|---|---|---|---|---|---|
| 850 | SOR | HL | 9 | 8 | 24 | -11 | B | - |
- Blows back on hit
- Wallsticks in the corner
- Same Move Prorate
Typically used in mid-screen combos to knock the opponent away for either an opportunity to summon or to send someone into the corner. In corner combos it is used to cause wall stick and extend the combo. Can also be used as an ender which offers strong okizeme options.
2A
| Damage | Cancel | Guard | Startup | Active | Recovery | Frame Adv | Attribute | Invul |
|---|---|---|---|---|---|---|---|---|
| 300 | CSOR | all | 7 | 4 | 8 | 0 | F | - |
A decent ranged and fast poke. Can chain into itself on whiff and has short recovery which makes it great for DP baiting and tick grabs. Because of Rachel's short crouching hitbox, it can also be used as a situational anti-air. When Rachel's opponent has a lot of moves that guard point or are invincible to projectiles, this is Rachel's go-to poke. Can also OTG characters, so it's a good tool for catching people attempting to late tech or roll.
2B
| Damage | Cancel | Guard | Startup | Active | Recovery | Frame Adv | Attribute | Invul |
|---|---|---|---|---|---|---|---|---|
| 480 | SOR | L | 10 | 6 | 18 | -10 | FP | - |
A fast low. Often used as part of Rachel's 5B 2B gatling strings. Like 5B, 2B is also a projectile so beware using it against characters that have moves that guard point or are invincible to projectiles. Also hits to the ground, but not used as much as 2A or 5B for OTGing.
2C
| Damage | Cancel | Guard | Startup | Active | Recovery | Frame Adv | Attribute | Invul |
|---|---|---|---|---|---|---|---|---|
| 1000 | R | HL | 23 | 13 | 42 | -34 | B | - |
- 5-35 GP
- Cannot guard against throws and unblockable attacks
2C is used very situationally and is extremely risky. On one hand, it can be used to take advantage of characters who are reckless with their offense. On the otherhand, if baited, due to it's long recovery you will very likely be punished with a combo that will do a lot of damage. Because of this, it's best to not use it carelessly and to have a backup plan like pumpkin/george to make it safe or 50 meter to RC it. 2C is also used in a small handful of combos.
6A
| Damage | Cancel | Guard | Startup | Active | Recovery | Frame Adv | Attribute | Invul |
|---|---|---|---|---|---|---|---|---|
| 620 | SOJ(H)R | HL | 13 | 5 | - | -3 | B | 7-12GP(H) |
- 7-12 Guard Point (Head)
Rachel's go-to anti-air. It has a great hitbox and can even hit behind Rachel. 6A no longer floats on hit, but will still launch characters if wind is used. 6A is used a lot in combos to either launch the opponent, combo into BBL, or as a means to gatling into 4B for ground bounce. 6A has a lot of untechable time on counter hit which will allow Rachel to do a ground combo instead of an aircombo. On normal hit, you will likely have to spend wind with something like j.C 2D to bring the opponent to the ground. In BBCPE, 6A has gained jump cancel properties on hit, but has more recovery which makes it more dangerous to whiff.
6B
| Damage | Cancel | Guard | Startup | Active | Recovery | Frame Adv | Attribute | Invul |
|---|---|---|---|---|---|---|---|---|
| 580 | SOJR | HL | 13 | 3 | 15 | -1 | B | - |
- Blows back and wallbounces on Counter Hit
Rachel's longest poke. Great for bullying people who are reckless with approach or have slow moves. Will also blowback on CH and wallbounce the opponent. You can follow up with a combo or use that opportunity to summon. 6B is jump cancellable so it can also be used to extend combos/pressure if you are too far to hit the opponent with 5B. For example, 6B 3D jc j.A is a very sneaky overhead. Follow the Help:Writing_Character_Pages guidelines
4B
| Damage | Cancel | Guard | Startup | Active | Recovery | Frame Adv | Attribute | Invul |
|---|---|---|---|---|---|---|---|---|
| 680 | SOR | H | 26 | 7 | 22 | -9 | B | - |
- Knocks down on hit
- Fatal Counters on Counter Hit
- Now used for combo enders instead of 3C
In BBCPE, 4B has regained 3C/5C gatling on block which makes it a viable windless overhead option. It can be used as a combo extender, however due to the change in 3C making 3C not as good for covering roll options on knock down, 4B is the go-to combo ender for knock down into oki when 5CC isn't available due to SMP.
6C
| Damage | Cancel | Guard | Startup | Active | Recovery | Frame Adv | Attribute | Invul |
|---|---|---|---|---|---|---|---|---|
| 89~464 | SOR | all | 13 | 3×N | 13L | +4 | H | - |
- All successive hits after 1st hit will be multiplied by 1.11 from the last attack's damage value, max 464 (18 hits)
- Forces standing on hit
Rachel's only plus on block normal. On block you can gatling into j.2C or j.C, though j.C will whiff on crouching characters. On hit 6C can be used with wind to carry the opponent into the corner. 6C will continue for as long as Rachel is in the air, so you can use 6C to carry the opponent pretty far whether horizontally or vertically. 6C also puts Rachel airborne, which can be situationally useful.
Due to changes in Rachel's other combo routes, 5D 6C has become a staple in her mid screen combos.
3C
| Damage | Cancel | Guard | Startup | Active | Recovery | Frame Adv | Attribute | Invul |
|---|---|---|---|---|---|---|---|---|
| 300×3 | SOR | L | 11 | 4,4,5 | 15 | -2 | F | - |
- Possible to charge (will extend move into 3[C])
- Vacuums on hit
3C was primarily used for knock down, but in BBCPE it is primarily used to extend combos by comboing someone into George, Sword Iris, or launching them with 8D. 3C is Rachel's only low that does not have projectile property. You can also use wind to make Rachel travel pretty fast while using 3C.
Due to the vacuum effect, on hit people are much closer when used for knock down which makes 3C less optimal for covering all knock down options compared to 4B and 5CC.
3[C]
j.A
| Damage | Cancel | Guard | Startup | Active | Recovery | Frame Adv | Attribute | Invul |
|---|---|---|---|---|---|---|---|---|
| 300 | SOJR | HA | 8 | 3 | 7 | - | H | - |
A fast aerial jab that hits overhead. Hitbox has been improved so it hits short characters better. j.A is a key part of Rachel's 50/50 mix up from 5B/5A as she can force the opponent to guess whether she'll do j.A or 2B. Has short recovery, so can also be used for safejumps.
j.B
j.C
| Damage | Cancel | Guard | Startup | Active | Recovery | Frame Adv | Attribute | Invul |
|---|---|---|---|---|---|---|---|---|
| 700 | SOJR | all | 8 | 6 | 20 | - | H | - |
- Possible to charge (causes Rachel to float, see j.[C])
Because of it's huge hitbox, j.C is great for using against characters who are directly above you. On counter hit, j.C has a long amount of untechable time which will allow you start a ground combo. Because j.C and j.[C] count as different moves, you can also repeat these moves in a combo (with 2D) to juggle the opponent.
j.[C]
| Damage | Cancel | Guard | Startup | Active | Recovery | Frame Adv | Attribute | Invul |
|---|---|---|---|---|---|---|---|---|
| - | - | - | - | - | 16L | - | - | - |
- Can airdash after 10 frames
If you hold j.[C] Rachel will float and slowly fall to the ground. Because she can still wind herself while doing this move, she can use j.[C] as a viable run away tactic or as part of certain mix up setups.
j.2C
| Version | Damage | Cancel | Guard | Startup | Active | Recovery | Frame Adv | Attribute | Invul |
|---|---|---|---|---|---|---|---|---|---|
| Level 1 | 680 | SOR | all | 13 | till L | 31L | - | H | - |
| Level 2 | 880 | SOR | all | 13 | till L | 31L | - | H | - |
| Level 3 | 1380 | SOR | all | 13 | till L | 31L | - | H | - |
j.2C will have different effects on hit depending on it's level as an attack. The level is dependent on Rachel's momentum when she hits.
- Level 1- Knock someone to the ground on air hit
- Level 2- Ground bounce the opponent on air hit or ground hit
- Level 3- Even bigger ground bounce on air hit or ground hit. Very untechable. Forces Fatal Counter.
Due to an overall slower falling speed and combo path change, j.2C is no longer the main part of Rachel's BnBs. However, j.2C is still useful in certain combos, though Rachel may need assistance from B Lotus to make it combo. j.2C can special cancel on hit. It can also cancel it's ground recovery into a special or a normal on hit. If it whiffs, Rachel will bounce which has pretty long recovery, so be careful when using it.
Universal Mechanics
Forward Throw
| Damage | Cancel | Guard | Startup | Active | Recovery | Frame Adv | Attribute | Invul |
|---|---|---|---|---|---|---|---|---|
| 0,1400 | --, SOR | T(70) | 7 | 3 | 18 | - | T | - |
- 100% minimum damage (1400)
Rachel's throw range is relatively short, but it's fairly decent for tick grabs. Must use wind to combo off of it midscreen. Has wallbounce properties like 6B, but unless you're in or near the corner you'll likely need to use 9D to make use of it. 7D is used for the normal mid screen BnB.
If anyone techs Rachel's ground or air throw or if Rachel techs a ground or air throw, it counts as a hit so George, Pumpkin, and Lotus will all disappear.
Back Throw
Air Throw
| Damage | Cancel | Guard | Startup | Active | Recovery | Frame Adv | Attribute | Invul |
|---|---|---|---|---|---|---|---|---|
| 0,1400 | --, SOR | T(70) | 7 | 3 | 18 | - | T | - |
- 100% minimum damage (1400)
- Ground bounces
Fairly good damage and range. However, despite it's animation, it reaches in front and above and not very far below. If you're low enough to the ground, you can follow up with microdash 5B to do a ground combo. If you're higher, you may need to use wind. In BBCPE it ground bounces opponents which makes it more difficult to combo off of.
Counter Assault
| Damage | Cancel | Guard | Startup | Active | Recovery | Frame Adv | Attribute | Invul |
|---|---|---|---|---|---|---|---|---|
| 0 | - | all | 13 | 3 | 33 | -17 | B | 1-20 All |
- 1-20 All Invul
- 180F Heat Gauge Cooldown
Rachel's counter assault is exactly like her 6B. If you have 50 meter, this is one of Rachel's more reliable defensive options. However, it can be low-profiled rather easily.
Crush Trigger
Special Moves
Tiny Lobelia
236A/B/C air OK
| Version | Damage | Cancel | Guard | Startup | Active | Recovery | Frame Adv | Attribute | Invul |
|---|---|---|---|---|---|---|---|---|---|
| Ground A | 600 | R | all | 11 | - | 47T | -6 | HBFP* | - |
| Ground B | 600 | R | all | 20 | - | 58T | -8 | HBFP* | - |
| Ground C | 600 | R | all | 20 | - | 58T | -8 | HBFP* | - |
| Air A | 600 | R | all | 9 | - | 53T | - | HBFP* | - |
| Air B | 600 | R | all | 22 | - | 55T | - | HBFP* | - |
| Air C | 600 | R | all | 22 | - | 55T | - | HBFP* | - |
- A Lobelia (ground version only) has Same Move Prorate
- When Lobelia hits the corner, the active frames will refresh which allows it to hit up to two times
Rachel launches a football-shaped seed that flies in an arc and is completely active unless cancelled out by another projectile or hits the ground. Ground A-C Lobelia travel from shortest distance to longest. In the air, this order is backwards with A air Lobelia travelling the farthest. Rachel can extend the distance or change the trajectory of Lobelia by using wind. When Lobelia hits the ground, they will plant a rod where they land. Only three rods can exist at a time and rods will disappear and be replaced by order of oldest to newest. The rods can then be activated with either Sword Iris, Baden Baden Lily, or Lotus and will disappear after.
Unlike previous versions of the game, Tiny Lobelia no longer floats on hit. Air B and C Lobelia knock the opponent towards the ground while A air Lobelia will send them flying across the screen. Also unlike previous version of the game, Lobelia will wall bounce off the corner, allowing for easier setups into multiple rods for Baden Baden Lily. Rachel can also very situationally make use of a glitch. If crouching opponent is hit by a Lobelia and Rachel is no longer in recovery, she can activate Overdrive to extend the hitstun.
In BBCPE Lobelia bounce off the corner which refreshes the active frames. This allows lobelia to hit twice as a combo extender, however due to the bounce trajectory it is more difficult to stack rods in the corner.
George the 13th
214A air OK
| Version | Damage | Cancel | Guard | Startup | Active | Recovery | Frame Adv | Attribute | Invul |
|---|---|---|---|---|---|---|---|---|---|
| Summon | - | - | - | 25 | 540 | 49T[till L] | - | - | - |
| Attack | 150×8 | - | all | 27 | 3×8 | - | - | HBFP* | - |
- Startup occurs when George arrives at opponent's position
- George gauge will appear when George disappears for any of the above reasons except if another George is summoned or if George is killed; while gauge fills up (299F duration), cannot use George the 13th
- Floats on hit
While on screen, George will very slowly follow the opponent. If Rachel uses wind towards the opponent, George will slide forward. If Rachel uses wind away from the opponent, George will walk in place. Overall, George is a great tool for Rachel. He provides her with ground control as opponents generally have to take a risk to deal with George or take to the air where Rachel can space control with Lobelia/Lotus/Sword Iris or stop air approaches with 6A. If someone commits to killing George, Rachel can take that opportunity to punish them or just summon another one. When he activates, George covers a good amount of space. Another key use of George is to force an opponent to block him on the ground, which gives Rachel a lot of time to run different mix ups.
Impish Gypsophila
214B air OK
| Damage | Cancel | Guard | Startup | Active | Recovery | Frame Adv | Attribute | Invul | |
|---|---|---|---|---|---|---|---|---|---|
| Summon | - | - | - | 27 | 300 | 46T[41T] | - | - | - |
| Attack | 300 | - | all | 5 after wind | 20 | - | - | HBFP* | - |
- Startup and active frames belong to Pumpkin
- Values in [] refer to aerial version
- Pumpkin disappears if: 1. active frames end; 2. after 180F of using most recent wind; 3. Pumpkin stops at any location except the ground three times; 4. Rachel gets hit; 5. Rachel blocks an attack
- Only possible to perform once in the air
Pumkin activates when Rachel uses wind. It flies in a straight line as a flying active hitbox in whatever direction Rachel uses wind. Pumpkin is Rachel's strongest tool in neutral and very strong for oki. Because Rachel can block while using wind, she can use Pumpkin to attack while blocking. Other uses are to make risky moves like 2C safe, extend pressure or combos, create a safe approach, and harass people pretty much anywhere on the screen. One interesting to note is that unlike Lobelia, Pumpkin does not gain new trajectory when used with B Lotus.
Sword Iris
214C air OK
| Version | Damage | Cancel | Guard | Startup | Active | Recovery | Frame Adv | Attribute | Invul |
|---|---|---|---|---|---|---|---|---|---|
| Ground | 600 | - | all | 19 | 8 | 42T | +2 | HBFP* | - |
| Air | 600 | - | all | 22 | 8 | 45+3LT | +24 | HBFP* | - |
- Frame advantage calculated off of shortest jump
- Floats on hit
- Will ignite both rods planted by Tiny Lobelia and bats attached via Beelze/Barrel Lotus
When Rachel uses Tiny Lobelia, she plants various rods on the screen. These rods stay out until they are activated. As explained in the Tiny Lobelia notes, only three rods can be on the screen at any given time and if more Lobelia are thrown, the rods will be replaced from oldest to newest. When Rachel uses the Sword Iris command, a bolt of lighting will strike all the rods, creating a long vertical hitbox that extends to the top of the screen. Upon activation, all the rods on screen disappear and new ones must be set. When used appropriately, Sword Iris is very good for stopping approaches, especially from the air. It can also be used to extend combos or pressure. Because it still retains it's float on hit properties, Rachel can use it as a way to launch opponents without spending wind.
Beelze Lotus
22A air OK
| Version | Damage | Cancel | Guard | Startup | Active | Recovery | Frame Adv | Attribute | Invul |
|---|---|---|---|---|---|---|---|---|---|
| Ground | 300 | - | all | 39 | 54 | 51T | +5 | HBFP* | - |
| Air | 300 | - | all | 39 | 54 | till L+10 | - | HBFP* | - |
- Increases effect of 7D, 8D, 9D
- If not attached, will disappear if Rachel is hit
- If attached stays on for about 7 seconds
Aside from activating rods with Sword Iris, Rachel also turn her rods into Lotus. When activated, the existing rods turn into helicopter bats and home in on the opponent. Both versions only travel a short distance, though A Lotus is able to travel slightly farther than B Lotus. However, the distance/speed travelled can also be enhanced greatly by wind. Lotus do a small amount of damage on hit, but will attach on hit or block. A Lotus is not really used much compared to B Lotus. However, when attached to opponents it can launch them extremely high and allow for new combo possibilities.
Air versions of both moves are pretty worthless due to their long recovery.
In BBCPE the attach time of Lotus has been shortened to 7 seconds. When Lotus are attached, they can also be activated into lightning with Sword Iris. However, due to the slow tracking this is only situationally useful.
Barrel Lotus
22B air OK
| Version | Damage | Cancel | Guard | Startup | Active | Recovery | Frame Adv | Attribute | Invul |
|---|---|---|---|---|---|---|---|---|---|
| Ground | 300 | - | all | 39 | 54 | 51T | +5 | HBFP* | - |
| Air | 300 | - | all | 39 | 54 | till L+10 | - | HBFP* | - |
- Increases effect of 5D
- Causes Rachel's 5D to home in on the opponent
- If not attached, will disappear if Rachel is hit
- If attached stays on for about 7 seconds
Of the two Lotus, B Lotus is much more commonly used. Rachel can safely set it up in combos, situations where someone techs in the air, or if far away to halt approaches on both the ground and air with Lotus's homing properties. It's a good option to use after making someone block a Lobelia. When it's attached, Rachel's 5D not only homes in, but is significantly stronger allowing combos like 5B > 5CDC to carry someone much farther than it normally would or after a level 3 j.2C to launch someone extremely high into the air. It can also be used to strengthen her zoning and space control, but it does not give Pumpkin new angles to attack.
In BBCPE the attach time of Lotus has been shortened to 7 seconds. When Lotus are attached, they can also be activated into lightning with Sword Iris. However, due to the slow tracking this is only situationally useful.
Distortion Drives
Baden Baden Lily
632146C air OK
| Version | Damage | Cancel | Guard | Startup | Active | Recovery | Frame Adv | Attribute | Invul |
|---|---|---|---|---|---|---|---|---|---|
| Version | Damage | Cancel | Guard | Startup | Active | Recovery | Frame Adv | Attribute | Invul |
| Ground (Normal) | 500×6 | R | all | 13+4 | 2×6 | 49T | +51 | HBFP*(2) | 13-22 All |
| Air (Normal) | 500×6 | R | all | 29+2 | 2×6 | till L + 8 | +54 | HBFP*(2) | 29-36 All |
| Ground (OD) | 500×6*2 | R | all | 13+4 | 2×18 (max 6 hits) | 49T | +71 | HBFP*(2) | 13-22 All |
| Air (OD) | 500×6*2 | R | all | 29+2 | 2×18 (max 6 hits) | till L + 8 | +74 | HBFP*(2) | 13-22 All |
| Rod (Normal) | 200×4 | R | all | see note | 2×4 | - | +31 | HBFP*(2) | - |
| Rod (OD) | 300×4 | R | all | see note | 2×16 (max 4 hits) | - | +31 | HBFP*(2) | - |
- Normal versions have 20% minimum damage (540)
- OD versions have 15% minimum damage (810)
- 180F Heat Gauge Cooldown
- Invincibility starts during superflash
- Frame advantage for air versions calculated off of shortest jump
- Normal Rods have 35% minimum damage
- OD Rods have 40% minimum damage
- Rods have Bonus Proration
Because Rachel's game is much more dependent on corner carry, Baden Baden Lily is now primarily used in corner combos. Baden Baden Lily does hit all the way to the top of the screen, so if for some reason someone is above you or far below you and hitting buttons for no reason, it's a potential option as a starter.
In Overdrive, stacked rods have bonus proration and a very high amount of minimum damage, making it worth to spend extra wind to get as many rods stacked before activating it.
Tempest Dahlia
632146B air OK
| Version | Damage | Cancel | Guard | Startup | Active | Recovery | Frame Adv | Attribute | Invul |
|---|---|---|---|---|---|---|---|---|---|
| Level 1 (Normal) | 200×7, 400 | R | all | 10+9 | - | 73T | +38 | HBFP*(2) | 10-11 All |
| Level 2 (Normal) | 200×9, 600 | R | all | 10+1 | - | 73T | +49 | HBFP*(2) | 10-11 All |
| Level 3 (Normal) | 200×7, 800 | R | all | 10+0 | - | 73T | +49 | HBFP*(2) | 10-11 All |
| Level 4 (Normal) | 200×5, 250×3, 500×3 | R | all | 10+0 | - | 73T | +81 | HBFP*(2) | 10-11 All |
| Level 5 (Normal) | 250×6, 300×3, 500×3 | R | all | 10+0 | - | 73T | +95 | HBFP*(2) | 10-11 All |
| Level 1 (OD) | 200×11, 400 | R | all | 10+9 | - | 73T | +57 | HBFP*(2) | 10-11 All |
| Level 2 (OD) | 200×14, 600 | R | all | 10+1 | - | 73T | +77 | HBFP*(2) | 10-11 All |
| Level 3 (OD) | 200×11, 600×3, 800 | R | all | 10+0 | - | 73T | +97 | HBFP*(2) | 10-11 All |
| Level 4 (OD) | 200×5, 250×7, 600, 300×3 | R | all | 10+0 | - | 73T | +105 | HBFP*(2) | 10-11 All |
| Level 5 (OD) | 250×6, 300×3, 300×3, 500×3, 815×3 | R | all | 10+0 | - | 73T | +126 | HBFP*(2) | 10-11 All |
- Minimum damage for Normal versions Lv1: 380 Lv2: 550 Lv3: 590 Lv4: 860 Lv5: 720
- Minimum damage for Overdrive versions Lv1: 590 Lv2: 740 Lv3: 1160 Lv4: 1290 Lv5: 1173
- 180F Heat Gauge Cooldown
- 10-11 All Invul
- Frame advantage calculated when opponent was in corner and Rachel is at point-blank range to opponent
- Recovery for aerial version is until landing + 7F
- Attack levels per projectile: bat and cow = 3, pumpkin = 4, frog = 5
- Blockstun per projectile: bat and cow = 16, pumpkin = 18, frog = 20
Though in past games Tempest Dahlia's main uses were to regain wind, create a blind mix up, fairly safely cover a lot of vertical space, and stall for time, in BBCP Tempest Dahlia also sees a lot of use as a midscreen combo ender. Due to it being fairly difficult to get high damage off of Baden Baden Lily midscreen due to Rachel's new combo paths, it's very common for that 50 meter to instead be spent on Combo > 5CC > Tempest Dahlia to knock the opponent to the corner and allow for safe summons.
Astral Heat
Clownish Calendula
2363214C
| Damage | Cancel | Guard | Startup | Active | Recovery | Frame Adv | Attribute | Invul |
|---|---|---|---|---|---|---|---|---|
| Death | - | all | 1+10 | 40 | 26 | -45 | HBF | 1-50GP(A) |
- 180F Heat Gauge Cooldown
- 1-50 GP(A)
BBCP and BBCPE's version of Clownish Calendula is Rachel's first true reversal. Though it is no longer unblockable, it's instead very fast and guard points from frame 1 which makes it a decent reversal option and a good punish. Rachel can combo into it from pretty much anything which makes it very optimal to use compared to past games. Do note that even though it guard points for 50 fames, there is still only one active attack, so beware moves that will clash like DPs, other guard point moves, and super counters like Yukikaze and Hakumen's/Noel's Astral.
External References
- Japanese Name: レイチェル=アルカード
- Japanese Wiki
- Japanese BBS
- Arcade Profile Dan Rankings
- Character Video Thread
