Overview
- Movement Options
- 1 Double Jump/Airdash, Run
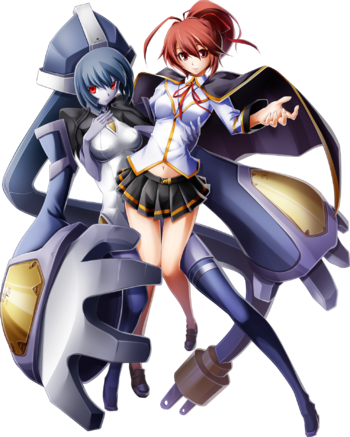
- Simple tools, combos, and gameplan. Very beginner-friendly character.
- Able to heal herself during Overdrive and with Amure Sorbet, partially negating damage taken during rounds.
- Reversal super is safe even on block.
- Good tick-throw game with strong reward.
- Multi-hitting normals make her pressure difficult to disrespect by jumping out, Fuzzy Jumping, etc.
- Awkward hurtboxes on many normals, allowing opponents to easily CH Celica.
- Lower than average HP.
- Requires either specific starters, meter, or the corner for more damaging combos.
- Standing Overheads need meter to be confirmed midscreen.
- While she has a variety of tools, she tends to be a jack of all trades, master of none.
| Health | 100 - 90% | 89 - 80% | 79 - 70% | 69 - 60% | 59 - 50% | 49 - 40% | 39 - 30% | 29 - 20% | 19 - 10% | 9 - 0% |
|---|---|---|---|---|---|---|---|---|---|---|
| Overdrive |
| There has been no official mook released for BBCPE. As a result, Celica's frame data is incomplete. |
Normal Moves
5A
5B
5C
| Damage | Cancel | Guard | Startup | Active | Recovery | Frame Adv | Attribute | Invul |
|---|---|---|---|---|---|---|---|---|
| 240, ? | SDrOR | HL/All | 11 | - | - | -4 | - | - |
- First hit is air unblockable in close range
- No push block, even if Instant Barrier blocked
- List what the move is used for
- List interesting properties in bullet points like invul, floating opponents on CH, etc.
Follow the Help:Writing_Character_Pages guidelines
2A
2B
2C
6A
| Damage | Cancel | Guard | Startup | Active | Recovery | Frame Adv | Attribute | Invul |
|---|---|---|---|---|---|---|---|---|
| 300, 400 | R | H, L | 24 | - | - | -9 | - | - |
At 24 frames start-up, -9 on block, no meterless cancel options, and a conversion only in the corner, 6A is not a great overhead. However, depending on the distance from your opponent, the first overhead hit can whiff, allowing the low to hit when the overhead otherwise would. With meter, 6A(1) > RC > into either j.B or IAD > j.B represents a good overhead starter for a true 50/50 mixup that's easy to confirm and leads to good damage.
6B
6C
3C
j.A
j.B
j.C
Drive Moves
5D
| Version | Damage | Cancel | Guard | Startup | Active | Recovery | Frame Adv | Attribute | Invul |
|---|---|---|---|---|---|---|---|---|---|
| 5D | 550 | DrR | HL | 10 | - | - | -21 | - | - |
| 5DD | - | DrR | HL | - | - | - | -19 | - | - |
| 5DDD | 2000 | R | HL | - | - | - | -19 | - | - |
- 5D is fastest Drive attack, but deals less damage and has shorter reach than the other Drive starters. Fatal counters.
- 5DD deals the most damage of the secondary Drive attacks, but generally causes a side switch so 6DD is preferred for corner carry unless used from the corner.
- 5DDD is the highest damage Drive ender that knocks the opponent in the air.
2D
| Version | Damage | Cancel | Guard | Startup | Active | Recovery | Frame Adv | Attribute | Invul |
|---|---|---|---|---|---|---|---|---|---|
| 2D | 600 | DrR | L | 19 | - | - | -20 | - | - |
| 2DD | 750 | DrR | L | - | - | - | -17 | - | - |
| 2DDD | 1100 | R | H | - | - | - | -9 | - | - |
- 2D hits low and deals a little more damage than 5D. Preferred over 5D because of range.
- 2DD also hits low but rarely sees use in combos and the opponent will probably already be blocking low if they guarded the first Drive hit.
- 2DDD hits high which is useful as a mixup ender for Drive blockstrings but she doesn't have a low ender so the opponent just has to block high to punish you and you shouldn't be using D attacks in blockstrings anyway. Otherwise, sees some use in combos as enders.
6D
| Version | Damage | Cancel | Guard | Startup | Active | Recovery | Frame Adv | Attribute | Invul |
|---|---|---|---|---|---|---|---|---|---|
| 6D | 700 | DrR | HL | 20 | - | - | -17 | - | - |
| 6DD | 300, 750 | DrR | HL, all | - | - | - | -22 | - | - |
| 6DDD | 1400 | R | all | - | - | - | -5 | - | - |
- 6D is the highest damaging starter and moves Celica forward.
- 6DD is generally preferred over 5DD midscreen for corner carry.
- 6DDD is better for corner carry. Can be switched out with 5D version for damage.
j.D
Universal Mechanics
Forward Throw
BC
| Damage | Cancel | Guard | Startup | Active | Recovery | Frame Adv | Attribute | Invul |
|---|---|---|---|---|---|---|---|---|
| 1400 | SOR | - | - | - | - | - | - | - |
- Can follow up with a fully charged Lance Quiche for a solid combo.
- Causes wallbounce midscreen and wall stick in the corner.
Charged Lance Quiche follow up doesn't work on Jin, Noel and Rachel for some reason. 214[C] only hits Jin with the front of the attack and goes completely under Noel and Rachel while they're in the air. Switch 214[C] with 214[B] for follow up which can be combo'd after.
Back Throw
4BC
Air Throw
j.BC
Counter Assault
6AB (when blocking)
Crush Trigger
5AB
Specials
Pic Confit
j.214A
Arc Griller
236B
Marteau Flan
214B
Hache Rotir
236C
Lance Quiche
214C
Distortion Drives
Armure Sorbet
632146A
Saber Anglaise
632146B
Casque Veloute
632146C
Astral Heat
Atout Rillettes
222A
External References
