Overview
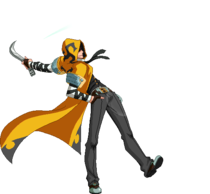
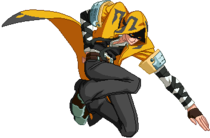
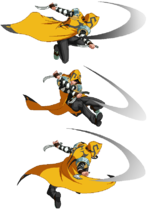
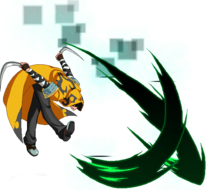
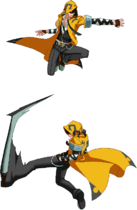
Yuuki Terumi is a member of the Six Heroes, as well as the creator of the Azure Grimoire. He appears in BlazBlue: Chrono Phantasma as a playable character.
Birthday: Unknown
Birtplace: Unknown
Blood Type: ?
Weight: 61 Kg/134 Lb
Height: 183cm/6"0
- Movement Options
- Double Jump, 1 Airdash, Dash type: Run
- Very high Heat gain means more Rapid Cancels/Counter Assaults/Crush Triggers/Distortion Drives
- Very good mobility with high speed
- Strong rushdown and pressure options
- Good defensive options with 50 meter
- Builds Heat extremely quickly
- Astral can be added easily at the end of most combos, combined with Terumi's high heat gain, that means his Astral is a very practical and quick way to end a match with little to no risk of the opponent making a comeback.
- Mixup game is nearly non-existent without meter
- Lacks a true standing meter-less overhead
- Has a very hard time confirming punishes at his max range without meter: Snakebite does not connect at maximum range, and 6C can have issues connecting at that range
- The hurtboxes on some of his normals often extend before the attack becomes active, meaning he must be very careful against footsie-oriented characters
- Lacks reversal options without 50 Heat
- Low average meterless damage
- Below average health
| Health | 100 - 90% | 89 - 80% | 79 - 70% | 69 - 60% | 59 - 50% | 49 - 40% | 39 - 30% | 29 - 20% | 19 - 10% | 9 - 0% |
|---|---|---|---|---|---|---|---|---|---|---|
| Overdrive | 180F | 210F | 240F | 270F | 300F | 390F | 420F | 450F | 480F | 600F |
| This data is all copied over from BBCP 1.1. Replace with 2.0 data as it becomes available (and delete this warning) |
Normal Moves
5A
5B
| Damage | Cancel | Guard | Startup | Active | Recovery | Frame Adv | Attribute | Invul |
|---|---|---|---|---|---|---|---|---|
| 480 | SOR | All | 8 | 2 | 14 | +2 | - | - |
- Terumi's 5B has much shorter range than the average 5B. However, it is +2 on block, making it an excellent pressure tool.
- Thanks to Terumi's fast run speed, this can also be used as a high damage counter poke in his neutral game.
5C
| Damage | Cancel | Guard | Startup | Active | Recovery | Frame Adv | Attribute | Invul |
|---|---|---|---|---|---|---|---|---|
| 380, 380 | SOJR | All | 11 | 2(11)2 | 19 | -2 | - | - |
- 5C moves Terumi forward, allowing him to stay in his opponent's face and helps a little bit to prevent his normals from whiffing due to the opponent barrier blocking.
- Terumi is also considered airborne at around the first active frame so it can be used as a throw bait if timed right.
- 5C can be jump canceled on the first hit; however you cannot double jump or air dash after jump-canceling.
- With meter, this is also his main mixup tool.
- Due to 5C only being -2 on block, it can sometimes be used as a tick throw option.
2A
2B
| Damage | Cancel | Guard | Startup | Active | Recovery | Frame Adv | Attribute | Invul |
|---|---|---|---|---|---|---|---|---|
| 420 | SOR | L | 9 | 3 | 19 | -8 | - | - |
- This move has some of the best range of his non-Drive attacks, and it is his main low hitting normal.
- This is used in his mixup game and in neutral, where his Drive normals are too slow to cut it.
- In CPEX the recovery was reduced making it -8 on block, but the recovery is still bad to the point where caution needs to be exercised.
- Beware of opponents with good instant blocking skills, as it makes any gatling to a C or D normal from this move besides 3C have a gap.
2C
| Damage | Cancel | Guard | Startup | Active | Recovery | Frame Adv | Attribute | Invul |
|---|---|---|---|---|---|---|---|---|
| 580 | SOJR | All | 13 | 4 | 25 | -12 | - | - |
- This is one of his longest ranged normals.
- It reaches slightly farther than 2B and is jump cancelable on block and hit.
- Unlike 5C, you can double jump and air dash when you jump cancel it.
- This is one of his main pokes. However, just like his other long range normals, it has pretty bad recovery on it, so be careful with its placement.
- It is as one of his few gateways to a mixup, especially without meter. This can lead to his overhead and a damaging low option.
- 2C also puts Terumi pretty low to the ground, which makes it a situational anti-air, as well as an excellent counter poke in certain matchups.
- Hurtbox extends during the startup frames and is as long as the hitbox so be careful with it in footsies.
6A
| Damage | Cancel | Guard | Startup | Active | Recovery | Frame Adv | Attribute | Invul |
|---|---|---|---|---|---|---|---|---|
| 520 | SOJR | All | 9 | 3 | 24 | -10 | - | H |
- This is Terumi's true anti-air.
- Fast, hitbox covers his entire head, good horizontal range, and jump-cancelable on hit and block; In other words, this is a great anti-air.
- The only downside is the damage off of it, even with Heat, can leave a lot to be desired on normal hit.
- On Counter Hit, it has a lot more hitstun allowing for good damage and Heat Gain.
6B
| Damage | Cancel | Guard | Startup | Active | Recovery | Frame Adv | Attribute | Invul |
|---|---|---|---|---|---|---|---|---|
| 600 | SOR | All | 24 | 3 | 13 | +3 | - | F,T |
- This normal goes under highs, and also has lower body and throw invulnerability.
- 6B can also be feinted by holding down B for throw setups and mind games.
- The weaknesses of this normal is that it has no mid or projectile invulnerability whatsoever. Most 5Bs and DPs will blow Terumi up for abusing this move.
- The feint has no kind of invuln whatsoever, meaning it is exclusively to play mind games with opponents that respect Terumi's pressure, and in certain matchups to bait reversals (Hakumen's Counter Drive, Noel's Chain Revolver Drive, Jin gale).
- How much this normal is used depends completely on the matchup and how well the opponent can instant block. Some matchups will be using it sparingly, but in others it will be spammed a lot.
6C
| Damage | Cancel | Guard | Startup | Active | Recovery | Frame Adv | Attribute | Invul |
|---|---|---|---|---|---|---|---|---|
| 520, 520, 960 | R | All | 13 | 2(10)6(14)4 | 31 | -14 | - | - |
- This is Terumi's longest ranged normal.
- 6C cannot be canceled into anything but a Rapid Cancel. However, it is possible to combo after it without meter on Counter Hit.
- It is very unsafe on block and whiff so if this does not connect or there is not enough meter to Rapid Cancel, Terumi will be punished heavily for it.
- 6C will mainly be used as a combo ender, extender with meter, whiff punisher, and for all kinds of hard reads.
3C
| Damage | Cancel | Guard | Startup | Active | Recovery | Frame Adv | Attribute | Invul |
|---|---|---|---|---|---|---|---|---|
| 660 | SOJR | L | 10 | 2 | 30 | -13 | - | - |
- Terumi's other low attack. Can be used in mixup.
- Allows for immediate use of 22C on hit.
- The only normal that doesn't chain into 6B
- On Counter Hit it gives a hard knockdown, allowing to link other normals for more damage and even 2D if done inmediatelly.
j.A
j.B
| Damage | Cancel | Guard | Startup | Active | Recovery | Frame Adv | Attribute | Invul |
|---|---|---|---|---|---|---|---|---|
| 350, 350 | DOJR | H | 10 | 4(2)2 | 14 | - | - | - |
- Great horizontal range, OK vertical range.
- Can cross up in the later parts of the move, and hits twice.
- All-purpose air normal, but compared to some of his other normals, it is not that good of a jump-in.
j.C
| Damage | Cancel | Guard | Startup | Active | Recovery | Frame Adv | Attribute | Invul |
|---|---|---|---|---|---|---|---|---|
| 300, 300, 500 | DOJR | H | 11 | 2(3)2(4)2 | 18 | - | - | - |
- This is a heavily altered version of Hazama's j.C. Where Hazama mainly uses this for combo filler (Terumi does this too), Terumi's j.C sees a lot of use in neutral.
- j.C would mainly be used as a way for Terumi to protect himself from an approach where j.D won't cut it due to its speed.
- Not that great of a jump-in, but it is still good to use off of an instant air-dash.
Drive Moves
5D
| Version | Damage | Cancel | Guard | Startup | Active | Recovery | Frame Adv | Attribute | Invul |
|---|---|---|---|---|---|---|---|---|---|
| Normal | 460 | SOR | All | 13 | 4 | 18 | -3 | - | - |
| Overdrive | 460 | SR | All | - | - | - | - | - | - |
- Gains 14% Heat on hit, 7-9% on block.
- This is Terumi's 2nd longest ranged normal, as well as his go-to poke.
- This move is NOT a projectile, but it can nullify projectiles and hit the opponent at the same time.
- There is no hurtbox on the snake itself.
- The max range of this move is NOT at the tip but at around the snake's eyes (just short of the tip).
- At max range (especially if it was used to counterpoke or whiff punish), Terumi is not going to get any reasonable damage or Heat Gain unless he already has Heat or gets a Counter Hit.
- The startup and recovery are pretty sizeable, so Terumi must be careful when throwing this out.
- While it is pretty negative on block (especially on Instant Block), the variety of Revolver Action options, special-cancels, super-cancels, and proper spacing will prevent punishment.
- Gains 18% Heat on hit and 11-12% Heat on block. Drains 2% Heat from the opponent on hit and block.
- Greatly increased horizontal and vertical range.
2D
| Version | Damage | Cancel | Guard | Startup | Active | Recovery | Frame Adv | Attribute | Invul |
|---|---|---|---|---|---|---|---|---|---|
| Normal | 600 | R | All | 40 | 15 | 7 | +5 | - | - |
| Overdrive | 966 | R | All | - | - | - | - | - | - |
- Gains about 24% Heat on hit, 9-10% Heat on block.
- Only used for oki and specific combos. It is not good as a pressure reset due to the extremely long startup and progressive hitbox.
- OD version
- Gains 35% Heat on hit and 22% Heat on block. Drains 6% Heat from the opponent.
- Has a much bigger hitbox, but the uses are the same as the normal version.
- Contrary to the normal one it causes 3 hits instead of one.
6D
| Version | Damage | Cancel | Guard | Startup | Active | Recovery | Frame Adv | Attribute | Invul |
|---|---|---|---|---|---|---|---|---|---|
| Normal | 1337 | DOR | All | 18 | 3 | 27 | -11 | - | - |
| Overdrive | 1649 | DR | All | - | - | - | - | - | - |
- Fatal Counter.
- Gains 28% Heat on hit.
- Combo filler only. Not recommended for anything else because he has other normals that can fulfill those other purposes.
- OD Version
- Gains 42% Heat on hit. Drains 5% Heat from the opponent.
- Very important combo filler for his OD combos, as it allows Terumi to tag a super at the end.
- On last hit, kicks opponent farther/higher than the normal version. (Properties of 1.1 6D)
j.D
| Version | Damage | Cancel | Guard | Startup | Active | Recovery | Frame Adv | Attribute | Invul |
|---|---|---|---|---|---|---|---|---|---|
| Normal | 660 | DOR | All | 20 | 4 | 23+6L | - | - | - |
| Overdrive | 660 | DR | All | - | - | - | - | - | - |
- Terumi's main air to ground normal.
- Gains about 16% Heat on hit and 5-6% Heat on block.
- The hitbox is massive and Terumi doesn't extend his hurtbox. This allows him to prevent his opponent from approaching too carelessly unless they want to give him free meter.
- J.D's slow startup makes it bad to throw out if the opponent is too close. The small amount of landing recovery allows some characters to punish Terumi on whiff; however this isn't easy to do for a lot of the cast.
- Can be very hard to confirm into combos. 5D only links if j.D is done as late as possible. j.D has a lot of pushback and knockback, making all of his other normals hard to link as well.
- When an airborne opponent is hit, unless it is a Counter Hit, the only options are to use meter or chain into j.2D.
- OD version Gains 18% Heat on hit and 7-8% Heat on block. Drains 2% from the opponent.
- Hitbox becomes even bigger in OD, making it even harder to contest.
- Thanks to j.2D's changes in OD, it can be used as OD combo filler.
j.2D
| Version | Damage | Cancel | Guard | Startup | Active | Recovery | Frame Adv | Attribute | Invul |
|---|---|---|---|---|---|---|---|---|---|
| Normal | 530 | DR | H | 15 | 8 | 12L | -3 | - | - |
| Overdrive | 530 | DR | H | - | - | - | - | - | - |
- Gains about 12-13% Heat on hit, 6-7% Heat on block.
- Terumi's “overhead”. Combined with jump startup, the fastest it can done is 20 frames.
- It is -3 on block on TK'd (-6 on instant block). Greatest possible frame adv on block is -2 (must be done right when landing from a jump).
- The only time Terumi can go into it without leaving a 10+ frame gap is from 5C or 2C (there is a small gap for the opponent to jab, but they don't get anything big unless they instant block, have a DP, or have meter).
- Combos off of j.2D can only be gotten without resources when done right when landing from a jump. Other than that, either RC or use supers.
- This move's main use is as on Overdrive combo extender and as an air combo ender.
- Can occasionally use j.2D as a mixup option, but it's best not rely on it too much to open up people.
- OD version
- Gains 14-15% Heat on hit, 8-9% on block. Drains 2% from the opponent.
- Hitbox and heat gain doesn't change; however it now causes a hard knockdown, allowing follow-ups whenever it lands no matter what.
- It also becomes +3 on block.
- Great OD combo filler and pressure option.
Universal Mechanics
Forward Throw
5/6B+C
Back Throw
4B+C
Air Throw
j.B+C
| Damage | Cancel | Guard | Startup | Active | Recovery | Frame Adv | Attribute | Invul |
|---|---|---|---|---|---|---|---|---|
| 1400 | SOR | - | - | - | - | - | - | - |
- Works the same as back throw, except when the opponent wall bounces, they bounce back towards Terumi.
- Beware of doing air grabs with the opponent too close to the corner. If they are, they will not wall bounce and they will simpily be put in a hard knockdown, where only Jakyou Messenga can reach in time to combo.
Counter Assault
6A+B (When Blocking)
Crush Trigger
5A+B
| Damage | Cancel | Guard | Startup | Active | Recovery | Frame Adv | Attribute | Invul |
|---|---|---|---|---|---|---|---|---|
| 1000 | - | B | 30 | 1 | 26 | -4 | - | - |
- Causes Guard Crush on normal block. Will drain a portion of the Barrier Gauge when Barrier Blocked, and can be charged to drain even more.
- Since Terumi gains a lot of Heat, there are a lot of opportunities to use this. However, like most Crush Triggers, it is negative on block.
- Can be used in some combo routes, but most of them require a Counter Hit or 75 Heat.
- It is also decent to open up the opponent, but it is recommend to have 75 Heat before trying this, so Terumi can either keep the pressure going if they Barrier Block it or to do a devastating combo.
Special Moves
Snakebite - Jagaku
236D
| Damage | Cancel | Guard | Startup | Active | Recovery | Frame Adv | Attribute | Invul |
|---|---|---|---|---|---|---|---|---|
| 936 | DR | - | 13 | 11 | 18 | -9 | - | - |
- Gains 29% Heat on hit. In Overdrive: Gains 34% on hit and drains 5% from the opponent.
- One of Terumi's main combo enders, extender with meter.
- Super cancelable on the first and third hit, can RC throughout the move.
- Decent whiff punisher when meter is needed.
- Can be used as a very gimmicky pressure reset and throw setup by putting the opponent in blockstun and making it whiff.
- Very unsafe on block so be careful throwing it out.
- Can be used to catch rolls on specific combo enders (6C, 22C)
- When used as a combo ender, it can be very hard to punish rolls midscreen.
Retaliating Fang - Gasenshou
214D
| Damage | Cancel | Guard | Startup | Active | Recovery | Frame Adv | Attribute | Invul |
|---|---|---|---|---|---|---|---|---|
| 1519 | DR | - | 25 | 3 | 43 | - | - | - |
- Gains 34% Heat on a successful grab. In Overdrive: Gains 44% Heat and drains 10% from the opponent.
- Has great range for a command grab, but it is very slow. Can be used sparingly as a mixup option to get the needed Heat, but if overdone, Terumi will be punished very heavily for it.
Cleaving Fang - Garengeki
22C
| Damage | Cancel | Guard | Startup | Active | Recovery | Frame Adv | Attribute | Invul |
|---|---|---|---|---|---|---|---|---|
| - | DR | - | 8 | - | - | - | - | - |
- Purely combo filler. All of Terumi's most damaging combos use this move.
- Has Same Move Proration, which can be abused to go for very damaging but gimmicky resets.
- Two versions exist for this move: 22C (Light version) and 22CCC (Heavy version). The heavy version can be triggered by pressing the C button at least three times before the second stomp connects.
- Light version: Two stomps, one kick; Causes groundslide midscreen, wallbounce in the corner.
- Heavy version: Eight stomps, one kick; Causes wallbounce midscreen and in corner, groundslide if Terumi is in corner.
Distortion Drives
Gleaming Fang - Jakyou Messenga
41236C air OK
| Version | Damage | Cancel | Guard | Startup | Active | Recovery | Frame Adv | Attribute | Invul |
|---|---|---|---|---|---|---|---|---|---|
| Normal | 1680 | R | All | 4+8 | 8 | 50 | -9 | - | 4~21 |
| Normal (Air) | 1519 | - | All | - | - | - | - | - | - |
| Overdrive | 1960 | DR | All | - | - | - | - | - | - |
| Overdrive (Air) | 1800 | D | All | - | - | - | - | - | - |
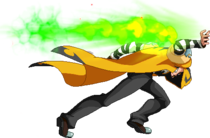
Terumi rushes at the opponent enveloped in a snake-shaped aura, covering up to ¾ of the screen (air version varies depending on how high Terumi is when used).
On a successful hit, around 3000 damage combos can be used with minimum requirements. The super has full invulnerability starting on frame 4 so it can't be used as a reversal on meaties. It is -9 on block, but a lot of characters have trouble punishing it on such cases. Air version is not punishable on block in most situations by most of the cast; However it loses to well timed anti-airs with head invulnerability.
Overall, this is his best Distortion Drive in terms of utility.
- OD version
- OD version adds an additional rush to the attack (ground and air version), negating the side switch.
- Does more damage and gives more time to follow up.
Divine Twin Blades - Gouga Soutenjin
623B air OK
| Version | Damage | Cancel | Guard | Startup | Active | Recovery | Frame Adv | Attribute | Invul |
|---|---|---|---|---|---|---|---|---|---|
| Normal | 2486 | R | All | 4+3 | 4.8(15)3 | - | -35 | - | 1~10 |
| Overdrive | 2771 | DR | All | - | - | - | - | - | - |
- Main reversal option.
- High minimum damage makes it good for closing out matches when below 75 heat.
- Can be followed up on Counter Hit.
- OD Version
- OD version adds an extra kick at the end which groundbounces the opponent, allowing follow-ups.
- Ground version gives 8 frames to follow-up while the air version gives 11 frames.
- Staple OD combo extender.
Serpent's Laceration - Orochi Burensen
63214A/B
| Version | Damage | Cancel | Guard | Startup | Active | Recovery | Frame Adv | Attribute | Invul |
|---|---|---|---|---|---|---|---|---|---|
| Normal (B) | 2418 | R | H | 13+2 | 2 | 16 | -1 | - | 9~16 |
| Normal (A) | 2083 | R | L | 13+2 | - | - | -13 | - | - |
| Overdrive (B) | 3236 | DR | H | - | - | - | - | - | - |
| Overdrive (A) | 3236 | DR | L | - | - | - | - | - | - |
- B version is an overhead.
- The B version is Terumi's main corner combo extender.
- The A version is a low. With 100 Heat, this is a legit mixup, but the damage is low for the amount of resources used.
- A version cannot be followed up without 100 Heat.
- When Rapid Canceled on the second hit, the A version leaves them in a long untechable state, making it useful in specific combos.
- Finishing an opponent with the first two hits of the A version has Terumi grinding his foot on the downed opponent.
- OD Versions
- Increases the damage of both versions, making them do the same amount of damage.
- The recovery is also increased, limiting its use to only being a combo ender.
Venomous Bite - Ouja Zanrouga
236236A
| Version | Damage | Cancel | Guard | Startup | Active | Recovery | Frame Adv | Attribute | Invul |
|---|---|---|---|---|---|---|---|---|---|
| Catch | - | - | - | GP1~112 | 75 | - | - | - | - |
| Attack | 3200 | R | UNB | - | - | - | - | - | - |
| Catch (OD) | - | - | - | GP1~112 | 75 | - | - | - | - |
| Attack (OD) | 4200 | DR | UNB | - | - | - | - | - | - |
- Super cancelable on successful counter, and can counter lows.
Terumi walks and casually swings Ouroboros while laughing.
A counter-super that triggers off mids and highs, but loses to lows, projectiles, unblockables, and throws. Counters on frame 1, and if triggered, Terumi flips over them and slashes with his chains for a side-switch combo. Deals massive damage and can be Rapid Canceled for even more, but the downside is that it loses to almost everything.
When triggered, creates a hitbox on the ground in front of Terumi which activates the counter if the opponent is caught by it. As such, it will guardpoint but not counter jump-ins, crossups, and rising moves like Inferno Divider.
Serpent's Cursed Sting - Jabaku Fuuenjin
632146D
| Version | Damage | Cancel | Guard | Startup | Active | Recovery | Frame Adv | Attribute | Invul |
|---|---|---|---|---|---|---|---|---|---|
| Attack | 1224 | - | All | 7+10 | 4 | 34 | -17 | - | 1~26 |
| Additional Attacks | 74-150 a hit | - | All | - | - | - | - | - | - |
| Finisher | 700-2000 | - | All | - | - | - | - | - | - |
| Attack (OD) | 1224 | - | All | 7+10 | 4 | 34 | -17 | - | 1~26 |
| Additional Attacks (OD) | 75-165 a hit | - | All | - | - | - | - | - | - |
| Finisher (OD) | 900-2500 | - | All | - | - | - | - | - | - |
Terumi slashes the opponent with a sword made out of his evil greenish energy. If it hits, he'll rush forward and grab the opponent, wrapping two snakes around their arms. He'll proceeds in pumping his vile force into the opponent while draining their power before dropping them to the ground and kicking them away.
Very strong combo ender due to its very high minimum damage if Terumi has at least 75 Heat. Also doubles as his third reversal option, although it is slower than 623B. It will always use up all of Terumi's Heat on a successful hit. That being said, unless Terumi has at least 75 Heat to spend, it is not recommended to use this Distortion Drive because 623B outdamages it in that case. When at 75 Heat and below 100, Terumi has 8 frames to follow up with a normal; however, the follow-up only comes into play if this move is used as a reversal.
- OD Version
- OD version drains a lot of the opponent's Heat (up to 53%; 5% Heat for every 5% Heat Terumi has).
- 100 Heat version does insane damage on hit. 75% version does more damage, and follow-up is still possible, but Terumi cannot get as much from it as the regular version. 50% version, besides the Heat drain, remains unchanged.
Screeches of the Condemned - Jarin Renshouga
236236D or 214214D
| Version | Damage | Cancel | Guard | Startup | Active | Recovery | Frame Adv | Attribute | Invul |
|---|---|---|---|---|---|---|---|---|---|
| Normal | 4594 | - | B | 9+22 | 95 | - | ±0 | - | 1~32 |
| Overdrive | 5866 | - | UNB | - | - | - | - | - | - |
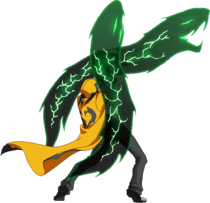
Terumi shoots out a chain either straight (236236D) or at a 45 degree angle (214214D). If it connects, he shoots another chain and lifts the opponent into the air. He then pulls himself to the opponent, inflicting great pain with his mightily kicks and slashes. In the great final, he lunges into his victim from above while covered in his diabolic energy resembling a green lindworm and devours them, including their screams of pain.
Costs 100 Heat and has a good amount of invulnerability. It guard-crushes on normal guard, and if Barrier Blocked, it pulls his opponent to him, leaving him/her in a good position and dealing critical damage to their Barrier Gauge(about 55/60%). This is mainly used to close out matches midscreen and against zoners to blow up projectile throwers and punish them fiercly. Has a minimum distance at which the opponent must be away from Terumi (roughly half screen; anti-air version is roughly 1 1/2 character lengths, although if they are too close, it becomes inconsistent) or it will completely pass through the opponent.
- OD Versions
- OD versions are completely unblockable.
- Can be used to play mind games with the opponent or on Overdrive Raid (GCOD) against projectiles to punish them for massive damage.
Astral Heat
Unholy Wrath of the Basilisk - Orochizanto Reppuga
222D
| Damage | Cancel | Guard | Startup | Active | Recovery | Frame Adv | Attribute | Invul |
|---|---|---|---|---|---|---|---|---|
| 34500 | - | - | - | - | - | - | - | - |
Terumi creates a red portal with his Ouroboros chains on the ground in front of him. If the opponent is caught in it, he proceeds to shoot out dozens of green snake-like energy blasts at the opponent from a portal summoned behind him while laughing like a maniac, then turns into the Black Susano'o and uses Evil Shippu to finish the opponent off.
A very easy Astral Heat to land. Can connect from 22C (midscreen before the last hit), 236D, 6D, CH 6A and numerous other things. Compared to other Astral Heats, Terumi's is a very practical way to finish the match.
External References
- Japanese Name: ユウキ=テルミ
- Japanese Wiki
- Japanese BBS
- Arcade Profile Dan Rankings
- Character Video Thread


