Overview
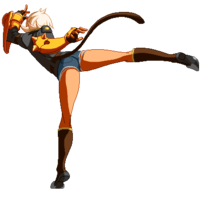
Bullet is a member of a mercenary force who appears to be against Sector Seven. Having been raised by mercenaries since she was young, she fights from one battlefield to another. Bullet has a candid attitude and she doesn't sweat small details. She is the type to always keep a promise to someone no matter what. She is slightly ignorant of the world around her due to her upbringing in an all-male environment.
Aside from the battle knowledge she's acquired, she doesn't know much. She is always ready to fight and usually applies her knowledge of the battlefield to everything. She is also aggressive, but has a 'big sis' sort of appearance.
- Movement Options
- 1 Double Jump/Airdash, Step-Dash
- By holding down the D button, Bullet creates a growing orange circle around her. If the opponent is inside this circle, they are "locked on" with a special crosshair. By releasing the D button, Bullet launches herself at the opponent she locked on to with an attack (if she didn't lock on to them, she simply cancels the stance).
- If Bullet lands a hit with her Drive, she gains one Heat Up level. She can have up to two (starting with none), with the first one denoted by an orange shade and the second one by a larger red one.
- Heat Up levels last for 900 frames; the timer resets each time she gains another level. Gaining levels when you're already at Lv2 doesn't do anything but reset the timer.
- Heat Up levels have many different effects on Bullet's moves. Some moves revert her to Lv0, usually leading into a combo that lets her regain at least one level.
- At Lv1 and Lv2, Bullet's ground and aerial dashes become faster and cover more distance. The circle produced by the Drive also gets larger.
- If Bullet doesn't land a hit with her Drive after launching herself (by getting it blocked or having the opponent dodge or stuff it), she loses a Heat Up level instead.
- By locking on to the enemy for long enough, the crosshair becomes red and makes a beeping noise. If Bullet attacks with her Drive in this "Red Lock" state, the properties of her moves change, dealing more damage, gaining invulnerability, and being more advantageous on block. The time required to get the Red Lock is reduced if Bullet has extra Heat Up levels.Overdrive: Heat the Beat
- After using Overdrive, Bullet immediately gains a single Heat Up level.
- During Overdrive, Bullet does not lose any Heat Up levels, whether the opponent blocks your D attacks or you use the D follow-ups of special moves.
- After leaving the Overdrive state, Bullet retains the Heat Up level she gained while entering it.
- The Heat Up level timer freezes while in Overdrive, and resets after Bullet leaves the Overdrive state.
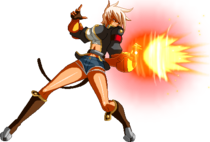
![]() Bullet is a Rushdown/Grappler Hybrid who wants to either keep her Heat Up level to maintain offense, or cash it in to deal lots of damage.
Bullet is a Rushdown/Grappler Hybrid who wants to either keep her Heat Up level to maintain offense, or cash it in to deal lots of damage.
- Has many different tools for any situation, including a projectile, a reversal move, and a command grab super
- Strong pressure at close range with tight blockstrings, high/low mixups, and frame traps
- Capable of extremely strong combos that don't require Heat
- Drive provides good mobility to stay on your opponent for the whole match
- Easy to learn, the combos are easy to execute
- Her dashes are short and slow on Heat Up Lv0, making it difficult to close in on mobile characters
- Even with the various ways of getting in, she depends on being close to the opponent, so zoners may be difficult to deal with
- Her high-damage combos require Heat Up levels, which should be gained while you're at the disadvantage
- Most of her grabs are blockable, limiting her mix-up to highs, lows, and an occasional cross-up
- Performs poorly on the defensive, making it very important to block well
| Health | 100 - 90% | 89 - 80% | 79 - 70% | 69 - 60% | 59 - 50% | 49 - 40% | 39 - 30% | 29 - 20% | 19 - 10% | 9 - 0% |
|---|---|---|---|---|---|---|---|---|---|---|
| Overdrive | 180F | 210F | 240F | 270F | 300F | 360F | 390F | 420F | 540F | 600F |
| This data is all copied over from BBCPE 1.1. Replace with 2.0 data as it becomes available (and delete this warning) |
Normal Moves
5A

Just another punch.

| Damage | Cancel | Guard | Startup | Active | Recovery | Frame Adv | Attribute | Invul |
|---|---|---|---|---|---|---|---|---|
| 300 | CSOJR | All | 6 | 3 | 9 | 0 | HB | - |
- Just an average jab with a fast startup. 2A is marginally better because of the extra frame of advantage and because it's able to hit all crouchers, so use it if you can.
- Can be used occasionally as an anti air
- Combos from M.Capture in the corner
- Gatlings into 6A or 2B for high/low mixup, and can be jump cancelled.
5B
The best non-Drive poke you got.

5C
Flamey punch brings satisfaction.

5[C]
If you need to punish them, use this.
| Damage | Cancel | Guard | Startup | Active | Recovery | Frame Adv | Attribute | Invul |
|---|---|---|---|---|---|---|---|---|
| 800 | SOR | HL | 19 | 5 | 12 | +1 | HBP | - |
- Pushes Bullet forward, making it useful for frametraps
- One of Bullet's best starters, so use it for a high damage punish
- Use this if you think they'll respect it
- The +1 frame advantage helps continue pressure
2A

poke poke poke dash* poke poke

| Damage | Cancel | Guard | Startup | Active | Recovery | Frame Adv | Attribute | Invul |
|---|---|---|---|---|---|---|---|---|
| 300 | CSOJR | All | 6 | 3 | 8 | +1 | F | - |
- Just an average jab with a fast startup. Marginally better than 5A because of the extra frame of advantage and because it's able to hit all crouchers, so use it if you can
- Gatlings into 6A or 2B for high/low mixup
- 66 > 2a > 4ab after knockdown is an option select that hits or misses with 2a due to tech and then either barriers if they tech or confirms your pick up combo with 5b. Extremely useful for if your pressure is being disrespected. Also works well with the 2a serpentine setup, which looks extremely similar to this.
2B

Best low normal and not that bad of a poke, too.

2C

Criss-cross!

6A

It's an overhead.

6B

Pretty good as far as anti-airs go.

6C

Knee of Justice?

3C

Sweep the leg.

j.A

- jump* poke poke poke

j.B

Kick em in the face.

j.C

Basically does everything.

Drive Moves
5D, j.D

zoop.


| Version | Damage | Cancel | Guard | Startup | Active | Recovery | Frame Adv | Attribute | Invul |
|---|---|---|---|---|---|---|---|---|---|
| Lv0 | 300, 0×2, 700 | R*, -, Rx2 | All | 10+8 | 18 | 20+10 | -10 | H | 1-19P |
| Lv0 (Red Lock) | 700, 0×2, 700 | R*, -, Rx2 | All | 29+8 | 18 | 20+10 | +2 | H | 1-19 All |
| Lv1 | 300, 0×2, 700 | R*, -, Rx2 | All | 10+6 | 18 | 20+10 | +4 | H | 1-19P |
| Lv1 (Red Lock) | 700, 0×2, 700 | R*, -, Rx2 | All | 24+6 | 18 | 20+10 | +6 | H | 1-19 All |
| Lv2 | 300, 0×2, 700 | R*, -, Rx2 | All | 10+4 | 18 | 20+10 | +6 | H | 1-19P |
| Lv2 (Red Lock) | 700, 0×2, 700 | R*, -, Rx2 | All | 15+4 | 18 | 20+10 | +9 | H | 1-19 All |
- Essential for combos, and can be special cancelled now.
- Holding the button will charge the ring, giving it a larger ring. If you wait for the target to turn red, you get extra damage and invincibility.
Higher heat levels give more frame advantage on block, but if it is blocked, you lose a heat level. Don't waste it.
- Hitting back while holding will cancel it.
- Chases the hell out of them if used for oki, and can beat reversals if you use the red ring. IAD over their head for a crossup.
2D

A mix-up tool with confusing animation.

| Version | Damage | Cancel | Guard | Startup | Active | Recovery | Frame Adv | Attribute | Invul |
|---|---|---|---|---|---|---|---|---|---|
| Lv0 | 800 | R | L | 17+31 | 3 | 26 | -10 | F | 6-24FT |
| Lv0 (Red Lock) | 1000 | R | L | 36+31 | 3 | 26 | -8 | F | 6-24FT |
| Lv1 | 800 | R | L | 15+28 | 3 | 26 | 0 | F | 6-24FT |
| Lv1 (Red Lock) | 1000 | R | L | 29+28 | 3 | 26 | +2 | F | 6-24FT |
| Lv2 | 800 | R | L | 13+23 | 3 | 26 | +2 | F | 6-24FT |
| Lv2 (Red Lock) | 1000 | R | L | 29+28 | 3 | 26 | +2 | F | 6-24FT |
- It hits low, but it is real slow, making this a no-go, sooooo....
6D

A mix-up tool with less confusing animation.

| Version | Damage | Cancel | Guard | Startup | Active | Recovery | Frame Adv | Attribute | Invul |
|---|---|---|---|---|---|---|---|---|---|
| Lv0 | 800 | R | HA | 17+29 | 3 | 26 | -10 | H | 6-32FT |
| Lv0 (Red Lock) | 1000 | R | HA | 36+29 | 3 | 26 | -8 | H | 6-32FT |
| Lvl | 800 | R | HA | 15+26 | 3 | 26 | 0 | H | 6-32FT |
| Lv1 (Red Lock) | 1000 | R | HA | 29+26 | 3 | 26 | +2 | H | 6-32FT |
| Lv2 | 800 | R | HA | 13+21 | 3 | 26 | +2 | H | 6-32FT |
| Lv2 (Red Lock) | 1000 | R | HA | 18+21 | 3 | 26 | +4 | H | 6-32FT |
- It hits high, but the startup will make you die, so don't try.
Universal Mechanics
Forward Throw
6B+C

Bounces them off the wall.

Backward Throw
4B+C

Drops them to the ground.

Air Throw
j.B+C

Similar to the ground forward throw.

Counter Assault
6A+B during blockstun w/50%
Don't get yourself in situations when you have to use this.
Crush Trigger
A+B w/25%

There's never enough ways to crack the enemy open.

Specials
Wadcut Engage
D during a D normal

Never a bad idea to use this in the corner.

Flint Shooter
236A

Not for, but against zoning.

Flint Shooter (Charged)
236[A]

A great combo tool. Now with neutral!

Cutting Shear
623B

Has a penchant for missing.

| Damage | Cancel | Guard | Startup | Active | Recovery | Frame Adv | Attribute | Invul |
|---|---|---|---|---|---|---|---|---|
| 0×2, 1400 | -x2, R | All | 15 | 2 | 37 | -29 | HB | 1-16 All |
- An adorable little reversal with a poor hitbox that yields little damage without the followup. It is easily punished, so you are better off rarely using outside of combos.
- It is your best combo ender after 5D, giving you a great knockdown with whatever oki you want.
- Gives a ok combo on counterhit.
Explode Engage
22D during Cutting Shear

A rare sight to see, but a cool one.

Miquelet Capture
41236C

Just don't use it as a command dash.

| Damage | Cancel | Guard | Startup | Active | Recovery | Frame Adv | Attribute | Invul |
|---|---|---|---|---|---|---|---|---|
| 0, 1500 | -, R | Unblockable | 5 | 3 | 20~37 | - | ground throw | 8-until recovery P |
- Unblockable, but hits standing or aerial opponents only. Has projectile invuln.
- You can use it as a preemptive anti-air, or to punish projectile zoning, but because it's highly punishable on whiff, use only when you are sure it'll work.
- Useful for combos, use after 5D or 5C on standing opponents, or 5C > 3C on crouching opponents (One doesn't work against the other).
Piercing Engage
236D during Miquelet Capture

This baby hurts.

Snaphance Fist
623C, air OK

Barely even an anti-air.

Flechette Engage
623D during Snaphance Fist

Catch and boom.

Afterburner
214D

For when they try to make fun of your stubby dash.

Distortion Drives
Rage Aggressor
2363214C
The ultimate combo ender.

| Version | Damage | Cancel | Guard | Startup | Active | Recovery | Frame Adv | Attribute | Invul |
|---|---|---|---|---|---|---|---|---|---|
| Normal | 200×3, 600×2, 300×7, 3000 | R | All | 1+14~23 | 3×3 | 11+20 | -15 | HB | - |
| Overdrive | 200×3, 600×2, 300×7, 500, 2800×5 | R | All | 1+14~23 | 3×3 | 11+20 | -15 | HB | - |
- Never use this outside of combos. It doesn't even have invuln. Really, don't try it.
Serpentine Assault
720A

And they said she's not a grappler.


| Damage | Cancel | Guard | Startup | Active | Recovery | Frame Adv | Attribute | Invul |
|---|---|---|---|---|---|---|---|---|
| 0×n, 320×2, 1520 | —, Rxn | 150 | 5+0 | 5 | 42 | - | ground throw | 1-10 All |
- Some say using meter for a command grab is a waste and too risky. Give them the flamey-fist of doom.
- Carries them to the corner.
- Spin on wakeup, spin after a double jump, spin after an airdash, spin after blocked 2C, start a 5D over their head, cancel it, and spin...
Frangible Engage
720D during Serpentine Assault

It's not over yet!

| Damage | Cancel | Guard | Startup | Active | Recovery | Frame Adv | Attribute | Invul |
|---|---|---|---|---|---|---|---|---|
| 0, 350 | - | - | - | - | - | Total 81 | HB | - |
- You've already been spinning for a awhile, why stop now? You need a heat level to use this. (actually, there's a good reason. It carries them midscreen)
- You can pick up a combo after this hit or keep spinning...
- spinning... spinning...
Blackout
1080D during Frangible Engage

Lights out!

| Version | Damage | Cancel | Guard | Startup | Active | Recovery | Frame Adv | Attribute | Invul |
|---|---|---|---|---|---|---|---|---|---|
| Normal | 100×4, 2110 | - | - | - | - | - | Total 158 | HB | - |
| Overdrive | 100×10, 2110 | - | - | - | - | - | Total 164 | HB | - |
- After all that spinning you deserve a reward. More spinning! As long as you are at heat level 2, you can pretend you are Tager. It does an exorbitant amount of damage, and can easily end the round.
Astral Heat
Hard Kill Bringer
632146D

Actually not that hard to kill with.


| Damage | Cancel | Guard | Startup | Active | Recovery | Frame Adv | Attribute | Invul |
|---|---|---|---|---|---|---|---|---|
| Death | - | All | 4+21 | 3 | 31 | -13 | HB | 1-26 All |
- Lots of invuln and a huge hitbox, but you are a scrub if you use it outside of combos.
- ...Ok, really I just mean you should back throw before you IK them. Then you don't have to worry about them blocking their fiery fate.
External References
- Japanese Name: バレット
- Japanese Wiki
- Japanese BBS
- Arcade Profile Dan Rankings
- Character Video Thread