Robo-Kisequé (talk | contribs) m (→Navigation: frivolous category, removed: Category:BBCPE Character) |
|||
| (48 intermediate revisions by 8 users not shown) | |||
| Line 1: | Line 1: | ||
{| | ==Overview== | ||
| | {{CharLinks | ||
|charMainPage=BBCPE/Kagura Mutsuki | |||
| | |videos=http://horibuna.web.fc2.com/BBCP/BBCP_KA.html | ||
|| | |forums=http://www.dustloop.com/forums/index.php?/forums/forum/255-kagura-mutsuki/ | ||
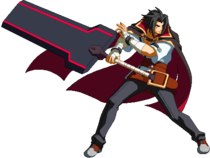
[[File:BBCP_Kagura_Portrait.png|350px | }} | ||
<div id="home-content" class="home-grid"> | |||
{{card|width=4 | |||
|content=Kagura Mutsuki is an NOL General, and the head of the Duodecim's Mutsuki family, who is secretly plotting to overthrow the NOL. He is an unlockable character in the console version of BlazBlue: Chrono Phantasma, unlocked by beating the true ending in the story mode. | |||
}} | |||
{{card|width=2|height=3 | |||
|header=Kagura Mutsuki | |||
|content=[[File:BBCP_Kagura_Portrait.png|350px]] | |||
{{CharData-BBCPE | |||
|health=11,500 | |health=11,500 | ||
|comboRate=65% | |comboRate=65% | ||
| Line 15: | Line 21: | ||
;Movement Options | ;Movement Options | ||
:Double Jump, 1 Airdash, Dash type: Run | :Double Jump, 1 Airdash, Dash type: Run | ||
}} | |||
{{card|width=4 | |||
|header=Drive: Black Gale | |||
|content=Kagura's drive allows him to enter three different stances. Each stance comes with its own set of unique moves that can be chained together once consecutively (5Dx>2Dx>6Dx), once a stance is used in a D chain, it cannot be used until coming out of stance (5Dx>2Dx>5Dx does not work). | |||
|header2=Overdrive: Infinite Coupling | |||
{{ | |content2= | ||
= | |||
Kagura's drive allows him to enter three different stances. Each stance comes with its own set of unique moves that can be chained together once consecutively (5Dx>2Dx>6Dx), once a stance is used in a D chain, it cannot be used until coming out of stance (5Dx>2Dx>5Dx does not work). | |||
* Removes the limit on stance cancels in D attack strings | * Removes the limit on stance cancels in D attack strings | ||
* Can dash cancel all C and D attacks except for 3C and 5DB | * Can dash cancel all C and D attacks except for 3C and 5DB | ||
| Line 32: | Line 32: | ||
* 6DC slides the opponent across the screen | * 6DC slides the opponent across the screen | ||
* 2DC causes untechable knockdown | * 2DC causes untechable knockdown | ||
* [4]1236C gets a additional follow-up attack | * [4]1236C gets a additional follow-up attack | ||
* 28D deal more hits and damages | * 28D deal more hits and damages | ||
}} | |||
{{ProsAndCons | |||
|intro= | |||
|pros= | |||
* Massive, sweeping normals | * Massive, sweeping normals | ||
* Very high average damage | * Very high average damage | ||
| Line 42: | Line 44: | ||
* Certain moves have super armor | * Certain moves have super armor | ||
* Has one of the best reversals in the game | * Has one of the best reversals in the game | ||
|cons= | |||
* Very poor mobility | * Very poor mobility | ||
* Fastest pokes have pitiful range | * Fastest pokes have pitiful range | ||
| Line 50: | Line 51: | ||
* Has arguably the worst mid range game in the entire roster. Characters with strong footsies give him a very hard time | * Has arguably the worst mid range game in the entire roster. Characters with strong footsies give him a very hard time | ||
* Struggles against fast mixup characters (Taokaka, Valkenhayn, etc...) | * Struggles against fast mixup characters (Taokaka, Valkenhayn, etc...) | ||
}} | |||
</div> | |||
<br clear=all /> | |||
{| class="wikitable" style="text-align: center;" | |||
|+Remaining Health vs. Overdrive Duration (in Frames) | |||
|- | |||
!Health !! 100 - 90% !! 89 - 80% !! 79 - 70% !! 69 - 60% !! 59 - 50% !! 49 - 40% !! 39 - 30% !! 29 - 20% !! 19 - 10% !! 9 - 0% | |||
|- | |||
!Overdrive | |||
|| | |||
|- | |||
|} | |||
{{warning|This data is all copied over from BBCP 1.1. Replace with 2.0 data as it becomes available (and delete this warning)}} | |||
==Normal Moves== | |||
===<big>5A</big>=== | |||
<div class="attack-container"> | |||
<div class="attack-gallery"> | |||
<gallery widths="210px" heights="210px" mode="nolines"> | |||
BBCP_Kagura_5A.png | | |||
</gallery> | |||
</div> | |||
<div class="attack-info"> | |||
{| class="wikitable attack-data" | |||
{{AttackDataHeader-BBCPE}} | |||
|- | |||
====== < | {{AttackData-BBCPE | ||
|header=no | |||
| | |||
| | |||
|damage=300 | |damage=300 | ||
|cancel=CSOJR | |cancel=CSOJR | ||
| Line 90: | Line 99: | ||
|invul= | |invul= | ||
|hitbox=Kagura/5A | |hitbox=Kagura/5A | ||
}} | }} | ||
} | |} | ||
====== < | Standard 5A. Can be used as an anti-air, but requires very good spacing to do so | ||
</div> | |||
</div> | |||
===<big>5B</big>=== | |||
| | <div class="attack-container"> | ||
| | <div class="attack-gallery"> | ||
<gallery widths="210px" heights="210px" mode="nolines"> | |||
BBCP_Kagura_5B.png | | |||
</gallery> | |||
</div> | |||
<div class="attack-info"> | |||
{| class="wikitable attack-data" | |||
{{AttackDataHeader-BBCPE}} | |||
|- | |||
{{AttackData-BBCPE | |||
|header=no | |||
|damage=400 | |damage=400 | ||
|cancel=SOR | |cancel=SOR | ||
| Line 119: | Line 136: | ||
|invul= | |invul= | ||
|hitbox=Kagura/5B | |hitbox=Kagura/5B | ||
}} | }} | ||
} | |} | ||
====== < | Quick, but very short range 5B. Hits low. | ||
</div> | |||
</div> | |||
===<big>5C</big>=== | |||
| | <div class="attack-container"> | ||
| | <div class="attack-gallery"> | ||
<gallery widths="210px" heights="210px" mode="nolines"> | |||
BBCP_Kagura_5C.png | | |||
</gallery> | |||
</div> | |||
<div class="attack-info"> | |||
{| class="wikitable attack-data" | |||
{{AttackDataHeader-BBCPE}} | |||
|- | |||
{{AttackData-BBCPE | |||
|header=no | |||
|damage=1000 | |damage=1000 | ||
|cancel=SOR | |cancel=SOR | ||
| Line 148: | Line 173: | ||
|invul= | |invul= | ||
|hitbox=Kagura/5C | |hitbox=Kagura/5C | ||
}} | |||
|} | |||
Huge, but slow swing with the sword. Blows opponent away on air hit. Can confirm from all ranges with 2DB. | |||
*Causes wall bounce on Air Counter Hit. | *Causes wall bounce on Air Counter Hit. | ||
</div> | |||
</div> | |||
====== < | ===<big>2A</big>=== | ||
<div class="attack-container"> | |||
<div class="attack-gallery"> | |||
<gallery widths="210px" heights="210px" mode="nolines"> | |||
| | BBCP_Kagura_2A.png | | ||
| | </gallery> | ||
</div> | |||
<div class="attack-info"> | |||
{| class="wikitable attack-data" | |||
{{AttackDataHeader-BBCPE}} | |||
|- | |||
{{AttackData-BBCPE | |||
|header=no | |||
|damage=300 | |damage=300 | ||
|cancel=CSOR | |cancel=CSOR | ||
| Line 179: | Line 212: | ||
|invul= | |invul= | ||
|hitbox=Kagura/2A | |hitbox=Kagura/2A | ||
}} | }} | ||
} | |} | ||
====== < | Standard 2A. Hits mid. | ||
</div> | |||
</div> | |||
===<big>2B</big>=== | |||
| | <div class="attack-container"> | ||
| | <div class="attack-gallery"> | ||
<gallery widths="210px" heights="210px" mode="nolines"> | |||
BBCP_Kagura_2B.png | | |||
</gallery> | |||
</div> | |||
<div class="attack-info"> | |||
{| class="wikitable attack-data" | |||
{{AttackDataHeader-BBCPE}} | |||
|- | |||
{{AttackData-BBCPE | |||
|header=no | |||
|damage=500 | |damage=500 | ||
|cancel=SOR | |cancel=SOR | ||
| Line 208: | Line 249: | ||
|invul= | |invul= | ||
|hitbox=Kagura/2B | |hitbox=Kagura/2B | ||
}} | }} | ||
} | |} | ||
====== < | Hits low. Has better reach than 5B, but slower startup. | ||
</div> | |||
</div> | |||
===<big>2C</big>=== | |||
| | <div class="attack-container"> | ||
| | <div class="attack-gallery"> | ||
<gallery widths="210px" heights="210px" mode="nolines"> | |||
BBCP_Kagura_2C.png | | |||
</gallery> | |||
</div> | |||
<div class="attack-info"> | |||
{| class="wikitable attack-data" | |||
{{AttackDataHeader-BBCPE}} | |||
|- | |||
{{AttackData-BBCPE | |||
|header=no | |||
|damage=900 | |damage=900 | ||
|cancel=SOR | |cancel=SOR | ||
| Line 237: | Line 286: | ||
|invul= | |invul= | ||
|hitbox=Kagura/2C | |hitbox=Kagura/2C | ||
}} | |||
|} | |||
Hits mid. Range is similar to 5C, but 1F faster, making it a slightly better tool at midrange. Causes stagger. Can be late canceled into 5C on block and hit. On air hit, causes a slide effect which in the corner can be comboed into 5C. On counter hit, the stagger effect is huge, and can be comboed into 6DA at mid to close ranges. | |||
*Staggers on hit | *Staggers on hit | ||
*Causes ground slide on air hit. | *Causes ground slide on air hit. | ||
</div> | |||
</div> | |||
====== < | ===<big>6A</big>=== | ||
<div class="attack-container"> | |||
<div class="attack-gallery"> | |||
<gallery widths="210px" heights="210px" mode="nolines"> | |||
| | BBCP_Kagura_6A.png | | ||
| | </gallery> | ||
</div> | |||
<div class="attack-info"> | |||
{| class="wikitable attack-data" | |||
{{AttackDataHeader-BBCPE}} | |||
|- | |||
{{AttackData-BBCPE | |||
|header=no | |||
|damage=800 | |damage=800 | ||
|cancel=SOR | |cancel=SOR | ||
| Line 270: | Line 327: | ||
|invul= | |invul= | ||
|hitbox=Kagura/6A | |hitbox=Kagura/6A | ||
}} | |||
|} | |||
Kagura's overhead which has him attacking his opponent with his elbow. Links into 3C on counter hit, and can be linked into 5A on normal hit against Tager and Hakumen. Causes ground bounce on air hit. | |||
*Forces crouch on hit | *Forces crouch on hit | ||
*Causes ground bounce on air hit | *Causes ground bounce on air hit | ||
</div> | |||
</div> | |||
====== < | ===<big>6B or 5BB</big>=== | ||
<div class="attack-container"> | |||
<div class="attack-gallery"> | |||
<gallery widths="210px" heights="210px" mode="nolines"> | |||
| | BBCP_Kagura_6B.png | | ||
| | </gallery> | ||
</div> | |||
<div class="attack-info"> | |||
{| class="wikitable attack-data" | |||
{{AttackDataHeader-BBCPE}} | |||
|- | |||
{{AttackData-BBCPE | |||
|header=no | |||
|damage=600 | |damage=600 | ||
|cancel=SOJR | |cancel=SOJR | ||
| Line 290: | Line 355: | ||
|starter= | |starter= | ||
|guard=HL | |guard=HL | ||
|startup= | |startup=11 | ||
|active=3 | |active=3 | ||
|recovery=24 | |recovery=24 | ||
| Line 302: | Line 367: | ||
|invul= | |invul= | ||
|hitbox=Kagura/6B | |hitbox=Kagura/6B | ||
}} | |||
|} | |||
Not stance cancelable. Jump cancelable on block/hit. Has more range than one would expect and leads to great damage, making it an excellent punish. Can be used to pre-emptively stuff pokes for a CH into 6C, but beware of throwing it out at neutral because it has long recovery on whiff. | Not stance cancelable. Jump cancelable on block/hit. Has more range than one would expect and leads to great damage, making it an excellent punish. Can be used to pre-emptively stuff pokes for a CH into 6C, but beware of throwing it out at neutral because it has long recovery on whiff. | ||
</div> | |||
</div> | |||
====== < | ===<big>6C</big>=== | ||
<div class="attack-container"> | |||
<div class="attack-gallery"> | |||
<gallery widths="210px" heights="210px" mode="nolines"> | |||
| | BBCP_Kagura_6C.png | | ||
| | </gallery> | ||
</div> | |||
<div class="attack-info"> | |||
{| class="wikitable attack-data" | |||
{{AttackDataHeader-BBCPE}} | |||
|- | |||
{{AttackData-BBCPE | |||
|header=no | |||
|damage=1200 | |damage=1200 | ||
|cancel=SOR | |cancel=SOR | ||
| Line 333: | Line 406: | ||
|invul= | |invul= | ||
|hitbox=Kagura/6C | |hitbox=Kagura/6C | ||
}} | |||
|} | |||
Kagura takes a step forward and swings his sword upwards towards his opponent. On hit, launches the opponent high into the air with a ton of untech time, allowing combos into a wide range of followups, notably 6D~A and 6D~B. On CH, causes wall bounce and hard knockdown, allowing for an easy 6DA or 3C pickup. | |||
*Launches on hit | *Launches on hit | ||
*Wall bounces and untechable knockdown on CH | *Wall bounces and untechable knockdown on CH | ||
*SMP | *SMP | ||
</div> | |||
</div> | |||
====== < | ===<big>3C</big>=== | ||
<div class="attack-container"> | |||
<div class="attack-gallery"> | |||
<gallery widths="210px" heights="210px" mode="nolines"> | |||
| | BBCP_Kagura_3C.png | | ||
| | </gallery> | ||
</div> | |||
<div class="attack-info"> | |||
{| class="wikitable attack-data" | |||
{{AttackDataHeader-BBCPE}} | |||
|- | |||
{{AttackData-BBCPE | |||
|header=no | |||
|damage=700 | |damage=700 | ||
|cancel=SOR | |cancel=SOR | ||
| Line 355: | Line 436: | ||
|startup=14 | |startup=14 | ||
|active=3 | |active=3 | ||
|recovery= | |recovery=23 | ||
|frameAdv=- | |frameAdv=-9 | ||
|attribute=F | |attribute=F | ||
|blockstun=16 | |blockstun=16 | ||
| Line 365: | Line 446: | ||
|invul= | |invul= | ||
|hitbox=Kagura/3C | |hitbox=Kagura/3C | ||
}} | }} | ||
} | |} | ||
====== < | Launcher, decently fast and useful for ground combos. Has a very poor hitbox VS air though, despite its appearance. Goes into a wide range of drive moves, as well as Crush Trigger only in the corner. | ||
</div> | |||
</div> | |||
| | ===<big>j.A</big>=== | ||
| | <div class="attack-container"> | ||
<div class="attack-gallery"> | |||
<gallery widths="210px" heights="210px" mode="nolines"> | |||
BBCP_Kagura_jA.png | | |||
</gallery> | |||
</div> | |||
<div class="attack-info"> | |||
{| class="wikitable attack-data" | |||
{{AttackDataHeader-BBCPE}} | |||
|- | |||
{{AttackData-BBCPE | |||
|header=no | |||
|damage=300 | |damage=300 | ||
|cancel=CSOJR | |cancel=CSOJR | ||
| Line 395: | Line 485: | ||
|invul= | |invul= | ||
|hitbox=Kagura/jA | |hitbox=Kagura/jA | ||
}} | }} | ||
} | |} | ||
====== < | Fast, forward air poke. | ||
</div> | |||
</div> | |||
===<big>j.B</big>=== | |||
| | <div class="attack-container"> | ||
| | <div class="attack-gallery"> | ||
<gallery widths="210px" heights="210px" mode="nolines"> | |||
BBCP_Kagura_jB.png | | |||
</gallery> | |||
</div> | |||
<div class="attack-info"> | |||
{| class="wikitable attack-data" | |||
{{AttackDataHeader-BBCPE}} | |||
|- | |||
{{AttackData-BBCPE | |||
|header=no | |||
|damage=450 | |damage=450 | ||
|cancel=SOJR | |cancel=SOJR | ||
| Line 424: | Line 522: | ||
|invul= | |invul= | ||
|hitbox=Kagura/jB | |hitbox=Kagura/jB | ||
}} | |||
|} | |||
Air poke that hits below and behind Kagura, very large crossup, good hitbox. Safer jump attack used when the opponent is right below Kagura. Has a ton of untechable time on air CH. | |||
*Huge untechable time on air CH. | *Huge untechable time on air CH. | ||
</div> | |||
</div> | |||
====== < | ===<big>j.C</big>=== | ||
<div class="attack-container"> | |||
<div class="attack-gallery"> | |||
<gallery widths="210px" heights="210px" mode="nolines"> | |||
| | BBCP_Kagura_jC.png | | ||
| | </gallery> | ||
</div> | |||
<div class="attack-info"> | |||
{| class="wikitable attack-data" | |||
{{AttackDataHeader-BBCPE}} | |||
|- | |||
{{AttackData-BBCPE | |||
|header=no | |||
|damage=750 | |damage=750 | ||
|cancel=SOR | |cancel=SOR | ||
| Line 454: | Line 560: | ||
|invul= | |invul= | ||
|hitbox=Kagura/jC | |hitbox=Kagura/jC | ||
}} | |||
|} | |||
Kagura does a huge downward swing with his sword while airborne. Amazing hitbox, good air defensive tool but need to well-spaced due to his recovery. Staggers for a long time on CH. | |||
*Ground opponent on air hit | *Ground opponent on air hit | ||
*Staggers grounded opponent on hit | *Staggers grounded opponent on hit | ||
*9F landing lag | *9F landing lag | ||
</div> | |||
</div> | |||
<br clear=all/> | <br clear=all/> | ||
==Drive Moves== | |||
====== < | ===<big>Stance</big>=== | ||
<span class="input-badge">'''5D/2D/6D, air OK'''</span> | |||
<div class="attack-container"> | |||
| | <div class="attack-gallery"> | ||
<gallery widths="210px" heights="210px" mode="nolines"> | |||
| | BBCP_Kagura_5D.png |5D | ||
BBCP_Kagura_2D.png |2D | |||
| | BBCP_Kagura_6D.png |6D | ||
BBCP_Kagura_4D.png |4D to cancel | |||
| | </gallery> | ||
</div> | |||
| | <div class="attack-info"> | ||
| | {| class="wikitable attack-data" | ||
{{AttackDataHeader-BBCPE}} | |||
|- | |||
{{AttackData-BBCPE | {{AttackData-BBCPE | ||
|header=no | |||
|version=Ground | |version=Ground | ||
|damage= | |damage= | ||
| Line 496: | Line 607: | ||
|invul= | |invul= | ||
|hitbox=Kagura/5D | |hitbox=Kagura/5D | ||
}} | }} | ||
|- | |||
{{AttackData-BBCPE | |||
|header=no | |||
|version=Air | |version=Air | ||
|damage= | |damage= | ||
| Line 522: | Line 630: | ||
|invul= | |invul= | ||
|hitbox=Kagura/jD | |hitbox=Kagura/jD | ||
}} | }} | ||
{{AttackData-BBCPE | {{AttackData-BBCPE | ||
|header=no | |||
|version=Cancel | |version=Cancel | ||
|damage= | |damage= | ||
| Line 550: | Line 652: | ||
|invul= | |invul= | ||
|hitbox=Kagura/4D | |hitbox=Kagura/4D | ||
}} | }} | ||
} | |} | ||
====== < | |||
* Ground Stance earliest cancel into a drive attack is 14F | |||
* Air Stance earliest cancel into Drive attack is 5F | |||
| | * Grounds fastly before using a Drive attack | ||
* All Kagura stance attacks are air unblockables (Barrier needed) | |||
| | <br/> | ||
| | Kagura enter in stance from frame 1. Each stance (5D, 2D and 6D) have a maximun of 3 attacks + his super. Any stance can be cancelled into another stance quickly. Any stance attack can be cancel into another one from a different stance (5D~A > 2D~A > 6D~A) for a maximun of 3 chains (except during Overdrive), no order required. The Chain is reset when a normal is used between drives. | ||
<br/> | |||
Air version of any stance. Hangs in air while active. Upon drive attack use, Kagura dives to the ground before performing the normal ground version of the drive. Can be followed up after his command throw and his 2D~A. | |||
<br/> | |||
You can adjust the direction of the dive by holding 4 (and 3) or 6 (and 1) when activating the drive attack. | |||
</div> | |||
</div> | |||
===<big>Dragon Blast</big>=== | |||
<span class="input-badge">'''5D~A'''</span> | |||
<div class="attack-container"> | |||
<div class="attack-gallery"> | |||
<gallery widths="210px" heights="210px" mode="nolines"> | |||
BBCP_Kagura_5D~A.png |龍破衝(りゅうはしょう) | |||
</gallery> | |||
</div> | |||
<div class="attack-info"> | |||
{| class="wikitable attack-data" | |||
{{AttackDataHeader-BBCPE}} | |||
|- | |||
{{AttackData-BBCPE | |||
|header=no | |||
|damage=700 | |damage=700 | ||
|cancel=SRDa | |cancel=SRDa | ||
| Line 569: | Line 689: | ||
|guard=HL | |guard=HL | ||
|startup=19 | |startup=19 | ||
|active= | |active=3 | ||
|recovery= | |recovery=31 | ||
|frameAdv=- | |frameAdv=-14 | ||
|attribute=B | |attribute=B | ||
|blockstun= | |blockstun= | ||
| Line 580: | Line 700: | ||
|invul= | |invul= | ||
|hitbox=Kagura/5D~A | |hitbox=Kagura/5D~A | ||
}} | |||
|} | |||
Kagura throws his sword and punches it towards his opponent. Can be canceled into a forward dash or backdash on hit/block. -3 SD on forward dash cancel, -6 SD on backdash cancel. | |||
*Staggers opponent on ground hit. | *Staggers opponent on ground hit. | ||
*On air hit, blows back slightly with wallbounce in corner. | *On air hit, blows back slightly with wallbounce in corner. | ||
| Line 587: | Line 709: | ||
*Fatals | *Fatals | ||
</div> | |||
</div> | |||
====== < | |||
===<big>Dragon's Claw</big>=== | |||
<span class="input-badge">'''5D~B'''</span> | |||
| | <div class="attack-container"> | ||
<div class="attack-gallery"> | |||
| | <gallery widths="210px" heights="210px" mode="nolines"> | ||
| | BBCP_Kagura_5D~B.png |龍戟爪(りゅうげきそう) | ||
</gallery> | |||
</div> | |||
<div class="attack-info"> | |||
{| class="wikitable attack-data" | |||
{{AttackDataHeader-BBCPE}} | |||
|- | |||
{{AttackData-BBCPE | |||
|header=no | |||
|damage=2000 | |damage=2000 | ||
|cancel=R | |cancel=R | ||
| Line 616: | Line 745: | ||
|invul= | |invul= | ||
|hitbox=Kagura/5D~B | |hitbox=Kagura/5D~B | ||
}} | |||
|} | |||
Short-ranged command grab followed by Kagura doing a mid-air spin kick to his opponent. Canceling into drives will put Kagura in air stance. | |||
*Ground bounces on second hit | *Ground bounces on second hit | ||
</div> | |||
</div> | |||
====== < | |||
===<big>Dragon Slaughter</big>=== | |||
<span class="input-badge">'''5D~C'''</span> | |||
| | <div class="attack-container"> | ||
<div class="attack-gallery"> | |||
| | <gallery widths="210px" heights="210px" mode="nolines"> | ||
| | BBCP_Kagura_5D~C.png |屠龍連斬(とりゅうれんざん) | ||
</gallery> | |||
</div> | |||
<div class="attack-info"> | |||
{| class="wikitable attack-data" | |||
{{AttackDataHeader-BBCPE}} | |||
|- | |||
{{AttackData-BBCPE | |||
|header=no | |||
|damage=750,750 | |damage=750,750 | ||
|cancel=SR | |cancel=SR | ||
| Line 636: | Line 774: | ||
|guard=HL | |guard=HL | ||
|startup=17 | |startup=17 | ||
|active= | |active=3(14)3 | ||
|recovery= | |recovery=34 | ||
|frameAdv=-16 | |frameAdv=-16 | ||
|attribute=B | |attribute=B | ||
| Line 647: | Line 785: | ||
|invul= | |invul= | ||
|hitbox=Kagura/5D~C | |hitbox=Kagura/5D~C | ||
}} | |||
|} | |||
Kagura ends his stance and swings his sword upwards twice. Huge hitbox and very tight blocksting when it is canceled into 2D~B. The head invulnerability and huge hitbox make it a powerful, but highly situational anti-air. Extremely bad recovery on whiff, so be careful using it at neutral. | |||
*Wall bounces on CH and wall bounds on regular hit in the corner | *Wall bounces on CH and wall bounds on regular hit in the corner | ||
*Throws opponent behind Kagura | *Throws opponent behind Kagura | ||
*Head invuln from frame 1 | *Head invuln from frame 1 | ||
*SMP | *SMP | ||
</div> | |||
</div> | |||
====== < | ===<big>Dragon Strike</big>=== | ||
<span class="input-badge">'''2D~A'''</span> | |||
<div class="attack-container"> | |||
| | <div class="attack-gallery"> | ||
<gallery widths="210px" heights="210px" mode="nolines"> | |||
| | BBCP_Kagura_2D~A.png |砕龍撃(さいりんげき) | ||
| | </gallery> | ||
</div> | |||
<div class="attack-info"> | |||
{| class="wikitable attack-data" | |||
{{AttackDataHeader-BBCPE}} | |||
|- | |||
{{AttackData-BBCPE | |||
|header=no | |||
|damage=1400 | |damage=1400 | ||
|cancel=SR | |cancel=SR | ||
| Line 671: | Line 817: | ||
|guard=HA | |guard=HA | ||
|startup=20 | |startup=20 | ||
|active= | |active=7 | ||
|recovery= | |recovery=41 | ||
|frameAdv=-27 | |frameAdv=-27 | ||
|attribute=B | |attribute=B | ||
| Line 682: | Line 828: | ||
|invul= | |invul= | ||
|hitbox=Kagura/2D~A | |hitbox=Kagura/2D~A | ||
}} | |||
|} | |||
Kagura jumps from his crouching position and slams his sword to the ground. Has a long ground bounce on hit, allowing combos into 5DA. Versitile combo tool and fast start-up for an overhead, but punishable on block. | |||
*Ground bounces on hit | *Ground bounces on hit | ||
*Cancels into air stances, will cancel into ground stances if done late in the animation | *Cancels into air stances, will cancel into ground stances if done late in the animation | ||
*SMP | *SMP | ||
</div> | |||
</div> | |||
====== < | ===<big>Dragon's Blade</big>=== | ||
<span class="input-badge">'''2D~B'''</span> | |||
<div class="attack-container"> | |||
| | <div class="attack-gallery"> | ||
<gallery widths="210px" heights="210px" mode="nolines"> | |||
| | BBCP_Kagura_2D~B.png |龍閃剣(りゅうせんけん) | ||
| | </gallery> | ||
</div> | |||
<div class="attack-info"> | |||
{| class="wikitable attack-data" | |||
{{AttackDataHeader-BBCPE}} | |||
|- | |||
{{AttackData-BBCPE | |||
|header=no | |||
|damage=500,800 | |damage=500,800 | ||
|cancel=R | |cancel=R | ||
| Line 705: | Line 859: | ||
|guard=LA | |guard=LA | ||
|startup=13 Minimum | |startup=13 Minimum | ||
|active= | |active=3(10)2 | ||
|recovery= | |recovery=26 | ||
|frameAdv=- | |frameAdv=-7 | ||
|attribute=F | |attribute=F | ||
|blockstun= | |blockstun= | ||
| Line 716: | Line 870: | ||
|invul= | |invul= | ||
|hitbox=Kagura/2D~B | |hitbox=Kagura/2D~B | ||
}} | |||
|} | |||
Kagura uses his sword to surf and attack the opponent. First attack hits low and allowing followup combos by RCing the first hit. Standard ender, can be cancelled into a Fireball for a mix up. | |||
*First attack hits low and causes hard knockdown | *First attack hits low and causes hard knockdown | ||
*Second hit is mid and is emergency techable | *Second hit is mid and is emergency techable | ||
</div> | |||
</div> | |||
====== < | |||
===<big>Dragon's Dual Strike</big>=== | |||
<span class="input-badge">'''2D~C'''</span> | |||
| | <div class="attack-container"> | ||
<div class="attack-gallery"> | |||
| | <gallery widths="210px" heights="210px" mode="nolines"> | ||
| | BBCP_Kagura_2D~C.png |臥竜双破(がりょうそうは) | ||
</gallery> | |||
</div> | |||
<div class="attack-info"> | |||
{| class="wikitable attack-data" | |||
{{AttackDataHeader-BBCPE}} | |||
|- | |||
{{AttackData-BBCPE | |||
|header=no | |||
|damage=400,1000 | |damage=400,1000 | ||
|cancel= | |cancel= | ||
| Line 737: | Line 900: | ||
|guard=HL | |guard=HL | ||
|startup=16 | |startup=16 | ||
|active= | |active=2(20)3 | ||
|recovery= | |recovery=27 | ||
|frameAdv=-9 | |frameAdv=-9 | ||
|attribute=B, F | |attribute=B, F | ||
| Line 748: | Line 911: | ||
|invul= | |invul= | ||
|hitbox=Kagura/2D~C | |hitbox=Kagura/2D~C | ||
}} | |||
|} | |||
Kagura attacks with two downward sword strikes into the ground. First attack hits higher and pulls in and the Second hit is a low but slightly ground bounces the opponent attack. Has a good hitbox, comes out fairly fast, making this an easy move to use to start drive combos with. Can be comboed into from 5C when done on a crouching opponent. Quite safe on block due to the push block of the last hit. | |||
*Untechable knockdown on CH | *Untechable knockdown on CH | ||
*Causes spin state when hitting grounded opponent. | *Causes spin state when hitting grounded opponent. | ||
*SMP | *SMP | ||
</div> | |||
</div> | |||
====== < | |||
===<big>Dragon's Fang</big>=== | |||
<span class="input-badge">'''6D~A'''</span> | |||
| | <div class="attack-container"> | ||
<div class="attack-gallery"> | |||
| | <gallery widths="210px" heights="210px" mode="nolines"> | ||
| | BBCP_Kagura_6D~A.png |龍牙迅(りゅうがじん) | ||
</gallery> | |||
</div> | |||
<div class="attack-info"> | |||
{| class="wikitable attack-data" | |||
{{AttackDataHeader-BBCPE}} | |||
|- | |||
{{AttackData-BBCPE | |||
|header=no | |||
|damage=800 | |damage=800 | ||
|cancel=SR | |cancel=SR | ||
| Line 769: | Line 941: | ||
|starter= | |starter= | ||
|guard=All | |guard=All | ||
|startup= | |startup=26-35 | ||
|active= | |active=5 | ||
|recovery= | |recovery=20 | ||
|frameAdv=- | |frameAdv=-6 | ||
|attribute=F | |attribute=F | ||
|blockstun= | |blockstun= | ||
| Line 781: | Line 953: | ||
|invul= | |invul= | ||
|hitbox=Kagura/6D~A | |hitbox=Kagura/6D~A | ||
}} | |||
|} | |||
Kagura dashes forward and swings his swords downwards towards the opponent's feet. Hits mid. Startup depends on distance from the opponent. On hit, groundbounces and can be linked into normals without canceling. Has very strange invuln for a lengthy portion of the move, avoiding mids and overheads, but losing to lows, low mids(2A's) and jumping normals. | |||
*Ground bounces on hit | *Ground bounces on hit | ||
*Amazing invuln, can go through DP's or supers. | *Amazing invuln, can go through DP's or supers. | ||
</div> | |||
</div> | |||
====== < | |||
===<big>Dragon's Mirage</big>=== | |||
<span class="input-badge">'''6D~B'''</span> | |||
| | <div class="attack-container"> | ||
<div class="attack-gallery"> | |||
<gallery widths="210px" heights="210px" mode="nolines"> | |||
| | BBCP_Kagura_6D~B_1.png |龍影迅(りゅうえいじん) | ||
| | </gallery> | ||
</div> | |||
<div class="attack-info"> | |||
{| class="wikitable attack-data" | |||
{{AttackDataHeader-BBCPE}} | |||
|- | |||
{{AttackData-BBCPE | |||
|header=no | |||
|damage=800 | |damage=800 | ||
|cancel=SR | |cancel=SR | ||
| Line 802: | Line 982: | ||
|starter= | |starter= | ||
|guard=All | |guard=All | ||
|startup=33 | |startup=33-42 | ||
|active= | |active=3 | ||
|recovery= | |recovery=24 | ||
|frameAdv=- | |frameAdv=-8 | ||
|attribute=F | |attribute=F | ||
|blockstun= | |blockstun= | ||
| Line 814: | Line 994: | ||
|invul= | |invul= | ||
|hitbox=Kagura/6D~B | |hitbox=Kagura/6D~B | ||
}} | |||
|} | |||
Kagura slides through his opponent and attacks them from behind. Crosses up. Typically used as a means of switching sides mid-combo. Has some invuln mid way into the move (some being used loosely), but nothing too amazing. | |||
*Side switches | *Side switches | ||
*Fatals | *Fatals | ||
</div> | |||
</div> | |||
====== < | |||
===<big>Sky Dragon's Strike</big>=== | |||
<span class="input-badge">'''6D~C'''</span> | |||
| | <div class="attack-container"> | ||
<div class="attack-gallery"> | |||
| | <gallery widths="210px" heights="210px" mode="nolines"> | ||
| | BBCP_Kagura_6D~C.png |飛龍尖撃(ひりゅうせんげき) | ||
</gallery> | |||
</div> | |||
<div class="attack-info"> | |||
{| class="wikitable attack-data" | |||
{{AttackDataHeader-BBCPE}} | |||
|- | |||
{{AttackData-BBCPE | |||
|header=no | |||
|damage=1200 | |damage=1200 | ||
|cancel=SR | |cancel=SR | ||
| Line 834: | Line 1,023: | ||
|starter= | |starter= | ||
|guard=HL | |guard=HL | ||
|startup=15 | |startup=15-20 | ||
|active= | |active=4 | ||
|recovery= | |recovery=26 | ||
|frameAdv=-9 | |frameAdv=-9 | ||
|attribute=B | |attribute=B | ||
| Line 846: | Line 1,035: | ||
|invul= | |invul= | ||
|hitbox=Kagura/6D~C | |hitbox=Kagura/6D~C | ||
}} | |||
|} | |||
Kagura charges his sword forward towards his opponent. Blows back on hit, but can be followed up in corner with various drive moves, notably 2D~C and 2D~B. Very good combo tool and corner carry. Does not hit crouching opponent at max range and does not go Fullscreen. Has armour against projectiles. | |||
*Blows back opponent on hit | *Blows back opponent on hit | ||
*Armour against projectiles | *Armour against projectiles | ||
*Wallbounces on counter hit | *Wallbounces on counter hit | ||
</div> | |||
</div> | |||
<br clear=all/> | <br clear=all/> | ||
==Universal Mechanics== | |||
====== < | ===<big>Forward Throw</big>=== | ||
<span class="input-badge">'''5/6B+C'''</span> | |||
<div class="attack-container"> | |||
<div class="attack-gallery"> | |||
<gallery widths="210px" heights="210px" mode="nolines"> | |||
| | BBCP_Kagura_ForwardThrow.png | | ||
| | </gallery> | ||
</div> | |||
<div class="attack-info"> | |||
{| class="wikitable attack-data" | |||
{{AttackDataHeader-BBCPE}} | |||
|- | |||
{{AttackData-BBCPE | |||
|header=no | |||
|damage=0,100,1300 | |damage=0,100,1300 | ||
|cancel=-, SOR | |cancel=-, SOR | ||
| Line 882: | Line 1,079: | ||
|invul= | |invul= | ||
|hitbox=Kagura/ForwardThrow | |hitbox=Kagura/ForwardThrow | ||
}} | |||
|} | |||
Can be followed up with [4]~6A to extend combos midscreen. | |||
*Wall bounces opponents midscreen | *Wall bounces opponents midscreen | ||
*Wall Splats opponents in the corner | *Wall Splats opponents in the corner | ||
</div> | |||
</div> | |||
====== < | ===<big>Back Throw</big>=== | ||
<span class="input-badge">'''4B+C'''</span> | |||
<div class="attack-container"> | |||
<div class="attack-gallery"> | |||
| | <gallery widths="210px" heights="210px" mode="nolines"> | ||
BBCP_Kagura_BackThrow.png | | |||
| | </gallery> | ||
</div> | |||
<div class="attack-info"> | |||
{| class="wikitable attack-data" | |||
{{AttackDataHeader-BBCPE}} | |||
|- | |||
{{AttackData-BBCPE | |||
|header=no | |||
|damage=0,100,1300 | |damage=0,100,1300 | ||
|cancel=-, SOR | |cancel=-, SOR | ||
| Line 914: | Line 1,119: | ||
|invul= | |invul= | ||
|hitbox=Kagura/BackThrow | |hitbox=Kagura/BackThrow | ||
}} | |||
|} | |||
The same as the forward throw, but in reverse. | |||
</div> | |||
</div> | |||
====== < | ===<big>Air Throw</big>=== | ||
<span class="input-badge">'''j.B+C'''</span> | |||
<div class="attack-container"> | |||
<div class="attack-gallery"> | |||
| | <gallery widths="210px" heights="210px" mode="nolines"> | ||
BBCP_Kagura_AirThrow.png | | |||
| | </gallery> | ||
</div> | |||
<div class="attack-info"> | |||
{| class="wikitable attack-data" | |||
{{AttackDataHeader-BBCPE}} | |||
|- | |||
{{AttackData-BBCPE | |||
|header=no | |||
|damage=500,200,700 | |damage=500,200,700 | ||
|cancel=-, SOR | |cancel=-, SOR | ||
| Line 945: | Line 1,158: | ||
|invul= | |invul= | ||
|hitbox=Kagura/AirThrow | |hitbox=Kagura/AirThrow | ||
}} | |||
|} | |||
Fourth hit causes ground bounce, easy to follow up with [4]6A | Fourth hit causes ground bounce, easy to follow up with [4]6A | ||
*Ground bounces | *Ground bounces | ||
</div> | |||
</div> | |||
====== < | ===<big>Counter Assault</big>=== | ||
<span class="input-badge">'''6A+B (While Blocking)'''</span> | |||
<div class="attack-container"> | |||
<div class="attack-gallery"> | |||
| | <gallery widths="210px" heights="210px" mode="nolines"> | ||
BBCP_Kagura_6B.png | | |||
| | </gallery> | ||
</div> | |||
<div class="attack-info"> | |||
{| class="wikitable attack-data" | |||
{{AttackDataHeader-BBCPE}} | |||
|- | |||
{{AttackData-BBCPE | |||
|header=no | |||
|damage=0 | |damage=0 | ||
|cancel=R | |cancel=R | ||
| Line 971: | Line 1,192: | ||
|recovery=31 | |recovery=31 | ||
|frameAdv=-14 | |frameAdv=-14 | ||
|blockstun=18 | |blockstun=18 | ||
|groundHit= | |groundHit= | ||
| Line 979: | Line 1,199: | ||
|invul=1-20 All | |invul=1-20 All | ||
|hitbox=Kagura/CA | |hitbox=Kagura/CA | ||
}} | }} | ||
} | |} | ||
====== < | Has the same animation as his 6B. Not stance cancelable. Knocks away, short tech time. | ||
</div> | |||
</div> | |||
===<big>Crush Trigger</big>=== | |||
| | <span class="input-badge">'''5A+B'''</span> | ||
<div class="attack-container"> | |||
| | <div class="attack-gallery"> | ||
<gallery widths="210px" heights="210px" mode="nolines"> | |||
BBCP_Kagura_CT.png | | |||
</gallery> | |||
</div> | |||
<div class="attack-info"> | |||
{| class="wikitable attack-data" | |||
{{AttackDataHeader-BBCPE}} | |||
|- | |||
{{AttackData-BBCPE | |||
|header=no | |||
|damage=1000 | |damage=1000 | ||
|cancel=R | |cancel=R | ||
| Line 1,009: | Line 1,237: | ||
|invul= | |invul= | ||
|hitbox=Kagura/CT | |hitbox=Kagura/CT | ||
}} | |||
|} | |||
Fairly short range Crush Trigger. Can be easily used in corner combos to greatly increase combo damage. | |||
*Costs 25% Heat | *Costs 25% Heat | ||
*Possible to charge | *Possible to charge | ||
*180F Heat Gauge cooldown | *180F Heat Gauge cooldown | ||
*Neutral on barrier guard. 40 frame+ spinning knockdown, launch on air hit. | *Neutral on barrier guard. 40 frame+ spinning knockdown, launch on air hit. | ||
</div> | |||
</div> | |||
<br clear=all/> | <br clear=all/> | ||
==Specials== | |||
====== < | ===<big>Dragon Spirit</big>=== | ||
<span class="input-badge">'''[4]~6A/B'''</span> | |||
<div class="attack-container"> | |||
| | <div class="attack-gallery"> | ||
| | <gallery widths="210px" heights="210px" mode="nolines"> | ||
| | BBCP_Kagura_4~6A.png |龍縛旋(りゅうばくせん) | ||
| | </gallery> | ||
</div> | |||
<div class="attack-info"> | |||
{| class="wikitable attack-data" | |||
{{AttackDataHeader-BBCPE|version=yes}} | |||
|- | |||
{{AttackData-BBCPE | |||
|header=no | |||
|version=A | |version=A | ||
|damage=450,450 | |damage=450,450 | ||
|cancel= | |cancel= | ||
|p1= | |p1=80 | ||
|p2= | |p2=95 | ||
|smp= | |smp= | ||
|starter= | |starter= | ||
| Line 1,048: | Line 1,284: | ||
|hitbox=Kagura/4~6A | |hitbox=Kagura/4~6A | ||
}} | }} | ||
|- | |||
{{AttackData-BBCPE | |||
|header=no | |header=no | ||
|version=B | |version=B | ||
|damage= | |damage=550×N (Short) 400×N(Long) | ||
|cancel= | |cancel= | ||
|p1= | |p1=90 | ||
|p2= | |p2=95 | ||
|smp= | |smp= | ||
|starter= | |starter= | ||
| Line 1,061: | Line 1,298: | ||
|active= | |active= | ||
|recovery=Total 54 | |recovery=Total 54 | ||
|frameAdv=+ | |frameAdv=+7 (Short) | ||
|attribute=BP* | |attribute=BP* | ||
|blockstun=13 | |blockstun=13 | ||
| Line 1,070: | Line 1,307: | ||
|invul= | |invul= | ||
|hitbox=Kagura/4~6A | |hitbox=Kagura/4~6A | ||
}} | |||
|} | |||
Dissipates rapidly after Kagura is hit. You can use the projectile as an okizeme tool, the B version starts as the A version, but the further it travels, the more hits it gets (Min 2, Max 5). Has Vacuum effect, which is negated if the opponent IB barriers. Grants small frame advantage on A version, massive frame advantage on B version if it travles far enough. Can be used for both: a combo extender and for okizeme. | |||
*45F charge | *45F charge | ||
*A version starts up faster and goes half-stage. B version takes longer to start up and moves slower initially, but rapidly accelerates and goes all the way across the stage, but number of hits varies per distance traveled (From 2 to 5) | *A version starts up faster and goes half-stage. B version takes longer to start up and moves slower initially, but rapidly accelerates and goes all the way across the stage, but number of hits varies per distance traveled (From 2 to 5) | ||
*Both have SMP, but it is not shared | *Both have SMP, but it is not shared | ||
</div> | |||
</div> | |||
===<big>Dragon's Ascent</big>=== | |||
<span class="input-badge">'''[2]~8B/C'''</span> | |||
<div class="attack-container"> | |||
<div class="attack-gallery"> | |||
<gallery widths="210px" heights="210px" mode="nolines"> | |||
BBCP_Kagura_2~8C.png |龍刃翔(りゅうじんしょう) | |||
</gallery> | |||
</div> | |||
<div class="attack-info"> | |||
{| class="wikitable attack-data" | |||
{{AttackDataHeader-BBCPE|version=yes}} | |||
|- | |||
{{AttackData-BBCPE | |||
|header=no | |||
|version=B | |||
|damage=(1)700 (2-3)350 | |||
|cancel=R | |||
|p1=80 | |||
|p2=(1)89 (2-3)100 | |||
|smp= | |||
|starter= | |||
|guard=HL | |||
|startup=9 | |||
|active= | |||
|recovery= | |||
|frameAdv=-13 (-26) | |||
|attribute=B | |||
|blockstun=16,20 | |||
|groundHit= | |||
|groundCH= | |||
|airHit= | |||
|airCH= | |||
|invul=1-17 Head Inv. | |||
|hitbox=Kagura/2~8C | |||
}} | }} | ||
|- | |||
{{AttackData-BBCPE | |||
{{ | |header=no | ||
| | |version=C | ||
| | |damage=(1)1000 (2-6)300 | ||
|damage= | |||
|cancel=R | |cancel=R | ||
|p1= | |p1=60 | ||
|p2= | |p2=(1)92 (2-6)100 | ||
|smp= | |smp= | ||
|starter= | |starter= | ||
|guard=HL | |guard=HL | ||
|startup= | |startup=13 | ||
|active=2(3) | |active=2(3)2×5 | ||
|recovery= | |recovery=49 | ||
|frameAdv=- | |frameAdv=-40 | ||
|attribute=B | |attribute=B | ||
|blockstun=16,20 | |blockstun=16,20 | ||
| Line 1,101: | Line 1,372: | ||
|airHit= | |airHit= | ||
|airCH= | |airCH= | ||
|invul=1- | |invul=1-27 | ||
|hitbox=Kagura/2~8C | |hitbox=Kagura/2~8C | ||
}} | |||
|} | |||
Uppercut, B version has only head invuln and must be barrier blocked in the air, while C version is completely invuln but can be regular blocked in the air. Damage scales well in combos. B version knocks the opponent very far away, in the corner on counter hit can comboed from, and is also safe on air block in most situations. C version launches them directly up, and is untechable untill knockdown on CH. Incredibly unsafe on block. | |||
*45F charge | *45F charge | ||
*B version is anti-air, C version is reversal | *B version is anti-air, C version is reversal | ||
</div> | |||
</div> | |||
<br clear=all/> | <br clear=all/> | ||
==Distortion Drives== | |||
====== < | ===<big>Supreme Dragon's Inferno</big>=== | ||
<span class="input-badge">'''[4]~41236+C'''</span> | |||
<div class="attack-container"> | |||
| | <div class="attack-gallery"> | ||
| | <gallery widths="210px" heights="210px" mode="nolines"> | ||
| | BBCP_Kagura_4~41236C.png |龍覇・獄焔塵(りゅうは・ごくえんじん) | ||
| | </gallery> | ||
</div> | |||
<div class="attack-info"> | |||
{| class="wikitable attack-data" | |||
{{AttackDataHeader-BBCPE|version=yes}} | |||
|- | |||
{{AttackData-BBCPE | |||
|header=no | |||
|version=Normal | |version=Normal | ||
|damage=2012 | |damage=2012 | ||
| Line 1,139: | Line 1,418: | ||
|hitbox=Kagura/4~41236C | |hitbox=Kagura/4~41236C | ||
}} | }} | ||
|- | |||
{{AttackData-BBCPE | |||
|header=no | |header=no | ||
|version=Overdrive | |version=Overdrive | ||
| Line 1,160: | Line 1,440: | ||
|invul= | |invul= | ||
|hitbox=Kagura/4~41236C | |hitbox=Kagura/4~41236C | ||
}} | |||
|} | |||
Kagura swings his sword and causes three pillars that travel forward towards his opponent. Projectile. Very fast get away move and safe on block. | Kagura swings his sword and causes three pillars that travel forward towards his opponent. Projectile. Very fast get away move and safe on block. | ||
*30F charge | *30F charge | ||
*180F Heat Gauge cooldown | *180F Heat Gauge cooldown | ||
*Minimum damage: 471 (927 OD) | |||
</div> | |||
</div> | |||
| | ===<big>The Dragon Lord's Striking Fang</big>=== | ||
| | <span class="input-badge">'''During a stance, 28D, air OK'''</span> | ||
<div class="attack-container"> | |||
| | <div class="attack-gallery"> | ||
| | <gallery widths="210px" heights="210px" mode="nolines"> | ||
BBCF_Kagura_28D1.png | | |||
BBCP_Kagura_28D.png |龍皇・斬牙欧衝(りゅうおう・ざんがおうしょう) | |||
</gallery> | |||
</div> | |||
<div class="attack-info"> | |||
{| class="wikitable attack-data" | |||
{{AttackDataHeader-BBCPE}} | |||
|- | |||
{{AttackData-BBCPE | |||
|header=no | |||
|damage=500,1747 | |damage=500,1747 | ||
|cancel= | |cancel= | ||
| Line 1,192: | Line 1,483: | ||
|invul= | |invul= | ||
|hitbox=Kagura/28D | |hitbox=Kagura/28D | ||
}} | |||
|} | |||
Kagura raises his sword and slams it to the ground, creating a vertical pillar below his opponent. Can be done either on the ground or in the air depending on the stance used. | |||
*Air OK | *Air OK | ||
*180F Heat Gauge cooldown | *180F Heat Gauge cooldown | ||
*Minimum Damage 1100 (1400 OD) | |||
</div> | |||
</div> | |||
<br clear=all/> | <br clear=all/> | ||
==Astral Heat== | |||
===<big>Black Dragon's Sky-Rending Blade</big>=== | |||
| | <span class="input-badge">'''236236C'''</span> | ||
<div class="attack-container"> | |||
| | <div class="attack-gallery"> | ||
<gallery widths="210px" heights="210px" mode="nolines"> | |||
| | BBCF_Kagura_astral.png | | ||
BBCP_Kagura_236236C.png |黒龍天翔雷刃(こくりゅうてんしょうらいじん) | |||
</gallery> | |||
</div> | |||
<div class="attack-info"> | |||
{| class="wikitable attack-data" | |||
{{AttackDataHeader-BBCPE}} | |||
|- | |||
{{AttackData-BBCPE | |||
|header=no | |||
|damage=Death | |damage=Death | ||
|cancel= | |cancel= | ||
| Line 1,226: | Line 1,528: | ||
|invul=1-32 | |invul=1-32 | ||
|hitbox=Kagura/236236C | |hitbox=Kagura/236236C | ||
}} | }} | ||
|} | |||
Kagura attacks the opponent with two slashes as black and purple lightning courses around his sword. He points his sword toward the sky and a cinematic occurs where his sword emits a large pillar of black energy. There is a zoomed in shot on Kagura's face which pans out as he delivers the final blow by crashing his sword down on the downed opponent. Incredibly easy to combo into from moves such as 3C, and just about any stance move, most notably 2DC. | |||
</div> | |||
</div> | |||
<br clear=all/> | <br clear=all/> | ||
== | ==External References== | ||
*Japanese Name: カグラ=ムツキ | |||
*[http://www54.atwiki.jp/kagura_mutsuki/ Japanese Wiki] | |||
*[http://jbbs.livedoor.jp/bbs/read.cgi/game/45148/1382675095/ Japanese BBS] | |||
*[http://sp.bbcp.ac/ranking_view.php?mode=exe&type=psr_rank&couse=&charactor=kg&pref=0 Arcade Profile Dan Rankings] | |||
* | *[http://www.dustloop.com/forums/index.php?/topic/9569-cpe-kagura-mutsuki-video-thread-updated-03062015/ Character Video Thread] | ||
<br clear=all/> | |||
==Navigation== | |||
{{CharLinks | |||
* | |charMainPage=BBCPE/Kagura Mutsuki | ||
|videos=http://horibuna.web.fc2.com/BBCP/BBCP_KA.html | |||
|forums=http://www.dustloop.com/forums/index.php?/forums/forum/255-kagura-mutsuki/ | |||
}} | |||
{{Navbar-BBCPE}} | |||
* | |||
=== | |||
<templatestyles src="Template:Move Card/shared/styles.css" /> | |||
= | |||
Latest revision as of 07:54, 28 December 2023
Overview

- Movement Options
- Double Jump, 1 Airdash, Dash type: Run
- Removes the limit on stance cancels in D attack strings
- Can dash cancel all C and D attacks except for 3C and 5DB
- 5DC launches upwards instead of behind
- 6DC slides the opponent across the screen
- 2DC causes untechable knockdown
- [4]1236C gets a additional follow-up attack
- 28D deal more hits and damages
- Massive, sweeping normals
- Very high average damage
- Stance cancels provide tricky mixup and mind games
- Almost all combos can end in fireball okizeme
- Certain moves have super armor
- Has one of the best reversals in the game
- Very poor mobility
- Fastest pokes have pitiful range
- Is very heavily momentum based. He will either decisively steal a match, or get hopelessly blown up
- Nearly all high damage combos must be in a corner
- Has arguably the worst mid range game in the entire roster. Characters with strong footsies give him a very hard time
- Struggles against fast mixup characters (Taokaka, Valkenhayn, etc...)
| Health | 100 - 90% | 89 - 80% | 79 - 70% | 69 - 60% | 59 - 50% | 49 - 40% | 39 - 30% | 29 - 20% | 19 - 10% | 9 - 0% |
|---|---|---|---|---|---|---|---|---|---|---|
| Overdrive |
| This data is all copied over from BBCP 1.1. Replace with 2.0 data as it becomes available (and delete this warning) |
Normal Moves
5A

5B

5C

2A

2B

2C

| Damage | Cancel | Guard | Startup | Active | Recovery | Frame Adv | Attribute | Invul |
|---|---|---|---|---|---|---|---|---|
| 900 | SOR | HL | 18 | 5 | 23 | -7 | F | - |
Hits mid. Range is similar to 5C, but 1F faster, making it a slightly better tool at midrange. Causes stagger. Can be late canceled into 5C on block and hit. On air hit, causes a slide effect which in the corner can be comboed into 5C. On counter hit, the stagger effect is huge, and can be comboed into 6DA at mid to close ranges.
- Staggers on hit
- Causes ground slide on air hit.
6A

| Damage | Cancel | Guard | Startup | Active | Recovery | Frame Adv | Attribute | Invul |
|---|---|---|---|---|---|---|---|---|
| 800 | SOR | H | 22 | 3 | 19 | -3 | B | - |
Kagura's overhead which has him attacking his opponent with his elbow. Links into 3C on counter hit, and can be linked into 5A on normal hit against Tager and Hakumen. Causes ground bounce on air hit.
- Forces crouch on hit
- Causes ground bounce on air hit
6B or 5BB

| Damage | Cancel | Guard | Startup | Active | Recovery | Frame Adv | Attribute | Invul |
|---|---|---|---|---|---|---|---|---|
| 600 | SOJR | HL | 11 | 3 | 24 | -10 | B | - |
Not stance cancelable. Jump cancelable on block/hit. Has more range than one would expect and leads to great damage, making it an excellent punish. Can be used to pre-emptively stuff pokes for a CH into 6C, but beware of throwing it out at neutral because it has long recovery on whiff.
6C

| Damage | Cancel | Guard | Startup | Active | Recovery | Frame Adv | Attribute | Invul |
|---|---|---|---|---|---|---|---|---|
| 1200 | SOR | HL | 24 | 6 | 29 | ~-10 | B | - |
Kagura takes a step forward and swings his sword upwards towards his opponent. On hit, launches the opponent high into the air with a ton of untech time, allowing combos into a wide range of followups, notably 6D~A and 6D~B. On CH, causes wall bounce and hard knockdown, allowing for an easy 6DA or 3C pickup.
- Launches on hit
- Wall bounces and untechable knockdown on CH
- SMP
3C

j.A

j.B

| Damage | Cancel | Guard | Startup | Active | Recovery | Frame Adv | Attribute | Invul |
|---|---|---|---|---|---|---|---|---|
| 450 | SOJR | HA | 10 | 4 | 15 | - | H | - |
Air poke that hits below and behind Kagura, very large crossup, good hitbox. Safer jump attack used when the opponent is right below Kagura. Has a ton of untechable time on air CH.
- Huge untechable time on air CH.
j.C

| Damage | Cancel | Guard | Startup | Active | Recovery | Frame Adv | Attribute | Invul |
|---|---|---|---|---|---|---|---|---|
| 750 | SOR | HA | ~15 | 5 | 24 | - | H | - |
Kagura does a huge downward swing with his sword while airborne. Amazing hitbox, good air defensive tool but need to well-spaced due to his recovery. Staggers for a long time on CH.
- Ground opponent on air hit
- Staggers grounded opponent on hit
- 9F landing lag
Drive Moves
Stance
5D/2D/6D, air OK

5D

2D

6D
4D to cancel


| Damage | Cancel | Guard | Startup | Active | Recovery | Frame Adv | Attribute | Invul | |
|---|---|---|---|---|---|---|---|---|---|
| Ground | - | - | - | 1 | - | - | - | - | - |
| Air | - | - | - | 1 | - | - | - | - | - |
| Cancel | - | - | - | - | - | ? | - | - | - |
- Ground Stance earliest cancel into a drive attack is 14F
- Air Stance earliest cancel into Drive attack is 5F
- Grounds fastly before using a Drive attack
- All Kagura stance attacks are air unblockables (Barrier needed)
Kagura enter in stance from frame 1. Each stance (5D, 2D and 6D) have a maximun of 3 attacks + his super. Any stance can be cancelled into another stance quickly. Any stance attack can be cancel into another one from a different stance (5D~A > 2D~A > 6D~A) for a maximun of 3 chains (except during Overdrive), no order required. The Chain is reset when a normal is used between drives.
Air version of any stance. Hangs in air while active. Upon drive attack use, Kagura dives to the ground before performing the normal ground version of the drive. Can be followed up after his command throw and his 2D~A.
You can adjust the direction of the dive by holding 4 (and 3) or 6 (and 1) when activating the drive attack.
Dragon Blast
5D~A

龍破衝(りゅうはしょう)

| Damage | Cancel | Guard | Startup | Active | Recovery | Frame Adv | Attribute | Invul |
|---|---|---|---|---|---|---|---|---|
| 700 | SRDa | HL | 19 | 3 | 31 | -14 | B | - |
Kagura throws his sword and punches it towards his opponent. Can be canceled into a forward dash or backdash on hit/block. -3 SD on forward dash cancel, -6 SD on backdash cancel.
- Staggers opponent on ground hit.
- On air hit, blows back slightly with wallbounce in corner.
- Fatal Counter and staggers for 43F
- Has Super Armor against everything but fast lows.
- Fatals
Dragon's Claw
5D~B

龍戟爪(りゅうげきそう)

Dragon Slaughter
5D~C

屠龍連斬(とりゅうれんざん)

| Damage | Cancel | Guard | Startup | Active | Recovery | Frame Adv | Attribute | Invul |
|---|---|---|---|---|---|---|---|---|
| 750,750 | SR | HL | 17 | 3(14)3 | 34 | -16 | B | - |
Kagura ends his stance and swings his sword upwards twice. Huge hitbox and very tight blocksting when it is canceled into 2D~B. The head invulnerability and huge hitbox make it a powerful, but highly situational anti-air. Extremely bad recovery on whiff, so be careful using it at neutral.
- Wall bounces on CH and wall bounds on regular hit in the corner
- Throws opponent behind Kagura
- Head invuln from frame 1
- SMP
Dragon Strike
2D~A
砕龍撃(さいりんげき)

| Damage | Cancel | Guard | Startup | Active | Recovery | Frame Adv | Attribute | Invul |
|---|---|---|---|---|---|---|---|---|
| 1400 | SR | HA | 20 | 7 | 41 | -27 | B | - |
Kagura jumps from his crouching position and slams his sword to the ground. Has a long ground bounce on hit, allowing combos into 5DA. Versitile combo tool and fast start-up for an overhead, but punishable on block.
- Ground bounces on hit
- Cancels into air stances, will cancel into ground stances if done late in the animation
- SMP
Dragon's Blade
2D~B

龍閃剣(りゅうせんけん)

| Damage | Cancel | Guard | Startup | Active | Recovery | Frame Adv | Attribute | Invul |
|---|---|---|---|---|---|---|---|---|
| 500,800 | R | LA | 13 Minimum | 3(10)2 | 26 | -7 | F | - |
Kagura uses his sword to surf and attack the opponent. First attack hits low and allowing followup combos by RCing the first hit. Standard ender, can be cancelled into a Fireball for a mix up.
- First attack hits low and causes hard knockdown
- Second hit is mid and is emergency techable
Dragon's Dual Strike
2D~C
臥竜双破(がりょうそうは)

| Damage | Cancel | Guard | Startup | Active | Recovery | Frame Adv | Attribute | Invul |
|---|---|---|---|---|---|---|---|---|
| 400,1000 | - | HL | 16 | 2(20)3 | 27 | -9 | B, F | - |
Kagura attacks with two downward sword strikes into the ground. First attack hits higher and pulls in and the Second hit is a low but slightly ground bounces the opponent attack. Has a good hitbox, comes out fairly fast, making this an easy move to use to start drive combos with. Can be comboed into from 5C when done on a crouching opponent. Quite safe on block due to the push block of the last hit.
- Untechable knockdown on CH
- Causes spin state when hitting grounded opponent.
- SMP
Dragon's Fang
6D~A

龍牙迅(りゅうがじん)

| Damage | Cancel | Guard | Startup | Active | Recovery | Frame Adv | Attribute | Invul |
|---|---|---|---|---|---|---|---|---|
| 800 | SR | All | 26-35 | 5 | 20 | -6 | F | - |
Kagura dashes forward and swings his swords downwards towards the opponent's feet. Hits mid. Startup depends on distance from the opponent. On hit, groundbounces and can be linked into normals without canceling. Has very strange invuln for a lengthy portion of the move, avoiding mids and overheads, but losing to lows, low mids(2A's) and jumping normals.
- Ground bounces on hit
- Amazing invuln, can go through DP's or supers.
Dragon's Mirage
6D~B

龍影迅(りゅうえいじん)

| Damage | Cancel | Guard | Startup | Active | Recovery | Frame Adv | Attribute | Invul |
|---|---|---|---|---|---|---|---|---|
| 800 | SR | All | 33-42 | 3 | 24 | -8 | F | - |
Kagura slides through his opponent and attacks them from behind. Crosses up. Typically used as a means of switching sides mid-combo. Has some invuln mid way into the move (some being used loosely), but nothing too amazing.
- Side switches
- Fatals
Sky Dragon's Strike
6D~C

飛龍尖撃(ひりゅうせんげき)

| Damage | Cancel | Guard | Startup | Active | Recovery | Frame Adv | Attribute | Invul |
|---|---|---|---|---|---|---|---|---|
| 1200 | SR | HL | 15-20 | 4 | 26 | -9 | B | - |
Kagura charges his sword forward towards his opponent. Blows back on hit, but can be followed up in corner with various drive moves, notably 2D~C and 2D~B. Very good combo tool and corner carry. Does not hit crouching opponent at max range and does not go Fullscreen. Has armour against projectiles.
- Blows back opponent on hit
- Armour against projectiles
- Wallbounces on counter hit
Universal Mechanics
Forward Throw
5/6B+C

Back Throw
4B+C

Air Throw
j.B+C

Counter Assault
6A+B (While Blocking)
Crush Trigger
5A+B

| Damage | Cancel | Guard | Startup | Active | Recovery | Frame Adv | Attribute | Invul |
|---|---|---|---|---|---|---|---|---|
| 1000 | R | B | 30 | 1 | 26 | +2 | B | - |
Fairly short range Crush Trigger. Can be easily used in corner combos to greatly increase combo damage.
- Costs 25% Heat
- Possible to charge
- 180F Heat Gauge cooldown
- Neutral on barrier guard. 40 frame+ spinning knockdown, launch on air hit.
Specials
Dragon Spirit
[4]~6A/B

龍縛旋(りゅうばくせん)

| Version | Damage | Cancel | Guard | Startup | Active | Recovery | Frame Adv | Attribute | Invul |
|---|---|---|---|---|---|---|---|---|---|
| A | 450,450 | - | All | 19 | 64 | Total 36 | +4 | BP* | - |
| B | 550×N (Short) 400×N(Long) | - | All | 40 | - | Total 54 | +7 (Short) | BP* | - |
Dissipates rapidly after Kagura is hit. You can use the projectile as an okizeme tool, the B version starts as the A version, but the further it travels, the more hits it gets (Min 2, Max 5). Has Vacuum effect, which is negated if the opponent IB barriers. Grants small frame advantage on A version, massive frame advantage on B version if it travles far enough. Can be used for both: a combo extender and for okizeme.
- 45F charge
- A version starts up faster and goes half-stage. B version takes longer to start up and moves slower initially, but rapidly accelerates and goes all the way across the stage, but number of hits varies per distance traveled (From 2 to 5)
- Both have SMP, but it is not shared
Dragon's Ascent
[2]~8B/C

龍刃翔(りゅうじんしょう)

| Version | Damage | Cancel | Guard | Startup | Active | Recovery | Frame Adv | Attribute | Invul |
|---|---|---|---|---|---|---|---|---|---|
| B | (1)700 (2-3)350 | R | HL | 9 | - | - | -13 (-26) | B | 1-17 Head Inv. |
| C | (1)1000 (2-6)300 | R | HL | 13 | 2(3)2×5 | 49 | -40 | B | 1-27 |
Uppercut, B version has only head invuln and must be barrier blocked in the air, while C version is completely invuln but can be regular blocked in the air. Damage scales well in combos. B version knocks the opponent very far away, in the corner on counter hit can comboed from, and is also safe on air block in most situations. C version launches them directly up, and is untechable untill knockdown on CH. Incredibly unsafe on block.
- 45F charge
- B version is anti-air, C version is reversal
Distortion Drives
Supreme Dragon's Inferno
[4]~41236+C

龍覇・獄焔塵(りゅうは・ごくえんじん)

| Version | Damage | Cancel | Guard | Startup | Active | Recovery | Frame Adv | Attribute | Invul |
|---|---|---|---|---|---|---|---|---|---|
| Normal | 2012 | - | - | 1+1 | 6(7)6(7)6 | 24 | -3 | - | - |
| Overdrive | 2764 | - | - | - | - | - | - | - | - |
Kagura swings his sword and causes three pillars that travel forward towards his opponent. Projectile. Very fast get away move and safe on block.
- 30F charge
- 180F Heat Gauge cooldown
- Minimum damage: 471 (927 OD)
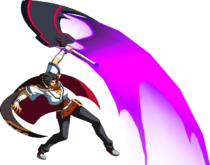
The Dragon Lord's Striking Fang
During a stance, 28D, air OK


龍皇・斬牙欧衝(りゅうおう・ざんがおうしょう)


| Damage | Cancel | Guard | Startup | Active | Recovery | Frame Adv | Attribute | Invul |
|---|---|---|---|---|---|---|---|---|
| 500,1747 | - | - | - | - | - | - | - | - |
Kagura raises his sword and slams it to the ground, creating a vertical pillar below his opponent. Can be done either on the ground or in the air depending on the stance used.
- Air OK
- 180F Heat Gauge cooldown
- Minimum Damage 1100 (1400 OD)
Astral Heat
Black Dragon's Sky-Rending Blade
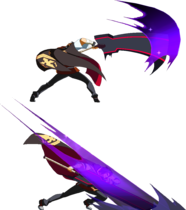
236236C

黒龍天翔雷刃(こくりゅうてんしょうらいじん)


| Damage | Cancel | Guard | Startup | Active | Recovery | Frame Adv | Attribute | Invul |
|---|---|---|---|---|---|---|---|---|
| Death | - | All | 7+15 | 5 | 40 | -24 | B | 1-32 |
Kagura attacks the opponent with two slashes as black and purple lightning courses around his sword. He points his sword toward the sky and a cinematic occurs where his sword emits a large pillar of black energy. There is a zoomed in shot on Kagura's face which pans out as he delivers the final blow by crashing his sword down on the downed opponent. Incredibly easy to combo into from moves such as 3C, and just about any stance move, most notably 2DC.
External References
- Japanese Name: カグラ=ムツキ
- Japanese Wiki
- Japanese BBS
- Arcade Profile Dan Rankings
- Character Video Thread