No edit summary |
Nightshifter (talk | contribs) |
||
| (538 intermediate revisions by more than 100 users not shown) | |||
| Line 1: | Line 1: | ||
==Overview== | ==Overview== | ||
Trunks is a | {{DBFZ/CharacterLinks}} | ||
<div id="home-content" class="home-grid"> | |||
{{card|width=4 | |||
|header=Overview | |||
|content='''Trunks''' is a versatile character centered around his mobility. While lacking in high-low mix-ups, Trunks boasts very strong left-right 50/50s with proper usage of Heavy Cyclone Jump, commonly referred to as EX Flip. These flip mix-ups are especially potent with assists, and in Sparking!, they have the potential to become very difficult to block. Trunks also has wide screen control options with Change The Future and Masenko, and EX Flip serves not only as a mix-up option but a movement tool and combo extender as well. | |||
However, Trunks does have his share of downsides. It is somewhat difficult to consistently execute his EX Flip mix-ups, on top of having an already lacking stagger pressure game. Trunks' Ki Blasts, while they do pierce other Ki Blasts, are horrendous to whiff. | |||
If you like being able to jump extra nimbly and quickly while keeping your opponent on their toes guessing, then choose this hero from the future! | |||
}} | |||
{{ | {{DBFZ/Infobox | ||
| | |fastestAttack= | ||
| | |reversal= | ||
| | }} | ||
| | {{ProsAndCons | ||
| | |intro=is a quick, momentum-based character who thrives off scintillating offensive pressure and mix-up potential. | ||
|pros= | |||
* '''Massive Mobility:''' [[#Cyclone Jump|Cyclone Jump]] greatly supplements Trunks' aerial movement. They also allow him to create more frame advantage from his normals and do unorthodox pressure resets. | |||
* '''Left/Right:''' [[#Cyclone Jump|214H]] and [[#5L|5LLL]] in Sparking offer tons of control and allow for very ambiguous left/right mix-ups, arguably making up for his lacking high/low. | |||
* '''Anti-Zoning:''' [[#Change the Future|214S]] is huge, safe on block, immune to ki blasts, and can also be used as a meaty. [[#5S|5S]] and [[#j.S|j.S]] also blow through most other ki blasts. | |||
|cons= | |||
* | * '''Blockstrings:''' Unsafe mediums limit stagger potential. {{clr|L|5L}} cannot gatling into itself and his {{clr|L|5LL}} is unsafe on block. | ||
* '''Susceptible Mobility:''' While being airdash-cancellable helps circumvent this, [[#Cyclone Jump|Cyclone Jump]] can be beaten by superdashes and anti-airs in neutral fairly consistently. | |||
* '''Committal Neutral:''' Ki Blasts have very high recovery and the air versions also have very narrow attack angles. | |||
|difficulty_rating=3 | |||
}} | |||
</div> | |||
* | |||
* | |||
* | ==Normal Moves== | ||
The | ===<big>{{clr|L|5L}}</big>=== | ||
{{DBFZ_Move_Card | |||
|input=5L,5LL,5LLL | |||
|description= | |||
;{{clr|L|5L}} | |||
* A mini sword normal but has very limited reach. | |||
** Mostly used to get to {{clr|L|5LL}} and {{clr|L|5LLL}}. {{clr|L|2L}} is almost always a superior choice in most other situations. | |||
---- | |||
;{{clr|L|5LL}} | |||
* Pushes forward a decent amount. A good option in neutral after a whiffed {{clr|L|5L}}. | |||
** The forward movement is good for keeping Trunks in close range during blockstrings. {{clr|L|5L}} (reflected) > {{clr|L|5LL}} will push Trunks back in their face, but it can whiff. | |||
---- | |||
;{{clr|L|5LLL}} | |||
* Dashes about 70% of the screen, enough for a full autocombo to travel completely fullscreen. | |||
** Fully invulnerable while it's active | |||
** Switches sides both on block and hit, even in the corner. The pushback makes this nigh unpunishable midscreen. | |||
** On block and in Sparking, jump canceling immediately will keep him same side, but 1f after impact he will always sides switch. | |||
** {{clr|L|5L}} (reflected) > {{clr|L|5LL}} (reflected) > {{clr|L|5LLL}} will always whiff. Overall this entire string is not so safe against Reflect. | |||
As a blockstring, {{clr|L|5LLL}} is rather gimmicky normally, but with Sparking it can setup for left-right 50/50 with {{clr|L|5LLL}} > jc > {{clr|S|236S}} (or {{clr|L|5LLL}} > {{clr|S|2369S}}). [[DBFZ/Trunks/Strategy#Mixups|You can read more about this here.]] | |||
}} | |||
===<big>{{clr|M|5M}}</big>=== | |||
{{DBFZ_Move_Card | |||
|input=5M | |||
|description= | |||
* Slides forward a decent bit. | |||
Good button with fairly fast startup, good range and a high hitbox. | |||
}} | }} | ||
===<big>{{clr|H|5H}}</big>=== | |||
{{ | {{DBFZ_Move_Card | ||
| | |input=5H | ||
|description= | |||
* Smash hit wall splats, combos into SD. | |||
* Non-Smash only combos into SD in the corner. | |||
Fairly standard {{clr|H|5H}} combo wise, but has abysmal active frames and lengthy recovery so try to avoid throwing it out carelessly. | |||
* | |||
* | |||
}} | }} | ||
=== | ===<big>{{clr|S|5S}}</big>=== | ||
{{ | {{DBFZ_Move_Card | ||
| | |input=5S | ||
|description= | |||
* Ki Blast property, but pierces through Lv1 projectiles. | |||
One of Trunks' normals that does not move him forward, so you can use this in blockstrings to set up certain desirable spacings for flip mixups. This can be very strong when covered by assists. It's a decent tool in neutral as well, though it whiffs hard so you want to make sure you're hitting with it at certain ranges, lest you get punished for your opponent jumping over it.. | |||
* | |||
A good fullscreen poke in Sparking!, being relatively fast, and can unsuspectingly lead to a combo off empty-vanish. | |||
}} | }} | ||
===<big>{{clr|L|2L}}</big>=== | |||
{{DBFZ_Move_Card | |||
|input=2L | |||
|description= | |||
Strong range for a 6f jab, good in neutral for contesting gaps in your opponents strings. | |||
Is also Trunks's only real stagger tool. | |||
}} | }} | ||
===<big>{{clr|M|2M}}</big>=== | |||
{{ | {{DBFZ_Move_Card | ||
| | |input=2M | ||
|description= | |||
* Slides forward about half-screen. | |||
Nice for keeping Trunks in close range during blockstrings. The range makes it good for catching backdashes, and will often put you right back in the opponent's face if they reflect. | |||
* Slides forward about | |||
Because of the distance it covers, it can be a good poke when you are on the ground. However, it hits extremely low to the ground so is more vulnerable to opponents jumping or trying to SD than {{clr|M|5M}}. | |||
}} | }} | ||
===<big>{{clr|H|2H}}</big>=== | |||
{{ | {{DBFZ_Move_Card | ||
|input=2H | |||
| | |description= | ||
* Smash hit combos into SD. | |||
Good horizontal range, but the vertical range leaves much to be desired. Doesn't really hit right on top of Trunks' head, so consider using reflect in those situations or just trying to avoid that spacing altogether. | |||
* | |||
}} | }} | ||
===<big>{{clr|M|6M}}</big>=== | |||
{{ | {{DBFZ_Move_Card | ||
| | |input=6M | ||
|description= | |||
* Good range for a {{clr|M|6M}}. | |||
* Good range for a 6M | |||
}} | }} | ||
===<big>{{clr|L|j.L}}</big>=== | |||
{{ | {{DBFZ_Move_Card | ||
| | |input=j.L | ||
|description= | |||
| | * Has a vertically short hitbox, causing it to not connect with oddly placed opponents or if jump canceling at max range of {{clr|M|2M}} > {{clr|M|5M}} if you don't delay the {{clr|M|5M}}. | ||
* Often used after flips so that Trunks can airdash afterwards. | |||
* | |||
}} | }} | ||
===<big>{{clr|M|j.M}}</big>=== | |||
{{ | {{DBFZ_Move_Card | ||
| | |input=j.M | ||
|description= | |||
| | * Good air-to-air normal. | ||
While {{clr|H|j.H}} has a better hitbox, this is still a pretty good jump-in and flip mix button. You can buffer in {{clr|H|j.2H}} after this for a combo if you think it might hit raw against an opponent approaching from the air. Stick to the former for crossups though, as this tends to whiff from point blank. | |||
In the corner you can do things like IAD j.ML > {{clr|L|j.214L}} > j.ML for 4 overhead hits. | |||
}} | }} | ||
===<big>{{clr|H|j.H}}</big>=== | |||
{{ | {{DBFZ_Move_Card | ||
| | |input=j.H | ||
|description= | |||
| | ;{{clr|L|5LLLLLLL}} | ||
* Dynamic hit can wall bounce. | |||
---- | |||
;{{clr|H|j.H}} | |||
* Smash hit causes SKD. | |||
* | * Very long disjointed hitbox. | ||
* Your main crossup button. Should also be your flip mix button if you can help it. | |||
This normal combined with an aerial backdash catches several aerial options while also being very hard to punish due to the spacing it creates. Inputting {{clr|H|j.H}} with a backdash serves as a great anti-approach tool in neutral with little risk and good reward. It's also just an extremely good jump-in. | |||
}} | }} | ||
===<big>{{clr|S|j.S}}</big>=== | |||
{{ | {{DBFZ_Move_Card | ||
| | |input=j.S | ||
|description= | |||
* Stops all air momentum. | |||
* Ki Blast property, but pierces through Lv1 projectiles. | |||
Can be used to snipe {{clr|H|2H}} attempts. Also a good keep-away when canceled into {{clr|M|j.214M}}. Just make sure this hits the opponent in some form, because you do NOT want to suffer the huge recovery on whiff. | |||
}} | }} | ||
===<big>{{clr|H|j.2H}}</big>=== | |||
{{ | {{DBFZ_Move_Card | ||
| | |input=j.2H | ||
|description= | |||
* Stops all air momentum and raises Trunks up and forward slightly. | |||
* | |||
}} | }} | ||
== | ==Special Moves== | ||
===<big>Shining Slash</big>=== | |||
{{InputBadge|'''{{clr|L|236L}}/{{clr|M|M}}/{{clr|H|H}} (Air OK)'''}} | |||
{{DBFZ_Move_Card | |||
|input=236L,236M,236H,j.236L,j.236M,j.236H | |||
|description= | |||
;All | |||
* Stops all momentum and leaps forward. | |||
* On hit, only recovers upon landing. Can call for assists during the cinematic to extend afterwards. | |||
* Smash hit causes SKD. All versions' SKD can combo into Lv1 anywhere on screen, and Lv3 in the corner. | |||
* Grounded hit pushes Trunks slightly backward unlike air hit. | |||
---- | |||
;{{clr|L|236L}} | |||
* Goes half screen. | |||
* Ground version doesn't have head property, cannot be anti-aired with moves like {{clr|H|2H}}. | |||
Trunks' most consistent combo ender. Combos from {{clr|S|j.S}} without needing to flip beforehand, so you'll be using this or Smash {{clr|H|j.H}} midscreen. In the corner, {{clr|M|j.236M}} should be your ender more often than not, but there's rare cases (such as long assisted combos) where hitstun decay is so high that that won't work after flip {{clr|S|j.S}} - this always will. | |||
On block, canceling from any button beside {{clr|L|5L}} and {{clr|L|2L}} will leave at least an 11f gap. Despite this, it's still a good blockstring ender, though it can be reflected, mashed or DP'd so it's not your go-to. | |||
{{ | ---- | ||
| | ;{{clr|M|236M}} | ||
| | * Has longer SKD than L version (stronger oki). As such, it's the main combo ender for corner combos. | ||
* Ground version goes almost fullscreen. | |||
* Air version will only attack when Trunks gets close to the opponent. Has a bit of both vertical and horizontal tracking, will not overshoot the opponent. | |||
Can't be true strung into but being plus on block means it can be used as a blockstring reset of sorts if the opponent doesn't have their {{clr|H|2H}} ready. Be careful midscreen though, since it has so much pushback that Trunks' {{clr|L|L}} buttons may not reach after it, depressingly enough. | |||
The grounded version gives a massive wallbounce similar to Roshi's {{clr|H|22H}}. You can confirm it with {{clr|S|5S}} or {{clr|H|5H}} mid-combo. | |||
---- | |||
;{{clr|H|236H}} | |||
* Has the speed of {{clr|L|L}} version, range of {{clr|M|M}} version, longer knockdown than both. | |||
* Will not overshoot the opponent. | |||
* Ground version doesn't have head property, cannot be anti-aired with moves like {{clr|H|2H}}. | |||
* | |||
{{clr|S|j.S}} > {{clr|H|j.236H}} gives Trunks a SKD anywhere on screen. It is Trunks' fastest grounded overhead, so it can be used for tricky setups, especially due to it having similar frame data to a Dragon Rush. Don't spam it, but use it if you can think you can get away with it. | |||
Ground version gives a wallbounce like the {{clr|M|M}} version does. | |||
}} | }} | ||
===<big>Cyclone Jump</big>=== | |||
{{ | {{InputBadge|'''{{clr|L|214L}}/{{clr|M|M}}/{{clr|H|H}} (Air OK)'''}} | ||
| | {{DBFZ_Move_Card | ||
| | |input=214L,214M,214H,j.214L,j.214M,j.214H | ||
| | |description= | ||
| | ;All | ||
* Command jump that's independent of air options, can only be done once in the air. | |||
* Air versions have shallower arc. | |||
* Can be canceled into airdashes or into any attack during active frames. Autocorrects if cancelled into normals, but not if cancelled into specials. | |||
Due to having start-up even in the air and no defensive options whatsoever, all versions are rather risky to use in neutral, as it can be stuffed with anything. They can be used in stagger pressure to "reset" to neutral to some extent, though Trunks can still start pressure. This also gives him enough time to refresh his assist cooldown, which is very useful for pressure. | |||
---- | |||
* | ;{{clr|L|214L}} | ||
* Flips about half screen forward. | |||
* Can manually side-switch after a launcher pre-superdash. | |||
Mostly a combo tool as it acts like an extra jump cancel. Travels further forward when used mid-combo, allowing for {{clr|S|j.S}} > {{clr|L|j.214L}} > {{clr|L|j.L}}/{{clr|S|j.S}} to work even midscreen. | |||
---- | |||
;{{clr|M|214M}} | |||
* Flips about 25% of the screen backward. | |||
Most useful for disengaging out of blockstrings, and baiting challenges. In a blockstring, any button beside {{clr|L|5L}} and {{clr|L|2L}} > {{clr|M|214M}}~{{clr|S|S}} has a 5~7f gap (depending on distance), making it a decent frame trap. | |||
---- | |||
;{{clr|H|214H}} | |||
* Flips about 75% of the screen forward. Can be directed with {{Ni|8}} {{Ni|2}} {{Ni|4}} {{Ni|6}}. | |||
** {{Ni|8}} and {{Ni|2}} on the way up increases/decreases his vertical reach, on the way down decreases/increases his falling speed (similar to a super jump). | |||
** {{Ni|6}} increases the travel distance up to full-screen, {{Ni|4}} moves him backward up to fullscreen. | |||
Massive application and is one of Trunks' strongest moves, if not his best. Its high momentum control opens the door for many new combo routes and many ''many'' ambiguous left/right 50/50. You can write a whole paragraph about this move... [[DBFZ/Trunks/Strategy#EX_Flip|which is exactly what we did over on his Strategy page.]] | |||
Keep in mind that EX flip mixups leave Trunks wide open, which means they require either an assist or a midscreen hard knockdown. | |||
}} | |||
===<big>Cyclone Buster</big>=== | |||
{{InputBadge|'''Cyclone Jump > {{clr|S|S}}'''}} | |||
{{DBFZ_Move_Card | |||
|input=214X > S | |||
|description= | |||
* Values in [ ] is from 214H~S / j.214H~S | |||
Slightly different frame data compares to j.S. Most notably giving it much higher hitstun, can combo into SD or {{clr|M|j.236M}} even from midscreen. | |||
* | |||
}} | }} | ||
===<big>Masenko</big>=== | |||
{{ | {{InputBadge|'''{{clr|S|236S}}'''}} | ||
| | {{DBFZ_Move_Card | ||
| | |input=236S | ||
| | |description= | ||
* Wall splats on hit. | |||
* Jails into Vanish. | |||
* Can cancel into SD. | |||
A beam not particularly special in any way, and can be inferior to Change the Future at times. Still does the usual beam things - zoning, beating small projectiles, forcing plus frames with Vanish, etc. The hitbox is also a bit smaller than regular beams by a very minuscule amount. | |||
* | |||
}} | }} | ||
===<big>Change the Future</big>=== | |||
{{ | {{InputBadge|'''{{clr|S|214S}} (Hold OK)'''}} | ||
| | {{DBFZ_Move_Card | ||
|input= | |input=214S,214[S] | ||
| | |description= | ||
* Dashes half screen forward, the blast covers the rest 45% of the screen. | |||
* First part is a strike with very tiny hitbox, second part has beam-property. | |||
* Smash on the first part. Smash hit corner splats. Smash {{clr|M|5MMM}} corner bounces. | |||
Incredibly useful tool for Trunks with its gigantic hitbox, good speed, and ki blast invulnerability, allowing it to be a very quick option in neutral. Has very low blockstun, but nonetheless safe. During blockstrings, cancelling from any button beside his lights will leave at least a 4 frame gap, which while catching mashing and chicken blocking, will lose to reversals. Smash hit can be confirmed meterless near the corner thanks to the corner splat and high hitstun. | |||
Change the Future can notably be set up as a meaty that's safe to reversals (other than 9f startup DPs) off any decent knockdown since it's very active. While very difficult to hitconfirm, it's very strong for discouraging defensive options like f1 anti-airs or physical counters. At times, can even act as a better space-control option than his Masenko beam since it has faster start-up and less recovery. | |||
---- | |||
* Hold button to feint, dashes forward without attacking. | |||
** Able to cancel into other Special Moves. | |||
Can be used to reset pressure and also bait reflect. Good after full-screen knockdowns from moves such as {{clr|H|236H}}, since it can get closer to the opponent faster than a normal dash can. can now perform a special move during feint. | |||
}} | }} | ||
====== < | ==Z Assists== | ||
{{ | ===<big>Assist A</big>=== | ||
{{InputBadge|'''Change the Future'''}} | |||
{{DBFZ_Move_Card | |||
| | |input=Assist A | ||
|description= | |||
* Unlike point Trunks, only the projectile has hitboxes. | |||
* Low blockstun, high hitstun. | |||
An all round good assist. It covers a good part of the screen closer up and can't be super dashed through just like the actual move. This can be very useful for limiting an opponent's options once you're in range and subsequently helping you approach more easily. Do note that similar to when Trunks is on point, he'll do a dash forward before doing it. This creates a bit of dead zone where the attack doesn't hit directly in front of your character so be sure to learn the spacing for when to use this assist in neutral. | |||
The giant blast can be pretty good at masking what your point character is doing, helping you convert from mix-ups that are usually reactable, such as the universal overhead. | |||
Being on the lower end of blockstun is bad, however as a low blockstun assist, it does have the ability to break cross-up protection. It also enables tick throwing with characters that have grabs as the last hit of their autocombo such as with Cell, Majin Buu, Zamasu, and Z Broly. Combined with it's giant blast, it can also be very useful for masking Dragon Rush, as you can do special moves into this assist and immediately DR afterwards, which could throw opponents off if they're not ready. | |||
}} | }} | ||
==Assist== | ===<big>Assist B</big>=== | ||
{{ | {{InputBadge|'''Masenko'''}} | ||
| | {{DBFZ_Move_Card | ||
|input=Assist B | |||
|description= | |||
* Wall splats on hit. | |||
It's a beam! Hurray! Trunks' B assist is very solid and is a great option for most teams. Though one would think this would just eclipse Change the Future, it is not the case. In some matchups, such as versus DBZ Broly, or for characters like Kefla who generally prefer fast assists and don't need the blockstun, you may want to stick with Change the Future as its ability to reflect ki blasts and its closer, slightly faster usage might be more useful. It simply comes down to playstyle preference or what works best for your team, as you may prefer what CTF brings over Masenko or vice versa. | |||
}} | |||
* | |||
===<big>Assist C</big>=== | |||
{{InputBadge|'''Flurry Slash'''}} | |||
{{DBFZ_Move_Card | |||
|input=Assist C | |||
|description= | |||
* Tracks the opponent on the ground. | |||
* On hit, teleports behind the opponent and knocks them down into a ground bounce SKD. | |||
* Values in [ ] is when the opponent is in hitstun/untech. | |||
A typical C assist. Very solid as a combo tool, as it does not use up Smash at all, and used in combos it has almost instant startup, making combos into it very easy to do. It can a bit hard to use in other situations, such as in neutral or in blockstrings, given how much recovery it takes for C assists to return. While it's a very solid option, the other two assists that Trunks offers are so good that it's hard to choose Assist C over those two. It does have high advantage on block, being +50, which makes it not a totally unviable option - though again, your other choices are likely better. | |||
}} | |||
==Super Moves== | |||
===<big>Burning Attack</big>=== | |||
{{InputBadge|'''{{clr|L|236L}}+{{clr|M|M}}'''}} or {{InputBadge|'''{{clr|H|236H}}+{{clr|S|S}}'''}} | |||
{{DBFZ_Move_Card | |||
|input=236L+M,236L+M > X | |||
|description= | |||
;Burning Attack | |||
* Minimum damage: 814. | |||
* As standard as a Super can get. | |||
* Buffer window is notably more lenient compared to other supers. | |||
The Burning Attack hitbox has a travel time, and although negligible, in some extreme scenarios where hitstun decay is at its peak, can whiff when used at a full-screen distance. | |||
---- | |||
;Burning Attack Follow-up {{InputBadge|Burning Attack > {{clr|L|[L}}/{{clr|M|M}}/{{clr|H|H}}/{{clr|S|S]}}}} | |||
* Minimum damage: 40, 10*16, 100 [160, 40*16, 350] | |||
* Tracks fullscreen | |||
* Trunks can do an EX flip mixup off this if it hits midscreen, just like his Level 3 mix. However this doesn't give a hard knockdown, so the mix can be escaped by just upteching. | |||
Whiffing the initial blast and hitting only with the follow-up will deal a smidge more damage than hitting with both parts of the Super. DHC-ing into this while the opponent is in the air to maximize damage output, but you're not missing a whole lot if your team can't do this. | |||
}} | }} | ||
== | ===<big>Heat Dome Attack</big>=== | ||
{{InputBadge|'''{{clr|L|214L}}+{{clr|M|M}}'''}} or {{InputBadge|'''{{clr|H|214H}}+{{clr|S|S}}'''}} | |||
{{DBFZ_Move_Card | |||
|input=214L+M | |||
|description= | |||
* Minimum damage: 1715. | |||
* Comboing into this midscreen requires some getting used to, as it's unorthodox. | |||
* {{clr|L|L}}+{{clr|M|M}} version's range is only slightly longer than {{clr|L|2L}} but with high vertical reach, and moves him forward a tiny bit. Meanwhile, {{clr|H|H}}+{{clr|S|S}} version travels ''halfscreen.'' You need to be stopped. | |||
* Doing raw, can only catch grounded and close-proximity opponents. Only mid-combo it can catch an airborne opponent. | |||
Among the highest Super damage in the game raw, and used to catch your opponents falling asleep. Doing raw, the opponent can dodge it by holding jump on reaction to the super flash, but at least it doesn't have a lot of recovery. A bad reversal in general, and again, almost always whiffs on airborne opponents completely. It does have some high vertical range, but it still won't catch jumps and it's still not worth potentially burning 3 bars and getting punished heavily for it. Being a cinematic Super, you have to DHC into it at the end or risk eating up damage from on-going Supers. | |||
Trunks has to do some specific routing to combo into this midscreen. The most reliable way to do it is, after a {{clr|H|2H}} or {{clr|H|j.2H}} launcher, doing {{clr|S|j.S}} > {{clr|L|j.214L}} > {{clr|L|j.L}}{{clr|H|H}} (the {{clr|H|j.H}} will hit in such a way that Trunks falls right behind the opponent, enabling his left/right mix even when near the corner). Even without that setup, he can use it after any Smash {{clr|H|j.H}} by microdashing upon landing and using the {{clr|H|H}}+{{clr|S|S}} version, but the timing is quite difficult. He can also use it right after raw {{clr|M|M}} or {{clr|H|H}} Shining Slash due to their massive wallbounces on hit. | |||
On hit, beside simple meaty setups like IAD {{clr|H|j.H}}, buffering CtF or {{clr|M|6M}}, if you wanna capitalize with EX flip mix, you most likely will want to spend a bar on whiff Vanish before going into Heat Dome, as it doesn't pull the opponent out of the corner for left/right mix (however, corner combos that sideswitch meterlessly ''do'' exist). Certain combo routes with C Assists can also achieve this without wasting the extra bar. | |||
{{ | |||
| | |||
}} | }} | ||
== | ==Colors== | ||
{{ | {{DBFZColors}} | ||
}} | |||
==Navigation== | |||
{{ | <center>{{Character Label|DBFZ|Trunks|size=32px}}</center> | ||
| | {{DBFZ/CharacterLinks}} | ||
| | {{notice|To edit frame data, edit values in [[{{PAGENAME}}/Data]].}} | ||
}} | {{DBFZ/Navigation}} | ||
{{ | |||
Latest revision as of 16:40, 6 January 2024
Overview
Trunks is a versatile character centered around his mobility. While lacking in high-low mix-ups, Trunks boasts very strong left-right 50/50s with proper usage of Heavy Cyclone Jump, commonly referred to as EX Flip. These flip mix-ups are especially potent with assists, and in Sparking!, they have the potential to become very difficult to block. Trunks also has wide screen control options with Change The Future and Masenko, and EX Flip serves not only as a mix-up option but a movement tool and combo extender as well.
However, Trunks does have his share of downsides. It is somewhat difficult to consistently execute his EX Flip mix-ups, on top of having an already lacking stagger pressure game. Trunks' Ki Blasts, while they do pierce other Ki Blasts, are horrendous to whiff.
If you like being able to jump extra nimbly and quickly while keeping your opponent on their toes guessing, then choose this hero from the future! |
| Unique Movement Options |
| Cyclone Jump Change the Future (Feint) |
| Fastest Attacks |
| Reversals |
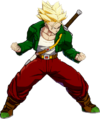
![]() Trunks is a quick, momentum-based character who thrives off scintillating offensive pressure and mix-up potential.
Trunks is a quick, momentum-based character who thrives off scintillating offensive pressure and mix-up potential.
- Massive Mobility: Cyclone Jump greatly supplements Trunks' aerial movement. They also allow him to create more frame advantage from his normals and do unorthodox pressure resets.
- Left/Right: 214H and 5LLL in Sparking offer tons of control and allow for very ambiguous left/right mix-ups, arguably making up for his lacking high/low.
- Anti-Zoning: 214S is huge, safe on block, immune to ki blasts, and can also be used as a meaty. 5S and j.S also blow through most other ki blasts.
- Blockstrings: Unsafe mediums limit stagger potential. 5L cannot gatling into itself and his 5LL is unsafe on block.
- Susceptible Mobility: While being airdash-cancellable helps circumvent this, Cyclone Jump can be beaten by superdashes and anti-airs in neutral fairly consistently.
- Committal Neutral: Ki Blasts have very high recovery and the air versions also have very narrow attack angles.
Normal Moves
5L


| Version | Damage | Guard | Smash | Startup | Active | Recovery | On-Block | Invuln |
|---|---|---|---|---|---|---|---|---|
| 5L | 400 | All | 6 | 3 | 14 | -5 | ||
| 5LL | 700 | All | 11 | 3 | 20 | -7 | ||
| 5LLL | 1000 | All | U3+ | 13 | 6 | 21 | -7 | 13-18 All |
- 5L
- A mini sword normal but has very limited reach.
- Mostly used to get to 5LL and 5LLL. 2L is almost always a superior choice in most other situations.
- 5LL
- Pushes forward a decent amount. A good option in neutral after a whiffed 5L.
- The forward movement is good for keeping Trunks in close range during blockstrings. 5L (reflected) > 5LL will push Trunks back in their face, but it can whiff.
- 5LLL
- Dashes about 70% of the screen, enough for a full autocombo to travel completely fullscreen.
- Fully invulnerable while it's active
- Switches sides both on block and hit, even in the corner. The pushback makes this nigh unpunishable midscreen.
- On block and in Sparking, jump canceling immediately will keep him same side, but 1f after impact he will always sides switch.
- 5L (reflected) > 5LL (reflected) > 5LLL will always whiff. Overall this entire string is not so safe against Reflect.
As a blockstring, 5LLL is rather gimmicky normally, but with Sparking it can setup for left-right 50/50 with 5LLL > jc > 236S (or 5LLL > 2369S). You can read more about this here.
5M

| Damage | Guard | Smash | Startup | Active | Recovery | On-Block | Invuln |
|---|---|---|---|---|---|---|---|
| 700 | All | 9 | 3 | 22 | -9 |
- Slides forward a decent bit.
Good button with fairly fast startup, good range and a high hitbox.
5H

| Damage | Guard | Smash | Startup | Active | Recovery | On-Block | Invuln |
|---|---|---|---|---|---|---|---|
| 850 / 1000 | All | U1 | 13 | 2 | 31 | -17 | 13-16 Ki Blasts |
- Smash hit wall splats, combos into SD.
- Non-Smash only combos into SD in the corner.
Fairly standard 5H combo wise, but has abysmal active frames and lengthy recovery so try to avoid throwing it out carelessly.
5S

| Damage | Guard | Smash | Startup | Active | Recovery | On-Block | Invuln |
|---|---|---|---|---|---|---|---|
| 600 | All | 15 | Total 59 | -5 |
- Ki Blast property, but pierces through Lv1 projectiles.
One of Trunks' normals that does not move him forward, so you can use this in blockstrings to set up certain desirable spacings for flip mixups. This can be very strong when covered by assists. It's a decent tool in neutral as well, though it whiffs hard so you want to make sure you're hitting with it at certain ranges, lest you get punished for your opponent jumping over it..
A good fullscreen poke in Sparking!, being relatively fast, and can unsuspectingly lead to a combo off empty-vanish.
2L

| Damage | Guard | Smash | Startup | Active | Recovery | On-Block | Invuln |
|---|---|---|---|---|---|---|---|
| 400 | All | 6 | 3 | 9 | ±0 |
Strong range for a 6f jab, good in neutral for contesting gaps in your opponents strings.
Is also Trunks's only real stagger tool.
2M

| Damage | Guard | Smash | Startup | Active | Recovery | On-Block | Invuln |
|---|---|---|---|---|---|---|---|
| 700 | Low | 12 | 9 | 17 | -10 |
- Slides forward about half-screen.
Nice for keeping Trunks in close range during blockstrings. The range makes it good for catching backdashes, and will often put you right back in the opponent's face if they reflect.
Because of the distance it covers, it can be a good poke when you are on the ground. However, it hits extremely low to the ground so is more vulnerable to opponents jumping or trying to SD than 5M.
2H

| Damage | Guard | Smash | Startup | Active | Recovery | On-Block | Invuln |
|---|---|---|---|---|---|---|---|
| 850 / 1000 | All | U1+ | 15 | 2 | 32 | -18 | 4-16 Head, 15-16 Ki Blasts |
- Smash hit combos into SD.
Good horizontal range, but the vertical range leaves much to be desired. Doesn't really hit right on top of Trunks' head, so consider using reflect in those situations or just trying to avoid that spacing altogether.
6M

| Damage | Guard | Smash | Startup | Active | Recovery | On-Block | Invuln |
|---|---|---|---|---|---|---|---|
| 850 | High | 24 | 6 | 4+6L | ±0 | 24-29 Ki Blasts |
- Good range for a 6M.
j.L

| Damage | Guard | Smash | Startup | Active | Recovery | On-Block | Invuln |
|---|---|---|---|---|---|---|---|
| 400 | High | 6 | 3 | 12 |
- Has a vertically short hitbox, causing it to not connect with oddly placed opponents or if jump canceling at max range of 2M > 5M if you don't delay the 5M.
- Often used after flips so that Trunks can airdash afterwards.
j.M

| Damage | Guard | Smash | Startup | Active | Recovery | On-Block | Invuln |
|---|---|---|---|---|---|---|---|
| 700 | High | 10 | 5 | 17 |
- Good air-to-air normal.
While j.H has a better hitbox, this is still a pretty good jump-in and flip mix button. You can buffer in j.2H after this for a combo if you think it might hit raw against an opponent approaching from the air. Stick to the former for crossups though, as this tends to whiff from point blank.
In the corner you can do things like IAD j.ML > j.214L > j.ML for 4 overhead hits.
j.H
| Damage | Guard | Smash | Startup | Active | Recovery | On-Block | Invuln |
|---|---|---|---|---|---|---|---|
| 850 / 1000 | High | D1+ [D3+] | 10 | 3 | 29 | 13-17 Ki Blasts |
- 5LLLLLLL
- Dynamic hit can wall bounce.
- j.H
- Smash hit causes SKD.
- Very long disjointed hitbox.
- Your main crossup button. Should also be your flip mix button if you can help it.
This normal combined with an aerial backdash catches several aerial options while also being very hard to punish due to the spacing it creates. Inputting j.H with a backdash serves as a great anti-approach tool in neutral with little risk and good reward. It's also just an extremely good jump-in.
j.S

| Damage | Guard | Smash | Startup | Active | Recovery | On-Block | Invuln |
|---|---|---|---|---|---|---|---|
| 600 | All | 16 | Total 50 |
- Stops all air momentum.
- Ki Blast property, but pierces through Lv1 projectiles.
Can be used to snipe 2H attempts. Also a good keep-away when canceled into j.214M. Just make sure this hits the opponent in some form, because you do NOT want to suffer the huge recovery on whiff.
j.2H

| Damage | Guard | Smash | Startup | Active | Recovery | On-Block | Invuln |
|---|---|---|---|---|---|---|---|
| 850 | All | U1+ | 13 | 3 | 24 |
- Stops all air momentum and raises Trunks up and forward slightly.
Special Moves
Shining Slash
236L/M/H (Air OK)

| Version | Damage | Guard | Smash | Startup | Active | Recovery | On-Block | Invuln |
|---|---|---|---|---|---|---|---|---|
| 236L | 1100 | High | D1 | 25 | 3 | 11+4L | -5 | |
| 236M | 1240 | High | D1 | 30 | 3 | 6+4L | +2 | |
| 236H | 1650 | High | D1 | 23 | 3 | 11+4L | -5 | |
| j.236L | 1000 | High | D1 | 20 | 3 | 17 | ||
| j.236M | 1140 | High | D1 | 26~Until L | 3 | 17 | +2 | |
| j.236H | 1350 | High | D1 | 18 | 3 | 17 |
- All
- Stops all momentum and leaps forward.
- On hit, only recovers upon landing. Can call for assists during the cinematic to extend afterwards.
- Smash hit causes SKD. All versions' SKD can combo into Lv1 anywhere on screen, and Lv3 in the corner.
- Grounded hit pushes Trunks slightly backward unlike air hit.
- 236L
- Goes half screen.
- Ground version doesn't have head property, cannot be anti-aired with moves like 2H.
Trunks' most consistent combo ender. Combos from j.S without needing to flip beforehand, so you'll be using this or Smash j.H midscreen. In the corner, j.236M should be your ender more often than not, but there's rare cases (such as long assisted combos) where hitstun decay is so high that that won't work after flip j.S - this always will.
On block, canceling from any button beside 5L and 2L will leave at least an 11f gap. Despite this, it's still a good blockstring ender, though it can be reflected, mashed or DP'd so it's not your go-to.
- 236M
- Has longer SKD than L version (stronger oki). As such, it's the main combo ender for corner combos.
- Ground version goes almost fullscreen.
- Air version will only attack when Trunks gets close to the opponent. Has a bit of both vertical and horizontal tracking, will not overshoot the opponent.
Can't be true strung into but being plus on block means it can be used as a blockstring reset of sorts if the opponent doesn't have their 2H ready. Be careful midscreen though, since it has so much pushback that Trunks' L buttons may not reach after it, depressingly enough.
The grounded version gives a massive wallbounce similar to Roshi's 22H. You can confirm it with 5S or 5H mid-combo.
- 236H
- Has the speed of L version, range of M version, longer knockdown than both.
- Will not overshoot the opponent.
- Ground version doesn't have head property, cannot be anti-aired with moves like 2H.
j.S > j.236H gives Trunks a SKD anywhere on screen. It is Trunks' fastest grounded overhead, so it can be used for tricky setups, especially due to it having similar frame data to a Dragon Rush. Don't spam it, but use it if you can think you can get away with it.
Ground version gives a wallbounce like the M version does.
Cyclone Jump
214L/M/H (Air OK)

| Version | Damage | Guard | Smash | Startup | Active | Recovery | On-Block | Invuln |
|---|---|---|---|---|---|---|---|---|
| 214L | 14 | 21 | 3+6L | |||||
| 214M | 14 | 21 | 3+6L | |||||
| 214H | 11 | 40 | 4 | |||||
| j.214L | 14 | 21 | 4+6L | |||||
| j.214M | 14 | 21 | 4+6L | |||||
| j.214H | 11 | 40 | 4 |
- All
- Command jump that's independent of air options, can only be done once in the air.
- Air versions have shallower arc.
- Can be canceled into airdashes or into any attack during active frames. Autocorrects if cancelled into normals, but not if cancelled into specials.
Due to having start-up even in the air and no defensive options whatsoever, all versions are rather risky to use in neutral, as it can be stuffed with anything. They can be used in stagger pressure to "reset" to neutral to some extent, though Trunks can still start pressure. This also gives him enough time to refresh his assist cooldown, which is very useful for pressure.
- 214L
- Flips about half screen forward.
- Can manually side-switch after a launcher pre-superdash.
Mostly a combo tool as it acts like an extra jump cancel. Travels further forward when used mid-combo, allowing for j.S > j.214L > j.L/j.S to work even midscreen.
- 214M
- Flips about 25% of the screen backward.
Most useful for disengaging out of blockstrings, and baiting challenges. In a blockstring, any button beside 5L and 2L > 214M~S has a 5~7f gap (depending on distance), making it a decent frame trap.
- 214H
- Flips about 75% of the screen forward. Can be directed with


 .
.
- and on the way up increases/decreases his vertical reach, on the way down decreases/increases his falling speed (similar to a super jump).
- increases the travel distance up to full-screen, moves him backward up to fullscreen.
Massive application and is one of Trunks' strongest moves, if not his best. Its high momentum control opens the door for many new combo routes and many many ambiguous left/right 50/50. You can write a whole paragraph about this move... which is exactly what we did over on his Strategy page.
Keep in mind that EX flip mixups leave Trunks wide open, which means they require either an assist or a midscreen hard knockdown.
Cyclone Buster
Cyclone Jump > S
| Damage | Guard | Smash | Startup | Active | Recovery | On-Block | Invuln |
|---|---|---|---|---|---|---|---|
| 600 [1000] | All | 10 | Total 48+6L |
- Values in [ ] is from 214H~S / j.214H~S
Slightly different frame data compares to j.S. Most notably giving it much higher hitstun, can combo into SD or j.236M even from midscreen.
Masenko
236S

| Damage | Guard | Smash | Startup | Active | Recovery | On-Block | Invuln |
|---|---|---|---|---|---|---|---|
| 262×5 | All | 18 | 25 | 21 | -16 |
- Wall splats on hit.
- Jails into Vanish.
- Can cancel into SD.
A beam not particularly special in any way, and can be inferior to Change the Future at times. Still does the usual beam things - zoning, beating small projectiles, forcing plus frames with Vanish, etc. The hitbox is also a bit smaller than regular beams by a very minuscule amount.
Change the Future
214S (Hold OK)

| Version | Damage | Guard | Smash | Startup | Active | Recovery | On-Block | Invuln |
|---|---|---|---|---|---|---|---|---|
| 214S | 900 | All | U1+ | 19 | 1, 12 | 8 | -5 | 1-20 Ki Blasts |
| 214[S] | Total 26 | 1-10 Ki Blasts |
- Dashes half screen forward, the blast covers the rest 45% of the screen.
- First part is a strike with very tiny hitbox, second part has beam-property.
- Smash on the first part. Smash hit corner splats. Smash 5MMM corner bounces.
Incredibly useful tool for Trunks with its gigantic hitbox, good speed, and ki blast invulnerability, allowing it to be a very quick option in neutral. Has very low blockstun, but nonetheless safe. During blockstrings, cancelling from any button beside his lights will leave at least a 4 frame gap, which while catching mashing and chicken blocking, will lose to reversals. Smash hit can be confirmed meterless near the corner thanks to the corner splat and high hitstun.
Change the Future can notably be set up as a meaty that's safe to reversals (other than 9f startup DPs) off any decent knockdown since it's very active. While very difficult to hitconfirm, it's very strong for discouraging defensive options like f1 anti-airs or physical counters. At times, can even act as a better space-control option than his Masenko beam since it has faster start-up and less recovery.
- Hold button to feint, dashes forward without attacking.
- Able to cancel into other Special Moves.
Can be used to reset pressure and also bait reflect. Good after full-screen knockdowns from moves such as 236H, since it can get closer to the opponent faster than a normal dash can. can now perform a special move during feint.
Z Assists
Assist A
Change the Future
| Damage | Guard | Smash | Startup | Active | Recovery | On-Block | Invuln |
|---|---|---|---|---|---|---|---|
| 800 | All | 25 | 12 | 61 | +14 | 17-36 Ki Blasts |
- Unlike point Trunks, only the projectile has hitboxes.
- Low blockstun, high hitstun.
An all round good assist. It covers a good part of the screen closer up and can't be super dashed through just like the actual move. This can be very useful for limiting an opponent's options once you're in range and subsequently helping you approach more easily. Do note that similar to when Trunks is on point, he'll do a dash forward before doing it. This creates a bit of dead zone where the attack doesn't hit directly in front of your character so be sure to learn the spacing for when to use this assist in neutral.
The giant blast can be pretty good at masking what your point character is doing, helping you convert from mix-ups that are usually reactable, such as the universal overhead.
Being on the lower end of blockstun is bad, however as a low blockstun assist, it does have the ability to break cross-up protection. It also enables tick throwing with characters that have grabs as the last hit of their autocombo such as with Cell, Majin Buu, Zamasu, and Z Broly. Combined with it's giant blast, it can also be very useful for masking Dragon Rush, as you can do special moves into this assist and immediately DR afterwards, which could throw opponents off if they're not ready.
Assist B
Masenko
| Damage | Guard | Smash | Startup | Active | Recovery | On-Block | Invuln |
|---|---|---|---|---|---|---|---|
| 200×5 | 34 | +30 |
- Wall splats on hit.
It's a beam! Hurray! Trunks' B assist is very solid and is a great option for most teams. Though one would think this would just eclipse Change the Future, it is not the case. In some matchups, such as versus DBZ Broly, or for characters like Kefla who generally prefer fast assists and don't need the blockstun, you may want to stick with Change the Future as its ability to reflect ki blasts and its closer, slightly faster usage might be more useful. It simply comes down to playstyle preference or what works best for your team, as you may prefer what CTF brings over Masenko or vice versa.
Assist C
Flurry Slash
| Damage | Guard | Smash | Startup | Active | Recovery | On-Block | Invuln |
|---|---|---|---|---|---|---|---|
| 450×2, 400 | All | 35 [20] | 4(8)2(17)2 | +55 |
- Tracks the opponent on the ground.
- On hit, teleports behind the opponent and knocks them down into a ground bounce SKD.
- Values in [ ] is when the opponent is in hitstun/untech.
A typical C assist. Very solid as a combo tool, as it does not use up Smash at all, and used in combos it has almost instant startup, making combos into it very easy to do. It can a bit hard to use in other situations, such as in neutral or in blockstrings, given how much recovery it takes for C assists to return. While it's a very solid option, the other two assists that Trunks offers are so good that it's hard to choose Assist C over those two. It does have high advantage on block, being +50, which makes it not a totally unviable option - though again, your other choices are likely better.
Super Moves
Burning Attack
236L+M or 236H+S


| Version | Damage | Guard | Smash | Startup | Active | Recovery | On-Block | Invuln |
|---|---|---|---|---|---|---|---|---|
| 236L+M | 2200 | All | UDV | 6+4 | Total 60 | -27 | 6-15 All | |
| 236L+M > X | 640, 120×16, 600 | High | UDV | 16+L | -5 |
- Burning Attack
- Minimum damage: 814.
- As standard as a Super can get.
- Buffer window is notably more lenient compared to other supers.
The Burning Attack hitbox has a travel time, and although negligible, in some extreme scenarios where hitstun decay is at its peak, can whiff when used at a full-screen distance.
- Burning Attack Follow-up Burning Attack > [L/M/H/S]
- Minimum damage: 40, 10*16, 100 [160, 40*16, 350]
- Tracks fullscreen
- Trunks can do an EX flip mixup off this if it hits midscreen, just like his Level 3 mix. However this doesn't give a hard knockdown, so the mix can be escaped by just upteching.
Whiffing the initial blast and hitting only with the follow-up will deal a smidge more damage than hitting with both parts of the Super. DHC-ing into this while the opponent is in the air to maximize damage output, but you're not missing a whole lot if your team can't do this.
Heat Dome Attack
214L+M or 214H+S


| Damage | Guard | Smash | Startup | Active | Recovery | On-Block | Invuln |
|---|---|---|---|---|---|---|---|
| 4863 | Throw | UDV | 9+3 | 1 | 37 | 1-14 All |
- Minimum damage: 1715.
- Comboing into this midscreen requires some getting used to, as it's unorthodox.
- L+M version's range is only slightly longer than 2L but with high vertical reach, and moves him forward a tiny bit. Meanwhile, H+S version travels halfscreen. You need to be stopped.
- Doing raw, can only catch grounded and close-proximity opponents. Only mid-combo it can catch an airborne opponent.
Among the highest Super damage in the game raw, and used to catch your opponents falling asleep. Doing raw, the opponent can dodge it by holding jump on reaction to the super flash, but at least it doesn't have a lot of recovery. A bad reversal in general, and again, almost always whiffs on airborne opponents completely. It does have some high vertical range, but it still won't catch jumps and it's still not worth potentially burning 3 bars and getting punished heavily for it. Being a cinematic Super, you have to DHC into it at the end or risk eating up damage from on-going Supers.
Trunks has to do some specific routing to combo into this midscreen. The most reliable way to do it is, after a 2H or j.2H launcher, doing j.S > j.214L > j.LH (the j.H will hit in such a way that Trunks falls right behind the opponent, enabling his left/right mix even when near the corner). Even without that setup, he can use it after any Smash j.H by microdashing upon landing and using the H+S version, but the timing is quite difficult. He can also use it right after raw M or H Shining Slash due to their massive wallbounces on hit.
On hit, beside simple meaty setups like IAD j.H, buffering CtF or 6M, if you wanna capitalize with EX flip mix, you most likely will want to spend a bar on whiff Vanish before going into Heat Dome, as it doesn't pull the opponent out of the corner for left/right mix (however, corner combos that sideswitch meterlessly do exist). Certain combo routes with C Assists can also achieve this without wasting the extra bar.
Colors

Color 1

Color 2

Color 3

Color 4

Color 5

Color 6

Color 7

Color 8

Color 9

Color 10

Color 11

Color 12


Color 131
Color 141

Color 151

Color 161


