Overview
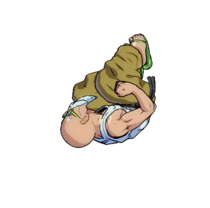
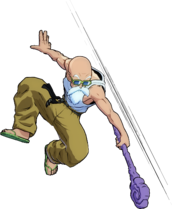
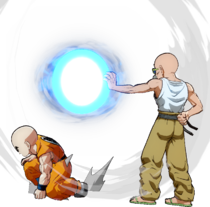
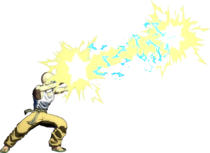
The Turtle Hermit Master Roshi is an extremely technical character loaded with tools to let him do just about anything, assuming you're a master yourself. Where other characters have only a handful of tools that are used for multiple applications, Master Roshi has many tools with specific applications. While he does not have a traditional superdash, his replacements in Masterful Leap and Reverse Kamehameha give him movement like no other character in the cast and have their own benefits and detractions. When all of his unique tools are put into good use, he is a scary opponent to face and proves that the Old Turtle Hermit isn't old yet.
Master Roshi's unique tools are a double-edged sword, however. His massive kit combined with his superdash replacements make him incredibly unintuitive to pick up and play. You must put in the time with the old man to maximize his strengths. Master Roshi is a potent character when you put the time into learning his quirks, and you will overwhelm your opponent once you figure him out. If you're willing to be loyal to a character with a high skill ceiling, try out the old man. Welcome to Master Roshi. |
| Unique Movement Options |
| Masterful Leap Reverse Kamehameha |
| Fastest Attacks |
| Reversals |
![]() Master Roshi is a high-skill all-rounder with an absurdly large toolkit that allows him to play nearly every situation.
Master Roshi is a high-skill all-rounder with an absurdly large toolkit that allows him to play nearly every situation.
- Insanely Massive Toolkit: Master Roshi's toolkit is incredibly expansive, combo-friendly and versatile. All of his moves have several applications for combos, knockdowns, mix-ups, and pressure.
- Amazing Pressure: Master Roshi has plentiful mixup tools and pressure resets despite his poor frame data. Cycling his options effectively makes him very difficult to defend against.
- Aerial Denial: 214S forces opponents to avoid jumping, being a completely air unblockable fullscreen beam that can lead to deadly Sparking combos.
- Movement Like No Other: While his lack of a Superdash may initially seem like a liability, its substitutes in Reverse Kamehameha and Masterful Leap give Roshi ground and air manuverability like no one else on the roster. 2S also gives Roshi a quick way to return to the ground while also being Ki Blast invulnerable.
- Defensive Powerhouse: 214L and 214M are both frame 4 reversals that are -5 on block and can be made plus with assists. 214H has guard point frame 1, making it nearly impossible to safejump, as well as 22H being frame 1 low crush and anti air while being safe on block.
- Inability to Super Jump Float: Master Roshi is the only character in the roster who can't Super Jump Float, making his aerial keepaway game weaker and makes it difficult to contest opponents that are directly below him. Additionally, some universal mixups are less threatening because of his lack of Float.
- High Execution: Master Roshi's unique mechanics and massive toolkit makes him unintuitive to pick up and play. Knowledge of his toolkit and high execution are required to maximize his strengths.
- Unintuitive: Master Roshi takes a LOT of getting used to in comparison to the rest of the cast, with his huge movepool and unique ability to not be able to superdash.
Unique Mechanics
Master Roshi is unable to steer his movement in the air (aka "float"), and his Super Dash is replaced with two unique options: Masterful Leap and Reverse Kamehameha.
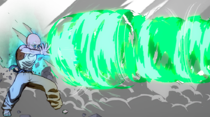
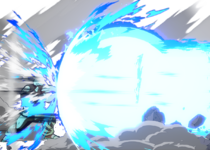
Masterful Leap is a Ki Blast invulnerable command jump with five different arcs depending on directional input, while Reverse Kamehameha is an aimed Ki Blast deflecting airdash with a lingering projectile hitbox trailing behind.
Masterful Leap and Reverse Kamehameha count as different moves, so he can use Masterful Leap to leave the ground and then use Reverse Kamehameha.
- Ki Blasts' blockstun can still be canceled into Masterful Leap and Reverse Kamehameha. Similarly, Ki Charge can also be canceled into Masterful Leap
- Masterful Leap's invul will overflow to Roshi's attacks, allowing him to punish Ki Blast zoning
- On block or hit, the strike portion of Reverse Kamehameha can be canceled into any attack, while the beam portion can only be canceled into Specials and Supers. Hitting with the strike puts Roshi at +5 on block and +4 on Reflect, while Super Dash is ±0 on block and -1 on Reflect
- As a combo starter, Dragon Rush will automatically use up Reverse Kamehameha
- Z Change and Guard Cancel Change are replaced with a horizontal Reverse Kamehameha. These have vertical tracking before Roshi enters the battlefield, and have faster travel speed than the typical Z Change/Guard Cancel that utilize Super Dash
Normal Moves
5L
| Version | Damage | Guard | Smash | Startup | Active | Recovery | On-Block | Invuln |
|---|---|---|---|---|---|---|---|---|
| 5L | 400 | All | 6 | 3 | 14 | -5 | ||
| 5LL | 180×4 | All | 8 | -7 | ||||
| 5LLL | 200×4, 300 | All | U3+ | 15 | -5 |
- 5L
- Big, advancing jab.
Roshi's 5L is a massive 6-frame button, pushing him very far forwards. This makes it great as a punish tool, but being -5 on block it's less suited to stagger pressure than other 5L buttons.
A perfect microdash 5L will catch both buttons and backdash after vanish, but keep in mind the gap will allow your opponent to jump out. Being able to stop backdashing and mashing at the same time is great for Roshi. Jumping isn't even all that bad for Roshi anyway, as he'll be +1 and able to press 5L again anyway.
- 5LL
- Short ranged multi-hitting normal.
- 8-frame startup. Quick for an M button but 214X are typically better in clashes.
- Active for a very long time, both a good thing and a bad thing.
Mainly good for blockstrings, occasionally for mashing. You generally won't want to whiff this. 5L > 2M should be your go-to string instead of 5L > 5LL when resetting pressure because of this.
- 5LLL
- Vacuums on block.
- On hit, pressing L again will give 3H+S.
- Not a throw.
Since 5LLL pulls opponent toward's Roshi, it allows for sneaky IAD j.4M cross-ups, even in the corner. Other than that, it usually leads to less damage than Roshi's other options. You'll exclusively be using this to pull people out of the corner.
5M
| Damage | Guard | Smash | Startup | Active | Recovery | On-Block | Invuln |
|---|---|---|---|---|---|---|---|
| 700 | All | 11 | 4 | 20 | -8 |
- Good vertical range.
- Moves Master Roshi forward a decent amount.
Mostly useful as a blockstring and combo tool. Being -8 on block it's very risky to re-assert pressure after with a jab, but Roshi has great frametrap options with 5H and 5S.
5H
| Damage | Guard | Smash | Startup | Active | Recovery | On-Block | Invuln |
|---|---|---|---|---|---|---|---|
| 850 / 1000 | All | U1 | 15 | 4 | 26 | -14 |
A standard 5H with good range, used as blockstring/combo filler and for anti-Reflect. Most of Roshi's buttons are very lacking in horizontal reach, so stray hits with this can serve him well. Wall bounces on Smash hit, and is Roshi's preferred launcher for corner loops.
On Smash hit, pressing H again will give 5H+S. This 5HH slightly slides forward before leaping, which causes this specific combo: 5H > 5HH > j.M ▷ 5M to drop on some body types in midscreen, but is universal with manual 5H+S.
5S
| Damage | Guard | Smash | Startup | Active | Recovery | On-Block | Invuln |
|---|---|---|---|---|---|---|---|
| 700 | All | 17 | 6 | 31 | -5 |
- Covers 80% of the screen, launches on hit.
- Doesn't have Ki Blast property, will beat superdash.
Has pretty high blockstun. You can truestring into Kamehameha with this midscreen, and 5S always jails into vanish. Sadly 5S > 236S will not combo, so use it sparingly. Great combo filler in the corner but not a terrific poke due to its recovery.
2L
| Damage | Guard | Smash | Startup | Active | Recovery | On-Block | Invuln |
|---|---|---|---|---|---|---|---|
| 400 | Low | 7 | 3 | 13 | -4 |
- Low.
- Disjointed reach.
Roshi's prime low due to its speed. Chains twice and has good frame advantage.
2M
| Damage | Guard | Smash | Startup | Active | Recovery | On-Block | Invuln |
|---|---|---|---|---|---|---|---|
| 700 | Low | 12 | 6 | 20 | -10 |
- Big range.
Roshi slides and does a sweep. Has a decent reach and is one of his best starters, but is on the slower side compared to other 2Ms. You're mainly going to use this in pressure and in combos.
2M does not true-string from his light normals, but the 1-frame gap makes this move ideal for reflect-proof strings. Doing 5L GuardAllStartup6Recovery14Advantage-5/2L
 GuardLowStartup7Recovery13Advantage-4 > 2M
 GuardLowStartup12Recovery20Advantage-10 will catch anyone doing anything outside of reversals after the reflect. If the opponent double reflects, you can add another layer by adding 5H
 GuardAllStartup15Recovery26Advantage-14.
2H
| Damage | Guard | Smash | Startup | Active | Recovery | On-Block | Invuln |
|---|---|---|---|---|---|---|---|
| 850 / 1000 | All | U1+ | 13 | 3 | 29 | -16 | 4-15 Head |
- Shimmies backwards during recovery
- Smash hit has higher hitstun, pressing H again will give 2H+S. Non-Smash hit can still combo with 2H+S > j.L even in midscreen.
- Grounded cancel options. 214X gives you plenty of time to confirm as you're safe thanks to the guard point.
- 1H can get crossed up and give you 3H, which is a lot harder to confirm. Keep this in mind when crouching/blocking.
Roshi's reward off a stray 2H is much higher than the rest of the cast, and he no longer needs an assist to access it. 2H > delay 214S > dash > 2M can easily convert into a combo doing over 6K damage. Roshi's preferred launcher midscreen, although
2S
| Damage | Guard | Smash | Startup | Active | Recovery | On-Block | Invuln |
|---|---|---|---|---|---|---|---|
| Total 24(+7L) | 1-21 Ki Blasts |
- Backwards flip
- Invuln to Ki Blasts frame 1
- Gives Roshi an air action
Great tool to both disengage in pressure or bait a big response from your opponent. Against solo characters, 2S > 2M will beat guard cancel on reaction. Otherwise, it will cancel to other H/S buttons upon landing (as well as special moves). 2S > 5H can be used to bait your opponent into doing something.
As of patch 1.27, Roshi can now perform an air action out of his 2S, opening up not only new routes, but a new 50/50 midscreen with a high blockstun assist by doing 3 HS 2S
6M
| Damage | Guard | Smash | Startup | Active | Recovery | On-Block | Invuln |
|---|---|---|---|---|---|---|---|
| 850 | High | 24 | 4 | 6+6L | ±0 |
- Universal overhead
Because he's too old, his 6M is less active than other 6Ms... Other than that, Roshi's 6M stands out only in relation to the rest of his kit. His massive 5L lets him re-establish pressure quite easily and 214L/M allow him to safely re-take his turn against other 6f characters. Keep in mind though that Roshi still does not get a combo from 6M unless he has an assist or is in Sparking.
6H
Afterimage
| Damage | Guard | Smash | Startup | Active | Recovery | On-Block | Invuln |
|---|---|---|---|---|---|---|---|
| 0, 850 | All | U1 | 32 | 2 | 25 | -5 | 26-33 All |
- Teleports behind the opponent.
- Doesn't hit airborne opponents.
- No sound cue. Hard to react to when the screen is focused on someone above him.
Slow until you remember that Piccolo's M crossup is only 1 frames faster. By using 3H after it hits, Roshi can combo without an assist or vanish. Not something to be overused, but a great tool to have in conjunction with 22S. Also decent to sneak under an airborne opponent when they're high enough to miss the startup animation. Your opponent is almost guaranteed not to block this the first time.
6S
Turtle Orb
| Version | Damage | Guard | Smash | Startup | Active | Recovery | On-Block | Invuln |
|---|---|---|---|---|---|---|---|---|
| 6S | 500 | All | 16 | -15 | ||||
| 6SS | 700 | All | +2 |
- Roshi throws a blue ball upwards. Inputting 6SS will direct it back behind the opponent.
- 6SS is plus on block and can jail into vanish, however the timing is a bit tricky.
Covers a great angle as a neutral tool and can be converted into plus frames with an assist. Keep in mind that it is superdashable, so you must be ready with 2H in case your opponent does something stupid.
Up close, 6S > 6SS has a mashable gap. This can be countered if you chain into 5H/5S or delay chain into 2H to try to catch your opponent off guard. Being +2 in the corner is much better than midscreen, as your opponent can backdash out and it requires a hard read to counter.
3H
Rising Phoenix
| Damage | Guard | Smash | Startup | Active | Recovery | On-Block | Invuln |
|---|---|---|---|---|---|---|---|
| 700 | All | 14 | 3 | 42 | -29 | 4-16 Head |
- Jump cancelable on hit.
- Very high recovery.
- Acts like 2H in gatlings, but does not gatling from 5H.
Weird smashless launcher used like A. Gohan 3H in combos. Another damage tool for a character with plenty to begin with. Don't whiff this move.
j.L
| Damage | Guard | Smash | Startup | Active | Recovery | On-Block | Invuln |
|---|---|---|---|---|---|---|---|
| 400 | High | 7 | 3 | 12 |
- Massive.
Big sword-like normal. Also great as an air-to-air normal.
j.M
| Damage | Guard | Smash | Startup | Active | Recovery | On-Block | Invuln |
|---|---|---|---|---|---|---|---|
| 700 | High | 11 | 4 | 21 |
- Massive.
- Slow.
Short horizontal reach means you'll hate getting this instead of j.4M going for crossups. Mostly combo filler or a jump-in. Hits higher than j.L at the cost of being four frames slower.
j.H
| Damage | Guard | Smash | Startup | Active | Recovery | On-Block | Invuln |
|---|---|---|---|---|---|---|---|
| 850 / 1000 | High | D1+ [D3+] | 12 | 6 | 30 |
- 5LLLLLLL
- Dynamic hit can wall bounce.
- j.H
- Smash hit causes a sliding knockdown.
Massive hitbox makes this a great jump-in and IAD normal. Mostly useful for safejumps from j.2M as j.M doesn't give double overheads from a normal jump.
j.S
| Damage | Guard | Smash | Startup | Active | Recovery | On-Block | Invuln |
|---|---|---|---|---|---|---|---|
| 500 | All | 13 | Total 35+12L |
- Freezes momentum.
- Downward angle means Ki Blasts will barely whiff an opponent at full screen from the crest of a jump.
- Used to hit meaty in certain combos, allowing for mid-air links.
Very weak knockback on air hit making it ideal combo filler. Not the best angle for a neutral tool, but it gets the job done. Not as much a pre-emptive Ki Blast as a reactive one. If you see your opponent dashing up at you from the air, this button might as well be a stop sign.
j.2H
| Damage | Guard | Smash | Startup | Active | Recovery | On-Block | Invuln |
|---|---|---|---|---|---|---|---|
| 850 | All | U1 | 13 | 6 | 21 |
- Wall splats on Smash hit, pressing H again will give j.H+S[8].
Not jump cancelable, so mostly useless for combs after Smash is used. Combos into j.2M in the corner and a bit further out as this move has a lot of hitstun. Decent as a neutral tool in conjunction with Masterful Leap and Reverse Kamehameha, allowing for it to be used like a pseudo air dash.
j.2S
| Damage | Guard | Smash | Startup | Active | Recovery | On-Block | Invuln |
|---|---|---|---|---|---|---|---|
| Until L(+7L) | 1-21 Ki Blasts |
- Air 2S.
- Handy to mix up your landings after Reverse Kamehameha.
- Landing recovery is whiff-cancelable into H/S normals and special moves.
- Hold 3S to jump forwards instead.
You can use this along with 5H+S leap to check Ki Blast attempts in neutral. Cancel the recovery of this into Masterful Leap and you'll remain Ki Blast invuln throughout nearly all of it. If your opponent is trying to punish a Reverse Kamehameha, 2S will help you land faster and you can cancel its recovery into 214X or 2H depending on the situation. Doing 3S after j.2H early into a combo will let you link into j.5L.
j.4M
Back Kick
Unique Mechanics
Masterful Leap
5H+S
| Version | Damage | Guard | Smash | Startup | Active | Recovery | On-Block | Invuln |
|---|---|---|---|---|---|---|---|---|
| 5H+S | 23 | Total 31+12L | 1-31 Ki Blasts, 4-18 Throw | |||||
| 2H+S | 15 | Total 28 | 1-28 Ki Blasts, 4-18 Throw | |||||
| 4H+S | 19 | Total 38 | 1-38 Ki Blasts, 4-18 Throw |
- Replaces Super Dash while grounded.
- Command jump, can be aimed with 4H+S, 1H+S, 2H+S or 3H+S. Cancelable into attacks after startup.
- 5H+S lunges forward almost fullscreen.
- 4H+S hops forward halfscreen. Best used for midscreen left/right mixups.
- 1H+S, 2H+S and 3H+S jumps very high into the air, Roshi will autocorrect on sideswitch when canceling into attacks or after recovery. Input determines how far Roshi travels horizontally.
Grazes Ki Blasts instead of Guard Point, making it more potent than Super Dash against 5S zoning since they won't be able to cancel into 2H to counter Roshi's approach.
4HS is one of Roshi's main assisted mixup tools, as 1/2/3HS launches too high to be useful and 5HS has too much landing recovery. Mixups from this move are fuzzy blockable, but Roshi has plenty of options after it's blocked to keep your opponent guessing.
Reverse Kamehameha
j.H+S
| Damage | Guard | Smash | Startup | Active | Recovery | On-Block | Invuln |
|---|---|---|---|---|---|---|---|
| 300 [1000] {1100} | All | 21 | 18 | 13+12L | +5 [-8] | 1-51 Ki Blasts |
- Shoots a beam to propel Roshi forward. Both the strike and beam come out on the same frame.
- Replaces Super Dash while airborne. Also acts as his Z Change and Guard Cancel, trading the homing capability for faster travel speed, but otherwise mostly identical to other character's Z Change/Guard Cancel
- Cancelable into any move on block/hit with his body
- Cancelable into special moves or j.2L/M on hit with beam
- The landing recovery will remain even if Roshi does a jumping normal after the animation
- Can be aimed six ways with directional inputs (specifically, the six ways are - downleft, downright, left, right, upleft, and upright)
- Holding 4, 7, or 1 will effectively give Roshi an aerial beam, as well as the only aerial beam that can be aimed in any direction
- Beam jails into vanish, hitting with Roshi's body removes his landing recovery
- Landing with j.2L/M will also negate the landing recovery and make Roshi recover much faster than normal. Especially useful in conjunction with the 7 beam
- Values in [] are for the beam, {} is for upward beam
Special Moves
Turtle Drop
j.2L/M
| Version | Damage | Guard | Smash | Startup | Active | Recovery | On-Block | Invuln |
|---|---|---|---|---|---|---|---|---|
| j.2L | 800 | All | 9 | Until L | 16 | -3 ~ ±0 | ||
| j.2M | 900 | All | D1 | 13 | Until L | 16 | -3 ~ ±0 |
- Smash hit causes sliding knockdown.
j.2L causes a small groundbounce that allows you to easily extend with assists, or combo into supers if you've already used a sliding knockdown move like 22H earlier on.
j.LLS > j.2M is an anywhere SKD. Microdash IAD j.H will cover all techs and safejump reversals midscreen, neutral jump j.H will cover all techs, safejump reversals, and check dashes in the corner. Combos into all Roshi's supers.
Wise Warrior
236L/M/H (Air OK)
| Version | Damage | Guard | Smash | Startup | Active | Recovery | On-Block | Invuln |
|---|---|---|---|---|---|---|---|---|
| 236L | 300, 630 | All | 14 | 7 | 19 | -5 | ||
| 236M | 300, 900 | All | U1+ | 17 | 7 | 19 | -5 | |
| 236H | 300, 990 | All | U1+ | 11 | 7 | 19 | -5 | |
| j.236L | 300, 630 | All | 14 | 7 | 27 | -5 | ||
| j.236M | 300, 900 | All | U1+ | 16 | 7 | 27 | -5 | |
| j.236H | 300, 990 | All | U1+ | 11 | 7 | 27 | -5 |
- All Versions
- Switches sides on block/hit, even in the corner.
- Roshi can use air actions on the way down after the air version connects.
- 236L
- Travels half screen.
Useful for mixups after a jump-in j.H. Depending on the assist, you can get a left/right/high/low going in the corner thanks to the sideswap.
- 236M
- Travels 80% of the screen.
- Wall splats on Smash hit.
Smash j.236M can link into j.H+S[2], acts as a sideswitch combo. Mostly useful if your back is to the corner, otherwise you'll be using the L or H versions.
- 236H
- Travels borderline fullscreen
- Huge wallbounce on Smash hit, leading to a combo anywhere on the screen.
Master Roshi's lariat. Travels practically fullscreen and is completely unreactable. Will lead to high damage on hit and is safe on block.
Also a great 0.5 bar pickup from a j.S crossup. Very useful in sparking because of this.
Martial Spirit
214L/M/H (Hold OK)
| Version | Damage | Guard | Smash | Startup | Active | Recovery | On-Block | Invuln |
|---|---|---|---|---|---|---|---|---|
| 214L | 300, 900 | All | 17 | ? (3) 5 | 20 | -5 | 4-21 Armor (10) | |
| 214M | 300, 950 | All | U1+ | 17 | ? (3) 5 | 20 | -5 | 4-21 Armor (10) |
| 214H | 300, 900×2 | All | U1+ | 10 | ? (3) ? (4) 5 | 20 | -15 | 1-14 Armor (10) |
- All Versions
- Roshi hulks out, surrounding himself in a 360 barrier before delivering an attack in Max Power.
- Armored until after the initial flex's active frames are over.
- Guard point against Ki Blasts and has 10 hits of armor for non-Super strikes and projectiles.
- Can be held to delay the second hit. There's a 3F gap at minimum between the first and the second blow on block.
- First attack ground bounces on hit. Second attack can auto-correct on sideswitch. Roshi is generally safe if the second hit whiffs.
- 214L
- Strikes the opponent with very little knockback.
Excellent for converting with an assist if you have one on the ready, since you won't be spending Smash.
- 214M
- Smash on the second hit, identical to L version otherwise.
- Smash hit causes a wall splat.
Generally used in the corner over the L version for beating Guard Cancel and for some corner combos.
- 214H
- Smash on the third hit, there's a 4F gap on block between the second and the third hit.
- Smash hit causes a wall splat.
Roshi's reversal. The only Guard Point reversal in the entire game. Really obnoxious for your opponent to safejump because you are technically blocking their attack, forcing them into hitstop and hitting them out of their jump in with the initial hit.
Jumping Splits
22L/M/H
| Version | Damage | Guard | Smash | Startup | Active | Recovery | On-Block | Invuln |
|---|---|---|---|---|---|---|---|---|
| 22L | 900 | All | 8 | 3 | 18 | -5 | 4-20 Low + Head | |
| 22M | 1000 | All | D1 | 8 | 3 | 18 | -5 | 4-24 Low + Head |
| 22H | 1300 | All | D1 | 8 | 3 | 18 | -5 | 1-24 Low + Head |
- All Versions
- Split kick with the backside hitting a bit later than the front.
- Smash on the front kick only. Launches on Smash hit.
- Low crushes and air invulernable from frame 4 (H version from frame 1)
- 22L
- Leaps backward.
Safe blockstring ender. Useful in edge cases during combos and blockstrings. It's also Roshi's non-sideswap blockstring ender special, and the spacing can set up mixups with Masterful Leap and a lockdown assist.
- 22M
- Leaps forward and slightly higher than L version.
- Smash hit causes a sliding knockdown.
Can be linked into 5L if it hits meaty, and can allow 5H to link into 5L in the corner if used after 5H. Damage loss between using this and j.2M isn't worth the okizeme.
- 22H
- Leaps in place.
- Smash hit causes a wall bounce into sliding knockdown.
- Frame 1 invul to both high and low attacks
- The main version you are going to use.
Combos directly into 236M/H. Roshi can followup with a combo before the opponent lands into SKD. 22H > 22M is actually a combo extender that links into 5L in the corner. Incredible to press on wake up due to its fast start up and invulnerability to low and high attacks.
Kamehameha
236S
| Damage | Guard | Smash | Startup | Active | Recovery | On-Block | Invuln |
|---|---|---|---|---|---|---|---|
| 1000 | All | 18 | 17 | 18 | -9 |
- Only hits once, unlike other beams.
- Wall splats on hit.
- Leads to Loops in the corner
- Can be cancelled into Masterful Leap.
- Can now perform other special moves after hitting the opponent.
Thinner than most other beams, but otherwise identical in use. This is his fastest beam (beating Instant Reverse Kame by 5 frames). Also good after a combo DR if you've already used 214S in a combo.
Thunder Shock Surprise
214S
| Damage | Guard | Smash | Startup | Active | Recovery | On-Block | Invuln |
|---|---|---|---|---|---|---|---|
| 1476 | Throw | U2+ | 21 | Until Off Screen | 48 from last active |
- Only whiffs against crouching opponent. Ground bounces on hit.
- Can be aimed at a steeper angle by holding
 or
or  during startup.
 - On hit, positions the opponent in front of Roshi just far enough for assisted combos, comboing into Supers, and notably for Sparking activation to whiff (even in the corner!), enjoy your TOD.
Long-range and air unblockable. Excellent as an anti-air if you notice your opponent jumps a lot.
Don't solely rely on this move for anti-airing an opponent, as it has comically high recovery on whiff.
Lullaby Fist
22S
| Damage | Guard | Smash | Startup | Active | Recovery | On-Block | Invuln |
|---|---|---|---|---|---|---|---|
| 0 | Throw | U2+ | 28 | 3 | 40 |
- Can only connect against grounded opponent, causes a crumple on hit.
- Is only Vanish cancelable on hit, however doing this won't give a Smash Vanish for follow-up combos.
Very slow command grab that leads to a full combo anywhere on the screen, though the damage isn't very good either. Startup can be made ambiguous with 5LL to make this move slightly more usable.
Z Assists
Assist A
Kamehameha
| Damage | Guard | Smash | Startup | Active | Recovery | On-Block | Invuln |
|---|---|---|---|---|---|---|---|
| 800 | All | 34 | +32 |
- Single-hit beam assist.
High hitstop means this beam is more combo-friendly than most, as hitstop is unaffected by hitstun scaling. It also wall bounces like every other good beam assist, enabling easy combos in the corner.
Assist B
Martial Spirit
| Damage | Guard | Smash | Startup | Active | Recovery | On-Block | Invuln |
|---|---|---|---|---|---|---|---|
| 300, 700 | All | 25 | +25 | 26-28f Guardpoint |
- Each hit has 25 frames of blockstun with a 6 frame gap in-between.
- Guardpoint starting on frame 26.
- Incredibly fast for the amount of utility Martial Spirit provides.
- Second attack will auto-correct on sideswitch like point version.
Assist B is fantastic on offense as it allows for gapless corner superdash 50/50s out of M/H normals. Interestingly, it also has a property where the second hit will always hit after the first. This is expressed as a delay between the two hits, as Roshi waits for the opponent to fall down before punching them away.
As of patch 1.27, ArcSys has nerfed Roshi's B assist for the 2nd time. The guardpoint is now only active from frames 26 to 28, removing its utility as a defensive assist entirely. Can still be used for gapless SD 50/50s, and be used for very unique high hitstun combos, but consider his A assist before B now. Fly high Roshi B.
Assist C
Turtle Hermit Flurry
| Damage | Guard | Smash | Startup | Active | Recovery | On-Block | Invuln |
|---|---|---|---|---|---|---|---|
| 150×4, 400×2 | All | 35 [20] | +60 |
- Teleports to the opponent on ground level.
- On hit, teleports again behind them and knocks down into a ground bounce SKD.
- Values in [ ] are when the opponent is in hitstun/untech.
Even though his B assist has been nerfed significantly, there's still no real reason to use this assist over it.
Super Moves
Evil Containment Wave
236L+M
| Damage | Guard | Smash | Startup | Active | Recovery | On-Block | Invuln |
|---|---|---|---|---|---|---|---|
| 2200 | All | UDV | 4+4 | 17 | 88 | -70 | 4-16 All |
- Forces a switch on hit, identical effect and frame advantage as a forced switch from ground DR.
- Can only DHC before the beam hits. DHC-ing early doesn't lose damage nor force a switch.
- Does a bit more damage if done on the opponent's last character, causes a soft knockdown and leaves Roshi at +1 at minimum.
- Get in the jar.
- Minimum Damage: 770.
- KO cinematic occurs if Roshi doesn't DHC and the opponent has 916 health or less.
Deals bonus psychological damage. Always try to kill with this if your opponent's healthbar is below the sparking indicator at the end of the combo for instant serotonin.
This super deals all of its damage in one hit, making it excellent for anti-spark burst damage. If you fear your opponent healing through Roshi's long 236H+S animation, then DHC with this. Just note that this deals less total damage than 236H+S, so if you're trying to confirm a kill then use that instead. Unless you're styling.
Turtle Hermit Extraordinaire
236H+S
| Version | Damage | Guard | Smash | Startup | Active | Recovery | On-Block | Invuln |
|---|---|---|---|---|---|---|---|---|
| 236H+S | 2364 | All | UDV | 10+4 | 2 | 34 | -20 | 10-15 All |
| 236H+S > X |
- Turtle Hermit Extraordinaire
- Minimum Damage: 864 (lvl2 adds 400)
- Roshi's DHC Super.
- Doesn't consume Smash if DHC before it hits.
- Full-Power Kamehameha Turtle Hermit Extraordinaire > [L/M/H/S] on hit
- Can be extended into Full-Power Kamehameha for 1 bar, allows for combos into Charged Special Beam Cannon and Super Spirit Bomb.
Ridiculously high return for spending 1 bar, and even higher with 2. Among the highest damage level 1 and level 2 supers in the game.
The Greatest Kamehameha
214L+M or 214H+S
| Damage | Guard | Smash | Startup | Active | Recovery | On-Block | Invuln |
|---|---|---|---|---|---|---|---|
| 4108 | All | UDV | 9+3 | 86 | 50 | -34 | 1-18 All |
- Minimum Damage: 1642 (only around 300 more than his level 2)
- +42 on hit, leaves opponent far away if used midscreen.
Of course he got a beam super. Roshi does not get any mixups off this that are not explicitly telegraphed before because he cannot superjump float, so the best thing he has here is an autotimed safejump. With assists, you can setup a mixup with Reverse Kame or j.236L.
Colors
- DBFZ Master Roshi color1.png
Color 1
- DBFZ Master Roshi color2.png
Color 2
- DBFZ Master Roshi color3.png
Color 3
- DBFZ Master Roshi color4.png
Color 4
- DBFZ Master Roshi color5.png
Color 5
- DBFZ Master Roshi color6.png
Color 6
- DBFZ Master Roshi color7.png
Color 7
- DBFZ Master Roshi color8.png
Color 8
- DBFZ Master Roshi color9.png
Color 9
- DBFZ Master Roshi color10.png
Color 10
- DBFZ Master Roshi color11.png
Color 11
- DBFZ Master Roshi color12.png
Color 12


