Overview
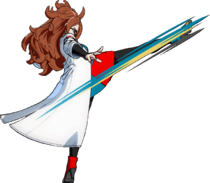
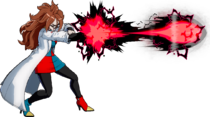
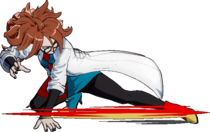
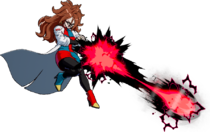
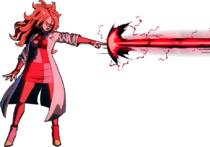
After years of studying DBFZ at the highest level, Android 21 (Lab Coat)—often appearing under the nicknames Labcoat or L21—can provide you with everything you could possibly ask for from a character. Each tool in her phenomenal kit breaks the game's rules in one way or another. She can zone, she can rushdown, she can mix, and she can play lame. Lab Coat has simple execution requirements, and can work anywhere on a team with great synergy with other characters.
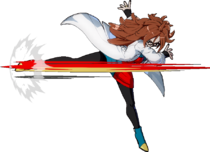
While extremely well-rounded with a low skill ceiling, Lab Coat nonetheless has quirks that can be exploited by her opponents. She's one of the few characters with a modifier that cripples her meter gain, and her uniquely powerful special moves also come with unique drawbacks. With that said, if you enjoy laughing maniacally and going crazy with the most cutting-edge special moves, then get ready, this cookie will only run you a fiver.![]() Lab Coat Android 21 is a powerful, well-rounded character who shuts down her opponents with her fiendish Photon Pulse.
Lab Coat Android 21 is a powerful, well-rounded character who shuts down her opponents with her fiendish Photon Pulse.
- Easy: To learn and to master.
- Neutral on a Leash: Has all the ways to control neutral and get a hit in without assists.
- Obnoxious Pressure: A whopping SIX lows, multihitting
 GuardAllStartup10Recovery16Advantage-4 normals
 GuardLowStartup8Recovery16Advantage-4, an extra overhead
 GuardHighStartup27Recovery18Advantage-5 and two
 GuardThrowStartup24~30Recovery24Advantage- command grabs
 GuardThrowStartup21Recovery17Advantage- give Labcoat some of the most threatening pressure in the game.
 - Omnidirectional Anti-Airs: 214X moves
 GuardAllStartup9Recovery12+6LAdvantage-4 hit on both sides and are air OK, getting her out of common situations like Spark > Held Vanish. It also helps her aerial Ki Blast
 GuardAllStartup12RecoveryTotal 41+3LAdvantage- game with ways to beat Super Dash.
 - OTG on Demand: 22X
 GuardLowStartup11Recovery16Advantage-5 hits opponents out of sliding knockdowns, extending her and her team's combos significantly.
 - Evil Grab Super: Photon Pulse
 GuardThrowStartup21Recovery17Advantage- is perhaps the cruelest super ever put in the game, instantly crippling her victim's damage output.
- Glutton: Labcoat wants to eat all the meter but barely brings any to the party.
- Poor Assists for Neutral: Contrasting her good solo neutral, she does not bolster that of her teammates very much. Assist A
 GuardAllStartup20Recovery45Advantage+40 is easily negated, B
 GuardStartupRecoveryTotal 85Advantage- is outclassed by other Android barriers, and C
 GuardAllStartup34 [20]Recovery50Advantage+30 is her only assist with real blockstun at the cost of twice the cooldown.
 - Special Specificity: Many of Labcoat's specials carry key weaknesses, such as her spinning lariats having ki blast property which lets them be reflected on block, making misuse of her strong tools potentially lethal.
Normal Moves
5L
| Version | Damage | Guard | Smash | Startup | Active | Recovery | On-Block | Invuln |
|---|---|---|---|---|---|---|---|---|
| 5L | 400 | Low | 6 | 3 | 13 | -4 | ||
| 5LL | 700 | All | 9 | 6 | 14 | -4 | ||
| 5LLL | 600, 500 | Throw | U3+ | 7 | 3 | 23 |
- 5L
Lab Coat's fastest button that's also a 6F low, useful for poking, starting blockstrings, defensive challenges and punishes. Advances pretty far forwards so it can stagger into itself indefinitely, and works for SD mixup in midscreen.
Though as both a blessing and a curse, the lack of vertical reach can be undesirable at times. For example: in ±0 situations, the opponent will be able to jump away from her 5L, and it often trades against other 5Ls instead of clashing. In a similar vein, Lab Coat's 5L can also whiff against point blank Super Dash.
- 5LL
Has great range and hits very high up, useful for typical 5LL things like as combo and blockstring filler. When whiff canceled from 5L, will hit on frame 17 at earliest. This lets Lab Coat to punish backdash whenever she's plus, e.g. post Vanish or when the opponent airblocks her 214X GuardAllStartup9Recovery17Advantage-4 series.
However since it's so fast, on Reflect, 5L > 5LL tends to be Reflected twice, pushing her back into neutral.
- 5LLL
Mediocre just like most other throw 5LLLs. Very rarely used for combo purposes and requires specific assists to set up tick throws. Avoid mashing too hard so you don't get this accidentally.
- Canceling into this from a blocked 5LL always leaves the opponent in too much blockstun for the throw to work
- Combos into SD on hit
5M
| Damage | Guard | Smash | Startup | Active | Recovery | On-Block | Invuln |
|---|---|---|---|---|---|---|---|
| 550×2 | All | 10 | 4(8)4 | 16 | -4 |
Great vertical range, but lackluster horizontal range. Very strong combo and blockstring filler as it can pull airborne opponents down into a grounded string. After the first hit lands, the second can be canceled at any point, and thus is entirely GC safe as Lab Coat can freely cancel into 2H/214X on reaction.
Due to the second hit always coming out unless canceled on hit or block, she's wide open on whiff so avoid aimlessly throwing 5M out in neutral.
- 2nd hit ground bounces airborne opponents
5H
| Damage | Guard | Smash | Startup | Active | Recovery | On-Block | Invuln |
|---|---|---|---|---|---|---|---|
| 850 / 1000 | All | U1 | 14 | 5 | 20 | -9 |
Main midscreen combo extender that wall splats on Smash hit and leads into beam rejump combos. Also acts as a typical blockstring filler and anti-Reflect button.
5S
(Hold OK)
| Damage | Guard | Smash | Startup | Active | Recovery | On-Block | Invuln |
|---|---|---|---|---|---|---|---|
| 300×1~5 | All | 13 | Total 37 | -4 |
Stays in place and shoots out basic P1 projectiles with Ki Blast property. Great neutral tool and corner combo filler for meter gain.
On block, 5H > 5S(1) will space her out nicely for stagger strings or disengaging. She also plays the Ki Blast minigame pretty well thanks to 5H, 3H and her command grabs. 5H and 3H will beat GC SD, while command grabs beat GC Reflect.
- Hold or mash S to shoot up to 5 Ki Blasts
- 5th Ki Blast launches on hit
2L
| Damage | Guard | Smash | Startup | Active | Recovery | On-Block | Invuln |
|---|---|---|---|---|---|---|---|
| 400 | Low | 7 | 3 | 13 | -4 |
A poke that keeps Lab Coat in place. Alternative to 5L since 2L can cancel into itself whereas 5L cannot. 2L also puts some distance between Lab Coat and her opponent.
2M
| Damage | Guard | Smash | Startup | Active | Recovery | On-Block | Invuln |
|---|---|---|---|---|---|---|---|
| 550×2 | Low | 8 | 6(14)4 | 16 | -4 |
One of the best 2Ms in the game for pressure and mix-up. Both hits are lows, true string, scale like typical Medium buttons, and due to the first hit being as fast as some characters' low 2Ls, it can be used in SD mixups in the corner for devastating damage. After the first hit lands, the second is entirely GC safe as Lab Coat can freely cancel into 2H/214X on reaction into a full combo. Second hit being cancelable at any point also makes it a good mixup opportunity like 2M(1) > delay 6H which can be visually confusing and will catch opponents on autopilot expecting 2M(2).
As a combo filler, both 5M(2) > 2M(2) and 2M(2) > 5M(2) always combo and are essentially identical strings that can lead to all of her basic grounded routes. The second hit of 2M also combos into SD anywhere on screen at low hitstun decay, allowing for Smashless rejumps with any starter.
Unfit for neutral usage as similar to her 5M, the second hit will always come out on whiff and puts her at -47, very punishable.
- Launches on hit
2H
| Damage | Guard | Smash | Startup | Active | Recovery | On-Block | Invuln |
|---|---|---|---|---|---|---|---|
| 850 / 1000 | All | U1+ | 13 | 5 | 18+10L | -17 | 4-17 Head |
Lab Coat's highest rewarding anti-air, and has additional utility of keeping a Happy Birthday combo going. On block, can sort of keep herself safe with 2H > j.214L (-4) or 2H > j.236L (-5), though beware of GC Reflect.
Has great vertical reach, but the horizontal range leaves a lot to be desired. It'll clip opponents directly above her or flying straight at her, but it has trouble with weird angles. Luckily, she has Vertical Slicer GuardAllStartup9Recovery17Advantage-4 to deal with that.
- Puts Lab Coat airborne
- Launches on hit. Smash hit combos into SD
6M
| Damage | Guard | Smash | Startup | Active | Recovery | On-Block | Invuln |
|---|---|---|---|---|---|---|---|
| 850 | High | 24 | 6 | 4+6L | ±0 |
It's a typical 6M. Very large as it uses j.H's animation, and is one of her 2 standing overheads to compliment the 6 lows and 2 command grabs.
6H
| Damage | Guard | Smash | Startup | Active | Recovery | On-Block | Invuln |
|---|---|---|---|---|---|---|---|
| 850 | High | 27 | 3 | 18 | -5 |
Strong overhead that leads into combos without needing additional resources, as it ground bounces on hit and has enough hitstun to combo into 3H or even SD. Similar to 6M, it doesn't have Head property despite being airborne, so cannot be anti-air'd by typical Head invul attacks. A good spot to sneak this in is after 2M(1).
Ground attacks canceled from 6H are 4 frames slower than usual as she has to land before continuing the string. On block, she can true string afterward with 6H > 22L. She can also set up mixups with 6H > j.214S + a high blockstun assist, just another thing to add to the list.
3H
| Damage | Guard | Smash | Startup | Active | Recovery | On-Block | Invuln |
|---|---|---|---|---|---|---|---|
| 750 | Low | 18 | 10 | 18 | -5 |
Combo filler and acts as an extra low that chases after the opponent, usually from 5S(1) > 3H where 22X would whiff. 5S > 3H is also good against delay GC Reflect in attempt to push Lab Coat away, they will be standing for the 4S input and get hit low. Additionally, the hitbox is high enough to hit them out of GC SD.
Beware that 3H does not true string from any of Lab Coat's normals. Has a 7F gap when canceled from 5L, 2L, and 6H (loses to most abare 5Ls), 3F gap from all other normals (frame traps and beats frame 4 reversals).
- Launches on hit
j.L
| Damage | Guard | Smash | Startup | Active | Recovery | On-Block | Invuln |
|---|---|---|---|---|---|---|---|
| 400 | High | 6 | 3 | 11 |
Small but has a crossup hitbox. Certain distances can make this a nasty crossup that she can convert out of with j.236H. Other than that, it's her fastest and least committal air button for neutral, albeit the small hitbox can make it difficult to air-to-air with.
j.M
| Damage | Guard | Smash | Startup | Active | Recovery | On-Block | Invuln |
|---|---|---|---|---|---|---|---|
| 600×2 | High | 8 | 2(6)4 | 12 |
First hit has high hitbox, but both hits have rather short horizontal reach. Due to it being multi-hit, it's good at bringing the opponent from the air to the ground. But the lengthy animation makes it more committal than the average j.M. And while it does hit twice, it's often unusable as a double overhead since the first hit will whiff against crouching opponents when used as IAD > immediate j.M.
j.H
| Damage | Guard | Smash | Startup | Active | Recovery | On-Block | Invuln |
|---|---|---|---|---|---|---|---|
| 850 / 1000 | High | D1+ [D3+] | 11 | 6 | 18 |
Huge and covers all techs pretty easily when used for a safejump.
This is also Lab Coat's primary jump-in and crossup normal. Due to the lack of fast advancing normals, after a crossup IAD j.H, she usually has to convert or continue pressure by microdashing into buttons. Point blank crossup IAD j.H will not true blockstring into any dash button, and since her 5L has a low hitbox, the opponent can slip out of her pressure in these situations.
- Forces crouching on grounded hit
- Smash hit causes a sliding knockdown. Dynamic hit can wall bounce
j.S
(Hold OK)
| Damage | Guard | Smash | Startup | Active | Recovery | On-Block | Invuln |
|---|---|---|---|---|---|---|---|
| 300×1~4 | All | 12 | Total 41+3L |
Halts all air momentum and shoots out P1 Ki Blasts at a shallow angle. Each shot pushes her a bit backward.
Synergizes very well with the rest of her kit. Lab Coat has strong Ki Blast game as not only is j.S repeatable with very low landing recovery, she also can react to SD and cancel into j.214X, an airborne anti-air that can be extended into big damage through the use of 22X or assists.
When spaced, j.S(2~4) can combo into SD, though the timing for this cancel is rather tight.
- Hold or mash S to shoot all 4 Ki Blasts
- Last Ki Blast launches on hit
j.2H
| Damage | Guard | Smash | Startup | Active | Recovery | On-Block | Invuln |
|---|---|---|---|---|---|---|---|
| 850 | All | U1 | 13 | 5 | 28 |
Standard combo extender that's useful for air-to-air confirms. In the corner, instant j.2H after a ground jump leads into her optimal beam loops.
- Halts all momentum and kicks sideways. Stays mostly in place throughout recovery animation
- Smash hit wall splats, combos into SD. In the corner and at low hitstun decay, can link to j.L
Special Moves
Savory Slicer
236L/M/H (Air OK)
| Version | Damage | Guard | Smash | Startup | Active | Recovery | On-Block | Invuln |
|---|---|---|---|---|---|---|---|---|
| 236L | 20×6, 912 | All | 13 | 2×6,5 | 12+4L | -8 | 4-29 Ki Blasts | |
| 236M | 20×6, 1030 | All | U1+ | 17 | 2×6,5 | 12+4L | -8 | 4-33 Ki Blasts |
| 236H | 20×6, 1581 | All | U1+ | 13 | 2×6,5 | 12+4L | -8 | 1-29 Ki Blasts |
| j.236L | 20×6, 912 | All | 13 | 2×6,5 | 16 | 4-29 Ki Blasts | ||
| j.236M | 20×6, 1030 | All | U1+ | 17 | 2×6,5 | 16 | 4-33 Ki Blasts | |
| j.236H | 20×6, 1581 | All | U1+ | 13 | 2×6,5 | 16 | 1-29 Ki Blasts |
- All Versions
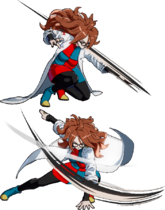
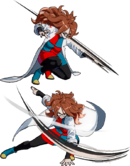
Lab Coat turns herself into a beyblade and lets it rip. These are powerful approaching tools with great range, 360 hitbox and Ki Blast deflect property. The backside hitbox allows them to punish panic Vanish, and they also have tendency to pull the opponent in if they're in her vicinity. EX spin is one of the most oppressive advancing special in the game that literally slices through neutral and leads into a full combo on hit. You should keep an assist available before spinning, to keep yourself unapproachable on whiff, or to gain advantage and start your offense on block.
Do not make these your only means of navigating through neutral however, for each of their outstanding pros, there's an equally terrible con. They have Head property so can be anti-air'd on a read, and can be 2H'd if canceled into Vanish. Despite the insane range, both M and H versions can also whiff at fullscreen distance if the opponent holds ![]() and walks out of range. And finally, the worst part:
and walks out of range. And finally, the worst part:
They can be GC Reflected on block.
Not only are they already punishable on block, Reflecting them put Lab Coat even worse at -15. While pushed far away, some characters can still reach her in time for the punish. You should not use these moves willy nilly, always call assists for backup, and mix her options up by using Ki Blasts or beam to control the screen.
- Smash on the last hit for M and H versions. Smash hit will reposition the opponent to be in front of her
- L Versions
Decent neutral tools but are overshadowed by M and H versions. Cover roughly the same range as 5H.
- M Versions
Travel fullscreen and are her go-to corner combo tools. Have good corner carry and wall splat on Smash hit. In midscreen, ground version can link into 236S for big damage, though this only works against medium sized and larger characters (2/3rd of the cast).
- H Versions
The ender of neutral. Have the speed of L versions and the range of M. Wall bounce on Smash hit for a confirm anywhere on screen.
Vertical Savory Slicer
214L/M/H (Air OK)
| Version | Damage | Guard | Smash | Startup | Active | Recovery | On-Block | Invuln |
|---|---|---|---|---|---|---|---|---|
| 214L | 20×4, 847 | All | 9 | 2×4(5)6 | 12+6L | -4 | 4-11 Head, 4-27 Ki Blasts | |
| 214M | 20×7, 892 | All | D1 | 14 | 2×7(5)6 | 16+6L | -4 | 4-16 Head, 4-38 Ki Blasts |
| 214H | 20×10, 1019 | All | D1 | 9 | 2×10(5)6 | 17 | -4 | 1-11 Head, 1-39 Ki Blasts |
| j.214L | 20×4, 847 | All | 9 | 2×4(5)6 | 16 | 4-11 Head, 4-27 Ki Blasts | ||
| j.214M | 20×7, 892 | All | D1 | 14 | 2×7(5)6 | 17 | 4-16 Head, 4-38 Ki Blasts | |
| j.214H | 20×10, 1019 | All | D1 | 9 | 2×10(5)6 | 17 | 1-11 Head, 1-39 Ki Blasts |
- All Versions
Okay but what if we make the beyblade goes upward instead?
Introducing: Contenders for the best anti-air in the game. Fast, Head invulnerable, 360 hitbox so they can blow up cross-ups, Ki Blast deflect property and are extendable into combos on hit thanks to 22X. While the 236X series are terrifying approach tools, 214X make it terrifying to approach her. Do not Super Dash at Lab Coat ever you WILL regret it. These moves carry low risk while giving Lab Coat great reward. Additionally thanks to the autocorrect property, it can also sometimes cross the opponent up for a free hit.
While there's little these moves aren't good for, similar to the horizontal spins, they have quite a list of downsides. They also have Head property, which means they're anti-airs that can be anti-air'd. M and H versions have horrendously long animations that stay roughly in place, so they can be consistently whiff punished with something like super jump j.L. And despite being safe on block, GC Reflect will make them -8 at best and it can only get worse, especially with a well timed Reflect on the final slash. So definitely think twice about using them as reversals, and always prepare an assist to be used for backup.
- Each slash during the spin vacuums on block/hit and only has Clash Level 2 (loses to j.H and most specials in a trade)
- Turns to face the opponent before the final hit
- Smash on the last hit for M and H versions. All versions ground bounce on non-Smash hit
- L Versions
Lowest commitment and are best used with an assist. They quickly cover all around Lab Coat, then the assist will either give her a combo extension or protect her from being punished.
Combo enders for high hitstun decay combos. Don't give SKD but the ground bounce makes it very easy to extend into Assist + j.214M ▷ 22M > Supers etc. The vacuum property along with not requiring Smash makes this a good Happy Birthday tool as well.
- M Versions
Go-to combo enders as they cause a sliding knockdown on Smash hit, and always leave Lab Coat close enough to combo into 22X. While j.214M and j.214S can be used interchangeably as they have similar startup and give good knockdowns, j.214M is what you wanna use in most situations since it stays same side and can easily be extended with 22X for even more damage.
j.214M also allows for special tag > j.DR anywhere on screen, though the timing is a bit strict (using quick tag shortcuts will help).
- H Versions
The best versions and one of the best defensive options in the game thanks to their speed and frame 1 Head invulnerability. Fantastic anti-Super Dash, anti-Ki Blast objects being put on top of her on oki, or even just anti-approach. Bonus as good combo enders since they have the same speed as L versions while causing a ground bounce sliding knockdown on Smash hit. H versions knocks the opponent back a bit further than M versions but have more frame advantage, so instead of immediately 22X upon landing, you should do dash 22X instead.
The ground bounce SKD on Smash hit enables for better combo routes compared to M versions, such as whiff Sparking before going into 22X. Ground 214H on Smash hit can also link to 5L if all 11 hits connect and Lab Coat doesn't turn around on the last hit, allowing her to convert without spending additional meters or assists. j.214H allows for special tag > j.DR as well, and is much easier to perform than with j.214M.
Frame 1 Head invulnerability and the ability to hit both sides allow Lab Coat to counter the other best defensive option in the game: Sparking Blast into held Vanish. For most characters, they'll be facing the wrong direction and often have to block against this setup, but Lab Coat can just j.214H through it.
A tidbit: As mentioned under the "All Versions" section, 214X series have lower Clash Level than most specials. In certain situations, it's possible to hit Lab Coat out of 214H with j.H and most specials. However, these are the hardest of reads with tight timings, and won't be very effective if Lab Coat decides to switch things up by delay wakeup 214H or just do anything else on wake up/tech.
Mignardise Heel
22L/M/H
| Version | Damage | Guard | Smash | Startup | Active | Recovery | On-Block | Invuln |
|---|---|---|---|---|---|---|---|---|
| 22L | 600 | Low | 11 | 5 | 16 | -5 | ||
| 22M | 700 | Low | U1+ | 18 | 5 | 16 | -5 | |
| 22H | 800 | Low | U1+ | 11 | 5 | 16 | -5 |
- All Versions
Top 3 uncontested best OTG moves in the game due to their speed and Smash properties allowing for conversions, as they can reliably connect after any of Lab Coat's solo sliding knockdowns. Not only do these moves make Lab Coat extremely self sufficient, they also give plenty of synergies with other characters. One egregious example is being able to extend ![]() Z Broly's L command grab
Z Broly's L command grab GuardThrowStartup17Recovery23Advantage- in the corner by special tagging into 22H.
- Ground bounce on hit
- Can hit opponents in OTG state and are not affected by hitstun decay. Meaning these moves can almost always be used as combo enders into Supers
- Special cancellable on Smash hit
- 22L
True blockstring from any normal, so can be tacked on as an extra low at the end of the string.
Doesn't use Smash but cannot be converted solo, so it's often used with assists to pick up after SKD.
- 22M
Go-to version for most OTG purposes, such as extending after Smash 214M/H or combo ender into Supers. On Smash hit, 22M gives a SD rejump in midscreen and can cause a corner splat. Corner splat instead of wall splat also means it will Happy Birthday, so this is also an alternative corner combo tool to 236M specifically for the purpose of wiping the opponent's assist(s).
Beside going for SKD oki, hitting OTG with a non-Smash 22M also sets up an auto-timed IAD j.H safejump in the corner. If you're weary about whiffing 22M, you can use 22L instead at slightly lower damage.
Identical startup to 3H means it does not true string from any of Lab Coat's normals. Has a 7F gap when canceled from 5L, 2L, and 6H (loses to most abare 5Ls), 3F gap from all other normals (frame traps and beats frame 4 reversals).
- 22H
THE combo extender, a beast of a tool that breaks the rules of the game. Extremely fast startup and causes a huge ground bounce and corner splats on Smash hit, letting Lab Coat combo from and into basically anything. The bounce is so high she can choose which side she wanna be on for the combo.
really what else is there to say SKD 22H go brrr
Photon Swipe
236S (Air OK)
| Version | Damage | Guard | Smash | Startup | Active | Recovery | On-Block | Invuln |
|---|---|---|---|---|---|---|---|---|
| 236S | 262×5 | All | 17 | 25 | 29 | -12 | ||
| j.236S | 262×5 | All | 17 | 25 | 30 |
A screen control move for when you're bored of using the other ones, as well as a great combo filler. It's a typical piercing P3 projectile beam that's whiff cancellable into SD and can jail into Vanish. Can be made -3 on block with a frame perfect IAS Instant Air Special
Conceptually includes Tiger KneePerforming a special as soon as possible after becoming airborne. Usually, but not always, involves an input trick.
For Example: 2369S for a j.236S input. j.236S. And despite its appearance, the hitbox extends downward so it can hit small or crouching opponents, even when done as IAS.
This move is also the core of Labcoat's optimal combos as it can be followed up with Superdash anywhere on the screen, and in the corner it can even link back into 5L when used close to the ground (i.e. in a sequence like 5LL jc j.2H j.236S 5L etc).
Connoisseur Cut
214S (Air OK)
| Version | Damage | Guard | Smash | Startup | Active | Recovery | On-Block | Invuln |
|---|---|---|---|---|---|---|---|---|
| 214S | 1000 | Throw | D2 | 24~30 | 4 | 24 | ||
| j.214S | 1000 | Throw | D2 | 13 | 14 | 15 |
Another mixup tool to overwhelm your opponent. On ground hit, immediate 22M will lead to a full combo. However at 24F of startup and a recognizable pose as visual cue, it will take some conditioning to have a good shot at landing, and you likely won't see this as much as her command grab super GuardThrowStartup21Recovery17Advantage-.
The air version can be used as a pseudo movement option and is also a great combo ender. If you can afford to switch sides, or have meters to burn with Vanish > delay j.214S, then it can be worth going for just for the healing alone. Landing j.214S at jump height or lower can also extend further with immediately airdashing into 22X.
- Dashes half screen forward. Ground version only performs the grab once she's near the opponent, while air version is active throughout the dash
- When used outside of combos, 214S only connects against grounded opponents and j.214S only connects against airborne opponent. Mid-combo, ground 214S will also connect against airborne opponents
- On hit, throws the opponent backward into a sliding knockdown and heals 500 total HP. Example: If she has 400 blue health, she will heal 400 blue health and 100 yellow health
Barrier Sphere
22S (Air OK)
| Version | Damage | Guard | Smash | Startup | Active | Recovery | On-Block | Invuln |
|---|---|---|---|---|---|---|---|---|
| 22S | Total 48 | 4-39 Non-throw [4-48 Non-throw] | ||||||
| j.22S | Total 47 | 4-38 Non-throw [4-47 Non-throw] |
An air OK frame 4 reversal that can lead to devastating punish thanks to the special cancelation property. Relatively low risk as it has a short and ambiguous punish window on whiff. Gives a great amount of meter when guarding multi-hit moves like beams, so it's good for reacting to assist calls, using against zoning or as a round start option when combined with her own assists.
With her 5M and 2M being GC safe, canceling into 22S against GC then punishing the landing recovery is much deadlier than simply anti-airing.
- Guard point against all attacks except throws, Supers, and Sparking Blast
- On successful guard:
- Guard frames will extend until end of recovery
- Gains 12.5%It's 25% × 0.5 from her Ki gain modifier Ki Gauges for each hit guarded
- Guarding Super Dash-type moves will give the opponent 10F of landing recovery
- Cancelable into Specials, Supers, Meteors, and will autocorrect to face the opponent. Canceling into Supers/Meteors can be inputted with shortcuts (air OK): L+M for 236L+M, H+S for 236H+S, 4L+M for 214L+M and 4H+S for 214H+S
Z Assists
Assist A
Savory Slicer
| Damage | Guard | Smash | Startup | Active | Recovery | On-Block | Invuln |
|---|---|---|---|---|---|---|---|
| 30×6, 852 | All | 20 | 1,2x5,5 | 45 | +40 | 4-35 Ki Blasts |
Impressive looking strike assist that's not as good as it might seem. Only a handful of assists have this same combination of fast startup and high blockstun, Lab Coat A on top of that has huge hitbox, lengthy active frames, and Ki Blasts deflection starting as early as frame 4. And in spite of being multi-hit, it works well for combo extensions at high hitstun decay where assists like ![]() Yamcha A
Yamcha A GuardAllStartup19Recovery48Advantage+45 or
 ![]() Goku (Super Saiyan) B
Goku (Super Saiyan) B GuardAllStartup20RecoveryAdvantage+40 would drop.
However, it keeps the same properties as the point versions, and can be GC Reflected on block. In practice, there are no reasons not to Reflect it, so Lab Coat A is incapable of giving you true string mixups, and frame advantage against Reflect is only +30.
It also keeps Head property so can be anti-air'd, and is trickier to use in common situations like approaching with SD + assist, or as an anti-ground call when you're in the air. The recovery is also rather high for this type of assist, putting her at risk of getting Happy Birthday'd.
- Launches on hit
- Frame advantage is for all hits. Last hit only is +29
Assist B
Barrier Sphere
| Damage | Guard | Smash | Startup | Active | Recovery | On-Block | Invuln |
|---|---|---|---|---|---|---|---|
| Total 85 | 9-11 All, 12-46 Non-Super, 47 Non-Super |
Lab Coat's B assist is her Barrier that defends against incoming attacks. Takes a different approach to her other assists given that it doesn't have a hitbox, but can be beneficial to certain team compositions or countering East Coast players. If your character is already good enough in scrambles then this assist could prove to be more useful than A, much like A18 GuardStartup10RecoveryAdvantage- or A17's barrier
 GuardAllStartup40RecoveryAdvantage+35.
On how good this is at its intended purpose, Lab Coat spawns behind the point character which is often a detriment, as even when used against things like GC, advancing attacks will put your character outside the barrier where they will get hit. Another note is since the barrier is pink, it's less effective at hiding DR than the other Androids' barriers.
- Guard point against all attacks except Supers and Sparking Blast
- Absorbs hits for both the point character and any other assists inside it
- Does not gain Ki for blocking attacks
Assist C
Photon Swipe
| Damage | Guard | Smash | Startup | Active | Recovery | On-Block | Invuln |
|---|---|---|---|---|---|---|---|
| 200×5, 400 | All | 34 [20] | 25 | 50 | +30 | [1-94 All] |
Her only assist with real blockstun. It's a typical piercing beam that clears the ground and polices the opponent's assist calls. On hit, teleports behind the opponent and knocks them down into a ground bounce SKD, giving easy combo extensions.
The cooldown is twice as long as her A and B assists, although it might just be worth it for the blockstun.
- Values in [ ] are when the opponent is in hitstun/untech
Super Moves
Total Detonation Ball
236L+M (Air OK) or j.236H+S
| Version | Damage | Guard | Smash | Startup | Active | Recovery | On-Block | Invuln |
|---|---|---|---|---|---|---|---|---|
| 236L+M | 2121 | All | UDV | 9+4 | Total 69+7L | -34 | 9-21 All | |
| j.236L+M | 2121 | All | UDV | 9+4 | Total 68 | -26 | 9-21 All | |
| j.236H+S | 2121 | All | UDV | 19+4 [9+1] | Total 78 | -26 | 19-31 All |
Standard Level 1 Supers for meter dumping at the end of combos. Ground version throws an energy ball along the floor that launches on hit. Air versions throws the ball diagonally downward that slide against the corner wall, explodes if it hits the ground and causes a ground bounce sliding knockdown on hit.
Air H+S version teleports behind opponents before throwing the ball and has reduced startup when used mid-combo, useful for combos that can't end in SKD (which is rare for her).
- Values in [ ] are when used mid-combo
- Minimum Damage (Ground): 827
- Minimum Damage (Air): 784
Photon Pulse
236H+S
| Damage | Guard | Smash | Startup | Active | Recovery | On-Block | Invuln |
|---|---|---|---|---|---|---|---|
| 2021 | Throw | 21 | 7 | 17 | 20-27 All |
The icing on the cake: A devastating command grab with the meanest reward on hit. It can be used as a tickthrow from essentially all normals without having to delay the input, doubles as frame trap to beat mashing attempts due to invulnerability frames. Since it's a Super, she can also do 236S > immediate 236H+S for an extra sneaky tickthrow. All the while this grab is very hard to react to despite the startup of 21F, since its key pose is very subtle, has no Super flash until it connects, and is yet another mixup option at her disposal.
On hit:
- Character that got grabbed will deal 21% less damage until the end of battle. This debuff is applied on top of everything else including Sparking, Limit Break, Super's minimum damage and so on. Debuff does not stack upon multiple uses
- Increases Lab Coat's Special Moves and Assists damage by 21% until the end of battle. Thankfully, this also doesn't stack
Not as much as it might seem, since the buff is only applied to her special moves and when she's used as an assist. It's most apparent when she front-loads the combo with special moves, but is barely noticeable otherwise.
- From a normal starter (5L, 5M, 2H, j.H...), her damage output is increased by 1~2%
- From a special starter (236H, 214H, 214S...), damage output is increased by 7~10% (before Super)
Additional Things to Know:
- Cannot hit airborne characters or characters in hitstun/untech
- Launches the opponent into a soft knockdown on hit and does not consume Smash. Adv: +27 against up/back/forward tech. In the corner, IAD j.H afterward is a safejump
Meteor Moves
Appetizing Rush
214L+M (Air OK)
| Version | Damage | Guard | Smash | Startup | Active | Recovery | On-Block | Invuln |
|---|---|---|---|---|---|---|---|---|
| 214L+M | 4221 | All | UDV | 9+12 [9+0] | 6 | Until L+10 | -16 | 1-26 All |
| j.214L+M | 4221 | All | UDV | 9+12 [9+0] | 6 | Until L+10 | -16 | 1-26 All |
High damaging and flexible Super, especially since this is also her DHC Super. Tracks the opponent anywhere on screen so it can be used to punish willy nilly usage of special moves.
In midscreen, this gives a rather average knockdown as she can only get a safejump afterwards. However when the opponent is at rejump height and up, a back-to-corner 214L+M like from j.214S > immediate j.214L+M will put them just outside the edge of the screen allowing for a nasty "invisible" IAD j.L cross-up. This can also work regardless of height against a few characters.
|
|
Not a very good reversal as it is slow outside of combos and especially 12F of startup post Super flash means the opponent can use delay Vanish to escape.
- Teleports behind opponents before attacking. Values in [ ] are when used mid-combo
- Advantage on hit: +28
- Minimum Damage: 1721
Excellent Full Course
214H+S (Air OK)
| Version | Damage | Guard | Smash | Startup | Active | Recovery | On-Block | Invuln |
|---|---|---|---|---|---|---|---|---|
| 214H+S | 4121 | All | UDV | 11+3 [11+0] | 12 | 31+10L | -26 | 1-30 All |
| j.214H+S | 4121 | All | UDV | 11+3 [11+0] | 12 | Until L+10 | 1-30 All |
Go-to reversal Level 3 since it has faster startup overall compared to 214L+M when used outside of combos. Has a small blind spot directly underneath Lab Coat due to her leaping up before attacking, so beware of low profile attacks as they will be able to slide under and dodge her.
Stays same side and can Happy Birthday so will mostly be used if you wanna keep the corner or for team wipe combos. Okizeme is identical to 214L+M, but has no corner steal potential so she can only safejump with IAD j.H afterward.
- Midcombo, has reduced startup and if Lab Coat isn't already on the same horizontal line as the opponent, will autocorrect and teleport vertically to their height before attacking. Values in [ ] are when used mid-combo
- Crosses over the opponent on block
- Advantage on hit: +28
- Minimum Damage: 1721


