Overview
Majin Buu has a kit built entirely around mix-up and okizeme, to the point where he's playing a totally different game to anyone else. Using his iconic Fat Throw, he can put opponents in a unique lockdown situation similar to a Level 3 Hard Knockdown for as little as zero meter. While many other DBFZ characters thrive on two-touch situations or powerful assists, Majin Buu pushes all his power into creating oppressive mixup setups and uses his well rounded toolkit to get himself where he wants to be. However, his setups require lots of labbing time in order to optimize. With a higher level of commitment, and more general weirdness than most other characters in DBFZ, he is a generally unpopular character.
However, getting used to Majin Buu's weirdness reaps huge rewards. Majin Buu doesn't play by DBFZ's rules: his tools allow him to bypass the tech RPS and block game entirely to go straight into a mixup after a combo, turning him into a reset train when optimized.
This is to say nothing of his surprisingly excellent neutral. Thanks to his great 5S, gorilla air normals, and his extremely versatile Anti-Air EX Specials, Majin Buu can easily dominate the screen from the ground and in the air.
If you like constant barrages of mixups or just sitting on people and making them cry, Majin Buu is for you.
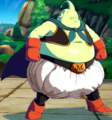
![]() Majin Buu is a setplay monster, with an extremely potent mixup game thanks to standing resets off of fat throw, an extremely oppressive corner game, and amazing keep-out with his large air normals and great anti-airs.
Majin Buu is a setplay monster, with an extremely potent mixup game thanks to standing resets off of fat throw, an extremely oppressive corner game, and amazing keep-out with his large air normals and great anti-airs.
- Fat Throw: Majin Buu's defining tool, a plus-on-block special that enables deadly 4-way restand mixups with the help of an assist after every combo.
- Amazing Mixups: Aside from Fat Throw, Majin Buu has a plethora of tools including a standing overhead in 5M, cross-ups using 236M, and various triple-overhead setups.
- Space Control: Massive air normals, strong ki blasts and a variety of anti-air options allow Buu to keep opponents locked down from range.
- Unique Combos: Majin Buu has some of the most unique combo structures in the game, with multiple different links and unique move properties that allow him to land very stylish and optimal combos with great damage and meter gain.
- Safe Offense: Almost all of his light/medium normals are safe on block, the only exception being 2M. All of his specials are either incredibly safe or space you out far enough to where the opponent can't counter-attack.
- Resource-Hungry: Needs both meter and assists for his 236H mixups, while not building much meter himself outside of the corner.
- Team Requirements: While he now has a generally wide selection of assists to use, Majin Buu's strongest teams need to be built specifically around him to enable his Fat Throw gameplan.
- Unorthodox Character: Normals have abnormal hitboxes and it's sometimes hard to work with them. Abnormal combo path, optimals require some extra execution. One of the most unorthodox characters in the game means a high learning curve.
Normal Moves
5L


| Version | Damage | Guard | Smash | Startup | Active | Recovery | On-Block | Invuln |
|---|---|---|---|---|---|---|---|---|
| 5L | 400 | All | 6 | 3 | 12 | -3 | ||
| 5LL | 700 | Low | 9 | 5 | 18 | -5 | ||
| 5LLL | 1000 | Throw | U3+ | 12 | 1 | 21 |
- 5L
Buu's fastest normal for starting pressure and defensive challenges. Has good range and a high hitbox that can be used for anti-airing as well as catching opponents after a blocked Super Dash. However, it will also whiff against most small characters and crouchers when they're outside of point-blank range.
- 5LL
Standard 5LL used for combos, blockstrings, and stagger pressure. 5L (whiff) > 5LL has enough range to punish backdash after a blocked Vanish.
- 5LLL
Grab ender with ridiculous range, comboable into Super Dash. Has uses in Fat Throw GuardAllStartup27RecoveryTotal 44Advantage+1 setups with 5LL > delay 5LLL being a tick throw.
Not very useful anywhere else. Canceling into this from a blocked 5LL will always whiff as the opponent will still be throw invulnerable, no matter how much it's delayed. Certain low blockstun assists can override 5LL's blockstun and make delay 5LLL a tickthrow, though this is hardly worth putting low blockstun assists in the team.
5M

| Damage | Guard | Smash | Startup | Active | Recovery | On-Block | Invuln |
|---|---|---|---|---|---|---|---|
| 700 | High | 27 | 4 | 16 | -4 |
Unique standing overhead that ground bounces airborne opponents on hit. A useful mixup option since it's confirmable into a full combo, although at the cost of not having a standard fast startup, high damaging combo starter 5M.
5H

| Damage | Guard | Smash | Startup | Active | Recovery | On-Block | Invuln |
|---|---|---|---|---|---|---|---|
| 850 / 1000 | All | U1 | 14 | 4 | 20 | -8 |
A typical blockstring filler, anti-Reflect button, midscreen combo extender that wall splats on Smash hit and leads into rejump combos.
5S
(Hold OK)

| Damage | Guard | Smash | Startup | Active | Recovery | On-Block | Invuln |
|---|---|---|---|---|---|---|---|
| 300×4 | All | 11 | Total 38 | -7 |
Fast, repeatable basic Ki Blasts. Good zoning tool but unsafe on block at close range. Used in combos to stabilize the opponent's position.
2L

| Damage | Guard | Smash | Startup | Active | Recovery | On-Block | Invuln |
|---|---|---|---|---|---|---|---|
| 400 | Low | 7 | 3 | 13 | -4 |
Buu's go-to low for high/low mixups, along with being his second most common button for starting pressure and defensive challenges.
2M

| Damage | Guard | Smash | Startup | Active | Recovery | On-Block | Invuln |
|---|---|---|---|---|---|---|---|
| 700 | Low | 10 | 4 | 22 | -10 |
Unique 2M that vacuums on block and hit. Has a ridiculous amount of hitstun that allows for unique combo extensions such as comboing into 6M or 214S. Also used in Fat Throw setups as the low hitting option.
While it can be used to pull the opponent out of the corner, it's heavily minus on block so he can't do much with this.
2H

| Damage | Guard | Smash | Startup | Active | Recovery | On-Block | Invuln |
|---|---|---|---|---|---|---|---|
| 850 / 1000 | All | U1+ | 13 | 5 | 27 | -16 | 4-17 Head |
His most reliable anti-air with great vertical hitbox and decent horizontal coverage. On block, cancel into 214M or 236S to stay safe.
2S

| Damage | Guard | Smash | Startup | Active | Recovery | On-Block | Invuln |
|---|---|---|---|---|---|---|---|
| 600 | All | 13 | Total 34 |
An upward-angled Ki Blast that can be used to snipe airborne opponents. Extremely useful in combos thanks to its high hitstun that can combo into Super Dash, link into 5L or even 5S.
Whiffs against almost all grounded characters, so should be avoided during blockstrings. Against tall, standing characters, it's -1 on block.
6M

| Damage | Guard | Smash | Startup | Active | Recovery | On-Block | Invuln |
|---|---|---|---|---|---|---|---|
| 850 | High | 24 | 6 | 4+6L | ±0 |
Standard universal overhead that used by Buu more often than any other character due to being comboable from 2M. 2M > 6M, 5L can work better than 2M > 5M in some juggles due to 5M's tendency to go past the opponent.
j.L

| Damage | Guard | Smash | Startup | Active | Recovery | On-Block | Invuln |
|---|---|---|---|---|---|---|---|
| 400 | High | 6 | 3 | 12 |
Good air-to-air due to being his fastest and least commitment air button.
Has a high hitbox that tends to whiff when the opponent is below Buu, which can cause awkward drops during combos.
j.M
| Damage | Guard | Smash | Startup | Active | Recovery | On-Block | Invuln |
|---|---|---|---|---|---|---|---|
| 700 | High | 10 | 3 | 18 | +6 (IAD) |
Fast with huge downward hitbox. Buu's go-to jump-in button.
j.H

| Damage | Guard | Smash | Startup | Active | Recovery | On-Block | Invuln |
|---|---|---|---|---|---|---|---|
| 850 / 1000 | High | D1+ [D3+] | 11 | 3 | 17 | +7 (IAD) |
- The extended arm has a hurtbox.
- Insanely fast for its range.
A half screen overhead. This move and j.2H are the staples in Buu's moveset with gigantic hitboxes, allowing him to control the air very effectively. Despite its massive range, it can be used as an IAD overhead, and is a fantastic cross-up option.
j.S
(Hold OK)

| Damage | Guard | Smash | Startup | Active | Recovery | On-Block | Invuln |
|---|---|---|---|---|---|---|---|
| 300×4 | All | 12 | Total 38+5L |
- Can be repeated up to four times. Each have different angles.
Good zoning tool thanks to the wide range the Ki Blasts can cover. Has high hitstun, allowing it to combo into Super Dash at certain heights, as well as link into j.L in the corner.
j.2H

| Damage | Guard | Smash | Startup | Active | Recovery | On-Block | Invuln |
|---|---|---|---|---|---|---|---|
| 850 | All | U1 | 13 | 6 | 22 |
- Very active hitbox, great for sniping Super Dashes.
- Extended arm has a hurtbox.
Similar to jH, j2H is a huge attack that excels at stuffing Super Dash, calling out jumps, and locking opponents down. Part of Buu’s incredible keepaway game, in addition to being your generic air combo starter.
Special Moves
Dive Bomb
236L/M/H (Air OK)

| Version | Damage | Guard | Smash | Startup | Active | Recovery | On-Block | Invuln |
|---|---|---|---|---|---|---|---|---|
| 236L | 1060 [700] | All, High [All] | D1 | 10 | 6(9)6,3 | 16 | +1 ~ +6 [+2] | 4-15 Head |
| 236M | 1140 [700] | All, High [All] | D1 | 10 | 6(9)6,3 | 16 | +1 ~ +6 [+2] | 4-15 Head |
| 236H | 1290 [700] | All, High [All] | D1, U2 | 7 | 6(9)6,3 | 16 | +1 ~ +6 [+2] | 1-12 Head |
| j.236L | 980 [700] | High [All] | D1 | 19 | Until L,3 | 16 | +1 ~ +6 [+2] | |
| j.236M | 1060 [700] | High [All] | D1 | 27 | Until L,3 | 16 | -1 ~ +4 [+2] | |
| j.236H | 1210 [700] | High [All] | D1, U2 | 19 | Until L,3 | 16 | +1 ~ +6 [+2] |
- All Versions
- Ground versions have a rising initial hit with air-invuln property. Your go-to anti-air aside from 2H.
- All versions' frame advantage on-block changes depending on when the falling hitbox connects with the opponent.
- Dive Bomb has a weak hit "splash" hitbox that hits on both sides if Majin Buu hits the ground before he hits an opponent. The splash hitbox is always +2 on block.
Dive Bomb is a multi-purpose special which can be used in blockstrings as an overhead or cross-up mixup, a combo extender, and generally, your go-to combo ender.
Dive Bomb's splash hitbox launches on-hit. Majin Buu recovers fast enough to link 5L after landing. Splash hitbox damage scaling akin to a j.M starter.
- 236L
- Goes a short distance forward.
Air version is used in combos and as a meterless combo ender in the corner. Can also create frame advantage on block if you TK it.
Used in pressure as a same-side overhead option. Simply mixing up 236L and 236M on block can be an effective yet risky strategy.
- 236M
- Goes about half screen forward.
Decent range for an overhead. Will cross up on block at close range. An effective mixup tool that you can solo confirm off of.
Don't use this to end corner combos, it will whiff.
While IAD j.M > j.L > j.236L is a triple overhead, IAD j.M > j.236M will be a crossup.
- 236H
- Tracks the opponent and travels almost fullscreen.
- If the Fat Throw hasn't already been used in the combo, EX will automatically perform Fat Throw.
A fairly fast 3/4 screen tracking overhead. This move is good to throw out from time to time when your opponent isn't expecting it. It can also go over beams, so if you have the read, throw it out in neutral to get some damage + pressure. As an added bonus, you can be up to +6 if the opponent decides to block, allowing you to start pressure. Can be 2H'd if the opponent starts to guess you.
Air version can be combo'd into everywhere on screen with j.[S] > j.236H, and is more than likely going to be your go-to combo ender, as it leads into a Fat Throw reset.
Cartwheel
214L/M/H (Air OK)

| Version | Damage | Guard | Smash | Startup | Active | Recovery | On-Block | Invuln |
|---|---|---|---|---|---|---|---|---|
| 214L | 900 | All | U1+ | 9 | 5 | 18 | -7 | 4-13 Head |
| 214M | 900 | All | U1+ | 16 | 5 | 18 | -7 | 4-20 Head |
| 214H | 1100 | All | U1+ | 8 | 5 | 18 | -7 | 1-12 Head |
| j.214L | 900 | All | U1+ | 9 | 4 | Until L+6 | 4-12 Head | |
| j.214M | 900 | All | U1+ | 12 | 4 | Until L+6 | 4-15 Head | |
| j.214H | 1100 | All | U1+ | 6 | 4 | Until L+6 | 4-9 Head |
- All Versions
- Flips backward and leaves Buu airborne. Only has hitbox in front of Buu.
- Smash hit wall bounces. With varying amount of bounce depending on versions.
- 214L
- A short flip with small wallbounce.
Very useful in corner combos due to its high hitstun letting you easily link into j.L and autocombo float back up, even after Smash has been used.
Good blockstring ender, frame data is deceptive as Buu spaces himself out too far to be punished.
- 214M
- A longer flip. Smash hit puts the opponent high up into a big wallbounce.
- Smash hit in the corner sideswaps the opponent.
j.214M is an alternative to j.2H in midscreen combos, as you can SD after the wallbounce and get SKD from j.H this way.
In a blockstring, 214M will always leave a gap when canceled from other normals, useful for frame traps as the opponent cannot mash out of it.
Can also be used similar to Cell's Perfect Attack midscreen, as it gives a crazy wallbounce that Fat Buu can confirm off of and is an unscaled starter. Enjoy the TOD!
- 214H
- A long flip that then bounces forward.
- Ground Smash hit is a big wallbounce, air Smash hit is similar to j.214L but with higher hitstun.
- Ground version is useful for blockstring mixups, as it allows for easy 50/50s with high-blockstun assists and enables j.MLL triple overhead on block.
In midscreen, IAD j.214H is a very fast cross-up that allows for easy conversion with land 5LL.
A fantastic option to throw out in pressure, scrambles, or combos whenever you feel like it due to its 8-frame startup (6f in the air), head-invuln property, insane reward on-hit, and its overall safety and utility. It's worth noting that grounded 214H is a deceptively ineffective reversal option, as it tends to clash on hit against jumping attacks or outright miss due to Majin Buu moving backwards.
Sweeping Breath
236S (Air OK)

| Version | Damage | Guard | Smash | Startup | Active | Recovery | On-Block | Invuln |
|---|---|---|---|---|---|---|---|---|
| 236S | 1100 | All | 17 | 10 | 16 | -5 | ||
| j.236S | 1100 | All | 17 | 10 | 20+3L |
- Covers about half the screen.
- Jails into Vanish.
- Has enough hitstun for Majin Buu to recover and combo off of it.
A powerful zoning tool with a very active hitbox that is great at catching Super Dashes and stopping opponents in their tracks.
Fat Throw
214S

| Damage | Guard | Smash | Startup | Active | Recovery | On-Block | Invuln |
|---|---|---|---|---|---|---|---|
| 400 | All | 27 | 30 | Total 44 | +1 |
- Tracks the opponent but has maximum height it can go. Disappears mid throw if Buu gets hit.
- On hit, holds the opponent in a fat shell for a set amount of time while, locking them down as they fall to the ground. This shell can be broken by hitting them out of it or after some time. Fat Throw only connects once per combo.
- Beats Lv2 Projectiles (such as DBZ Broly/ Trunks 5S), but loses to beams.
The cornerstone of Majin Buu's gameplan. Fat Throw is a powerful plus on-block setplay projectile with decent tracking and high priority which gives powerful okizeme when used after a knockdown, as well as enabling his devastating restand mixups when used as a combo ender.
Check the Fat Throw section for details.
Z Assists
Assist A
Sweeping Breath
| Damage | Guard | Smash | Startup | Active | Recovery | On-Block | Invuln |
|---|---|---|---|---|---|---|---|
| 800 | All | 25 | 10 | +30 |
- Decent pop up assist.
Bog-standard assist, though it's worth noting that Majin Buu appears behind your character when you call it, making this a relatively safe defensive assist.
Assist B
Fat Throw
| Damage | Guard | Smash | Startup | Active | Recovery | On-Block | Invuln |
|---|---|---|---|---|---|---|---|
| 600 | All | 40 | 26 | +18 |
- Different than the point version that it doesn't restand the opponent.
Can still be used for mixups if you happened to never take the opponent off of the ground, which unfortunately isn't something most characters can reliably do without having too little scaling to truly create a mixup. Kid Buu can at least set up Arm Ball mixups.
Outside of mixups, it's mostly just a combo tool. Can still be used in neutral and will still give an insanely easy confirm if it hits the opponent, but its very slow startup can make it inconsistent.
Assist C
Cartwheel

| Damage | Guard | Smash | Startup | Active | Recovery | On-Block | Invuln |
|---|---|---|---|---|---|---|---|
| 800, 400 | All | 45 [20] | +25 |
- Wins neutral. Drags the opponent all the way down.
- Tracks opponent fullscreen, even into the air.
- Has air invuln.
Very silly assist. Bad blockstun for a C assist, especially given the startup, but it's extremely hard to avoid and is a near guaranteed neutral win.
Super Moves
Now Buu really...hate you!
236L+M or 236H+S


| Damage | Guard | Smash | Startup | Active | Recovery | On-Block | Invuln |
|---|---|---|---|---|---|---|---|
| 140×18 | All | UDV | 13+2 | 38 | -24 | 4-20 All |
- Hits the entire screen.
- Minimum damage: 42×18.
Incredibly easy to DHC into, and just as easy to DHC out of. Does fairly standard damage for a level 1. Overall, this is a pretty good super. It can safely DHC into faster Lv1s such as Yamcha's or Krillin's due to the super being active for so long.
Turn into candy!
214L+M or 214H+S


| Damage | Guard | Smash | Startup | Active | Recovery | On-Block | Invuln |
|---|---|---|---|---|---|---|---|
| 3900 | All | UDV | 11+1 | -29 | 1-23 All |
- Heals to 1500 blue health on hit.
- Minimum damage: 1605.
Can be an unreliable reversal due to the small hitbox and slow travel time. The "beam" also only has hitbox at the tip.
Colors

Color 1

Color 2

Color 3

Color 4
Color 5

Color 6

Color 7

Color 8

Color 9

Color 10

Color 11

Color 12


Color 131

Color 141
Color 151

Color 161


