Overview
Cell is a perfect and handsome Android who can do pretty much anything you ask him to, as long as you put him on Point. Cell's large range, aggressively angled beam and quick speed allow him to quickly catch and mount pressure on the opponent, which is only further complimented with his frame data and mixups. When Cell has the opponent cornered, his mixup is enhanced further, he gains access to his infamous Cell Loops, and has the threat of a nasty, easy to execute 50/50 mixup with 236H GuardAll×4, HighStartup8Recovery15Advantage-2 following his Level 3 super attack
 GuardAllStartup9+3Recovery51Advantage-34 [+42].
Defensively, a cornered bug is not a squashed bug: Perfect Attack is memetic for being a safe and extremely proficient anti-air, with the M version GuardAllStartup12Recovery36Advantage-3 ~ -2 having great upper body invulnerability and the H versionGuardAllStartup12Recovery32Advantage-1 version being frame 1 invulnerable. If Cell lands this and doesn't kill, the opponent will be back in the corner post-combo, and the subsequent mixup certainly will. He has a frame 1 invulnerable Level 1 super attack
 GuardAllStartup10+3Recovery50Advantage-35 as well which he can DHC off of to heal. Despite both having offense and defense while leading, Cell's assists are rather situational if not outright terrible, and he also likes having good assists to enable his deadliest mixups.
 |
| Fastest Attacks |
| Reversals |
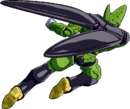
![]() Cell is a dangerously perfect fighter, equipped with a deadly arsenal of moves that dominate the course of the match.
Cell is a dangerously perfect fighter, equipped with a deadly arsenal of moves that dominate the course of the match.
- King of All Trades: The definition of perfection: outstanding range and frames on buttons, good air-to-airs, a beam that has good angles both ground and aerial, versatile combo routes, stable rejumps, and one of the most infamous TOD starters in the entire game (see below).
- High Damage: Excellent corner carry along with rejump routes. Possesses a high variety of corner combo routes and realistic ToDTouch of DeathA combo that can KO a character from full health. routes that don't use Sparking!.
- Relentless Pressure: Amazing stagger pressure plus frame traps, far-reaching normals such as 5LL
 GuardAllStartup9Recovery20Advantage-5 and 5M
 GuardAllStartup9Recovery18Advantage-5, and 5M reliably combos off of left/right cross-ups.
 - Perfect Attack
 GuardAllStartup12Recovery30Advantage-3 ~ -1: A horrifying anti-airAnti-airA move intended to hit the opponent out of the air. These moves are generally enforced with special properties such as head or full invincibility against aerial moves. series of attacks with invincible properties depending on which one you use. It's a combo extender, safe on block mixup, reversal, and TOD starter all in one. Truly a perfect move.


- Poor Assists: All of his assists are situational; Assist A
 GuardAllStartup41Recovery95Advantage+30 is a slow beam assist, Assist BGuardAllStartup20RecoveryAdvantage+29 is a generic lariat assist, and Assist CGuardAllStartup28 [20]RecoveryAdvantage+25 becomes only one hit on block. None have great blockstun.
 - Sub-par Neutral: At full-screen, all he has to re-assert pressure are beams. Without resources, his best bet is to superjump and pray a j.M connects.
- Selfish: While Cell has amazing pressure, he often relies on assists for truly fearsome mix and damage once he gets a hit. Combined with his reliance on assists for neutral and meter use due to the potency of his special moves, teams are often built around him than vice versa.

Normal Moves
5L


| Version | Damage | Guard | Smash | Startup | Active | Recovery | On-Block | Invuln |
|---|---|---|---|---|---|---|---|---|
| 5L | 400 | All | 6 | 3 | 12 | -3 | ||
| 5LL | 700 | All | 9 | 9 | 20 | -5 | ||
| 5LLL | 1000 | Throw | U3+ | 9 | 1 | 18 |
- 5L
- Short jab, especially when compared to the rest of Cell's buttons.
- 6 frames. Cell privilege. Moves him forward.
Use this when you really need the 6 frames or need access to 5LL.
- 5LL
- 5LL goes over half screen.
- Holding
 or
or  during startup halves the distance Cell covers.
5L > 5LL is an easy and pretty consistent anti-Reflect string. 5L > 5LL[4] can work to bait double Reflect as the 5LL[4] will whiff, in which case Cell will usually have enough time to punish with a 5M, though 5L is more reliable.
- 5LLL
- Cancelling into 5LLL from a blocked 5LL always leaves the opponent in too much blockstun for the throw to work.
- Can used multiple times per combo.
- The faster of Cell's command throws.
Some characters' assists can set up tick throws with this move. It has to have 25 frames or less of blockstun and takes some timing, but 5LLL or 2M from 5LL is a low/throw mixup thats hard to deal with.
5M
| Damage | Guard | Smash | Startup | Active | Recovery | On-Block | Invuln |
|---|---|---|---|---|---|---|---|
| 700 [550] | All | 9 | 3 | 18 | -5 |
- Can late cancel into itself once with 4MM, even on whiff.
- Value in [ ] is when being used as 4MM.
- 5M > 4MM will combo on standing/crouching characters.
Excellent button after doing a left-right mixup. If it connects, you can link combo into 2M > 6H > 5H etc. If the opponent blocks, you can continue your pressure.
The core of Cell's staggers is off this button. Spaced out, 5M > 5M beats delay mash, 5M > 6H beats mashing reflect, and 5M4M beats any other kind of mashing. You can also run up and re-establish with lights once your opponent is scared of your pressure, or you can go for a mixup with 6M or DR.
5H
(Hold OK)

| Damage | Guard | Smash | Startup | Active | Recovery | On-Block | Invuln |
|---|---|---|---|---|---|---|---|
| 850[1150] / 1000[1300] | All | U1 | 14~30 | 3 | 21 | -8 |
- [] is when fully held.
- Charged version has higher damage and pushback on block.
- Smash hit wall splats, combos into SD.
Charged 5H allows for shenanigans like pseudo-safe 214S in the corner. Otherwise, you're most likely using it as a last-ditch frame trap or for a rejump combo.
5S
(Hold OK)

| Damage | Guard | Smash | Startup | Active | Recovery | On-Block | Invuln |
|---|---|---|---|---|---|---|---|
| 300×5 | All | 10 | P[(10)P*4] | 24 | -4 |
- Hold or mash S to shoot all 5 Ki Blasts.
- Last Ki Blast launches on hit.
- On block, M and H normals > 5S always leaves at least an 1f gap.
If Cell pointed his finger like Frieza does, this Ki Blast would be broken. Sadly this is not the case. Mostly relegated to frame traps and combo filler before canceling into a special move. Has limited use in pushing opponents away from Cell, as in most cases you want the opposite.
2L

| Damage | Guard | Smash | Startup | Active | Recovery | On-Block | Invuln |
|---|---|---|---|---|---|---|---|
| 400 | Low | 7 | 3 | 12 | -3 |
- Remarkable range for a 2L.
- Excellent stagger tool.
Cell's main low and stagger tool. It's large range allows it to stagger off of a blocked 6H when 5L wouldn't reach.
2M

| Damage | Guard | Smash | Startup | Active | Recovery | On-Block | Invuln |
|---|---|---|---|---|---|---|---|
| 700 | Low | 12 | 8 | 18 | -10 |
- Great range. Always connects after 5M and 4MM.
- Does not reach after 5LL anti-reflect. Use Ki Blast instead.
- Frame traps from 5L and 2L with a 1-frame gap.
2M > 6H will whiff if Cell hits with the tip of 2M, you can get around this by doing 2M > delay 6H instead.
2H

| Damage | Guard | Smash | Startup | Active | Recovery | On-Block | Invuln |
|---|---|---|---|---|---|---|---|
| 850 / 1000 | All | U1+ | 13 | 3 | 31 | -18 | 4-15 Head |
- Stays completely stationary.
- Short horizontal range.
The other normal Cell has that's not good, and it's actually somewhat bad. Still does the job as a standard 2H, but the hitbox is not as lenient as others. You will be cursing this move out at least some point during the time you play this character.
2S

| Damage | Guard | Smash | Startup | Active | Recovery | On-Block | Invuln |
|---|---|---|---|---|---|---|---|
| 400×3 | All | 18 | P(10)P(10)P | Total 56+15L | +2 |
- Lunges forward.
- On hit, launches and carries the opponent with Cell.
Mostly useful as combo filler for Cell's sparking loops, as it can be Reflected on reaction and have it's frame advantage negated.
6M

| Damage | Guard | Smash | Startup | Active | Recovery | On-Block | Invuln |
|---|---|---|---|---|---|---|---|
| 850 | High | 24 | 6 | 4+6L | ±0 |
- Easily spaced and made plus.
- Weird range, hitbox advances but is very horizontally small.
Short range and Cell's stubby jab mean it's hard to challenge after this is blocked. However, due to the range, it's actually rather common for this to hit meaty in the corner during stagger pressure.
6H
Low Kick

| Damage | Guard | Smash | Startup | Active | Recovery | On-Block | Invuln |
|---|---|---|---|---|---|---|---|
| 850 | Low | 13 | 3 | 18 | -5 |
- Scales like a light.
A third low, useful during blockstrings and combos. A core part of what makes Cell's 5M so scary. Dealing 850 damage means you'll want to fit this in combos whenever you possibly can.
j.L

| Damage | Guard | Smash | Startup | Active | Recovery | On-Block | Invuln |
|---|---|---|---|---|---|---|---|
| 400 | High | 6 | 3 | 17 |
- Long reaching and fast, a good air-to-air.
Vertical hitbox leaves a little to be desired, as such some air combos need to be adjusted. The horizontal hitbox more than makes up for it, as this is one of the best horizontal air-to-airs in the game.
j.M

| Damage | Guard | Smash | Startup | Active | Recovery | On-Block | Invuln |
|---|---|---|---|---|---|---|---|
| 700 | High | 11 | 3 | 17 |
- Good air to air normal.
- Good hitstun, allows it to combo into j.S and j.2H.
Great downward hitbox makes this an amazing IAD normal. Also enables Cell's 5H rejumps, making it crucial to Cell's midscreen combos.
j.H
| Damage | Guard | Smash | Startup | Active | Recovery | On-Block | Invuln |
|---|---|---|---|---|---|---|---|
| 850 / 1000 | High | D1+ [D3+] | 13 | 8 | 22 |
- 5LLLLLLL Dynamic hit can wall bounce.
- j.H Smash hit causes a sliding knockdown.
Unlike most characters, Cell's j.H does not necessarily mean the end of his combos. At a height slightly above jump height, it will start to combo into the second hit of j.S, enabling a combo into j.236X or j.2M that can be further extended with meter or assists.
j.S

| Damage | Guard | Smash | Startup | Active | Recovery | On-Block | Invuln |
|---|---|---|---|---|---|---|---|
| 500, 500 | All | 17 [15] | 2(1)P | 45 |
- Initial hit is a strike that ground bounces the opponent. The explosions are Ki Blasts that can only hit once, launch on hit.
- Startup is reduced when canceled from Smash 5LLLLLLL or Smash j.H, compensating for the increased fall speed.
Have high hitstop, so despite being Ki Blasts, the explosions can stack against themselves and jail into SD in the corner.
The corner combo filler due to having good hitstun and meter gain. In midscreen, it can be combo'd into from j.H at certain heights, or even from j.M against big characters.
j.2H

| Damage | Guard | Smash | Startup | Active | Recovery | On-Block | Invuln |
|---|---|---|---|---|---|---|---|
| 850 | All | U1 | 15 | 3 | 19 |
- Knocks the opponent away horizontally instead of upwards.
- Smash hit wall splats, combos into SD.
Your main combo extender midscreen, as it guarantees a sliding knockdown in the combos you'll use it in. Cell does not struggle to get knockdowns as he can force them with Rolling Crush, therefore the move sending outward is a huge upside for him. Practically guarantees the corner for you.
You can use it in the corner too, but corner j.2H combos are mostly for style points. Also useful as a way to combo into j.236X as in some cases it will do more than j.S > j.236X.
Special Moves
Hell Strike
j.2M


| Damage | Guard | Smash | Startup | Active | Recovery | On-Block | Invuln |
|---|---|---|---|---|---|---|---|
| 900 | High | 33 | 3 | 30 | -3 | 8-15 All |
- Switches sides, tracks anywhere on screen.
Mostly combo filler before Vanishing to keep Cell same side for corner carry, e.g. j.S > j.2M > Vanish. Too slow to be used for anything else without a solid read.
Rolling Crush
236L/M/H (Air OK)
| Version | Damage | Guard | Smash | Startup | Active | Recovery | On-Block | Invuln |
|---|---|---|---|---|---|---|---|---|
| 236L | 100×4, 900 | All×4, High | D1 | 8 | 2,2,2,2(8)3 | 15 | -2 | |
| 236M | 100×4, 1000 | All×4, High | D1 | 10 | 2,2,2,2(8)3 | 15 | -2 | |
| 236H | 100×4, 1200 | All×4, High | D1 | 8 | 2,2,2,2(8)3 | 15 | -2 | |
| j.236L | 100×N, 700 | All×N, High | D1 | 19 | 2×N(??)3 | 15 | -2 | |
| j.236M | 100×N, 700 | All×N, High | D1 | 19 | 2×N(??)3 | 15 | -2 | |
| j.236H | 100×N, 1000 | All×N, High | D1 | 8 | 2×N(??)3 | 15 | -2 |
- All Versions
- Smash on the last overhead hit.
- Ground verions' roll launches on hit. Air version keeps them grounded.
- The roll portion ground bounces airborne opponent.
Cell's main combo ender, or combo extender with assists. The preceeding hits will telegraph the final overhead and the overhead itself does not scale well. You'll only hit someone who's asleep and you won't hit very hard.
- 236L
- Smash hit causes a short sliding knockdown.
- Ground version goes half screen.
- Air version rolls down at a 45 degree angle.
Borderline useless, especially air version. It's supposedly more consistent as a combo ender than j.236M, but there are always j.236M routes that work on every character. The only time you'll really want to use the ground version is during clashes. Oddly enough, it can also be a decent round-start option if you think your opponent is going to do a lariat-type move.
Only use j.236L when you're really really unsure if j.236M would work, e.g. on air-to-air confirms.
- 236M
- Smash hit causes a ground bounce sliding knockdown.
- Ground version goes half screen. Can alter the distance Cell travels by holding or
 .
. - Air version rolls down at a shallower angle than j.236L.
Go-to blockstring and combo ender. Air version has ridiculous corner carry and can easily be extended with assists on Smash hit.
Mid-blockstring, 236M[4] will keep Cell further away from the opponent compared to 236M while still being -2 on block.
- 236H
- Smash hit causes a ground bounce sliding knockdown.
- Roll portion hits from both sides of Cell, autocorrect on the last hit.
- Ground version is essentially 236M but faster. Can crossover the opponent even in the corner.
- Air version rolls straight down.
On block or hit, inputting 236H[4] can prevent him from crossing over due to the reduced travel distance. 236H[4] also prevents him from crossing over at all in the corner.
In a blockstring, this sideswitch is meaningless due to crossup protection. However, after a corner Lv3 knockdown, you can time 236H[4] vs 236H and meaty them with a left-right 50/50 as they get up. This has rather low reward if Cell only hits with the overhead, but hitting with the rolling portion will scale the followup combo much less, reaching up to 4.5k with a Vanish extension.
Air version can be used to instantly attack anything below Cell. The speed also makes it a good crossup fakeout vs IAD j.M, an extra overhead during a jump-in (23f at lowest height), and a good combo ender at high hitstun decay even if you don't have D Smash, as canceling it early will give you a ground bounce that combos into Supers.
Perfect Attack
214L/M/H

| Version | Damage | Guard | Smash | Startup | Active | Recovery | On-Block | Invuln |
|---|---|---|---|---|---|---|---|---|
| 214L | 400, 400, 400 | All | 12 | 3 | 30 | -3 ~ -1 | 4-14 Head | |
| 214M | 400, 400, 600 | All | U1+ | 12 | 3 | 36 | -3 ~ -2 | 3-14 Head |
| 214H | 400, 400, 1000 | All | U2+ | 12 | 3 | 32 | -1 | 1-3 Head, 4-14 All |
- All Versions
- On hit: First kick launches, followup ground bounces, Smash on the second followup.
- On block: 214L/M will still do their first followup, while 214H will teleport behind the opponent.
- All versions are unscaled starter(!)
- 214L
Alternative blockstring ender to 236L/M. Also midscreen TOD starter since it doesn't consume Smash and you can Spark after the last hit, or used as extra damage at the end of combos (e.g. DR > 214L(2) > Super).
- 214M
- Switches sides both on block/hit.
- Smash hit corner splats.
214L and 214M look identical and are both true blockstrings. Though if you have an assist with relatively low blockstun (like Trunks A), getting it to hit in between the 2 hits of 214L/M will leave a gap, "breaking" crossup protection and allowing for a left-right 50/50.
214M is especially dangerous when Cell has his back against the corner as it's a gigantic anti-air that can be solo, meterlessly converted into a 5k combo. Not only that, since Smash 214M(3) > Spark activation whiffs against all characters, on top of being one of the few moves that can wall bounce assists, this is THE Touch of Death king and you WILL pray that Cell doesn't hit you with it.
- 214H
- Has enough range to hit all characters from round start position.
- On block, Cell recovers in midair behind the opponent, even in the corner. Can be used for mixups with assists.
- On reflect, won't do the teleport followup, unlike L and M version.
- On hit, ends with a grab that only hits once per combo.
The ground and air versions of this move have very different uses. The ground version is Cell's main mixup tool, as it leaves him airborne, -1, and with his air action. Any assist with 30 frames of blockstun will give a gapless high/low/crossup mixup, but it's still quite good even if you can't make it gapless. It's also useful as a wakeup tool, as it's frame 1 head invul and will teleport you out the corner.
Air Perfect Attack
j.214L/M/H
| Version | Damage | Guard | Smash | Startup | Active | Recovery | On-Block | Invuln |
|---|---|---|---|---|---|---|---|---|
| j.214L | 500, 500 | All | 12 | 3 | 26 | 4-15 Head | ||
| j.214M | 500, 500 | All | 8 | 3 | 32 | 4-10 Head | ||
| j.214H | 500, 500, 500 | All | U1+ | 8 | 3 | 32 | -1 | 4-10 All |
- All Versions
- Restores Cell's air options on hit.
- Has head-invul, giving Cell a good option to respond to superdashes while in the air.
They're also unscaled starters like ground Perfect Attack.
- j.214L
- Launches on hit, adds a follow-up that knocks down.
- Stays same-side.
"Combo filler," typically used to keep Cell airborne by whiffing it. At certain height, j.S(2) > j.214L (whiff) recovers faster than j.S(2) on its own, letting Cell link into j.L in the corner. This is the meat of his corner loops.
- j.214M
- Launches on hit, adds a follow-up that knocks down.
- Switches sides on hit.
Extremely fast, being able to combo from non-Smash j.H at some angles, and the sideswitch allowing Cell to Vanish to stay same side.
- j.214H
- Stays same-side.
- Adds two extra follow-ups, Smash on the last hit.
- Smash hit wallbounces for a combo.
- Teleports behind the opponent on block.
Air 214H is mostly useful as a combo extender. It will always take you back to the ground on hit, which gives consistent conversions when you don't have your superdash available.
Kamehameha
236S (Air OK)


| Version | Damage | Guard | Smash | Startup | Active | Recovery | On-Block | Invuln |
|---|---|---|---|---|---|---|---|---|
| 236S | 262×5 [280×5] | All | 18 | 25 [21] | 21 [17] | -16 [-10] | ||
| j.236S | 262×5 | All | 18 | 25 | 24 |
- Jails into Vanish.
- Ground version can be aimed upwards by holding or
 after the input. Air version can only be fired angled downwards.
 - Straight Kame wall splats on hit.
- Values in [] are aimed up version.
- Cancels into SD.
Its ability to be used both on the ground and in the air gives Cell a respectable presence at range. Cell's air Kame in particular has a mean angle against grounded opponents, and his 5LL almost ensures that he'll stay in once it connects.
Psycho Crash
214S


| Damage | Guard | Smash | Startup | Active | Recovery | On-Block | Invuln |
|---|---|---|---|---|---|---|---|
| 150×8, 800 | Throw | U2+ | 30 | 3 | 25 |
- Hits from over halfscreen to fullscreen.
- Will whiff on opponents at close range in the midscreen, doesn't overshoot the corner.
Gimmicky in midscreen since it can't hit close to Cell, but somewhat usable in the corner. The startup animation can be hard to see in neutral and in a string, but this move isn't nearly as good for neutral checking as SSB Gogeta's own grab. Can be used after 5LLL to add some extra damage in corner combos, and is generally seen there.
Z Assists
Assist A
Kamehameha
| Damage | Guard | Smash | Startup | Active | Recovery | On-Block | Invuln |
|---|---|---|---|---|---|---|---|
| 200×5 | All | 41 | 25 | 95 | +30 |
Fires a Kamehameha downwards. Slow startup makes this a pretty lackluster neutral tool, and the angle makes it less useful as a long range neutral tool. It's pretty good as an anti-air though, and can be used for pressure in the corner.
Assist B
Shoulder Tackle
| Damage | Guard | Smash | Startup | Active | Recovery | On-Block | Invuln |
|---|---|---|---|---|---|---|---|
| 800 | All | 20 | 9 | +29 |
Cell tackles the opponent. Solid, albeit generic, strike assist. Has fast start-up and covers half of the screen quickly, anyone hit by the assist then gets put into an easy to combo from wallbounce. Will also trade with most lights and mediums.
Assist C
Perfect Attack
| Damage | Guard | Smash | Startup | Active | Recovery | On-Block | Invuln |
|---|---|---|---|---|---|---|---|
| 550, 400×2 | All | 28 [20] | 6 | +25 | Head |
Cell teleports to the opponent and performs all three hits of L Perfect Attack on hit. On block, he only does the first hit.
- Starts up significantly faster than the average C assist, but still has the cooldown.
Bad blockstun for a C assist. Not great for pressure, but it's got a niche in combos and being an anti-air in neutral.
Super Moves
Energy Field
236L+M (Air OK) or 236H+S (Air OK)
| Version | Damage | Guard | Smash | Startup | Active | Recovery | On-Block | Invuln |
|---|---|---|---|---|---|---|---|---|
| 236L+M | 500×6 | All | UDV | 10+3 | 3×6 | 50 | -35 | 1-30 All |
| j.236L+M | 500×6 | All | UDV | 10+3 | 3×6 | 52 | 1-30 All |
- Minimum damage: 135*6 (810).
Combo ender and frame 1 reversal, also Cell's only frame 1 reversal besides level 3. Among the higher damage level 1 supers.
Solar Kamehameha
214L+M or 214H+S

| Damage | Guard | Smash | Startup | Active | Recovery | On-Block | Invuln |
|---|---|---|---|---|---|---|---|
| 220×19, 360 | All | UDV | 9+3 | 85 | 51 | -34 [+42] | 1-19 All |
- Minimum damage: 1672.
- +42 on hit, but leaves the opponent at fullscreen if you aren't in the corner.
An overall average level 3. Despite being very easy to combo into, it deals below average damage and provides very limited oki outside of the corner.
Midscreen, the best he can do is run up and meaty with 2L or attempt a delayed 214S as a gimmick.
In the corner, you can either go for a j.H safejump, SJ IAD mixup, or 236H crossup. 236H requires meter, assists, or sparking to convert off of, but it is a true 50/50. It's also unscaled. And you can use 214M to throw them back into the corner. Have fun!
Colors
- DBFZ Cell color1.png
Color 1
- DBFZ Cell color2.png
Color 2
- DBFZ Cell color3.png
Color 3
- DBFZ Cell color4.png
Color 4
- DBFZ Cell color5.png
Color 5
- DBFZ Cell color6.png
Color 6
- DBFZ Cell color7.png
Color 7
- DBFZ Cell color8.png
Color 8
- DBFZ Cell color9.png
Color 9
- DBFZ Cell color10.png
Color 10
- DBFZ Cell color11.png
Color 11
- DBFZ Cell color12.png
Color 12
- DBFZ Cell color13.png
Color 131
- DBFZ Cell color14.png
Color 141
- DBFZ Cell color15.png
Color 151
- DBFZ Cell color16.png
Color 161