Please feel free to make edits, but include edit summaries and sources where applicable.
Overview
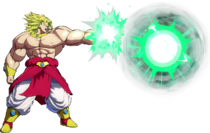
Broly is both a zoner and a grappler, a combination fitting for the Devil. Broly's neutral and pressure make him one of the most terrifying opponents in the game, as he can effectively control any space on the screen with his armor and projectiles. Broly's 5S GuardAllStartup13RecoveryTotal 42Advantage-9 is an incredible zoning tool, much larger than other Ki Blasts while also piercing through them, and can be aimed upwards to stop opponents from escaping. If any opponent tries to retaliate against his 5S, he will just set up 214S
 GuardStartup29RecoveryTotal 40Advantage-, shielding himself from every projectile and assist, winning neutral instantly. Plus, quite unfortunately, it's when Broly gets close that he's at his scariest. Terrific frame data, an armored tick throw A throw done after attacks, very soon after if not exactly when throw invulnerability expires on the opponent. A Tick Throw take advantage of that the opponent naturally expect a Frame Trap coming, making it very hard to react to or escape from. with 214L
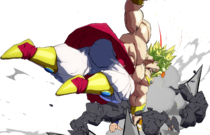
 GuardThrowStartup17Recovery23Advantage- and a tiger knee An input method to perform a special move in the air as fast as possible after you leave the ground. Almost always abbreviated to TK. For Example: 2369 for a j.236 input.-able air grab, Broly can easily grapple and frame trap opponents. Even on defense, Broly is far from helpless thanks to his armor and Lariat Express. All of this resulted in Broly's famed community nickname being coined, "Z Bully."
What can be inferred from this is that Broly's strengths are unrivalled in number and magnitude. But the Bully is dwindled without his bat, per se. Because he only has one unscaled starter (5LL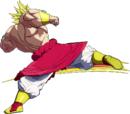 GuardAllStartup10Recovery14Advantage-2), Broly relies on having a lot of meter to burn to deal heavy damage, and eats through it fast, notably with Gigantic Meteor combos. Furthermore, being the largest character in the game, with a lot of recovery on his moves, means he can be left helpless if he misses. Finally, in a game where many characters have been retroactively given guard-point on their own attacks, Broly is still stuck with the classic armor system of 1 hit of armor most of the time.
However, while you were reading that, you probably just got hit yet again by either tick throw 214L, 10 rounds of 5S, or a (236H GuardAllStartup19~37Recovery24Advantage-9) into a gigantic combo if you got impatient and skipped to this part. Broly truly is the controller-breaker and rage-inducer in one nasty package: If you like making opponents feel embittered, predictable, and helpless, you will revel in the might of the Legendary Super Saiyan, Broly.
![]() Broly is a massive brute who uses a combination of powerful blows and command grabs imbued with super armor to bully his victims.
Broly is a massive brute who uses a combination of powerful blows and command grabs imbued with super armor to bully his victims.
- Fantastic Neutral: Neutral game is absolutely devilish, with huge normals, one of a kind Ki Blast, a counter-zoning tool in Powered Shell
 GuardStartup29RecoveryTotal 40Advantage-, many armored moves, and a very proficient anti-air grab in Gigantic Strike
 GuardThrowStartup12Recovery22Advantage-.
 - Versatile Mix-ups: Strong stagger potential combined with a fast, armored grab
 GuardThrowStartup17Recovery23Advantage- make defending against him an absolute nightmare.
 - Unique Level 3: Gigantic Meteor
 GuardAllStartup9+15RecoveryTotal 68Advantage- is very versatile, enables extreme damage off of his grabs and can even give forbidden mixup in the corner. Its H+S variant on the other hand is very combo friendly and excellent for meter dumping.
- Resource Reliant: Without resources, Broly's damage output is on the lower end. He needs assists and meters to achieve Bully status, and will also burn through them relatively fast.
- Large Hurtbox: Broly's size makes him more susceptible to random hits than others. While Broly does have armor to compensate, his normals and special moves are pretty slow and leave him wide open if whiffed.
Unique Abilities
Almost all of Broly's attacks have guard point against Ki Blast and at least one hit of armor that absorbs all attacks except Vanish, Supers and Sparking Blast. Though there are a few caveats:
- Armor comes with higher initial proration values, reducing his overall damage potential
- Normal attacks are only armored if they're the first attack of the string. He cannot utilize the armor property during a blockstring without using specials
- Armored air normals lose specifically to 2H, but not to other Head invulnerable attacks
Normal Moves
5L
| Version | Damage | Guard | Smash | Startup | Active | Recovery | On-Block | Invuln |
|---|---|---|---|---|---|---|---|---|
| 5L | 500 | All | 7 | 3 | 15 | -2 | ||
| 5LL | 700 | All | 10 | 4 | 14 | -2 | ||
| 5LLL | 1000 | Throw | U3+ | 15 | 1 | 17 |
- 5L
A log of a 5L.
- Whiffs against short or crouching opponents at longer range.
- Uncharacteristically high and big for a jab, can be used as a ghetto anti-air, but is also susceptible to low profile attacks such as most 2Ms.
At 7f of startup, Broly cannot use 5L to contest in ±0 situations like after a blocked 6M. Thankfully, his armored specials can be used as reversals instead.
- 5LL
Broly's bat.
- The only attack in Broly's moveset that is an unscaled / "Medium" starter.
- Do not get hit by this. A common setup is 5L > delay 5LL.
On almost all common openings, Broly's damage output can be described as on the lower end. This move however, exists to give you a taste of what a genuine demon Broly could've been if his other normals don't have extra proration.
This is just one of the reasons why your opponent is doomed from the moment they block Broly. He can simply repeat 5L > delay 5LL to keep up his pressure in addition to literally every other tool. Both moves have great range and are only -2 on block, making them superb stagger tools. If they continue to block, then eating a command grab is inevitable, but if they wiggle to try to escape, then they risk outright die against 5LL.
- 5LLL
A convenient grab.
- Switches sides on hit. And despite the animation, Broly stays grounded.
- Cancelling into this from a blocked 5LL always leaves the opponent in too much blockstun for the throw to work.
Mostly used for post-Vanish extension, as he has better combo routes in other situations.
With low blockstun assists, he can get a cheeky tickthrow from 5LL + Assist > 5LLL. Though the reward is not that high.
5M
| Damage | Guard | Smash | Startup | Active | Recovery | On-Block | Invuln |
|---|---|---|---|---|---|---|---|
| 700 | All | 11 | 6 | 26 | -11 | 9-16 Armor |
Long range, advancing, big size attack.
- Due to having armor, has higher proration level than other characters' mediums.
An unorthodox 5M that trades damage and speed for range and armor. Fairly standard use otherwise. essential for comboing into 2H, as Broly's 2H is terrible horizontal range and 5M pushes him close to his opponent.
5H
(Hold OK)
| Damage | Guard | Smash | Startup | Active | Recovery | On-Block | Invuln |
|---|---|---|---|---|---|---|---|
| 850[1150] / 1000[1300] | All | U1 | 16~30 | 3 | 24 | -11 | 9-18~32 Armor |
One of Broly's numerous smash starters.
- Cannot true string from any normal, always leaving at least an 1f gap.
- Smash hit wall splats.
- Can be charged by holding down the button. Full charge increases damage and makes Broly move forward further.
Forms a simple mix-up with delayed 214L, since they have deceptively similar start-up animations. Reflecting will beat 5H but lose to 214L, while chicken blocking will beat 214L but lose to 5H.
5S
(Hold OK)
| Damage | Guard | Smash | Startup | Active | Recovery | On-Block | Invuln |
|---|---|---|---|---|---|---|---|
| 300×6 | All | 13 | Total 42 | -9 |
A key part of Broly's neutral and maintains pressure at all ranges. The Ki Blasts are very fast, counterzone other Ki Blasts and can cover a large part of the screen when mixing between 5S and 5S[8].
It's not completely infallible though, Broly still has to actively react to Super Dash for a punish, and the Ki Blasts themselves can be avoided by dash super jumps or beaten by beams.
- Any of the Ki Blasts can be aimed upwards with 5S[8].
- Pierces through other Level 1 projectiles on contact.
- Last Ki Blast launches on hit.
- Aimed down Ki Blasts have a small deadzone. Can whiff against small or crouching opponents at roundstart distance.
2L
| Damage | Guard | Smash | Startup | Active | Recovery | On-Block | Invuln |
|---|---|---|---|---|---|---|---|
| 500 | All | 8 | 3 | 13 | 0 |
Another great, long range stagger tool along with 5L and 5LL.
- Being 0 on block means you can dashblock to bait a reversal, or even back dash 5LL for a nasty read.
2M
| Damage | Guard | Smash | Startup | Active | Recovery | On-Block | Invuln |
|---|---|---|---|---|---|---|---|
| 700 | Low | 13 | 2 | 25 | -11 | 9-14 Armor |
Long range sweep that is not safe on block, making any string after lights somewhat committal.
- Moves Broly forward a tiny bit.
- Due to having armor, has higher proration level than other characters' mediums.
2H
| Damage | Guard | Smash | Startup | Active | Recovery | On-Block | Invuln |
|---|---|---|---|---|---|---|---|
| 850 / 1000 | All | U1+ | 15 | 3 | 25 | -8 | 4-17 Head, 9-17 Armor |
This move is god. Head invulnerable from frame 4, and fully armored from frame 9. It hits most characters at the apex of their jumps, which lets you shut down most air approaches and IAD pressure resets. If they block it, it also leads to a strike/throw mixup with 236S or 214L. Run up > 2H is actually a pretty good idea with Z Broly due to the sheer amount of options it covers.
- Short horizontal range, but very big vertically.
- Combo into this with 2M > 5M, other routes will whiff.
Due to its reach, Broly can also convert stray SD hit against grounded opponents with something like SD > delay j.M > j.L ▷ 2H > SD etc.
6M
| Damage | Guard | Smash | Startup | Active | Recovery | On-Block | Invuln |
|---|---|---|---|---|---|---|---|
| 850 | High | 24 | 6 | 4+6L | ±0 |
Universal overhead with above average range.
Very useful when used as a corner meaty thanks to its crazy range catching all techs and leaving Broly plus, if timed perfectly he can even continue a combo should the opponent get hit. It's gimmicky but fun.
A setup for this is j.2H/3H knockdown > meaty 6M.
j.L
| Damage | Guard | Smash | Startup | Active | Recovery | On-Block | Invuln |
|---|---|---|---|---|---|---|---|
| 500 | High | 6 | 4 |
Not useful for jump-ins, but it's a good combo filler due to its high hitstun and Broly aiming the punch slightly upwards.
j.M
| Damage | Guard | Smash | Startup | Active | Recovery | On-Block | Invuln |
|---|---|---|---|---|---|---|---|
| 700 | High | 10 | 4 | 9-13 Armor |
- Aimed slightly downwards.
Very good for IAD jump-ins and is especially good for midscreen IAD cross-ups.
j.H
| Damage | Guard | Smash | Startup | Active | Recovery | On-Block | Invuln |
|---|---|---|---|---|---|---|---|
| 850 / 1000 | High | D1+ | 12 | 4 | 9-15 Armor |
- j.H
Unique knockdown j.H that has uses as a combo extender. On Smash hit, Broly dunks the opponent down to the ground and bounces them up with so much hitstun that he can continue the combo with dash 5L > 5LL...
- 5LLLLLLL
Also unique in that it's the only 5LLLLLLL with no unique properties compared to j.H, other than giving a Dragon Ball.
j.S
(Hold OK)
| Damage | Guard | Smash | Startup | Active | Recovery | On-Block | Invuln |
|---|---|---|---|---|---|---|---|
| 400×4 | All | 17 | Total 39+5L |
Another solid zoning tool, though not as good as 5S.
- Any of the Ki Blasts can be aimed downwards with j.S[8]. This can work as a same side fakeout to complement his crossups.
- Pierces through other Level 1 projectiles on contact.
- Last Ki Blast launches on hit.
- Freezes Broly in place while preserving his momentum.
Mostly combo filler for meter gain. Broly wants to be able to reliably anti-air the opponent should they attempt to superdash his zoning, though there's a mindgame of if he will continue stalling his air momentum or just stop firing. The best tool he can use for that after j.S is j.214H.
j.2H
| Damage | Guard | Smash | Startup | Active | Recovery | On-Block | Invuln |
|---|---|---|---|---|---|---|---|
| 850 / 1000 | All | D1 | 18 | Until L | 21 | -11 ~ -7 | 9-20 Armor |
Broly stomps down, bringing his opponent with him. One of his main combo enders. Smash on air-to-air hit, gives a short sliding knockdown. Holding a forward direction during startup will increase its range horizontally, thus j.[3]H is the one to use most of the time.
In the corner, j.[3]H > 214S lets him put up barrier while still having enough frame advantage for a safejump. Another option is j.[3]H > 214M (whiff), IAD j.H, which is an auto-timed safejump that lets your assists regenerate.
Special Moves
Lariat Express
236L or 236M/H (Hold OK)
| Version | Damage | Guard | Smash | Startup | Active | Recovery | On-Block | Invuln |
|---|---|---|---|---|---|---|---|---|
| 236L | 1000 | All | 13 | 6 | 24 | -9 | 4-18 Armor | |
| 236M | 1100 / 0,1125 [1400 / 0,1440] | All | U1+ | 28~46 | 12 | 24 | -9 | 4-39~57 Armor |
| 236H | 1200 / 0,1350 [1500 / 0,1665] | All | U1+ | 19~37 | 12 | 24 | -9 | 4-30~48 Armor |
- All Versions
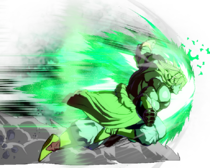
Broly clotheslines the enemy. Has armor, goes far, and converts into combos after the M/H versions.
- Has 10 hits of armor.
- Smash hit carries to the corner, corner splats and can be comboed off of meterlessly.
- Regardless of Smash, all versions can combo directly into H+S Gigantic Meteor at low hitstun decay in the corner.
- On block, 236X > Vanish has an 1f gap. Spending a bar like this is safe against 2H, but Reflect and frame 1 anti-air/DPs will still be a threat.
Can be used very well defensively. With Sparking or Limit Break, it's one of the scariest and most obnoxious defensive options in the game.
- 236L
Moves forward about half screen. Used as a meterless reversal, since it has frame 4 armor and is decently fast.
- Moves forward about half screen.
The armor property is lost after the active frames end, leaving Broly vulnerable to a counter hit if he only makes contact against an assist.
- 236M
Stays in place for a while before charging fullscreen forward. Not too recommended since it's horribly slow, allowing the opponent to react with Vanish or even Supers if they trigger his armor.
- Can be charged up for more damage.
The charged up damage is applied once the screen starts shaking, a little before the max charge time.
- 236H
The M version but a lot faster. Combos from 2M, allowing for full corner carry and a corner combo from anywhere on the screen. Broly can delay 5L to extend the combo after hitting this move.
- Enemy bounces off the ground comically before getting up, allowing for easy oki or super conversions.
Very fair meter dump move when combined with Gigantic Meteor, as Broly will instantly put the opponent in the corner, take over half of their HP bar in a combo, level 3, and now they're in knockdown state; assuming they're not dead.
TOD starter in limit break.
Gigantic Claw
214L or 214M/H (Hold OK)
| Version | Damage | Guard | Smash | Startup | Active | Recovery | On-Block | Invuln |
|---|---|---|---|---|---|---|---|---|
| 214L | 1800 | Throw | D2 | 17 | 1 | 23 | 4-17 Armor | |
| 214M | 1650 [1950] | Throw | U1+ → D2 | 24~43 | 1 | 22 | 4-24~43 Armor | |
| 214H | 1700 [2000] | Throw | U1+ → D2 | 24~42 | 1 | 22 | 4-24~42 Armor |
- All Versions
Scary grabs. They have fairly low recovery, so if the opponent guesses correctly and jumps up, Broly will most likely already recover in time against something like a falling j.M. In order to punish these grabs, they will have to go for hard reads like IAD or SD.
- 214L
An unreactable, armored command grab that works at any point in a blockstring. Due to all of Broly's button having high blockstun, Broly has to delay cancel into this if he wants to tick throw.
Delayed strikes and this grab are the main source of Broly's pressure. Always keep this option in mind when blocking against Broly!
- Always causes a sliding knockdown.
Frame trap vs delayed 214L is a very efficient mixup. The opponent has very low chances of successfully mashing back due to Broly's armor, they can't chicken block because Broly can frame trap the jump's startup. Even though a solo Broly can only extend with Supers on hit, his reward off of command grab > Super is the highest in the game. On midscreen hit, 214L > 236H+S is 3k, and if Broly's in Sparking or Limit Break, 214L > 214L+M will do a whopping 5.5k. Its high damage also makes it a good combo ender, e.g. corner [DR] > 214L > 236L+M.
- 214M
The L version if it was slower but let you combo out of it solo.
- Smash hit causes a wall splat for a conversion in the corner.
- Non-Smash hit causes a sliding knockdown like L version.
- Deceptively long range, about one character length.
- Can be charged up for more damage.
Perfect amount of startup for frame-perfect tick throw from any normals, but inferior to the L version due to its much more reactable start-up animation.
The charged up damage is applied once the screen starts shaking, a little before the max charge time.
- 214H
Fast and comboable grab, but the EX shine makes it more obvious to see.
- Smash hit wall bounces, allows for a solo combo anywhere on the screen.
- Non-Smash hit causes a sliding knockdown like L version.
- Huge range. Connects from round start position.
- Can also be charged up for more damage.
Basically just 214M with higher reward.
Gigantic Strike
j.214L or j.214M/H (Hold OK)
| Version | Damage | Guard | Smash | Startup | Active | Recovery | On-Block | Invuln |
|---|---|---|---|---|---|---|---|---|
| j.214L | 1800 | Throw | 12 | 5 | 22 | 4-16 Armor | ||
| j.214M | 1900 [2200] | Throw | D2 | 16~36 | 7 | 22 | 4-22~42 Armor | |
| j.214H | 2000 [2300] | Throw | D2 | 11~30 | 7 | 27 | 4-17~36 Armor |
Broly charges in place before violently thrusting upward and grabbing the enemy.
- All versions switch sides on hit.
- Like most of his special moves, M and H versions can be charged up for more damage.
- j.214L
Doesn't go very far.
- Fast, but short range.
Mostly used as combo filler before Vanish due to not having Smash property, while putting the opponent in a very convenient position for a grounded extension.
- j.214M
Slower, but longer grab range.
- Causes a short sliding knockdown.
Acts as a midscreen combo ender for when you don't wanna spend any extra resources. The sliding knockdown allows you to dash up and meaty 5L/2L, but not much else.
- j.214H
Broly's fastest air grab, with massive range to boot. Great for reading jumpy opponents in neutral, as it does some serious mental damage.
- Causes a big ground bounce sliding knockdown.
Has crazy air control, as it's super fast, deals as much damage as a Level 1 Super (and more if charged up), and can be extended into even more damage. From a midscreen hit and at relatively low height, you can add j.S(4) before Vanishing. j.214H ▷ 236H+S also works anywhere on screen. With his back to the corner, Broly has combo routes that can meterlessly convert with the bounce as well.
Note that at 2H height and up, j.214H > j.214L+M isn't a reliable combo ender, as it will whiff against some characters in midscreen (e.g. A18, BRS, KRL, GKU).
Eraser Blow
236S
| Damage | Guard | Smash | Startup | Active | Recovery | On-Block | Invuln |
|---|---|---|---|---|---|---|---|
| 300,1200 / 0,1500 / 0,1350 | All | U1+ | 20 | 1(2)P | Total 50 | -5 [+19] | 4-28 Armor |
A cornerstone of Broly's combos and pressure. Broly throws a giant ball of energy that counts as a beam.
- Damage: Raw / Non-Smash / Smash.
- First part is a strike, second part is a projectile with beam properties.
- Projectile increases in speed as it travels.
- Smash on the strike. Smash hit sends opponents into a funny spinning animation that lets him combo off it anywhere on the screen.
Safe on block with very good pushback, but doesn't true string from any normals and always leaves a 5f gap minimum. It can be chicken blocked out of, though Broly will be +1 if they do so. Typically a good pressure reset in this situation.
This is an amazing zoning tool that compliments 5S if people start getting impatient, but it's best not to use this too much as the opponent can Level 1 or 3 super on reaction due to the lag that Broly goes through after use.
As a combo tool, it has comically high hitstun that essentially forces a soft knockdown. You can also link back into 5L even off the Smashless version in the corner, set up 214S, or hard read a air tech for a tiger knee j.214H
Powered Shell
214S (Air OK)
| Version | Damage | Guard | Smash | Startup | Active | Recovery | On-Block | Invuln |
|---|---|---|---|---|---|---|---|---|
| 214S | 29 | 240 | Total 40 | 29-268 Guard | ||||
| j.214S | 29 | 240 | Total 43 | 29-268 Guard |
Broly puts up a giant shield for a few seconds. Not an 18 Barrier, but still horrifically oppressive in a different way.
- Guard point against all assists and projectiles except Supers and Sparking Blast.†
- Preserves air momentum when used in the air.
- Disappears if Broly blocks, gets hit, or triggers a cinematic with most attacks (notably, j.2H, Vanish and Sparking activation won't deactivate the shell).
- While the shell is active, Broly can still use this move again to refresh it. Doing so deactivates the current shell on frame 6, leaving him briefly vulnerable.
- Certain attacks like 5L and 2H can put Broly's hurtbox outside the shell, where he can still get hit by projectiles.
Shell loses to a few specific projectiles and assists:
- Android 18: last hit of 214H~214H
- Frieza: close range 5H and close C assist
- Nappa: Saibaman's grab
- Tien: 214S and B assist
- Vegito (SSGSS): close range 236S, j.236S and A assist
Unique interactions:
- Frieza: 214S will break upon making contact with the shell
- Super Baby 2: 5S and j.S will pass through the shell instead of exploding on contact like normal Ki Blasts
An insane special, reinforces every aspect of Broly's gameplan. A frequent goal Broly tries to achieve with zoning is a safe window to use 214S.
If Broly can get it up in neutral, then neutral is over. It absorbs not only every non-super projectile, but also every assist in the game, limiting your opponent's option to character-specific options and superdash. This is also a good argument to run Broly mid as opposed to anchor as most neutral assists will let you safely set this up.
You can also use it as a frame kill from j.2H in the corner. It's great as a visual distraction as well as an IAD safejump setup. Using DR while the barrier is up is actually evil because of the way it hides it.
Z Assists
Assist A
Eraser Blow
| Damage | Guard | Smash | Startup | Active | Recovery | On-Block | Invuln |
|---|---|---|---|---|---|---|---|
| 800 | All | 30 | +30 | Ki Blasts |
Basically 236S with a little dash.
- Only the projectile has hitboxes, unlike the point version.
- No armor, but keeps the Ki Blast guardpoint.
Due to its rather slow speed, you can call this assist and run behind the projectile as a safe approach.
Assist B
Machine Gun Shot
| Damage | Guard | Smash | Startup | Active | Recovery | On-Block | Invuln |
|---|---|---|---|---|---|---|---|
| 210, 147×4 | All | 37 | +52 |
j.S(5) from a relatively low height. A defensive assist with pretty good angle and also clears out other Ki Blasts like his point j.S. Compared to Broly's other assists, this has the highest blockstun (if respected). Overall Broly's most versatile assist, but not always his best.
- Last Ki Blast launches on hit.
Assist C
Lariat Express
| Damage | Guard | Smash | Startup | Active | Recovery | On-Block | Invuln |
|---|---|---|---|---|---|---|---|
| 800, 400 | All | 35 [20] | 9 | +29 | Armor |
Armored Lariat that can get people mad.
- Has 10 hits of armor.
- Teleports to the opponent on ground level.
- On hit, teleports behind the opponent and knocks them down into a ground bounce sliding knockdown.
- Values in [ ] are when the opponent is in hitstun/untech.
For a C assist, it's great. Very fast, very active, good tracking, high vertical reach, armored and auto-confirms. It might as well be a beam assist... that can tank through other beams and assists; making it great for Happy Birthday combos!
Super Moves
Eraser Cannon
236L+M or 236H+S
| Version | Damage | Guard | Smash | Startup | Active | Recovery | On-Block | Invuln |
|---|---|---|---|---|---|---|---|---|
| 236L+M | 600, 2000 | All | UDV | 4+2 | -27 | 4-17 All | ||
| 236H+S | 2000 | All | UDV | 13+4 | -27 | 4-23 Armor, 24-End Ki blasts |
- L+M
Broly does a HUGE uppercut that floats the opponent for a while until he throws a blast of energy. This uppercut won't consume Smash if Broly DHCs out before it can hit.
- Minimum damage: 120, 700.
- Frame 4 invuln. Can be funny, but it's not great or you'd see a lot more people using it as a reversal.
- Projectile wall splats on hit.
While the opponent recovers in the air on hit, in the corner, Broly is pushed back at the perfect distance for further pressure where other characters would lose it.
After this super in the corner:
- 5S(1) covers most options and furthers pressure, you can go into a stagger or a special
- You are at +11 if they air tech
- Their forward tech mash will get counter hit
- Their Up tech > backdash can be caught with 5S[8] and you can pressure with a special afterward
- 236S will tank Super Dash attempts and either blow them up or lock them down, since Broly is +1 if they block
Generally the best response is not air teching at all and taking the soft knockdown.
Broly will still do the full animation even if he's DHC'd out, allowing for some characters to continue the combo afterward for a bit more damage or even knockdown. An example of a character who benefits from this is Piccolo.
- H+S
Broly only throws the projectile, skipping the uppercut entirely.
- Often used midscreen when L+M version won't connect, such as after a j.214H ender. In the corner you get similar oki to the L+M counterpart. Don't do this raw unless you're trying to snuff out a beam or equivalent.
Gigantic Meteor
214L+M (Air OK) or 214H+S (Air OK)
| Version | Damage | Guard | Smash | Startup | Active | Recovery | On-Block | Invuln |
|---|---|---|---|---|---|---|---|---|
| 214L+M | 60*N, 4000 | All | UDV | 9+3 | 1-18 All | |||
| 214H+S | 60*N, 4000 | All | UDV | 9+15 | Total 68 | 1-11 All | ||
| j.214H+S | 60*N, 4000 | All | UDV | 17+15 | Total 76 | 1-19 All |
- L+M
Broly generates a ball of energy in his hand before dropping it downward diagonally. Very easy to use, consistent Level 3.
- Minimum damage in a combo: ~1740.
- Always flies at a 45 degree angle. Doesn't travel offscreen.
- Ground version auto-adjusts during startup to aim the ball directly at the opponent, but there's a limit to how high he can leap up to. Air version has very little to no adjustment.
- Broly is stuck in the air until after the ball explodes. Once it does, he will teleport to the ground.
Flexible DHC Super since Broly will adjust himself to where the opponent is.
With certain combo routes, Broly can set up Level 3 at just far enough from the corner that he can meaty 236S on oki, which:
- Keeps him plus even if they block or Reflect.
- Lets him combo off of it with dash 5L.
- Leaves him outside of Sparking Blast range, allowing him to whiff punish Spark with 5L.
- Lets his assists regenerate.
The easiest way to set this up is with j.214L > Vanish, j.2H > 214L+M, 236S.
- H+S
Broly throws out a small ball that accelerates at a much slower rate than L+M version, multiplying in size once it gets near or connects with the opponent (on block or hit).
- Minimum damage in a combo: ~1500.
- The ball always explodes when it hits the floor, even if it somehow never expands and stays a baby ball.
- Broly recovers shortly after he releases the ball, allowing him to continue the combo.
- On hit, the opponent cannot be hit with anything else until after the explosion.
- Ball disappears only if Broly gets hit, but not if he blocks, tags out, or if the tagged out teammate gets hit.
- The opponent can be air tech shortly after the explosion. Causes soft knockdown otherwise.
A horrible reversal compared to L+M version since the invulnerability goes away long before the hitbox comes out, but functions as the cornerstone of Broly's most damaging combos. Without assists, there are a few common ways to combo into this Super like midscreen 236M/H, Smash j.H, or in the corner: 236L (at low hitstun decay) or j.214X > Vanish > j.214H+S. Combos afterward aren't affected by Super scaling, and there are many ways to extend out of it like 5L, a command grab, or Dragon Rush. If an enemy Broly has meter, be scared of this move's potential.
Do note however that despite being high damaging, you should consider only using this if you have a lot of meters or you're going for the kill, as L+M version is strictly superior for okizeme thanks to its hard knockdown.
Colors
- DBFZ Broly color1.png
Color 1
- DBFZ Broly color2.png
Color 2
- DBFZ Broly color3.png
Color 3
- DBFZ Broly color4.png
Color 4
- DBFZ Broly color5.png
Color 5
- DBFZ Broly color6.png
Color 6
- DBFZ Broly color7.png
Color 7
- DBFZ Broly color8.png
Color 8
- DBFZ Broly color9.png
Color 9
- DBFZ Broly color10.png
Color 10
- DBFZ Broly color11.png
Color 11
- DBFZ Broly color12.png
Color 12
- DBFZ Broly color13.png
Color 131
- DBFZ Broly color14.png
Color 141
- DBFZ Broly color15.png
Color 151
- DBFZ Broly color16.png
Color 161
