This can be due to patches to the game, or developments in the metagame. You can help by updating it.
Overview
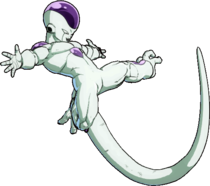
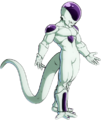
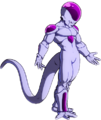
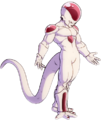
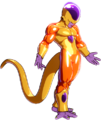
The ruler of the largest intergalactic army in the cosmos and Emperor of Universe 7: Frieza... is currently training inside a Hyperbolic Time Chamber to find his identity. In DBFZ, Frieza's toolkit is half the size of an average character's kit, and the tools themselves are janky and mediocre. He's not sure if he should be a zoner, a rushdown character, or maybe an Install character to make the craziest 1v3 comebacks. Hurting himself in his confusion, he ends up doing none of those things very well.
You can still find a lot to love about Frieza. His 5S GuardAllStartup9Recovery25Advantage-4 is one of the best in the game that shoots out extremely fast Ki Blasts with piercing property. Death Saucer
 GuardAllStartup30RecoveryTotal 61Advantage+2 or "Discs" are unique returning projectiles, great for neutral and blockstrings. And of course, the famed Golden Frieza
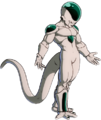
 GuardStartup34+0RecoveryAdvantage- greatly enhances his movement, pressure and damage output.
 |
| Unique Movement Options |
| Double Airdash (in Golden Frieza) |
| Fastest Attacks |
| Reversals |
![]() Frieza can control space, can pressure, and can coat himself in gold. He's one of the characters of all time
Frieza can control space, can pressure, and can coat himself in gold. He's one of the characters of all time
- Powerful Space-Control: Loads and loads of projectiles to keep the enemy at bay.
- Incredible EX Move: EX Death Slash
 GuardAllStartup12Recovery20Advantage-2 is an instant screenfiller that only costs half a bar and is safe.
 - Good Pressure: Solid framedata, especially on 2M
 GuardLowStartup10Recovery14Advantage-2, and a pressure reset in Death Saucer
 GuardAllStartup30RecoveryTotal 61Advantage+2 that simultaneously enables tricky mixups.
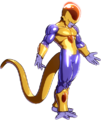
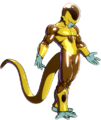
 - Golden Frieza: Golden Frieza
 GuardStartup34+0RecoveryAdvantage- is a very important tool to keep in mind, enabling for terrifying and deadly comeback potential thanks to its speed, damage and reverse beat. Sparking also pauses its timer, and switching resets it!
- Mediocrity: Zoning is outclassed by a grappler. Pressure and Install are outclassed by some monkeys.
- Anti-Airs: Frieza's ability to stop people from jumping over his projectiles is limited to his 2S
 GuardAllStartup12Recovery24Advantage-3 and its variations. He's also terrible once airborne with few options to air-to-air with.
Normal Moves
5L
| Version | Damage | Guard | Smash | Startup | Active | Recovery | On-Block | Invuln |
|---|---|---|---|---|---|---|---|---|
| 5L | 400 | All | 6 | 3 | 13 | -4 | ||
| 5LL | 700 | All | 10 | 4 | 16 | -6 | ||
| 5LLL | 400 / 0,1000 | All | U3+ | 13 | 3 | 23 | -5 |
- 5L
- Standard 5L.
- 5LL
- A far reaching 5LL that's -2 when blocked at max range.
- 5LLL
- Tracks fullscreen.
- At very close range, the explosion sends them outward. Otherwise, it sends them inward.
- No longer counted as a ki-blast so this will beat superdash.
Often useful after a vanish extension.
5M
| Damage | Guard | Smash | Startup | Active | Recovery | On-Block | Invuln |
|---|---|---|---|---|---|---|---|
| 700 | All | 13 | 5 | 17 | -6 |
- Strange, proximity-based normal
- Allows Golden Frieza to combo off of 5S at far ranges
Very odd 5M compared to most. At close range it functions the same as all the others, but farther away Frieza will automatically dash forward and then attacks either once he's close enough to the opponent to hit or after going nearly fullscreen length. Hops over a few lows, and otherwise has the same uses as other 5Ms in combos and blockstrings. Although difficult to space due to the nature of the normal, it's possible to make it up to -3 if Frieza hits from max range.
5H
| Damage | Guard | Smash | Startup | Active | Recovery | On-Block | Invuln |
|---|---|---|---|---|---|---|---|
| 150, 100×8 / 300, 100×8 | All | U1 | 13 | 5(8)P×8 | Total 55 | -13 ~ -3 |
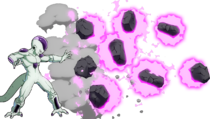
Goofy, inconsistent, held together by duct tape. 5H serves as a typical blockstring filler and horizontal launcher for combos, and still somehow managed to suck at that.
It can be used similar to a beam for things such as controlling the ground and clearing Ki Blasts. However, the rocks won't start moving until frame 26, so it's slower than a typical beam while losing to beams. Rocks will also instantly evaporate if Frieza cancels into Vanish, so it cannot jail into Vanish. Finally if all that wasn't bad enough, there's a punishable gap between the rocks appearing on screen and them moving forward. This allows the opponent to visually attack Frieza through the wall of rocks.
On block, frame advantage varies depending on spacing and how many rocks make contact. In most cases like when used after 5M or 2M, it'll be -12 to -8.
Smash on the first hit and wall bounces, comboable into SD in midscreen and 214S in the corner. Even then, the rocks can spawn behind the opponent and fly offscreen if used too close to the corner. When this happens, at best he loses out on some damage, and at worst it completely messes up the combo.
- Rocks spawn on frame 9 and can clash with other projectiles even while their active frames are deactivated
|
If 5H clashes with another projectile before it hits the opponent and causes a Smash hit (happens more often than you'd think), the move will just fail and oftentimes decide not to give Frieza a proper wall bounce. Has both properties of a physical attack and a projectile, to make sure Frieza is screwed over by all types of invulnerablity, guardpoint and armor. For example, it will lose to |
5S
(Hold OK)
| Damage | Guard | Smash | Startup | Active | Recovery | On-Block | Invuln |
|---|---|---|---|---|---|---|---|
| 300×6 | All | 9 | 2 [(11)1×6] | 25 | -4 |
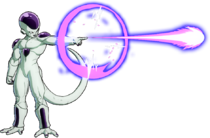
- Hold or mash S to shoot all 6 Ki blasts.
- Sixth hit launches and wall bounces.
- Fastest Ki blast in the game.
Can be followed up with 236M > Vanish. More useful than some other Ki Blasts due to how it pierces opponents, potentially stopping assist calls. Other than that, it's pretty average and loses to Z Broly.
2L
| Damage | Guard | Smash | Startup | Active | Recovery | On-Block | Invuln |
|---|---|---|---|---|---|---|---|
| 400 | Low | 7 | 3 | 13 | -4 |
- Low-hitting 2L. Not the best range, but quite useful as a low nonetheless.
2M
| Damage | Guard | Smash | Startup | Active | Recovery | On-Block | Invuln |
|---|---|---|---|---|---|---|---|
| 600×2 | Low | 10 | 4(10)4 | 14 | -2 |
- Frieza's main low normal.
- Being -2 on block makes it extremely useful for stagger pressure.
2H
| Damage | Guard | Smash | Startup | Active | Recovery | On-Block | Invuln |
|---|---|---|---|---|---|---|---|
| 850 | All | 15 | 5 | 29 | -18 |
- Leaves a blind spot over Frieza's head
Despite looking like it and his 5H GuardAllStartup13RecoveryTotal 55Advantage-13 ~ -3 firing projectiles, this is not treated as a projectile. While there's still a gap over his head, it has huge horizontal range, which can be useful in some mid-range scenarios. It also acts as a very strong followup if the opponent gets hit by Frieza's Death Saucer
 GuardAllStartup30RecoveryTotal 61Advantage+2, as you are likely already crouching - enabling a full followup with SKD afterwards.
1S / 2S / 3S
| Damage | Guard | Smash | Startup | Active | Recovery | On-Block | Invuln |
|---|---|---|---|---|---|---|---|
| 700 | All | 12 | 1 | 24 | -3 |
- 1S shoots almost horizontally, 2S shoots at a 30 degree angle, 3S shoots at a 60 degree angle.
- 1S, 2S, and 3S can cancel into eachother.
Good range and covers some useful anti-air angles, can also be cancelled into 2H even on whiff making this very safe to use when the enemy is jumping in neutral.
Good combo and neutral tool.
6M
j.L
| Damage | Guard | Smash | Startup | Active | Recovery | On-Block | Invuln |
|---|---|---|---|---|---|---|---|
| 400 | High | 7 [6] | 4 |
- Hits at a downward angle, useful for IAD-pressure.
- Ridiculously fast as an IAD crossup, can be converted off of with j.2S into a superdash combo.
j.M
| Damage | Guard | Smash | Startup | Active | Recovery | On-Block | Invuln |
|---|---|---|---|---|---|---|---|
| 600×2 | High | 7 | 2(7)3 |
- First hit has no range at all, second hit has much longer range.
- Great air-to-air normal.
The first hit has the same startup as his j.L, making it excellent for combos. Be careful using on smaller characters for IAD overheads or pressure, the first hit will miss.
j.H
| Damage | Guard | Smash | Startup | Active | Recovery | On-Block | Invuln |
|---|---|---|---|---|---|---|---|
| 850 / 1000 | High | D1+ [D3+] | 13 | 5 |
- 5LLLLLLL
- Dynamic hit can wall bounce.
- j.H
- Is a Heavy with a fairly good reach.
- Smash hit causes sliding knockdown.
j.S
(Hold OK)
| Damage | Guard | Smash | Startup | Active | Recovery | On-Block | Invuln |
|---|---|---|---|---|---|---|---|
| 500×3 | All | 12 | 6 |
- Hold or mash S to shoot all 3 blasts.
- Piercing projectiles that also beat Super Dash, sending the opponent full screen.
- Third hit wall bounces.
† Despite being a projectile, can be anti-air'd by Head invulnerable attacks.
j.2H
| Damage | Guard | Smash | Startup | Active | Recovery | On-Block | Invuln |
|---|---|---|---|---|---|---|---|
| 850 / 1000 | All | D1 | 18 | 5 |
- Command normal that causes sliding on air hit and an immediate tech on ground hit.
Mainly used after j.2S or j.S in the corner for sliding knockdown, will keep the enemy quite close to Frieza. Can also be used as a third sneaky overhead in an IAD string, use sparingly though as it can be 2H'd.
j.2S
Special Moves
Death Slash
236L/M/H
| Version | Damage | Guard | Smash | Startup | Active | Recovery | On-Block | Invuln |
|---|---|---|---|---|---|---|---|---|
| 236L | 1100 | All | 14 | 5 | 26 | -2 | ||
| 236M | 1100 | All | 14 | 5 | 23 | -2 | ||
| 236H | 1000×2 | All | 12 | 9 | 20 | -2 |
- 236L
- Explodes the ground in front of Frieza.
Frieza's main way of safely ending blockstrings.
- 236M
- Explodes the ground on the other half of the screen. Doesn't reach fullscreen.
Can be used after a long-range 5H or 5S to tack on some additional damage either by itself, or can be vanished for even more damage.
- 236H
- Creates 2 explosions that covers the entire screen.
A good way to catch people trying to do anything. Can be casted 2 times in a row to combo in itself.
You might not survive this time
236S (Air OK)
| Version | Damage | Guard | Smash | Startup | Active | Recovery | On-Block | Invuln |
|---|---|---|---|---|---|---|---|---|
| 236S | 300,300×4 / 0,400,850 | All | U2+ | 13 | 24+6L | -5 | ||
| j.236S | 300,300×4 / 0,400,850 | All | U2+ | 13 | Total 51 | -11 |
- Smash at point blank, the opponent will be locked inside the ball before it starts traveling, explodes once it touches the wall.
- On Smash hit, becomes full invulnerable until after recovery.
- Cancelling the move will cause the ball to explode early.
- Breaks out of move when Frieza takes damage.
- Hold 4 to make the ball move slowly.
Good as a combo ender before going into Supers, can be spammed in the air if you want your opponent to be annoyed.
Death Saucer
214S
| Damage | Guard | Smash | Startup | Active | Recovery | On-Block | Invuln |
|---|---|---|---|---|---|---|---|
| 700×2, 700×2 | All | 30 | Total 61 | +2 |
- Throws 2 discs forward that come back after traveling off screen.
- Discs merely launch going forward, but cause a sliding knockdown to the opponent on the way back.
- The return trip discs can friendly fire and hit Frieza and his assists. Friendly fire discs scale less and deal more damage to Frieza than they do to the opponent (700+560 to foe and 700+630 to Frieza).
- Can be crouched under, including L+S Ki Charge.
- Disappear if Frieza's hit or tagged out, but not if he blocks.
Frieza is always plus after using this in a blockstring, so it's a very strong blockstring ender. Use 5L afterwards to catch jumps/vanish ect. This move also doubles as a good combo tool in the corner, or even midscreen with assists.
Warp Smash
22S
| Damage | Guard | Smash | Startup | Active | Recovery | On-Block | Invuln |
|---|---|---|---|---|---|---|---|
| 900 | All | 34 | 5 | 31 | -3 | 4-19 All |
- Teleports a set distance forward, auto corrects. Can pull the opponent out of the corner.
- Invulnerable from frames 4 to 19.
- Causes a ground bounce on the opponent when they're either standing or in the air.
Can be used as a reversal, but it's very inconsistent on actually punishing the opponent since it tends to miss. It also doesn't have frame 1 invulnerability.
Z Assists
Assist A
Death Slash
| Damage | Guard | Smash | Startup | Active | Recovery | On-Block | Invuln |
|---|---|---|---|---|---|---|---|
| 800 | All | 23 | 5 | 58 | +23 |
- Hold 1 to have it hit the close distance of the L version. By default it will hit the medium distance of the M version. Hold 3 to have it hit a farther distance than that.
- The damage buff from Golden Frieza applies to this assist as well.
- Has a minimum distance, stunting its use.
Extremely annoying assist. Forces the opponent to respect you in neutral because of how huge its hitbox is.
Assist B
You might not survive this time
| Damage | Guard | Smash | Startup | Active | Recovery | On-Block | Invuln |
|---|---|---|---|---|---|---|---|
| 250, 175x3 | All | 19 | 31 | +11 |
- The damage buff from Golden Frieza applies to this assist as well
- Large enough hitbox to catch vanishes.
- Hold [4] to make the ball move slowly.
A projectile assist that is quite fast and difficult to punish. It is good as an approach tool, working almost like Guile walking in behind a fireball for your point. It has a lot of hitstun at 51f, but has the lowest blockstun in the game for "normal" assists. The blockstun, or lack thereof, makes it nonexistent for blockstring pressure, but handy for tick throw set-ups. Your opponent might also just respect it because it looks like it has far more blockstun than it actually has.
Assist C
Psychokinesis
Super Moves
Death Ball
236L+M (Air OK) or 236H+S (Air OK)
| Version | Damage | Guard | Smash | Startup | Active | Recovery | On-Block | Invuln |
|---|---|---|---|---|---|---|---|---|
| 236L+M | 20*N, 2600 | All | UDV | 8+4 | ||||
| j.236L+M | 20*N, 2600 | All | UDV | 7+4 |
- Costs 1 Ki Gauge.
- L+M version throws towards the middle of the screen, H+S version throws towards the edge of the screen.
- Minimum damage: 4*N, 754.
A useful level 1 super that does additional damage if done from big heights. Because of how slowly the ball travels, some characters can DHC and then get an extension afterward, usually in the form of air DR or j.H.
If Frieza is hit with Death Saucer in the middle of this move, he can then combo into You must die by my hand! without suffering from super scaling, as he hasn't entered neutral stance.
Nova Strike
214L+M (Air OK)
| Version | Damage | Guard | Smash | Startup | Active | Recovery | On-Block | Invuln |
|---|---|---|---|---|---|---|---|---|
| 214L+M | 4200 | High | UDV | 11+1 | -26 [+42] | |||
| j.214L+M | 4200 | High | UDV | 11+1 | Until Landing | 1-6F after landing All |
- Costs 3 Ki Gauges.
- Minimum damage: 1680.
- Inconsistent frame advantage on hit, based on which one of the two hits the ground first.
High damaging level 3. Is only one hit, which means an opponent in Sparking won't get any regeneration done during the animation, making it an excellent combo ender.
Can also be used as a reversal, though it has a tendency to go straight over the opponent in this case so this is generally not recommended.
You must die by my hand!
[H+S] while knocked down
| Damage | Guard | Smash | Startup | Active | Recovery | On-Block | Invuln |
|---|---|---|---|---|---|---|---|
| 480×10 | All | UDV | 39+2 | 45 | -68 [+35] |
- Costs 3 Ki Gauges.
- Minimum damage: 208*10.
- Only invulnerable during active frames.
Not a good wakeup option compares to the 2 other Lv3s he has. However, the insanely high minimum damage means it's the best combo ender, used after getting hit by his own Death Saucer. (which is kind of ironic if you think about it)
- Oftentimes used in Golden Frieza TOD's
Golden Frieza
214H+S
| Damage | Guard | Smash | Startup | Active | Recovery | On-Block | Invuln |
|---|---|---|---|---|---|---|---|
| 34+0 | 1-34 All |
The Emperor comes to reclaim his throne. Just don't run out of time.
- Costs 3 Ki Gauges. Can only be done once per match. Inputting 214H+S again will deactivate Golden Frieza.
- During Golden Frieza, gains a 20% damage buff, a second air dash, access to full reverse beat, and increased movement speed.
- Lasts about 21 seconds when he's the point character, won't deactivate until he returns to neutral ground stance. The timer is paused when he's in Sparking, as well as resetting the timer whenever he's tagged out or an enemy's character dies.
- Raw startup is long, but autoguards and recovers instantly after the super flash. Startup during combos is fast, so you can go Golden Frieza mid-combo.
- Can be used to tank raw supers and instill fear into your opponent
- Has ~1 second of Ki gain cooldown.
- Reverse beat gives him access to unpredicatable DR in blockstrings
- LOOPS
Sorbet's Ray Gun
S when Golden Frieza ends
| Damage | Guard | Smash | Startup | Active | Recovery | On-Block | Invuln |
|---|---|---|---|---|---|---|---|
| 1200 | All | UDV | 8+0 |
- Costs 1 Ki Gauge.
- Minimum damage: 840.
- Has some invulnerability and hits opponent during timestop.
- Crumples grounded opponent, causes a sliding knockdown on airborne.
Does hit off sliding knockdowns but since the shot is small and goes quite high up, it requires strict timings.
By timing the shot as late as possible into Frieza's crumple animation, you can get enough frame advantage for extra followups like Supers or even just run up 5L. Comboing after this Super doesn't receive Super scaling.
One of the most satisfying and fun ways to combo into You must die by my hand!, easily achieved by using 214S>2M>214H+S (cancelling out of golden) followed by pressing S when the second Death Saucer hits the opponent, and then clicking H+S for an easy and extremely high damage end to a Golden Frieza combo in the corner, sometimes even resulting in a TOD due to You must die by my hand!'s high minimal damage.


