Overview
Gogeta (SSGSS), often referred to as Gogeta (SSB) or Gogeta Blue by the community, is a high-risk, high-reward character with powerful burst options and explosive damage output. He has many moves that allow him to outright skip neutral, such as 5S GuardAllStartup18Recovery33Advantage-24, j.2S
 GuardAllStartup18RecoveryTotal 71+10LAdvantage-, 2M
 GuardLowStartup12Recovery21Advantage-13, the H version of Soul Strike and Multiplex Afterimage. Once he's in, he uses his plethora of mix-up options to keep his opponent guessing: high/low, left/right, overheads
 GuardHighStartup10RecoveryAdvantage-, command grabs
 GuardThrowStartup25RecoveryAdvantage-, and more. Almost any hit that Gogeta connects will lead to insane damage, making him extremely good at two-touching, sometimes even TODTouch of DeathA combo that can KO a character from full health.ing, the opponent. On top of that, he's no slouch defensively either, sporting some genuinely amazing DPs in Rising Vortex. Gogeta Blue is a powerful rushdown character that will explode his opponent when things go his way.
However, when things do not go his way, it's a nightmare. Gogeta Blue possesses burst options that fling him across the screen, but they leave him extremely vulnerable on whiff, making him susceptible to momentum shifts. High recovery and small cancel windows on his normals also mean he needs to look out for Guard Cancel more than other characters. Additionally, due to the 50% modifier on his meter build, managing meter for the team while playing him is a struggle bus as it makes him the only designated Point in the game who struggles to build even 1 bar per combo. This means your options are very limited if you want to build a good team for him.
Gogeta Blue has incredibly strong toolkit and explosive, consistent gameplan. Combined with his neediness and inability to provide back for his team in almost any capacity, this makes him a very controversial character in the DBFZ community when it comes to deciding how strong he is. Fortunately, the opponent takes just as many risks if not more against Gogeta's stylish onslaught, proving once and for all he is the ultimate fusion! (Unlike those other two)
Note: This is Gogeta in Dragon Ball canon. For his non-canon, GT counterpart, see SS4 Gogeta. |
| Ki Gain Modifier |
| ×0.5 |
| Fastest Attacks |
| 5L (6f) |
| Reversals |
| 214M/H (f1) |
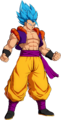
![]() SSB Gogeta is a high-risk, high-reward character who uses his burst options to chase the opponent into the corner quickly and blows them up with explosive punishes.
SSB Gogeta is a high-risk, high-reward character who uses his burst options to chase the opponent into the corner quickly and blows them up with explosive punishes.
- Burst Options: Gogeta has a plethora of Burst Option An explosive, quick attack that is usually unreactable from close to medium range.s that allow him to easily close the distance: 5S
 GuardAllStartup18Recovery33Advantage-24 true-strings into Vanish A technique that costs 1 bar of meter, which will cause the player character to immediately teleport behind the opponent and attack. It can extend combos as well as being plus on block. It is inputted with M+H., 2M
 GuardLowStartup12Recovery21Advantage-13 travels almost fullscreen, 5SGuardAllStartup18Recovery33Advantage-24 to 236H
 GuardAll×2, HighStartup13RecoveryAdvantage-5 and 236S
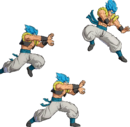 GuardAll×5, HighStartup34RecoveryAdvantage+2 both being full-screen jails.
 - Combo God: To compensate for his low meter build, Gogeta Blue deals extremely high meterless damage off any starter.
- Mix-up Monster: High-Low A mixup where the opponent must choose between blocking high and low.s, Left-RightA mixup where the opponent must choose between blocking left and right.s, Command Throw A throw that is performed by inputting a special command like 214C. Generally command throws have special properties in comparison to normal throws like increased damage or being untechable.s... you name it, Gogeta has it.
- Rising Vortex: The only DPs in the game that can be solo-combo'd from with no extra resources.


- Volatile: Gogeta's burst options have substantial Recovery The recovery of an attack refers to the amount of time an attacker must wait before they may perform another action, even blocking. on whiff. Some moves carry so much risk that using them outside of combos is unwise.
- Frame Data: To compensate for his crazy mix-ups, most of Gogeta's normals are very negative on block and have small cancel windows.
- Assist Reliance: If Gogeta doesn't have any assistance to back him up, his Offense The act of trying to do damage to your opponent, typically from ranges closer than full screen away. Offense is a broad, encompassing term that can include your ability to apply effective mixups, keep good frame advantage during your attacks, and convert openings into high damage. and Neutral When neither player is in an advantageous position in terms of stage position. game are riskier and limited. This enforces him to the Point In a 3v3 fighting game, Point refers to the 1st character up to fight out of the 3 selected by the player. position and leaves him with little to no solo functionality.
- Meter Penalty: Gogeta is one of the only characters who has a x0.5 meter multiplier, meaning he builds meter horribly.
Normal Moves
5L


| Version | Damage | Guard | Smash | Startup | Active | Recovery | On-Block | Invuln |
|---|---|---|---|---|---|---|---|---|
| 5L | 400×2 | All | 6 | 3(6)3 | 14 | -3 | ||
| 5LL | 700 | All | 11 | 3 | 21 | -10 | ||
| 5LLL | 1000 | High | U3+ | 26 | 4 | 26 | -5 |
- 5L
5L is Gogeta's fastest normal. It's a double-hitting jab with great range. The second jab will come out on hit, block or whiff, meaning that whiffing it puts Gogeta in a bad spot. Fortunately, the second hit will always connect on a reflect, giving you extra time to react with 2M and force them to reflect twice or to block it.
Has a tendency to trade with other 6f jabs instead of clashing in ±0 situations. Since the first hit has abnormally low hitstop, such trades would put Gogeta at -5 costing all of his momentum, maybe even get counter hit for trying to 5L again. In these situations, he'll have to fall back on defensive options like blocking, Reflecting or go wild with DPs.
- 5LL
Gogeta moves forward while performing a quick hook. It has a decent upwards hitbox, and it can be comboed into j.DR, 6M or j.H due to its launching properties on a grounded hit. However, it's rather slow and not good for mashing due to 5L's long active frames. Very unsafe on block.
- 5LLL
Gogeta leaps forward and sledgehammers the opponent. On block or on hit, Gogeta will be launched forward, switching sides, and stealing the corner if the opponent had his back on it. Gogeta recovers mid air, allowing for a backdash to get back at the opponent. While it is a grounded overhead option, it is easily reactable. Though it can turn into a mix-up if you cover the large gap between 5LL and 5LLL, there is almost no need to try this when 6M is much safer and a less scaled starter. In the rare case you want to use this in pressure, immediately cancelling into 236LLL will let you land without a post-SD scramble, giving you time to call an assist and continue offense.
- Huge gap between 5LL and 5LLL, enough to be jabbed out or 2H'd.
- On block, can cancel into SD early to stay same side.
5M

| Damage | Guard | Smash | Startup | Active | Recovery | On-Block | Invuln |
|---|---|---|---|---|---|---|---|
| 700 | All | 11 | 3 | 21 | -8 |
Gogeta performs a rising kick while moving forward.
Overall a great button, with amazing vertical reach and moving Gogeta forward, though outshined by 2M in neutral. Because it hits pretty high up, it can meaty the opponent's up tech well, and can generously catch them trying to chicken block out of the pressure. Can go into a very tight (though still not gapless) 6M or 2M for a mix-up if air blocked.
Sees use in both pressure and combos since it can work as a strong frametrap or as a risky pressure reset.
5H

| Damage | Guard | Smash | Startup | Active | Recovery | On-Block | Invuln |
|---|---|---|---|---|---|---|---|
| 850 / 400,600 | All | U1 | 13 [14~18] | 3 | 26 | -13 | [8-9~13 Assist Intangible] |
Gogeta smashes his elbow into the opponent's face and kicks them if the elbow isn't blocked. One of Gogeta's best starters and buttons.
It is good as an anti-reflect button and as a counter move after a successful reflect, yet 2M is the preferred option. Depending on the distance between him and the opponent, Gogeta will quickly teleport to the opponent. Will lead into incredible corner carry and damage by doing 214S after it, though rejumps are also possible.
5S
| Damage | Guard | Smash | Startup | Active | Recovery | On-Block | Invuln |
|---|---|---|---|---|---|---|---|
| 900 | All | 18 | 17 | 33 | -24 |
Gogeta fires a Kamehameha instead of using Ki Blasts.
Not the best projectile, lacking swiftness and fast recovery, but the benefit of having a beam property normal is being able to cancel it into specials or into vanish, even on whiff. 236H goes hand in hand with this normal thanks to it both being a truestring (unless the rival does a back dash and is not in the corner) and comboing anywhere on the screen after 5S connects due to having a small wallbounce. On top of all this, 5S also has absurd hitstun which makes it easy for Gogeta to heavily punish faraway commitments without spending any meter (by cancelling into SD or, preferably, 214S), and makes hitconfirming it into 236H trivial.
In pressure, 5S frametraps from any normal, but is obviously impossible to stagger with. Truestrings into Superdash in the corner, letting Gogeta go for a gapless SD mix-up.
2L

| Damage | Guard | Smash | Startup | Active | Recovery | On-Block | Invuln |
|---|---|---|---|---|---|---|---|
| 500 | Low | 9 | 6 | 15 | -5 |
2L is Gogeta's fastest low and a crucial part of his high/low mixups.
It's a sliding kick that launches on hit, and posseses variable frame data depending on how late it's blocked (up to 0 on block). Massive range for a 2L at the cost of being slower than average. Will catch backdash after a blocked Vanish.
Has a very small cancel window which makes 5L true string after it no matter how much you delay it. Must use M normals to frametrap after this.
2M
| Damage | Guard | Smash | Startup | Active | Recovery | On-Block | Invuln |
|---|---|---|---|---|---|---|---|
| 700 | Low | 12 | 8 | 21 | -13 |
Gogeta performs a rotating sweep that travels about 2/3 of the screen. His premiere gap closer and one of the best 2Ms in the game for neutral due to the sheer amount of space it covers in a brief amount of time.
Terrible for resetting pressure. Due to it being -13 on block and slow, and you generally want to use 2L for pressure instead, though both buttons have horrendous cancel windows. However, because of the distance it covers, it's excellent for catching backdashes as an anti-reflect tool as 2M will keep Gogeta in from all prior gatling options.
2H

| Damage | Guard | Smash | Startup | Active | Recovery | On-Block | Invuln |
|---|---|---|---|---|---|---|---|
| 850 | All | U1+ | 13 | 6 | 30 | -20 |
Gogeta performs an advancing uppercut that leaves Gogeta airborne afterward. A great anti-air on its own and hits very high.
Gogeta has air options after he recovers, but a keen opponent will recognize the situation and can punish Gogeta before he can recover. This can be remedied if he calls an assist to protect him when recovering.
2H be used for deceptive cross-up mixes midscreen thanks to recovering on the air, but not much else. Forced landing recovery on block prevents him from doing high/low mixups after it.
2S
| Damage | Guard | Smash | Startup | Active | Recovery | On-Block | Invuln |
|---|---|---|---|---|---|---|---|
| 900 | All | 26 | Total 75+10L | -28 |
Jumps and fires a Galick Gun to the ground. Groundbounces for simple followups with SD making it a common sight after 5S in combos, and also that's the only time you should use it.
Terrible move anywhere else. Hefty startup and extremely long recovery, using 2S outside of a combo is asking to die. Stick to your M normals in neutral, they'll cover more ranges with less risk and greater reward.
2S > SD isn't a true blockstring, and the gap isn't small enough to stuff 2H. Don't bother using this for mixups, Gogeta has much better tools.
6M
| Damage | Guard | Smash | Startup | Active | Recovery | On-Block | Invuln |
|---|---|---|---|---|---|---|---|
| 850 | High | 24 | 6 | 10 | 0 |
The universal overhead. Gogeta has far stronger options to use for a high/low mixup such as his L/M Soul Strike > M mix, but 6M is still an option to consider if you don't have that option available.
Be careful when going for 6M without assists; if the opponent blocks this mix-up, Gogeta's 5L will tend to trade with 6F jabs instead of clashing, and due to the low hitstun on the first hit, it will usually leave Gogeta -5, costing his turn.
5LL > 6M can link into another 5L in the corner, thanks to the hitstun of 5LL.
j.L

| Damage | Guard | Smash | Startup | Active | Recovery | On-Block | Invuln |
|---|---|---|---|---|---|---|---|
| 400 | High | 6 | 6 | 11 |
Absolutely superb air normal. Used for fuzzy-guard setups, gives safejumps, jabs out Superdash. Don't forget you have this.
j.M
| Damage | Guard | Smash | Startup | Active | Recovery | On-Block | Invuln |
|---|---|---|---|---|---|---|---|
| 400×3 | High | 10 |
Gogeta performs three downward kicks. An excellent air normal and one of the best in the game. It can shut down many approaches due to how active and large it is. j.L is still generally better for jabbing out Superdash.
All of j.M kicks must be blocked high, making it a triple overhead normal. This makes it very annoying to block on IADs since any delay will make only two kicks come out instead of three, letting you go low and potentially catch opponents off guard.
The second hit of j.M has less hitstun compared to the other two hits, so be aware of cancelling j.M(2) into j.2S since it will drop. You also have to be fast with confirming a cross-up if only two hits are connected. You can confirm it with either 66 5L (the second hit of this will still reach if you get reflected) or 5M.
- Can cancel on any hit.
- Great at maximizing damage in scaled combos.
- Gogeta's go-to air button for safejump set-ups.
j.H

| Damage | Guard | Smash | Startup | Active | Recovery | On-Block | Invuln |
|---|---|---|---|---|---|---|---|
| 850 | All | U1 [D3+] | 13 |
j.H is a forward air kick that travels around the 70% of the screen. You can use this as a way to spend your Smash in combos, but there's no situation where you should since j.214M fulfills the same role but better anywhere on the screen, so keep this as just combo filler.
A "tiger-knee" j.H can combo into 2L or 66 5L midscreen, but not against short characters. You won't see this often, however, due to 5H 214S routes being strictly superior.
Although this move has lots of range and converts into combos, it carries high risk in neutral due to its very hefty recovery. Gogeta is frozen in place during its last active frames, making him a sitting duck. Use it wisely.
- Big wall bounce on Smash hit.
j.S

| Damage | Guard | Smash | Startup | Active | Recovery | On-Block | Invuln |
|---|---|---|---|---|---|---|---|
| 900 | All | 18 | Total 67+10L |
Air counterpart of 5S, overs a higher part of the screen which the majority of assists won't reach, so can be used for screen domination, but the recovery is incredibly high, so it shouldn't be used outside of combos.
In combos, however, it's amazing. It combos into SD anywhere, so it can be used as an alternative to j.2S midscreen for better corner carry, and it also combos into j.236S[4] at low hitstun decay. Additionally, you can do j.236H after it, but fake crossup j.2S > j.S > j.236H actually scales worse than just doing j.2S > j.236H, so omit it in that situation.
- Causes a small wall bounce.
j.2H

| Damage | Guard | Smash | Startup | Active | Recovery | On-Block | Invuln |
|---|---|---|---|---|---|---|---|
| 850 | High | D1 | 18 | -5 |
j.2H is an air divekick, and a key combo tool that further increases Gogeta's stellar damage.
As a combo ender, it has much better oki compared to j.236L~L~L, and leaves the opponent much closer, but is inferior to j.236L~M~M in the corner. When going for the DHC mid-screen, j.2H is needed to connect Gogeta's supers without an extremely tight link from j.236L~L~L into Big Bang Kamehameha GuardAllStartup10+4RecoveryAdvantage-33.
j.2H shines the most as Gogeta's premiere combo extender. On Smash hit, causes a big ground bounce that knockdowns the opponent, and it can be cancelled into specials or Super Dash if it hasn't been used yet. The latter option is the most useful one, since it enables a rejump, granting more damage and corner carry.
As a pressure tool, j.2H hits overhead, but it's -2 on hit and gives no combos at all on grounded hit, and can't be followed into Vanish. However, it can be used as a surprise overhead by cancelling any hit of j.M into it.
- Jails into Vanish.
j.2S
| Damage | Guard | Smash | Startup | Active | Recovery | On-Block | Invuln |
|---|---|---|---|---|---|---|---|
| 900 | All | 18 | Total 71+10L |
j.2S is one of Gogeta's most used combo fillers combined with j.S.
j.2S > SD is a common combination in Gogeta's combos, that work everywhere on screen. A superb, extremely useful combo tool that enables a lot of flashy combos, or simple low-execution routes that still manage to deal great damage.
j.2S sees use in pressure, since it can be used for a non-2Hable same side option. If it hits, it can be cancelled into Super Dash or j.236H for a full combo. However, this move has a lot of recovery, so its use shouldn't be abused.
Its use in neutral is very low due to the recovery, but it's more useful than 2S.
- Beam property.
- Causes a big ground bounce.
Special Moves
Soul Strike
236L/M/H (Air OK)
| Version | Damage | Guard | Smash | Startup | Active | Recovery | On-Block | Invuln |
|---|---|---|---|---|---|---|---|---|
| 236L | 650 | All | 12 | -8 | ||||
| 236M | 700 | All | 17 | -8 | ||||
| 236H | 750×2,900 / 750×2,900,400 | All×2, High | D1, U1 | 13 | -5 | |||
| j.236L | 650 | All | 12 | |||||
| j.236M | 700 | All | 17 | |||||
| j.236H | 750×2,900 / 750×2,900,400 | All×2, High | D1, U1 | 13 |
- All
- Any followup can be used on whiff.
- Only ground L and L~L rekkas keep grounded opponents standing. The others launch on hit.
- Ground rekka doesn't have head property, air rekka does.
- Distance traveled: Air H > Ground H > Ground M > Ground L = Air L > Air M
- 236L
- Strikes half screen forward.
Your safest bet. Most opponents will expect you to truestring into the rest of the L chain, making staggering with this not as scary as the framedata would lead you to believe.
- 236M
- Can cancel into H followup during startup.
Reels back before the attack. Performing this with his back against the wall gives significantly better range than midscreen.
- 236H
- Each hit of 236H automatically does its next followup on hit, block, or reflect.
- Last hit causes a ground bounce, Smash hit adds sliding knockdown.
- After landing, does an extra hit that switches sides and causes a big wall bounce on Smash hit, and a sliding knockdown without.
- The second to last hit can also be cancelled instead for a grounded Super.
- The non-smash hit ALWAYS give sliding knockdown
236H should be treated more as a lariat than a rekka since the followups come out for you. It gives very good reward on hit with the proper combos, but consumes both smashes. There are setups to help mitigate the lack of a sliding knockdown besides using another EX move.
Soul Strike Follow-up
L/M Soul Strike > L/M

| Version | Damage | Guard | Smash | Startup | Active | Recovery | On-Block | Invuln |
|---|---|---|---|---|---|---|---|---|
| 236X > L | 650 | All | 10 | -8 | ||||
| 236X > M | 700 | All | 16 | -8 |
- All
- Ground 236L~L or 236M~L are true strings but recover on the ground.
- You can slightly delay these for more corner carry, even when finishing long combos.
- L
- Gapless, but recover on the ground and unsafe.
236L > L/236M > L are both gapless, but recover on the ground. This followed up is used to set up his F-Shiki Sometimes known as "Fuzzy Overhead". When you are in blockstun, you can switch high/low blocking, but your blocking animation and hurtbox does not change until you leave blockstun or block another attack. F-Shikis take advantage of this and use overheads that would miss on crouching characters, but not on standing characters. mix-up. Because the final hit is an overhead, the opponent will be forced to stand up to not get hit by the overhead and potentially a big combo. For this mix-up to work, you need a single-hit assist with at least 32f of hitstun. After they block the assist, you can go for IAD j.LL or 2M.
- M
- M followup always recovers in the air but leave a gap from 236L/M and their air versions.
Since it recovers in the air, you can go for a 50/50 A mix-up where the opponent has a choice between two options, such as strike-throw or high-low. A "true 50/50" is used to describe a mix-up in which the defender must guess and commit to one option, without any way to determine which option the opponent will choose and react accordingly. high/low mix-up with late airdash j.M or land 2L. Because j.M is three hits and all must be blocked high, it can be very difficult to Fuzzy Guard A defensive technique where the defender changes their guard direction rapidly and precisely to cover multiple ways they can be hit such as high/low or left/right. this mix-up and make up for his 2L being on the slower side.
The follow-up will always leave a small gap, meaning the opponent can reflect or reversal out. This can be countered by just doing 236L, which will cover every option outside of mashing.
Soul Strike Finisher
L/M Soul Strike > H or Soul Strike Follow-up > L/M/H


| Version | Damage | Guard | Smash | Startup | Active | Recovery | On-Block | Invuln |
|---|---|---|---|---|---|---|---|---|
| 236X > X > L | 850 | High | D1 | 14 | -5 | |||
| 236X > X > M | 900 | High | D1 | 17 | -5 | |||
| 236X > X > H | 900 / 900,400 | High | D1, U1 | 12 | -5 |
- All
- Auto-corrects.
- Range: L > M > H
- L
- Only causes a short sliding knockdown on Smash hit.
Very poor oki. Extremely difficult to hit Big Bang Kamehameha after. M is superior and will always work in the corner, so only end combos with this instead of j.2H if your corner carry wasn't enough.
- M
- Smash hit causes a ground bounce and sliding knockdown.
- Hits below Gogeta.
- Leaves a gap from any 236X~X or j.236X~X
You'll be using the M version at the end of your combo for a knockdown in the corner. It causes a ground bounce, meaning that you can call an assist for an extension.
In pressure, this follow-up is usually used if you have an assist to set-up his F-Shiki Sometimes known as "Fuzzy Overhead". When you are in blockstun, you can switch high/low blocking, but your blocking animation and hurtbox does not change until you leave blockstun or block another attack. F-Shikis take advantage of this and use overheads that would miss on crouching characters, but not on standing characters. mix-up. If the opponent gets hit by the overhead, you can call the assist to get a full combo.
- H
- Causes a ground bounce, Smash hit consumes sliding knockdown.
- After landing, does an extra hit that switches sides and causes a big wall bounce on Smash hit.
- The final hit can also be cancelled instead for a grounded Super.
- The final non-smash hit will always lead to a sliding knockdown.
236L~H is a 100% unpunishable and gapless overhead. 236L~H is 25f, 236M~H is 26f, but at close range the opponent can block 236L before the H comes out, which doesn't happen to 236M.
The unfortunate weakness of the H follow-up is the expenditure of both smashes and swapping sides. Gogeta can perform the H version of the final hit to get a sliding knockdown post-smash, although this often leaves the opponent in midscreen.
Rising Vortex
214L/M/H (Air OK)


| Version | Damage | Guard | Smash | Startup | Active | Recovery | On-Block | Invuln |
|---|---|---|---|---|---|---|---|---|
| 214L | 150×3, 600 | All | 9 | -32 | ||||
| 214M | 150×5 / 150×5,1000 | All | U1+ | 16 | -42 | |||
| 214H | 1000 / 550,1000 | All | U1+ | 9 | -22 | |||
| j.214L | 150×3, 600 | All | 9 | |||||
| j.214M | 150×5 / 150×5,1000 | All | U1+ | 12 | ||||
| j.214H | 150×7 / 150×7,1000 | All | U1+ | 9 |
- All
- Hitbox completely surrounds Gogeta.
- 214L
- Frame 1 air invuln
- The fastest option Gogeta has
Your typical light DP. Unscaled starter, so perfect for TODs and beating super dashes mid-air, however what makes this particularly standout is the 360 hitbox letting you even use this to easily beat crossups, especially with the incredible startup.
Can also be used in clashes thanks to its speed, and is preferred over 214H thanks to its invincibility, multi-hits and TOD potential.
- 214M
- Frame 1 full invul, true DP.
- Goes slightly further than L versions.
- Adds an extra kick at the end which uses Smash.
- Smash hit wall bounces, can link into j.H or j.S even midscreen.
360 DP. Also the only DP in the game that's comboable meterlessly anywhere on the screen. Gogeta can confirm it with j.S into SD for pretty good damage and particularly insane corner carry, as is usual for him.
- 214H
- Frame 1 full invul, true DP.
- Ground version does a gut punch, air version is a faster j.214M
- Both versions switch sides, causes a big wall bounce on Smash hit.
- The non-smash hit causes sliding knockdown.
The grounded version is a blessing and a curse. Somewhat stubby range, but gives combos while Gogeta's back is against the wall. The air version however is mostly a combo tool, since j.214L is just as fast while still having air invincibility.
Multiplex Afterimage
236S (Air & Hold OK)
| Version | Damage | Guard | Smash | Startup | Active | Recovery | On-Block | Invuln |
|---|---|---|---|---|---|---|---|---|
| 236S | 262×5, 500 | All×5, High | D1 | 34 | +2 | |||
| 236[S] | Total 45 |
- Can only be done once in the air.
- Fully invulnerable from frame 6-10 while Gogeta is invisible.
- Hold
 to use j.S clone, and
  or
or  to use j.2S clone.
 - During startup, the bottom clone is always the real one. Hitting fake ones will cause them to disappear.
- Normally does a tracking j.2H on block or hit, causes a ground bounce. Smash even on grounded hit and adds sliding knockdown.
- 5S clone true strings into the dive kick, making it plus even at point blank. This clone sets up for lows and command grab/DR.
- j.2S clone's beam pops the opponent up like a typical beam instead of ground bounces. This clone sets up for a high/low 50/50 and cross-up j.L/M.
- Hold S to feint, can also choose which clone to warp to.
- Performing this at jump height will still give the ground version, so the feint into the 5S clone counts as landing, regaining your air options.
- Can super jump install into an airborne clone, retains super jump's momentum control.
- Can cancel into SD during the later half of the motion on whiff.
Mainly seen in combos at lower levels of hitstun decay or off raw SD hits. Can be used to Special Tag a different character into a rejump. Smashless version gives a groundbounce that can combo into his grounded Supers, which can be handy as an ender off starters like 236H.
Potentially a very potent mix-up tool when paired with a high blockstun assist. Unfortunately pretty weak when he's solo unless they're conditioned to block, and potentially disastrous in neutral if you decide to shoot and end up missing. You're a whopping -93 if you whiff, and while you could steal neutral by using an assist or vanish to steal your turn back after the j.2H follow-up, 5S or 236H will do that with much less risk than this. Use only if you know it'll work.
Punisher Drive
214S
| Damage | Guard | Smash | Startup | Active | Recovery | On-Block | Invuln |
|---|---|---|---|---|---|---|---|
| 180×5, 1188 | Throw | U2+ | 25 |
- Full screen command grab, max range startup is 32.
- All assists immediately leave the screen on hit, also can't call any assist until after recovery.
- On hit, leaves Gogeta point blank behind the opponent, keeps grounded opponent standing.
- Whiffs on airborne. Can still hit airborne opponent mid-combo, causes sliding knockdown.
- Only hits once per combo, like most command grabs.
This move is better off used as a neutral tool than a mixup tool. In pressure it's too telegraphed due to the bright glow and startup, along with giving very little reward. You can gimmick some people by cancelling the first hit of 5L into this, but it still rounds out to more risk on your end than reward. Against passive opponents who don't want to try to challenge Gogeta in the air however, this move really shines thanks to its short recovery. Fullscreen people are less likely to notice the startup, and if they do then it's already too late for them to punish it.
214S is also excellent for combos. 5H into 214S scales very little and is a classic TOD starter for Gogeta. On top of that, it can link back into 5L or 2L during combos which makes them very easy and very damaging. Optimal routes use this.
Z Assists
Assist A
Super Dash Kick
| Damage | Guard | Smash | Startup | Active | Recovery | On-Block | Invuln |
|---|---|---|---|---|---|---|---|
| 800 | All | 30 | +29 |
- Big wall bounce. Enough for GT Goku to combo into Spirit Bomb from midscreen.
- Has head property.
Really good. Has a good amount of blockstun and sets up a ton of utility for many characters, such as midscreen snap setups and confirms from beams, thanks to its wall bounce and being fullscreen. The only downside to it being it's rather slow, so you can't just throw it out whenever you please - and using it in combos can be tricky if you don't have the timing down completely. Regardless, Gogeta's A assist is very good for what it can do for a majority of the cast, and is one to be feared.
Assist B
Rising Vortex
| Damage | Guard | Smash | Startup | Active | Recovery | On-Block | Invuln |
|---|---|---|---|---|---|---|---|
| 19 | +21 ~ +35 |
- Big, lenient, and omnidirectional pinwheel allows versatility for pressure with a massive amount of hitstun.
- Blockstun is dependent on how far you are to the opponent when the assist is called, or how close the assist is to the opponent.
Really handy for covering tech options (except for delay tech), after a sliding knockdown with its ascending hitbox, allowing pressure to continue.
Assist C
Galick Gun
| Damage | Guard | Smash | Startup | Active | Recovery | On-Block | Invuln |
|---|---|---|---|---|---|---|---|
| 45 [20] | +27 |
Gogeta teleports to the opponent and 2S's them in the face. It does track anywhere on the screen, and given that it's a beam, it can be easy to hit depending on the situation; however, its tracking is not the fastest, so you may need to run it through a couple scenarios to get the hang of using this assist.
Super Moves
God Punisher
236L+M


| Version | Damage | Guard | Smash | Startup | Active | Recovery | On-Block | Invuln |
|---|---|---|---|---|---|---|---|---|
| 236L+M | 2018 | All | UDV | 10+4 | -24 | |||
| 236L+M > X | 1214 | UDV |
- God Punisher
- Minimum Damage: 841 (425 additional damage for the 1 bar follow up)
- Leaves Gogeta almost full screen away from the opponent after it connects, giving him no oki.
- Stardust Breaker God Punisher > [L/M] on hit
Extra damage. When there's one downed teammate, DHC using the assist button for that downed character will use this super instead of Big Bang Kamehameha, allowing Gogeta to dump meters.
Stardust Fall
j.236L+M

| Damage | Guard | Smash | Startup | Active | Recovery | On-Block | Invuln |
|---|---|---|---|---|---|---|---|
| 2380 | All | UDV | 9+4 |
- Causes sliding knockdown, though he doesn't get any oki from it.
- Good for DHCs as it puts the opponent from the air to the ground.
- Minimum Damage: 750
Decent air ender for when you don't have SKD available.
Big Bang Kamehameha
236H+S (Air OK)
| Version | Damage | Guard | Smash | Startup | Active | Recovery | On-Block | Invuln |
|---|---|---|---|---|---|---|---|---|
| 236H+S | 285×9, 307 | All | UDV | 10+4 | -33 | |||
| j.236H+S | 285×9, 307 | All | UDV | 10+4 |
- This is his DHC.
- Lasts long enough that some characters can get a Dragon Rush off of it when they DHC in after this super, such as Nappa and Adult Gohan. Also sets up Base Goku's Spirit Bomb.
- Minimum Damage: 827
Meteor Explosion
214L+M (Air OK) or 214H+S (Air OK)


| Version | Damage | Guard | Smash | Startup | Active | Recovery | On-Block | Invuln |
|---|---|---|---|---|---|---|---|---|
| 214L+M | 4354 | All | UDV | 10+3 | -29 | |||
| 214L+M > X | 2000 | UDV |
- Meteor Explosion
- Minimum Damage: 1790
- Puts Gogeta about a mid-screen length away from the opponent.
Gogeta performs an advancing punch. Does above-average damage and leaves the opponent about mid-screen.
Okizeme is pretty standard midscreen. You can go for IAD j.M for a safe jump meaty. If you're fast enough, the j.M will miss and you can go for a fake, tricky mix-up such as Dragon Rush or 214S.
Meteor Explosion will pull the opponent out of the corner, so after doing the meaty, you can go for a IAD crossup j.M or j.2S > j.236H for a high-risk/high-reward same side option.
- Ultimate Kamehameha Meteor Explosion > [L/M/H/S] on hit
- Minimum Damage: 964
- Puts Gogeta about a full-screen length away from the opponent.
The most satisfying meterburn option available in the game. Okizeme is non-existent with Ultimate Kamehameha, so you're mainly going to use this to finish off opponents.
Colors

Color 1

Color 2

Color 3

Color 4

Color 5
Color 6

Color 7
Color 8

Color 9

Color 10

Color 11

Color 12


Color 131

Color 141
Color 151
Color 161

Color 592


