m (→{{clr|M|2M}}) |
m (→{{clr|S|5S}}) |
||
| Line 75: | Line 75: | ||
|input=5S | |input=5S | ||
|description= | |description= | ||
Ki blasts, good for controlling space. Has one more Ki Blast than the average of four, and if the opponent can shoot more than her she can cancel into {{clr|S|22S}} to stay safe. Also good to set up a downward-aimed Destructo Disc. | |||
* Can be repeated up to 5 times. | |||
}} | }} | ||
Revision as of 07:11, 27 January 2024
This can be due to patches to the game, or developments in the metagame. You can help by updating it.
Please feel free to make edits, but include edit summaries and sources where applicable.
Overview
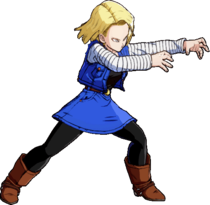
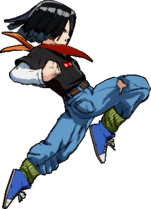
Android 18 is a mix-up machine who uses her plethora of options, alongside her brother Android 17 (from the Cell saga), to consistently crack down the opponents' defense. Her 214X series special move Support Attack allows her to summon her brother Android 17, doubling both as an effective, versatile assist and the most dripped out character on the roster. Each one of the attacks that Android 17 can do are designed to help with 18's overall goal of slowly mounting pressure and pushing her opponent into the corner.
Once her enemy is knocked down in the corner, Android 18's true worth comes to the forefront as she becomes a truly fearsome character to deal with. Properly utilizing assists, Support Attack's several GuardAllStartup14RecoveryTotal 32Advantage- potent
 GuardStartup26RecoveryTotal 32Advantage- options
 GuardAllStartup32RecoveryTotal 39Advantage+27 for pressure, her command grab series of specials, and her feared Level 3 Super attack
 GuardAllStartup9+3RecoveryAdvantage-14 [+30], will drown 18's opponent in a flood of options to defend from, lest they get hit and suffer the same situation again after the combo. Good utilization of Support Attack is vital to Android 18's gameplan in neutral and pressure, and her other specials do a great job at enforcing fear into the opponent when she eventually gets into attacking range.
18's biggest weakness is her mediocre and sometimes risky neutral presence. Due to the fact that 18 has no strong neutral tools for closing the distance, she is incredibly reliant on her allies' assists and Support Attack to force a scramble. Her iconic Barrier GuardStartupRecoveryTotal 48Advantage- may seem like an amazing option to bait enemy attacks (especially assists), and it is; but at the same time, a patient opponent who can successfully keep their distance from 18 and bait her approaches is troublesome. She often struggles against anyone with zoning potential, with a few common examples being Z Broly, the Vegetas, and Janemba.
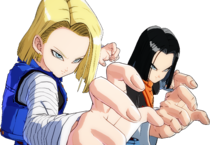
![]() Android 18 thrives off locking opponents down with the help of 17, as well as turning defense into offense with her strong Barriers.
Android 18 thrives off locking opponents down with the help of 17, as well as turning defense into offense with her strong Barriers.
- Extra Assist: Support Attack is a highly versatile offensive tool with several good lockdown, neutral, combo, and mix-up qualities. It allows 18 to set up pressure from even the softest knockdowns, and can effectively control an opponent's movements in neutral.
- Suffocating Mix-ups: 214H
 GuardAllStartup14RecoveryTotal 32Advantage- grants unseeable 50/50 mix after a corner knockdown. Command grabs keep enemies scared in blockstrings, and barriers discourage mashing at any time. Level 3 leads to terrifying mix-up situations only limited by the player.
 - Great Defensive Assist: Assist A
 GuardStartup10RecoveryAdvantage- protects against strikes and lets you steal a turn, covering blindspots and setting up offense.
 - Level 3 Oki: After her level 3 super, Android 18 can get a 50/50 left/right mix up anywhere on screen, similar to pre-patch Android 21.
- Poor Range: Normals have short range, resulting in lackluster approach options and reliance on assists and 17 calls in neutral. Particularly weak to Reflect > Raw Tag.
- Aerial Game: Mediocre air attacks and no unique air options outside of her barrier and Support Attack make her air game quite defensively oriented.
- Poor Air Knockdowns: 18 lacks a special move that can give hard knockdowns off of aerial combos, so she often needs an assist or 17 to help her SKD.
Normal Moves
5L
| Version | Damage | Guard | Smash | Startup | Active | Recovery | On-Block | Invuln |
|---|---|---|---|---|---|---|---|---|
| 5L | 400 | Low | 6 | 3 | 13 | -4 | ||
| 5LL | 700 | All | 10 | 4 | 16 | -4 | ||
| 5LLL | 1000 | All | U3+ | 12 | 5 | 17 | -5 |
- 5L
6-frame normal, second fastest meterless attack 18 has. Great for stagger pressure, but its low hitbox means that some characters can jump out after she uses vanish.
- Hits low. Tied with Adult Gohan for the fastest low in the game.
- 5LL
Like all other 2nd auto combo hits, it's a medium button in disguise. Higher hitbox than 5M, some jump cancel combos will require this. 5LL moves foward after 5L to stay close, decent filler in pressure.
- Good frame advantage for stagger pressure.
- 5LLL
18 re-enacts kneeing Vegeta. Smashes and combos into superdash.
5M
| Damage | Guard | Smash | Startup | Active | Recovery | On-Block | Invuln |
|---|---|---|---|---|---|---|---|
| 700 | All | 10 | 4 | 18 | -6 |
18 moves forward with an elbow. A decent normal to close some space.
- Jump cancels on hit.
- Great horizontal range.
5H
| Damage | Guard | Smash | Startup | Active | Recovery | On-Block | Invuln |
|---|---|---|---|---|---|---|---|
| 850 / 1000 | All | U1 | 15 | 4 | 22 | -10 |
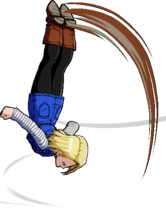
Moves forward and does a roundhouse like to Vegeta's arm. Pretty good on hit, but you probably want to cancel it on block into something. Especially in corner to setup j.214M oki off soft knockdown.
- Combos into Superdash midscreen with Smash, or without Smash in the corner.
- Sets up rejumps under the same conditions.
5S
(Hold OK)
| Damage | Guard | Smash | Startup | Active | Recovery | On-Block | Invuln |
|---|---|---|---|---|---|---|---|
| 300×5 | All | 13 | Total 36 | -3 |
Ki blasts, good for controlling space. Has one more Ki Blast than the average of four, and if the opponent can shoot more than her she can cancel into 22S to stay safe. Also good to set up a downward-aimed Destructo Disc.
- Can be repeated up to 5 times.
2L
| Damage | Guard | Smash | Startup | Active | Recovery | On-Block | Invuln |
|---|---|---|---|---|---|---|---|
| 400 | Low | 7 | 2 | 14 | -4 |
- Hits low.
- Fast and good frame advantage makes it a good pressure tool.
Crouches and kicks at their feet. While not as fast as her 5L, it's still a good button to use to challenge pressure. Has abnormally low pushback, which can make it difficult to use crossups after.
2M
| Damage | Guard | Smash | Startup | Active | Recovery | On-Block | Invuln |
|---|---|---|---|---|---|---|---|
| 700 | Low | 11 | 6 | 18 | -8 |
Sweeps at their feet. Similar to Goku's, a generic but good low starter. Can low profile attacks, but this isn't likely to happen. Slides if done out of dash.
2H
| Damage | Guard | Smash | Startup | Active | Recovery | On-Block | Invuln |
|---|---|---|---|---|---|---|---|
| 850 / 1000 | All | U1+ | 13 | 3 | 27+3L | -17 | 4-15 Head |
- Anti air that kicks upwards. Leaves her airborne so her followups are less than stellar. Has head invulnerable like any other 2H, use well.
Mainly used for 2H properties to anti-air or for 2H > j.214M for combos on the ground. Can be made safe on block with j.214L.
2S
| Damage | Guard | Smash | Startup | Active | Recovery | On-Block | Invuln |
|---|---|---|---|---|---|---|---|
| 600 | All | 32 | Total 44 | +8 |
18 jumps into the air first, then fires. Movement is briefly stalled. Cannot be true-stringed into without assists. It's okay at best.
Mostly used as combo filler in the corner due to high hitstun. Can be used as a blockstring reset tool with pretty generous plus frames, however it's arguably worse than her other reset and frametrap tools as it can also be superdashed through along with being susceptible to reflecting, reversals, and mashing.
6M
| Damage | Guard | Smash | Startup | Active | Recovery | On-Block | Invuln |
|---|---|---|---|---|---|---|---|
| 850 | High | 24 | 6 | 4+6L | ±0 |
- Standard universal overhead strike.
j.L
| Damage | Guard | Smash | Startup | Active | Recovery | On-Block | Invuln |
|---|---|---|---|---|---|---|---|
| 400 | High | 6 | 3 |
- Taller than it looks.
Decent air-to-air button, but mostly useful for combo filler.
j.M
| Damage | Guard | Smash | Startup | Active | Recovery | On-Block | Invuln |
|---|---|---|---|---|---|---|---|
| 700 | High | 11 | 3 |
Can cross up with IAD for a good mixup, and solid jumping normal. Has a deadzone in terms of where it can and cannot cross up.
j.H
| Damage | Guard | Smash | Startup | Active | Recovery | On-Block | Invuln |
|---|---|---|---|---|---|---|---|
| 850 / 1000 | High | D1+ [D3+] | 13 | 4 |
- 5LLLLLLL Dynamic hit can wall bounce.
- j.H Smash hit causes a sliding knockdown.
Good for an instant overdash overhead opener or for pressure on block.
j.S
| Damage | Guard | Smash | Startup | Active | Recovery | On-Block | Invuln |
|---|---|---|---|---|---|---|---|
| 600 | All | 15 | Total 35+3L |
- A ki blast at a sharp angle below 18.
- Stops 18's movement while firing.
Not really useful. Combos into lvl3 without smash but that's about it.
j.2H
Special Moves
Back Grapple
236L or 236M/H (Hold OK)
| Version | Damage | Guard | Smash | Startup | Active | Recovery | On-Block | Invuln |
|---|---|---|---|---|---|---|---|---|
| 236L | 600, 1000 | Throw | D2 | 17 | 1 | 24 | ||
| 236M | 600,1000 / 600,1100 | Throw | U1+ → D2 | 30 | 1 | 24 | ||
| 236H | 600,1200 / 700,1100 | Throw | U1+ → D2 | 28 | 1 | 24 |
- All Versions
- Switches sides on connect.
- Holding L/M/H prevents 17 from coming out.
- 17 also won't come out if he was used recently.
- Usable in combos, giving a sliding knockdown regardless of the version when connecting after a Smash.
- 236L
Stomps opponent into a side switching sliding knockdown. Great for ending combos, and the oki can easily be used to set up left/right even in the corner.
- 236M
- Throws opponent to 17, who then knocks them into a sliding knockdown.
- Hold version corner splats and allows a Vanish combo.
- Non-Smash version stomps into sliding knockdown like L version.
- 236H
- Ground bounces the opponent into 17, who then launches them upward.
- Jump and special cancelable. Super Dash will naturally combo as if it's a regular launch.
- Non-Smash version stomps into sliding knockdown like L version.
Support Attack
214L/M/S (Air & Hold OK) or 214H (Air OK)
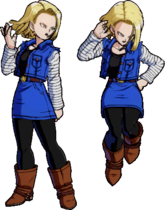
- 18 fixes her hair while 17 does the work.
- Different buttons correspond to different actions 17 take.
- Holding down your button of choice will make grounded 18 get an air 17 call, or an airborne 18 get a grounded 17 call. She has access to every version anywhere.
- Regardless of version, 17 will retreat if 18 gets hit or tags out.
Because 17 is attacking and not 18, this makes pressure off this move reflect-proof, since 18 herself isn't pushed back.
L Support Attack
| Version | Damage | Guard | Smash | Startup | Active | Recovery | On-Block | Invuln |
|---|---|---|---|---|---|---|---|---|
| 214L | 700 | All | 14 | 8 | Total 39 | -5 | ||
| j.214L | 700 | All | 20 | 3 | Total 39 |
- Ground Version
- Does a knee strike to the opponent.
18's safe blockstring ender. High pushback when used midscreen which will generally put you back to neutral. Can also be used to setup assist pressure, but the usefulness varies depending on the assist.
- Air Version
- Does a launching kick.
- Start-up is sped up when the opponent is in hitstun.
- The spawn position changes when the opponent is in hitstun mid-air.
Useful as a frame trap from a blocked 2H, but not much else.
M Support Attack
| Version | Damage | Guard | Smash | Startup | Active | Recovery | On-Block | Invuln |
|---|---|---|---|---|---|---|---|---|
| 214M | 400×3 | All | 32 | 4(13)4(18)9 [4(8)4(18)9] |
Total 39 | +27 | ||
| j.214M | 450×2 | All | 23+ | 4(15)4 | Total 32+7L |
- Ground Version
- Startup for 2nd attack is reduced if 1st connects.
- 3rd attack only comes out if the 2nd hits.
Excellent for stealing turns and safely setting up mixups with an assist. 32 frame startup means you only need 17 frames of blockstun to make this a true string from 5H.
- Air Version
- 17 appears in the air, falls closer to the ground and does a 2 hit string on the opponent.
- Additional startup frames based on altitude, minimum of 23 frames.
- Has Head attribute.
Primarily used for oki off 5H > SD > j.LLL > j.214M(oki) and from j.H sliding knockdown.
H Support Attack
| Version | Damage | Guard | Smash | Startup | Active | Recovery | On-Block | Invuln |
|---|---|---|---|---|---|---|---|---|
| 214H | 117×10, 137×7 | All | 14 | 300 | Total 32 | |||
| j.214H | 117×10, 137×7 | All | 14 | 300 | Total 32 | |||
| 214H > 214H | 117×10, 137×7 | All | 30 | Total 39 | +29 | |||
| 214H > j.214H | 117×10, 137×7 | All | 30 | Total 39+7L |
17 pops in to strike a riveting conversation. Throughout his TED Talk, he is invulnerable to all projectiles and waits for an enemy's assist call or another call from 18 to teleport above and fire an Energy Wave for large damage.
- Goes away if you call your assists. If the opponent calls their assists, 17 will teleport above the assists and fire the Energy Wave. If the opponent tags out, he attacks in front of you; if they DHC, he tracks the new point character.
- This attack can be manually triggered by using an additional .5 meter to use 214H/j.214H again, though this version doesn't track.
- 18 can cancel this move into any other Support Attacks, or Back Grapples with 17.
The manual trigger for this move is absolutely horrifying, and is one of 18's most important pressure tools. For one total bar, 18 can set up 17 after a j.H knockdown and then time 17's beam so that it hits super meaty, allowing 18 to get pressure that is basically unseeable due to the explosion covering the blast - and even if you do nothing, you're still plus. Good for neutral as well, especially against opponents running lots of assists that are strong in neutral (such as beam assists). It discourages reckless assist use, since the enemy risks a character and possibly themselves getting hit by this move.
S Support Attack
| Version | Damage | Guard | Smash | Startup | Active | Recovery | On-Block | Invuln |
|---|---|---|---|---|---|---|---|---|
| 214S | 300×3 | All | 43 | Total 39 | +38 | |||
| j.214S | 26 | 40 | Total 32 | 32-65 Non-throw, non-Super |
- 214S
17 appears behind 18 on the ground and fires 3 horizontal ki blasts.
- j.214S
17 appears and creates a barrier. Has basically all properties of 18's, but 18 can move around while it's active.
- Barrier is active from frames 32 to 65.
- Blocks hits for 18 and any of her assists. Doesn't stop throws and supers.
- Gains 25% Ki gauge each hit absorbed.
- 214[S]
When used while not airborne, 17 appears to make a barrier.
- Safe on block when canceled into from any grounded normals.
18 gaining a grounded version of this barrier call has given her grounded blockstrings a whole new threatening layer. She's able to use it as an offensive bait that covers every angle of attack; catching any buttons, Super Dash, Vanish, or even letting her punish a whiffed Reflect. It can also be used to counter assists while gaining meter and not locking down 18's movement as much as her own barrier. The only universal hard callout to this option is Dragon Rush.
Destructo-Disc
236S
| Damage | Guard | Smash | Startup | Active | Recovery | On-Block | Invuln |
|---|---|---|---|---|---|---|---|
| 1000 | All | 18 | -3 |
18 throws a Destructo Disc. It can be controlled with holding ![]() and
and ![]() .
.
- Explodes if it hits the ground, leaving Android 18 highly plus on hit or block.
- Deals high chip damage.
Useful in both neutral and corner combos. Its aiming property means you can threaten from full screen, even if the control isn't that great. Aiming it into the ground results in an explosion that can extend 18's pressure in the corner, or even hit-confirmed into a combo. Deals high chip damage on block, a property shared with other disc-type moves.
Barrier
22S (Air OK)
| Version | Damage | Guard | Smash | Startup | Active | Recovery | On-Block | Invuln |
|---|---|---|---|---|---|---|---|---|
| 22S | Total 48 | 4-39 Non-throw, non-Super | ||||||
| j.22S | Total 48 | 4-39 Non-throw, non-Super |
18 puts up a barrier. Absorbs all strikes and projectiles, and loses to throws and supers. Also blocks hits for your and from enemy assists.
- Active from frames 4 to 41(?) and longer if a move hits it.
- 18 can cancel into Support Attack when using this, notably grab for a quick SKD and 18's Barrier
 GuardStartup26RecoveryTotal 32Advantage- for extra safety. This is a large part of her mindgames with Barrier.
 - Successful absorb extends active frames and can be canceled into supers with L+M for lvl1 or 4L+M for lvl3.
- Gains 25% Ki gauge each hit absorbed.
- If Guard Cancel hits the shield they cannot act until they hit the ground. Can now perform special moves while barrier is active.
Z Assists
Assist A
Barrier
| Damage | Guard | Smash | Startup | Active | Recovery | On-Block | Invuln |
|---|---|---|---|---|---|---|---|
| 10 | 13-53 Non-throw, non-Super |
Android 18's assist is her barrier special that defends against incoming attacks, though it won't give meter for doing so. It's not as straightforward to use as a beam/projectile, but its ability to defend every angle of your point character can be extremely useful for setup characters like Beerus and Nappa.
- Doesn't gain Ki for blocking attacks like the point version...
- Shows up in front of the point character. Absorbs hits for both the point character and any other assists.
- The barrier will NOT cover for you if you aren't inside it. Staying around the edge and attacks with large coverage will go right through 18 directly to you.
- Has the nasty aspect of being green, which, when standing directly inside it, makes the point character's Dragon Rush almost entirely unseeable.
Assist B
Destructo-Disc
| Damage | Guard | Smash | Startup | Active | Recovery | On-Block | Invuln |
|---|---|---|---|---|---|---|---|
| 800 | All | 25 | +26 |
The disc but as an assist.
- 45 frames of hitstun.
Very solid assist all around. Quick startup, beam properties, combo-friendly juggle, full screen, and decent blockstun. Certainly an easy choice if you aren't feeling barrier assist, but also a very good assist in its own right, on pretty much any team.
Assist C
Support Attack
Super Moves
Energy Wave
236L+M (Air OK) or 236H+S (Air OK)
| Version | Damage | Guard | Smash | Startup | Active | Recovery | On-Block | Invuln |
|---|---|---|---|---|---|---|---|---|
| 236L+M | 130×10, 170×7 | All | UDV | 24~27+4 | 40 | -27 | 10-?~37 All | |
| j.236L+M | 130×10, 170×7 | All | UDV | 24~27+4 | 40 | -27 | 10-?~37 All |
- Costs 1 bar.
- Minimum damage: 44*10, 54*7 (818)
- Teleports forward about half screen, firing a beam down. Always moves upward unless the opponent is in range.
- When in range:
- During combo: 18 tracks the opponent's current location and beams them down.
- Outside of combo (raw): Will teleport to their current X coordinate and slightly above the ground. Does not track vertically.
- 18 recovers before she has fallen halfway.
Meteor Moves
Accel Dance
214L+M (Air OK) or 214H+S (Air OK)
| Version | Damage | Guard | Smash | Startup | Active | Recovery | On-Block | Invuln |
|---|---|---|---|---|---|---|---|---|
| 214L+M | 4218 | All | UDV | 9+3 | -14 [+30] | 1-? All | ||
| j.214L+M | 4218 | All | UDV | 9+3 | Until L | 1-? All |
- Costs 3 bars.
- Invulnerable from frames 1 to 23.
- 1718 minimum damage.
- If Krillin is on your team and not on-screen, 18 will perform the super with the best boi Krillin instead of Android 17.
- Can pick up multiple characters, meaning you can punish a poorly called assist character along with the character on point.
- Drops in the perfect range to summon medium 17 for Oki
Invincible startup super. Reaches about 3/4ths screen distance, and can connect after almost any combo leaving the opponent in front of 18. Most of the damage is done during the last part, meaning the opponent can recover a fair chunk of blue life if Sparking Blast is active.
Colors
- DBFZ Android 18 color1.png
Color 1
- DBFZ Android 18 color2.png
Color 2
- DBFZ Android 18 color3.png
Color 3
- DBFZ Android 18 color4.png
Color 4
- DBFZ Android 18 color5.png
Color 5
- DBFZ Android 18 color6.png
Color 6
- DBFZ Android 18 color7.png
Color 7
- DBFZ Android 18 color8.png
Color 8
- DBFZ Android 18 color9.png
Color 9
- DBFZ Android 18 color10.png
Color 10
- DBFZ Android 18 color11.png
Color 11
- DBFZ Android 18 color12.png
Color 12
- DBFZ Android 18 color13.png
Color 131
- DBFZ Android 18 color14.png
Color 141
- DBFZ Android 18 color15.png
Color 151
- DBFZ Android 18 color16.png
Color 161


