Nightshifter (talk | contribs) m (→{{clr|L|5L}}) |
Nightshifter (talk | contribs) m (→{{clr|M|5M}}) |
||
| Line 56: | Line 56: | ||
Considering how short your {{clr|L|5L}} is, you'll prefer this to mash on their pressure or engage in neutral. | Considering how short your {{clr|L|5L}} is, you'll prefer this to mash on their pressure or engage in neutral. | ||
It's also a | It's also a phenomenal move in pressure, leaving you in range to reset with {{clr|L|5L}} in most situations, or as a tool to restart your string after spacing yourself with {{clr|S|5S}} and {{clr|M|2M}}. | ||
}} | }} | ||
Revision as of 02:22, 3 July 2023
This can be due to patches to the game, or developments in the metagame. You can help by updating it.
Please feel free to make edits, but include edit summaries and sources where applicable.
Overview
Android 17 is a fast, heavy mix-up based character that possesses a combination of various mobility options and rekka moves that grants him an overall constant pressure, fantastic mix-up and unorthodox combo routes that lead to very high damage. With just an assist and half a bar to hand, an unscaled starter can lead to colossal punishment, and he will continue chasing you after you get back up with Accel Driver and Finishing Driver: two rekkas with a huge tray of different follow-ups. They give Android 17 colossal option select prowess, and allow him to mow down the opponent merely through catching them blindly. He provides brilliant synergy to a team with his assist, versatile for nigh infinite scenarios.
With such tremendous strengths, it makes sense that 17 is contrasted by being one of the least beginner friendly characters in FighterZ, with lackluster range, coupled with the arduous task of having to learn all the different Driver follow ups. 17 is a character that takes many, many hours to learn, but those hours reward you with possibly the most terrifying mixup monster the game has to offer. |
| Unique Movement Options |
| Air Fake Out Acrobatic Assault |
| Fastest Attacks |
| Reversals |
![]() Android 17 operates using speed and dizzying consecutive attacks that render opponents frantic.
Android 17 operates using speed and dizzying consecutive attacks that render opponents frantic.
- Terrifying Pressure: Driver Moves, four lows, an overhead, and a feint give him a plethora of mix-up options, as well as good stagger pressure with his buttons. Driver Moves in tandem with buttons and assists lead to insanely long pressure.
- Great Battery: Some of the best meter gain in the game when utilizing ki blasts, enabling multiple ToDs with the right assists especially with Sparking!.
- Special Assist: A has multiple applications, being a frame 10 shield to any incoming attacks, and a very strong offensive assist, having a TON of hitstun and being +35 on block
- Option Select: Barrier beats reflect-proof options, Guard Cancel, level 3 Supers, and EX Barrier also jails into Vanish.
- Movement: Acrobatic Assault and Air Fake Out gives 17 unprecedented air mobility, making it extremely difficult for an opponent to keep him still, or pin him in the corner.
- Rekka Conditioning: Players must be able to condition with A17's Driver Moves to open opponents' defense and complete combos. His speed only shines when you know exactly what moves you are using to keep the opponent guessing.
- Poor Range: Normals have short range, resulting in lackluster neutral and approach options without assists. His other tools must be used to compensate.
Normal Moves
5L
| Version | Damage | Guard | Smash | Startup | Active | Recovery | On-Block | Invuln |
|---|---|---|---|---|---|---|---|---|
| 5L | 400 | All | 6 | 2 | 13 | -1 | ||
| 5LL | 700 | All | 7 | 5 | 16 | -5 | ||
| 5LLL | 1000 | All | U3+ | 15 | 4 | 17 | -5 | 4 Low |
- 5L
A stationary jab with very poor horizontal range. You can 4LL to perform it twice in a row, making this a good tool for stagger pressure, but you'll often have to dash to get in range for it.
- 5LL
This forward advancing knee comes out really fast, sorta making up for 5L whiffing.
Its speed allows it combo from 2L even if 5L whiffs.
- 5LLL
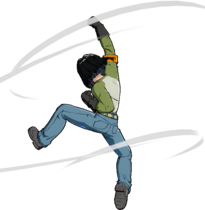
17 jumps and swings his arms at you. This move's noteworthy for allowing air special cancels on block, enabling his mixup between j.214H GuardStartupRecoveryTotal: Until L(+?)Advantage- ~ 2L
 GuardLowStartup10RecoveryAdvantage-11 and j.236H
 GuardHighStartup18RecoveryAdvantage- with an assist.
- In the corner, you can link into a j.L for optimal combos.
5M
| Damage | Guard | Smash | Startup | Active | Recovery | On-Block | Invuln |
|---|---|---|---|---|---|---|---|
| 700 | All | 9 | 4 | 17 | -5 |
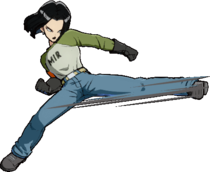
A fast and far-reaching 5M, 17's best normal. Considering how short your 5L is, you'll prefer this to mash on their pressure or engage in neutral.
It's also a phenomenal move in pressure, leaving you in range to reset with 5L in most situations, or as a tool to restart your string after spacing yourself with 5S and 2M.
5H
| Damage | Guard | Smash | Startup | Active | Recovery | On-Block | Invuln |
|---|---|---|---|---|---|---|---|
| 850 / 1000 | All | U1 | 15 | 4 | 22 | -10 |
Combo and blockstring filler. It allows you to combo into 236M midscreen and 214L~L in the corner, you'll want to route into this more often than not.
It works as an anti reflect after 5L, 2L, 5LL and 5M, but not other normals.
- Doesn't gatling into 3H
5S
(Hold OK)
| Damage | Guard | Smash | Startup | Active | Recovery | On-Block | Invuln |
|---|---|---|---|---|---|---|---|
| 300×6 | All | 13 | Total 37 | -4 |
An average ki blast. It's useful for pressure as it's really safe on block, it can also be used to poke in neutral.
From far range fire a couple of ki blasts and look to 2H a superdash or vanish if they get hit. You can also combine it with a fullscreen assist, for example a beam, to force them to block and take your turn.
You can also use it at close and mid range, as here 17 can follow up 1 or 2 ki blasts with 3H to start a combo or a blockstring.
- Low horizontal pushback on air hit, 2M>5S>5H combos midscreen.
- Hold or mash S to shoot up to 6 Ki Blasts
- 6th Ki Blast launches on hit
2L
| Damage | Guard | Smash | Startup | Active | Recovery | On-Block | Invuln |
|---|---|---|---|---|---|---|---|
| 400 | Low | 7 | 3 | 13 | -2 |
A low with slightly more range than your 5L. Be careful with your spacing when using this move as it's still prone to whiffing.
- Can chain into itself once.
2M
| Damage | Guard | Smash | Startup | Active | Recovery | On-Block | Invuln |
|---|---|---|---|---|---|---|---|
| 700 | Low | 8 | 4 | 18 | -5 |
A fast, short range low. Doesn't have much use in neutral but it's useful in blockstrings, as not only it is -5 but it also creates some space between you and your opponent. Remember to dash 5L if you reset your blockstring here.
2H
| Damage | Guard | Smash | Startup | Active | Recovery | On-Block | Invuln |
|---|---|---|---|---|---|---|---|
| 850 / 1000 | All | U1+ | 14 | 3 | 22+7L | -16 | 4-16 Head |
A standard anti air, has bad horizontal range.
It can be useful to set up mix, as on block you have access to your air rekkas. If you want to use 2H in a blockstring, chain it from 3H to make sure it doesn't whiff.
6M
| Damage | Guard | Smash | Startup | Active | Recovery | On-Block | Invuln |
|---|---|---|---|---|---|---|---|
| 850 | High | 24 | 6 | 4+6L | ±0 |
- Universal overhead.
3H
Sliding Sweep
| Damage | Guard | Smash | Startup | Active | Recovery | On-Block | Invuln |
|---|---|---|---|---|---|---|---|
| 750 | Low | 12 | 8 | 17 | -10 | 4-20 Head |
Great combo and blockstring tool. Besides being one more low in your string, it's really useful for hit confirms, as it anti reflects and combos out of basically everything.
Has anti air properties, which comes into play if your 2H input gets crossed up or if they try to SD your 5S in pressure.
If spaced, it can be made safe on block.
- Scales like an 'L' normal (Thanks a lot, Cell).
- Posseses some low profile properties.
- 17's farthest reaching normal, hits at round start range.
j.L
| Damage | Guard | Smash | Startup | Active | Recovery | On-Block | Invuln |
|---|---|---|---|---|---|---|---|
| 400 | High | 6 | 3 |
Mostly combo filler thanks to its stubby nature.
j.M
| Damage | Guard | Smash | Startup | Active | Recovery | On-Block | Invuln |
|---|---|---|---|---|---|---|---|
| 700 | High | 9 | 3 |
Your best button for crossups and air to airs. It doesn't have that much range downward, which can cause some combos to drop.
j.H
| Damage | Guard | Smash | Startup | Active | Recovery | On-Block | Invuln |
|---|---|---|---|---|---|---|---|
| 850 / 1000 | High | D1+ [D3+] | 13 | 4 |
- 5LLLLLLL
- Dynamic hit can wall bounce.
- j.H
- Smash hit causes a sliding knockdown.
j.S
(Hold OK)
| Damage | Guard | Smash | Startup | Active | Recovery | On-Block | Invuln |
|---|---|---|---|---|---|---|---|
| 250×6 | All | 11 | Total 46+3L |
Shoots 6 ki blasts in pairs of 2. Incredible for punishes as you can combo into superdash from surprisingly far, and a crucial part of your combos as it builds a worrying amount of meter.
It also has increased blockstun, so you can use it for same side and crossups and confirm it with j.214H GuardStartupRecoveryTotal: Until L(+?)Advantage- ~ 5L
 GuardAllStartup8RecoveryAdvantage-9 without leaving a mashable gap.
If done after IAD j.M, allows you to go for a high low between j.236H GuardHighStartup18RecoveryAdvantage- and j.214H
 GuardStartupRecoveryTotal: Until L(+?)Advantage- ~ 2L
 GuardLowStartup10RecoveryAdvantage-11 without needing an assist.
- Mash or hold S to do all 3 hits.
j.2H
Special Moves
Accel Driver
236L or 236M/H (Hold OK)
| Version | Damage | Guard | Smash | Startup | Active | Recovery | On-Block | Invuln |
|---|---|---|---|---|---|---|---|---|
| 236L | 900 | All | 15 | -23 | 4-18 Head | |||
| 236M | 950 | All | 25-30 | -23 | 4-28~33 Head | |||
| 236H | 1000 | All | 33-47 | -23 | 1-36~50 Head | |||
| 236[M] | Total 33~38 | 4-19~24 Head | ||||||
| 236[H] | Total 35~49 | 1-22~35 Head |
- All versions
17 performs an attack, then gains access to his gear follow-ups. The attack has anti-air properties.
- 236L
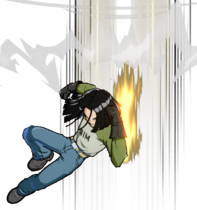
Short range but fast enough to be your gapless blockstring ender, this is what makes your pressure last for so long. When in doubt, 236L~M~2M~2S is your go-to safe rekka sequence.
- 236M
Dashes just shy of fullscreen and attacks once it reaches the opponent. Hold any button to perform a feint instead.
It's an important part of your combos, as performing a full rekka string after 5H and extending with an assist deals quite a bit of damage, plus it leaves you with a power blitz charge.
You can occasionally use the feint to reset your pressure but it's not to be abused as it has quite the recovery.
- 236H
Always crosses through the opponent, even fullscreen, then performs the attack. After crossing over you can hold any button for a feint, or you can override the initial attack with a follow-up.
As a crossup, this move is heavily telegraphed as the opponent can just react to the EX special effects, it doesn't help that it can be punished harshly.
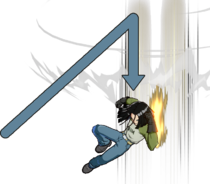
Where it shines is in setting up mixups with an assist, as it always steals the corner. You can either go for the feint and take advantage of your + frames or you can use ~4L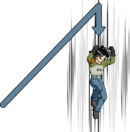 GuardStartupRecoveryAdvantage- to create left right 50/50s, all while threatening your other rekka options.
Air Second Gear
j.236L/M/H
| Version | Damage | Guard | Smash | Startup | Active | Recovery | On-Block | Invuln |
|---|---|---|---|---|---|---|---|---|
| j.236L | 900 | High | 18 | Until L | ||||
| j.236M | 950 | High | D1 | 20 | Until L | |||
| j.236H | 1000 | High | D1 | 18 | Until L |
- All Versions
17's primary combo ender and extender.
- Can be anti aired.
- As a starter, scales your combo harshly, at 50%
- j.236L
Only connects after j.M in midscreen, and is useful to drag the opponent to the ground while saving your SKD.
- j.236M
Smash hit causes a sliding knockdown and can be combo'd into from j.S(6), so it serves as a meterless SKD.
- j.236H
This is one of your main high/low mixup tools, as with Smash hit it causes a ground bounce, allowing a full combo using your drivers.
You will most often set it up with 5LLL, j.S or 2H but it can also be done raw out of staggers, however doing it midscreen requires a precise Tiger Knee An input method to perform a special move in the air as fast as possible after you leave the ground. Almost always abbreviated to TK. For Example: 2369 for a j.236 input. or you'll go over your opponent.
Also really useful as a combo ender, since it works at high hitstun decay and you can choose to take a damaging extension or a sliding knockdown.
Finishing Driver
214L or 214M/H (Hold OK)
| Version | Damage | Guard | Smash | Startup | Active | Recovery | On-Block | Invuln |
|---|---|---|---|---|---|---|---|---|
| 214L | 900 | All | 31 | -23 | 4-22 Projectiles 23- 34 Head |
|||
| 214M | 950 | All | 37 | -23 | 4-27 Projectile 28-47 Head |
|||
| 214H | 1000 | All | 40 | -23 | 4-22 Projectiles 23-54 Head |
|||
| 214[M] | Total 48~55 | 4-27 Projectiles 28-34~41 Head |
||||||
| 214[H] | Total 45~56 | 4-22 Projectiles 23-31~42 Head |
- All Versions
Sways back before rushing in with identical properties to 236X GuardAllStartup15RecoveryAdvantage-23, but you can also override the attack by buffering a drive follow-up during the back sway.
Back sway into Reverse Gear GuardStartupRecoveryAdvantage- can be used on reaction to beams and assists, but unlike
 ![]() Android 18 your options after absorbing an attack are limited to calling an assist or using your barrier's follow-up.
Android 18 your options after absorbing an attack are limited to calling an assist or using your barrier's follow-up.
- 214L
You want to use this as a frametrap tool. 214L~L will whiff punish most mashing attempts for a medium starter and on block you'll have 236L still available to extend your string.
- Cancellable at frame 19.
- 214M
You can hold any button to perform a feint, similar to 236M.
- Sways back more than 214L.
- Cancellable at frame 23.
- 214H
Has the same uses as 214L with an added mixup layer, as it crosses up like 236H when not cancelled. When done after 5L it can look like a DR, adding to the mental stack, and at the same time you present a mixup between letting 214H cross-up or cancelling it into any of your follow ups to stay same side.
- Sways back more than 214L.
- Cancellable at frame 19.
Air Fake Out
j.214L/M/H
| Version | Damage | Guard | Smash | Startup | Active | Recovery | On-Block | Invuln |
|---|---|---|---|---|---|---|---|---|
| j.214L | Total: Until L(+?) | |||||||
| j.214M | Total: Until L(+?) | |||||||
| j.214H | Total: Until L(+?) |
- All Versions
A fast fall that can be cancelled into gear follow-ups on landing.
- j.214L
Jumps forward before falling down. Has some uses in setting up left-right mixups with assists.
- j.214M
Jumps backward before falling down.
- j.214H
Falls down immediately.
The complementary mixup option to j.236H, as you can press ~2L GuardLowStartup10RecoveryAdvantage-11 once you land to perform a quick low. It recovers quickly if you don't go for gear follow-ups, meaning you can also try a DR or a crossup, but all these options leave a mashable/jumpable gap that has to be covered by an assist.
It can be used used as a movement option, as it can cancel into Reverse Gear GuardStartupRecoveryAdvantage- the moment you land.
Acrobatic Assault
236S (Air OK) or 214S (Air OK) or 6S during Gear string (Air OK) or 4S during Gear string (Air OK)
| Version | Damage | Guard | Smash | Startup | Active | Recovery | On-Block | Invuln |
|---|---|---|---|---|---|---|---|---|
| 236S | Until wall | +3L | ||||||
| j.236S | Until wall | +3L |
17 jumps torwards a screen edge, then dives forward once he reaches it. You can cancel into any attack once you touch the wall, but you aren't allowed to block during the dive.
It's one more movement option, making 17 hard to catch even if you already used your air action. It's commonly used to retreat to fullscreen by cancelling it into j.214H or to cross over a grounded opponent, calling an assist to take your turn.
If you call an assist while 17's touching the wall, the assist can spawn behind the opponent and steal the corner.
- 214S jumps backward, 236S jumps forward.
- Movement starts at frame 12.
- Air version can only be performed once until landing.
Power Blitz Charge
22S or 2S during Gear string
| Damage | Guard | Smash | Startup | Active | Recovery | On-Block | Invuln |
|---|---|---|---|---|---|---|---|
| 800×2 | All | 14 | -5 |
Charges up your power blitz. For that reason, this is your preferred blockstring ender and an important part of your combos.
Its pop up effect makes it easy to extend your combo with any assist, or
if you use this as a combo ender you can always combo into Barrier Explosion GuardAllStartup7+4RecoveryAdvantage-21 or Super Electric Strike
 GuardAllStartup10+3RecoveryAdvantage-42.
- Both of 17's hands have hitboxes during the initial portion of the charging animation.
- Charges on frame 11.
Power Blitz
22S after Charge (Air OK) or 2S during Gear string after Charge (Air OK)
| Version | Damage | Guard | Smash | Startup | Active | Recovery | On-Block | Invuln |
|---|---|---|---|---|---|---|---|---|
| 22S Shot | (300,150×4)×2 | All | 17 | +6 | ||||
| j.22S Shot | (300,150×4)×2 | All | 16 | Until L |
- Causes a sliding knockdown on hit.
- Throws 2 balls downward. First ball arcs up while the second arcs down.
- Air version perfroms a fast fall after shooting.
- Loses charge on frame 16, the moment the first blast is thrown.
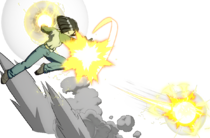
One of the best singular moves in the game. Tremendous reward in many situations, standing as a high damage combo finisher, instant win of neutral (with either tremendous oki or having a 6 frame advantage on block), and instantly puts 17 back on the ground, even on whiff. This means 17 is not relegated to being a sitting duck if he gets caught in the air, keeping his "annoying factor" sky high. The only problem being, of course, is that you need the charge the thing in the first place, but with 17 on point, assists and potentially his own B assist when he is not in play ensures he will have the opportunity to charge Power Blitz. Once you have the move, use it wisely and well, as it gives 17 tremendous status in neutral and solves his knockdown issues when he has it ready.
Gear Follow-ups
Gear follow-ups can cancel into one another or any other Special Move on whiff, but each move can only be used once per string. The rules of a Gear string are as follow:
- Starts with Accel Driver
 GuardAllStartup15RecoveryAdvantage-23 and Finishing Driver
 GuardAllStartup31RecoveryAdvantage-23 on the ground, or Air Second Gear
 GuardHighStartup18RecoveryAdvantage- and Air Fake Out
 GuardStartupRecoveryTotal: Until L(+?)Advantage- in the air. Starting a string with Air Second Gear counts as using 6L/6M, the same applies to Air Fake Out and 4L/4M.
 - Pressing L or M without a direction will choose a follow-up going by this order, skipping any gear you already used: Top Gear
 GuardAllStartup8RecoveryAdvantage-9 > Second Gear
 GuardHighStartup25RecoveryAdvantage-12 > Low Gear
 GuardLowStartup10RecoveryAdvantage-11.
 - Using Accel Driver or Finishing Driver mid-string will refresh the usage of Gear follow-ups.
- Using 236S/214S or 22S ends the string.
Example of a full string: Air Second Gear > Follow-ups > Accel Driver > Follow-ups > Finishing Driver > Follow-ups > Power Blitz Charge
Top Gear
5L/M during Gear string
| Version | Damage | Guard | Smash | Startup | Active | Recovery | On-Block | Invuln |
|---|---|---|---|---|---|---|---|---|
| Gear 5L | 700 | All | 8 | -9 | ||||
| Gear 5M | 750 | All | 10 | -9 |
- Very useful and quick frame trap.
- Amazing scaling, deletes health bars if 17 has resources to spare.
All M Gears deal more damage and have more range than L versions, with the extended range varying between moves.
Second Gear
6L/M during Gear string
| Version | Damage | Guard | Smash | Startup | Active | Recovery | On-Block | Invuln |
|---|---|---|---|---|---|---|---|---|
| Gear 6L | 700 | High | 25 | -12 | ||||
| Gear 6M | 750 | High | 26 | -13 |
- Despite being an overhead attack, it doesn't have head property, meaning the move can't be 2H'd/anti-aired.
- Has an abhorring 60% initial proration, whereas other rekka moves have 70% when used as a combo starter.
- M version has enourmous range.
The rekka "mixup." While technically reactable, opponents waiting to block it or mash against it are more vulnerable to pressure resets or Barrier.
Low Gear
2L/M during Gear string
| Version | Damage | Guard | Smash | Startup | Active | Recovery | On-Block | Invuln |
|---|---|---|---|---|---|---|---|---|
| Gear 2L | 700 | Low | 10 | 4 | -11 | |||
| Gear 2M | 750 | Low | 12 | 4 | -11 |
- 70% scaling, 17 has to work to get meaningful damage out of this move.
- M version doesn't have as much range as the other follow-ups.
The low for 17's rekka "mixup." Can be made a little more difficult to react to if done from the 4L/M follow-up as it resembles Second Gear, but smart opponents will fuzzy block it. Best used as a second frametrap after a Top Gear should opponents not get hit by the first frametrap.
Fake Out
4L/M during Gear string
| Version | Damage | Guard | Smash | Startup | Active | Recovery | On-Block | Invuln |
|---|---|---|---|---|---|---|---|---|
| Gear 4L | ||||||||
| Gear 4M |
- Jumps forward and then fast falls down.
- Just like the overhead, the M version travels almost fullscreen.
The high fakeout, best used in tandem with Low Gear. Almost useless if Low Gear or Second Gear has already been used in the string as there is no more mixup.
Reverse Gear
5H/S during Gear string
| Version | Damage | Guard | Smash | Startup | Active | Recovery | On-Block | Invuln |
|---|---|---|---|---|---|---|---|---|
| Gear 5H | ? Non-throw | |||||||
| Gear 5H > X | 1000 | All | U1+ | -22 | ? Non-throw | |||
| Gear 5S | ? Non-throw, non-Super | |||||||
| Gear 5S > X | 1000 | All | U1+ | -22 | ? Non-throw, non-Super |
- Press L/M/H/S to trigger the attack. Smash hit causes a wall bounce.
- S version can only cancel into the attack after absorbing a hit. Gains 25% Ki gauge each hit absorbed.
- H version can use Ki Blast follow-up at any point. Doesn't gain meter from successful block, but can guard against Supers.
- Can not use follow ups after H version if blocked, but can jail into vanish. Only use this if you have 1.5 bars if you ran out of assists.
Mash callout tool that also nets 17 a nice combo. The attack builds a ton of meter by itself from the S version of the barrier. The H version is useful to get a combo if 17 doesn't have assists available or doesn't want to spend them. In most cases, even a mildly optimized combo will build the meter back.
Z Assists
Assist A
Reverse Gear
| Damage | Guard | Smash | Startup | Active | Recovery | On-Block | Invuln |
|---|---|---|---|---|---|---|---|
| 800 | All | 40 | +35 | 11-33 Guard |
- Does barrier > Ki Blast followup, absorbed hits don't give any meter.
- Barrier activates at the 10th frame.
- Wall bounces on hit with really good hitstop and hitstun.
17's best all around assist and especially useful for command grab characters. The barrier portion stops mashers and the built-in attack is great for punishing them or stopping jumps. It takes some time to get used to the timing in a combo but the long hitstop and hitstun make it a great combo tool to boot.
Assist B
Power Blitz Charge
| Damage | Guard | Smash | Startup | Active | Recovery | On-Block | Invuln |
|---|---|---|---|---|---|---|---|
| 800 | All | 20 | +40 |
- Only does the charge.
- Point 17's Power Blitz will be charged after this assist is used.
- Has some issues with where 17 spawns in which can make it whiff after lariat-style moves.
Fast, high blockstun assist. Can be useful for fuzzy guard style mixups but is generally outclassed by his A assist.
Assist C
Accel Driver
| Damage | Guard | Smash | Startup | Active | Recovery | On-Block | Invuln |
|---|---|---|---|---|---|---|---|
| 450×2, 400 | All | 35 [20] | +55 |
- His first two hits of the rekka sequence.
- Even being a blockstun type C-assist, it has anti-air properties in his first hit, which makes it a little bit better than the others of its kind.
- Tracks opponents, though it remains on the ground.
17's C assist is a tracking, +50 anti-air assist. Not a bad choice if you really want a C assist due to it having some extra utility, but his A assist is generally more applicable.
Super Moves
Endgame
236L+M
| Damage | Guard | Smash | Startup | Active | Recovery | On-Block | Invuln |
|---|---|---|---|---|---|---|---|
| 2417 | All | UDV | 7+7 | -21 | 7-? All |
- Teleports behind
youthe opponent. - Just like Cooler, DHC early will keep you on the same side while still get reduced damage, but 17 will still appear behind the opponent.
- KOing with this causes a kneeling animation.
- Minimum damage 891. Non-cinematic version has minimum damage 708
- Slow startup so Sliding Knockdown pickup is hard in some cases
Barrier Explosion
236H+S (Air OK)
| Version | Damage | Guard | Smash | Startup | Active | Recovery | On-Block | Invuln |
|---|---|---|---|---|---|---|---|---|
| 236H+S | 2322 | All | UDV | 7+4 | -21 | 1-? All | ||
| j.236H+S | 2322 | All | UDV | 6+4 | Until L | 1-? All |
- 17 covers himself in a barrier and rushes forward the opponent, covering all the screen.
- The ground version corrects 17's position and puts him in the same height as his opponent.
- Fully invulnerable from frame 1.
- This is 17's DHC Super.
- Minimum damage 817. Non-cinematic version has minimum damage 708.
- Gives SKD, even in the air.
This super is the ultimate answer to anyone who gets too frisky with their supers. 17 can initiate drive-thru mode on that pesky Vegeta and his Final Flash, and punt him straight into the floor for only a single bar. This only adds to the annoyance factor of fighting 17, as he can usually get a free punish out of this, waste the opponent's meter, and it sets up nicely for DHC into another character. Often, when you are in the air, it may be worth spending the bar for a knockdown with this super, especially if your damage has been heavily scaled by a light, where 5S into aerial Second Gear just falls short. You may also have to choose this super over Endgame if you want to keep your side.
This super confirms that mashing against 17 is a terrible idea. Do not use raw supers against 17.
Super Electric Strike
214L+M (Air OK) or 214H+S (Air OK)
| Version | Damage | Guard | Smash | Startup | Active | Recovery | On-Block | Invuln |
|---|---|---|---|---|---|---|---|---|
| 214L+M | 320×15 | All | UDV | 10+3 | -42 | 1-18 All | ||
| j.214L+M | 320×15 | All | UDV | 10+3 | Until L | 1-18 All |
- Ground version makes 17 jump back a little bit.
- Minimum damage: 1680, so does not scale horribly despite low raw damage
Pretty solid as a reversal, although that would ignore how awesome Barrier Explosion is. Takes up most of the screen in all directions, thus the opponent cannot just jump over it to escape, although it has pretty underwhelming damage compared to other projectile supers. However, it doesn't scale too badly despite the low raw damage, meaning it's a solid combo ender if you have meter to burn.
Colors
- DBFZ Android 17 color1.png
Color 1
- DBFZ Android 17 color2.png
Color 2
- DBFZ Android 17 color3.png
Color 3
- DBFZ Android 17 color4.png
Color 4
- DBFZ Android 17 color5.png
Color 5
- DBFZ Android 17 color6.png
Color 6
- DBFZ Android 17 color7.png
Color 7
- DBFZ Android 17 color8.png
Color 8
- DBFZ Android 17 color9.png
Color 9
- DBFZ Android 17 color10.png
Color 10
- DBFZ Android 17 color11.png
Color 11
- DBFZ Android 17 color12.png
Color 12
- DBFZ Android 17 color13.png
Color 131
- DBFZ Android 17 color14.png
Color 141
- DBFZ Android 17 color15.png
Color 151
- DBFZ Android 17 color16.png
Color 161


