
Quick gun jab.
< BBCF
(→6B: Hitboxes) |
m (→2B) |
||
| Line 206: | Line 206: | ||
* Whiff cancelable into itself. | * Whiff cancelable into itself. | ||
This move is slightly longer than {{clr|A|2A}}, but a tad shorter than {{clr|B|5B}} which makes it decent low attack, and is best used as combo or blockstring filler for frame traps. It also sees some use in neutral and against certain character's reversals on wakeup like {{Character Label|BBCF|Azrael|label=Azrael's}} {{MiniMoveCard|game=BBCF|chara=Azrael|input=623B|label= | This move is slightly longer than {{clr|A|2A}}, but a tad shorter than {{clr|B|5B}} which makes it decent low attack, and is best used as combo or blockstring filler for frame traps. It also sees some use in neutral and against certain character's reversals on wakeup like {{Character Label|BBCF|Azrael|label=Azrael's}} {{MiniMoveCard|game=BBCF|chara=Azrael|input=623B|label=Panzer Strike}} or {{Character Label|BBCF|Makoto_Nanaya|label=Makoto's}} {{MiniMoveCard|game=BBCF|chara=Makoto Nanaya|input=623C|label=Corona Upper}} since it makes Noel's hurtbox relatively short and allow her to {{keyword|low profile}}. Can be repeated twice per string. | ||
Being able to whiff cancel and having relatively low recovery allows Noel to also bait out twitch reactions in a similar manner to {{clr|A|5A}} but with a much better reward and less risk. For example, {{clr|B|5B}} > {{clr|B|2B}}(w) on block comes in at -5, but it allows Noel to make her pressure much more threatening and less linear with proper reads and conditioning. | Being able to whiff cancel and having relatively low recovery allows Noel to also bait out twitch reactions in a similar manner to {{clr|A|5A}} but with a much better reward and less risk. For example, {{clr|B|5B}} > {{clr|B|2B}}(w) on block comes in at -5, but it allows Noel to make her pressure much more threatening and less linear with proper reads and conditioning. | ||
Revision as of 09:36, 8 June 2022
Overview
Noel is a beginner friendly mobile rushdown character with several unorthodox methods for offense. Noel's fast run and solid air dashes give her good natural movement to close in. Despite having short range she boasts a good set of pressure options that can lead into an extended offense coupled with frame traps, whiff pressure tactics and mix ups to open up her opponents. Although very risky, Noel's Drive Attacks can also be used to call out certain moves while potentially establishing a continued offense from a passive defensive / offensive position. Noel is for players who like a generally fast mobile character with unorthodox means of offense up-close and personal.
Noel's Drives function in two different ways. Upon pressing the D button, Noel uses a Drive attack. Afterwards, Noel enters the chain revolver state. In this state, Noel is limited to normal attacks, specials, and distortion drives. This state changes all of her normal attacks and gives her access to three more special moves. The chain revolver state lasts until you stop inputting commands or perform a special/distortion cancel.
- Noel may cancel any Drive move into any other move, with the exception that she may not repeat a move twice in a row.
- If chain revolver ends without a special cancel, Noel performs a short reload animation before being able to perform any other commands again.
- Noel is limited to 4 normal commands after the initial drive stater. Attempts to perform more will be ignored, but she may still perform a special cancel at this point.
- In drive state, Noel can use any special move she previously had access to, as well as 3 special moves exclusive to Drive: Spring Raid, Bloom Trigger, and Assault Through.
Activating Noel's Overdrive has numerous positive effects:
- Faster startup speed and faster recovery for drive moves (Loses "Reload" animation).
- Bloom Trigger (d.236D) hits more than twice.
- Assault Through (d.214D) has increased invuln and short invisibility before going active.
- Spring Raid (d.623D) has increased untech time allowing for combos.
- Thor (j.236236D) allows Noel to recover in the air after the missile fires.
 | |
| Health | |
| 11,000 | |
| Prejump | |
| 4F | |
| Backdash | |
| 22F (1~5F Inv All, 2~15 airborne) | |
| Fastest Attack | |
| Reversals | |
| Fatal Starters | |
Normal Moves
5A


- Chains into itself 3 times.
- Jump cancelable on hit or block.
- Throw cancelable on hit or block.
- Whiff cancelable into itself.
- Works on crouching opponents.
- Very short range.
Noel's staple pressure starter. Good button to start stagger pressure The use of intentionally delaying gatlings or cancels in order to create frame traps with the intent of catching your opponent mashing or jumping. Loses to reversals. and set up tick throw A throw done after attacks, very soon after if not exactly when throw invulnerability expires on the opponent. A Tick Throw take advantage of that the opponent naturally expect a Frame Trap coming, making it very hard to react to or escape from.s. Noel can combine 2A to create space and 5A's ability to whiff cancel to bait the opponent into a twitch reaction that can be punished, albeit not without some risk.
5B

Mid-range spacing tool.


- Jump cancelable on hit or block.
- Average range and speed.
- Whiffs at max range on some crouching characters.
Noel's main spacing tool. Use this along with 5C to confirm mid to max range hits into Chamber Shot, or 3C on crouching opponents. At closer ranges it can be comboed into 6A and on CH also combos into 3C and 5D.
Although 5B is one of Noel's main buttons in neutral, it is easily low profile When a character's hurtbox is entirely beneath an opponent's attack. This can be caused by crouching, certain moves, and being short.'d due to having next to no vertical hitbox.
5C

Farthest reaching normal.


- Jump cancelable on hit.
- Flare clashes with projectiles.
- Can now sometimes miss if it hits offscreen in corners or if certain characters are within a very close proximity to Noel during the animation. (Inside of the space between Noel and Noel's muzzle flash)
5C is perhaps Noel's best poke since it has a good hurtbox and slightly larger hitbox compared to 5B, but it is slower. Will combo into 3C on crouching opponents. On CH it also leads into damaging combos through 5D, 6B > 5D, or 214A. Overall 5C is your go to punish starter in most situations, which can lead to very damaging combos potentially up to 8K depending on conditions met and resources at your disposal.
Be warned that the muzzle flash visual effect is random, leading this move to be visually deceptive as it may give off the impression that 5C is larger than it really is.
2A


- Chains into itself 3 times.
- Throw cancelable on hit or block.
- Faster than average 2A.
One of Noel's more versatile buttons. 2A having natural frame traps into both 5C and 2C for high reward while also having the ability to throw cancel means that this button is excellent as a pressure starter and for stagger pressure. It is also a decent defensive button, as being one of the faster 2As with 6F startup and having longer range than 5A lets Noel have the ability to challenge pressure that most characters wouldn't be able to otherwise. The only major downside with this button is that the hurtbox is much larger than the hitbox, which can often cause Noel to trade unfavorably with other characters.
2B


- Limit 2 uses per gatling sequence.
- Whiff cancelable into itself.
This move is slightly longer than 2A, but a tad shorter than 5B which makes it decent low attack, and is best used as combo or blockstring filler for frame traps. It also sees some use in neutral and against certain character's reversals on wakeup like ![]() Azrael's Panzer Strike
Azrael's Panzer Strike GuardHigh/Low, AllStartup18Recovery30Advantage- or
 ![]() Makoto's Corona Upper
Makoto's Corona Upper GuardMidStartup9Recovery28+17Advantage-42 since it makes Noel's hurtbox relatively short and allow her to low profile When a character's hurtbox is entirely beneath an opponent's attack. This can be caused by crouching, certain moves, and being short.. Can be repeated twice per string.
Being able to whiff cancel and having relatively low recovery allows Noel to also bait out twitch reactions in a similar manner to 5A but with a much better reward and less risk. For example, 5B > 2B(w) on block comes in at -5, but it allows Noel to make her pressure much more threatening and less linear with proper reads and conditioning.
2C

+1 on Block.

- Clashes with projectiles
This move is mostly used as a blockstring for frametraps or combo filler. If used early in a blockstring, it can be very good due to it being +1, but its pushback is a problem so it's a bit harder to capitalize on the frame advantage. As of BBCF2.0 it will combo into 3C on crouching opponents.
6A


- Frames 6-11 Head Invul.
Noel's sad excuse for an anti-air. Its hitbox isn't that great, and if it whiffs your opponent gets a free punish. However, it's not a good idea to neglect this move, since if used well it can be an asset. It's also a staple for hit-confirming on a standing opponent.
6B

SOKOH


- Forces crouching on hit
- Forces knockdown state on air hit
Noel's main overhead outside of drive. It's slow but somewhat ambiguous, and since it's possible to cancel into it from many other normals, it has to be reacted to, rather than anticipated. Leads to mediocre damage midscreen, and respectable damage in the corner. Can be kara canceled into throw.
6C

Looks cool and that's all there is to it

- No longer wall sticks on 2nd hit
- Forces standing on counter hit
- First hit is not jump cancellable anymore
- Second hit of 6C cannot hit crouches
- Second hit is now jump cancellable on block
- Will now stagger the opponent long enough for the muzzle flash to hit without needing a counter
6C is heavly nerfed in the juggle department as opponents will now tech a lot sooner than usual in prorated combos. This also means things like 6C > 6B knockdowns are no longer possible after the first few hits in a juggle combo. It is also no longer possible to jump cancel 6C(1) to bait bursts or transition into j.D routes mid combo as it is now a tool that forces you to commit fully into it's use as an option/combo filler.
It is still possible to delay cancel the 2nd hit into a 2C or a throw but the window for this is now smaller due to the 2nd hit now coming out a lot faster in CF, effectively making this gimmick less reliable for opening up opponents when used along with the 6C > 6B gatling.
Use this move only as a combo filler in normal situations. However, to punish DPs that recover crouching like Jin's 623C, use CH 6C > 214A or CH 6C > 6B > 5D > etc.. for a punish up to potentially 5k. Overall, 6C is your secondary go to punish starter behind 5C in the event you need a standing confirm.
3C

Not a Projectile.

- Only possible to cancel into Silencer
- Fatal Counter
Only use to hitconfirm on crouching opponents. Its normally best to use this with rapid cancel to help back it up since its very unsafe on block and guarantees a free punish for the opponent otherwise. It is possible to combo CH 5B and CH 5C into 3C, though there are better options for both.
j.A

Overhead.

Use j.A as an up close air-to-air tool. It's also the best jump-in overhead Noel has in terms of hitbox, though its damage potential is weak. It's speed also allows it to be used in jump-in F-Shiki Sometimes known as "Fuzzy Overhead". When you are in blockstun, you can switch high/low blocking, but your blocking animation and hurtbox does not change until you leave blockstun or block another attack. F-Shikis take advantage of this and use overheads that would miss on crouching characters, but not on standing characters. mix ups.
j.B

Overhead.

A somewhat situational air spacing tool. Can be used preemptively to beat out or trade with some air normals when spaced well enough. Its best application is normally for air to ground routes in some combos in the corner leading into j.D, or into Revolver Blast air ender, which for Noel, Air combos are a last resort for situations where you cannot convert into a ground combo. It is also used occasionally to setup "Drive Landing Cancellation" tactics into d.6B on the way down offensively for a very fast overhead attempt if it is blocked. It can also be used after jumping in with j.C, to add a weak F-Shiki Sometimes known as "Fuzzy Overhead". When you are in blockstun, you can switch high/low blocking, but your blocking animation and hurtbox does not change until you leave blockstun or block another attack. F-Shikis take advantage of this and use overheads that would miss on crouching characters, but not on standing characters. overhead (since j.C itself is not).
j.C

NOT an Overhead.

- Reverse beats into j.A or j.B.
Noel's best air normal, period. Its hitbox is relatively decent, when spaced well in the air you can get a nice CH combo. Its underwhelming as a jump in due to its small vertical hitbox, also do take note that it is not an overhead. Like j.B you can use this normal preemptively to meet opponents ground to air for a considerable sized hitbox on the way up. On air CH, the untech time is long enough for you to land into a 5C pick up in most situations. Also is used in conjunction with "Drive Landing Cancellation" tactics leading into d.6B for an overhead on the way down.
j.2C

NOT an Overhead.

- Wallbounces in the corner, allowing for j.2C > air dash > j.2C
- No longer causes a hard knockdown state on air hit (previously did in CPEX)
- Now causes soft knockdown state on hit (opponents can neutral tech immediately now)
- Now floats the opponent on hit against a ground opponent
- 110% Bonus Proration
Overall, j.2C doesn't really see much use outside of corner combos. In the case of corner combos it is usually a combo extender leading to Noel's combo enders overall. However, if used near the beginning of a combo after 5C, it leads to some of Noel's highest damage cofirms up to potentially 5k or more making this a staple in corner combos. In neutral, you can use this as a unusual spacing tool when combined with an air dash or a second jump after it whiffs for some tricky footwork. Another way to use it is to preemptively go into it on rising jump startup near the opponent to simulate a jump in attempt. j.2C's recoil effect after it whiffs / hits helps halt your position in the air for a moment which can be used as a way to dodge an opponent's initial anti air attempt if used right, then you can air dash back in for a potential hit confirm after the recoil effect. It's a gimmicky tactic to use but it's risky so use sparingly
Drive Moves
5D

Clashes with projectiles.

- Fatal Counter
No invincibility, fastest drive move used to start drive mixup. When used against a knocked down opponent in the corner, it will catch all rolls for a 3K corner combo. Your most damaging punish on Fatal Counter for invulnerable reversals that leave the opponent standing.
In Overdrive, 5D becomes faster, allowing you to combo 5C into 5D on standing hit.
2D
- BBCF Noel 2D.png
Clashes with projectiles.
- Foot Invuln. from frame 4 - till landing frames
- Now only hits 3 times (5 hits in CPEX previously)
- Now forces crouching state on hit
- Can no longer be cancelled into Thor Distortion or Revolver Blast on hit or block
2D has had an animation change that changes it from a huge drive cart wheel into a little drive hop that closely resembles her old 2D from older Blazblue iterations before CP, but hits differently now. It is a useful drive move for dodging a lot of low hitting attacks in the game while travelling forward a considerable amount of distance at the same time but is pretty slow on start up. It's a decent drive to use to re-enter back in range for drive mix ups after a long pressure string with Noel's normals on pushback on a blocking opponent. You will also find yourself doing this a lot in corner combos along side things like d.5B for the wall bounce that leads into Revolver Blast. If you can get the height midscreen you can also use this as a useful viable screen carry also.
It is also possible to clash kill projectiles with 2D but is not a prominent tactic to do concerning this drive as its rare to do this in general. This is also quite punishable by Anti-airs or general pokes from fast reacting opponents as it does take a split second for the animation to go active in terms of an actual hit box after the hop.
6D
- BBCF Noel 6D.png
Clashes with projectiles.
- Frame invuln calculated from shortest and longest distance from Noel.
- Forces knockdown state on hit, using 22B or 22C after it hits is now possible.
A low hitting drive attack. Although it's a bit on the slow side, 6D is a very useful move to dodge a considerable amount of projectile or body based attacks while covering ground. This makes 6D an effective tool in matchups against zoners or in certain long range spacing situations that Noel has trouble dealing with due to her short range. It is also one of the three choices to start drive pressure, next to 5D and 2D. It can also catch some people blocking high if they're expecting 6B. You can call out bad pressure with this move, but 4D functions better as a reversal. Both lose to F property attacks. It is most helpful to Instant Block into 6D when on the defensive to maximize its use as a reversal attempt.
4D

Actually a projectile.

- 1-31F Body & Projectile Invul.
- No longer causes float on hit (floats opponents in CPEX)
- Does not cause Fatal Counter on Counter Hit
- Now staggers the opponent on hit
4D is Noel's main reversal option. Nerfed compared to older versions of Blazblue, but still useful. You can use this reversal option at its best by using an option select to help along with proper reads and judgment calls (1 > 4+AB~D~1) to dodge some body attacks and overheads. Can be used offensively to bait most DPs, reversals, Exceed Accel, and Counter Assaults. Can also be used to hit opponents who jump during their pressure, but must be done while the opponent is still rising, since 4D no longer has Head Invuln.
j.D

Clashes with projectiles, NOT an Overhead.

- Forward momentum returned but travels slightly farther than usual
- Knocks down on hit
- Can no longer be cancelled into Thor Distortion or Revolver Blast on hit or block
j.D is mostly an important drive combo filler that helps convert air combos to ground combos. In most combos it is normally used near the beginning of the combo or near the end of coner combos that use the j.2C > air dash > j.2C route that transitions into j.D right afterwards. Trying to go into j.D after a certain amount of hits will cause it to whiff in a lot of combos after j.C(1) or on a short starter / prorated combo.
It should be noted that j.D is a hurtbox has a tendency to extend to the guns meaning somebody can hit the muzzle flash and it will occasionally hit her out of j.D sometimes. Can be used as a cross up gimmick via IAD > j.D but don't rely on it too much as it can quickly get you killed if blocked.
OD version moves Noel forward when used, so it can be used for crossups again.
d.5A

Clashes with projectiles.

No results
- Fatal Counters
The quickest drive followup in Noel's arsenal, normally used to keep an opponent blocking while transitioning into High/Low mixup. Be careful when attempting to transition into d.6D from d.5A. It will cause d.6D to inadvertently perform the slow cross up variation when upclose, unless you delay the d.6D input.
d.6A or d.4A

Clashes with projectiles.

No results
Used to float opponents for drive combos, but can also be used like d.5A, though it is a bit slower and is harder to poke afterwards due to more blockstun. It is more consistent at getting out non cross up d.5D for a high low mix up with d.6B after 5D and 6D drive starters.
d.5B

Second hit clashes with projectiles.

No results
Used only as a combo filler, or to create space during a drive blockstring. You can also attempt to use this as a pseudo poke gesture in certain blockstrings or in neutral via 5D > d.5B > Optic Barrel / Bloom Trigger / Chamber shot. Also is an essential part of Noel's Overdrive combos, both at midscreen and in the corner as its untech time allows for links to optimal routes such as d.6B > d.5B > 665B > 5C midscreen or d.5B > TK OD Thor in the corner.
d.6B or d.4B

Overhead, does NOT clash with projectiles.

No results
- 110% Bonus Proration added
Noel's Drive Overhead, it's extremely fast and is half of Noel's High/Low drive mixup. It is also commonly used with "Drive Landing Cancellation" tactics to help open up her opponents on the way down from her air normals.
d.5C
Clashes with projectiles.

No results
Used only as combo filler.
d.6C or d.4C

Actually a projectile.

No results
- No longer a fatal counter
Used only as combo/blockstring filler. Has a ridiculous amount of blockstun, which makes it able to true blocktring into any of her other drive normals. The absurd blockstun also allows her to Crush Trigger with only about a 3 frame gap. In CF, you can now use this move to attempt a pressure reset in drive by allowing the reload frames to occur and follow up with 5A or 2A since the reload frames are much faster.
d.5D
Clashes with projectiles.
No results
The follow up version of 5D, there's no real difference between the two moves.
d.2D
- BBCF Noel 2D.png
Clashes with projectiles.
No results
- Frame 4 - till landing Foot Invul.
The follow up version of 2D. Pretty much the same as the 2D starter, other than the fact that it can be distortion and air special cancelled on hit or block, unlike 2D.
d.6D
- BBCF Noel 6D.png
Low, clashes with projectiles. Crossup when near opponent.
No results
The follow up version of 6D, there's not much of a difference between this move and the starter version, though d.6D has a higher P1, leading to higher damage than it's starter variation. d.6D is a low drive hit that has similar startup to d.6B, this is half of Noel's High/Low drive mixup
Using d.6D while in very close proximity to your opponent will cause Noel to shadow step through the opponent and hit from behind. This becomes extremely useful when you become very familiar with skipping the initial drives on landings. This means you can do things like dropping directly or diagonally on your opponent while using j.C on the way down forcing them to block, quickly inputting the desired drive making your first drive the shadow step (d.6D) instead of the regular slower and a short drive 6Dd.4D
Actually a projectile.
No results
- 5-28F Body & Projectile Invul.
Used mainly to help bait certain DPs during drive pressure. As combo filler, it produces a higher elevation launch after 6D, d.6D, or a d.5B in the corner.
Bloom Trigger
d.236D

Second hit clashes with projectiles.

No results
- Wallbounces midscreeen & in the corner
- First hit causes stagger, 2nd hit causes blowback effect
Noel's normal drive ender for midscreen combos. On the offensive, this is usually used to help push back an opponent on block to make enough space to escape back into neutral, but is punishable on Instant Block. It can also decently set up a safe jump attempt as a follow up midscreen by IAD into j.C as long as the opponent neutral techs into this situation. However, the opponent can roll tech out of the safe jump attempt, which Noel cannot answer to outside of just chasing them afterwards.
In overdrive Bloom Trigger is usable in corner combos with a prerequisite of a little bit of height to your juggle. The overdrive version adds more hits to Bloom Trigger.
Assault Through
d.214D

Shoulder Gang

No results
- 1-18F Fully Invul.
- Causes blowback ground slide effect on air normal hit
- Causes blowback wallbounce effect on Counter Hit
Assault Through is a drive special that is occasionally used as a method to produce corner push in midscreen to corner combos, help put the opponent back in the corner in specific corner combos, and lastly help setup 22B corner oki as it provides a hard sliding knockdown state for the setup. It can be used as a weak crossup, though it gives you no real advantage on hit or on block. On CH it wallbounces leading to a decent combo. This move is mainly used to punish opponents who are attempting to punish Noel whiffing drive outside of combo use, the goal is for this to counter hit overall.
Assault Through in overdrive causes a wall bounce on air hit, and allows a standing combo on normal hit. The invuln frames of the overdrive version also cause Noel's sprite to disappear, making it a little harder to block as a crossup, though not much.
Type III: Spring Raid
d.623D

Does NOT clash with projectiles.

No results
- 1-10F Fully Invuln.
- Can now be used in combos meterless & without counter hit
- Now has a lower hop effect on Noel leaving her closer to the ground
Spring Raid is mostly used in corner combos to help maximize Noel's corner damage overall. Can be used in combos midscreen as well but is less prominently used there as opposed to the corner. It is also a somewhat decent way to potentially CH then opponent from trying to hit you on the way down from something like j.D but its risky so be careful not to find yourself in this situation often.
The overdrive version of Spring Raid launches the opponent higher than usual allowing for follow ups with 5C, 6C, or 5D
Universal Mechanics
Forward Throw
5B+C

No results
- 100% minimum damage (1400)
Standard throw. At midscreen you must cancel the first hit into 214A to combo from it.
Back Throw
4B+C

No results
- 100% minimum damage
Standard throw. At midscreen you must cancel the first hit into 214A to combo from it.
Air Throw
j.B+C

No results
- 100% minimum damage
Standard air throw, can be followed up with 5B and 2B after landing. If done too high though, 5B and 2B will not combo. At some heights you can use j.D, but at super jump height you must use j.C to pick up from the ground.
Counter Assault
6A+B while Blocking
New Counter Assault.
No results
- Frames 1-20 Fully Invul.
- 180F Heat Gauge Cooldown.
New Counter Assault animation that uses her d.5B animation to blow the opponent away.
Crush Trigger
5A+B (Chargeable)

Noel FINALLY has a way to Guard Crush.

No resultsNo results
- Possible to charge.
- 180F Heat Gauge Cooldown.
Outside of causing Guard Crush, it's rarely used by Noel because there are not many places to fit it in effectively. In combos, the charged variation is also rare outside of 5K confirms off of CH 5C on crouching and CH 6C (both in corner). For the most part it's better to save your meter for more important things. It can occasionally be used as a method of exiting drive pressure without being at frame disadvantage or using d.6C.
Specials
Type XI: Optic Barrel
236A or 236B

Projectile.


- 236A: Shoots at a midscreen distance from Noel
- 236B: Shoots at basically the maximum distance both characters can be from each other.
- Can now dash cancel on hit or whiff
Severely weakened frame advantage on block. Following it up with a dash cancel into 5A/2A is now a very risky option as it loses to 6 frame attacks and trades with 7 frame attacks. Neither version of Optic Barrel causes a knockdown on a ground hit. The goal is to hit them in the air, which will cause a knockdown.
Type XVII: Chamber Shot
236C

Projectile.

- No longer wall sticks in corner
- No longer ground slide from a blowback effect midscreen
- Causes a launch effect similar to Noel's 6A on hit
Combos off of 5C and 2C for a basic knockdown. Noel's best choice for midscreen short confirms in which going into drive conversions into Bloom Trigger isn't an option. Chamber Shot serves as Noel's secondary combo ender and also as a combo extender for corner confirms which is typically followed up with 5B or a dashing 2A. You can also use Chamber Shot as a poke gesture in neutral and a somewhat unconventionally situational anti air if spaced and timed right against some IAD jump ins as it does have a sizable hitbox.
Type XIII: Revolver Blast
j.214C

Projectile.
Follow up j.2C attack

No results
- Knockdown distance after j.2C follow up is closer to Noel midscreen
Noel's air ender to end air combos. Essential to Noel's corner combos (i.e. d.5B > d.2D) to increase overall combo damage. Midscreen it isn't that great of an ender as the opponent is able to just roll out after due to recovery and spacing after the follow up attack j.2C. Due to this its mainly just used in corner combos. Noel's air ender to end air combos. Can also be used to create a big hitbox around her during it's animation to potentially hit incoming opponents who approach her by Tiger Kneeing its input close to the ground. The multiple hits can also be used situationally to clash kill multihit projectiles.
Type IX: Muzzle Flitter
214A
Command Grab, only works on Standing Opponents.

- Combo throw, can hit enemies in hitstun without incurring purple exclaimation marks.
- Can only grab standing opponents
A Command Grab that can be combo'd into and out of. Can only hit standing opponents, and will whiff on crouching or jumping opponents. Can be combo'd into with normal throw, Fatal 5D, CH 5C/6C/d.4D, d.6C, d.4D during a Fatal combo, or d.236D(1) > Rapid. Overall its not that good as its risky to do considering it puts Noel in Counter Hit state on whiff guaranteeing a punish for the opponent. It is primarily used to variate mix ups between d.6B and d.6D where MF can substitute for the d.6B to catch high blocking opponents.
Type VI: Flash Suppressor
22B or 22C near downed opponent

Projectile.
- BBCP Noel Silencer B.png

- 200% Heat Gain
- Both versions can only be used if the opponent has already been knocked down once in the combo.
22B
- Hold B for more shots
22B is used as a combo extender in some cases. Is also used as a combo ender to set up Noel's 22B oki. Can be chained into the C version by hitting C while holding down B, which is useful when a faster startup or different timing is required in a combo
22C
- Dash cancellable
- Ground bounces
22C is used as a combo filler after 3C, 6D, d.6D or any general knockdown to continue a combo.
Distortion Drives
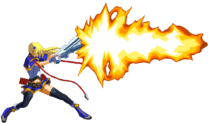
Zero Gun: Fenrir
632146D


Bullets and Finisher are Projectiles, first hit is not.


- Minimum damage: 160, 16*10, 600 (920)
- OD minimum damage: 160, 16*10, 14*20, 600 (1200)
- Minimum damage without the first hit: 30*24 (720)
- Final attack only triggers if the initial ram with the gun barrel hit.
Damage super, used at the end of combos. Can also be used as a reversal.
Bullet Storm > Zero Gun: Thor
j.236236D


In case you haven't heard "projectile" enough on this page, this move's also one.


- 1-4F Fully Invul.
- Invincibility disappears after super flash
- 15% minimum damage (Normal: 710 OD: 895)
- 180F Heat Gauge Cooldown
- Last hit is airdash cancellable in Overdrive
Overall, Thor is a super that is normally used to either stack a lot of damage upfront for a strong 4- 5k combo (mostly in corners), midscreen counter hit OD combos that use OD Thor for up to 5K, or to tack on damage to close out a round. It is also sometimes used to counter anti air attempts in some situations but is risky depending on the opponent's character. You can combo Thor into Fenrir as a double super ender for corner combos.
Exceed Accel
Zero Gun: Sleipnir
A+B+C+D during Overdrive

Bring out the big guns

No results
- Behaves the same as every other Exceed Accel.
- 296/618 Minimum Damage
- Good Pushback
- Repositions both Noel & opponent about 1/3rd of the stage (Half stage instead if Noel is in corner)
- Positions Noel & opponent about the same distance as Optic Barrel A version range from each other afterwards.
Noel's only true meterless reversal. Puts Noel and the opponent at about midscreen.
Astral Heat
Valkyrie Veil
236236C

Counter Attack.


- 1-7F Fully Invul.
- 8-55F Catches
- 180F Heat Gauge Cooldown
- Can now trigger on Barrier Bursts
- Catches everything except projectiles, throws, Nirvana, and Ignis
Counter Astral. Classic Noel retains her old astral (214214C) while still being able to combo it into nearly any situation.
Valkyrie Veil (Classic Noel)
214214C
You Are Already Dead.

Classic Noel Only: Noel's astral completely removes her hurtbox from her sprite, so it can be used as a reversal, however certain moves (Invulnerable moves with forward momentum) will pass right through her over to the other side, thus making the actual Astral whiff. In most cases, if you're attempting to use this as a reversal, you're more likely to catch with her counter astral although this option is safer. No longer links of juggle 6C. Can juggle off d.6C but standing hit d.6C may cause the opponent to pass through your character and whiff. Guaranteed off first hit of throw, juggle d.5B in corner. Very limited combo options off mid-screen.
Colors
 |
 |
 |
 |
 |
 |
 |
 |
 |
 |
 |
 |
 |
 |
 |
 |
 |
 |
 |
 |
 |
 |
 |
 |
 |
 |
 |
 |
 |
 |
 |
 |
 |
 |
 |
 |
 |
 |
 |
 |
 |
 |
 |
 |
 |
 |
 |
 |
External References
- Noel Guide
- Playlist of CF Noel Tech by Litherain
- 22B(w) oki
- Japanese Name: ノエル=ヴァーミリオン
- Japanese Wiki
- Japanese BBS
- Arcade Profile Dan Rankings
- Character Video Thread
- Color Palettes on https://blazblue.wiki
To edit frame data, edit values in BBCF/Noel Vermillion/Data.
 Amane Nishiki [★]
 Arakune [★]
 Azrael [★]
 Bang Shishigami [★]
 Bullet [★]
 Carl Clover [★]
 Celica A. Mercury [★]
 Es [★]
 Hakumen [★]
 Hazama [★]
 Hibiki Kohaku [★]
 Iron Tager [★]
 Izanami [★]
 Izayoi [★]
 Jin Kisaragi [★]
 Jubei [★]
 Kagura Mutsuki [★]
 Kokonoe [★]
 Lambda-11 [★]
 Litchi Faye Ling [★]
 Mai Natsume [★]
 Makoto Nanaya [★]
 Mu-12[★]
 Naoto Kurogane [★]
 Nine the Phantom [★]
 Noel Vermillion [★]
 Nu-13 [★]
 Platinum the Trinity [★]
 Rachel Alucard [★]
 Ragna the Bloodedge [★]
 Relius Clover [★]
 Susano'o [★]
 Taokaka [★]
 Tsubaki Yayoi[★]
 Valkenhayn R. Hellsing [★]
 Yuuki Terumi [★]
Click [★] for character's full frame data
Essentials
• HUD •
Controls •
FAQ •
The Basics
• Movement/Canceling •
Offense •
Defense •
Gauges •
Universal Strategy •
Detailed & Advanced Information
• Damage/Combo •
Attack Attributes •
Frame Data & System Data •
Misc •
Archived Information
• Patch Notes • Tier Lists •
- Active Flow
- Advanced Input
- Attack Attributes
- Attack Level
- Astral Heat
- Auto Heat Gain
- Burst
- Barrier Block
- Barrier Gauge
- Bonus Proration
- Clash
- Combo Rate
- Counter Assault
- Counter Hit
- Counter Hit Carry
- Crush Trigger
- Danger State
- Distortion Drive
- Exceed Accel
- Fatal Counter
- Guard Cancel Overdrive
- Guard Crush
- Guard Bonus
- Hard Knockdown
- Heat Gauge Cooldown
- Instant Barrier
- Instant Block
- Negative Penalty
- Overdrive
- Overdrive Cancel
- Purple Throw
- P1, P2
- Rapid Cancel
- Same Move Proration (SMP)
- Starter Rating
- Super Flash Buffer
- Throw Reject Miss (TRM)
- Ukemi/Tech (Air)
- Ukemi/Roll/Emergency Tech
- Untechable State