General Tactics
There are several guides for starting out.
- An "FAQ" guide that explains how to do common things. Helpful if you're already familiar with Blazblue's mechanics. If you want a more advanced one, check this one.
Introduction
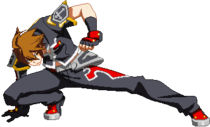
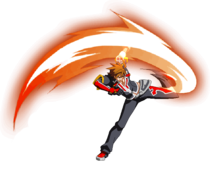
Naoto is an excellent rushdown character who uses a variety of offensive options to open up his opponent. On offense, his 5A can hit crouchers, and he also has a 2A low. His 5AA is an excellent pairing with his 5A, since its a fast gut punch that moves Naoto forward, allowing him to stay in. In addition, Naoto's 6A is a good standing overhead that he can combo from for great corner carry and damage. 6B is a solid button to his kit that calls out 2A mashing and throw attempts. In neutral, Naoto's goal is to stay close enough to threaten with specials like 214D (Slash Kaid) or chip away at the opponent with fully charged Drive attacks, that cause Guard Break when normal blocked. In defense, Naoto's 2A is a great low profile that can beat out certain attacks. Naoto's 623D, Inferno Crusader, is outright one of the best reversals in the game, with great range, fast startup, and when rapid canceled, allows Naoto to transition right into pressure. Naoto can stay at a midrange until he finds an opening, and then blow up his opponent for making any mistake. Although he lacks the range of other characters, his unique ability, Enhancer, allows him to get access into powered-up versions of his specials, giving him a plethora of new options to overwhelm the opponent and deal massive damage.
FAQ: Is Naoto Hard?
In short, it depends. He has a very easy gameplan and he can combo into decently-damaging easy combos with some reliability. His corner pressure and mixups are also very easy to perform. However, his optimal gameplay is very difficult and requires judicious use of the input buffer, microdashing and dash cancelling to perform at anywhere above base-level effectiveness. Contrast him with Ragna, Jin, or other beginner characters, and one can see how his execution can be very high.
Part of this executional barrier is because Naoto is very strong. His conversions lead into combos that can deal upwards of 4k damage from midscreen with the right starter, and that doesn't include counter hit or burning meter. Similarly, his pressure is very difficult to escape from if you can microdash, with lots of reset opportunities to keep his opponents blocking for long periods of time while he goes for a sneaky and hard-to-see mixup.
That being said, it isn't too difficult to learn him. His dash cancels have more of a buffer to them then you might think, and nailing them down will take less time then you assume if you commit to practicing. In particular, look to practice Naoto's important dash cancel spots, like 214A GuardStartupRecovery39 [37]Advantage- and 5D
 GuardMidStartup20 [18]Recovery18Advantage-2. Do something basic like dashing>5B
 GuardMidStartup8Recovery18Advantage-4>EnRekka~B
 GuardAllStartup14Recovery22Advantage-10>dc>EnCDP
 GuardMidStartup6Recovery26+11Advantage-28 [-22] or EnKaid
 GuardAllStartup15 [13]Recovery23Advantage-9 [-7] to get a feel for how the game wants you to be dash cancelling. As well, make sure you don't go down the rabbit hole of Naoto optimization- many of the combos found on the combo page are well optimized but very difficult, so don't feel bad about going for an easier combo that deals 300 less damage, because Naoto already hits so hard that he outdamages most of the cast. In particular, 3C
 GuardLowStartup11Recovery17Advantage-4>214A
 GuardStartupRecovery39 [37]Advantage- is used in many midscreen combos to dash cancel into EnCDP
 GuardMidStartup6Recovery26+11Advantage-28 [-22]. This is a fairly tricky input to do and is mostly used in situations where Naoto has opened with a 5A
 GuardAllStartup6Recovery12Advantage-1, but it's entirely possible to also combo into his Rekka~B
 GuardAllStartup14Recovery22Advantage-10 and do good damage while carrying the opponent much farther into the corner. Lastly, Naoto's Overdrive is very strong and can be used to steal huge chunks of life off an opponent through some very easy combos, so don't be afraid to use it.
Overall, Naoto is both more and less difficult then he seems at first glance. You don't need to be performing hard, optimized combos with him in order to perform well in a match. It is still recommended that you become familiar with his dash cancels enough to take advantage of Enhancer, since many of the specials that benefit from it lead to easy combos with exceptional corner carry. All in all, focus on the basics and slowly build up your repertoire of harder mechanics.
Neutral
Anti-Air
Key Anti-Air Normals
| input | damage | guard | startup | active | recovery | onBlock | attribute | invuln |
|---|---|---|---|---|---|---|---|---|
| 5B | 550 | Mid | 8 | 3 | 18 | -4 | B | |
| 2A | 300 | Low/Air | 7 | 2 | 12 | -2 | F | |
| 2C | 850 | Mid | 11 | 6 | 22 | -11 | B | 7~13 H |
Naoto has at his disposal a good amount of normals that can work as anti-airs to protect himself for any aerial approarch or any opponent's attempt to reset pressure with an IAD. These normals are:
- 5B, which has good vertical range paired with a disjoint on the upper part of the kick
- 2C, which possesses Head invulnerability
- 2A, thanks to its low profiling hurtbox.
5B is an advancing fast kick aimed high with a disjoint on his leg. 5B's speed and angle allows Naoto to quickly cover his frontal air space with a disjointed hitbox to avoid IADes in pressure or falling air normals. However, 5B lacks any Head invulnerability during its duration, so it's best to use it as a preemptive anti-air normal.
2A is a low hitting kick with low profiling properties. 2A comes in clutch as a way to low profile air normals, so instead to hitting them, it makes the opponent whiff completely. Since its also self cancellable on whiff, 2A gives Naoto the capacity to target landing recoveries.
2C is Naoto's primary anti-air. Boasting great vertical damage, fast start-up and Head attribute invulnerability, 2C is Naoto's main way to make the opponent suffer from reckless air approaches. Although its horitzontal reach is extremely lacking, 2C has strong hitconfirms into damaging combo routes.
Grounded Footsies
The grounded neutral RPS Rock Paper ScissorsA situation wherein an attacker and a defender have options that only beat certain responses from their opponent. For example, on wakeup a defending opponent may use a reversal to stop an attacker from using an attack, but the attacker can also block to defeat the reversal. If the attacker blocks, the defender can use the opportunity to take the offensive.
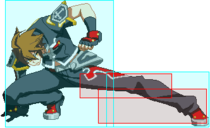
Take a note that Pain's Hitbox is much more smaller due to its Range check
| input | damage | guard | startup | active | recovery | onBlock | attribute | invuln |
|---|---|---|---|---|---|---|---|---|
| 5C | 800 | Mid | 12 | 4 | 18 | -3 | B | |
| 2B | 480 | Low | 8 | 3 | 15 | -4 | F | |
| 6B | 750 | All | 17 | 4 | 4+12 | -1 | H | 5~24 FT |
| 3C | 780 | Low | 11 | 4 | 17 | -4 | F | |
| 214A 8A | 0, 1426×2 | Unblockable (120) | 15 [5] | 5 | 28 | T | 1~19 HB [1~9 HB] |
Naoto is a mobility character. This means that Naoto is best rewarded when he stuffs extended hurtboxes (startup) and whiff punishes retracting hurtboxes (recovery), rather than challenging pokes head on. With that in mind, Naoto's neutral revolves around:
- Dashing 2B/3C - ate-waza. Use dashing normals to force your turn.
- Waiting 3C/5C - oki-waza. Use your long C buttons to cover space and hit extended hurtboxes.
- Reactionary Sway/6B - sashi-kaeshi. Use your attribute invulnerable moves to beat the moves your opponent uses.
Therefore, Naoto's neutral can be broken down into three options: Dash-in and attack, Attack preemptively, and Dodge and counter. This three options create a RPS situation, where Naoto is either forcing his turn with dashing normals, using his biggest normals to hit the opponent trying to get closer, or making the opponent's move to whiff and then Counter Hit them. Knowing how to properly use this options and how to avoid getting predicted increases the possibilty to get in and start Naoto's exhaustive pressure or to get a stray hit and deal great amounts of damage.
Drives and Enhanced Specials
Naoto's Neutral Tools
| input | damage | guard | startup | active | recovery | onBlock | attribute | invuln |
|---|---|---|---|---|---|---|---|---|
| 5[D] | 1350 | Guard Break 24 [34]/Barrier | 40 [28] | 5 | 18 | -1 | B | |
| 2[D] | 1350 | Guard Break 24 [34]/Low Barrier | 44 [32] | 5 | 18 | -1 | F | |
| 6[D] | 1500 | Guard Break 24 [34]/Barrier | 48 [36] | 6 | 17 | -1 | B | |
| 214D | 1000 | All | 15 [13] | 3 | 23 | -9 [-7] | B | |
| 214A | 39 [37] | 1~30 HBP [1~26 HBP] |
Naoto has at his disposal specific tools that he can use to get the most out of a neutral situation. These tools also double sometimes as specific match-up neutral tools, so learning how to use them properly will grant Naoto more opportunities to win the neutral and run his pressure.
EnKaid (En214D): One of Naoto's most used specials in neutral. It's fast, disjointed and travels about 3/4 of the screen. It allows Naoto to move quickly through the screen while covering himself with a large disjointed hitbox. Although the move is unsafe on block, the opponent won't be able to punish it unless Naoto ends point-blank to him. Against characters like ![]() Rachel, EnKaid allows Naoto to disable George
Rachel, EnKaid allows Naoto to disable George GuardStartup25RecoveryTotal: 49Advantage- while closing the gap between him and Rachel, and potentially hitting her trying to set up Lobelias
 GuardAllStartup11RecoveryTotal: 47Advantage-9.
EnSway (En214A): A strong tool that should not be abused of, since it has its weaknesses and improper use of it can dispose of the round. Loaded with 26 frames of invulnerabilty and travelling about 1/2 of the screen, EnSway is meant to be Naoto's response to opponents who like to zone and keep Naoto away from getting close. However, EnSway doesn't have Foot invulnerabilty, so large low pokes like ![]() Kokonoe 3C
Kokonoe 3C![]() GuardLow, MidStartup14Recovery15Advantage-1 or large pokes with Foot attribute like
GuardLow, MidStartup14Recovery15Advantage-1 or large pokes with Foot attribute like ![]() Kagura 2C
Kagura 2C![]() GuardMidStartup16Recovery23Advantage-9 will beat predictable EnSway approaches.
GuardMidStartup16Recovery23Advantage-9 will beat predictable EnSway approaches.
Charged Drives: Not as useful or common like the other listed tools, since all Charged Drives have lengthy startup, but they have their uses.
- 5[D]: The fastest out of all Charged Drives with 40 frames of startup. Since it's the fastest of all of them, it's the most used one. It's a large disjointed poke that covers 1/2 of the screen that can Guard Break, and if close enough, Naoto can cancel it into 214A > EnRekka~B for a combo.
- 2[D]: Has less use than 5[D] in neutral since its a little slower (44 frames of startup), but it comes with some differences. First of all, is a large disjointed low attack that can also cause Guard Break. Before throwing out the sword, Naoto will slightly move forward, giving it a little more range than 5[D]. Since Naoto charges the move crounching, it gives him some low profile hurtbox, yet it's not a reliable option.
- 6[D]: The slowest of the Charged Drives with 48 frames of startup, it's also the most dangerous of them. Naoto throws out a slice of blood in an angle that covers a great amount of air space, but that's not all this move has to offer. 6[D] is a Fatal Dtarter with 1500 of base damage and great proration. Landing it on neutral is practically impossible due to the startup, but if Naoto manages to land it, all routes deal over 5k damage.
Defense
Naoto has a plethora of reversals and half attribute invulnerable moves that can be used on wake-up and in response to your opponent's offense to exploit the gaps in their pressure.
Fully Invulnerable Options
Naoto's Invulnerable Reversals
| input | damage | guard | startup | active | recovery | onBlock | attribute | invuln |
|---|---|---|---|---|---|---|---|---|
| 623D | 700×2 [700, 450×4] |
Mid, All [Mid] | 9 | 3,10 [3,3,3,2,2] |
38+16 [29+16] |
-45 [-28] | B | 1~17 All |
| 632146B | 2000 [2400] {1800 [2160]} | All | 5+(50 Flash)+2 | 10 | 23 | -11 | B | 1~6 All 7~16 P |
| 632146D | 1300, 2719 {1300, 1900, 2200} |
All | 4+(40 Flash)+9 | 1 | 48 | -18 | B | 1~27 All |
These f1 full invulnerable reversals that will beat high commit meaties on wake-up are:
623D Inferno Crusader (air OK) - standard meterless option; fantastic startup and hitbox, but can be airdashed over before actives kick in.
632146B Divine Smasher (air OK) - horizontal reversal (startup only; projectile invul travel)
632146D Divine Reaper - 13f startup, most amount of invulnerability frames of the three options and great range. Will stuff backdashes on your wake-up to bait DP.
6A+B in blockstun - Standard CA. Fantastic vertical/horizontal hitbox, hardest to bait and difficult to stuff
Partially Invulnerable Options
Naoto's partially invulnerable moves
| input | damage | guard | startup | active | recovery | onBlock | attribute | invuln |
|---|---|---|---|---|---|---|---|---|
| 6B | 750 | All | 17 | 4 | 4+12 | -1 | H | 5~24 FT |
| 214A | 39 [37] | 1~30 HBP [1~26 HBP] |
||||||
| 214A 8A | 0, 1426×2 | Unblockable (120) | 15 [5] | 5 | 28 | T | 1~19 HB [1~9 HB] |
Naoto has access to half attribute invulnerable moves that have situational uses, like:
214A Shift Sway - Loses to throws and foot attribute moves. Has Head, Body and Projectile invulnerability. It is used as a neutral first response to gain frame advantage by making zoning attempts whiff, and potentially dash cancelling into either EnKaid/EnRekka(1) to press further advantage or cancelling into a risky reversal to beat Abare An attack during the opponent's pressure, intended to interrupt it. options.
- 214A~8A Phantom Pain - Shift Sway's follow-up, Phantom Pain has Head and Body invulnerability but it loses Projectile invulnerability despite Shift Sway having Projectile invulnerability.
Invulnerability on both moves start from frame 1.
6B - The complete opposite of Shift Sway, this carries invulnerability against Foot and Throw attribute, starting from frame 5 instead of frame 1
Offense
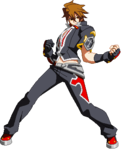
Naoto is a pressure oriented character, whose speciality is to stay in and open up the opponent's pressure with a frightening amount of staggers, pressure resets, fast lows and a standing overhead. Staggering pressure using jabs is Naoto's specialty, and consist of 5A GuardAllStartup6Recovery12Advantage-1, 5AA
 GuardMidStartup8Recovery14Advantage-1, 2A
 GuardLow/AirStartup7Recovery12Advantage-2, and 6B
 GuardAllStartup17Recovery4+12Advantage-1.
Frame Trap Pressure
Naoto's Basic Frametraps
| input | damage | guard | startup | active | recovery | onBlock | attribute | invuln |
|---|---|---|---|---|---|---|---|---|
| 5AA | 600 | Mid | 8 | 4 | 14 | -1 | B | |
| 5C | 800 | Mid | 12 | 4 | 18 | -3 | B | |
| 5D | 900 | Mid | 20 [18] | 5 | 18 | -2 | B | |
| 2D | 900 | Low | 22 [20] | 5 | 18 | -2 | F | |
| 236B | 700 | All | 13 | 3 | 17 | -3 | B |
Naoto's stagger is still stagger pressure, it relies on conditioning the opponent to block Naoto in the first place. Mashy people are an annoyance and need to be dealt first in order to switch to stagger and basic frametraps is the answer to this problems, the frametraps will also help you gauge your opponent's defense without taking too much risk.
Delaying your inputs is the bread and butter of frametraps, Naoto has safe and rewarding buttons with 5AA, 5C, his D buttons and EnRekka. However, you can pretty much use any button, 2A, 5B, 2B or 6B. Of course, making every button a frametrap isn't a very good idea as it makes it almost impossible to hit confirm, as such you will want press buttons in chains (e.g. 5A > dl.5AA > immediate 5B...). If you find out that the opponent still gets blown up by frametraps, it won't be necessary to switch to stagger pressure.
In the heat of the battle, it might be hard or too bothersome to manually delay your buttons, in this case you can use automatic frame traps to worry about other things such as the oven you might not have turned off. Some examples are:
- 5D/2D > 66EnRekka(1) being a 1-2f gap
- 5C > 5D being a 2f gap
- 5C > 2D being a 4f gap
- 5D > 2D being a 2f gap
- Most importantly 2D > 5D being absolutely un-mashable, having a 0f gap
Stagger Pressure
Naoto's Basic Pressure
| input | damage | guard | startup | active | recovery | onBlock | attribute | invuln |
|---|---|---|---|---|---|---|---|---|
| 2A | 300 | Low/Air | 7 | 2 | 12 | -2 | F | |
| 6B | 750 | All | 17 | 4 | 4+12 | -1 | H | 5~24 FT |
| j.B | 580 | High/Air | 9 | 6 | 13 | H | ||
| j.C | 900 | High/Air | 10 | 6 | 12 | H |
Now that you've determined that your opponent is actually willing to block a little of pressure, you can now switch to staggers in order to execute longer blockstrings. 5A, 5AA and 2A are your best buttons as they are fairly fast and very safe on block which are perfect to reset pressure with. 5A trades in Naoto's favor, 2A low profiles high hitting 5As, such as ![]() Ragna 5A
Ragna 5A GuardAllStartup5Recovery9Advantage0 or
 ![]() Jin 5A
Jin 5A GuardAllStartup6Recovery11Advantage-2 and 5AA beats mashing and has great reward as a Counter Hit starter. Due to being A buttons, they also cancel into throw for Throw Reject Miss setups.
Outside of the A gatling table, 5B and 5C both have jump cancel windows and good frame advantage, allowing Naoto to use air normals like j.B and j.C to force the opponent to block high or to reset pressure with a microdash button albeit riskier due to the higher pushback and hitstop.
All of those mixed in with the aforementioned basic frametraps in between, it can become very scary for the opponent to challenge Naoto's pressure. 6B can also be used to hard punish low as it beats all 2As abare attempts but its longer recovery and limited gatling option despite its good frame advantage (only -1) make it much easier to challenge.
Dash Cancel Reset
Naoto's Drive Pressure
| input | damage | guard | startup | active | recovery | onBlock | attribute | invuln |
|---|---|---|---|---|---|---|---|---|
| 5D | 900 | Mid | 20 [18] | 5 | 18 | -2 | B | |
| 2D | 900 | Low | 22 [20] | 5 | 18 | -2 | F | |
| 214A | 39 [37] | 1~30 HBP [1~26 HBP] |
All of Naoto's Drive normals are dash cancellable from frame 10 onwards, allowing Naoto to go for a pressure reset or to frame trap with Enhanced specials, like En236B. Be aware that Naoto can be hit during the dash cancel of the Drive if done predictably. Shift Sway (214A) can be used with the same purpose, since it's dash cancellable from frame 9 onwards and possesses partial invulnerability.
Rekka RPS Pressure
Naoto's Banishing Fang pressure
| input | damage | guard | startup | active | recovery | onBlock | attribute | invuln |
|---|---|---|---|---|---|---|---|---|
| 236B | 700 | All | 13 | 3 | 17 | -3 | B | |
| 236B 236B | 800 | All | 9 | 6 | 18 | -7 | B |
236B and its Enhanced version allows Naoto easily frametrap the opponent. A blocked 236B is -3 on normal block, which creates a RPS situation. The options Naoto has are:
Blocking: Low risk/low reward, protects against any kind of abare or DP attempt
Pressure reset: moderate risk/good reward, allows Naoto to keep his pressure up
236B236B frametrap: high risk/high reward, Fatal Counter starter, although 236B236B is -7 on block
Blockstrings
Staggers, Drive dash cancels, Banishing Fang frametraps
Naoto's blockstrings can be varied/altered in response to your opponent's blocking habits, either changing when to go for a pressure reset or modifying the pace of the staggers.
- 5A > dl.5A > 2A > 2A > 2B > 5C > (5D) > 214D
- 5A > 5AA > 5B > 6B > 236B > 2A>...
- 5A > 5A > 2B > 5B/C > IAD j.A > j.C > 2A > 2B > dl.5B > 6B > 214D/236B/Wait
- 5A > 2A > 5A > 5B > 2B > 3C > 236B/214D
- 5A > dl.5A > 2B > dl.5B > 5C > 5D > 2D > Wait
- 2A > 2A > 5A > dl.5A > 5B > 5C > 5D > 214D/(5Ddc > EnRekka(1)
- 2A > 2A > 2B > 5B > 6B > 236B > 2A > ...
- 2A > 2A > 2B > 5C > 2D > 236B/214A
- 2B > 5B > IAD j.A > j.B > 2A > 5C > 5D > 6D > 214A
- 2A > 5B > 665B > 5C > Jump Barrier > j.A>...
- 2A > 2B > 2A > 5B > Jump back > j.D/j.[D]
- 5A > 2A > 2B > 5C > 5/2D > Wait...
- 5A > dl.5A > 5AA > 5B > (5/2C) > Jump Barrier > falling j.B > j.C
- 2A > 5A > dl.5A > 5C > IAD j.B > j.C
- 5A > dl.5A > 5AA > 5C > IAD j.B > j.A > 5A > 2B > 5C > 2D/214A
- 2A > 5A > 5AA > 5C > 5D > 214Adc > EnRekka(1)
- 5A > 5A > 5AA > 5C > 5D > 2Ddc > EnRekka(1)>...
- 5A > 2A > 2A > 5B > 2B > 2D > 5Ddc > EnRekka(1)
- 5A > 5A > 2A > 5A > 5C > 5D > 6D > j.D/j.[D]
- 6B > dl.6B > 236B > 2A > 5A>...
Waiting after a Drive is also acceptable due to all his Drives being -2, and -1 on Barrier. This essentially means that Naoto doensn't need to commit to dash cancelling 5D/2D/214A into EnRekka(1).
Okizeme
Basic Meaty Options
2A/2B OR 214A~8A > 9dl.j.B
Naoto Relies on a few options in knockdown situations:
- (66)2A
- (66)2B
- j.B off Pain safejump
These options all cover the basic situations, but the ones notated with (66) are mainly to punish roll attempts into full confirms which makes an already risky option such as rolling, even riskier against Naoto. (66)2A/2B can catch forward roll attempts as they try to pass through him and j.B not only catches rolls but can catch delay tech as well. In an instance 2A/2B whiff Naoto can still be on top of his opponent, thus keeping them within his effective range and can put them back into the same knockdown situation.
Enhanced Slash Kaid Okizeme
Corner combo > Grounded c.EnKaid
The Enhanced version of Slash Kaid (214D) has the property of putting the opponent in a crumple state animation when hitting close. Moreover, it can also OTG The act of hitting the opponent when they are knocked down. Short for "off the ground" or "on the ground." to extend combos. His jab, 5A, has the ability to hit crounchers. Pairing these two moves, Naoto is able to create what's known as a re-stand, a situation where your opponent leaves a combo standing, negating all of his tech and wake-up options. This mix-up is character specific, however.
The video explains how this re-stand works, how to set it up and which characters are susceptible to this mix-up. Remember: Naoto doesn't need to set this re-stand every time, but it's important to note it's another option to add to his gameplan.
Tips and Tricks
Input Shortcuts
- Enhanced Banishing Fang: 2366B
- Enhanced Inferno Crusader: 6623C/D
- Enhanced Distortions: 6321466B/D
- Distortions out of Sway: 63214A66B/D
- Enhanced Fang out of 2D: 2[D]366B
- Enhanced Inferno out of 6D: 6[D]623C/D
- Astral out of Shift Sway: 214A2366C
- Tiger Knee'd Air Divine Smasher: Input a full circle + B (6321496B). Used occasionally in double Distortion routes outside of Overdrive.
- Enhanced Crusader on wake-up: 63263D
Edgedark's tweet showing off Enhanced Crusader on wake-up inputs: https://twitter.com/Edgedark_/status/1531436875399016448
Oniro (Burst Recap)'s tweet explaining Enhanced Crusader on wake-up: https://twitter.com/BurstRecap/status/1368209743219744770
Sway OS
The input is 2A (meaty) > 2B > 214A~8A~C. 2A is done meaty by buffering it. This OS is theoretically safe against an opponent unable to reversal faster than 12 frames.
How does this OS work?
- If the opponent does not reversal, the input buffer will cancel 2A into 2B > 5C since the entire Sway > Phantom Pain input is performed before 2B becomes cancellable.
- If the opponent reversals, 2A will whiff safely during the reversal's start-up. The 2B will not come out since 2A whiffed. Sway > Phantom Pain comes out and punishes the DP.
For a visual reference, visit this tweet: https://twitter.com/problem_skater/status/805372203445403648
Phantom Pain Fuzzy
Naoto can set up situations where he can "fuzzy" Phantom Pain. If Naoto manages to keep his opponent in stand block for long enough, he can use Phantom Pain to essentially unblockable them. There are several common Phantom Pain fuzzy setups:
- Timed on opponent's wakeup > 5D > 66 > EnSway~Pain
- Deep j.C, EnSway~Pain
- Jailing the opponent in the air > 214A > 66 > EnSway~Pain
By timing a Shift Sway (214A) or 5D on an opponent's wakeup and dash canceling it into Enhanced Phantom Pain (214A~8A), you can fuzzy the opponent as shown in this Twitter video. Fuzzy EnSway~Pain setups will lose to the opponent holding 3 (crounch blocking in the opposite direction), barrier blocking(???) and mashing crouching normals on wakeup.
On any hit with a deep j.C, Naoto can buffer Enhanced Sway to fuzzy them. This is one of the easier ways to set up the fuzzy as j.B > j.C is a relatively common jump-in for Naoto.
Jailing the opponent is also relatively common for Naoto. For clarification, jailing the opponent refers to catching an opponent in the air and keeping them in blockstun until they fall to the ground. If Naoto can successfully jail them, he can use Phantom Pain to catch them out of the air while negating their air options. This will lose to the opponent using Air IBB to push Naoto away. While the oppponent can still use options like air DP, double jump (height dependent), or Overdrive, Naoto recovers quickly enough to react to those options.
Rising j.A Fuzzy
IAD j.B>dlj.C>669>j.A>j.623C
In order to understand how this technique works, consider reading the following article: https://www.dustloop.com/wiki/index.php?title=F-Shiki
Naoto can set-up a fuzzy overhead thanks to j.C blockstun. In order to get the fuzzy j.A, you need to perform an IAD j.B>j.C. Make sure that j.B comes out as fast as you can, and then delay the j.C so it hits as low to the ground as posible. Once the j.C is blocked, Naoto can threat the opponent with his 2A, forcing them to block low, or he can go into a rising j.A, that will catch your opponent if he was expecting the 2A. This rising j.A should be microdashed in order to add consistency to the j.623C. If the rising j.A hits, Naoto can special cancel it into a j.623C to get a combo. Remember that this setup is susceptible to anti-airs, so remember to rotate and mix up all of your pressure options.
The rising j.A>j.623C works on everyone except ![]() Carl,
Carl, ![]() Izayoi,
Izayoi, ![]() Azrael,
Azrael, ![]() Kokonoe,
Kokonoe, ![]() Hibiki and
Hibiki and ![]() Mai. These characters can get hit by the j.A, but the j.623C will whiff. Against this characters, delay a j.C after the rising j.A hits, so you can loop the fuzzy setup, but your opponent can anti-air this falling j.C, so it shouldn't be overused. Doesn't work at all on
Mai. These characters can get hit by the j.A, but the j.623C will whiff. Against this characters, delay a j.C after the rising j.A hits, so you can loop the fuzzy setup, but your opponent can anti-air this falling j.C, so it shouldn't be overused. Doesn't work at all on ![]() Jubei and
Jubei and ![]() Es.
Es.
Fighting Naoto
Fighting Naoto relatively boils down to
- Having options that disallow him to function at his full potential/use certain tools that would be a boon in other MU's (i.e: Neutral/controlling air space)
- Being able to out neutral him and forcing him to make higher risks to get into a position where he operates best in
- Handling and knowing your way around Rekka RPS, Such as Fuzzy Jump against Delay Enrekka strings
- Being Arakune, which is the above three options exemplified on top of having a bad Hurtbox, making offense rather difficult--
When Defending against Naoto, your best friend in all honesty is System mechanics. Knowing what and when to Barrier, Utilizing IB against Rekka among other things. Being wary about his options/tools in situations on defense is also essential, mainly against Rekka and his Drive Pressure.
Firstly speaking about defending against him. Instant Block is actually one of if not the best option you have against Rekka more so than anything. Instant Blocking 1st Rekka makes it -6 instead of -3 thus heightening the risk of Rekka follow ups but still being apart of the RPS as a whole. What this does is allow the use of reversals if the Naoto continues the rekka after the first, either going into 2nd Rekka or potentially 2A/6B. If he doesn't continue, it can be your turn if you mash 5/2A against him, but keep in mind the RPS is still there.
In neutral, if a Naoto player Poorly spaces Enhanced Kaid, not only is it -7 but you're guaranteed a punish on instant block.
Against Drives it is a bit riskier due to them being -2. However, if there is a commitment into EnRekka from Sway Dash Cancel there is a 1-2 Frame gap as to where you can mash any invuln reversal or potentially mash, however the latter option carries far more risk.
Naoto Match-Up Chart
A useful chart where it's described each of Naoto's matchups, an important piece of information to improve your gameplan depending on the character your opponent chooses.
 Amane Nishiki [★]
 Arakune [★]
 Azrael [★]
 Bang Shishigami [★]
 Bullet [★]
 Carl Clover [★]
 Celica A. Mercury [★]
 Es [★]
 Hakumen [★]
 Hazama [★]
 Hibiki Kohaku [★]
 Iron Tager [★]
 Izanami [★]
 Izayoi [★]
 Jin Kisaragi [★]
 Jubei [★]
 Kagura Mutsuki [★]
 Kokonoe [★]
 Lambda-11 [★]
 Litchi Faye Ling [★]
 Mai Natsume [★]
 Makoto Nanaya [★]
 Mu-12[★]
 Naoto Kurogane [★]
 Nine the Phantom [★]
 Noel Vermillion [★]
 Nu-13 [★]
 Platinum the Trinity [★]
 Rachel Alucard [★]
 Ragna the Bloodedge [★]
 Relius Clover [★]
 Susano'o [★]
 Taokaka [★]
 Tsubaki Yayoi[★]
 Valkenhayn R. Hellsing [★]
 Yuuki Terumi [★]
Click [★] for character's full frame data
Essentials
• HUD •
Controls •
FAQ •
The Basics
• Movement/Canceling •
Offense •
Defense •
Gauges •
Universal Strategy •
Detailed & Advanced Information
• Damage/Combo •
Attack Attributes •
Frame Data & System Data •
Misc •
Archived Information
• Patch Notes • Tier Lists •
- Active Flow
- Advanced Input
- Attack Attributes
- Attack Level
- Astral Heat
- Auto Heat Gain
- Burst
- Barrier Block
- Barrier Gauge
- Bonus Proration
- Clash
- Combo Rate
- Counter Assault
- Counter Hit
- Counter Hit Carry
- Crush Trigger
- Danger State
- Distortion Drive
- Exceed Accel
- Fatal Counter
- Guard Cancel Overdrive
- Guard Crush
- Guard Bonus
- Hard Knockdown
- Heat Gauge Cooldown
- Instant Barrier
- Instant Block
- Negative Penalty
- Overdrive
- Overdrive Cancel
- Purple Throw
- P1, P2
- Rapid Cancel
- Same Move Proration (SMP)
- Starter Rating
- Super Flash Buffer
- Throw Reject Miss (TRM)
- Ukemi/Tech (Air)
- Ukemi/Roll/Emergency Tech
- Untechable State


