< GGACR
| Line 1,212: | Line 1,212: | ||
*The infamous Puddle. Most shadow combos end on this. It traps the opponent, granting Eddie some nice guaranteed damage if they don't have Burst | *The infamous Puddle. Most shadow combos end on this. It traps the opponent, granting Eddie some nice guaranteed damage if they don't have Burst | ||
*If they do have Burst and you think they are going to use It, walk back, let them whiff It and do {{clr|1|5P}}>j.khd | *If they do have Burst and you think they are going to use It, walk back, let them whiff It and do {{clr|1|5P}}>j.khd | ||
*Uses the | *Uses 100% of the Shadow Gauge | ||
'''Additional Frame Data''' ''Shadow Gauge starts recovering from 2F~. Shadow is fully invincible 12F onwards. Hitstop 6F. Stun modifier x0. Initial prorate 80%. Removes OTG state from opponent on hit. Traps opponent in place on hit. Opponent stays trapped for 175F max. Hits that launch opponent will end the trap effect, all other hits keep opponent trapped. If a crouching opponent gets hit by the trap, they'll be in crouching state while trapped, in all other cases they'll be trapped in standing state. Trap can only hit the opponent if they're inside the Shadow hole ???'' | '''Additional Frame Data''' ''Shadow Gauge starts recovering from 2F~. Shadow is fully invincible 12F onwards. Hitstop 6F. Stun modifier x0. Initial prorate 80%. Removes OTG state from opponent on hit. Traps opponent in place on hit. Opponent stays trapped for 175F max. Hits that launch opponent will end the trap effect, all other hits keep opponent trapped. If a crouching opponent gets hit by the trap, they'll be in crouching state while trapped, in all other cases they'll be trapped in standing state. Trap can only hit the opponent if they're inside the Shadow hole ???'' | ||
</div> | </div> | ||
Revision as of 16:31, 12 April 2022
Overview
Eddie, the shadow of the former head of the Assassin's Guild - Zato-1 - is an archetype-defining puppet character with a myriad of overwhelming offensive pressure. Eddie has unblockables, pressure for days, flight, and plenty of dual attacking options to deal with opponent's defensive options. Letting Eddie get the initiative is suicide and all of the pressure is placed on the opponent once Eddie gets in and runs his game.
On the flip side, Eddie is horribly weak defensively. When his shadow gauge is emptied, he must often run away, or contend with his overall subpar normals. He has the worst guts in the game with a bad defense modifier, a poor backdash, slower buttons, and no meterless reversal. His Dead Angle is barely passable and his reversal super is downright awful. Worse yet, Eddie's shadow can actually be killed if it's successfully poked out, meaning one wrong move is all it takes for Eddie to immediately lose all of his offensive threat.
Eddie is a character who wants to get in and stay on the absolute offensive, giving the opponent zero chance to breathe. If you can master his unconventional fighting style, then you'll learn to love the overwhelming offensive options Eddie brings to the table
![]() Eddie
Eddie ![]() Eddie is an archetype-defining puppet character with a myriad of overwhelming offensive pressure.
Eddie is an archetype-defining puppet character with a myriad of overwhelming offensive pressure.
Pros
Cons
- Strong Block Strings and Mixups: Offensive pressure that can can be looped, and can be made reversal safe.
- Low Commitment Zoning with Shadow: Eddie and his shadow can cover a variety of spacings and timings without putting themselves at much risk.
- Checkmate Scenarios: Practical unblockables with meter.
- High reward: Eddie often gets good damage, and strong okizeme options after a successful close-range hit.
- Great Movement Toolbox: Eddie has several unique tools such as Flight, a unique controllable airdash, Break The Law and swapping places with shadow. One can mix up your approaches a lot and cover oneself with the shadow to prevent anti-airs.
- Screen Control with Shadow: With shadow out, Eddie has access to long range lows, strong anti-airs, good mid-range pokes and high reward when up close. Eddie doesn't really have a position he doesn't want to be in with shadow.
- Poor Defensive Options: Eddie has below average health and defense stats, few (and bad) reversal options, including Dead Angle, poor abare, and poor punish options. Getting crossed-up by the opponent can also interfere with his shadow options. To compound the issue, getting hit or blocking unsummons the shadow.
- Flight Drawbacks It is more difficult to move out of the range of air throws than with a normal double jump and Eddie cannot block during flight.
- Needs Shadow: Without Shadow ready, Eddie is often described as "half of a character". The shadow is an essential part of his gameplan.
- Finnicky Lockdown: Shadow's limited movement speed can make it difficult to stop people from moving around.
Note: Eddie's unique control scheme requires significant investment to adjust to and his neutral game requires a lot of knowledge and confident control of his shadow.
Little Eddie attacks only when corresponding buttons are released not pressed.
With proper meter management and execution, Eddie is capable of attacking alongside the shadow for devastating simultaneous attacks. This gives Eddie his extensive offensive pressure game and allows tandem attacks to prevent escapes and multiple mixup opportunities per blockstring, with varying levels of punishment depending on how much meter is left. He can also spend 25% meter to extend his gauge further, and exclusive to +R, he can also perform a "Vice" summon, which gives the shadow a moveset closer to Eddie's XX and #R iteration, which is generally much stronger in the corner.
If it is emptied however, Eddie loses access to this shadow for several seconds, and cannot summon, leaving him susceptible to being stuck in a very bad defensive position. Proper control of this gauge is key. | |
| Damage Received Mod | |
| ×1.06 | |
| Guts Rating | |
| 0/5 | |
| Gravity Mod | |
| ×1 | |
| Stun Resistance | |
| 60 | |
| Prejump | |
| 3F | |
| Backdash | |
| 16F (1~7F Strike Invuln) | |
| Wakeup Timing | |
| 25F (Face Up)/ 22F (Face Down) | |
| Number of Jumps: | |
| 2 | |
| Number of Air Dashes: | |
| 1 | |
| Unique Movement Options | |
| Flight Break the Law Traversing | |
| Fastest Attack | |
| Reversals | |
Guilty Bits Character Intro
Normal Moves
StartupThe time before an attack is active. Written startup values include the first active frame, so the startup on a frame chart will display one less square than the written value. Frames
Active The active frames of an attack refers to the amount of time an attack can hit the opponent. Frames
InactiveFrames in the middle of multi-hit attacks which cannot hit the opponent, but are after the move has become active at least once. Frames
Recovery The recovery of an attack refers to the amount of time an attacker must wait before they may perform another action, even blocking. Frames
Special RecoveryThe recovery of an attack refers to the amount of time an attacker must wait before they may perform another action.Recovery frames which happen under abnormal conditions, such as after landing. Frames
ProjectileIndicates an entity that exists separately from the character has become active. Usually something like a Fireball A projectile which usually travels slowly across the screen in a horizontal path above the ground.. Active
CancelA window in which to cancel a move. Can be varied in usage. Window
5P


Total: 16
- Situational Anti-Air. Same follow up Combo as 6P
- Can be used to set up tick-command grabs.
- Whiffs on some smaller crouching characters.
- Slower than 2P.
Gatling Options: 2P, 6P, 5K, 2K, c.S, f.S, 2S, 5H, 2H, 5D,2D
Additional Frame Data Intial Prorate: 90%
5K


Total: 19
- Standing low, go-to low option in mixups.
- A lot of cancel options but none of them are low so double lows aren't possible (other than cancelling to drill)
- Very high proration. if you open them up with this it is usually better to end the combo quickly.
- Weirdly jump cancellable. Opens up mixup options with the controllable airdash
Gatling Options: c.S, f.S, 2S, 5H, 2H, 5D
Additional Frame Data Initial Prorate: 70%
c.S


Frames 9-10

Frames 11-13


Total: 22
- Primarily blockstring/combo filler
- A lot of cancel options, notably combos to 2D.
Gatling Options: 6P, f.S, 2S, 5H, 2H, 5D, 2D
f.S


1st Hit (Frames 6-8)

2nd Hit (Frames 9-10)

2nd Hit (Frames 11-13)

3rd Hit (Frames 14-16)


Total: 36
- Decent ranged poke
- Stuff>f.S>2S is a useful in blockstring to push opponent into 22H range
- Combos to 2D if within range.
- Cancel to 2H on air hit to knock the opponent away.
Gatling Options: 2S, 5H, 2H, 5D, 2D
Additional Frame Data 6f Histop. 16f CH Hitstun
5H


1st Hit (Frames 13-14)

2nd Hit (Frames 15-17)

2nd Hit (Frames 18-20)

3rd Hit (Frames 21-23)


Total: 38
- The only way to combo to drills solo.
- The third hit is not special cancelable
- If the opponent gets hit crouching in mawaru loops it can be cancelled to 236D to extend the combo without dropping it.
- Staggers on CH. Allows a combo to 5D if it does.
Gatling Options: 5D
Additional Frame Data Staggers on CH (Max 41f). Hitstop 7f.
6P


1st Hit (Frames 13-16)

2nd Hit (Frames 17-20)


Total: 32
- Go to Anti-air for airdashes
- Good upper body invul
- Upper body invul allows it to be a good pressure starter against DP characters since invul in tandem with shadow tanking a hit will cause DP to whiff
Gatling Options : c.S, f.S, 2S, 5H, 2H
Additional Frame Data Upper body invincible 1~16f. Initial Prorate: 90%.
6K


Total: 40
- Standing overhead, go-to overhead starter
- Special cancelable on block/hit
- Forces crouch on hit
- Although it has a less severe initial prorate than 5K and the route for overhead Mawaru loop deals more damage and reduces the RISC gauge less, rule of thumb is to end it early.
- Sometimes your shadow will get killed but your 6K will make it through. It will usually end up being a CH. You can cancel into drill on reaction or gatling into 6H if they are low on health.
Gatling Options: 6H
Additional Frame Data Initial prorate 75%. Forces standing opponent into crouching state on hit
6H


Frames 13-15

Frames 16-18

Frames 19-21

Frames 22-24

Frames 25-27


Total: 47
- Very large normal, good at covering a lot of space.
- Slow startup and bad hitbox means it must be used quite preemptively, and even then it can be hit.
- Special cancelable in the late frames, so canceling into Drunkard Shade (214S) can help make it more safe on block
- On CH, you are allowed to go wild. It's one of the few chances Eddie has to confirm his Overdrives.
Additional Frame Data Floats opponent on hit (Untechable for 28F) Can not special cancel after ???.
5D


Total: 52
- Slower overhead than 6K but can be used as a hail mary way of wasting time for the Shadow to recover.
- Can be confirmed into when Shadow is out
- Foot invincible and can be used to avoid some lows such as slidehead's projectile.
Additional Frame Data Feet invincible during move.
2P

Faster Jab with Slash Range.


Total: 16
- Eddie's fastest normal, decent hitbox, go-to close range poke
- Gatlings into 2D, making it a very crucial part of Shadowless Eddie's gameplan.
Gatling Options: 2P, 6P, 5K, 2K, c.S, f.S, 2S, 5H, 2H, 5D,2D
Additional Frame Data Initial Prorate: 80%.
2K


Total: 20
- A very good poke option. the speed/range ratio is really good, and it has a deceptively big hitbox.
- No hurtbox where leg is underground allows it to be used pretty creatively.
- Has a dead zone between Zato and the leg. Will whiff if used point blank.
- On CH It combos into 22S. On certain crouching characters and at max range, it also combos into 22H.
- Not a low despite appearances.
Gatling Options: f.S, 2H, 6H
Additional Frame Data Initial Prorate: 90%.
2S


Total: 28
- One of the best pokes Eddie has. The hurtbox is larger than the hitbox so it is easy to counterpoke.
- Combos into both drills on counter hit
- Common summon point but not guaranteed. The opponent can mash to kill Shadow.
- Has a dead zone in front of Zato, similar to 2K
Gatling Options: 5H, 2H, 5D
2H


Frames 11-12

Frames 13-14

Frames 15-16


Total: 35
- Ideal AA for when opponent approaches from high above you
- Counter hit grants hard knockdown
- Hitbox extends surprisingly far forward and down, allowing it to be used in conjunction with nobiru in the corner for pressure
Gatling Options: 2D
Additional Frame Data Floats opponent on hit (untechable for 26F)
2D


Total: 29
- Best way to end combos when little eddie is unsummoned as it grants hard knockdown
- Special cancleable on block/hit, so plenty of time to summon eddie and start oki, or drill to be safe on block.
- Jump cancelable so you can IABD away on block to run away. Also allows combo extensions with Shadow in the corner
j.P


Frames 5-6

Frames 7-8


Total: 15
- His Fastest air normal
- Mainly used for safe Air-to-Air and as part of the j.k>j.p>j.k flight cancel.
Gatling Options: j.P, j.K, j.S, j.H, j.D
Additional Frame Data Initial Prorate: 90%
j.K


Frames 6-8

Frames 9-11


Total: 19
- Your main Air-To Ground normal.
- The only jump cancellable normal.
- Used for Fuzzy guard mixups by cancelling to flight then immediately to another normal.
- Reverse gatlings to j.P
Gatling Options: j.P, j.S, j.H
Additional Frame Data Initial Prorate: 90%
j.S


Frames 7-10

Frames 11-14

Frames 15-18


Total: 30
- Hits directly below Eddie and swings upwards.
- Useful for crossups and IAD (9563) strings when cancelled to j.H
Gatling Options: j.H
Additional Frame Data Initial Prorate: 80%
j.H


Frames 11-13

Frames 14-16


Total: 28
- Primarily used as air combo fodder.
- Best normal to use for mine unblockables because it does not prorate if it hits first.
Gatling Options: j.D
j.D


Total: 38
- Good air to air hitbox.
- Knocks down on counter hit allowing a free summon and pressure if close to the corner.
- Uncancellable into any other normals or safe specials so it is often unsafe if blocked.
- The main way to end most air combos.
- Combos to j.41236S in the corner if the opponent is low enough.
- Will whiff on crouching characters (Except Potemkin)
Additional Frame Data Blows back opponent on hit (untechable for 30F).
Universal Mechanics
Ground Throw

- Does not grant as much reward as Damned Fang but is much faster so it is useful on defence
- Grants enough frame advantage to get a summon if they are thrown into the corner.
- It is possible to combo after if Shadow is summoned but the combo will be heavily prorated so it is usually not worth it.
Additional Frame Data Knockdowns. Forced Protate: 50%
Air Throw

- Doesn't grant much advantage plus unless you are in the corner it puts them at midscreen distance from you. So you don't get as much reward as ground throw but it allows a safe summon if they are far.
- Has the coolest animation of any air throw.
Additional Frame Data Knockdowns. Forced Prorate: 50%
Dead Angle Attack
- Very poor Dead angle. Uses 2H animation and hitboxes so it can be very easily low profiled. Plus it is quite slow and not much horizontal range.
- Inflicts significantly more untechable time on counter hit, but doesn't cause knockdown.
Additional Frame Data Fully invincible 1~21F. Throw invincible 22~36F. Floats opponent on hit (untechable for 20F). Initial prorate 50%
Specials
Invite Hell
22S or 22H

- Eddie's most important special. Mix up between this and summoning on block. Whenever you don't have Little Eddie out yet, everything you do will be done to make them block/get hit by this.
- Plus frames on block even solo, if done meaty it can be up to +28.
- Long knockdown if it hits, allows for a summon.
- Useful in neutral for screen control.
- 22H has Eddie's important FRC point during 12~13f that, when mastered, Allows repressure, set ups unblockables after certain knockdowns, as well as throwing it out more safely.
Additional Frame Data Knocks down opponent on ground hit. Eddie is in CH state from 1~26F.
Break the Law
214[K]

| Version | Damage | GuardHow this attack can be guarded. Throws have their throw range listed instead. High: High or air Faultless Defense Low: Low or air FD Mid: Any ground block or air FD |
StartupHow many frames it takes for the move to become able to strike the opponent. Startup includes the frame on which the move becomes active. | ActiveHow many frames for which the move has a hitbox where if the opponent touches it, they will take damage. Occurs after Startup. | RecoveryHow many frames that the move must go through after its active frames end to automatically go back to a neutral state. | On-BlockAlso known as Frame AdvantageThe difference between the attacker's recovery and the period that the opponent is in blockstun. This value is based on the first active frame. | Invuln | Level |
|---|---|---|---|---|---|---|---|---|
| Break The Law 214K |
Total 26~167 | 5~6F Upper Body 7~9F Above Knees 1~9F Throw |
||||||
| Followup 214K -> 41236S/63214S |
40 | High/Air | 10 for BtL+20 | 3 | 22+5 Landing | -13 | 1~2F Low Profile 3~8F Above Feet |
4 |
- Eddie takes a Dive Down, making him invincible during it while being able to move.
- Shadow is still controllable while Zato is underground.
- Has a lot of potential as a way to avoid opponents trying to make you block to force unsummons, and avoid aerial moves. But leaves Shadow unprotected.
- The longer you stay undergound the longer the resurfacing animation takes.
- Has a followup into Shadow gallery 2nd hit.
Additional Frame Data Upper body invincible 5~6F. Above knees invincible 7~9F. Throw invincible 1~9F Eddie is underground and fully invincible from 10F~ onwards. Eddie is in CH state when disappearing/reappearing. Can perform Followup Shadow Gallery while underground. Time spent underground affects recovery when reappearing: Time spent underground 1~59F: Total recovery 16F, throw invincible 1~2F, above knees invincible 1~4F, upperbody invincible 5~10F. Time spent underground 60~121F: Total recovery 24F, fully invincible 1~4F, throw invincible 5~6F, above knees invincible 7~8F, upperbody invincible 9~16F. Time spent underground 122F: Total recovery 36F, throw invincible 1~5F, above knees invincible 1~10F, upper body invincible 11~22F.
The followup version of SG from BTL which only does the second hit. Overhead and causes a sliding state on hit and knocks down.
- Is very strong in combos. It can be looped for as long as you have Eddie meter and puts the opponent in the right range for unblockables.
- While it is overhead it's not very useful as a mixup since BTL has no low option. You can pepper it is as a surprise when it is hard to see.
Additional Frame Data Low profile 1~2F. Above feet invincible 3~8F. Eddie is airborne from 7F onwards. Slides opponent on hit (untechable for 60F, slides for 36F)
Shadow Gallery
j.41236S

- Shadow Gallery is a strange special move. It does not have much utility in neutral, neither is it easy to use in combos.
- While it is strike invul until it reaches the ground it becomes vulnerable before it becomes active. It is also throwable throughout.
- Can be used to punish opponents trying to attack Shadow while you're in the air.
- Will cross up the opponent when used point-blank
- The first hit knocks down while the second hit doesn't. Most of the time you will want the first hit only.
- Aerial SG has an FRC point during 19~21f, making it less risky if you do whiff and always knocks down. You can often avoid using the FRC with the right combo but it is character specific.
Additional Frame Data Low profile 1~2F. Above feet invincible 3~8F. Eddie is airborne from 7F onwards. Slides opponent on hit (untechable for 60F, slides for 36F)
Summon Eddie
236P/K/S/H or 214H

No results
- To control the shadow, use either 7,4 and 1 to move it to the left and 9,6 and 3 to move it to the right.
- Eddie's main mechanic and defining trait. Your goal when solo is to get him out safely ASAP.
- Normal summon (236H) is generally preferred in neutral and midscreen
- Summoning with 236P/236K/236S will perform the corresponding Shadow move on the first possible frame.
- Vice summon (214H) is an alternate moveset for the shadow taking moves from older Guilty Gear titles. The moves are generally better than the normal summon when the opponent is cornered.
- Mixing up between drills and summon is your best option when making the opponent block solo. Drills bait escape options or abare and will knock down if successful and allow a free summon. Summoning will take advantage of when they are scared to press any buttons but normally will lose if they press buttons.
- Eddie's Shadow will take a hit if they are both in the same hitbox. You can take advantage of this to create reversal safe pressure, but it is generally advisable to keep the Shadow alive.
- If the shadow gauge runs out naturally, or the Shadow gets Hit, you will not be able to use it until the gauge fills again. (236D will not help you if Shadow is dead)
- Getting hit or blocking will automatically unsummon the Shadow.
- Use 236P/K/SH when Shadow is already out to unsummon. If you do this the Shadow Gauge will recharge faster than if dead, and you will be allowed to use without it needing to be completely full. Doing this will cancel any Shadow special being performed without recovery for the Shadow.
- Shadow is controllable from frame 12 if using 236H summon. Otherwise performs Traversing/Small/Anti-Air Attack as soon as possible.
Additional Frame Data Eddie is in CH state during entire move. Starts consuming Shadow Gauge during standby period. Shadow Gauge has a total length of 1000 points. When completely emptied, Shadow gauge takes 446F to completely refill. If summon command is repeated, Shadow disappears (Total 29F, no CH state). Shadow disappears 7F after entering command. Shadow Gauge turns white and recovers from empty to full in 286F after unsummon
Traversing Attack
]P[ with Normal Shadow

- The fastest move the Shadow has.
- It's invincible from startup through to the active frames and moves the Shadow forward a significant amount so it is very useful as a counterpoke and an approach tool.
- Very useful to move Shadow through attempts to kill him.
- Can be used to start pressure from far away with -P- > 22H > -K-
- Also Useful in the Dizzy MU since it can also kill her familiar.
- Uses 15% of the Shadow Gauge
Additional Frame Data Shadow is fully invincible 1~11F. Hitstop 6F
Small Attack
]K[ with Normal Shadow

- Mawaru! Eddie's shadow most important pressure tool. It vacuums them back to Eddie and allows him to continue his pressure game.
- Normally, Mawaru's 1st Hit won't naturally combo into the second against standing opponents (your opponent can backdash or do a reversal, so beware). CH Mawaru, however, does, so the damage is guaranteed.
- Mawaru will also juggle the opponent If you launched them previously (probably with 22S/22H), opening up nasty unblockable set-ups, which are discussed in the combo section.
- Uses 24% of the Shadow Gauge
Additional Frame Data Shadow is fully invincible 31~50F. Pulls in opponent on hit or block. 1st is untechable for 19F, 2nd hit for 23F. 1st hit has hitstop 6F, 2nd hit has hitstop 7F
Anti-air Attack
]S[ with Normal Shadow

- Nobiru! Extremely useful anti air and allows for painful juggle and 5D combos in the corner
- CH Nobiru wall bounces the opponent allowing Eddie to do Nobiru loops in conjuction of 2H and confirm his Overdrives.
- Uses 18% of the Shadow Gauge.
Additional Frame Data Shadow is fully invincible 26~32F. Wallbounces opponent on hit (untechable for 30F)
Shadow Hole
]H[ with Normal Shadow

Normal
Capture

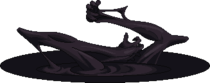
- The infamous Puddle. Most shadow combos end on this. It traps the opponent, granting Eddie some nice guaranteed damage if they don't have Burst
- If they do have Burst and you think they are going to use It, walk back, let them whiff It and do 5P>j.khd
- Uses 100% of the Shadow Gauge
Additional Frame Data Shadow Gauge starts recovering from 2F~. Shadow is fully invincible 12F onwards. Hitstop 6F. Stun modifier x0. Initial prorate 80%. Removes OTG state from opponent on hit. Traps opponent in place on hit. Opponent stays trapped for 175F max. Hits that launch opponent will end the trap effect, all other hits keep opponent trapped. If a crouching opponent gets hit by the trap, they'll be in crouching state while trapped, in all other cases they'll be trapped in standing state. Trap can only hit the opponent if they're inside the Shadow hole ???
Overhead Attack
]D[ With Normal Shadow

- Used to setup unblockables on Okizeme, mainly in conjunction with 22S and 22D
- Uses 62% of the Shadow Gauge
Additional Frame Data Shadow is fully invincible 28~36F. Hitstop 7F. Initial prorate 80%. Startup to hit a crouching opponent is 25F (tested on Sol). Is a projectile. Projectile appears on 14f.
Traversing
214P with Normal Shadow

- Swaps the placement of Zato and the Shadow. Not very useful. Can be used if the opponent likes to cross up to get the Shadow back in the right place. Also cancels any Shadow special which can be used for gimmicks.
- Uses 20% of the Shadow Gauge
Additional Frame Data Both Zato and the Shadow are fully invincible 1~16F Shadow appears on 16F. Shadow can be used from 20F~
Traversing Attack Vice
]P[ with Vice Shadow

Poke their shins!

- Also the fastest move this Shadow has, but even more so.
- Has less range so its only use is in mid to close range. Great for frame traps, and setting up 5D combos and tick throws.
- Uses 12% of the Shadow Gauge
Additional Frame Data Hitstop 6F
Small Attack Vice
]K[ with Vice Shadow

- OG Mawaru! This is the main reason you want to use Vice Shadow over the normal one. Puts them in blockstun for a very long time, allowing for mix-ups best suited in the corner.
- Uses 30% of the Shadow Gauge
Additional Frame Data Hitstop 6F
Anti-Air Attack Vice
]S[ with Vice Shadow

- Nobiru Again! Since it goes straight up, it's less useful as a pure Anti Air, but it makes up for it by being easier to combo from than Normal Summon's Nobiru in the corner (although you still lose on damage) and covering a blind spot for Eddie, which is right above him
- Uses 20% of the Shadow Gauge
Additional Frame Data Floats opponent (untechable on ground hit for 28F)
Drill Special Vice
]H[ with Vice Shadow

- Use this as you get the knockdown when the shadow is about to disappear to setup unblockables with j.H
- Uses the entire Shadow Gauge
Additional Frame Data Shadow transforms in 13F. Projectile. Untechable for 29F
Overhead Attack Vice
]D[ with Vice Shadow

Godlike in the corner, but please consider positioning in midscreen

- Exact same uses as its counterpart, although this one does it better than the default ]D[ since it is faster as well as doing a ground slam if it connects mid air, leading to a hard knockdown, and Vice Summon gets a lot of its damage from corner unblockables.
- Can also be used to maneuver the shadow, allowing it to potentially avoid pokes and projectiles
- Uses 30% of the Shadow Gauge
Additional Frame Data Initial prorate 70%. Slams down opponent on hit (untechable for 40F). Hitstop 6F
Drunkard Shade
214S

- Reflects projectiles thrown at Eddie
- A lot of his slow moves can cancel into Drunkard Shade, allowing him to continue combos and make them somewhat safe in the case of 6H.
- Throw invincible at the start. Great against characters with a command grab like Potemkin, Slayer, Sol or another Eddie.
- Since it's Throw invincible, and it wallbounces on CH, Drunkard is also your best option against throw happy opponents on their wake up.
- FRC point at 9~10f when you REALLY messed up after a 6H to make it more safe.
Additional Frame Data Throw Invincible during 1~18f. on CH (untechable for 80F). Reflects projectiles 3~18F
| Character | Move |
|---|---|
| |
| |
| |
| |
| |
| |
| |
| |
|


Damned Fang
623S

"Mysterious bubbles can capture so much."

- If the insane high-low mixup he has wasn't enough, he also has access to a fairly fast Command Grab. Use the aforementioned mix-up as well as tick throws with this in Tandem and your pressure will reach ridiculous levels.
- On its own, it's a pretty decent command grab, although somewhat slow. With shadow out, though, inputting this move normally will naturally make the Shadow do a Nobiru, guaranteeing your safety or giving you a CH Punish if they were mashing.
- The shadow can move freely while Zato is doing Damned Fang.
- If normal shadow is out, you can use Damned Fang, move the Shadow so it's placed away from the opponent, do -H-, and then make them land in the puddle or set up and unblockable with Vice's -H-.
- Damned Fang has a very generous FRC during the 7~10f after the opponent gets stabbed. This restores air options, allowing you to get an Air Combo going with an Air Dash to close a round. Midscreen you can use this to get much more advantage while still being near. Use 66[2] to space yourself out of throw range.
- If Shadow is not already summoned Damned Fang gives you enough frame advantage to summon and still get a meaty drill in the corner
Additional Frame Data Total recovery on whiff: 24F. Eddie is in CH state till end of recovery Forced prorate 50%.
Flight
7/8/9 while airborne

- Eddie's flight is one of his main features. Gives Eddie immense freedom in the air to waste time, change approach angles and timings and also gives him great mixup potential with flight cancel j.K or crossing up with j.S
- You CANNOT normal block nor IB while in Flight Mode.
- Can be cancelled with any air normals or FD.
- Using this tool in conjunction with Shadow -P- gives him an incredibly strong approach against grounded opponents. Using with -S- covers nearly the whole sky
Force Breaks
Drill Special
22D

- It covers the spacing between 22S and 22H.
- Only the first hit is low.
- Can be used to set up unblockables with both Shadow ]D[s. Or discourage approach with its large vertical hitbox.
- Guaranteed to stay active after frame 10, so If an opponent manages to hit you they might still take the hit.
- FRC Point during 22~23f. You need 50% meter but it allows you to pressure with both a Normal and Vice Mawaru if they block and making it safe if they go over it.
Additional Frame Data Knocks down opponent on ground hit. Eddie is in CH state from 1~31f. Is a projectile. Untechable for 29F
Exhaustion
236D

No results
- Restores one full Eddie meter worth (overcharging if there is any left for potentially up to 2 Eddie meters)
- Mainly used during both Shadow's ]K[, allowing him to Continue his mad offense
- Allows him to restart pressure even after a full combo.
- Exhaustion will NOT work if the shadow gauge is on red.
Additional Frame Data
- Restores 1000 points to shadow gauge on 13F.
- Eddie is in CH state during move
Overdrives
Amorphous
632146H

Everyone will forget it's air unblockable

- Your only true reversal tool.
- Air unblockable so while it can be used to anti-air it is a lot of meter to spend for one.
- Has a very infamous blind spot in between Eddie and the super. Don't do this if they are too close.
Additional Frame Data Fully invincible 1~17F. Throw invincible 18~29F. Floats opponent on hit. 1st hit on ground hit is untechable for 28F. 2nd hit is untechable for 25F Eddie is in CH state from 1~29F Hitstop 0F. Chip Damage x2. If Eddie is hit, Amorphous disappears. Destroys projectiles
Executor-X
j.236236S

- Metered combo ender for his aerial strings. Gets a knockdown from aerial hits which normally isn't possible for Eddie without specific combos.
- Hold S to not do the followup hit. Still knocks down but gives you more frame advantage in exchange for much less damage.
- Leaves Eddie right next to the opponent after recovery.
Additional Frame Data Strike invincible 3~17F. 1st hit floats opponent (untechable for 90F). 2nd hit only happens if 1st hit hits (not blocked/whiffed). 2nd hit slams down opponent on hit, fully untechable. Hitstop 0F. Eddie is in CH state till end of recovery. Eddie reappears from the floor during recovery. During reappearance animation: invincible above knees 1~10F, upper body invincible 11~22F
Instant Kill
Black in Mind
During IK Mode: 236236H

- Like all IKs, best reserved when you get them Dizzied or when you are fighting A.B.A
Additional Frame Data IK Mode activation time: 68F. During IK activation: above knees invincible 9~60F. During IK attack: strike invincible 9~28F
Colors
Default P

Default K

Default S

Default H

Default D

EX P

EX K

EX S

EX H

EX D

Slash P

Slash K

Slash S

Slash H

Slash D1

Reload P

Reload K

Reload S

Reload H

Reload D1


Gold2
Shadow2


To select your color, press the corresponding button while in the designated "color set". Color sets can be toggled through by hitting the Respect button.
- Only selectable on the Arcade and PC-Rollback versions of the game.
- Available on home ports, and are selected by pressing the Rec. Enemy button on the Slash or Reload color sets, respectively. Gold characters are powered up versions, Shadow characters have infinite tension. Both are banned from tournament play.
External References
To edit frame data, edit values in GGACR/Eddie/Data.
A.B.A
Anji
Axl
Baiken
Bridget
Chipp
Dizzy
Eddie
Faust
I-No
Jam
Johnny
Justice
Kliff
Ky
May
Millia
Order-Sol
Potemkin
Robo-Ky
Slayer
Sol
Testament
Venom
Zappa
Systems Pages