

A flick of the wrist and you're dead, baby
< GGACR
Overview
Overview
I-No is difficult to control and has great potential when mastered. Her biggest strengths are her explosive damage combined strong high/low mixup options. In place of her ground dash she has a unique hoverdash that makes her airborne, allowing her to use her aerial moves low to the ground for greater speed. When she makes an opponent block a multi-hit music note projectile either on knockdown or from neutral she can safely utilize her strong mixup options, and she can generally get unprorated damage if she has meter for optimal routes. This grants I-No some of the most dangerous okizeme in the game, which means she also has explosive comeback potential.
I-No possesses weaknesses to offset her strong oki game, the biggest of which is the complexity of her neutral game. While her hoverdash is amazing for high/low mixup it is incredibly prohibitive for movement and pressure. Her normals and special moves are typically good at one specific job so you will be forced to guess more often than with other characters who can cover a lot of options with a few moves. Though her defense isn't as low as other characters such as Millia, I-No is just as susceptible to being dizzied. Eating a single counterhit from some characters can end the round in a loss, which discourages you from taking certain actions and can make you more predictable. Finally, she tends to struggle in matchups against characters who can consistently commit less than her in neutral.
That said, landing a well placed counterhit in neutral, confirming the full combo, and succeeding on oki with an unproated normal can be enough to destroy squishy characters. Alternatively, if you can win neutral in even a small way to begin your offensive snowball I-No can reward you with repeated use of some of the most dangerous mixup and reversal baits in the game. Her mixup has more holes than Dizzy and Millia but you get way more damage when successful.
Just how difficult is the character?
 |
| Damage Received Mod |
| ×1.06 |
| Guts Rating |
| 1/5 |
| Gravity Mod |
| ×1.05 |
| Stun Resistance |
| 55 |
| Prejump |
| 3F |
| Backdash |
| 16F (1~11F Strike Invuln) |
| Wakeup Timing |
| 24F (Face Up)/ 21F (Face Down) |
| Number of Jumps: |
| 2 |
| Number of Air Dashes: |
| 2 |
| Unique Movement Options |
| Hover Dash |
| Fastest Attack |
| 5P (4F) |
| Reversals |
| 632146H (9F) |
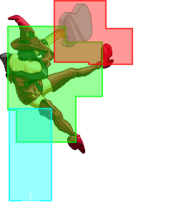
![]() I-No is a tricky character who can fight from just about any range to secure knockdown or note pressure, then uses her strong high/low mixup tools to crack her opponent's defenses and score a high damage combo.
I-No is a tricky character who can fight from just about any range to secure knockdown or note pressure, then uses her strong high/low mixup tools to crack her opponent's defenses and score a high damage combo.
Pros
Cons
- Vicious Mixups: Hoverdash for quick high/lows, TK overhead options, j.D and all of its associated techniques give I-No great overhead opportunities to condition opponents.
- Versatile Toolkit: HCL
 GuardAllStartup11Recovery12+8 after landingAdvantage+3 is a projectile reaching 2/3 screen that negates 1 hit of other projectiles while passing through them and remaining active. Note
 GuardAllStartup19RecoveryTotal 50Advantage-11 can be controlled vertically and gains hits the longer it's on screen. Overdrives are safe on block and typically grant a full conversion on hit.
 - High Tension Efficiency: I-No's hoverdash builds more meter than a standard forward dash. Her STBT and Dive special moves build lots of Tension on contact. She frequently only needs to spend 25% to reset pressure or start big conversions.
- Explosive Damage: Using optimized character-specific combos, I-No can deal incredibly high amounts of damage to the entire cast. She can also convert at surprising ranges thanks to HCL 6FRC6, though this requires tight execution.
- Superb Aerial Mobility: I-No has two air dashes and Sultry Performance to help her move around the upper half of the screen. FB Sultry Performance even restores her air options.
- Strong Backdash: Having the fourth longest total backdash invul in the game allows her to escape some situations other characters can't escape with their backdash.
- Hoverdash Restrictions: It has 9 startup frames, which creates difficulties in escaping some situations, inhibits certain types of pressure and weakens her throw game.
- ★High Execution Barrier: I-No has hard combos and advanced movement, which can make learning and piloting her difficult. Her low defensive stats make it very easy for her to blow up off of a single mistake.
- Low Midscreen Damage: Does little damage without spending meter or scoring the right Counter Hit at midscreen.
- Tricky & Committed Neutral Game: I-No's normals all have specific uses and often have a number of weaknesses baked into them, such as her lows not reaching low enough to crush low-profile moves. I-No's most difficult matchups tend to be the ones where her opponent can reliably commit less than her while also covering many of her options. This can come up against characters who have strong air tools since I-No cannot self-gatling on whiff with her j.P, and has the worst airthrow range in the game.
- Fragile: I-No has low defense, low guts, and low stun resistance. She may last longer than other squishy characters on average, but she struggles with being killed easily in some matchups. A particularly bad counterhit can instantly stun her.
Note: Tips for playing I-No on a leverless device (Hitbox) can be found by clicking this link. This is often considered very difficult, however like many other things on this character it is fine after some practice. A catalogue of all of I-No's advanced techniques with explanations can be found here. This is not required for starting with I-No, but will be a good reference for learning how to perform these techniques.
Unique Mechanics
Hoverdash
Hoverdash
I-No's dash is completely unique in that it makes her airborne starting on frame 4. The earliest she can act is on frame 10. Letting go of the dash will cause I-No to drop to the ground in an actionable state.
While I-No's hoverdash can be tricky to get used to, successful operation allows her to endlessly loop mixup attempts and go for shockingly fast instant-overheads. More information on how to use
- The fastest you can land is on frame 20, even if you whiff a normal (like j.H) to try to land faster.
- Hoverdash expands her hurtbox in all directions except down. She actually lifts significantly on frame 4, allowing her to dodge many low attacks.
Starter Guide
Need help getting started? Go to this page for information targeted at new players. It covers easy combos, key moves, and what to do after you knock the opponent down.
StartupThe time before an attack is active. Written startup values include the first active frame, so the startup on a frame chart will display one less square than the written value. Frames
Active The active frames of an attack refers to the amount of time an attack can hit the opponent. Frames
InactiveFrames in the middle of multi-hit attacks which cannot hit the opponent, but are after the move has become active at least once. Frames
Recovery The recovery of an attack refers to the amount of time an attacker must wait before they may perform another action, even blocking. Frames
Special RecoveryThe recovery of an attack refers to the amount of time an attacker must wait before they may perform another action.Recovery frames which happen under abnormal conditions, such as after landing. Frames
ProjectileIndicates an entity that exists separately from the character has become active. Usually something like a Fireball A projectile which usually travels slowly across the screen in a horizontal path above the ground.. Active
CancelA window in which to cancel a move. Can be varied in usage. Window
Normal Moves
5P


| Damage | Guard | Startup | Active | Recovery | On-Block | Invuln |
|---|---|---|---|---|---|---|
| 12 | Mid | 4 | 4 | 6 | 0 |
Total: 13
A short, quick jab that whiffs against people crouching, but is a great situational anti-air. The combination of the very fast startup, lack of extended hurtboxes during startup, 4 active frames that are highly disjointed, and low recovery (with only 2 extended hurtbox frames during recovery) make this an amazing normal to use in neutral.
- You can chain several hits of 5P if you want to burst bait before starting your air combo.
- On block you can go into any of I-No's other moves or jump cancel, so her high-low mixup is on the table.
- An excellent normal to throw out when you want to preempt your opponent and stuff their pokes that have extended hurtboxes during startup frames.
- 5P is an effective anti-air when used properly.
- If your opponent jumps in with a deep/late air-to-ground to beat I-No's 6P, hit them first with this frame-4 move. If they start their jump-in earlier to beat a 5P, 6P will then work.
- If they try to feint a landing to bait 6P and double jump into their normal, they open themselves up to airthrow or 632146S. When both 5P and 6P fail against an opponent's air normal, 5K may be able to do the job.
Gatling Options: 5P, 2P, 6P, 5K, 2K, c.S, f.S, 2S, 5H, 2H, 6H, 5D, 2D
| FRC Window | Proration | Guard Bar+ | Guard Bar- | Level |
|---|---|---|---|---|
| N/A | 3 | 8 | 1 |
- Burns 5.5% meter when blocked with FD
5K

Kickin' your can all over the place


Frames 7-9

Frames 10-13


| Damage | Guard | Startup | Active | Recovery | On-Block | Invuln |
|---|---|---|---|---|---|---|
| 20 | Mid | 7 | 7 | 12 | -7 |
Total: 25
Her staple move for comboing into 632146K (Horizontal Chemical Love/HCL) when 5H isn't possible. Necessary for many combos and gatlings to most normals.
- Good mixup tool as the jump cancel lets you go into j.236K/S or j.D FDC for overhead options, or you can manual jump install and gatling to 2S/2D for low options.
- 5K > JI 632146K 6FRC6 is the standard punish after an opponent bursts badly. The long active frames will catch them falling so you don't drop your burst punish, but you can also use them to catch backdashes.
- Tricky to use as a poke, but highly effective when used right.
- I-No extends her hurtbox forward during startup, the hitbox shrinks inside the hurtbox for the last 4 active frames, and her hurtbox remains extended during recovery.
- If your opponent doesn't respect you and mindlessly pushes the wrong buttons in neutral, you can control space with the active frames and let them stick their startup hurt boxes into this attack, but if your opponent knows the matchup, or is mindlessly pressing the right buttons, you'll get blown up.
- I-No lifts her leg off the ground which could potentially dodge lows at the right range, but her leg can easily whiff over the opponent since the hitbox is so high. This move is an Anti-Air, not a low crush.
- From an air-CH up close you can confirm into TK j.236P, and if they're far away you can confirm with IAD j.H, with both setups leading to beefy meterless damage.
- From a ground hit, you can usually link 632146K for a 6FRC6 conversion, but some characters recoil in a way that prevents this setup at max 5K range even with the counter hit, and this wont work vs crouching either. If they're close enough you can manually JI and use 2D to float them into the 632146K to get your conversion. Otherwise all you can really do is link 2S for more damage or jump/special cancel and go for a possibly unexpected mixup.
- I-No extends her hurtbox forward during startup, the hitbox shrinks inside the hurtbox for the last 4 active frames, and her hurtbox remains extended during recovery.
- Fun fact: this move can actually dodge Slidehead during it's first 2 frames, but from my testing it's not actually airborne. Her hurtbox rises slightly on those frames, but not quite enough to dodge other low attacks like Slayer's 2H, so this is extremely situational.
Gatling Options: 6P, c.S, f.S, 2S, 5H, 2H, 5D, 2D
| FRC Window | Proration | Guard Bar+ | Guard Bar- | Level |
|---|---|---|---|---|
| N/A | 6 | 7 | 2 |
- Burns 7.5% meter when blocked with FD
c.S


Frames 6-7

Frames 8-10


| Damage | Guard | Startup | Active | Recovery | On-Block | Invuln |
|---|---|---|---|---|---|---|
| 34 | Mid | 6 | 5 | 9 | 0 |
Total: 19
Combo tool and block string poke that can lead to a high/low mixup using jump cancel to overhead (TK j.236K/S, j.D, etc), or cancel into low (2S, 2D, 41236S.
- Because it has 5 active frames, you have a little wiggle room to delay your chain and create a frame trap. c.S > delay 5H can lead to huge unprorated damage if they bite.
- It's not advised to try to antiair with this move due to the risk of accidental f.S, but it can work.
- Be wary that the range at which the game considers your 5S press "close" is relatively short, which can cause you to get f.S at nearly point-blank range and drop your combo.
- This is more common in the corner after an airthrow. Walk forward 1-frame before using c.S or go for 2K > c.S to work around this problem.
- There is a dead zone where f.S will activate, but whiff because you're too close... or because c.S doesn't activate from far enough away.
Gatling Options: 6P, f.S, 2S, 5H, 2H, 5D, 2D
| FRC Window | Proration | Guard Bar+ | Guard Bar- | Level |
|---|---|---|---|---|
| N/A | 10 | 7 | 3 |
- Burns 11% meter when blocked with FD
f.S


Frames 19-20

Frames 21-23

Frames 24-26

Frames 27-29


| Damage | Guard | Startup | Active | Recovery | On-Block | Invuln |
|---|---|---|---|---|---|---|
| 32 | Mid | 19 | 11 | 1 | +5 |
Total: 30
A great mid-range poking tool with excellent recovery. It's somewhat spammable, raises guard bar considerably (which is unusual for projectiles), nullifies single hit projectiles, and launches on hit.
- It's worth setting up frame traps with this move if your mixup attempt is blocked since it's +5 by default.
- Use this from far away to force the other player to go over or under it, then stuff that option with the appropriate normal (5H/2H if they go low, 6H or j.P if they IAD).
- If you're close enough that the first active frames would connect, you're probably too close to poke with this unless you already have the initiative (frame advantage or knockdown).
- I-No typically uses 2S the way a lot of characters would use their f.S.
- Sometimes you'll opt to f.S on oki instead of using a note due to the time you have to set up. If the last few frames connect, you'll have so much frame advantage that you can dash in for your mixup with less fear of your opponent countermashing.
- At best +15 on normal block
- Your opponent would need to IB and counter-mash with a sufficiently fast normal (learn the matchups where you have to watch for this) or commit to a wakeup-invul move that you can bait.
- Occasionally a late f.S on oki will catch inexperienced players because it lingers longer than it looks like it should, so you should be ready for a non-CH confirm.
- Even when done properly on oki there would be a gap when you try to run your mixup, so work in frametraps to enforce respect here too.
| FRC Window | Proration | Guard Bar+ | Guard Bar- | Level |
|---|---|---|---|---|
| N/A | Forced 60% | 14 | 6 | 4 |
- Untechable on CH for 80F
- Projectile
- Burns 10.5% meter when blocked with FD
5H


Frames 13-14

Frames 15-16


| Damage | Guard | Startup | Active | Recovery | On-Block | Invuln |
|---|---|---|---|---|---|---|
| 37 | Mid | 13 | 4 | 18 | -3 | 11~18F Feet |
Total: 34
Solid combo tool, explosive when you score a counter hit.
- Ground CH leads to a big beefy meterless combo now that you can jump cancel 41236H.
- This move also has enough hitstun that you can TK j.632146K from it, to attempt the "easier" version of 6FRC6 while you're still building your execution.
- When you're optimizing for damage you'll want to look for more ways to use this move since it's among I-No's higher damage attacks, and as a lvl 5 move it scales well.
- Now that 6P has a forced prorate you'll get more damage on 632146K 6FRC6 combos by skipping directly into 5H where possible (such as from c.S or 2S) and with jump install you can combo with JI 632146K 6FRC6 combo.
- Learn to frametrap into this move, and you can also try to crush your opponents' low hitboxes, but don't count on it to "just work" because of the airborne frames.
- She's not that high off the ground, but it's "good enough" to help her beat some normals in some matchups.
- Can be used against moves like Slayer's 2H, but it only barely makes a difference at max range vs his 2D. Can also help to blow up Slidehead from long distances.
- It's not all that fast and it has long recovery, so you can't throw it out mindlessly. Control space with your other moves, then crush low attempts with this move.
- This is one of I-No's better hitboxes, but she does extend her hurtbox forward slightly during startup.
- She also extends her hurtbox upward during startup, which is less of an issue since you don't AA with this move, but is still relevant in some matchups (EX: May's vertical dolphins may accidentally catch you using 5H).
- She's not that high off the ground, but it's "good enough" to help her beat some normals in some matchups.
Gatling Options: 2H, 5D, 2D
| FRC Window | Proration | Guard Bar+ | Guard Bar- | Level |
|---|---|---|---|---|
| N/A | 20 | 6 | 5 |
- Burns 11.75% meter when blocked with FD
5D


First active

Mid travel

Maximum range


| Damage | Guard | Startup | Active | Recovery | On-Block | Invuln |
|---|---|---|---|---|---|---|
| 15 | High | 29 | 12 | 7 | -5 |
Total: 47
Used to be a decent corner mixup tool in AC at 25 frames, but in +R the startup time was nerfed heavily to 29 frames, making it easily react-able and susceptible to counter attacks before its active frames. Despite the range, this move is not a projectile and can be RC'd on hit or on block. Also, I-No is a goddamn contortionist if you look at the animation for this move.
- Unless you run into an opponent who doesn't have the recognition to block this, you should rarely use it just for the overhead property.
- It's worth using this as a zoning tool rather than trying to mix up your opponent with it, since it's active for a surprising duration and the hitbox is pretty wide.
- Use it when it's "safe" to do so, just to give your opponent one more thing to watch for. This makes it that much harder for them to block you in neutral or on defense.
- I-No extends her hurtbox forward slightly on startup, so the "safe" range really is from far away where you'd think no one would ever get hit.
- Use at around 2/3 screen distance when you read that they'll dash in (especially if you control space above them with a note), or time it meaty on oki if you think they're asleep, or occasionally in pressure strings when you're at long range (such as after 2S).
- When they think they can dash under max range 632146K to punish you, that's when this works.
- Be wary in some matchups as it's too risky to throw out 98% of the time (EX: Pot can Hammerfall through it, Baiken can terminator run through it, etc.).
- Even though the hitbox is big, there's zero reward on air hit (even on CH, though you can RC and link 5K > JI 632146K > 6FRC6 if you have 75% to burn), and due to scaling it doesn't lead to the greatest meterless damage unless you've cranked their GB. This also contributes to the move not being great to throw out.
- Use it when it's "safe" to do so, just to give your opponent one more thing to watch for. This makes it that much harder for them to block you in neutral or on defense.
| FRC Window | Proration | Guard Bar+ | Guard Bar- | Level |
|---|---|---|---|---|
| N/A | 8 | 20 | 3 |
- Burns 6.25% meter when blocked with FD
6P


| Damage | Guard | Startup | Active | Recovery | On-Block | Invuln |
|---|---|---|---|---|---|---|
| 28 | Mid | 9 | 3 | 21 | -10 | 1~4F Upper Body 5~11F Above Knees |
Total: 32
6P has great upper-body invincibility and will be your most often used anti-air. It's also a staple in combos since it launches on hit, setting up most of her meterless air combo routes.
- Since the hitbox is out in front of I-No, this move is effective ground-to-ground when you want to blow clear through enemy pokes that don't reach low enough to hit I-No's legs. The long recovery makes this risky on whiff, but when successful you can generally confirm into f.S or 5H to get a combo going.
- Since this hitbox is low to the ground, you'll find some characters can space their jump ins such that their hurtboxes remain too high to make contact with, so they'll land and block before this move hits them.
- As an example, Sol can do this with j.P and j.H. You'll have to work around this with IB > ground throw, preemptive airthrow, preemptive j.P, or 632146S when you encounter an opponent who spaces their jump ins correctly, but if they're off by a little bit you can still tag them.
| FRC Window | Proration | Guard Bar+ | Guard Bar- | Level |
|---|---|---|---|---|
| N/A | Forced 90% | 10 | 7 | 3 |
- Burns 9.5% meter when blocked with FD
6H

Wavin' your banner all over the place


1st hit (Frame 7)

2nd hit (Frames 15-16)

2nd hit (Frames 17-18)

2nd hit (Frames 19-20)

2nd hit (Frames 21-22)


| Damage | Guard | Startup | Active | Recovery | On-Block | Invuln |
|---|---|---|---|---|---|---|
| 20, 52 | Mid | 7 | 1(7)8 | 17 | -6 |
Total: 39
6H is a situational poke that shines when used on players who try to instant air dash on I-No. Its arc is more than a complete 180 degrees starting at her feet and culminating a little past the back of her head. 2 hit strike, hitting early upon startup at 7 frames, and then again during its arc, so missed throw attempts will auto option select into a move with decent startup and a disjointed AA hitbox.
- If you're using this move in neutral you're typically fishing for an anti-air CH, which can be followed up by a meterless corner carry combo.
- The extra hitstop on air counter-hit sets up for a meterless corner carry air combo, but a ground CH (2nd hit) staggers so you'll generally need to spend meter to get a reward off of that (typically via 632146K 6FRC6).
- It has a special late gatling (which can be performed on whiff) to 5K that can let you confirm in the corner when the first hit connects and combos into the second, or if the second hit connects raw but wasn't a CH (both instances will require meter but lead to unprorated damage).
- This move is very high risk due to the long total duration, but can be worth using if you control space well with I-No's other normals.
- If your opponent tries to IAD on you and you have the precision to snipe them out of the air with 6H (2nd hit), it's worth the reward.
- It's also worth discouraging your opponent from IADing in mindlessly since it keeps them on the ground where your much safer 5H/2H options are effective.
- In most matchups you're better off going for a safer option like j.P or reactionary 6P, but in some matchups you'll get away with 6H more than you would expect.
Gatling Options: 5K
| FRC Window | Proration | Guard Bar+ | Guard Bar- | Level |
|---|---|---|---|---|
| N/A | 14, 20 | 6×2 | 4, 5 |
- Staggers on ground CH (max 35F)
- Can gatling into 5K after 20F
- Burns 7.5% meter when blocked with FD for first hit, 15.5% for second
2P

Blow him a kiss, and you're mad


| Damage | Guard | Startup | Active | Recovery | On-Block | Invuln |
|---|---|---|---|---|---|---|
| 10 | Mid | 5 | 2 | 6 | +2 |
Total: 12
Quick mid with frame adv that is your main go-to for setting up tick throws.
- This move actually doesn't have all that big of a hitbox, so it's pretty situational as a poke. 90% of the time you have a better option. You're pretty much only going to use this to set up traps and pressure, or for specific whiff punishes.
- You'd use it when 5P is too high and 2K is too low, but also when 6P is too slow and risky (since it does a better job of covering that space).
- Use this for whiff punishes where you would normally use 2K, as 2K prorates slightly harder.
- Example setup: Sol uses Bandit Bringer and you perfectly time a 2K under it. There are exactly enough frames to go for 2K or 2P in that scenario, and since Sol is crouching under 5P during those frames, 2P is your best damage punish if your timing is on point (otherwise you would throw him).
- Tick throw from this until they decide they don't want to be thrown anymore, then frame trap from it.
- This gatlings to 2H with a 1-frame gap, so you can frame trap players who like to mash after conditioning them with tick-throws
- You can gatling to 2S to catch players who try to jump when they expect the tick-throw.
- 2P > slight delay 632146K could also be used to great effect as a frametrap for huge meterless damage in the corner if you think your opponent will try to throw you out of your own tick-throw setup.
Gatling Options: 5P, 2P, 6P, 5K, 2K, c.S, f.S, 2S, 5H, 2H, 5D, 2D
| FRC Window | Proration | Guard Bar+ | Guard Bar- | Level |
|---|---|---|---|---|
| N/A | 80% | 3 | 8 | 1 |
- Burns 5% meter when blocked with FD
2K


| Damage | Guard | Startup | Active | Recovery | On-Block | Invuln |
|---|---|---|---|---|---|---|
| 15 | Low | 5 | 2 | 8 | 0 | 5~8F Low Profile |
Total: 14
Good low with nice range, gatlings into 6P, 5S, 2S. Prorate 75% but an amazing confirm nonetheless.
- Has low profile property frames 5-8 and can be used to make specific jump-ins whiff over her head, creating an opportunity to counter attack.
- At frame 5 this is one of I-No's fastest pokes, so it's effective to counter poke when you create gaps with IB or FD.
- Unfortunately the hitbox on this isn't along the ground, so other low-profile moves can go underneath it.
Gatling Options: 6P, c.S, f.S, 2S, 2H, 5D, 2D
| FRC Window | Proration | Guard Bar+ | Guard Bar- | Level |
|---|---|---|---|---|
| N/A | 75% | 3 | 8 | 1 |
- Burns 6.25% meter when blocked with FD
2S

Get Down, Make Love


| Damage | Guard | Startup | Active | Recovery | On-Block | Invuln |
|---|---|---|---|---|---|---|
| 28 | Low | 9 | 2 | 17 | -5 |
Total: 27
2S is a great low poking tool which moves I-No's body slightly forward, causing it to reach nearly 1/2 screen. It cancels into 5H, 2H, 2D, and 632146K (Horizontal Chemical love/HCL). It also has the added bonus of having no proration at all, so as a combo starter this move can lead to ludicrous amounts of damage.
- Since I-No's f.S is rather unusual for a far slash, you'll use 2S in a lot of situations where other characters would use their f.S to force their opponent to respect their space. And fortunately for I-No, we control a lot of space with this move.
- Score knockdown by combing into 632146K where you can, but don't go for it if you hit a crouching opponent, or at ranges where you know 632146K wont combo. Learn to take the small damage and go back to neutral.
- In neutral you can use it after performing an empty hover dash (or dash to whiff j.H) then use 2S as you land to catch the opponent blocking high.
- You can also 2S to catch the opponent trying to run forward or jump at the wrong time.
- If you're too far away they'll know that the only options you have to hit them are 2S or 632146K (632146K whiffs if they crouch, and they need to crouch block the 2S anyway), so be smart about how you use it, and know that forcing your opponent to respect it opens up other options in neutral.
- 2S is a common burst point, but if they burst the 2S hit without confirming the startup of the next move, you can just wait after the 2S and block the burst.
- You generally need at least 25% to confirm with 632146K 6FRC6 into max damage, but a 40% combo off of a low is totally worth it.
- Remember that you cannot jump cancel 2S so you would need to carry a jump install from somewhere else. Explanation for jump install and I-No specific 632146K 6FRC6.
- You still have your jump install for a few frames when landing (after a hover dash or empty jump).
- You can manual jump install from 5K and c.S.
- Turns out that if you attack on the first frame of exiting blockstun you'll have a jump install. This could lead to I-No getting some amazing punishes after forcing the opponent to whiff with FD.
- Remember that you cannot jump cancel 2S so you would need to carry a jump install from somewhere else. Explanation for jump install and I-No specific 632146K 6FRC6.
Gatling Options: 5H, 2H, 5D, 2D
| FRC Window | Proration | Guard Bar+ | Guard Bar- | Level |
|---|---|---|---|---|
| N/A | 8 | 7 | 3 |
- Burns 9.5% meter when blocked with FD
2H

I'm gonna kneel down by your side and pray


| Damage | Guard | Startup | Active | Recovery | On-Block | Invuln |
|---|---|---|---|---|---|---|
| 35 | Mid | 11 | 2 | 11 | +6 | 11~15F Low Profile |
Total: 23
This move has great frame advantage and starts up faster than 5H. It can also burst bait with the low profile frames, but this rarely works due to bursts having more active time than this has low profile time.
- You'll mostly use this when 5H is just barely a little too slow, or as a frametrap mid blockstring that then resets into another frametrap via +frames.
- I-No's hurt box extends up as she raises the guitar over her head, then out in front before she slams it, so she's more vulnerable in front of her body than when using 5H.
- Once she's active she should be low-profile and has a better hurtbox.
- The hitbox reaches very low to the ground which makes it suitable for hitting low profile moves, but it's not suitable for attacking above the enemy's knees if they have lower body invul.
Gatling Options: 5D, 2D
| FRC Window | Proration | Guard Bar+ | Guard Bar- | Level |
|---|---|---|---|---|
| N/A | 20 | 6 | 5 |
- Burns 11.25% meter when blocked with FD
2D

Just surrender and it won't hurt at all


| Damage | Guard | Startup | Active | Recovery | On-Block | Invuln |
|---|---|---|---|---|---|---|
| 26 | Low | 11 | 3 | 18 | -7 |
Total: 31
Average sweep with added range buff in +R. Not much here except for being used in her low confirm combos.
- Slower than 2S, but the body of the guitar is disjointed so it has some rare use as a poke.
- You pretty much have to spend meter to confirm off of raw 2D at the spacing where you want to use it over 2S.
- Occasionally you'll have to use 2D to float your opponent into 632146K to get a confirm.
- Opponent's can low profile under I-No's sweep.
| FRC Window | Proration | Guard Bar+ | Guard Bar- | Level |
|---|---|---|---|---|
| N/A | 8 | 7 | 3 |
- Burns 9% meter when blocked with FD
j.P


| Damage | Guard | Startup | Active | Recovery | On-Block | Invuln |
|---|---|---|---|---|---|---|
| 18 | High/Air | 5 | 5 | 12 |
Total: 21
Excellent air to air move that will clash or beat clean almost everything. Confirm into dive loop in the corner or j.236D and take them home to the corner. The definition of Abare. On counter hit will combo into j.H and set up 632146K 6FRC6 for better damage.
- This hitbox is relatively high, and I-No leans in a way that lifts her hurtbox.
- You can end air-to-ground strings with a j.P to reduce the hitstop and blockstun to go into a tick throw, or land into a frame tight 2K, or go into 632146K if you think they'll get cheeky and try to throw you instead.
- You can cancel the last 7 frames of recovery into j.P or j.K on contact or whiff.
Gatling Options: j.P, j.K, j.S, j.H, j.D
| FRC Window | Proration | Guard Bar+ | Guard Bar- | Level |
|---|---|---|---|---|
| N/A | 3 | 8 | 1 |
- Burns 7% meter when blocked with FD
j.K


Frames 5-7

Frames 8-16


| Damage | Guard | Startup | Active | Recovery | On-Block | Invuln |
|---|---|---|---|---|---|---|
| 13 | High/Air | 5 | 12 | 27 |
Total: 43
Excellent jump in tool which has a great hit-box, reaching across I-No's body. It's slightly disjointed below I-No's body so it clashes with many moves which opponents might throw out to challenge her, sometimes even the second hit of Volcanic Viper. Crosses-up. Prorates 90%. Active for a long time.
- This is a fast option for an overhead out of hoverdash.
- 66956 j.K is a good choice for trying to catch a backdash at mid screen.
- Due to j.K's speed, you can use j.S > djc. > j.K as a fuzzy overhead against everyone in the cast.
Gatling Options: j.P, j.S, j.D
| FRC Window | Proration | Guard Bar+ | Guard Bar- | Level |
|---|---|---|---|---|
| N/A | 90% | 5 | 7 | 2 |
- Burns 5.75% meter when blocked with FD
j.S


Frames 8-10

Frames 11-13


| Damage | Guard | Startup | Active | Recovery | On-Block | Invuln |
|---|---|---|---|---|---|---|
| 23 | High/Air | 8 | 6 | 23 |
Total: 36
Unprorated overhead. Pretty terrible as a poke, but if you have them blocking a note it works fine for your mixup game and it's general combo/pressure filler too.
- You should rarely use this to try to hit your opponent in a neutral situation.
- Air-to-air use j.P, or at long range j.H instead.
- While rising use j.P, attempt an airthrow, or if you have meter use FBdive.
- While falling use j.K (or in specific circumstances j.H).
- The hitbox is mostly inside the hurtbox and the hurtbox is huge. This move has a purpose and it's not poking.
Gatling Options: j.K, j.H, j.D
| FRC Window | Proration | Guard Bar+ | Guard Bar- | Level |
|---|---|---|---|---|
| N/A | 8 | 7 | 3 |
- Burns 8.25% meter when blocked with FD
j.H

Don't Lose Your Head


Frames 12-14
Frames 15-17


| Damage | Guard | Startup | Active | Recovery | On-Block | Invuln |
|---|---|---|---|---|---|---|
| 32 | High/Air | 12 | 6 | 61 |
Hits at almost an 180 degree curve in front of her. This move is difficult to challenge when spaced correctly.
- A major drawback to this is that I-No is in counter hit state until all (61?!) recovery frames have ended, meaning any whiffed throw attempt can be especially deadly for her if you don't use an airthrow OS.
- I-No extends her hurtboxes along her legs before the hitboxes go active.
- Contrary to popular belief, this move does not cause I-No to land any earlier than normal when used out of a hover dash, though you can still be ambiguous about whether or not you're going to j.H or land into 2K.
- Blows away on aerial hit. Can end air strings with j.H and simply shoot j.214H to maintain pressure where a more extended combo or guaranteed knockdown isn't possible or worth the meter.
Gatling Options: j.D
| FRC Window | Proration | Guard Bar+ | Guard Bar- | Level |
|---|---|---|---|---|
| N/A | 8 | 7 | 3 |
- Blows back opponent on air hit
- I-No is in CH state during move
- Burns 10.5% meter when blocked with FD
j.D


| Damage | Guard | Startup | Active | Recovery | On-Block | Invuln |
|---|---|---|---|---|---|---|
| 40 | High/Air | 16 | 5 | 20+8 after landing |
Total: 48
Delayed overhead in mixups, causes I-No to fall when used while rising, or float when used while failling. Excellent hitbox. One of I-No's best moves.
- Untechable on counter hit.
- Jump cancelable and can chain from all of I-No's other air normals.
- High base damage (prorate 80%).
- Can fastfall this move when used during specific frames of I-No's airdash (similar to FF j.632146S), and if the airdash is done at the right height you can even jump cancel the landing recovery.
- j.D FDC can be used to alter I-No's vertical air movement without using the full animation of the attack, canceling it on the 2nd or 3rd frame into FD or SB. This allows you to take advantage of the momentum shift while using other attacks.
- Jump canceling after the 13 frames of hitstop of j.D will remove the landing recovery.
| FRC Window | Proration | Guard Bar+ | Guard Bar- | Level |
|---|---|---|---|---|
| N/A | 80% | 8 | 7 | 3 |
- Burns 12.5% meter when blocked with FD
Universal Mechanics
Ground Throw

Tie your mother down!

| Damage | Guard | Startup | Active | Recovery | On-Block | Invuln |
|---|---|---|---|---|---|---|
| 60 | 45 pixels |
Completes her strong mixup/rush down game. Knockdown. FRC point, but forced prorate 40%. You can get some extra damage, but it's not meter efficient. Do it for the kill, or if you have meter to burn and want corner carry.
| FRC Window | Proration | Guard Bar+ | Guard Bar- | Level |
|---|---|---|---|---|
| 55~56F | Forced 40% | 6,7 |
Air Throw

I'll take you to the seven seas of Rhye!

| Damage | Guard | Startup | Active | Recovery | On-Block | Invuln |
|---|---|---|---|---|---|---|
| 60 | 80 pixels |
At only 80 dots in +R, on paper went from the 2nd best air grab in the game (96 dots) to the worst. However, I-No's hover dash is still an excellent tool for chasing techs and setting up airthrows. Wall bounces. Untechable.
- You should block bursts for an unprorated punish rather than going for the throw. However, the only punish for a gold burst is an airthrow, and I-No gets a combo afterward in the corner.
- This is less likely to happen with the reduced airthrow range, but it's possible to catch backdashes with airthrow.
- Is it a dropped combo? Or a reset?
- A weaker player can be mentally destroyed almost entirely by throwing their techs repeatedly. Get the corner airthrow, get your basic confirm into some damage, then reset into a throw attempt instead of taking the knockdown. While that may not work on skilled players, it's an easy way to beat the weak, so you can save your focus for harder opponents.
- Due to the high damage for an individual hit, airthrows contribute highly to I-No causing dizzy/stun.
- Airthrow resets also contribute to dizzy because you avoid the temporary boost in dizzy recovery over time from knockdown, and also go right back into damage without having to open the other player back up (while they're recovering). You can set up a guaranteed dizzy against a handful of characters off of one CH at round start into a meterless combo into a reset.
| FRC Window | Proration | Guard Bar+ | Guard Bar- | Level |
|---|---|---|---|---|
| N/A | Forced 50% | 6 |
- Sends opponent on opposite side of throw direction
Dead Angle Attack

I need no sympathy
| Damage | Guard | Startup | Active | Recovery | On-Block | Invuln |
|---|---|---|---|---|---|---|
| 25 | All | 11 | 3 | 25 | -14 | 1~13F All 14~33F Throw |
Total: 38
Decent DAA. Wall bounces, grounds on hit.
| FRC Window | Proration | Guard Bar+ | Guard Bar- | Level |
|---|---|---|---|---|
| N/A | 50% | 10 | 7 | 3 |
Respect

Because I'm easy come, easy go


| Damage | Guard | Startup | Active | Recovery | On-Block | Invuln |
|---|---|---|---|---|---|---|
| 2 | All | 174 | 3 | 32 | -25 |
Total: 208
If you ever dizzy someone and don't go for the IK, start your punish with this move. There's no reason to do this, but there's little reason not to.
| FRC Window | Proration | Guard Bar+ | Guard Bar- | Level |
|---|---|---|---|---|
| N/A | 3 | 8 | 1 |
- Can be canceled into anything except blocking or movement from 18F onwards
Dash

Little high


| Damage | Guard | Startup | Active | Recovery | On-Block | Invuln |
|---|---|---|---|---|---|---|
| 9 |
Weak opponents are crushed by repeated hoverdash into... stuff. Due to the startup on the dash, an opponent on defense can simply stand there and jab I-No out of whatever she's doing. Dashing forward with this character is a risk, but the ability to dodge lows while moving forward has it's perks, along with the ability to do 14 frame overheads. Just remember that where everyone else can dash break or attack in a few frames and not have to commit to moving forward, you'll need to buy I-No a wedding ring every time you make her hover dash. Learn to walk.
- Feet are off the ground on frame 4, and her hurtbox shrinks upwards allowing her to dodge most low hitboxes.
- 9 frames of startup. The fastest you can start acting is on frame 10.
- The fastest you can land is on frame 20, even if you whiff a normal (like j.H) to try to land faster.
- Hurtbox expands in all directions (except down) when hover dashing.
- Character origin/collision is well below I-No when hover dashing, which affects her ability to airthrow.
- I-No can actually airthrow Faust out of pogo due to her low character origin, even though his origin is on the ground.
- Sometimes you'll want to stop hover dashing to adjust I-No's character origin upward and increase the chances for your aithrow to work (going for throw with 4H instead of 6H will do this for you).
- Sometimes you'll also want to jump out of the hover dash to chase a jump or double jump.
| FRC Window | Proration | Guard Bar+ | Guard Bar- | Level |
|---|---|---|---|---|
| N/A |
- Airborne on 4F
- Fastest possible landing is 20F
Special Moves
Stroke the Big Tree
41236S or 41236H

Little low


Low profile

Hit


| Version | Damage | Guard | Startup | Active | Recovery | On-Block | Invuln |
|---|---|---|---|---|---|---|---|
| 41236S | 40 | Low | 20 | 2 | 17 | 0 | 3~21F Low Profile 6~15F Throw |
| 41236H | 40 | Low | 28 | 2 | 16 | +1 | 5~29F Low Profile 11~23F Throw |
Total: 38
Total: 45
Stroke the Big Tree move is a great attack in which proper use can set up great pressure and mixups. S Version
- Stagger on regular hit allows you to confirm with 5K > JI 632146 6FRC6 if you have 25% meter, or you get launch on CH for a meterless combo.
- Good for setting up resets (using the stagger) if you combo this from 5H/2H against a crouching opponent. Sometimes you'll go for this because 2D wont reach (and neither will 632146K because crouching).
- It's possible to shake the stagger in time to block 632146K or to mash against dash-ins, so you'll need to condition your opponent to give you openings.
H Version
- Floats on regular hit and counterhit.
- Jump cancelable on hit or block, so you get big damage or more mixup opportunities.
- Use this move to go under your opponent’s mid/high attacks and non-grounded projectiles.
- Has 2 FRC points and can be used to surprise your opponent with an instant ground grab, or 6FRC6 out of one of the FRC points and hover dash into an overhead attack.
- Due to the long startup it's risky to use in pressure situations, even when you're trying to call out specific attacks. However, you can condition your opponent to try to poke or DP out, and feint with FRC to backdash, or FRC to super, or FRC to block into punish.
| Version | FRC Window | Proration | Guard Bar+ | Guard Bar- | Level |
|---|---|---|---|---|---|
| 41236S | N/A | 80% | 15 | 6 | 5 |
| 41236H | 13~15F, 26~28F | 90% | 15 | 6 | 5 |
41236S:
- Floats higher on CH (untechable for 40F)
- Staggers on normal hit for a max of 38f
- I-No is in crouching state during the move
- Deals 5 chip damage on block
- Burns 3.2% meter when blocked with FD
41236H:
- I-No is in crouching state during the move
- Deals 5 chip damage on block
- Burns 3.2% meter when blocked with FD
Antidepressant Scale
214P or 214H (Air OK)

Traveling

Very big after few hits


| Version | Damage | Guard | Startup | Active | Recovery | On-Block | Invuln |
|---|---|---|---|---|---|---|---|
| 214P | 12×1~5 | All | 19 | Total 50 | -11 | ||
| j.214P | 12×1~5 | All | 13 | Until landing+6 |
Staple starter of her offense from a neutral game standpoint, and is the main ingredient in creating okizeme situations in which the opponent has no choice but to guess the incoming mixup. I-No can control the vertical movement of the note during its entire duration, and can FRC to move in tandem with it. The P version starts off slow and speeds up with time, being great for corner oki situations. The H version starts off quickly and gradually slows with duration, so this version is more suited to long range situations and after moves that put the opponent far from I-No during their wakeup, such as a 632146K or her ground throw.
- Both versions gain additional hits depending on the time it is out and distance traveled up to a maximum of 5 hits.
The air version is notably less recovery than the grounded version, with 4 extra FRC frames to cancel (total of 6). Decision of which to use depends on which knockdown you used, and how far away you are from them. Also, you can vary which version to affect how many hits the note generates, creating mixups and unpredictability. EX: Shoot H note where it will whiff, but P note would have worked, then throw.
- If you're trying to counter-zone another character that has effective projectiles (Venom, Ky), you can use P note at long range since it'll build up more hits before it reaches mid screen, then block the other player's projectile with it and let the note's explosion control space for you.
| Version | FRC Window | Proration | Guard Bar+ | Guard Bar- | Level |
|---|---|---|---|---|---|
| 214P | 22~23F | 0 | 8, 7×0~4 | 1, 2×0~4 | |
| j.214P | 16~21F | 0 | 8, 7×0~4 | 1, 2×0~4 |
214P:
- Deals 1 chip damage (per hit) on block
- Burns 1.6% meter (per hit) when blocked with FD
- See note ※1
j.214P:
- I-No remains stationary in the air from 1~33F
- Fastest TK note startup is 16F, total 44F including prejump
- 1F of jump before note is 49F total, 1F of super jump is 50F total including prejump
- Deals 1 chip damage (per hit) on block
- Burns 1.6% meter (per hit) when blocked with FD
- See note ※1
Sultry Performance
j.236P or j.236K or j.236S or j.236H (Hold OK)


Gotta leave you all behind


P: Frame 13

P: Frame 14 (+3N)

P: Frames 15-16 (+3N)

K/S

H


| Version | Damage | Guard | Startup | Active | Recovery | On-Block | Invuln |
|---|---|---|---|---|---|---|---|
| j.236P | 30 | High/Air | 13 | Until landing | 16 after landing | +1 | |
| j.236K | 35 | High/Air | 13 | Until landing | 12 after landing | +1 | |
| j.236S | 40 | High/Air | 13 | Until landing | 14 after landing | -1 | |
| j.236H | 25×3 | All | 10 | 32 | Until landing+10 |
j.236P is mostly used during combos and pressure strings as it bounces off opponent and allows I-No to air dash after block/hit.
- It's possible to knockdown with j.236P, but it's really hard. If you do, you'll be far enough away that FB Note has 10 hits, which is enough to crank GB to flashing. Also enough distance for either P or H note to hit 3 times, creating gapless oki.
j.236K is a divekick style overhead attack which when performed as low to the ground as possible, results in an 18 frame overhead (K/S versions).
- j.236K knocks down on regular hit, but on counter hit it causes floor slide which you can confirm with 5H into an IAD combo (meterless) or JI 632146K 6FRC6 (better damage).
- Safer to use than S version since K version has better recovery.
- Sometimes you can TK it low to the ground for the + frame, then TK another Kdive to fish for a CH (or at least get a knockdown and get oki).
j.236S has the same startup/overhead timing as K version. Launches on hit, but prorates 80%.
- At super jump height, the move travels more than full screen and coupled with a RC gives her a relatively useful get-in card in some matchups.
- On block, you can follow up a K/S dive with RC into S dive for a really scummy mixup.
- If you go into j.D you'll carry the forward momentum, so depending on timing you'll either hop over them and fly to the other corner to escape, or you'll bounce right in their face.
- You can try to airdash following the dive, but it puts you so low to the ground that you'll probably screw up due to the minimum airdash height requirement, so you'd really only be able to do this following a dive that made contact way too high on your opponent (which would have been unsafe, so your opponent is probably trying to mash jab or something and may hit you out of the dash).
j.236H is a pseudo psycho crusher style move with an FRC point at the end. Has limited use in some matchups and in character specific combos.
- In +R its movement speed was increased, and recovery was shortened.
- When spaced at nearly-max to max range and TK'd as low to the ground as possible, this move has a static difference of 0.
| Version | FRC Window | Proration | Guard Bar+ | Guard Bar- | Level |
|---|---|---|---|---|---|
| j.236P | N/A | 8 | 7 | 3 | |
| j.236K | N/A | 8 | 7 | 3 | |
| j.236S | N/A | 80% | 8 | 7 | 3 |
| j.236H | 42~45F | 10×3 | 7×3 | 3 |
j.236P:
- I-No is in crouching state during landing recovery
- I-No bounces off opponent on hit or block
- Can cancel into air dash or specials 9F after bounce, landing recovery 0F
- Listed Frame Adv is for the fastest possible TK attack (startup 18F)
- Deals 3 chip damage on block
- Burns 2.4% meter when blocked with FD
- See note ※2
j.236K:
- Slides on CH (untechable for 64F, slides for 39F)
- I-No is in crouching state during landing recovery
- Listed Frame Adv is for the fastest possible TK attack (startup 18F)
- Deals 4 chip damage on block
- Burns 2.8% meter when blocked with FD
- See note ※2
j.236S:
- I-No is in crouching state during landing recovery
- Listed Frame Adv is for the fastest possible TK Attack (startup 18F)
- Deals 5 chip damage on block
- Burns 3.2% meter when blocked with FD
- See note ※2
j.236H:
- Max 3 hits
- Deals 3 chip damage (per hit) on block
- Burns 2.4% meter (per hit) when blocked with FD
- Passes through opponent from 10F onwards
- See note ※2
Chemical Love (Horizontal)
632146K (Air OK)

Dynamite with a laser beam.


Initial range

This part travels


| Version | Damage | Guard | Startup | Active | Recovery | On-Block | Invuln |
|---|---|---|---|---|---|---|---|
| 632146K | 45 | All | 11 | 11 | 12+8 after landing | +3 | |
| j.632146K | 45 | All | 11 | 11 | 22+8 after landing |
Excellent mid to long range poking tool, which counts as a projectile and has hitboxes on I-No's body. The Horizontal version extends approximately 2/3 screen forward (with the camera zoomed out!) and about half screen behind her (can get some silly confirms off of crossups). In counter hit state throughout entire moves duration. The move's name is frequently abbreviated as "HCL."
- Be careful throwing this move out recklessly midscreen, as various characters can run underneath the wave and punish her.
- In +R, the hitbox was vastly improved reaching downward at her body, making the spam of this move on a cornered opponent a deadly trap tool as well as a high/low mixup starter when combined with its FRC point.
- Since this is frame-1 airborne, use this to bait throws on oki. If they know how to IB you'll get thrown easily if you don't FRC, or they'll poke out and force you to block, but if they don't IB it you'll have a frametrap to work with. However, if you want to try to crush a low on wakeup, you'd want to use 632146S instead (and even that doesn't work well against lows that were used meaty on oki).
- Using 632146K's FRC point does not give I-No her jump options, so you will need to jump install to use her best conversions. Though you can play I-No well without having 632146K 6FRC6 in your pocket, you will eventually want to learn how to do it.
- Dash momentum Horizontal Chemical Love (DM 632146K) can be done by canceling dash startup into 632146K. You should get forward momentum without seeing or hearing the effects of hoverdash. The input is 632146 56K. This technique has many uses, and some uses for DM 632146S.
- DM 632146K can be used in neutral to fish for a CH and go into a meterless corner carry combo, or in the corner for huge meterless damage. However, this technique is easy to screw up and the hitbox is rather thin vertically unless I-No is right on top of her opponent, so you'll get blown up for using it willy-nilly.
- Since you move forward there are situations where 632146K would have normally lost an exchange, but instead the momentum carry scores you a CH.
- Example: Round start vs KY, if he does 2S he will low profile your 632146K and punishes your recovery. If you do DM 632146K you score a CH and can link c.S, allowing you to combo him into the corner with 35% of his health missing.
- Since you move forward there are situations where 632146K would have normally lost an exchange, but instead the momentum carry scores you a CH.
- You can end a blockstring with frame advantage (f.S or 2H) and frametrap into 632146K extend to close the distance and keep the pressure on.
- DM 632146K can be used in neutral to fish for a CH and go into a meterless corner carry combo, or in the corner for huge meterless damage. However, this technique is easy to screw up and the hitbox is rather thin vertically unless I-No is right on top of her opponent, so you'll get blown up for using it willy-nilly.
The air version is pretty much a combo tool, but it recovers before landing now so it's less risky to air-to-air with.
| Version | FRC Window | Proration | Guard Bar+ | Guard Bar- | Level |
|---|---|---|---|---|---|
| 632146K | 16~17F | 0 | 6 | 5 | |
| j.632146K | 16~17F | 0 | 6 | 5 |
632146K:
- I-No is airborne from 1F onwards
- I-No is in CH state until landing
- Deals 5 chip damage on block
- Burns 3.2% meter when blocked with FD
- See note ※3
j.632146K:
- Landing recovery applied only if I-No lands before move recovers
- I-No is in CH state until landing
- Deals 5 chip damage on block
- Burns 3.2% meter when blocked with FD
- See note ※3
Chemical Love (Vertical)
632146S (Air OK)

Guaranteed to blow your mind.


Initial hitbox. Max range is similar to HCL

| Version | Damage | Guard | Startup | Active | Recovery | On-Block | Invuln |
|---|---|---|---|---|---|---|---|
| 632146S | 45 | All | 11 | 11 | 11+13 after landing | -8 | |
| j.632146S | 45 | All | 11 | 11 | 20+13 after landing |
The vertical version is a preemptive anti-air move which when FRC’d is completely safe and will leave her at an advantage, leading to great damage when confirmed properly.
- This move will cause I-No to fast fall when used during airdash frames, and will carry forward momentum from a ground dash. If done during a low hoverdash into airdash (66956), it will be more advantageous the later into an airdash you do it.
- When FRC’d from the ground, it will leave I-No temporarily airborne, which can be turned into un-reactable mixups utilizing falling overheads, low attacks and instant air dashes out of the FRC point if you are jump installed.
- Dash momentum 632146S has far more limited in use than DM 632146K, since you're moving yourself forward on a long and committed animation that doesn't have a hitbox in front of you. You would mostly use it for some sexy combos such as CH 41236S > DM 632146S > c.S, or j.D > j.2363214S > DM 632146S > c.S. High damage and great for racking up dizzy.
- Both versions of Chemical Love are airborne from frame 1, but it seems like I-No lifts herself off the ground a little earlier with this one, and since the hitbox reaches to the ground when used on the ground, 632146S is the better choice to try to stuff lows. I-No is in CH state 1~21F.
- If the opponent runs oki with a low and is a frame late or more (not a true meaty) you can crush them with reversal 632146S, and if you FRC you can convert that into unprorated damage. Most 2Ks or 2Ds will get crushed in this manner so long as they're as little as 1-frame late, but if they go for 2P (tick throw setup) you'll get stuffed due to the higher hitbox.
- Reversal 632146S should be used sparingly since your opponent could just git gud and meaty properly. That said, it's extremely sexy to Reversal DM 632146S and escape the corner while scoring knockdown.
The two main uses of the air version is for Fast Fall Chemical Love and doing j.632146S at a height where it recovers faster than grounded 632146S. This move recovers in mid air, allowing it to recover up to 4 frames faster than grounded 632146S, and from double jump or super jump height it gives I-No enough time to link to airdash j.K. Or you can land after recovering from normal jump height and have more time to link something after. This new use enables meterless corner carry and some fancy corner combos. You can also be silly by trying to hit people directly below you with it.
| Version | FRC Window | Proration | Guard Bar+ | Guard Bar- | Level |
|---|---|---|---|---|---|
| 632146S | 16~17F | 0 | 7 | 3 | |
| j.632146S | 16~17F | 0 | 7 | 3 |
632146S:
- I-No is in CH state 1~21F
- Deals 5 chip damage on block
- Burns 3.2% meter when blocked with FD
- See note ※3
j.632146S:
- Landing recovery applied only if I-No lands before move recovers
- I-No is in CH state 1~21F
- Deals 5 chip damage on block
- Burns 3.2% meter when blocked with FD
- See note ※3
Force Breaks
FB Antidepressant Scale
214D (Air OK)

Now two of them
See caption on normal version
| Version | Damage | Guard | Startup | Active | Recovery | On-Block | Invuln |
|---|---|---|---|---|---|---|---|
| 214D | 12×6~14 | All | 15 | Total 42 | +10 | ||
| j.214D | 12×6~14 | All | 13 | Until landing+6 | +9 |
If you need to create space, want to attempt to kill with chip damage, attempt to trade favorably against a move that doesn't wreck you on CH, attempt to set up an air-unblockable when the opponent doesn't have meter for FD, attempt another mixup after your first one failed on oki, or you just feel like ruining your opponent's day by forcing them to move the way you want or get stuck blocking, this is the move to throw out.
- 42F total duration.
- Forces guard gauge to start flashing (+80 GB) when both notes are blocked full screen. At 10+ blocked hits, their guard bar will flash.
- If you score a knockdown with 50% meter, the ensuing combo from a blocked 214D on oki can be extremely high off of an unprorated mixup tool (j.S/2S).
- If you want to force a burst, use this move on oki.
Public Service Announcement: This move is amazing. Please don't forget that some characters have answers to it. Don't use it as a crutch either: learn to neutral for real, then add this move in when and where it's a good idea.
Unlike regular note, the air version has faster startup than the ground one.
- Fastest possible TK attack has startup of 16F, 36F total duration.
| Version | FRC Window | Proration | Guard Bar+ | Guard Bar- | Level |
|---|---|---|---|---|---|
| 214D | 18~19F | 10×6~14 | 4×6~14 | 1,2×6~14 | |
| j.214D | 16~21F | 10×6~14 | 4×6~14 | 1,2×6~14 |
214D:
- Deals 1 chip damage (per hit) on block
- Burns 1.6% meter (per hit) when blocked with FD
- After note is released, gains additional hits after 30F, 31F, 39F, 40F, 49F, 50F, 59F, 60F
j.214D:
- Fastest possible TK attack has startup of 16F, 44F total duration including prejump
- 1F of jump before note is 49F total, 1F of super jump is 50F total including prejump
- Deals 1 chip damage (per hit) on block
- Burns 1.6% meter (per hit) when blocked with FD
- After note is released, gains additional hits after 30F, 31F, 39F, 40F, 49F, 50F, 59F, 60F
FB Sultry Performance
j.236D (Hold OK)

Look up to the skies and see.


Changes every 2 frames


| Version | Damage | Guard | Startup | Active | Recovery | On-Block | Invuln |
|---|---|---|---|---|---|---|---|
| j.236D | 20×5 | All | 9 | 18 | 23 | 6~9F Strike | |
| j.236D > X | 1 |
Can carry the opponent corner-to-corner and score knockdown since this gives back your air options. Can cancel FOR FREE by pressing a button at any time from frame 6-60, ensuring you get your combo, or take their burst.
- Strike invincible on frames 6-9 which helps you AA jump-ins that I-No normally can't counterpoke.
- Has an amazing hitbox, to the point where you might not even need the strike invul frames to beat things clean if you're able to start early enough.
- Can hold on startup and cancel before letting it rip to reset air options without actually using the move, meaning you can do this as many times as you have meter for it!
- Can be cancelled on the first frame if the move is held, meaning a frame perfect j.236D > X is the fastest possible cancel.
- Cancelling has 1 frame of recovery, meaning the frame after pressing X is inactionable. You can still FD on this frame.
- If you do this input too quickly, you can easily end up with another j.236X by accident. This is because the 236 motion is still remembered by the input parser. This can be avoided by:
- Doing the input, waiting a moment, then pressing the buttons.
- Inputting j.236D early during the hitstop of a move, so that the move only happens once the 236 motion is forgotten by the input parser.
- Hold the buttons you pressed so that you don't activate another j.236X with a negative edge input (releasing the button).
- Activating this move (even if you hold it) stops all air momentum, so you can:
- TK FB Dive > confirm they stood there > Cancel > falling j.K or j.H (punish them for jumping, or for not jumping)
- Airdash string > FB Dive > cancel > another airdash string (because we can)
- On oki, 66956 dash into j.K, but then FB Dive > cancel > low (condition with 3/4/5 overheads, then sneak in lows)
- Dash in mixup > j.D > dj.D > FB Dive > cancel > j.D > dj.D > etc (Your mixup should be as freaky as I-No's pillow dancing)
- Commit less with your air movement and become safe where you shouldn't be.
The most important part of this move is that you can stop it at anytime with a button press. Stop on hit, or on block, or on whiff, FOR FREE.
| Version | FRC Window | Proration | Guard Bar+ | Guard Bar- | Level |
|---|---|---|---|---|---|
| j.236D | N/A | Forced 80% | 14×5 | 3×5 | 4 |
| j.236D > X | N/A |
j.236D:
- Can perform Stop from 2F onwards
- I-No is in CH state during move
- Restores jump options
- Can only perform once per jump
- Deals 2 chip damage (per hit) on block
- Burns 2% meter (per hit) when blocked with FD
- See note ※2
j.236D > X:
- Restores jump options
Overdrives
Longing Desperation
632146H

I want to break free!


First active

Mid travel

Max range


| Damage | Guard | Startup | Active | Recovery | On-Block | Invuln |
|---|---|---|---|---|---|---|
| 46×3 | All | 7+2 | 20 | 10 | +1 | 1~13F Strike |
Frame 1 invul reversal overdrive, I-no's most reliable (and only one, really), as it starts fast, has good invincibility, is safe on block, and beats pretty much anything that doesn't low profile. You can combo into it easily, but you're generally better off going into Fortissimo if you want to spend your meter like that. You can combo out of it in the corner, or in some cases if you spend meter on 5K JI 632146K 6FRC6 follow ups.
Note: The hitbox on this attack does not reach all the way to the ground. It can be low profiled by moves like Grand Viper and Stroke the Big Tree.
| FRC Window | Proration | Guard Bar+ | Guard Bar- | Level |
|---|---|---|---|---|
| N/A | 10×3 | 7×3 | 3 |
- Dizzy modifier x0
- Passes through other projectiles
- Deals 5 chip damage (per hit) on block
- Burns 3.2% meter (per hit) when blocked with FD
Ultimate Fortissimo
j.2363214S

No escape from reality


First active

Max range


| Damage | Guard | Startup | Active | Recovery | On-Block | Invuln |
|---|---|---|---|---|---|---|
| 50×3 | All | 7+0 | 9 | Until landing | +27 | 1~9F Strike |
Contender for best Overdrive in the game. This super does a LOT of damage, and combos both ways willy nilly. If she combos off of a raw hit, expect to lose 50% of your lifebar. I-no will wreck your shit with this move.
- Fortissimo hits the opponent 3 frames before they leave superflash, meaning they mostly can't input anything before the hit.
- If your opponent wasn't already blocking or invul, they're getting hit.
- If your opponent was even partially invul (like from 6P), they're probably trading or beating you clean.
- With nearly half a second in frame advantage on block, I-no gets to go for another mixup if it's blocked and even if it's slashbacked due to the huge amount of hitstop.
| FRC Window | Proration | Guard Bar+ | Guard Bar- | Level |
|---|---|---|---|---|
| N/A | 14×3 | 6×3 | 4 |
- I-No is in CH state until landing
- Dizzy modifier x0
- Opponent is in superflash for first 3 active frames
- Listed Frame Adv is for the fastest possible TK attack (startup 10F)
- Deals 6 chip damage (per hit) on block
- Burns 3.6% meter (per hit) when blocked with FD
Instant Kill
Last Will and Testament
During IK Mode: 236236H

Nothing really matters


| Damage | Guard | Startup | Active | Recovery | On-Block | Invuln |
|---|---|---|---|---|---|---|
| Fatal | All | 7+8 | 3 | 32 | -25 | 4~17F Strike |
Very short range
| FRC Window | Proration | Guard Bar+ | Guard Bar- | Level |
|---|---|---|---|---|
| N/A | 3 | 1 |
- IK Mode activation: 76F
Colors

Default P

Default K

Default S

Default H

Default D

EX P

EX K

EX S

EX H

EX D

Slash P

Slash K

Slash S

Slash H

Slash D1

Reload P

Reload K

Reload S

Reload H

Reload D1


Gold2

Shadow2


To select your color, press the corresponding button while in the designated "color set". Color sets can be toggled through by hitting the Respect button.
- Only selectable on the Arcade and PC-Rollback versions of the game.
- Available on home ports, and are selected by pressing the Rec. Enemy button on the Slash or Reload color sets, respectively. Gold characters are powered up versions, Shadow characters have infinite tension. Both are banned from tournament play.
To edit frame data, edit values in GGACR/I-No/Data.
A.B.A
Anji
Axl
Baiken
Bridget
Chipp
Dizzy
Eddie
Faust
I-No
Jam
Johnny
Justice
Kliff
Ky
May
Millia
Order-Sol
Potemkin
Robo-Ky
Slayer
Sol
Testament
Venom
Zappa
Systems Pages