Controls
- Guilty Gear uses a notation known as Numpad Notation.
Think of your controller's analog stick or D-Pad as if it were the num pad on a computer keyboard. When none of the buttons are being pressed/the stick is not being tilted then the controller is in state 5. This simply means you aren't inputting a direction. The 4 cardinal buttons on a D-Pad are represented with the numbers 4-Left, 6-Right, 8-Up, 2-Down. The diagonals are represented with the numbers 7-Up-Left, 9-Up-Right, 1-Down-Left, 3-Down-Right.
Below is a table showing the layout visually.
| 7 |
8 |
9 |
| 4 |
5 |
6 |
| 1 |
2 |
3 |
Button Representations:
 = Punch
 = Kick
 = Slash
 = Heavy Slash
 = Dust
The taunt button does not have a universal pre-defined location.
Special moves use more then one directional input. For instance, rotating the stick a quarter circle to the right ![]() is represented as 236.
is represented as 236.
 +
+ = 236K
 +
+ = 623S
 +
+ = 41236H
 +
+ = 214P
 +
+ = 63214D
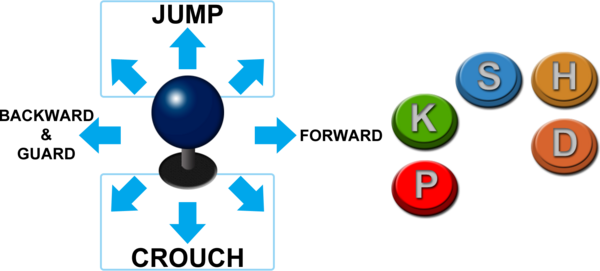
Arcade Layout
Movement
![]()
![]() = Dash (or Step)
= Dash (or Step)
- Dashes move the character forward at a greater speed than walking. Hold
 after starting a dash to run.
![]()
![]() = Backdash
= Backdash
- Backdashes move the character a preset distance and have some amount of invincibility.
![]()
![]() = Super Jump
= Super Jump
- After a Super Jump, you can not double jump, but you can air dash. Pressing

 or
or 
 will have you super jump diagonally in the specified direction. You can use any downward direction for the
  input - doing
 will still give you a Super Jump.
(In Air) ![]()
![]() or
or ![]()
![]() = Air Dash
= Air Dash
- Dash in the specified direction in mid-air. Air dashes quickly cover a lot space, but you can not block during the first few frames of air dashing.
(In Air) ![]() = Double Jump
= Double Jump
- Jump again while in the air. Alternatively you can press
 or
or  to double jump in the specified direction.
![]()
![]()
![]() or
or ![]()
![]()
![]() = Instant Air Dash (IAD)
= Instant Air Dash (IAD)
- IAD is a way to perform an Air Dash as soon as possible after a jump.
Offense
Normals
Normals require nothing more than a single press of a button, and are your main means of attacking. There is a different variation for each when done standing, crouching, or jumping.
They can also cancel into one another, usually in ascending order of strength, i.e. ![]() >
> ![]() >
> ![]() >
> ![]() >
> ![]() . This is known as a Gatling.
. This is known as a Gatling.
Not every normal gatlings into a higher level normal, and some characters can gatling stronger normals into weaker ones! Be sure to check your character's gatling chart on their Frame Data page.
![]() = Punch: Usually fast moves with low recovery and are safe, but have little damage and reach, as well as high scaling. They usually can gatling into themselves, and in some cases, can into some other normals on whiff. Every character also has a 6P, explained below in Command Normals.
= Punch: Usually fast moves with low recovery and are safe, but have little damage and reach, as well as high scaling. They usually can gatling into themselves, and in some cases, can into some other normals on whiff. Every character also has a 6P, explained below in Command Normals.
- Standing Punches (5P) are mainly fast, close range pokes, or low risk anti-airs.
- Crouching Punches (2P) are also usually fast, sometimes plus on block, and are good for okizeme when OS'd with other buttons.
- Jumping Punches (j.P) are for close range air confirms, rising Anti-air, or air-to-air block pressure.
![]() = Kick: The all-around button. Usually carries a myriad of functions, from anti-air (Sol 5K), pokes (Dizzy 5K), and sometimes standing lows (Ky 5K). Usually can gatling all around, or are the few buttons in a character's kit that can gatling to sweep (2D).
= Kick: The all-around button. Usually carries a myriad of functions, from anti-air (Sol 5K), pokes (Dizzy 5K), and sometimes standing lows (Ky 5K). Usually can gatling all around, or are the few buttons in a character's kit that can gatling to sweep (2D).
- Standing Kicks (5K) strike a balance of speed and range.
- Crouching Kicks (2K) is predominantly most characters' quickest low normal with decent reach.
- Jumping Kicks (j.K) tend to mostly be air-to-air pokes or jump-in buttons.
![]() = Slash: A button which usually utilizes a character's weapon, meaning higher damage and ranged attacks. Every character has a close and far standing Slash.
= Slash: A button which usually utilizes a character's weapon, meaning higher damage and ranged attacks. Every character has a close and far standing Slash.
- Close Slashes (c.S) tend to be punish starters with big hitboxes, limited by their activation range.
- Far Slashes (f.S) are usually a moderate speed long ranged poke.
- Crouching Slashes (2S) are similar to 5Ks in that they range in utility from Anti-Air, alternate pokes, or blockstring enders which are plus on block!
- Jumping Slashes (j.S) vary from air-to-air or air-to-ground, and are slower than j.Ks but higher reward.
![]() = Heavy Slash: The big damage buttons, with all kinds of purposes. They tend to have the most range and damage. They tend to work best early in combos as they scale the least out of every button. They also tend to gain strong effects on Counter Hit, like launching, become untechable, or adding slide, bounce, or stagger.
= Heavy Slash: The big damage buttons, with all kinds of purposes. They tend to have the most range and damage. They tend to work best early in combos as they scale the least out of every button. They also tend to gain strong effects on Counter Hit, like launching, become untechable, or adding slide, bounce, or stagger.
. The Heavy Slash button is also tied to Throws.
- Standing Heavy Slashes (5H) tends to be a big ranged attack that's slow but powerful.
- Crouching Heavy Slases (2H) are usually a slow uppercut like move (that works for Anti-Air), or comes with another purpose. Sometimes they're plus on block or carry extra effects!
- Jumping Heavy Slashes (j.H) get to be a big air button, and is very often a go-to for air combos.
![]() = Dust: A universal standing overhead and sweep button, explained more in depth below:
= Dust: A universal standing overhead and sweep button, explained more in depth below:
- Standing Dusts (5D) are explained here: Dust Attack
- Crouching Dusts (2D) are explained here: Sweep
- Jumping Dusts (j.D) are unusual moves with a very wide application, and are usually very good while offset as being the only jumping normals with landing recovery.
Command Normals
A command normal is performed by pressing a specific direction with a specific button. Every character has both a 6P and 6H command normal, and some have command normals with 6K as well. It's up to you to learn the different command normals and the properties of each for your character.
- All 6P command normals has some form of upper-body invulnerability and most are useful as anti-air attacks.
- Most 6H command normals are slow, far reaching attacks.
Dust Attack
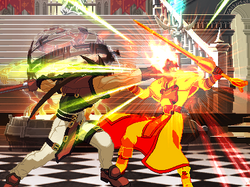
Press 5D to perform a standing overhead attack. Connecting a Dust Attack on your opponent will send them flying into the air. Hold any upwards direction to perform the Homing Jump and follow them up. From here, it's up to you to slap them up with your best air combo.
Homing Jumps allow most of your attacks to cancel into each other for a very limited time, so Dust Combos often look very different from a character's standard air combos.
Sweep
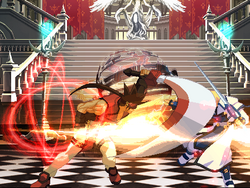
Press 2D to perform a sweep. Each sweep attack possesses different properties and follow-up opportunities so it's important to know what options are available with your character. Sweep attacks provide a great alternative to Dust Attacks as they must be guarded against low.
Note that Robo-Ky does not have a Sweep with 2D. His 2S serves the same purpose, however.
Throw and Air Throw
Throws are a strong tool in Guilty Gear to knock the opponent down, giving you the chance to set up a mixup. To throw hold left or right while pressing H. Throws in Guilty Gear start up in 0 frames and in cases of a throw vs strike trade scenarios, the throw always wins!
Note that holding the diagonals will not work when attempting a throw, it MUST be straight left or right.
In depth on how throw works in this game: Link
Throw range table: Link
Special Attacks
Special attacks are attacks that require a more elaborate command input, and have unique effects and properties. These range from standard projectiles (Ky's Stun Edge) to Dragon Punches (Sol's Volcanic Viper) to command throws (Potemkin's Potemkin Buster). All Special Attacks are free, not requiring Tension or otherwise, but some characters have special attacks which change under certain conditions.
One distinct difference between special and normal attacks is that specials always build some tension, even if they miss completely. Special attacks also deal Chip Damage as well.
Force Breaks (FB)
Force Breaks are basically Special attacks that cost 25% Tension. Force Breaks are all character specific, so look at your character's move list for more information on how to do them.
Force Breaks are very strong and usually are well worth the Tension spent!
Overdrive Attacks ("Supers")
Much like "Supers" from other fighting games, Overdrive Attacks are attacks that use 50% of your Tension Gauge. Each Overdrive Attack is character specific, and it's up to you to know what your characters variation does and what properties it contains.
Note: Some characters have Overdrive attacks which require a full 100% meter to perform!
Instant Kill (IK)
To perform an Instant Kill, you must first enter Instant Kill Mode by pressing the P+K+S+H buttons at once. Afterwards, enter a second command (usually 236236H) to execute your Instant Kill.
When you enter Instant Kill Mode, your current Tension transforms into a timer. If the timer empties, you will remain in Instant Kill Mode, but your LIFE will begin to drain! You can manually exit Instant Kill Mode by pressing P+K+S+H.
Executing an Instant Kill takes you out of Instant Kill Mode and removes the Tension Gauge for the rest of the round. Meaning you will not be able to use commands that require Tension like Overdrives and Faultless Defense!
Defense
Blocking
Hold back or down-back to block high or low. Hold any backward direction to block while in midair.
- High block will not block lows
- Low block will not block overheads
- Air block will not block standing attacks
Faultless Defense
Hold any two attack buttons other than D or S+H while blocking to perform a Faultless Defense.
- FD quickly drains your tension
- FD pushes the opponent further away while blocking as well as negating chip damage and Guard Gauge buildup.
- Air FD allows you to block grounded attacks.
Thus you are trading Tension (usually an offensive resource) for defense.
FD Brake
By using Faultless Defense during a dash, you can block instantly, instead of being stuck in a dash's recovery animation.
This extremely vital technique is called FD Brake, and is one of the most important tools in the game.
Instant Block
Begin blocking just before an attack hits you to perform an Instant Block.
- IBs reduce both blockstun and pushback, allowing you more opportunities to counter attack.
- IB does not negate chip damage, nor does it allow you to block "incorrectly". You must still high block overheads, and low block low attacks.
- Your character will flash white if you performed an IB.
In depth on IB: Link
Slashback
Press S+H while blocking to perform a slashback.
- SBs greatly reduce blockstun and allow you to counterattack almost immediately afterwards.
- SBs negate chip damage and guard gauge buildup.
- Timing an SB is difficult: You must SB within 2 frames of the attack hitting you.
- You must SB in the correct direction. You must still high block overheads, and low block low attacks.
- Attempting a SB costs 2% of your Tension.
- You can not SB for a few frames on wakeup.
- After an unsuccessful SB, you can not block for a few frames.
Thus SBs are high risk, high reward defensive tool that punishes predictable offensive opponents who use the same blockstrings constantly.
In depth on SB: Link
Dead Angle Attack
Dead Angle Attacks are an invincible attack that does small amounts of damage that costs 50% Tension that can be performed while blocking.
Press forward and any two attack buttons (except Dust) while blocking to perform the DAA. These are synonymous to Counter Assaults in BlazBlue or Alpha Counters from Street Fighter Alpha.
These attacks are used to stop an opponent's offensive momentum, but can be baited by jump canceling into air block.
For more information on defensive mechanics, see this page.
Other Mechanics
Roman Cancel and Force Roman Cancel
Roman Cancels and Force Roman Cancels are a very important mechanic in Guilty Gear. We will give a brief overview of them here:
Roman Cancel
- Press any 3 attack buttons (excluding Dust) to cancel your attack into a neutral state.
- RCs cost 50% Tension
- Attacks must TOUCH the opponent (hit or block) in order to be RCd.
- Projectiles can not be RCd.
- You will know you did a RC if you see red rings appear around your character.
Roman Cancels may sound very expensive, but they are very versatile and very much worth the meter; RCs can make unsafe attacks safe, extend combos, and be used in mixups/frametraps.
Force Roman Cancel
- Press any 3 attack buttons (excluding Dust) during a small window during certain attack to return your character to a neutral state.
- FRCs cost 25% Tension and are available even on whiff!
- Only certain attacks can be FRCd. Go to training mode and turn on the input display to see which moves can be FRCd. If the input bar turns Blue, then it has an FRC.
- FRC windows are also listed in each character's frame data.
- You will know you did a FRC if you see blue rings appear around your character.
FRCs are just as important as RCs if not more so thanks to the fact that they are available even on whiff and cost only 25% Tension. The downside is that the FRC window is usually very small (2 frames on average) and thus require lots of practice to perform them reliably in a match.
Bursts
Bursts are an attack where your character creates an energy shockwave and blows the opponent away. Bursts can be used as an offensive or defensive tool depending on the scenario. Press D + any other attack button with a full burst gauge to perform a burst.
The Burst gauge fills up very slowly over time or when getting hit.
Blue Burst
Press D + any other attack button while blocking or getting hit to perform a Blue Burst. Blue Bursts blow the opponent away, allowing you to interrupt an opponent's combo or reset the momentum of a match.
- You can not Blue Burst while getting hit by throws and supers.
- Bursts are strike invincible during startup, but not throw invincible!
- You are vulnerable while recovering from a Blue burst.
- Using a Blue Burst completely empties your Burst Gauge...
- ... but hitting the opponent with the Blue Burst refills approximately 1/3 of it!
Gold Burst
Press D + any other attack button while in a neutral state to perform a Gold burst.
- Hitting the opponent with Gold Burst fills up your Tension to max!
- Bursts are strike invincible during startup, but not throw invincible!
- Unlike Blue Bursts, you are still strike invincible while recovering from a Gold Burst.
- Using a Gold Burst consumes approximately 2/3 of your Burst Gauge
Taunts and Respects
Though it's not really "attacking", Taunt and Respect do have their uses.
All characters have both a Taunt and a Respect. To perform a Taunt, simply press Start (Arcade) or R (Respect on Console). Taunts can be canceled into into any attack after about half of the animation has played. Respects, on the other hand, can be canceled at any time. Respects are performed by pressing 6R (or 6Start). Both the Taunt and Respect can be used to give a false sense of vulnerability as your opponent may be lured into attacking. Since the Respect can be canceled at any time, it's usually the best choice for a lure attempt.
Performing a Taunt will raise your opponents Tension Gauge slightly.
Performing a Taunt at the end of the match after the opponent is defeated will cause a 'Rakusyo', which will give the other player 50% tension at the start of the next round.


