
A quick poke, with a decent hitbox to boot
< GGACR
Overview
Overview
The grappler of Guilty Gear, named after the great Russian warship, The Potemkin. Pot essentially is a walking tank, dealing damage of ridiculous proportions whenever he gets in with his command throw of terrifying power: The Potemkin Buster.
Potemkin of course works best directly in the opponent's face, but still has some unique tools for dealing with situations outside of grab range. He has large hitboxes, good range, moves with super armor, and a variety of powerful throws at his disposal. He also has a number of anti-zoning tools, like F.D.B (a flick that turns enemy projectiles back at them) and Slide Head (full screen unblockable that sweeps anyone standing on the floor). Pot can then capitalize off these reads by using the mighty Hammer Fall to dash across the screen and begin his close-range brawling. If Pot can get you to sit still long enough, he'll throw in a Potemkin Buster and laugh as 1/3rd of your health is ripped away in a single move.
Perhaps more than any other character, Pot is capable of punishing on good reads very well. He has the best ground throw range in the game without Pot Buster alone, along with two anti-air grabs, an aerial command throw and the best air throw range in the game to boot. It's important to know that even with all of his anti-zoning tools, Potemkin still traditionally struggles against zoners and those who stay out of his range. As well, his mobility is awful, with no airdash to speak of.
Though he may have trouble against good zoning and projectiles galore, big damage is Pot's game. He just needs to get close enough to readily instill the fear. |
| Damage Received Mod |
| ×0.87 |
| Guts Rating |
| 4/5 |
| Gravity Mod |
| ×0.94 |
| Stun Resistance |
| 80 |
| Prejump |
| 5F |
| Backdash |
| 21F (1~20F Strike Invuln) |
| Wakeup Timing |
| 24F (Face Up)/ 22F (Face Down) |
| Number of Jumps: |
| 2 |
| Number of Air Dashes: |
| 0 |
| Unique Movement Options |
| No Run No Airdash Hammer Fall |
| Fastest Attack |
| 5P (5F) 632146P (3F) |
| Reversals |
| 632146H (17F) |
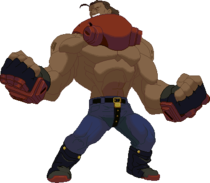
![]() Potemkin lumbers through neutral to headlock his opponent into a terrifying vortex of death.
Potemkin lumbers through neutral to headlock his opponent into a terrifying vortex of death.
Pros
Cons
- Potemkin Buster: The grab that defined every future anime grappler. No move matches its speed, damage, and range. Its sheer existence instills dread in every choice the opponent makes, including defending.
- Hammerfall: Sees obvious use as an armored charging move to challenge pokes, but the real meat comes from its application in Hammerfall Break Pressure—a way to gain frame advantage and correct spacing.
- Hits Like A Freight Train: Normals have ginormous base damage, reach and active time. Potemkin easily deals over 50% from several starters.
- Chokeholds His Opponent: Gets great knockdowns off of everything, turning his opponent's defense into paste in a matter of seconds.
- Defensive Buster: Toolkit lends itself excellently to universal defensive options like Instant Block, Slashback and Backdash. His throws also have great range and reward. Pressuring Potemkin is quite scary!
- Built Like A Tank: Has the highest defense and stun modifier in the game and the second highest guts giving Potemkin the overall highest base health in the game
- Horrid Mobility: Cannot dash or airdash, limiting his options to simply walking forward. Hammerfall is not a suitable replacement for either of these, and as such neutral requires strong patience and decision-making.
- Runaway Matchups: Potemkin's awful movement is accentuated when opponents don't need to come to him to be effective. He struggles against foes who gain advantage from running away and laming him out.
- Big target: Potemkin is both very wide and very tall, leaving him susceptible to things like instant overheads, F-Shiki Sometimes known as "Fuzzy Overhead". When you are in blockstun, you can switch high/low blocking, but your blocking animation and hurtbox does not change until you leave blockstun or block another attack. F-Shikis take advantage of this and use overheads that would miss on crouching characters, but not on standing characters.s, and character specific combos. Potemkin also cannot duck many things other characters can, such as many 5Ps and other moves that whiff on other crouching characters
Starter Guide
Need help getting started? Go to this page for information targeted at new players. It covers easy combos, key moves, and what to do after you knock the opponent down.
StartupThe time before an attack is active. Written startup values include the first active frame, so the startup on a frame chart will display one less square than the written value. Frames
Active The active frames of an attack refers to the amount of time an attack can hit the opponent. Frames
InactiveFrames in the middle of multi-hit attacks which cannot hit the opponent, but are after the move has become active at least once. Frames
Recovery The recovery of an attack refers to the amount of time an attacker must wait before they may perform another action, even blocking. Frames
Special RecoveryThe recovery of an attack refers to the amount of time an attacker must wait before they may perform another action.Recovery frames which happen under abnormal conditions, such as after landing. Frames
ProjectileIndicates an entity that exists separately from the character has become active. Usually something like a Fireball A projectile which usually travels slowly across the screen in a horizontal path above the ground.. Active
CancelA window in which to cancel a move. Can be varied in usage. Window
Normal Moves
5P


Frames 5-6

Frames 7-9


| Damage | Guard | Startup | Active | Recovery | On-Block | Invuln |
|---|---|---|---|---|---|---|
| 11 | Mid | 5 | 5 | 6 | -1 |
Total: 15
Your quickest jab, with a pretty good hitbox, capable of hitting crouching, standing, or even airborne opponents (sometimes).
Chain into 5K on the ground, or c.S if they're in the air. If they block, you can chain as normal, or go right into a Potemkin Buster if they're not expecting it.
Gatling Options: 5P, 2P, 6P, 5K, 2K, c.S, f.S, 2S, 5H, 2H, 6H, 5D, 2D
| FRC Window | Proration | Guard Bar+ | Guard Bar- | Level |
|---|---|---|---|---|
| N/A | 3 | 8 | 1 |
5K

Active for ages


| Damage | Guard | Startup | Active | Recovery | On-Block | Invuln |
|---|---|---|---|---|---|---|
| 22 | Low | 7 | 9 | 9 | -4 |
Total: 24
Your go to meaty option. Crazy active making it great for catching backdashes.
Tied with 2K for Potemkin's quickest low. Although 2K has more range, 5K has a higher attack level and will combo into 2S, giving it much more explosive damage. Can be alternated with 6K for a simple but very effective mixup with meter.
Gatling Options: c.S, f.S, 2S, 5H, 2H, 5D, 2D
| FRC Window | Proration | Guard Bar+ | Guard Bar- | Level |
|---|---|---|---|---|
| N/A | 90% | 8 | 7 | 3 |
c.S

50/50 chance this is going into 2S or APB


| Damage | Guard | Startup | Active | Recovery | On-Block | Invuln |
|---|---|---|---|---|---|---|
| 40 | Mid | 9 | 3 | 11 | 0 |
Total: 22
Perhaps the most standard button Potemkin has.
c.S is quite a good button on its own. It's quick, the hitbox is large and being jump-cancellable with Level 3 hitstun gives it a lot of use in aerial combos. The issue is nothing more than it being a close proximity button. His other options at close range help Potemkin in far more areas or have layered applications, which vastly outstrip this move's potential. Often just blockstring or combo filler, but it'll do its job without complaints.
Gatling Options: f.S, 2S, 5H, 2H, 5D, 2D
| FRC Window | Proration | Guard Bar+ | Guard Bar- | Level |
|---|---|---|---|---|
| N/A | 10 | 7 | 3 |
f.S

Traffic controller Potemkin says, "STOP!"


Frames 12-14

Frames 15-18


| Damage | Guard | Startup | Active | Recovery | On-Block | Invuln |
|---|---|---|---|---|---|---|
| 36 | Mid | 12 | 7 | 18 | -11 |
Total: 36
The perfect move for stopping IADs and advancing opponents. Hits at an upward angle, so you can throw it out early to stop your opponent from going airborne.
If you hit an airborne opponent at range, cancel into (2S) Heat Knuckle, or Heavenly Potemkin Buster if you've got tension to spare/it will win the round. On block it's a good idea to HFB, but you can also cancel into Slide Head for gimmicks.
Gatling Options: 2S, 5H, 2H, 5D, 2D
| FRC Window | Proration | Guard Bar+ | Guard Bar- | Level |
|---|---|---|---|---|
| N/A | 10 | 7 | 3 |
5H

The long arm of Zeppian Law


Frames 15-16

Frames 17-21


| Damage | Guard | Startup | Active | Recovery | On-Block | Invuln |
|---|---|---|---|---|---|---|
| 58 | Mid | 15 | 7 | 16 | -4 |
Total: 37
One of Potemkin's best pokes: fantastic range, big guard bar bump, plenty of blockstun.
Works like f.S, but for opponents that'll stay grounded or very low in the air (I-no, Order Sol, Jam to an extent). Cancel into Hammerfall Break for better advantage on block or just to gain ground, or cancel into Slide Head for cheap (but very punishable) mixup.
CH 5H leads to Slidehead or Hammerfall Break into a follow up combo. 5H is also the only move besides 6P/2H that leads to Giganter super vs airborne opponents. At distances where nothing else is possible, Air CH 5H > delay 5H works.
Gatling Options: 5D, 2D
| FRC Window | Proration | Guard Bar+ | Guard Bar- | Level |
|---|---|---|---|---|
| N/A | 20 | 6 | 5 |
5D


Frames 31-32, 35-36, 39-40

Frames 33-34, 37-38


| Damage | Guard | Startup | Active | Recovery | On-Block | Invuln |
|---|---|---|---|---|---|---|
| 30 | High | 31 | 10 | 6 | +3 |
Total: 46
Standing dust, with a remarkably large hitbox. While easier to use than 6K, the poor startup renders it very reactable. Best used as a surprise tactic after spacing the opponent out where they wouldn't expect to be hit overhead.
Anti-Air CH can be followed up (situationally) for a combo into Heat Knuckle/HPB.
| FRC Window | Proration | Guard Bar+ | Guard Bar- | Level |
|---|---|---|---|---|
| N/A | 15 | 20 | 5 |
- Potemkin is in CH state during move
6P

Pray you hit this move


Frames 13-14

Frames 15-19


| Damage | Guard | Startup | Active | Recovery | On-Block | Invuln |
|---|---|---|---|---|---|---|
| 35 | Mid | 13 | 7 | 19 | -9 | 1~4F Upper Body 5~14F Above Knees |
Total: 38
Potemkin's fantastic anti-air. Sports a great hitbox, lots of upper-body invincibility and lots of active frames. Pray the jump-ins away.
6P beats a ton of air attacks that other characters might struggle with, and it's so low profile that many attacks will whiff even if Potemkin anti-airs far too late. It's a solid defensive option against many things, such as late IADs, certain long-ranged pokes or improper safejumps. Whiffs on crouchers and has a vertical hitbox, so it nearly entirely lacks offensive use, but it does plenty already.
Followups are simple and damaging with many branching options. On a normal hit, Potemkin can go for an easy knockdown with Heat Knuckle or better yet jump cancel for an air combo. Options naturally become more freeform with a counterhit. See the combo page for more specifics.
| FRC Window | Proration | Guard Bar+ | Guard Bar- | Level |
|---|---|---|---|---|
| N/A | 90% | 14 | 6 | 4 |
- Floats on CH (untechable for 42F)
6K

The preferred overhead


| Damage | Guard | Startup | Active | Recovery | On-Block | Invuln |
|---|---|---|---|---|---|---|
| 40 | High | 18 | 3 | 20 | -4 | 1~15F Throw |
Total: 40
An 18 frame, nearly unreactable overhead with short range. Terrifying mixup tool combined with 5K.
Only used in Potemkin's oki for three reasons. One, no buttons gatling into 6K. Two, no one would ever just sit there and let Pot stagger into an overhead at close range, as they're too busy screaming bloody murder. Three, if you find someone who is willing to just sit there, you already know what to do Guard176 pixelsStartup3Recovery37Advantage-.
Spacing Potemkin out or safejumping is the preferred way to enforce the aforementioned mixup. While 6K has throw invulnerability on startup, it ends 3 frames before the attack hits. For this reason, its usage as a point-blank meaty will lose to reversal throws. Timing the attack late will allow it to shrug through throw attempts, but then it won't catch most characters' jump startup, among other problems.
Although one of Potemkin's hardest combos due to charging, 6K -> Hammerfall combos on crouching and baits bursts automatically. It's only really worth it with meter, but it leads to insane damage. Without meter, cancel to 2D.
Gatling Options: 2D
| FRC Window | Proration | Guard Bar+ | Guard Bar- | Level |
|---|---|---|---|---|
| N/A | 85% | 15 | 6 | 5 |
- Slams down on hit
6H


| Damage | Guard | Startup | Active | Recovery | On-Block | Invuln |
|---|---|---|---|---|---|---|
| 90 | Mid | 23 | 5 | 30 | -11 |
Total: 57
Potemkin's longest-ranged normal, hitting from nearly 2/3 of the screen away. Great for tagging backdashes or just landing an unexpected hit at range. Ridiculous on counter hit, as the CH holds them in place momentarily, allowing followups such as Giganter.
Cancel into Slide Head for an unblockable, or Hammerfall Break to get big frame advantage thanks to the custom hitstun. Characters with 4/5 frame prejump cannot escape Slide Head without IB/Backdash/Reversal.
Can be FRC'd right before it becomes active. 5P > 6H FRC Pot buster for shenanigans, or let it rip to catch backdashers.
| FRC Window | Proration | Guard Bar+ | Guard Bar- | Level |
|---|---|---|---|---|
| 20~21F | 50% | 20 | 6 | 5 |
- Dizzy modifier x0.75
- Custom blockstun
2P


| Damage | Guard | Startup | Active | Recovery | On-Block | Invuln |
|---|---|---|---|---|---|---|
| 12 | Low | 9 | 4 | 8 | -2 |
Total: 20
2P is almost a dead button, nigh worthless due to its terrible speed and shouldn't be used often. Its best use is to poke Eddie's shadow from far away at little risk to yourself. Otherwise any other normal would do you better.
Gatling Options: 6P, 5K, 2K, c.S, f.S, 2S, 5H, 2H, 5D, 2D
| FRC Window | Proration | Guard Bar+ | Guard Bar- | Level |
|---|---|---|---|---|
| N/A | 80% | 3 | 8 | 1 |
2K


Frames 7-8

Frames 9-10


| Damage | Guard | Startup | Active | Recovery | On-Block | Invuln |
|---|---|---|---|---|---|---|
| 16 | Low | 7 | 4 | 14 | -6 |
Total: 24
2K comes out as fast as 5K with better range, but has a lower attack level, higher recovery, and fewer active frames. Not a bad button, but not as widely applicable as 5K, and the reward on hit is rather poor.
On hit (f.S >) 2D is usually the most you will get. If the opponent is crouching, you can combo into 2S either on crouch hit or from c.S if close enough, but this rarely happens. Keep in mind that getting a knockdown as Potemkin is more than acceptable even if the damage isn't impressive, since you can easily make up for the poor damage from now afterwards.
Gatling Options: c.S, f.S, 2S, 2H, 5D, 2D
| FRC Window | Proration | Guard Bar+ | Guard Bar- | Level |
|---|---|---|---|---|
| N/A | 90% | 5 | 7 | 2 |
2S

A backhand so powerful, the opponent is sucked into the ensuing vacuum


| Damage | Guard | Startup | Active | Recovery | On-Block | Invuln |
|---|---|---|---|---|---|---|
| 36 | Mid | 13 | 3 | 16 | -2 |
Total: 31
Everyone's favorite move. Likely Potemkin's best normal in terms of overall usefulness.
Good range, high attack level, staggers on counter-hit, but most importantly, it has a vacuum effect that pulls the enemy towards you on hit or block. Can follow up with 2H at close range for massive combos, and combined with HFB GuardStartupRecoveryTotal 15Advantage- it's 0 on block. In neutral it's a sidegrade from f.S, with less active frames but more disjoint and harder to low profile.
Gatling Options: 2H, 5D, 2D
| FRC Window | Proration | Guard Bar+ | Guard Bar- | Level |
|---|---|---|---|---|
| N/A | 14 | 9 | 4 |
- Pulls in opponent on hit or block
- Pulls in and staggers on ground CH (max 35F)
2H

You'll either kill god or die trying.


| Damage | Guard | Startup | Active | Recovery | On-Block | Invuln |
|---|---|---|---|---|---|---|
| 66 | Mid | 13 | 5 | 35 | -21 |
Total: 52
A vicious uppercut that reaches ridiculously high, starts all of Potemkin's nastiest combos. The easiest followup is Heat Knuckle, which will always work on a previously grounded opponent. Using HFB instead is where Potemkin starts his aerial routes, which all do gargantuan damage and lead into knockdowns.
Counterhit 2H is Potemkin's absolute best starter. Your opponent can't tech until they've hit the ground, no matter how high they were when you hit, along with a great starting proration. Even relatively simple combos off of CH 2H can do 50% or more. Slashback 2H is a frequent way to get these counterhits and annihilate people. The move also carries a 1.25x dizzy modifier, so use this instead of 6H if you're aiming to stun.
It's not recommended as an anti-air over 6P, but if you're going to use it then make sure you know it'll connect before committing to it. With no invincibility and slow startup, you'll have to throw it out early, but it can at least catch crossups quite well.
Has an FRC point when it goes active, but it's mostly situational, used for some anti-burst option selects and some specific/stylish combos.
Gatling Options: 5D, 2D
| FRC Window | Proration | Guard Bar+ | Guard Bar- | Level |
|---|---|---|---|---|
| 13~15F | 20 | 6 | 5 |
- Dizzy modifier x1.25
2D


| Damage | Guard | Startup | Active | Recovery | On-Block | Invuln |
|---|---|---|---|---|---|---|
| 35 | Low | 12 | 5 | 14 | -5 |
Total: 30
A great low with fantastic range. Use it to end ground combos, tag your opponent on wakeup, or just keep them guessing at range. Special cancellable, so use Hammerfall Break to get that much closer to the opponent after a knockdown or extra safety on block.
Combos into Heat Knuckle on Faust and May (unless it hits at max range).
| FRC Window | Proration | Guard Bar+ | Guard Bar- | Level |
|---|---|---|---|---|
| N/A | Forced 80% | 8 | 7 | 3 |
j.P


| Damage | Guard | Startup | Active | Recovery | On-Block | Invuln |
|---|---|---|---|---|---|---|
| 18 | High/Air | 5 | 9 | 6 |
Total: 19
Important for gaining some height in Pot's air combos. Low attack level makes it good for tick throws after a jump in.
Gatling Options: j.P, j.K, j.S, j.H, j.D
| FRC Window | Proration | Guard Bar+ | Guard Bar- | Level |
|---|---|---|---|---|
| N/A | 3 | 8 | 1 |
j.K


| Damage | Guard | Startup | Active | Recovery | On-Block | Invuln |
|---|---|---|---|---|---|---|
| 22 | High/Air | 9 | 8 | 13 |
Total: 29
Has a decent hitbox, but you'll mostly just be using this because it's jump cancellable. It also crosses up, giving Potemkin a left/right mixup after Heat Knuckle connects.
Gatling Options: j.P, j.S
| FRC Window | Proration | Guard Bar+ | Guard Bar- | Level |
|---|---|---|---|---|
| N/A | 8 | 7 | 3 |
j.S

Cornerstone of Potemkin's air game


Frames 14-16

Frames 17-19


| Damage | Guard | Startup | Active | Recovery | On-Block | Invuln |
|---|---|---|---|---|---|---|
| 32 | High/Air | 14 | 6 | 23 |
Total: 42
Probably Potemkin's best air move, with a nice, tall hitbox. If you want to jump, this normal will do you many favors. Good for safejumps.
Functions as Potemkin's knockdown tool in air combos, since it brings the opponent down on hit. On counter hit gives a fully untechable ground bounce giving you plenty of options to follow up.
Gatling Options: j.P, j.H, j.D
| FRC Window | Proration | Guard Bar+ | Guard Bar- | Level |
|---|---|---|---|---|
| N/A | 8 | 7 | 3 |
- Ground bounces on CH (untechable for 60F)
- Slams down opponent on hit
j.H

Excellent combo filler, crossup, and whiffed air throw


| Damage | Guard | Startup | Active | Recovery | On-Block | Invuln |
|---|---|---|---|---|---|---|
| 40 | High/Air | 11 | 6 | 16 |
Total: 32
Good for air-to-air damage or as a crossup attack, but doesn't offer a lot of follow-ups without proper routing. Can be used to safejump, and can be easier for this purpose than j.S, but has heavier pushback which may not always be ideal.
| FRC Window | Proration | Guard Bar+ | Guard Bar- | Level |
|---|---|---|---|---|
| N/A | 11 | 6 | 4 |
j.D


| Damage | Guard | Startup | Active | Recovery | On-Block | Invuln |
|---|---|---|---|---|---|---|
| 45 | High/Air | 11 | Until landing | 8 after landing | 9F~Landing Butt |
Total: 19
Pot Butt. After a brief pause, Potemkin drops rapidly to the ground. Silly air normal with many uses, but shouldn't be relied upon.
Catching an air opponent plummets them to the earth with you for a knockdown. Can change the angle of descent by holding left/right, and has lower body invuln.
While useful for many things; getting to the ground faster, whiffing it for surprise busters, and as an anti-anti-air, j.D is also very gimmicky. Potemkin should rarely ever be in the air, and there are plenty of moves that beat it clean or will cause a clash, which you'll lose if you're not prepared. Don't throw it out willy-nilly.
Combos after j.S for a knockdown into whatever oki you please.
| FRC Window | Proration | Guard Bar+ | Guard Bar- | Level |
|---|---|---|---|---|
| N/A | 11 | 6 | 4 |
- Slams down opponent on hit
- Potemkin is in crouching state during landing recovery
- Can change angle of descent by holding left/right
Universal Mechanics
Ground Throw

| Damage | Guard | Startup | Active | Recovery | On-Block | Invuln |
|---|---|---|---|---|---|---|
| 45, 30 | 55 pixels |
Toss your opponent like a ragdoll. Has two hits, one right as Potemkin lets go, and another once they land.
Has a 4F FRC window after tossing the opponent, allowing for follow-ups like 2S > Heat Knuckle to keep your opponent close and give you oki. Forced 50% proration means anything longer won't be worth it unless they're nearly dead already.
| FRC Window | Proration | Guard Bar+ | Guard Bar- | Level |
|---|---|---|---|---|
| 40~44F | Forced 50% | 6, 0 |
- Sends opponent on opposite side of throw direction
Air Throw

| Damage | Guard | Startup | Active | Recovery | On-Block | Invuln |
|---|---|---|---|---|---|---|
| 70 | 104 pixels |
A particularly satisfying airthrow with huge range. Slams the opponent down on hit.
| FRC Window | Proration | Guard Bar+ | Guard Bar- | Level |
|---|---|---|---|---|
| N/A | Forced 50% | 6 |
- Slams down opponent on hit
Dead Angle Attack

Frames 13-17
Frames 18-32

| Damage | Guard | Startup | Active | Recovery | On-Block | Invuln |
|---|---|---|---|---|---|---|
| 35 | All | 13 | 20 | 3 | -9 | 1~17F All 18~32F Throw |
Uses 5D animation, making its horizontal reach notably better than most other Dead Angles. If you need some breathing room, this is a great way to get it. A point blank hit in the corner can net you a 5P into a small combo, otherwise gives a knockdown.
| FRC Window | Proration | Guard Bar+ | Guard Bar- | Level |
|---|---|---|---|---|
| N/A | 50% | 10 | 7 | 3 |
- Potemkin is in CH state during move
Special Moves
Mega Fist
236P or 214P


Frames 25-27

Forward: Frames 28-32
Backward: Frames 28-33


| Version | Damage | Guard | Startup | Active | Recovery | On-Block | Invuln |
|---|---|---|---|---|---|---|---|
| 236P | 50 | High/Air | 25 | 8 | 0+13 after landing | -9 | 1~24F Lower Body |
| 214P | 50 | High/Air | 25 | 9 | 0+6 after landing | +4 | 1~24F Lower Body |
Total: 45
Total: 39
Mega Fist Forward (236P) jumps over a ton of normals while putting out a massive hitbox that's difficult to beat and prone to trading. Scores a knockdown on hit, which is always great for Potemkin. Fantastic as a counterpoke, especially when mixed in with your own pokes and Hammerfall, and can be quite abusable in certain matchups. However in terms of raw data, it's inferior to Reverse in every way. Oddly only Level 2 on block.
Has some interesting FRCs. The first FRC point is before the hit, turning the move into a weird command jump that can be jump installed for air options. The second FRC point is during the first active frames making it safer if blocked.
Mega Fist Backward (214P) is solid as an easy-to-input defensive option, and can be mixed in with other options to make it harder to handle Potemkin's defense. Better as a raw attack than Forward thanks to superior data, it has a high attack level, more active frames, less recovery, and staggers on counter hit for big damage. But don't lie, you got this as a Potemkin Buster misinput and wrote it off as a disengagement option.
Can be FRC'd on frames 25-26F, and 28-29F. Yes, they're a frame apart. No, I don't know why.
| Version | FRC Window | Proration | Guard Bar+ | Guard Bar- | Level |
|---|---|---|---|---|---|
| 236P | 16~17F, 25~26F | 5 | 7 | 3 | |
| 214P | 25~26F, 28~29F | 15 | 6 | 5 |
236P:
- Potemkin is airborne from 4F onwards
- Level 2 attack on block
- Slams down opponent on hit
214P:
- Slams down opponent on hit
- Potemkin is airborne from 5F onwards
- Staggers on ground CH (max 35F)
Slide Head
236S

You think you're safe standing fullscreen like that?


The first hitbox. The second hit strikes along the entire floor

| Damage | Guard | Startup | Active | Recovery | On-Block | Invuln |
|---|---|---|---|---|---|---|
| 40, 0 | Low, Unblockable | 23 | 2(2)1 | 25 | -11 | 1~16F Above Feet, 26~35F Above Knees |
Total: 52
One of Potemkin's more interesting moves, used as an anti-zoning and fullscreen knockdown tool.
Slide Head has two different attacks during its active frames. If either hit, the opponent gets knocked down and kept them there for an extra 40 frames over normal knockdown length, giving Pot time to advance. The first is Potemkin's actual body itself, a level 5 attack that hits low, but that's likely not what you're using it for. If the first attack misses, the second attack occurs, which sends out an unblockable shockwave, covering about 3/4 of the ground at full zoom-out.
This shockwave can be avoided by being airborne or if a character lifts their hurtbox off the ground (Dizzy dash, May 5K, etc.). As a fullscreen tool, it can make characters like A.B.A or Justice think twice about using certain tools in neutral, as a well timed Slide Head will put them right into your vicious oki game. Beware, if you use it poorly or your opponent reads you, you can be punished severely.
Has a secondary use in oki. It has a very similar animation to 6K, but as previously stated the first hit is a low while the move will instead become unblockable if spaced and requires a completely different response. This is generally only worth it along with the FRC, but makes blocking all the harder.
| FRC Window | Proration | Guard Bar+ | Guard Bar- | Level |
|---|---|---|---|---|
| 27~29F | 90% | 15, - | 6 | 5 |
- Followups are treated as OTG
- 2nd hit (quake) has startup 27F
- Quake does not come out if first hit touches opponent
Hammer Fall
[4]6H

Blow up their poke


| Damage | Guard | Startup | Active | Recovery | On-Block | Invuln |
|---|---|---|---|---|---|---|
| 60 | Mid | 19~27 | 2 | 33 | -18 | 1F~1st active frame: Armor |
Earliest Hammerfall
Latest Hammerfall
Total: 47
Total: 63
Potemkin's second most important move, an armored charging attack that does it all. Requires a 30f charge time.
Lunges forward with a single hit of armor for a certain distance or until he reaches the opponent, then smashes his fists together. Deals huge damage, and causes a knockdown when it connects on a grounded opponent. The armor and speed of Hammerfall makes it amazing for crushing opponents who try to keep Potemkin away with slower buttons, and as a frametrap or anti-jump during pressure.
Hammerfall's second yet most important trait is its ability to be cancelled into Hammerfall Break (or Hammerfall Brake, if you will), which can be used to dramatically reduce the recovery of many attacks and/or move Potemkin forward during his pressure. By itself Hammerfall is already fantastic, but with this it sets Potemkin apart from any other grappler.
Because of its wide use, Hammerfall should be charged by holding back whenever possible, often referred to as Potemkin's ABCs. Note that Potemkin cannot cancel the first frame of Hammerfall, as he must first enter Hammerfall before he is able to cancel it. Additionally, the lack of an input buffer requires P to be input distinctly after H.
Hammerfall also has an FRC window, which begins 3F after hitstop or 3F of Potemkin's fists connecting on whiff. This FRC is one of the best in the game, as it turns Hammerfall massively plus (+14) and enables explosive combos. It is likely the most important FRC for Potemkin to learn.
| FRC Window | Proration | Guard Bar+ | Guard Bar- | Level |
|---|---|---|---|---|
| 3F after first active | 14 | 12 | 4 |
- Must charge back for 30F to perform Hammer Fall
- Startup varies with distance from opponent
- Can cancel into Hammer Fall Break from 2F until 9F before the end of Startup
- Armor absorb one non-super hit for half damage
Hammer Fall Brake
[4]6H > P

From a generic grappler charge, to the great equalizer
| Damage | Guard | Startup | Active | Recovery | On-Block | Invuln |
|---|---|---|---|---|---|---|
| Total 15 |
Total: 15
Hammer Fall Brake lets Potemkin stop Hammer Fall early without an attack, allowing you to put up a defense, or use a more suitable attack for the given situation. Note that if you hit P too late (within about ten frames of it going active), Brake won't occur, so it's worthwhile to practice at different ranges and get the timing down, especially when using it for going in after Slide Head, or to catch an opponent with a Potemkin Buster.
Fastest possible Hammer Fall Brake completes in 16F, 1F of Hammer Fall and 15F of Hammer Fall Brake.
| HFB Frame Advantage Cheat Sheet | ||
|---|---|---|
| Attack | On-Block | On Block + HFB |
| 5P | -1 | -7 |
| 2P | -2 | -7 |
| 6P | -9 | 0 |
| 5K | -4 | -3 |
| 2K | -6 | -5 |
| 6K | -4 | +2 |
| c.S | 0 | -3 |
| f.S | -11 | -3 |
| 2S | -2 | 0 |
| 5H | -4 | +2 |
| 2H | -21 | +2 |
| 6H | -11 | +7 |
| 2D | -5 | -3 |
| FRC Window | Proration | Guard Bar+ | Guard Bar- | Level |
|---|---|---|---|---|
| 3~10F |
- Fastest possible Hammer Fall Break completes in 16F
F.D.B.
63214S

The Flick

The Flicked


| Version | Damage | Guard | Startup | Active | Recovery | On-Block | Invuln |
|---|---|---|---|---|---|---|---|
| 63214S | 40 | All | 21 | 3 | 12 | +2 | 4~14F Reflect |
| 63214S Reflect | 16 | All | 1 | 98 | Total 22 | 1~End Strike |
Total: 35
Flick Dat Back! A mighty flick with two separate aspects: the attack and the reflect (see below).
The attack portion sports a huge, disjointed hitbox extended well beyond and above the flick itself and good priority. If it hits a grounded opponent, they'll be staggered, and a counter-hit will catapult the opponent across the screen and cause a wallstick for followups if Potemkin is close enough. On block, they'll be pushed away a good distance, but it's fortunately plus on block. Can be used as a frametrap if Potemkin is spaced out and doesn't want to risk Hammerfall, but sadly gives little reward on an air hit.
The second aspect of F.D.B. During frames 4-14 of F.D.B.'s startup, any projectile within Potemkin's hurtbox (the box that determines if Potemkin is hit) will be reflected back as a slow moving, screen filling projectile. After reflecting a projectile, Potemkin is strike invincible until he recovers, although this won't save you from multi-hit projectiles unless they're out of the way by then.
This projectile will keep going even if it hits other projectiles (most of which will be destroyed), and will travel for a full screen length or until it strikes the opponent.
| Flickable Moves | |
|---|---|
| Character | Flickable Moves |
| |
| |
| |
| |
| |
| |
| |
| |
| |
| |
| |
| |
| |
| |
| |
| |
| |
| |
| |
| |
| |
| |
| |
| |


| Version | FRC Window | Proration | Guard Bar+ | Guard Bar- | Level |
|---|---|---|---|---|---|
| 63214S | N/A | 14 | 6 | 4 | |
| 63214S Reflect | N/A | 0 | 7 | 3 |
63214S:
- Wall sticks on CH (untechable for 80F, sticks for 28F)
- On successful reflect creates projectile (See F.D.B. Reflect)
- Stagger on normal hit for a max of 65F
63214S Reflect:
- Goes through other projectiles
- Staggers on normal hit for a max of 35F
Potemkin Buster
632146P


You'll only see this sprite if you missed, so try not to do that

| Damage | Guard | Startup | Active | Recovery | On-Block | Invuln |
|---|---|---|---|---|---|---|
| 160 | 176 pixels | 3 | 1 | 37 | 1~2F Front Foot 1~16F Throw 3~5F All |
Total: 40
The grab to end all grabs, that which all of Potemkin's game plan is centered around, and set the groundwork for many future grapplers. Potemkin Buster puts terror in your offense, reinforces your defense, steals games, destroys health bars, and makes people hate your character. Every Buster landed feels like a victory of its own.
With 3F startup and a 176-pixel range, it's hard not to catch people with this. In addition to its already great range, many attacks actually bring the character's throwbox forward, making them even easier to catch before their active frames have even started. Has 12F afterwards to follow-up attack, for example with c.S or 5K in the corner, for even higher damage and meterbuild.
| FRC Window | Proration | Guard Bar+ | Guard Bar- | Level |
|---|---|---|---|---|
| N/A | Forced 75% | 6, 15 |
- Dizzy modifier x0.5
- Has 12F afterwards to follow-up attack
Heat Knuckle
623H

His hand represents only about half of the hitbox


No upper body invincibility, so don't use this as a raw anti-air

| Damage | Guard | Startup | Active | Recovery | On-Block | Invuln |
|---|---|---|---|---|---|---|
| 0, 15×2, 40 | Unblockable, FD×3 | 14 | 1 | 22 |
Total: 36
An unblockable anti-air grab best used in combos or to stop people jumping away after Hammerfall Brake. Has good reach horizontally and vertically, but no invincibility, so its use as an anti-air in neutral is somewhat limited.
Only hits airborne opponents, and unceremoniously drops them to the ground in front of you for great oki. Alternatively you can cancel it into Heat Extend for big damage, big meterbuild, and a big launch.
There is an FRC point that is only available on whiff, thus meaning you can use it to make it safer if it misses. This gives a potential Option Select A technique where one command (or series of commands) will perform a different action depending on the circumstances, thereby allowing one action to be able to handle two distinct situations.: With less than 50 meter, it leads to FRC if the opponent used Burst, allowing a full punish. On hit, it will continue like normal.
- Fun Fact: it's actually possible to Slashback the first hit of Heat Knuckle and Faultless Defense the rest (or Slashback all of them).
| FRC Window | Proration | Guard Bar+ | Guard Bar- | Level |
|---|---|---|---|---|
| 23~24F on whiff | 8, 6×3 | 1, 5×3 |
- Can only hit airborne opponents
- Can input motion for followup Heat Extend for 50F after Potemkin grabs them
- 1st hit can be SBed
Heat Extend
623H > 63214H

| Damage | Guard | Startup | Active | Recovery | On-Block | Invuln |
|---|---|---|---|---|---|---|
| 95 | FD | Strike |
Heat Knuckle followup. Blast their body across the map, and build tons of meter.
Midscreen, you sacrifice oki for using this, and will need to Hammerfall to regain footing. This doesn't render it useless, as sometimes the damage is just enough to close out the round, or the extra damage and meter are deemed useful enough to you that it's fine having a worse oki situation. In the corner you don't sacrifice as much, but you'll still need to Hammerfall.
If they Slashbacked your Heat Knuckle, there are three things they can do from here. The first is to simply FD, and survive at the cost of meter. The second is to use air reversals, which are detailed below. The third is to Slashback Heat Extend, which will cause them to fall to the ground slowly. Potemkin is strike invincible for a short period of time, meaning he can be thrown, or the opponent can simply wait and attack. Counterhit during its entire recovery.
| Possible Air Reversals against Heat Extend | ||||
|---|---|---|---|---|
| Character | Move | Clashes✓ - clashes, allowing for cancels ✗ - does not clash |
Can Buffer✓ - does not require timing ✗ - requires specific timing |
Notes |
Volcanic Viper GuardAllStartup5RecoveryUntil landing+10Advantage- GuardAllStartup5RecoveryUntil landing+10Advantage- |
✓ | ✓ | Falls slowly if cancelled. | |
Vapor Thrust GuardMidStartup9Recovery32+13 after landingAdvantage-34 GuardMidStartup9Recovery32+13 after landingAdvantage-34 |
✗ | ✗ | Always loses. | |
Ride The Lightning GuardAllStartup7+1RecoveryUntil landing+3Advantage- GuardAllStartup7+1RecoveryUntil landing+3Advantage- |
✓ | ✗ | Drifts down towards Potemkin. | |
Beta Blade GuardAllStartup3RecoveryUntil landing+8Advantage- (both) GuardAllStartup3RecoveryUntil landing+8Advantage- (both) |
✓ | ✓ | Falls slowly if cancelled. | |
FB Sultry GuardAllStartup9Recovery23Advantage- GuardAllStartup9Recovery23Advantage- |
✓ | ✗ | Requires strange timing. Falls slowly. | |
Ultimate Fortissimo GuardAllStartup7+0RecoveryUntil landingAdvantage+27 GuardAllStartup7+0RecoveryUntil landingAdvantage+27 |
✗ | ✗ | Always loses. | |
Storm Viper GuardAllStartup8RecoveryUntil landing+8Advantage- GuardAllStartup8RecoveryUntil landing+8Advantage- |
✓ | ✓ | Launches Sol up, bad situation for him. | |
Executor GuardAllStartup4+7Recovery37 after appearingAdvantage- GuardAllStartup4+7Recovery37 after appearingAdvantage- |
✗ | ✓ | Punishable with Buster. Just FD/SB instead. | |
| Note: ABA, Bridget, Jam, Johnny, Millia, Robo-Ky, Slayer and Zappa all must time it to the explosion. | ||||
| FRC Window | Proration | Guard Bar+ | Guard Bar- | Level |
|---|---|---|---|---|
| N/A | 6 | 5 |
- Blows away opponent on hit
- Replaces final hit of Heat Knuckle
Force Breaks
Judge Gauntlet
63214D

More awesome than effective


Frames 28-30

Frames 31-33


| Damage | Guard | Startup | Active | Recovery | On-Block | Invuln |
|---|---|---|---|---|---|---|
| 85 | Mid | 28 [10] | 6 | 28 | -15 | 2~28F Armor |
Total: 61
Pseudo-reversal armored punch. If Potemkin is hit during the startup, he enters a reeling stance and immediately attack 10 frames after hitstop ends, even autocorrecting if he's crossed up.
Often considered one of the worst Force Breaks in the game. Horrendous startup that isn't frame 1 invincible, a bad hitbox that's easily avoided by jumping, no throw invuln, and other character-specific counters. The reeling stance combined with super armor granting hitstop only serves to telegraph the move and make it easier for opponents to avoid it once it's triggered, although moves with low hitstop won't cause issues.
As a panic reversal it's a metered gamble with its only upside being its easy input; Potemkin has many other ways to escape pressure that do not carry nearly as many weaknesses as this. Judge Gauntlet's best applications come in beating very specific setups typically involving slow multi-hitting moves or flowcharted pressure that you can't beat with IB Buster yet need to escape from.
This is not to say it will never succeed or be used effectively, however, most Potemkin players strongly recommend forgoing its use entirely and instead learning to properly use Potemkin's other options, wherein Judge Gauntlet will only exist to make you look like a clown when you mess up TK APBTiger Knee Aerial Potemkin Buster
Often done by performing a 360 motion starting from 6 (632147896).
Startup can be cancelled with P, and is mainly used in some pressure escapes and silly shock tactic buster setups. Cancel animation is 14F.
| FRC Window | Proration | Guard Bar+ | Guard Bar- | Level |
|---|---|---|---|---|
| N/A | 85% | 20 | 6 | 5 |
- Potemkin absorbs enemy attacks between 2~28F
- If Potemkin gets hit between 2~23F, then he goes into endurance stance immediately
- If Potemkin gets hit between 24~28F, then he attacks immediately
- Attack starts 10F after the start of endurance stance (geting hit again resets the 10F startup)
- Potemkin immediately attacks after getting hit 7+ times while in endurance stance
- Potemkin takes half damage while absorbing hits
- Potemkin cannot absorb supers
- Can input P to cancel between 6~24F. Cancel animation is 14F.
Aerial Potemkin Buster
j.632146D

Was it not enough just to have it on the ground?


| Damage | Guard | Startup | Active | Recovery | On-Block | Invuln |
|---|---|---|---|---|---|---|
| 0, 140 | FD | 5 | 1 | Until landing+12 | 1~9F Throw |
Total: 17
Most fun combo tool in the game, somewhat tricky to use and not actually a grab. Takes all the suck from Judge Gauntlet and turns it into goodness.
Connects as part of a combo, but you can't cancel into it from air normals. On hit, Potemkin jumps in the opposite direction from the one he was originally traveling and busters the opponent with a slightly different knockdown arc and an FRC for even more damage. You'll mostly use it as a followup to ground attacks like counter-hit 6P, a 2H followed by Hammerfall Break, or after midair jump cancels.
In the corner, c.S > APB and 2H HFB > APB loop into themselves, creating the Potemkin Bus Tour which has no stops and only lets you off when you're dead. This lends itself greatly to cashing out on Tension and closing rounds, since c.S connects after a ground Potemkin Buster in the corner.
Actually hits mid and whiffs on grounded opponents, so it can be blocked using Faultless Defense in the air. If blocked in this manner, Potemkin can RC it.
| FRC Window | Proration | Guard Bar+ | Guard Bar- | Level |
|---|---|---|---|---|
| 9~11F after throw | 100%, Forced 75% | 6, 0 | 5 |
- Can only hit airborne opponents
- Cannot be cancelled into
- Potemkin is in CH state until landing
- Potemkin is in crouching state during landing recovery
- On hit, Potemkin jumps in the direction opposite to the direction he was originally travelling
- Can RC only if blocked
Overdrives
Giganter
632146H

The wall of stun

| Damage | Guard | Startup | Active | Recovery | On-Block | Invuln |
|---|---|---|---|---|---|---|
| 45 | All | 9+8 | 48 | Total 41 | +9 | 1~9F All 10~15F Strike |
Total: 41
Projects a giant wall of energy that slowly moves forward. Godlike super, and one of Potemkin's best uses for meter.
On hit, Giganter staggers your opponent on the ground and floats them in the air along with a hefty 3x stun modifier to almost instantly put them in the red—especially on counterhit. If that doesn't stun, Potemkin has more than enough time to followup with whatever he wants, which can simply be a Potemkin Buster or a jaw-dropping stun combo if he so pleases.
Can cancel into Gigantic Bullet from 16-29F regardless of hit or whiff, which gives Giganter even more interesting applications.
Also good as a reversal. The projectile always comes out and stays out even if Potemkin gets hit, absorbs projectiles, and is plus on block. It's not infallible, with slow startup, a deadzone between Potemkin and the mirror as well as invincibility running out before the active frames, it's possible for opponents to bait it with quicker moves and then punish with a throw. In other cases, the massive reward on hit will make many opponents think twice about pressure against Potemkin. Fear the mirror.
| FRC Window | Proration | Guard Bar+ | Guard Bar- | Level |
|---|---|---|---|---|
| N/A | 20 | 6 | 5 |
- Dizzy modifier x3
- Can cancel into Gigantic Bullet from 16~29F
- Shield destroys most other projectiles on contact
- Shield always goes active on successful input
- Staggers on normal hit for a max of 55F
Gigantic Bullet
632146H > 4123641236P

The wall of pain


| Damage | Guard | Startup | Active | Recovery | On-Block | Invuln |
|---|---|---|---|---|---|---|
| 126 | Mid | 51 | 24 | 14 | -19 |
Total: 88
Meterless Giganter followup, trading versatility for colossal damage. Bring the pain.
Purely a combo tool, and terrifying when optimized. Wallbounces for followups on any hit for even more damage, and oki. Things only get better when you use it after an air hit Giganter, going from a simple 5K followup to netting you a 2H for even crazier routes. Note that if you're using this in the corner, Gigantic Bullet loses a lot of merit. The aforementioned wallbounce can play against you, so stick to the regular Giganter or APB there. An easy way to use this super is to simply spin your stick/pad during Giganter's superflash, then pressing P.
If you're too lazy to do 6K > HF > FRC, Gigantic Bullet's got you covered. Confirming into this from 6K grants the unreactable overhead massive damage for not much execution, just a simple Tension fee.
| FRC Window | Proration | Guard Bar+ | Guard Bar- | Level |
|---|---|---|---|---|
| N/A | 20 | 6 | 5 |
- Dizzy modifier x0
Heavenly Potemkin Buster
236236S

I am protector of Zeppian skies!


Frames 13-20

Frames 21-27


| Damage | Guard | Startup | Active | Recovery | On-Block | Invuln |
|---|---|---|---|---|---|---|
| 170 | Unblockable | 12+1 | 15 | 10 | 1~12F All 13~27F Upper Body |
Total: 37
Big leaping anti-air grab. Despite the cool name and high raw damage, HPBHeavenly Potemkin Buster is very mediocre and can end up as a waste of Tension, but hey at least it's not Judge Gauntlet.
HPB in combos serves as a low execution, burst-safe ender. Everything falls apart if you're willing to put in a little more elbow grease, as 2H > HFB > APB does nearly identical damage while allowing for better followups for less meter cost. Further issues pile on, from its terrible damage scaling, high price and more. Outside of easily closing rounds, you should forget about using this move in combos.
The other use for HPB is as an anti-air. Invulnerability during startup and upper-body invincibility while the hitbox is active lets it get the job done, but the initial hitbox is lackluster and whiffs at random. As you may have also guessed, launching Potemkin into the air is a massive issue when the move misses, and its unimpressive startup often means a 6P probably would've worked just fine for more than acceptable (if not better) reward. Still, you can get some uses out of it for opponents who insist on buzzing over your head, or to flex your crazy reads.
| FRC Window | Proration | Guard Bar+ | Guard Bar- | Level |
|---|---|---|---|---|
| N/A | 6 |
- Can only hit airborne opponents
- Potemkin is airborne from 13F onwards
- Dizzy modifier x0.5
Instant Kill
Magnum Opera
During IK Mode: 236236H

Kiss your ass goodbye


| Damage | Guard | Startup | Active | Recovery | On-Block | Invuln |
|---|---|---|---|---|---|---|
| Fatal | All | 11+6 | 12 | 16 | -9 | 1~21F Strike |
Total: 44
The hitbox is a huge square around Potemkin. A dizzied opponent in the corner is probably your best chance, but don't bet on it. Much cooler than Infernal Tour.
| FRC Window | Proration | Guard Bar+ | Guard Bar- | Level |
|---|---|---|---|---|
| N/A | 20 | 5 |
- IK Mode activation: 98F
Colors

Default P

Default K

Default S

Default H

Default D

EX P

EX K

EX S

EX H

EX D

Slash P

Slash K

Slash S

Slash H

Slash D1

Reload P

Reload K

Reload S

Reload H

Reload D1


Gold2

Shadow2


To select your color, press the corresponding button while in the designated "color set". Color sets can be toggled through by hitting the Respect button.
- Only selectable on the Arcade and PC-Rollback versions of the game.
- Available on home ports, and are selected by pressing the Rec. Enemy button on the Slash or Reload color sets, respectively. Gold characters are powered up versions, Shadow characters have infinite tension. Both are banned from tournament play.
To edit frame data, edit values in GGACR/Potemkin/Data.
A.B.A
Anji
Axl
Baiken
Bridget
Chipp
Dizzy
Eddie
Faust
I-No
Jam
Johnny
Justice
Kliff
Ky
May
Millia
Order-Sol
Potemkin
Robo-Ky
Slayer
Sol
Testament
Venom
Zappa
Systems Pages