| Line 1,058: | Line 1,058: | ||
===<big>Elegant Slash</big>=== | ===<big>Elegant Slash</big>=== | ||
<span class="input-badge">'''{{clr|1|623P}} | <span class="input-badge">'''{{clr|1|623P}} '''</span> | ||
<div class="attack-container"> | <div class="attack-container"> | ||
<div class="attack-gallery"> | <div class="attack-gallery"> | ||
| Line 1,064: | Line 1,064: | ||
Images = | Images = | ||
<gallery widths="210px" heights="210px" mode="nolines"> | <gallery widths="210px" heights="210px" mode="nolines"> | ||
GGAC_Ky-EX_ElegantSlash.png| | GGAC_Ky-EX_ElegantSlash.png|Civilized Throw | ||
</gallery> | </gallery> | ||
|-| | |-| | ||
Revision as of 08:31, 9 October 2021
Guilty Bits Character Intro
Normals
5P


A well-rounded jab. Ky generally has better options for most situations but you can set up frame traps, bait Bursts, and anti-air with it.
- Good vertical range.
- Nice backup anti-air when 6P would fail (like if you were crossed up).
- Gatlings into any other attack.
Gatling Options: 5P, 2P, 6P, 5K, 2K, 6K, c.S, f.S, 2S, 5H, 2H, 3H, 5D, 2D
5K

Literally footsies


Frames 5-6

Frames 7-9

Frames 10-12


Ky's main normal for okizeme and low mixup. Super fast, active for a long time, and hits low.
- Hits surprisingly high up.
- Active enough to catch backdashes.
Additional Frame Data: 80% initial proration.
Gatling Options: 6P, 6K, c.S, f.S, 2S, 5H, 2H, 3H, 5D, 2D
c.S

Multipurpose normal.


A versatile attack that's usually the midway point in a gatling string. By the time you use this in a string you can hit confirm and combo, or cancel into a jump, or another normal on block. c.S is also used a lot in combos or as a punish starter due to its speed and many cancel options.
- Lots of options on hit or block.
- Hits really high up, so it works as an anti-air.
- Preferred normal to throw option select with.
- Preferred normal to Jump Install in specific combos.
- Long hitstun on CH, enough to combo into 3H.
- Often used to frame trap due to its high reward on CH.
Gatling Options: 6P, 6K, f.S, 2S, 5H, 2H, 3H, 5D, 2D
f.S

Transcontinental normal


Frames 10-12

Frames 13-15


A long reaching normal best used to space out your opponent from medium to far range. Usually cancelled into 2S or 236H/S, depending on range. It's recommended to be careful using it against characters who have low profiling moves such as Stun Dipper and Sol's Grand Viper along with Zappa's run and Faust's crouch walk.
- Extends hurtbox significantly
Gatling Options: 6K, 2S, 3H, 5D, 2D
5H

His 5H from GGX. Despite appearances, it can't be used for anti-airing, but is an otherwise nice, fast, long-reaching hit that leaves you with advantage on block. Go into Stun Edge if you want some pressure extension, or Grand Vapor Thrust for damage conversions.
Gatling Options: 6K, 5D, 2D
6P


Ky's go-to anti-air, and a good combo starter on Counter Hit. This is generally used instead of 2H when you're specifically reacting to a deep jump in, since it is fast and has invul. Often cancelled into c.S for safety in the event of a clash or to hit confirm.
- Upper body invulnerable early in the animation, then above-knees invulnerable for the rest.
- Its invul can be used to beat some defensive options, such as DAA, or Vapor Thrust.
- Floats and blows opponent back a far distance on CH.
- Often used as a frame trap due to high reward on CH.
- Sometimes used to start 6H loops on CH from very close hits.
Additional Frame Data: Upper body invincible 1~6F. Above knees invincible 7~13F. Blows back opponent on CH (untechable for 56F on ground hit, air hit for 28F). 90% initial proration.
Gatling Options: 6K, c.S, f.S, 2S, 5H, 6H, 3H, 5D, 2D
6K


Slower than his normal version, but causes ground slide on hit that can be converted into damage in the corner.
- Moves Ky forward.
- 0 on IB.
Additional Frame Data: Puts opponent in blowback state on air hit (untechable 25F).
6H

Go ahead, mash that DP


1st Hit (Frames 23-30)

2nd Hit (Frame 31)


A powerful attack for okizeme when you have enough time to use it. Ky's slowest grounded normal other than 5D, in exchange for being ultra plus on block and option selecting most reversals when timed correctly.
The Option Select works because 3H's recovery is extremely fast (only 3 frames). If you use it at the correct okizeme timing, you can hit the opponent with the last couple of active frames if they blocked, and recover in time to block if they did an invulnerable attack. This technique becomes more difficult the faster the opponent's reversal is, since the safe window shrinks. For example, against Robo Ky it's a 1f window to correctly bait his Level 2/3 DP and have the second hit of 3H connect, because it has only 3f of startup. Against Ky you have a much larger window due to his Vapor Thrust having 11f of startup.
- Hits 2 times.
- Forces opponent into crouching state on hit.
- Heavily increases Guard Gauge.
- The 2nd hit is a common target for SB. Though this will negate Ky's absurd frame advantage, he is still safe.
5D

Don't be careless with this dust!


A long range overhead cancellable from a lot of normals. Unsafe on block, but the opponent might have some trouble punishing it if used further away. On hit, you can do a simple Dust combo or go for harder, more optimal Impossible Dust combos.
2P

The Linker


Ky's fastest normal, making it a great combo tool for making links as stable as possible, setting up tick throws and frame traps, and for mashing out of pressure.
- Though this is his fastest normal, 2K may be the preferred link in certain situations where its superior range is necessary.
Additional Frame Data: 80% initial proration.
Gatling Options: 5P, 2P, 6P, 5K, 2K, 6K, c.S, f.S, 2S, 5H, 2H, 3H, 5D, 2D
2K

Exhibit A: "What defines a crouching light kick"


A fast, low risk poke in neutral, especially when dashing in.
- Has very good range for its speed.
- Being low to the ground avoids airdash attacks.
Additional Frame Data 70% initial proration.
Gatling Options: 6P, 6K, c.S, f.S, 2S, 5H, 2H, 3H, 5D, 2D
2S


A superb, low risk neutral tool for spacing the opponent out and ending pressure at range. Covers a lot of options that Ky's standing pokes lose to, including very low-profile moves such as Sol's Grand Viper and 2D. Often cancelled into Stun Edge on hit or block, or layered with a 2D input to combo into a knockdown at closer ranges.
- Quite a disjointed hitbox.
- Being low to the ground avoids airdash attacks.
Gatling Options: 6K, 5H, 2H, 3H, 5D, 2D
2H

Keep The Flag Flying


Frames 12-13

Frames 14-15


A huge anti-air that can also be used as a poke to cover many options in neutral at once. Because it's a bit slow and has no upper body invulnerability, it's usually used as a preemptive anti-air to beat airdashes and stop the opponent from jumping out of pressure. On block it's very safe since it can be jump canceled. The recovery on this move isn't insignificant, but it's quick for what it is.
- Pulls in on air hit.
- Launches on Counter Hit.
Gatling Options: 5D, 2D
2D
Some say it's still active to this day...


Frames 7-12

Frames 13-17


Used in combos to knock down into okizeme and at the end of blockstrings to disengage using a jump cancel. Cancel into Stun Edge FRC, Sacred Edge, or Lightning Sphere to extend combos or reset pressure.
- Hilariously long active frames
Additional Frame Data: 85% initial proration.
j.P


Frames 6-8

Frames 9-11


A fast airborne poke. It has somewhat short range and doesn't hit below Ky so it isn't very good for hitting an opponent under you. Used while rising to check the opponent or to interrupt something. Usually canceled into from better jump ins like j.S.
- Cancels into j.D to start tricky mixup situations.
- Burst safe.
Gatling Options: j.P, j.K, j.S, j.H, j.D
j.K

A go-to option for air-to-air tactics.


Frames 7-10

Frames 11-14


A big air poke used to stuff moves from far away. Great in general for air-to-air fights.
- Crosses up.
- Not jump cancellable, so cancels into j.P or j.S for air combos.
- Cancels into j.D to start tricky mixup situations.
Gatling Options: j.P, j.S, j.H, j.D
j.S

Tingly (yet great) option to air combos.


A versatile move. It's a strong jump-in attack, is used in airdash high/low mixups off of Charged Stun Edge FRC, and cross-ups after a Lightning Javelin knockdown. You can also apply advanced f-shiki mixups off of a deep j.S due to its big vertical hitbox.
- Crosses up.
- Air combo filler.
Gatling Options: j.P, j.H
j.H

Get dunked.


A massive swipe that's great for space control, and Ky's go-to landing move, especially when performing a safejump. Cancel into j.236S/H/D when it's blocked to keep the pressure up. Its startup frames are also useful when doing empty jump mixups, where you would fake it hitting overhead.
j.D

Stop! You violated the law. Stop mashing or be served your punishment. Your airspace is now forfeit.

j.D is a unique move. Ky creates an electric cross in the air that hangs in place a moment before exploding, launching on hit and even higher on counterhit. It's often used for okizeme to encourage the opponent to block, and in tricky crossup mixups after a solid knockdown. It can also be used in neutral to cover yourself from both air and grounded approaches, or be chained into from j.P and j.K to set up mixups, but it can be risky to use in these ways due to its long startup and high amount of landing recovery.
The landing recovery for j.D will be applied even if Ky airdashes or does another attack in the air afterwards - unless Ky does a double jump, in which case he can land normally.
- Stops Ky's air momentum on use.
- Remains even if Ky blocks, but disappears if Ky is hit.
- Hard to hit short characters like Zappa and Faust.
Additional Frame Data: Floats opponent on ground hit (untechable for 28F). Floats opponent higher on CH (untechable for 46F). Landing recovery 11F. Ky is in CH state until 16F. Is a projectile. If j.D makes contact with another projectile, j.D's hitbox immediately disappears. Cannot perform a second j.D until first j.D disappears.
Universal Mechanics
Ground Throw

A basic throw, but vital nonetheless. Option Select offensively with c.S, or defensively with 6P. FRC just as Ky's sword hits the ground for a combo to make your mixup more punishing.
- 2f FRC point at 59~60f.
Additional Frame Data: Knocks down. 50% forced proration.
Air Throw

Air throw that wallbounces in the corner, link with 2P for a combo. Option Select with j.P or j.K for safety.
Additional Frame Data: Wall bounces opponent on hit (untechable for 60F). 50% forced proration.
Dead Angle Attack
While useful in a pinch, Ky has a lot of defensive options you should consider using before committing to this unsafe guard cancel.
- Uses 6P's animation.
- Wallbounces in the corner.
Additional Frame Data: Total length of animation: 38F. Fully invincible 1~14F. Throw invincible 15~32F. Wall bounces opponent on hit (untechable for 28F). Initial prorate 50%.
Specials
Stun Edge
236S/H

Coconut!

A fast, single hit projectile. Good for controlling space. FRC to force your way in at neutral, reset pressure, or in difficult optimal damage combos.
- The S version comes out very fast and recovers quickly.
- Good harassment tool for ending blockstrings and cancelling from f.S or 2S.
- Opponents can Instant Air Dash over it to punish continued use.
- 2F FRC point at 22~23F, when Ky's cape comes back to rest on his legs.
- The FRC can be used to continue pressure on block, combo on hit, and bait air dashes.
Additional Frame Data: Untechable for 18F. Ky is in CH state from 1~21F.
H Stun Edge moves faster, but has longer startup and recovery. It's good in neutral situations and in combos where the S version doesn't work.
- 2F FRC point at 25~26F, same visual cue as S version.
Additional Frame Data: Untechable for 20F. Ky is in CH state from 1~24F.
Charged Stun Edge
236D

A large 3-hit projectile that excels on okizeme, allowing free mix-ups when opponents are forced to block it.
- Travels nearly fullscreen.
- 2F FRC point at 31~32F, just as Ky flourishes to unleash the attack.
- Jumping immediately after an FRC makes the projectile follow Ky into the air, controlling a large amount of space. Input forward for a moment before jumping to cancel the follow effect.
- The FRC can be used to create opportunities in neutral, or set up high/low mixup on okizeme.
Additional Frame Data: Untechable for 20F Hitstop 7F. Can cancel into followup (Lightning Sphere) from 9~27F
Air Stun Edge
j.236S/H

A fast, single-hit projectile fired at the ground. Good for controlling space. You can mess with your landing timing by firing this off as opponents try to anti-air you. FRC to force your way in, escape bad situations, and set up airdash high/low mixups.
- S version goes at about a 30 degree angle.
- Significant landing recovery.
- 3F FRC point at 16~18F, just after the projectile begins to fly. Slightly later than H version.
- FRC restores air options.
Additional Frame Data: Untechable for 18F. Ky is in crouching state during landing recovery. Has a minimum height requirement
The H version is better used to harass the opponent in neutral, or in combos due to its longer hitstun.
- H version goes at about a 60 degree angle.
- Significant landing recovery.
- 3F FRC point at 14~16F, as soon as the projectile begins to fly.
- FRC restores air options.
Additional Frame Data: Ky is in crouching state during landing recovery. Has a minimum height requirement
Air Charged Stun Edge
j.236D

3-hit projectile, much like the ground version. Travels at about a 30 degree angle like S Air Stun Edge, preventing opponents from getting under it. Useful against Faust, who can crouch under ground 236D.
- 2F FRC point at 21~22F, just as Ky flourishes to unleash the projectile.
- This FRC does not reset your jump options like the Air Stun Edge FRCs do.
- FRCing can cause the projectile to change directions to face the opponent.
- The infamous 'shtkn strat' j.236D FRC negative edge a j.236H! If you do this right, Ky will effectively do 2 air fireballs that cover a big part of the playing field.
- While you won't do much damage off this, You can use it to keep the opponent away and catch unsuspecting enemies that try to air dash or jump at you.
Additional Frame Data: Untechable for 25F. Ky is in crouching state during landing recovery. Hitstop 7F. Has a minimum height requirement
Vapor Thrust
623S/H (Air OK)

High into the atmosphere.

EX Ky's most obvious improvement over his normal counterpart is here. This move starts up a little bit faster and has the attack able to hit the opponent if they are next to Ky. It's very similar to Volcanic Viper in function. This helps elevate it from a primarily combo tool with an occasional reversal use, to an actually reliable (is somewhat still overly vertical) reversal.
Additional Frame Data: Fully invincible 1~8F. Ky is airborne from 9F onwards. Floats opponent on hit (untechable for 50F). Initial prorate 80%.
- H version's invul extends into active frames, so it's strictly better to use if you're getting jumped at.
- Launches the opponent lower than S version
Additional Frame Data: Fully invincible 1~10F. Strike invincible 11~15F. Ky is airborne from 11F onwards. Initial prorate 80%.
- Air version mostly sees use as a combo filler.
Additional Frame Data: Strike invincible 1~10F. Floats opponent on hit (untechable for 45F). Can cancel into Lightning Javelin from 15~33F
Strike Through
Vapor Thrust/Grand Vapor Thrust -> 214K

S version wallsticks, H version wallbounces

A quick whack with the sword before both Ky and his opponent fall down. This move has a lot of untechable time, which can lead into solid okizeme, but if the opponent is too high, they can tech out of it.
Needle Spike
236K (Air OK)

2nd hit won't combo if you do it too close to the opponent.

A sword slash that floats followed by a divekick that knocks down. The kick part is an overhead, but since it's telegraphed by the first hit, it's more of a close ranged combo ender into fireball oki.
The aerial version just does the kick, before Ky falls straight down. Can be used to change your air momentum, but if you tiger knee the input, it becomes a fast, difficult to react to overhead. Not a lot of reward, but does lead into knockdown and lets you start your offense back up.
Greed Sever
236[K]

UNBLOCKABLELow crush
(bless GGPO)

Uses the first hit of Needle Spike and the actual Greed Sever part takes years to happen. You would likely to have to be asleep to be hit by this raw.
Crescent Slash
214K The Grand Return

'

Another glorious return from GGX, this rising overhead is fast, low crushes, is silent during startup, and leads into an air combo.
Grand Vapor Thrust
214S

Ky slides along the ground and swings his sord, before rising into a Vapor Thrust. Very useful for converting your ground strings thanks to it's FRC. The first hit can pass through the opponent, but the move comes out too fast to be a crossup, so no cheap mixups for you young man.
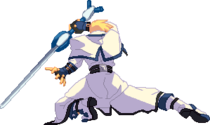
Elegant Slash
623P

Civilized Throw

Quick fast command throw that leads into a small air combo similar to Crescent Slash. This turns Ky's tick throw game into something especially scary, since he doesn't need to rely on an FRC to get conversions
Force Breaks
Lightning Sphere
Charged Stun Edge -> 4D

Through the gates of heaven...

A powerful attack that's performed during the startup of 236D. Great in neutral for suddenly filling the space in front of you, in blockstrings for resetting pressure, and in high damage combos. Commonly used after 6k to confirm into a combo or reset pressure. Often you can catch an opponent reacting to the startup of 236D and attempting to jump over it with this attack.
- Vacuums opponent.
- Must be blocked with FD in the air.
- Can be cancelled into Charge Drive.
Additional Frame Data Untechable for 25F. Hitstop 7F. Total length 43F. Can cancel into followup (Charge Drive) from 30~36F
Charge Drive
Lightning Sphere -> 46D

...to the altars of hell

Finishing blow followed up from Lightning Sphere. Deals a high amount of stun and blows the opponent away. Wall Sticks in the corner, allowing a short follow-up combo.
Additional Frame Data Forced prorate 70%. Wallsticks opponent on hit (untechable for 80F, sticks for 60F)
Stun Rays
j.214D
Looks just like j.D, but has a lot of special properties.
An exceptionally powerful version of Ky's j.D that lasts a long time and remains active even if Ky gets hit. It can be used to set up a wall to keep the opponent away in neutral. Setting it for okizeme severely limits the opponents wakeup options and will launch on hit, starting combos.
- Must be blocked in the air with Faultless Defense
- Be sure to space it correctly (or be in the air) when the opponent wakes up in order to avoid being thrown.
Additional Frame Data 22F hitstun on standing hit. Untechable for 40F. Floats opponent on CH (untechable for 62F). Ky is in CH state until 15F. Hitstop 6F. Has a minimum height requirement. Projectile guaranteed to appear after 12F
Lightning Strike
222D
- GGACR Ky 222D.png
Holy shit guys, we solved the Justice matchup
Like the one from his normal version, but can be used at any time and while the opponent is anywhere on screen, including midair.
Overdrives
Ride the Lightning
632146H (Air OK)

Lies, you don't ride it

This version is a stationary projectile that wallbounces on hit. Theoretically more useful in combos than the normal version, but that isn't saying very much. Very hard to argue with a reversal super that will guarantee to catch opponents not blocking before the super flash however.
Sacred Edge
632146P (Air OK)

Burned by the glory of a sacred fire

Same animation as the normal version, but the projectile lingers a bit before going forward, making it pretty worthless in neutral compared to before. Also there is now an air version.
Instant Kill
Rising Force
During IK Mode: 236236H

Thunder and spark, in the heart of the dark

Ky's Instant Kill is actually pretty fast and far-reaching. This makes it exceptionally useful (by IK standards, anyway) if you are able to stun your opponent or if you are fighting ABA and force her into Suka Motion
Additional Frame Data IK mode activation: 46F
Colors

Default P

Default K

Default S

Default H

Default D

EX P

EX K

EX S

EX H

EX D
Slash P

Slash K

Slash S

Slash H

Slash D1

Reload P

Reload K

Reload S

Reload H

Reload D1


Gold2

Shadow2


To select your color, press the corresponding button while in the designated "color set". Color sets can be toggled through by hitting the Respect button.
- Only selectable on the Arcade and PC-Rollback versions of the game.
- Available on home ports, and are selected by pressing the Rec. Enemy button on the Slash or Reload color sets, respectively. Gold characters are powered up versions, Shadow characters have infinite tension. Both are banned from tournament play.
External References
To edit frame data, edit values in GGACR/Ky Kiske/Data.
 A.B.A [★]
 Anji Mito [★]
 Axl Low [★]
 Baiken [★]
 Bridget [★]
 Chipp Zanuff [★]
 Dizzy [★]
 Eddie [★]
 Faust [★]
 I-No [★]
 Jam Kuradoberi [★]
 Johnny [★]
 Justice [★]
 Kliff Undersn [★]
 Ky Kiske [★]
 May [★]
 Millia Rage [★]
 Order-Sol [★]
 Potemkin [★]
 Robo-Ky [★]
 Slayer [★]
 Sol Badguy [★]
 Testament [★]
 Venom [★]
 Zappa [★]
Click [★] for character's full frame data
• Starter Guide •
HUD •
Controls •
Frame Data & System Data •
FAQ •
Training Mode •
• Movement/Canceling •
Offense •
Defense •
Damage/Combo System •
Gauges •
Misc •