No edit summary |
(Color Coding) |
||
| Line 3: | Line 3: | ||
======<span style="visibility:hidden;font-size:0">Overview</span>====== | ======<span style="visibility:hidden;font-size:0">Overview</span>====== | ||
{{Overview | {{Overview | ||
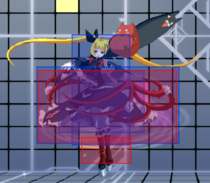
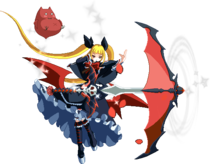
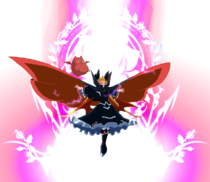
|overview=Rachel Alucard is a zoner/rushdown hybrid in BBTag with an incredibly strong okizeme vortex both solo and with her partner. Her unique mechanic is called '''Sylpheed''', which allows her to influence the direction of certain normal and projectiles, including herself, her opponent, and both their partners. Her zoning is oppressive and flexible due to the recovery on her 236A and the angles she can cover with wind; her vortex is just as strong due to | |overview=Rachel Alucard is a zoner/rushdown hybrid in BBTag with an incredibly strong okizeme vortex both solo and with her partner. Her unique mechanic is called '''Sylpheed''', which allows her to influence the direction of certain normal and projectiles, including herself, her opponent, and both their partners. Her zoning is oppressive and flexible due to the recovery on her {{clr|1|236A}} and the angles she can cover with wind; her vortex is just as strong due to j{{clr|1|2A}} and {{clr|1|2A}} being an unreactable high/low mixup that’s only made better with layered assist pressure. The transition from zoning to her rushdown/vortex game plan is made much easier due to her winding herself with {{clr|1|214A}} and {{clr|3|214B}}. Her {{clr|1|5A}}, {{clr|1|5AA}}, and {{clr|1|2A}} are all capable of deleting projectiles, which allows her to act immediately after to set up her own zoning game or rushdown pressure immediately after. If you fall behind in momentum against Rachel, it can be incredibly difficult to regain your footing as she can control the pace in any way she chooses. She can also be slippery to pin down when you do try to catch her due to the insane movement capabilities Sylpheed gives her access to. | ||
|lore=Head of the infamous Alucard vampire family, Rachel is an extremely powerful individual, controlling wind and lightning. She primarily acts as an observer during the events of Blazblue, and she will rarely directly interfere with the world-altering phenomena that surround the Hierarchical City of Kagutsuchi. However, Rachel may occasionally gently nudge pieces into their places when she views it necessary for the benefit of the world, such as when she saved Ragna by giving him the Azure Grimoire, or when she saves a time-displaced Jin by granting him the Susano'o Unit. Rachel main goal in doing this, however, is to one day break the century-long time loop that has affected the BlazBlue universe since time immemorial. She has several servants under her command; Nago, a cat familiar, and Gii, a bat familiar, which serve as her weapons, furniture, and anger relief. Her butler, Valkenhayn R. Hellsing, is also notable for being a powerful werewolf and one of the Six Heroes, a legendary group of warriors that defeated the Black Beast. | |lore=Head of the infamous Alucard vampire family, Rachel is an extremely powerful individual, controlling wind and lightning. She primarily acts as an observer during the events of Blazblue, and she will rarely directly interfere with the world-altering phenomena that surround the Hierarchical City of Kagutsuchi. However, Rachel may occasionally gently nudge pieces into their places when she views it necessary for the benefit of the world, such as when she saved Ragna by giving him the Azure Grimoire, or when she saves a time-displaced Jin by granting him the Susano'o Unit. Rachel main goal in doing this, however, is to one day break the century-long time loop that has affected the BlazBlue universe since time immemorial. She has several servants under her command; Nago, a cat familiar, and Gii, a bat familiar, which serve as her weapons, furniture, and anger relief. Her butler, Valkenhayn R. Hellsing, is also notable for being a powerful werewolf and one of the Six Heroes, a legendary group of warriors that defeated the Black Beast. | ||
|voice_actor= | |voice_actor= | ||
| Line 34: | Line 34: | ||
==Normal Moves== | ==Normal Moves== | ||
===<big>4A</big>=== | ===<big>{{clr|1|4A}}</big>=== | ||
<div class="attack-container"> | <div class="attack-container"> | ||
<div class="attack-gallery"> | <div class="attack-gallery"> | ||
| Line 63: | Line 63: | ||
|} | |} | ||
==== ==== | ==== ==== | ||
* Only 4A is jump cancelable | * Only {{clr|1|4A}} is jump cancelable | ||
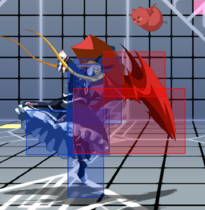
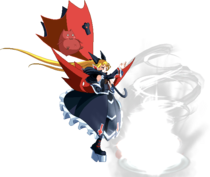
Her anti-air, one of the better anti-airs in the game. Guard point comes out frame 5, and on counter hit the hitstun lasts until ground tech. Hits crossup and is jump cancellable on block. 4AA is a mid and isn't a true blockstring so it can be mashed out of with a reversal. | Her anti-air, one of the better anti-airs in the game. Guard point comes out frame 5, and on counter hit the hitstun lasts until ground tech. Hits crossup and is jump cancellable on block. {{clr|1|4AA}} is a mid and isn't a true blockstring so it can be mashed out of with a reversal. | ||
</div> | </div> | ||
</div> | </div> | ||
===<big>5A</big>=== | ===<big>{{clr|1|5A}}</big>=== | ||
<div class="attack-container"> | <div class="attack-container"> | ||
<div class="attack-gallery"> | <div class="attack-gallery"> | ||
| Line 104: | Line 104: | ||
* Jump Cancelable | * Jump Cancelable | ||
Because 5A can be jump canceled, this normal is another good opportunity to go for an instant overhead j.A in your pressure. | Because {{clr|1|5A}} can be jump canceled, this normal is another good opportunity to go for an instant overhead {{clr|1|j.A}} in your pressure. | ||
In neutral, the wind portion of this normal has no hurtbox while having decent range of its own. This allows Rachel to use it as a counter poke to pokes with hurtboxes that extend forward a good amount. | In neutral, the wind portion of this normal has no hurtbox while having decent range of its own. This allows Rachel to use it as a counter poke to pokes with hurtboxes that extend forward a good amount. | ||
| Line 110: | Line 110: | ||
* Jump Cancelable | * Jump Cancelable | ||
Similar to 5A, 5AA is jump cancelable and is another good opportunity to go for an instant overhead j.A mixup. | Similar to {{clr|1|5A}}, {{clr|1|5AA}} is jump cancelable and is another good opportunity to go for an instant overhead {{clr|1|j.A}} mixup. | ||
Outside of this, 5AA is mostly used in combos. However, it should be noted that at 5A's maximum spacing, 5AA will whiff. In these cases, you should cancel into 5B instead to avoid dropping the combo. | Outside of this, {{clr|1|5AA}} is mostly used in combos. However, it should be noted that at {{clr|1|5A}}'s maximum spacing, {{clr|1|5AA}} will whiff. In these cases, you should cancel into {{clr|3|5B}} instead to avoid dropping the combo. | ||
5AA also vacuums the opponent towards you, allowing you to pull them out of the corner to cross up. | {{clr|1|5AA}} also vacuums the opponent towards you, allowing you to pull them out of the corner to cross up. | ||
---- | ---- | ||
* Great for corner carry | * Great for corner carry | ||
* Can use wind by inputting a direction as the move is coming out | * Can use wind by inputting a direction as the move is coming out | ||
Currently, the unwinded version of 5AAA doesn't see too much use outside of doing the A smart combo. If you apply a 6 wind to it, it can be great for corner, especially if you extend the combo with an assist afterwards. It's important to note this attack lasts as long as Rachel is in the air or A is hit again, meaning if you wind her in an upward direction, the hitbox will remain active until she touches the ground. | Currently, the unwinded version of {{clr|1|5AAA}} doesn't see too much use outside of doing the A smart combo. If you apply a 6 wind to it, it can be great for corner, especially if you extend the combo with an assist afterwards. It's important to note this attack lasts as long as Rachel is in the air or A is hit again, meaning if you wind her in an upward direction, the hitbox will remain active until she touches the ground. | ||
---- | ---- | ||
* Knocks down | * Knocks down | ||
| Line 126: | Line 126: | ||
</div> | </div> | ||
</div> | </div> | ||
===<big>5B</big>=== | ===<big>{{clr|3|5B}}</big>=== | ||
<div class="attack-container"> | <div class="attack-container"> | ||
<div class="attack-gallery"> | <div class="attack-gallery"> | ||
| Line 161: | Line 161: | ||
* On air hit, blows back | * On air hit, blows back | ||
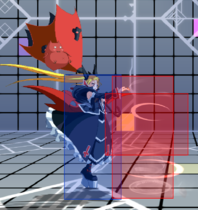
Rachel's longest reaching ground poke is 5B. This button is best used to catch people off guard when they're chasing after you from the ground. | Rachel's longest reaching ground poke is {{clr|3|5B}}. This button is best used to catch people off guard when they're chasing after you from the ground. | ||
---- | ---- | ||
* Moves Rachel forward a good distance, allowing it to connect even from 5B's max range | * Moves Rachel forward a good distance, allowing it to connect even from {{clr|3|5B}}'s max range | ||
5BB is mostly just used for combos. | {{clr|3|5BB}} is mostly just used for combos. | ||
---- | ---- | ||
* Crumples on hit, allowing combo extensions by doing microdash 5A on some characters | * Crumples on hit, allowing combo extensions by doing microdash {{clr|1|5A}} on some characters | ||
* Can use wind by inputting a direction as the move is coming out | * Can use wind by inputting a direction as the move is coming out | ||
5BBB is mostly used in combos. | {{clr|3|5BBB}} is mostly used in combos. | ||
</div> | </div> | ||
</div> | </div> | ||
===<big>5C</big>=== | ===<big>{{clr|4|5C}}</big>=== | ||
<div class="attack-container"> | <div class="attack-container"> | ||
<div class="attack-gallery"> | <div class="attack-gallery"> | ||
| Line 202: | Line 202: | ||
* Universal overhead | * Universal overhead | ||
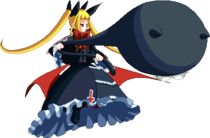
Not much to say about this one, your standard 5C. Comes out relatively quickly, but is extremely easy to see coming thanks to Nago's dramatic transformation. | Not much to say about this one, your standard {{clr|4|5C}}. Comes out relatively quickly, but is extremely easy to see coming thanks to Nago's dramatic transformation. | ||
</div> | </div> | ||
</div> | </div> | ||
===<big>2A</big>=== | ===<big>{{clr|1|2A}}</big>=== | ||
<div class="attack-container"> | <div class="attack-container"> | ||
<div class="attack-gallery"> | <div class="attack-gallery"> | ||
| Line 234: | Line 234: | ||
* Main low mixup | * Main low mixup | ||
Rachel's main low mixup and the second half of her 50/50 mixup game. At most points where you can go for an instant overhead j.A mixup, you can go for a 2A low mixup. Can be used twice in a blockstring as opposed to before where it could be only used once. This coupled with her previously mentioned instant overhead gives Rachel incredibly deadly mixup game in close quarters. | Rachel's main low mixup and the second half of her 50/50 mixup game. At most points where you can go for an instant overhead {{clr|1|j.A}} mixup, you can go for a {{clr|1|2A}} low mixup. Can be used twice in a blockstring as opposed to before where it could be only used once. This coupled with her previously mentioned instant overhead gives Rachel incredibly deadly mixup game in close quarters. | ||
</div> | </div> | ||
</div> | </div> | ||
===<big>2B</big>=== | ===<big>{{clr|3|2B}}</big>=== | ||
<div class="attack-container"> | <div class="attack-container"> | ||
<div class="attack-gallery"> | <div class="attack-gallery"> | ||
| Line 265: | Line 265: | ||
* Has full body guardpoint (5-23f) | * Has full body guardpoint (5-23f) | ||
* Launches on hit | * Launches on hit | ||
* Can be comboed into from 5BB | * Can be comboed into from {{clr|3|5BB}} | ||
Rachel's infamous cat chair, despite it being a poor reversal tool both in previous titles and in this game. Guardpoint is active on frame five, meaning that if meated properly, mashing 2B will just get Rachel counterhit. Intended as an anti-air, this attack starts up fairly quickly, has good vertical reach, and has decent untech time, meaning that on counterhit combos are possible without an assist. However, converting off of a counterhit 2B on airborne foes is more difficult than on grounded foes. | Rachel's infamous cat chair, despite it being a poor reversal tool both in previous titles and in this game. Guardpoint is active on frame five, meaning that if meated properly, mashing {{clr|3|2B}} will just get Rachel counterhit. Intended as an anti-air, this attack starts up fairly quickly, has good vertical reach, and has decent untech time, meaning that on counterhit combos are possible without an assist. However, converting off of a counterhit {{clr|3|2B}} on airborne foes is more difficult than on grounded foes. | ||
</div> | </div> | ||
</div> | </div> | ||
===<big>2C</big>=== | ===<big>{{clr|4|2C}}</big>=== | ||
<div class="attack-container"> | <div class="attack-container"> | ||
<div class="attack-gallery"> | <div class="attack-gallery"> | ||
| Line 302: | Line 302: | ||
* Hold C to do more hits but lose the ability to special cancel | * Hold C to do more hits but lose the ability to special cancel | ||
Rachel's sweep. It's good for knocking an opponent off their feet so you can start air juggling an opponent in a combo by following it up with 236A/B~8. It's also good for ending your combos when you're on the ground since it'll knockdown and you can special cancel it into Lotus or George for oki if you have a nearby lobelia pole or Skill Gauge to spend. | Rachel's sweep. It's good for knocking an opponent off their feet so you can start air juggling an opponent in a combo by following it up with {{clr|1|236A}}/{{clr|3|B}}~8. It's also good for ending your combos when you're on the ground since it'll knockdown and you can special cancel it into Lotus or George for oki if you have a nearby lobelia pole or Skill Gauge to spend. | ||
</div> | </div> | ||
</div> | </div> | ||
===<big>j.A</big>=== | ===<big>{{clr|1|j.A}}</big>=== | ||
<div class="attack-container"> | <div class="attack-container"> | ||
<div class="attack-gallery"> | <div class="attack-gallery"> | ||
| Line 338: | Line 338: | ||
A very strong mixup tool. When combined with a 2 input to use wind, it allows for a very fast overhead option that leads to a full combo. | A very strong mixup tool. When combined with a 2 input to use wind, it allows for a very fast overhead option that leads to a full combo. | ||
It can also be used as a jump in normal when combined with a 3 wind input. However, j.A doesn't have a lot of reach and can be beaten by most of anti-airs. When you use it as a jump in, it should mostly be used to catch an opponent by surprise as they're chasing after you by doing stuff like jump back > air dash j.3A. | It can also be used as a jump in normal when combined with a 3 wind input. However, {{clr|1|j.A}} doesn't have a lot of reach and can be beaten by most of anti-airs. When you use it as a jump in, it should mostly be used to catch an opponent by surprise as they're chasing after you by doing stuff like jump back > air dash {{clr|1|j.3A}}. | ||
---- | ---- | ||
j.AA is mostly just used in combos. | {{clr|1|j.AA}} is mostly just used in combos. | ||
</div> | </div> | ||
</div> | </div> | ||
===<big>j.B</big>=== | ===<big>{{clr|3|j.B}}</big>=== | ||
<div class="attack-container"> | <div class="attack-container"> | ||
<div class="attack-gallery"> | <div class="attack-gallery"> | ||
| Line 375: | Line 375: | ||
</div> | </div> | ||
</div> | </div> | ||
===<big>j.C</big>=== | ===<big>{{clr|4|j.C}}</big>=== | ||
<div class="attack-container"> | <div class="attack-container"> | ||
<div class="attack-gallery"> | <div class="attack-gallery"> | ||
| Line 403: | Line 403: | ||
* Ground bounces | * Ground bounces | ||
Mostly used at the end of air combos. j.C will bring an opponent all the way back down to the ground and the ground bounce is big enough that you can do 2C afterwards to end your combo in a knockdown. | Mostly used at the end of air combos. {{clr|4|j.C}} will bring an opponent all the way back down to the ground and the ground bounce is big enough that you can do {{clr|4|2C}} afterwards to end your combo in a knockdown. | ||
</div> | </div> | ||
</div> | </div> | ||
| Line 411: | Line 411: | ||
===<big>Ground Throw</big>=== | ===<big>Ground Throw</big>=== | ||
<span class="input-badge">'''5B+C'''</span> | <span class="input-badge">'''{{clr|3|5B}}+{{clr|4|C}}'''</span> | ||
<div class="attack-container"> | <div class="attack-container"> | ||
<div class="attack-gallery"> | <div class="attack-gallery"> | ||
| Line 437: | Line 437: | ||
|} | |} | ||
==== ==== | ==== ==== | ||
* Can combo by linking a 5A or 5B juggle. | * Can combo by linking a {{clr|1|5A}} or {{clr|3|5B}} juggle. | ||
Pretty standard throw. Launches the opponent fairly high up vertically but not very far horizontally. | Pretty standard throw. Launches the opponent fairly high up vertically but not very far horizontally. | ||
| Line 444: | Line 444: | ||
</div> | </div> | ||
===<big>Gerbera Lute</big>=== | ===<big>Gerbera Lute</big>=== | ||
<span class="input-badge">'''5A+D'''</span> | <span class="input-badge">'''{{clr|1|5A}}+{{clr|2|D}}'''</span> | ||
<div class="attack-container"> | <div class="attack-container"> | ||
<div class="attack-gallery"> | <div class="attack-gallery"> | ||
| Line 483: | Line 483: | ||
===<big>Tiny Lobelia</big>=== | ===<big>Tiny Lobelia</big>=== | ||
<span class="input-badge">'''236A/B (Air OK)'''</span> | <span class="input-badge">'''{{clr|1|236A}}/{{clr|3|B}} (Air OK)'''</span> | ||
<div class="attack-container"> | <div class="attack-container"> | ||
<div class="attack-gallery"> | <div class="attack-gallery"> | ||
| Line 517: | Line 517: | ||
* Active until it touches the ground | * Active until it touches the ground | ||
Rachel's lobelias are a key part in her neutral game. They remain active until they turn into poles, at which point they can be detonated or converted into Lotus bats. Wind manipulation can be used to either deter enemies from running directly at Rachel (236A~6 and 236A~9) or to prevent them approaching from the air (236A~8). Learning to manipulate Lobelias is extremely important to playing Rachel. | Rachel's lobelias are a key part in her neutral game. They remain active until they turn into poles, at which point they can be detonated or converted into Lotus bats. Wind manipulation can be used to either deter enemies from running directly at Rachel ({{clr|1|236A}}~6 and {{clr|1|236A}}~9) or to prevent them approaching from the air ({{clr|1|236A}}~8). Learning to manipulate Lobelias is extremely important to playing Rachel. | ||
B Lobelia has slightly more startup and recovery than A Lobelia, but throws the Lobelia higher and further without wind. 236B~8 is a key component in Rachel's midscreen BnBs and 236B~9 is key in her corner combos. 236B~2 can be used in reaction to run ins. | B Lobelia has slightly more startup and recovery than A Lobelia, but throws the Lobelia higher and further without wind. {{clr|3|236B}}~8 is a key component in Rachel's midscreen BnBs and {{clr|3|236B}}~9 is key in her corner combos. {{clr|3|236B}}~2 can be used in reaction to run ins. | ||
---- | ---- | ||
* Can use wind to manipulate the direction of the projectiles | * Can use wind to manipulate the direction of the projectiles | ||
| Line 525: | Line 525: | ||
* Air A version Travels the furthest of the meterless Lobelias | * Air A version Travels the furthest of the meterless Lobelias | ||
Same notes as above, learning to use lobelias is important. A air Lobelia is mainly used at long distances to prevent opponents from approaching Rachel. It can be used to end an air string in a pinch, but you're better off trying to end with j.C. | Same notes as above, learning to use lobelias is important. A air Lobelia is mainly used at long distances to prevent opponents from approaching Rachel. It can be used to end an air string in a pinch, but you're better off trying to end with {{clr|4|j.C}}. | ||
Same notes as above, learning to use lobelias is important. Air B Lobelia is arguably the least useful of the Lobelias. It throws a Lobelia almost straight down from Rachel's hand, hitting opponents almost directly below Rachel. As of right now, it has no use in combos and sees little use in neutral. | Same notes as above, learning to use lobelias is important. Air B Lobelia is arguably the least useful of the Lobelias. It throws a Lobelia almost straight down from Rachel's hand, hitting opponents almost directly below Rachel. As of right now, it has no use in combos and sees little use in neutral. | ||
| Line 533: | Line 533: | ||
===<big>Barrel Lotus</big>=== | ===<big>Barrel Lotus</big>=== | ||
<span class="input-badge">'''214A (Air OK)'''</span> | <span class="input-badge">'''{{clr|1|214A}} (Air OK)'''</span> | ||
<div class="attack-container"> | <div class="attack-container"> | ||
<div class="attack-gallery"> | <div class="attack-gallery"> | ||
| Line 570: | Line 570: | ||
</div> | </div> | ||
===<big>Sword Iris</big>=== | ===<big>Sword Iris</big>=== | ||
<span class="input-badge">'''214B (Air OK)'''</span> | <span class="input-badge">'''{{clr|3|214B}} (Air OK)'''</span> | ||
<div class="attack-container"> | <div class="attack-container"> | ||
<div class="attack-gallery"> | <div class="attack-gallery"> | ||
| Line 609: | Line 609: | ||
===<big>EX Tiny Lobelia</big>=== | ===<big>EX Tiny Lobelia</big>=== | ||
<span class="input-badge">'''236C (Air OK)'''</span> | <span class="input-badge">'''{{clr|4|236C}} (Air OK)'''</span> | ||
<div class="attack-container"> | <div class="attack-container"> | ||
<div class="attack-gallery"> | <div class="attack-gallery"> | ||
| Line 644: | Line 644: | ||
</div> | </div> | ||
===<big>George the 13th</big>=== | ===<big>George the 13th</big>=== | ||
<span class="input-badge">'''214C (Air OK)'''</span> | <span class="input-badge">'''{{clr|4|214C}} (Air OK)'''</span> | ||
<div class="attack-container"> | <div class="attack-container"> | ||
<div class="attack-gallery"> | <div class="attack-gallery"> | ||
| Line 689: | Line 689: | ||
==Partner Skills== | ==Partner Skills== | ||
===<big>5P</big>=== | ===<big>{{clr|5|5P}}</big>=== | ||
<span class="input-badge">'''Enhanced 5AAA'''</span> | <span class="input-badge">'''Enhanced {{clr|1|5AAA}}'''</span> | ||
<div class="attack-container"> | <div class="attack-container"> | ||
<div class="attack-gallery"> | <div class="attack-gallery"> | ||
| Line 719: | Line 719: | ||
* Good to extend pressure and force the opponent into the corner | * Good to extend pressure and force the opponent into the corner | ||
5P sends Rachel flying forward, similar to 5AAA~6. Does a surprising amount of damage and pushes airborne opponents slightly upwards. Hits quite a few times, making the point character hard to pushblock when used in pressure. | {{clr|5|5P}} sends Rachel flying forward, similar to {{clr|1|5AAA}}~6. Does a surprising amount of damage and pushes airborne opponents slightly upwards. Hits quite a few times, making the point character hard to pushblock when used in pressure. | ||
</div> | </div> | ||
</div> | </div> | ||
===<big>6P</big>=== | ===<big>{{clr|5|6P}}</big>=== | ||
<span class="input-badge">'''Tiny Lobelia'''</span> | <span class="input-badge">'''Tiny Lobelia'''</span> | ||
<div class="attack-container"> | <div class="attack-container"> | ||
| Line 757: | Line 757: | ||
</div> | </div> | ||
</div> | </div> | ||
===<big>4P</big>=== | ===<big>{{clr|5|4P}}</big>=== | ||
<span class="input-badge">'''Sword Iris'''</span> | <span class="input-badge">'''Sword Iris'''</span> | ||
<div class="attack-container"> | <div class="attack-container"> | ||
| Line 788: | Line 788: | ||
* Infinite vertical range | * Infinite vertical range | ||
The fact this detonates rods is amazing, allowing fullscreen punishes from point characters that don't normally have ranged options, such as Kanji or Waldstein. Mostly used to control space, though it can be used in combos where 5P would push the opponent too far away or would whiff. | The fact this detonates rods is amazing, allowing fullscreen punishes from point characters that don't normally have ranged options, such as Kanji or Waldstein. Mostly used to control space, though it can be used in combos where {{clr|5|5P}} would push the opponent too far away or would whiff. | ||
</div> | </div> | ||
| Line 798: | Line 798: | ||
===<big>Tempest Dahlia</big>=== | ===<big>Tempest Dahlia</big>=== | ||
<span class="input-badge">'''236B+C (Air OK)'''</span> | <span class="input-badge">'''{{clr|3|236B}}+{{clr|4|C}} (Air OK)'''</span> | ||
<div class="attack-container"> | <div class="attack-container"> | ||
<div class="attack-gallery"> | <div class="attack-gallery"> | ||
| Line 834: | Line 834: | ||
</div> | </div> | ||
===<big>Baden Baden Lily</big>=== | ===<big>Baden Baden Lily</big>=== | ||
<span class="input-badge">'''214B+C (Air OK)'''</span> | <span class="input-badge">'''{{clr|3|214B}}+{{clr|4|C}} (Air OK)'''</span> | ||
<div class="attack-container"> | <div class="attack-container"> | ||
<div class="attack-gallery"> | <div class="attack-gallery"> | ||
| Line 877: | Line 877: | ||
==Distortion Skill Duo== | ==Distortion Skill Duo== | ||
===<big>Baden Baden Lily</big>=== | ===<big>Baden Baden Lily</big>=== | ||
<span class="input-badge">'''P during partner's distortion drive'''</span> | <span class="input-badge">'''{{clr|5|P}} during partner's distortion drive'''</span> | ||
<div class="attack-container"> | <div class="attack-container"> | ||
<div class="attack-gallery"> | <div class="attack-gallery"> | ||
| Line 914: | Line 914: | ||
==Astral Heat== | ==Astral Heat== | ||
===<big>Clownish Calendula</big>=== | ===<big>Clownish Calendula</big>=== | ||
<span class="input-badge">'''222B+C'''</span> | <span class="input-badge">'''{{clr|3|222B}}+{{clr|4|C}}'''</span> | ||
<div class="attack-container"> | <div class="attack-container"> | ||
<div class="attack-gallery"> | <div class="attack-gallery"> | ||
Revision as of 02:04, 26 February 2022
Rachel Alucard is a zoner/rushdown hybrid in BBTag with an incredibly strong okizeme vortex both solo and with her partner. Her unique mechanic is called Sylpheed, which allows her to influence the direction of certain normal and projectiles, including herself, her opponent, and both their partners. Her zoning is oppressive and flexible due to the recovery on her 236A and the angles she can cover with wind; her vortex is just as strong due to j2A and 2A being an unreactable high/low mixup that’s only made better with layered assist pressure. The transition from zoning to her rushdown/vortex game plan is made much easier due to her winding herself with 214A and 214B. Her 5A, 5AA, and 2A are all capable of deleting projectiles, which allows her to act immediately after to set up her own zoning game or rushdown pressure immediately after. If you fall behind in momentum against Rachel, it can be incredibly difficult to regain your footing as she can control the pace in any way she chooses. She can also be slippery to pin down when you do try to catch her due to the insane movement capabilities Sylpheed gives her access to.
- Incredible solo mixup
- Sylpheed is extremely versatile
- Capable at all ranges
- Solo looping unblockable setups
- Good active switch windows
- Fullscreen lockdown
- Great with using meter
- Flexible on anchor or point
- Polarizing matchups
- Very meter reliant at times
- Few teams with good double sided synergy
- Assists are good but are niche and difficult to use properly
- Lack of a strong midrange poke and air to air
- Loses fullscreen to other zoners
- Average damage is ~5000
- Stubby normals
- Mediocre cashouts
- Polarizing matchups
Normal Moves
4A
- Only 4A is jump cancelable
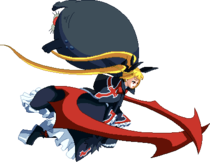
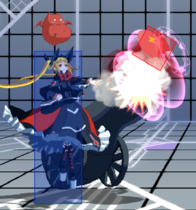
Her anti-air, one of the better anti-airs in the game. Guard point comes out frame 5, and on counter hit the hitstun lasts until ground tech. Hits crossup and is jump cancellable on block. 4AA is a mid and isn't a true blockstring so it can be mashed out of with a reversal.
5A
- Good counter poke
- Jump Cancelable
Because 5A can be jump canceled, this normal is another good opportunity to go for an instant overhead j.A in your pressure.
In neutral, the wind portion of this normal has no hurtbox while having decent range of its own. This allows Rachel to use it as a counter poke to pokes with hurtboxes that extend forward a good amount.
- Jump Cancelable
Similar to 5A, 5AA is jump cancelable and is another good opportunity to go for an instant overhead j.A mixup.
Outside of this, 5AA is mostly used in combos. However, it should be noted that at 5A's maximum spacing, 5AA will whiff. In these cases, you should cancel into 5B instead to avoid dropping the combo.
5AA also vacuums the opponent towards you, allowing you to pull them out of the corner to cross up.
- Great for corner carry
- Can use wind by inputting a direction as the move is coming out
Currently, the unwinded version of 5AAA doesn't see too much use outside of doing the A smart combo. If you apply a 6 wind to it, it can be great for corner, especially if you extend the combo with an assist afterwards. It's important to note this attack lasts as long as Rachel is in the air or A is hit again, meaning if you wind her in an upward direction, the hitbox will remain active until she touches the ground.
- Knocks down
Mostly only used in the A smart combo. Requires assist to combo after, even at greater heights.
5B
- Great poke for intercepting ground approaches
- Jump Cancelable
- On air hit, blows back
Rachel's longest reaching ground poke is 5B. This button is best used to catch people off guard when they're chasing after you from the ground.
- Moves Rachel forward a good distance, allowing it to connect even from 5B's max range
5BB is mostly just used for combos.
- Crumples on hit, allowing combo extensions by doing microdash 5A on some characters
- Can use wind by inputting a direction as the move is coming out
5BBB is mostly used in combos.
5C
- Universal overhead
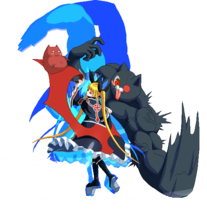
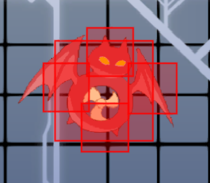
Not much to say about this one, your standard 5C. Comes out relatively quickly, but is extremely easy to see coming thanks to Nago's dramatic transformation.
2A
- Main low mixup
Rachel's main low mixup and the second half of her 50/50 mixup game. At most points where you can go for an instant overhead j.A mixup, you can go for a 2A low mixup. Can be used twice in a blockstring as opposed to before where it could be only used once. This coupled with her previously mentioned instant overhead gives Rachel incredibly deadly mixup game in close quarters.
2B
- Has full body guardpoint (5-23f)
- Launches on hit
- Can be comboed into from 5BB
Rachel's infamous cat chair, despite it being a poor reversal tool both in previous titles and in this game. Guardpoint is active on frame five, meaning that if meated properly, mashing 2B will just get Rachel counterhit. Intended as an anti-air, this attack starts up fairly quickly, has good vertical reach, and has decent untech time, meaning that on counterhit combos are possible without an assist. However, converting off of a counterhit 2B on airborne foes is more difficult than on grounded foes.
2C
- Good combo ender on the ground
- Can use wind by inputting a direction as the move is coming out
- Hold C to do more hits but lose the ability to special cancel
Rachel's sweep. It's good for knocking an opponent off their feet so you can start air juggling an opponent in a combo by following it up with 236A/B~8. It's also good for ending your combos when you're on the ground since it'll knockdown and you can special cancel it into Lotus or George for oki if you have a nearby lobelia pole or Skill Gauge to spend.
j.A
- Great for overhead mixups
A very strong mixup tool. When combined with a 2 input to use wind, it allows for a very fast overhead option that leads to a full combo.
It can also be used as a jump in normal when combined with a 3 wind input. However, j.A doesn't have a lot of reach and can be beaten by most of anti-airs. When you use it as a jump in, it should mostly be used to catch an opponent by surprise as they're chasing after you by doing stuff like jump back > air dash j.3A.
j.AA is mostly just used in combos.
j.B
- Good for dealing with opponents directly above Rachel
Because this move hits directly above Rachel, this move can be very good at dealing with opponents in the air that are directly above you or higher up in the air than you are.
j.C
- Ground bounces
Mostly used at the end of air combos. j.C will bring an opponent all the way back down to the ground and the ground bounce is big enough that you can do 2C afterwards to end your combo in a knockdown.
Universal Mechanics
Ground Throw
5B+C
- Can combo by linking a 5A or 5B juggle.
Pretty standard throw. Launches the opponent fairly high up vertically but not very far horizontally.
Gerbera Lute
5A+D
- EXTREMELY large hitbox
- Air unblockable without meter
Rachel's DP. Looks as if it has infinite vertical reach, when in reality it only reaches just above the top of the screen, meaning it can theoretically be jumped over, though it's unlikely this will occur. Main component in her corner unblockable resets using lotus and a delayed assist.
Skills
Tiny Lobelia
236A/B (Air OK)
- Can use wind to manipulate the direction of the projectiles
- Active until it touches the ground
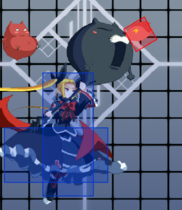
Rachel's lobelias are a key part in her neutral game. They remain active until they turn into poles, at which point they can be detonated or converted into Lotus bats. Wind manipulation can be used to either deter enemies from running directly at Rachel (236A~6 and 236A~9) or to prevent them approaching from the air (236A~8). Learning to manipulate Lobelias is extremely important to playing Rachel.
B Lobelia has slightly more startup and recovery than A Lobelia, but throws the Lobelia higher and further without wind. 236B~8 is a key component in Rachel's midscreen BnBs and 236B~9 is key in her corner combos. 236B~2 can be used in reaction to run ins.
- Can use wind to manipulate the direction of the projectiles
- Active until it touches the ground
- Air A version Travels the furthest of the meterless Lobelias
Same notes as above, learning to use lobelias is important. A air Lobelia is mainly used at long distances to prevent opponents from approaching Rachel. It can be used to end an air string in a pinch, but you're better off trying to end with j.C.
Same notes as above, learning to use lobelias is important. Air B Lobelia is arguably the least useful of the Lobelias. It throws a Lobelia almost straight down from Rachel's hand, hitting opponents almost directly below Rachel. As of right now, it has no use in combos and sees little use in neutral.
Barrel Lotus
214A (Air OK)
- Great for space control
- On hit, lotus will automatically explode into Sword Iris
- Travels very quickly and lasts a very long time
- Disappears if Rachel gets hit or blocks an attack
Lotus lasts for a RIDICULOUS amount of time and travels significantly faster than in previous titles, but does not stick on block nor on hit. Instead, Lotus will automatically detonate on hit, allowing for a followup if you're swift since lightning no longer stuns the opponent. Lotus remains on swap, so throwing out Lotus to force your opponent to block while Rachel swaps out isn't a bad idea. This also allows Rachel ample time to approach, set up, drop George, etc. If the opponent blocks these in the air, Rachel can call an assist and throw out her DP for an easy unblockable.
Sword Iris
214B (Air OK)
- TK Sword Iris allows Rachel recover very fast and is very plus on block
- Good for pressure resets
Sword Iris starts up significantly faster than in prior titles, allowing Rachel to punish random acts in her forest of rods significantly easier than before. However, since there's no stun from electric attacks in this game, converting off of rods is significantly more difficult than before, making Sword Iris much more of a zoning tool than anything else.
Extra Skills
EX Tiny Lobelia
236C (Air OK)
- Can use wind to manipulate the direction of the projectiles
- Active until they touch the ground
EX Lobelias acts exactly like Unlimited B Lobelia from CPEX. Rachel throws three lobelias at A, B, and C ranges from prior games. This is mainly used for instant setup and can coat the opponent in bats if Lotus is used immediately afterwards. Otherwise it makes the opponent second guess their approach, as Rachel can detonate or convert the rods at any time.
George the 13th
214C (Air OK)
- Disappears if Rachel is hit
- Can be destroyed by taking a certain amount of damage from strike attacks
- Immune to projectiles
- Will trigger only in proximity to the opponent and not partners
- Does NOT disappear if Rachel swaps out and partner is hit
- Lasts for 600 frames and has 2000 health
George is more powerful than he ever has been. Since he's immune to projectiles, he can act as a shield against characters with projectiles that travel along the ground, such as Es's waves. This does include supers, however, Jin's Touga still goes through George, but does not destroy him. George is useful if set as oki, but is easily pushblocked. However, two pushblocks are required to keep Rachel out in the corner and can be avoided entirely with an active swap, though swapping can be risky and gives Rachel's partner less time to mix up the opponent. George will always do a total 12 hits.
Partner Skills
5P
Enhanced 5AAA
- Rachel's primary combo assist
- Good to extend pressure and force the opponent into the corner
5P sends Rachel flying forward, similar to 5AAA~6. Does a surprising amount of damage and pushes airborne opponents slightly upwards. Hits quite a few times, making the point character hard to pushblock when used in pressure.
6P
Tiny Lobelia
- Good for controlling air space and covering an approach on opponents hanging back
Rachel throws out the equivalent of her B and C lobelias from Blazblue at the same time. On their way up, they control a lot of air space and make it hard for the opponent to approach by air. If the opponent is in the area that the lobelias come down in, the lobelias will limit their options and allow Rachel to approach.
4P
Sword Iris
- Will ignite any Tiny Lobelia poles on the screen if there are any, in addition to the poleless one it usually does
- Has some tracking when done as an active partner call
- Infinite vertical range
The fact this detonates rods is amazing, allowing fullscreen punishes from point characters that don't normally have ranged options, such as Kanji or Waldstein. Mostly used to control space, though it can be used in combos where 5P would push the opponent too far away or would whiff.
Distortion Skills
Tempest Dahlia
236B+C (Air OK)
- Deals a good amount of chip damage
- Very plus on block, allowing Rachel to approach
Unlike prior titles, Tempest is not affected by Rachel's wind levels, nor does it replenish her wind. However, it remains extremely plus, making it a difficult-to-avoid super that locks down the opponent wherever they may be, unless they are directly below and behind an airborne Rachel. Most useful in the air since supers like Black Hawk Stinger, Yang's Black Hawk Stinger, and Carnage Scissosr exist. Different animals do different damage.
Baden Baden Lily
214B+C (Air OK)
- Creates a large pillar of lighting around Rachel
- Detonates all lighting rods on the stage
- The lighting pillar will remain even if Rachel is hit during the super
- NOT plus on block
- Has invuln on startup
- Can combo after it
- If used in air, the pillar extends all the way down to the ground
Rachel's primary combo super. Detonates poles as well, allowing for increased damage with proper setplay. The vertical distance covered can make it an interesting Distortion Skill Duo followup to some Distortions that knock opponents into the air. On whiff lighting can only hit once.
Distortion Skill Duo
Baden Baden Lily
P during partner's distortion drive
- Important points go here
Detailed description of the usefulness of the move go here
Astral Heat
Clownish Calendula
222B+C
- Infinite vertical reach
- STILL doesn't vaporize
- Combos off throw
Rachel's Astral. Has guardpoint through most of the duration and infinite vertical reach, making it both an excellent reversal tool as well as being easy to combo into.
External References
 Azrael [★]
 Celica A. Mercury [★]
 Es [★]
 Hakumen [★]
 Hazama [★]
 Iron Tager [★]
 Izayoi [★]
 Jin Kisaragi [★]
 Jubei [★]
 Mai Natsume [★]
 Makoto Nanaya [★]
 Naoto Kurogane [★]
 Nine the Phantom [★]
 Noel Vermillion [★]
 Nu-13 [★]
 Platinum the Trinity [★]
 Rachel Alucard [★]
 Ragna the Bloodedge [★]
 Susano'o [★]
Click [★] for character's full frame data
Essentials
• HUD •
Controls •
The Basics
• Movement/Canceling •
Offense •
Defense •
Gauges •
Attack Attributes •
Detailed & Advanced Information
• Damage/Combo •
Frame Data & System Data •
Misc •
Archived Information
• Patch Notes •
- Active Change
- Air Recovery
- Astral Heat
- Clash
- Clash Assault
- Cross Burst
- Cross Combo
- Cross Gauge
- Cross Raid
- Cross Gauge Cooldown
- Delayed Down Entrance
- Distortion Skills
- Distortion Skill Duo
- Duo Change
- Extra Assault
- Extra Skills
- Ground Recovery
- Guard Bonus
- Health
- Minimum Damage
- P1, P2
- Partner Skills
- Rampage Time
- Reject Guard
- Reversal Action
- Resonance Blaze
- Resonance Gauge
- Skill Gauge
- Skills
- Smart Combo
- Throw
- Throw Reject
- Throw Counter
- Throw Reject Miss


