The BBTag wiki has major gaps in information. The game has gone through numerous significant changes since its release. As a result, many BBTag pages on Dustloop Wiki are out of date or lacking important information.
We need your help expanding the content for this game. If you have knowledge to share, or know people who can help, please contribute to the wiki by editing sections where you can.Overview
 |
| Health |
| 17,000 |
| Prejump |
| 4F |
| Backdash |
| 41F (1~11F Inv All) |
| Fastest Attack |
| 5A (7F) 2A (7F) |
| Reversals |
| A+D (10F) 236B+C (15F) 214B+C (15F) |
- Instant Overhead and Low with j.214A and 214A. Both are very long range.
- Strong Air Normals. j.A controls lots of space in front of Orie and recovery quickly, j.C is fast and hits behind her, useful for crossups.
- Command Order Followups gives lots of flexibility for active switch setups
- EX Divine Thrust is great for button checking the opponent from full screen and is + on block
- Low Damage: Orie's damage potential is low, even with decent starters
- Difficulties Getting In: Lacking a projectile and threatening options outside of the mid-range, Orie can struggle versus zoners.
Normal Moves
5A
| Version | Damage | Guard | Startup | Active | Recovery | On-Block | Attribute | Invuln |
|---|---|---|---|---|---|---|---|---|
| 5A | 1000 | All | 7 | 2 | 19 | -7 | B | |
| 5AA | 1500 | All | 9 | 2 | 23 | -8 | B | |
| 5AAA | 170×12 | All | 11 | 2×12 | 23 | -9 | B | |
| 5AAAA | 1700 | All | 16 | 10 | Total: 54 | -15 | P |
- Quick for it's range
5A is essentially your go-to poke in neutral
- 5AA is your hit confirm after 5A
If they pushblock 5AA you will end up doing this move into nothing without being able to cancel it.
Because 5AAA's multi-hit, you can use this in cross-combo mixups.
- 5AAAA Has a gap on block from 5AAA
You won't ever use this except for Cross Raid.
| Version | Level | P1 | P2 |
|---|---|---|---|
| 5A | 2 | 100 | 75 |
| 5AA | 3 | 100 | 80 |
| 5AAA | 3 | 100 | 80 |
| 5AAAA | 4 | 80 | 85 |
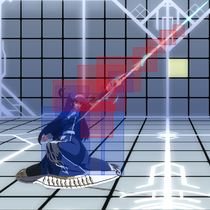
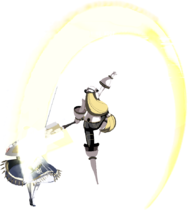
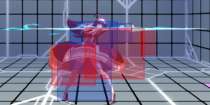
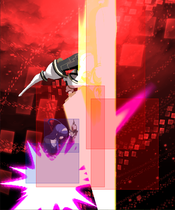
5A:
5AA:
5AAA:
5AAAA:
5B
| Version | Damage | Guard | Startup | Active | Recovery | On-Block | Attribute | Invuln |
|---|---|---|---|---|---|---|---|---|
| 5B | 1500 | All | 12 | 4 | 21 | -8 | B | |
| 5BB | 1500 | All | 15 | 5 | 16 | -4 | B | |
| 5BBB | 1700 | All | 18 | 4 | 24 | -9 | B |
- Moves forward
Better scaling if you start combos with this rather than 5A, but those situations can be mostly limited to punishes due to the slower startup speed.
- Moves forward
Because 5B and 5BB both move forward, this can make hit confirms easier.
- Has a gap on block from 5BB
Like most smart combo enders, you won't use this much/at all
| Version | Level | P1 | P2 |
|---|---|---|---|
| 5B | 3 | 100 | 80 |
| 5BB | 3 | 100 | 80 |
| 5BBB | 4 | 100 | 85 |
5B:
5BB:
5BBB:
5C
| Damage | Guard | Startup | Active | Recovery | On-Block | Attribute | Invuln |
|---|---|---|---|---|---|---|---|
| 800+ | High | 26 | 3 | 5+13L | -4 | H |
- Jumps forward before performing an overhead attack
Useful as a throwbait, since Orie is put airborne. Otherwise not really worth using if you have j.214A and an assist available due to how much slower it is. If solo, occasionally alright to check the opponent but then your turn ends.
| Level | P1 | P2 |
|---|---|---|
| 3 | 100 | 100 |
2A
| Damage | Guard | Startup | Active | Recovery | On-Block | Attribute | Invuln |
|---|---|---|---|---|---|---|---|
| 1000 | Low | 7 | 2 | 15 | -5 | F |
- 5A > 2A (Rebeat): -10
- 5AA > 2A (Rebeat): -7
- 5B > 2A (Rebeat): -7
- 5BB > 2A (Rebeat): -7
- 2B > 2A (Rebeat): -7
- 2C > 2A (Rebeat): -5
One of Orie's main pressure tools. This move can be throw canceled for tick throws or jump canceled into j.214A or instant airdash j.C, or even instant airdash back to bait a whiffed move. During blockstrings, Orie will generally want to rebeat back into this move to keep her safe and mix the opponent.
2A is a natural frametrap into 5B and 236A, so if the opponent likes to challenge Orie after blocking 2A she can go into either of those moves for a counter hit confirm. This sequence is also useful during sandwiches, as active switching between 2A and 5B/236A has a very small gap that the opponent has to switch directions between. If they blocked the 2A they get crossed up, and if they got hit then you get a combo from your partner.
| Level | P1 | P2 |
|---|---|---|
| 1 | 90 | 70 |
2B
| Damage | Guard | Startup | Active | Recovery | On-Block | Attribute | Invuln |
|---|---|---|---|---|---|---|---|
| 1500 | All | 9 | 3 | 24 | -10 | B | 5~11 H |
A strong anti air with the famous "ahoge hitbox", which hits slightly behind Orie's head. This move has a good amount of head invulnerability which starts early, making it your go to anti air. If this move hits the opponent in the air, Orie can go into 2 loops of her ladder and still retain proper oki. On the ground, she can cancel into 5A or 2C to still get a single ladder. That situation is common when using 2B to beat bursts, which can be done on reaction to the flash.
A niche use of 2B is using it to hit an assist coming from behind Orie. This commonly occurs when the opponent airdashes or jumps over her and calls assist, hoping to create a sandwich. The ahoge hitbox will tend to beat out assists before they become active.
| Level | P1 | P2 |
|---|---|---|
| 3 | 90 | 80 |
2C
| Damage | Guard | Startup | Active | Recovery | On-Block | Attribute | Invuln |
|---|---|---|---|---|---|---|---|
| 1700 | Low | 11 | 5 | 21 | -7 | F |
- Decent reach
Can be a mixup if you rebeat back to 2A afterward, but mostly you'll use this in combos
| Level | P1 | P2 |
|---|---|---|
| 4 | 90 | 75 |
j.A
| Version | Damage | Guard | Startup | Active | Recovery | On-Block | Attribute | Invuln |
|---|---|---|---|---|---|---|---|---|
| j.A | 1500 | High | 10 | 6 | 12 | H | ||
| j.AA | 1500 | High | 7 | 2 | 17 | H |
j.A is decent on jump-in or air-to-air if they're about on level with you.
j.AA is mostly just for combos, but you can use the second hit for a double overhead if j.A hits early enough against a grounded opponent.
| Version | Level | P1 | P2 |
|---|---|---|---|
| j.A | 3 | 80 | 80 |
| j.AA | 3 | 80 | 80 |
j.A:
j.AA:
j.B
| Damage | Guard | Startup | Active | Recovery | On-Block | Attribute | Invuln |
|---|---|---|---|---|---|---|---|
| 1700 | High | 11 | 5 | 16 | H |
- Hits the opponent upward
Good for air-to-air due to hitting slightly above and ahead.
Using this as part of your air combo can make Orie's combo loop easier to land.
| Level | P1 | P2 |
|---|---|---|
| 3 | 80 | 80 |
j.C
| Damage | Guard | Startup | Active | Recovery | On-Block | Attribute | Invuln |
|---|---|---|---|---|---|---|---|
| 2000 | High | 12 | 7 | 16 | H |
- Fast cross up
- Knocks down on air to air hit
| Level | P1 | P2 |
|---|---|---|
| 4 | 80 | 85 |
Universal Moves
Ground Throw
5B+C
| Damage | Guard | Startup | Active | Recovery | On-Block | Attribute | Invuln |
|---|---|---|---|---|---|---|---|
| 0, 2000 | Throw | 7~30 | 3 | 23 | T |
- Wall Bounces
Because Orie's run speed is decently quick, you can sometimes catch opponents off-guard with this.
| Level | P1 | P2 |
|---|---|---|
| 0, 4 | 100 | 50 |
- Minimum damage 2000
Sacred Arrow
5A+D (Air OK)
| Version | Damage | Guard | Startup | Active | Recovery | On-Block | Attribute | Invuln |
|---|---|---|---|---|---|---|---|---|
| AD | 800×6 | Air Unblockable | 10 | 2×6 | 36+15L | -38 | B | 1~19 All |
| j.AD | 800×6 | All | 12 | 2×6 | Until L+11L | H | 1~23 All |
- Good vertical range
Keep them out of your airspace.
| Version | Level | P1 | P2 |
|---|---|---|---|
| AD | 4 | 80 | 60 |
| j.AD | 4 | 80 | 60 |
AD:
- Minimum Damage 40×6 (240)
j.AD:
- Minimum Damage 40×6 (240)
Skills
Divine Thrust
236A/B
| Version | Damage | Guard | Startup | Active | Recovery | On-Block | Attribute | Invuln |
|---|---|---|---|---|---|---|---|---|
| 236A | 2000 | All | 12 | 4 | 21 | -4 | B | |
| 236B | 2200 | All | 21 | 6 | 16 | -1 | B |
- A version travels about 1/3 screen
- B version travels about 3/4 screen
- 25f to max travel distance
You can use this to get in if you see an opening.
| Version | Level | P1 | P2 |
|---|---|---|---|
| 236A | 4 | 80 | 85 |
| 236B | 5 | 80 | 90 |
236A:
- Minimum Damage 100
236B:
- 25f / +4 at max range
- Minimum Damage 110
Command Order
214A/B
| Version | Damage | Guard | Startup | Active | Recovery | On-Block | Attribute | Invuln |
|---|---|---|---|---|---|---|---|---|
| 214A | 1700 | Low | 13 | 5 | Total: 39 | -8 | F | |
| 214B | 2000 | All | 22 | 3 | Total: 44 | -4 | B |
- A version hits low
Key part of Orie's mixup; 214A is a low while j.214A is a high, making this her fast high/low mixup option. You will need an assist to combo off it.
- B version knocks down on hit
- Has a decent hitbox above and in front of Orie
Doing only the first hit generally gives better oki, so consider only doing the first hit if you're using this as a combo ender.
You can use this as an anti-air against instant airdashes from far away, giving you oki after it hits.
| Version | Level | P1 | P2 |
|---|---|---|---|
| 214A | 4 | 80 | 85 |
| 214B | 4 | 80 | 85 |
214A:
- Minimum Damage 85
214B:
- Minimum Damage 100
Air Command Order
j.214A/B
| Version | Damage | Guard | Startup | Active | Recovery | On-Block | Attribute | Invuln |
|---|---|---|---|---|---|---|---|---|
| j.214A | 1700 | High | 16 | 4 | Total: Until L+24L | H | ||
| j.214B | 2000 | High | 29 | 5 | Total: Until L+17L | H |
- A version hits overhead against grounded opponent
- Orie cannot act until she lands after using this
Used as a zoning tool or as an instant overhead
Keep in mind that if you are too close and it is blocked or whiffs, it's very easy to punish unless you have an assist backing you up.
- B version ground bounce on hit
- Orie cannot act until she lands after using this
Useful in throw combos as well as beating anti air attacks since it freezes Orie's air momentum.
| Version | Level | P1 | P2 |
|---|---|---|---|
| j.214A | 4 | 80 | 85 |
| j.214B | 4 | 80 | 85 |
j.214A:
- Minimum Damage 85
j.214B:
- Minimum Damage 100
Thick and Fast
214X -> A
| Damage | Guard | Startup | Active | Recovery | On-Block | Attribute | Invuln |
|---|---|---|---|---|---|---|---|
| 1200×2 | All | 13 | 3(7)2 | Total: 62 | -21 | B |
- Has a gap on block
A combo ender. Also used for corner CC combo loops(specifically 214B~A) when looping 236B is not an option or difficult.
Can be used to cover ground space in neutral after 214A/B. Not recommended due to extremely large recovery and difficulty to convert off even with assists.
| Level | P1 | P2 |
|---|---|---|
| 4 | 80 | 85 |
- Minimum Damage 60×2 (120)
Succession
214X -> B
| Damage | Guard | Startup | Active | Recovery | On-Block | Attribute | Invuln |
|---|---|---|---|---|---|---|---|
| 2000 | All | 15 | 4 | Total: 45 | -12 | B |
Has a large vertical hitbox that can be used as an anti air.
Launches the opponent into the air on hit.
Has a natural gap on block after 214A
If the opponent is hit at certain heights, and on counter hit, you are able to convert off this move solo.
Be mindful of the dead zone right in front of Orie, as whiffing this move while the opponent is right on top of you is not unreasonable.
| Level | P1 | P2 |
|---|---|---|
| 4 | 80 | 85 |
- Minimum Damage 100
Aerial Leap
214X -> C
| Damage | Guard | Startup | Active | Recovery | On-Block | Attribute | Invuln |
|---|---|---|---|---|---|---|---|
| ??+0L |
Can cancel into attacks on 23f.
You are unable to block during the entirety of the animation, making Orie very vulnerable to air to airs and anti airs.
Can cause a cross up with j.C, at some spacings.
Useful tool to approach or evade danger after 214A/B, if you see an opportunity to do so.
| Level | P1 | P2 |
|---|---|---|
- Can cancel into attacks on 23F
Extra Skills
EX Divine Thrust
236C
| Damage | Guard | Startup | Active | Recovery | On-Block | Attribute | Invuln |
|---|---|---|---|---|---|---|---|
| 2200, 220×5 | All | 11 | 8 [(16)4×5] | 28 [40] | +2 | B, P0×5 |
- 18f to max travel distance
One of Orie’s best tools to force offense or to check the opponent from a distance.
Does not hit fullscreen (travels about 3/4th the screen).
Orie will always swap sides after 236C, even in the corner, making this a great move to create sandwiches.
Despite this move being +2, your opponent can usually avoid pressure by upbacking after 236C or just simply pushblocking.
| Level | P1 | P2 |
|---|---|---|
| 5×6 | 80, 100×5 | 80, 100×5 |
- 18f to reach maximum range
- Minimum Damage 220, 22×5 (330)
Oblique Edge
214C (Air OK)
| Version | Damage | Guard | Startup | Active | Recovery | On-Block | Attribute | Invuln |
|---|---|---|---|---|---|---|---|---|
| 214C | 800×2, 2000 | All | 16 | 6,5,9 | Total: 61 | -9 | B | |
| j.214C | 800×2, 2000 | All | 25 | 6,5,9 | Total: Until L+15L | H |
- Large hitbox, but slow startup
Mainly used in corner combos.
Can be used as an anti air, though 214X~B or 2B are usually better, more efficient options.
- Air version is +1 at Tiger-Knee height
Primarily used to bait and punish anti airs.
Always combos into 236C, even midscreen. You can pick up with other moves but it's dependent on positioning.
Incredibly effective against most character’s anti air options, but be careful against characters with long vertical reaching anti airs(i.e Hyde) as it's not unreasonable for you to still get counter hit when using this.
Has a niche use in combos after a 5BBB hard knockdown midscreen, allowing you to get a bit more damage.
| Version | Level | P1 | P2 |
|---|---|---|---|
| 214C | 4 | 80 | 85 |
| j.214C | 4 | 80 | 85 |
214C:
- Minimum Damage 80×2, 200 (360)
j.214C:
- +1 at tk height
- Minimum Damage 80×2, 200 (360)
Partner Skills
5P
Sacred Spire
| Damage | Guard | Startup | Active | Recovery | On-Block | Attribute | Invuln |
|---|---|---|---|---|---|---|---|
| 700×3, 1700 | All | (18)+12 | 5,4,4 [5,4,4(5)4] | 23 [23+20L] | -10 | B |
- The final leap up slash will only happen on hit
Standard combo assist. The final leap allows plenty of time to confirm off of. This assist does a surprisingly large amount of damage, so a lot of partners will want to use this assist for their optimal punishes. It has a decent amount of blockstun for pressure and leaves Orie close to the opponent. If the opponent is opened up during the active frames the last hit will still come out.
| Level | P1 | P2 |
|---|---|---|
| 3 | 70 | 85 |
- Only does followup rising attack (values in []) on hit
- Minimum Damage 35×4, 85 (190)
6P
Divine Thrust
| Damage | Guard | Startup | Active | Recovery | On-Block | Attribute | Invuln |
|---|---|---|---|---|---|---|---|
| 2200 | All | (18)+21 | 6 | 20 | -5 | B |
- Travels a good distance, up to around 3/4th the screen
Standard thrust assist. Not as versitile as a projectile assist but it can still be used in neutral using Orie herself as a bullet to get her in. This assist also does a lot of damage due to its high P2 and good base damage, though many characters can't convert off it due to its far launch distance and angle. It's generally about as good as 5P when both are applicable, however.
| Level | P1 | P2 |
|---|---|---|
| 5 | 70 | 90 |
- Minimum Damage 110
4P
Sealing Hoplon
| Damage | Guard | Startup | Active | Recovery | On-Block | Attribute | Invuln |
|---|---|---|---|---|---|---|---|
| 450×8 | All | (18)+55 | 3×8 | Total: (18)+60 | +48 | P1 |
- This assist cannot be pushblocked! If the opponent attempts to pushblock this, Orie will be pushed back but Thanatos will not
Simply a huge ball of lockdown. Generally this will be used in the corner after a knockdown for oki, or in neutral if the opponent is trying to chase you down. If you call cross combo and don't use Orie, she will remain intangible and the assist will be uninteruptable, leading to strong inescapable lockdown.
| Level | P1 | P2 |
|---|---|---|
| 3 | 70 | 80 |
- Minimum Damage 22×8 (176)
Distortion Skills
Sacred Spire Lucent
236B+C
| Damage | Guard | Startup | Active | Recovery | On-Block | Attribute | Invuln |
|---|---|---|---|---|---|---|---|
| 850×6, 2200, 4900 [850×6, 2200, 500, 800×5, 3100] |
All | 1+(50 Flash)+14 | 4×6(5)4 | 33+27L | -45 | B | 1~20 All |
Quick and easy to combo into. Higher minimum damage and better oki makes this preferred for ending combos.
| Level | P1 | P2 |
|---|---|---|
| 3×6, 4 [3×6, 4, 5, 4×6] |
80 | 60 |
- Values in [] are for Enhanced version
- Minimum Damage: 85×6, 220, 931 (1611)
- [Minimum Damage: 85×6, 220, 50, 80×5, 620 (1800)]
- Crumple Duration 15F, Crumple Fall 60F
Luminous Embrace
214B+C
| Damage | Guard | Startup | Active | Recovery | On-Block | Attribute | Invuln |
|---|---|---|---|---|---|---|---|
| 1700, 1280×6 [1700, 700×12, 2000] |
All | 2+(60 Flash)+13 | Until Hit×7 [×12] | Total: 151 | -60 | P2 | 1~15 All |
Good for ending combos where the opponent is in the air, such as after your jump loops. Better at hitting both characters or finishing at awkward combo heights. The enhanced version provides notably better better oki.
| Level | P1 | P2 |
|---|---|---|
| 5 | 80 | 60 |
- Values in [] are for Enhanced version
- Minimum Damage: 225, 202×6 (1407)
- [Minimum Damage: 225, 105×12, 120 (1605)]
Distortion Skill Duo
Luminous Embrace
P during Partner's Distortion Skill
| Damage | Guard | Startup | Active | Recovery | On-Block | Attribute | Invuln |
|---|---|---|---|---|---|---|---|
| 500, 250×6 [500, 125×12, 500] |
All | 1+(96 Flash)+1 | Until Hit | Total: 92 | -64 | P2 | 1~5 All |
- Does a set amount of damage, regardless of combo scaling
Used to get that last little bit of damage to finish off a character.
| Level | P1 | P2 |
|---|---|---|
| 5 | 100 | 100 |
- Values in [] are for Enhanced version
- Minimum Damage: 2000 [2500]
Astral Heat
Rest In Peace
222B+C when Astral Conditions are met
| Damage | Guard | Startup | Active | Recovery | On-Block | Attribute | Invuln |
|---|---|---|---|---|---|---|---|
| All | 5+(85 Flash)+11 | 4(20)4,4,4,4 | Total: 102 | -27 | P2 | 1~75 All |
- Combos after your 5BB smart combo
- Hits a short distance in front of Orie
| Level | P1 | P2 |
|---|---|---|
| 5 |
Colors


