
Who put lows in an autocombo?
< BBTag
| Line 11: | Line 11: | ||
*Sledge is a very strong zone breaking tool with high and mid guard points | *Sledge is a very strong zone breaking tool with high and mid guard points | ||
*Can easily nullify most projectile wars at the cost of 1 skill gauge with Spark Bolt | *Can easily nullify most projectile wars at the cost of 1 skill gauge with Spark Bolt | ||
*Piles on damage quickly. Unburstable command grabs, hard hitting normals, and Spark Bolt make Tager's damage potential | *Piles on damage quickly and consistently. Unburstable command grabs, hard hitting normals, and Spark Bolt make Tager's damage potential consistently threatening. | ||
*Strong reset potential on opponent's wakeup thanks to magnetized command grabs. | *Strong reset potential on opponent's wakeup thanks to magnetized command grabs. | ||
|cons= | |cons= | ||
Revision as of 06:46, 3 May 2022
Overview
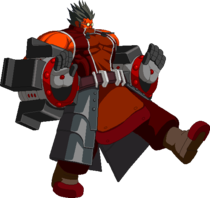
Tager is a grappler character. He has slow and limited movement but by using a combination of his 5B (his old Sledge special) to cover ground, his Voltic Battler drive to pull his opponent towards him and solid fundamenetal movement, Tager can close the gap between him and his opponent. Once close, Tager has a number of command grabs that can either be very damaging on their own or which can lead to an even more damaging combo.
Pros
Cons
- 20k health; highest tier of health in the game
- A variety of threatening command grabs to control the ground and air, including his invincible 720 command grab which can be used both in the air and on the ground
- Sledge is a very strong zone breaking tool with high and mid guard points
- Can easily nullify most projectile wars at the cost of 1 skill gauge with Spark Bolt
- Piles on damage quickly and consistently. Unburstable command grabs, hard hitting normals, and Spark Bolt make Tager's damage potential consistently threatening.
- Strong reset potential on opponent's wakeup thanks to magnetized command grabs.
- Low mobility. Tager cannot air dash or double jump
- Sledge is weak against lows and sometimes inconsistent against strong multihit pokes while speeding towards the opponent
- Very tall and vulnerable to instant overhead mixups
- Assists are fairly situational and teammate dependent
- Meter dependent, especially considering the threat potential of tools like Spark Bolt and Genesic Emerald Tager Buster
| Iron Tager | |
|---|---|
 | |
| Health | |
| 20,000 | |
| Prejump | |
| 6F | |
| Backdash | |
| 28F (1~20F Inv All) | |
| Unique Movement Options | |
| No Run No Double Jump No Air Dash | |
| Fastest Attack | |
| Reversals | |
Normal Moves
4A


- 4A is Tager's fastest ground poke.
- Slower than 214A but still very useful for safely controlling space.
- Jump cancellable on hit and on block.
- Can be used to tick throw 214A/C/B+C
- 4AA hits low
- Jump cancellable on hit and on block.
- Can be used to tick throw 214A/C/B+C
Be careful using this when connecting 4A against aerial opponents or at longer ranges where it might whiff. Chain into 2C instead in those situations.
- 4AAA has slight magnetism
- Can be used to tick throw 214A/C/B+C
Can be a decent setup into a command grab. Special cancelable and chainable into 2C.
5A


Who put highs in an autocombo?


- 5A is jump cancelable on hit and on block.
- 5AA is chargeable for magnetism and high/mid guard point.
- Can be held for 31f
- Special cancelable into Tager's command grabs
- Fully charged does additional damage and combos into 2B on grounded hit
- Frankly ridiculous amounts of armour. You can tank the first half of Nine's Flame Punisher and still do your attack undisturbed
- Catches jump startup after 5A
Canceling into 214B or 214C after this move is a situationally useful mixup against blocking opponents. In the event they get counterhit on the ground, you can actually combo directly into 214B.
- 5AAA's magnetism can draw opponents back in after a pushblocked 5AA, stopping some counter-attacks.
- Comboable into 5B on counter hit
- Catches jump startup after 5AA
- 5AAAA is an overhead.
As it's special cancelable, you can combo into 236C or 236AB afterwards. Another alternative is calling an Assist during this move and special canceling into 236B as the Assist lifts the opponent from the ground.
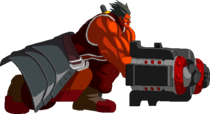
5B
Sledgehammer

Sledge...

Hammer!


- 5B is chargeable. Sledge will cover more distance and deal more damage when fully charged.
- Has high and mid guard points while charging.
- Launches airborne opponents, allowing further combo.
- Can be held for 29f
Difficult to punish on block, use this move to cover screen distance and approach zoners. Chainable into 2A, 2B, 2C, and 5C on hit but not block. Thanks to high and mid guard points, Tager can also bait Bursts with this move for a counterhit combo.
- 5BB is deceptively large, long-lasting overhead hitbox
- Sends airborne opponents downwards
- Only combos in Gadget Finger
Don't use this if Sledgehammer gets blocked as it's easy to punish. Will autocorrect if an opponent crosses over Tager after he uses Sledge.
5C


Standard overhead.
2A


- 9-12f head invulnerable
Can be used as an anti-air, but more important is the fact that as of patch 1.5 Tager was given the ability to combo into 5A after this move assuming he hasn't used 5A earlier in a gatling. Use this to your advantage especially considering that you can combo into 2A from moves like 4A and even Sledge. Due to head invulnerability, you can try to get a counterhit with this move when an opponent tries to burst one of your combos on the ground, letting you afterwards juggle them with Sledge.
2B

Who thought letting this be cancellable into 5C overhead was a good idea.


- Has magnetism
- Special cancelable
Rather slow to start and easily stuffed in neutral, but can be a decent pressure tool against blocking opponents. Useful in some juggle combos as it is chainable into Sledge, 2A, and 2C.
2C
TIME FOR BED


Decently quick and mostly safe low poke. Special cancelable and chainable into Gadget Finger.
j.A


j.A is quick and has a lot of active frames, making it a solid jump-in normal. j.A -> rising j.A can fuzzy most of the cast.
j.AA is mostly used in combos. Chainable into j.B or j.C
j.B


- Very attractive against aerial opponents
- Can be low profiled by some moves and some crouching opponents [ie. Linne, other Under Night Characters]
- Poor vertical hitbox close to Tager will cause the move to whiff unexpectedly when the opponent gets close.
Used in aerial combos, and can be used as an air to air. Has high frame advantage on hit and block against grounded opponents. j.B has two distinct hitboxes: a vertically large one where the magnetism effect is, and a vertically small one on his arms. Will generally whiff against crouchers up close, but not necessarily at max range.
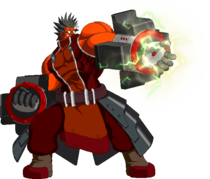
j.C
Crimson Punisher

CRIMSON PUNISH


- Two stage attack, if the initial arm sweep hits, his opponent is hit straight down with a hard knockdown and Tager immediately follows up with a bellyflop on the stricken opponent.
- During the initial arm sweep, Tager is launched slightly upwards and forwards and loses all previous jumping momentum, enabling it to easily hit enemies slightly above him due to air hits, but also makes hitting it on standing opponents very tricky.
- Can be used as a ghetto double jump to perform crossups and bait out anti-air attacks.
- Around 0 on block before landing, making jc into ja a strong option do to ja's 7f startup.
- Recovers fast enough to use ja before landing when not at minimum height.
- Cannot hit assists.
Universal Mechanics
Ground Throw
5B+C


- If performed outside of Tager's grab range, he'll waddle forward a couple of steps before trying to grab.
Because Tager's ground speed is incredibly slow, you really never want to try this outside of point blank range.
Charged Lightning
5A+D
- BBTag Tager ChargedLightning.png
Magnetic Storm

- Big vertical hitbox all around Tager's body
Skills
Atomic Collider
236A/B

Pray for your opponent to jump on wakeup.


- 236A
- No magnetism
- Can only grab airborne opponents
- Moves opponent to the other side of Tager
- Only combos into Gadget Finger
- Has head attribute invulnerability frames 4-15
Thanks to the upper body invulnerability and deceptively large hitbox this move can occasionally be an effective anti-air, though Tager has other anti-air alternatives that do considerably more total damage. Generally speaking this move is best used at the end of a combo. Is +41 upon landing, can safejump 9+f reversals.
- 236B
- Extremely attractive to airborne targets, grounded opponents will slide along the floor slowly
- Can only grab airborne opponents
- Hold button to extend active frames
- Moves opponent to the other side of Tager
- Ground bounces for further comboing
- Has head attribute invulnerability frames 5-34
- Can be held for 42f
Be careful as opponents who super jump will typically fly over Tager's head. Be mindful that you can be hit while pulling opponents towards you as well as during the long startup of the move.
Gigantic Tager Driver
214A
REAL SOVIET DAMAGE


- No magnetism
- Only grabs grounded opponents
- Only combos into Gadget Finger
Technically Tager's fastest move in terms of startup. Also your main tool to exert pressure after Gadget Finger. Is +35 upon landing, allowing Tager to safejump 15f+ reversals, but only applicable on forward tech/corner.
Wedge Catapult
214B
- BBTag Tager WedgeCatapult.png
- BBCF Tager WedgeCatapult2.png

- Wall Bounces, convert into a combo by linking 5A, 2B, j.A
- Has full body invulnerability on frames 6-29
Has invulnerability and magnetism early in the move up to the point right before Tager grasps at this opponent. Be wary of very active moves as Tager is vulnerable for 1 frame before the grab hitbox is active. The damage scaling on this move is very good, allowing for some of Tager's most damaging combos upon a successful grab. While uncommon and largely impractical, it is also possible to combo grounded opponents directly into this grab via assists or counterhit 5AA and j.B.
Air Driver
j.214A/B
- BBTag Tager AirDriver.png
NO JUMPING, BOY


- j.214A
- No magnetism
- Can only grab airborne opponents
- Only combos into Gadget Finger
- j.214B
- Extremely attractive to airborne opponents
- Grounded opponents will slide along the floor slowly
- Can only grab airborne opponents
- Stops all momentum when in use
- Button can be held to extend active frames
- Only combos into Gadget Finger
- Can be held for 59f
Be careful when using this. Grounded opponents will have plenty of time to get under you. While opponents who super jump will usually fly overhead and can hit you as they fly by.
Gadget Finger
After certain attacks -> A/B/C

NOW, GET UP


- Can only be used after 5AAAA, 5BB, 2C, 236A, 214X, or j.214X successfully hit the opponent's point character.
- Can be delayed to whiff after 5BB, 214X, or j.214X
- 100% minimum damage
- Leaves Tager close and +5 after application
As of 1.30 update, drops the opponent just inside 214A range with Tager at a small frame advantage. This is a very strong position for Tager where in order to avoid a properly timed command grab, the opponent must buffer a jump, reversal, or backdash. The Rock-Paper-Scissors scenario is generally as follows.
- 4A catches jump startup, beats abare
- 214A, 214C beats blocking. 214A has a somewhat strict timing, making it difficult to use it to hit meaty.
- 5A, delayed 4A, and 2B beat varying speed and distances of backdashes
- Blocking beats reversal actions
Though generally a scary mixup situation, not opting for gadget finger ender gives Tager the option of meaty assist, which can lead to even more powerful oki.
You can also consider also using Active Switch to extend combos or for better positioning in your resets when using this to end Tager's combos.
Extra Skills
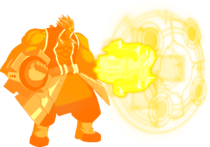
Spark Bolt
236C

Whose idea was this


- Wall Bounces
Tager no longer needs to charge a separate resource and instead only consumes one Skill Gauge to use this move. Just like in other BlazBlue games, this will beat other normal projectiles easily. Also an important combo extender for Tager.
EX Gigantic Tager Driver
214C

- Brief period of magnetism
- Only grabs grounded opponents, but can be done mid combo
- Only combos into Gadget Finger
Has the same startup as the A version, but as this move can be held briefly for Magnetism, it benefits from greater effective range as well as active frames, making unseeable tick throw setups considerably easier to execute without getting counterhit by mashed normals. Is +35 upon landing, allowing Tager to safejump 15f+ reversals, but only applicable on forward tech/corner.
EX Air Driver
j.214C
- BBTag Tager AirDriver.png
Aerial combo grab

- Extremely attractive to airborne opponents
- Grounded opponents will slide along the floor slowly
- Can only grab airborne opponents, but can be done mid combo
- Button can be held to extend active frames for about 1 second
- Only combos into Gadget Finger
- Can be held for 33f
The magnetism on this move is stronger than that of j.214B, making the move moderately more consistent at raw grabbing aerial opponents. Also of note is that this grab can be comboed into, which could be considered an option as an unburstable combo ender.
Partner Skills
5P
Sledgehammer

- Tager's fastest assist
- Launches and causes a soft knockdown
Useful in Cross Combos due to its relatively fast startup and cooldown.
6P
Spark Bolt

- Fires straight ahead
- Absurdly long startup time
- Wall bounces opponent to Tager's position
A highly situational assist. The extremely long startup makes it very easy to react to in neutral, but it can sometimes be uniquely advantageous in combos that have long forced animations. Unlike in other BlazBlue games, Tager's charging stance does not have protection of any kind, making him entirely vulnerable before the move activates.
4P
Up Spark Bolt

6P, but up


- Fires at a 30° angle from the ground
- Much faster than his 6P
- Wall bounces to Tager's position
Shallow angle combined with Spark Bolt's large size and very fast speed makes this a ok anti-air assist. Easily stuffed due to Tager's large frame
Distortion Skills
Magna Tech Wheel
236B+C

spin2win


- Lightning spin super
Followup only comes out in resonance/Cross combo. Can be used with short Distortion Skill Duos, allowing for partner combo extension.
Genesic Emerald Tager Buster
214B+C (Air OK) 720B+C (Air OK)

WHO THOUGHT GIVING HIM THIS MOVE IN THE AIR WAS A GOOD IDEA?!


- Ground Version
- Extremely attractive
- Can only grab grounded opponents
- Invincible startup
- Button can be held to extend active frames, though you are not invincible while doing this
If you input 720B+C instead of 214B+C, the damage of GETB will be increased by 500 (6620/7620). The range on this move is deceptively huge especially thanks to the generous magnetism during the startup, making it a powerful tool in footsies as well as a threatening reversal. Is +21 upon landing, but the opponent is placed far from Tager.
- Air Version
- Extremely attractive to airborne opponents
- Grounded opponents will slide along the floor slowly
- Can only grab airborne opponents
- Stops all momentum when in use
- Invincible startup
- Button can be held to extend active frames
Be careful when using the air version. Grounded opponents will have plenty of time to get under you. While opponents who super jump will usually fly overhead and can hit you as they fly by. Is +21 upon landing, but the opponent is placed far from Tager.
Input 720B+C will also give you an extra 500 damage (7350/8350).
Distortion Skill Duo
Terra Break
P during Partner's Distortion Skill
Don't do this on block


- 100% minimum
- Sends opponent to far side of the screen
Astral Heat
King of Tager
222B+C

"Releasing Armagus!"

Buckle Up.

Cause I wanna take you for a ride.


- Requires level 4 Resonance Blaze to meet 9 meter cost requirement
- Unlike Tager's other command grabs, this can grab either grounded or airborne opponents
- Extremely attractive
- Buttons can be held to extend magnetism duration.
- Easy confirm from 2A, 2C, Wedge Catapult. Confirms off gadget finger.
You can be hit while extending the magnetism of this move, but this shouldn't be an issue when ending the round with a hit confirm.
External References
To edit frame data, edit values in BBTag/Iron Tager/Data.
 Azrael [★]
 Celica A. Mercury [★]
 Es [★]
 Hakumen [★]
 Hazama [★]
 Iron Tager [★]
 Izayoi [★]
 Jin Kisaragi [★]
 Jubei [★]
 Mai Natsume [★]
 Makoto Nanaya [★]
 Naoto Kurogane [★]
 Nine the Phantom [★]
 Noel Vermillion [★]
 Nu-13 [★]
 Platinum the Trinity [★]
 Rachel Alucard [★]
 Ragna the Bloodedge [★]
 Susano'o [★]
Click [★] for character's full frame data
Essentials
• HUD •
Controls •
The Basics
• Movement/Canceling •
Offense •
Defense •
Gauges •
Attack Attributes •
Detailed & Advanced Information
• Damage/Combo •
Frame Data & System Data •
Misc •
Archived Information
• Patch Notes •
- Active Change
- Air Recovery
- Astral Heat
- Clash
- Clash Assault
- Cross Burst
- Cross Combo
- Cross Gauge
- Cross Raid
- Cross Gauge Cooldown
- Delayed Down Entrance
- Distortion Skills
- Distortion Skill Duo
- Duo Change
- Extra Assault
- Extra Skills
- Ground Recovery
- Guard Bonus
- Health
- Minimum Damage
- P1, P2
- Partner Skills
- Rampage Time
- Reject Guard
- Reversal Action
- Resonance Blaze
- Resonance Gauge
- Skill Gauge
- Skills
- Smart Combo
- Throw
- Throw Reject
- Throw Counter
- Throw Reject Miss