
Anti-Airs, Neutral, Pressure, Confirms. This normal does it all!

Cool poses for hitconfirming a situation.

| (56 intermediate revisions by 5 users not shown) | |||
| Line 1: | Line 1: | ||
{{ | {{BBTag_Construction_Card}} | ||
= | ==Overview== | ||
{{Overview | {{BBTag/CharacterLinks}} | ||
| | <div id="home-content" class="home-grid"> | ||
| | {{card|width=4 | ||
| | |header=Overview | ||
| | |content='''Yosuke Hanamura''' is {{keyword|rushdown}} character specilzing speed & mobitily. | ||
| | |||
Yosuke is tied with {{Character Label|BBTag|Seth|label=Seth}} for the fastest character in the game which combined with his excellent air movement, lets him move around the field in different ways to change his approach and confuse the opponent. | |||
He has flexible {{keyword|gatling}} options which keep his blockstring varied and easily transition from ground to air-based offence and vice versa. He can set up left/right mixups both solo and with his partner thanks to his specials which are layered with fast {{keyword|overhead}}s, {{keyword|frame trap}}s and good stagger pressure. | |||
He's not with flaws though. His normals are short and he lacks a projectile making him reliant on assists to get in certain matchups. This also gives him a lack of midrange presence. He struggles against characters with strong air control like {{Character Label|BBTag|Nine the Phantom|label=Nine}} due to his additionally poor air presence in neutral and his low health means you can't make too many mistakes. | |||
Still, if you like a speedy character with good pressure who can annoy the enemy to death, then pick him up and show them why '''"EVERY DAY'S GREAT AT YOUR JUNES!"''' | |||
}} | |||
{{BBTag/Infobox | |||
| fastestAttack = [[#4A|4A]] (5F) | |||
| reversal = [[#Dodge|A+D]] (Catch 1~25F)<br/>[[#Garudyne|236B+C]] (16F)<br/>[[#Shippu - Nagareboshi|214B+C]] (5F) | |||
}} | |||
{{ProsAndCons | |||
|intro=is a rushdown character that can overwhelm the opponent with speed and left-right mixups | |||
|pros= | |pros= | ||
* | *'''Unmatched Mobititly''':Yosuke has the fastest run speed, above average jump height, and air dash distance on top of his air actions. | ||
* High | *''' High Solo Damage''': Most of Yosuke's combos result in 6.5- 7K without resources or counter-hit. | ||
* | *''' Unique & Strong Pressure''': With fast buttons, flexible gatlings, jump cancels, {{clr|2|5B}} being immune to pushblock & even more, he has excellent pressure. | ||
* | *'''Nice Assist Kit''': {{clr|5|4P}} is very fast and has a large hitbox. {{clr|5|6P}} is great for pressure and neutral and {{clr|5|5P}} is universal combo tool. | ||
|cons= | |cons= | ||
* | *''' Poor Midrange Game''': While he has decent pokes, his short range and lack of projectiles make him less threatening when he gets you in the corner (more so than other characters). | ||
*''' Can't make too many mistakes.''': His low health and lacklustre reversal action means he can struggle on defence. | |||
* | }} | ||
| | </div> | ||
| | |||
{{card|width=4 | |||
|header=Unique Ability: Air Actions | |||
|content= Yosuke can chain multiple specials while in the air. He can string these together during combos, to mix up his aerial approach or bait anti-airs. | |||
3 Moonsaults and 1 V Slash can be used after he jumps and can only be refreshed by landing. You can combine them however you want as long as the actions are available. V Slash can’t be cancelled into any air actions but you can manually input Moonsault/normals after recovery while in the air. | |||
* Hitting '''A''' during Moonsault / Dash Spring will give you V Slash | * Hitting '''{{clr|1|A}}''' during Moonsault / Dash Spring will give you V Slash. | ||
* Hitting '''B or C''' during Dash Spring will give you Moonsault or EX | * Hitting '''{{clr|2|B}} or {{clr|3|C}}''' during Dash Spring will give you Moonsault or EX Monsault. | ||
* Hitting '''B or C''' during Moonsault will give you Crescent Slash | * Hitting '''{{clr|2|B}} or {{clr|3|C}}''' during Moonsault will give you Crescent Slash. | ||
* Hitting '''B or C''' AFTER Crescent Slash will give you another Moonsault | * Hitting '''{{clr|2|B}} or {{clr|3|C}}''' AFTER Crescent Slash will give you another Moonsault. | ||
*You can't use Moonsualt in the same direction twice in row. | |||
* You can also do manual inputs or 6/4+Button to change directions | * You can also do manual inputs or 6/4+Button to change directions | ||
* You | * You can cancel the start-up for {{clr|3|j.C}} into air actions also using manual inputs. | ||
}} | }} | ||
==Normal Moves== | ==Normal Moves== | ||
===<big>4A</big>=== | ===<big>{{clr|1|4A}}</big>=== | ||
{{BBTag Move Card|game=BBTag | |||
|input=4A,4AA,4AAA,4AAAA | |||
|versioned=input | |||
|description= | |||
A versatile normal useful for just about anything. | |||
{{clr|1|4A}}'s fast {{keyword|startup}}, {{keyword|recovery}} and long {{keyword|active}} frames make it a low commitment {{keyword|poke}} in {{keyword|neutral}}. | |||
It has every cancel option so it's good for starting {{keyword|pressure}} and the hitbox and speed can let it be an {{keyword|anti-air}} at certain heights. It can be used at the end of {{keyword|combo}} to do a {{keyword|reset}}. | |||
*Jump cancelable | |||
*Throw cancelable | |||
{| | |||
{{ | |||
| | |||
}} | |||
{{ | |||
{{ | |||
| | |||
}} | |||
|} | |||
* | |||
* | |||
---- | ---- | ||
* | A good option for {{keyword|stagger pressure}}, {{keyword|frame trap}}s and {{keyword|hit confirm}}. | ||
{{clr|1|4A}} has a long window to {{keyword|gatling}} into {{clr|1|4AA}} letting you bait the opponent and {{clr|1|4AA}} still has plenty cancels making it good for confirming hits. | |||
*Throw cancellable | |||
---- | ---- | ||
An occasional but still good pressure tool and combo piece. | |||
{{clr|1|4AAA}} makes Yosuke airborne, letting you use {{MiniMoveCard|game=BBTag|chara=Yosuke Hanamura|input=j.236B|label=Moonsault}} for left\right {{keyword|mix-up}}s especially with an assist. | |||
You can {{keyword|link}} a {{keyword|microdash}} {{clr|1|5A}} after {{clr|1|4AAA}} letting you get decent damage for a {{clr|1|4A}} starter. | |||
While somewhat minus on block, {{clr|1|4AAA}} sends Youske backwards making it hard to {{keyword|punish}} for most characters so you can safely end blockstring with it. | |||
---- | ---- | ||
Identical to {{clr|1|5AAAA}} except it can't go into [[BBTag/Mechanics#Cross_Raid|Cross Raid]] so its useless. Just use {{clr|1|4AA}} or {{clr|1|4AAA}} to go into {{clr|1|5A}} for better damage and {{keyword|okizeme}} | |||
}} | |||
< | ===<big>{{clr|1|5A}}</big>=== | ||
</ | {{BBTag Move Card|game=BBTag | ||
|input=5A,5AA,5AAA,5AAAA | |||
|versioned=input | |||
|description= | |||
Your best combo starter and flexible blockstring option. | |||
{{clr|1|5A}} is jump and throw cancellable on all three hits, goes into all your other normals excluding {{clr|1|4A}} and is only -1 on block so it's excellent for starting pressure. It's particularly good for aerial offense like doing {{clr|1|5A}} >{{keyword|TK}} {{MiniMoveCard|game=BBTag|chara=Yosuke Hanamura|input=j.236C|label=EX Moonsault}}. | |||
| | |||
{{ | |||
{{ | |||
| | |||
| | |||
| | |||
Always try to | It's also Youske's best starter damage-wise which combined with its fast startup makes it your go-to {{keyword|DP}} punish option. | ||
*Always try to land all three hits before cancelling | |||
*Can be used twice in the same string | |||
---- | ---- | ||
An important combo piece and branching point for pressure. | |||
* Jump cancelable on hit | |||
{{clr|1|5AA}} causes a ground bounce on airborne opponents which makes it important for certain combos. | |||
{{clr|1|5AA}} can go into {{clr|1|2A}} and back to {{clr|1|5A}} but you wont be able to use {{clr|1|5AA}} a second time so use {{clr|2|5B}} instead. Mixing up and delaying these options will help make your blockstrings less predictable. | |||
*Jump cancelable on hit | |||
---- | ---- | ||
An important part in his combo loops but otherwise outclassed by other options. | |||
{{clr|1|5AAA}} makes Yosuke airborne like {{clr|1|4AAA}} letting you use air specials, however, it can be jump cancelled on hit. Still, besides the aforementioned loops,{{clr|1|5AAA}} sees little use due to there being better options, both for combos and pressure. | |||
---- | ---- | ||
As with most {{clr|1|5A}} autocombo enders, {{clr|1|5AAAA}}'s only real use is as a combo ender so you can use [[BBTag/Mechanics#Cross_Raid| Cross Raid]]. Outside of that, almost all of your other combo options are preferred. | |||
*Wait until all the kunai hit before the 5th {{clr|1|A}} press to optimise damage. | |||
}} | |||
< | ===<big>{{clr|2|5B}}</big>=== | ||
</ | {{BBTag Move Card|game=BBTag | ||
|input=5B,5BB,5BBB | |||
|versioned=input | |||
|description= | |||
Another well-rounded button, mainly used in combos and pressure. | |||
{{clr|2|5B}} sees most use as combo filler as autocombo plays a large role in Yosuke's combo routing. | |||
It also helps vary your pressure as it can be {{keyword|reverse beat}} into {{clr|1|5A}}. While not useful midscreen, it makes corner pressure better by letting you incorporate jump cancels. | |||
{{clr|2|5B}} is a servicable {{keyword|poke}} with good range. However, it's long recovery, large {{keyword|hurtbox}} due to being a persona move and extra damage should you get hit make it risky to throw carelessly so use with caution. | |||
*Jump Cancelable on hit | |||
{{ | |||
| | |||
* Jump | |||
---- | ---- | ||
Mainly combo and blockstring filler. | |||
* Jump | |||
Landing {{clr|2|5BBB}} on airborne enemies can be tricky so doing {{clr|2|5BB}}> {{MiniMoveCard|game=BBTag|chara=Yosuke Hanamura|input=236B|label=Dash Spring}} is usually preferred, making it one of your most common routes. | |||
Like {{clr|2|5B}}, {{clr|2|5BB}} can be reverse beat into {{clr|1|5A}} so the same pressure uses apply. | |||
By delaying the 3rd {{clr|2|B}} press, Yosuke will do {{clr|2|5B}} again instead of doing {{clr|2|5BBB}}. You can do this up to 4 times. If the opponent pushblocks or tries to jump out after {{clr|2|5BB}}, the next {{clr|2|5B}} can potentially catch them. | |||
*Jump cancellable on hit | |||
---- | ---- | ||
A combo tool and nothing else. | |||
{{clr|2|5BBB}} stuns and then relaunches the opponents letting you combo into {{clr|2|236B}} on grounded opponents making it one of your main routes. | |||
It also disables [[BBTag/Mechanics#Cross_Burst| Cross Burst]] which combined with the long animation make it perfect for an [[BBTag/Mechanics#Active_Change| Active Switch]] to your partner to either extend the combo or go into a super for unburstable damage. | |||
*Cannot hit the opponent's partner | |||
}} | }} | ||
===<big>{{clr|3|5C}}</big>=== | |||
{{BBTag Move Card|game=BBTag | |||
|input=5C | |||
|description= | |||
[[BBTag/Mechanics#Clash_Assault|Universal Overhead]]. Like most Blazblue and Persona characters, it's decently fast but is punishable on block. Due to Yosuke jumping forward, it has slightly more range compared to many others in the same category. | |||
It is a decent mixup to use now and again when the opponent expects your other, stronger options but don't rely on it. | |||
*Airborne during the hop | |||
}} | }} | ||
< | ===<big>{{clr|1|2A}}</big>=== | ||
</ | {{BBTag Move Card|game=BBTag | ||
|input=2A | |||
|description= | |||
Your main low, another good pressure button and second best abare option. | |||
{{clr|1|2A}}'s fast startup and decent range makes it good for {{keyword|stagger pressure}} and setting up {{keyword|tick throw}}as well as a poke. | |||
It has slightly more range than {{clr|1|4A}} and only has 1 more frame of startup making it your next best option for mashing out of blockstrings. | |||
*Chains into itself twice | |||
*Can be used twice in a string | |||
}} | }} | ||
< | ===<big>{{clr|2|2B}}</big>=== | ||
</ | {{BBTag Move Card|game=BBTag | ||
|input=2B | |||
|description= | |||
Your main {{keyword|anti-air}} and an amazing one. | |||
{{clr|2|2B}} has fast startup, early head {{keyword|invul}} and a great vertical {{keyword|hitbox}} that even reaches behind, letting you catch {{keyword|crossup}}s attempts. Its only weaknesses are its short horizontal range and long recovery. | |||
*Jump cancelable on hit and block | |||
*Can {{keyword|reverse beat}} into {{clr|1|5A}} | |||
| | |||
{| | |||
{{ | |||
{{ | |||
| | |||
| | |||
}} | }} | ||
< | ===<big>{{clr|3|2C}}</big>=== | ||
</ | {{BBTag Move Card|game=BBTag | ||
|input=2C | |||
|description= | |||
A situational {{keyword|neutral}} option. | |||
{{clr|3|2C}} moves Youske forward and {{keyword|low profile}}s letting him go under certain attacks such as {{Character Label|BBTag|Vatista|label=Vatista's}} {{MiniMoveCard|game=BBTag|chara=Vatista|input=214A|label={{clr|1|214A}}}} or {{Character Label|BBTag|Hakumen|label=Hakumen's}} {{MiniMoveCard|game=BBTag|chara=Hakumen|input=5B|label={{clr|2|5B}}}}. | |||
On normal hit, you can only go into {{clr|1|236A}}/{{clr|3|C}} with different combo options for both. On {{keyword|counter}} hit you cancel into {{clr|2|236B}}. | |||
| | |||
{ | |||
{ | |||
{{ | |||
| | |||
| | |||
}} | }} | ||
|} | |||
===<big>{{clr|1|j.A}}</big>=== | |||
{{BBTag Move Card|game=BBTag | |||
|input=j.A,j.AA | |||
|versioned=input | |||
|description= | |||
Your primary air button. | |||
{{clr|1|j.A}} has a nice {{keyword|hitbox}} making it your best {{keyword|air-to-air}}, jump in and normal for {{keyword|safejump}}s. | |||
{{clr|1|j.A}} is also great setting up {{keyword|mix-up}}s. Against tall characters like {{Character Label|BBTag|Hakumen|label=Hakumen}}, {{clr|1|j.A}} can be used as a {{keyword|fuzzy overhead}}. If the opponents blocks {{clr|1|j.A}} in the air you can use Moonsault to cross them up potentially. | |||
* Jump cancelable on hit and block | * Jump cancelable on hit and block | ||
---- | ---- | ||
Combo and blockstring filler especially against airborne opponents. | |||
* Jump cancelable on hit and block | * Jump cancelable on hit and block | ||
*Can combo back into {{clr|1|j.A}} once | |||
}} | |||
</ | }} | ||
===<big>{{clr|1|j.2A}}</big>=== | |||
{{InputBadge|Flying Kunai}} | |||
{{BBTag Move Card|game=BBTag | |||
|input=j.2A | |||
|description= | |||
A piece in air combos and occasional neutral option. | |||
{{clr|1|j.2A}} has long {{keyword|hitstun}} compared to Yosuke's other air normals, letting you do {{MiniMoveCard|game=BBTag|chara=Yosuke Hanamura|input=j.236B|label=Moonsualt}} to Cresent Slash on airborne opponents. | |||
Due to the angle it goes, {{clr|1|j.2A}} isn't the best for neutral but it's his only projectile. If the kunai miss you can't act until landing and you still have landing recovery. But if they land you cancel into specials to avoid being punished. | |||
*Special and super cancellable on hit and block | |||
}} | }} | ||
===<big>j.B</big>=== | ===<big>{{clr|2|j.B}}</big>=== | ||
{{BBTag Move Card|game=BBTag | |||
|input=j.B | |||
|description= | |||
A normal mainly used when {{clr|1|j.A}}'s faster startup isn't needed. | |||
{{clr|2|j.B}} can only be canceled into {{clr|3|j.C}} and can't be jump canceled but it has very long {{keyword|active}} frames making it a good landing option to start pressure. | |||
*Not an overhead | |||
{{ | |||
{{ | |||
| | |||
| | |||
}} | }} | ||
===<big>{{clr|3|j.C}}</big>=== | |||
{{BBTag Move Card|game=BBTag | |||
|input=j.C | |||
|description= | |||
An excellent pressure option for baiting your opponent due to the cancel options. | |||
Jiraya causes a puff of smoke where Youske disappears and reappears on the ground while doing a sliding low attack. As soon as the smoke effect appears, you can cancel the startup into any '''air specials and both supers'''. This makes it extremely versatile as you can use this to bait anti-airs, throws, most {{keyword|reversal}}s, cross up the opponent with Moonsault or go for a high/low with {{clr|3|j.236C}} and the low. | |||
Although the sliding attack is unsafe, you can cancel into {{clr|1|236A}} to stay mostly safe. Jumping back and doing a falling air normal can punish the attack recovery but you don't have to commit to the low and potentially punish the enemy's attack. | |||
Mix up your options with {{clr|3|j.C}} to keep the opponent guessing. | |||
*Jiiraiya is invincible during the startup | |||
*Can be used to get to ground faster after an aerial combo drop | |||
}} | }} | ||
<br style="clear:both;"/> | <br style="clear:both;"/> | ||
==Universal Mechanics== | ==Universal Mechanics== | ||
===<big>Ground Throw</big>=== | ===<big>Ground Throw</big>=== | ||
{{InputBadge|{{clr|2|5B}}+{{clr|3|C}}}} | |||
{{BBTag Move Card|game=BBTag | |||
|input=BC | |||
|description= | |||
Yosuke's pressure is mostly air-based but mixing in throws occasionally helps make pressure less predictable. | |||
{| | |||
{{ | |||
{{ | |||
| | |||
| | |||
| | |||
| | |||
Your main throw confirm is a dashing {{clr|1|5A}} but if you're not confident in your timing, you can cancel the 2nd hit into {{clr|2|236B}}/{{clr|3|C}} for an easier combo. | |||
}} | }} | ||
===<big>Dodge</big>=== | |||
{{InputBadge|{{clr|1|5A}}+{{clr|4|D}}}} | |||
{{BBTag Move Card|game=BBTag | |||
|input=AD,AD Attack | |||
|versioned=input | |||
|description= | |||
[[BBTag/Mechanics#Reversal_Action |Universal {{keyword|Dragon Punch}}]] | |||
Yosuke’s Reversal Action has 2 parts, “Taunt” and “Kick”. “Taunt” is the initial action when the DP is pressed (Kunai Swing) where Yosuke is in his {{keyword|counter}} state. “Kick” is when Yosuke’s Reversal Action is triggered causing Jiraiya to come out and kick the opponent away. If it’s not triggered, Yosuke sighs and becomes punishable. | |||
A decent counter but not the best. It can beat most {{keyword|safejump}}s and is triggered by all attacks including projectiles but the startup of the kick isn't that fast and it can lose to moves with armour such as {{Character Label|BBTag|Yang Xiao Long|label=Yang's}} {{MiniMoveCard|game=BBTag|chara=Yang Xiao Long|input=5B|label={{clr|2|5B}}}}. | |||
*Jiraiya can appear behind Yosuke during activation if he’s crossed up with proper timing | |||
*When triggered, Jiraiya will target the active character. | |||
}} | |||
<br style="clear:both;"/> | <br style="clear:both;"/> | ||
==Skills== | ==Skills== | ||
===<big>Dash Spring</big>=== | ===<big>Dash Spring</big>=== | ||
{{InputBadge|{{clr|1|236A}}/{{clr|2|B}}}} | |||
{{BBTag Move Card|game=BBTag | |||
|input=236A,236B | |||
|versioned=input | |||
|description= | |||
*All 3 version are referred to as '''Run''' by most of the community. | |||
*Allows Yosuke to cancel into {{MiniMoveCard|game=BBTag|chara=Yosuke Hanamura|input=j.236A|label=Flying Cut Slash}} using {{clr|1|A}}, Moonsault using {{clr|2|B}} and EX Moonsault using {{clr|3|C}}. | |||
---- | |||
| | ;{{clr|1|236A}} | ||
Travels goes a little over half-screen and slightly bounces the opponent. | |||
Due to the small bounce, you can only combo into V-Slash or EX Moonsault, limiting its use in combos. | |||
---- | |||
;{{clr|2|236B}} | |||
Has more startup but goes nearly fullscreen and bounces the opponent higher. | |||
{{ | The higher bounce lets you go into Moonsualt giving you a variety of combos options making it your go-to for almost all of your combo routes. | ||
The landing recovery can be canncelled by doing Moonsalut (aka pressing {{clr|2|B}}) letting do {{clr|2|5B}} immedtialy after {{clr|2|236B}}. | |||
| | |||
}} | }} | ||
< | ===<big>Flying Flash Cut</big>=== | ||
</ | {{InputBadge|{{clr|1|j.236A}}}} {{InputBadge|{{clr|1|j.214A}}}} | ||
{{BBTag Move Card|game=BBTag | |||
|input=j.236A | |||
|description= | |||
Your primary combo ender and counter against overly aggressive enemies. | |||
While V Slash doesn't give the best knockdown, it can still give strong {{keyword|oki}} with the use of {{keyword|meaty}} assists. It also useful catching opponents during {{clr|3|j.C}} startup. | |||
After the second slash, Yosuke can't double jump or airdash but after a short pause, he can use air normals, specials and supers. So while it possible to punish him (especially on {{keyword|whiff}}), the window is short and if missed can result in them being punished by Yosuke. | |||
*Referred to as '''V-Slash''' | |||
*Direction depends on input | |||
{| | |||
}} | }} | ||
===<big>Moonsault</big>=== | ===<big>Moonsault</big>=== | ||
{{InputBadge|{{clr|2|j.236B}}}} {{InputBadge|{{clr|2|j.214B}}}} | |||
{{BBTag Move Card|game=BBTag | |||
|input=j.236B | |||
|description= | |||
A versatile move for mobility, combos and mixups. | |||
Moonsault makes Yosuke jump in a wide arc in the air. You can cancel it into itself thrice so you can cross up multiple times and it will switch sides even in the corner. This lets you easily do left/rights both with and without an assist. making it one of your best mixup options. It also has 7 frames of {{keyword|invul}} letting it dodge attacks with good timing. | |||
It's also used in conjunction with Crescent Slash for nearly all of Yosuke's combos. | |||
*Direction depends on input | |||
*Can be cancelled into Crescent Slash, V-Slash, and other Moonsaults after frame 20 | |||
*Can be performed by inputting {{clr|2|4B}} or {{clr|2|6B}} after Run or another Moonsault | |||
{| | |||
{{ | |||
| | |||
| | |||
}} | }} | ||
===<big>Crescent Slash</big>=== | ===<big>Crescent Slash</big>=== | ||
{{InputBadge|Moonsault -> {{clr|1|A}}/{{clr|2|B}}/{{clr|3|C}}}} | |||
{{BBTag Move Card|game=BBTag | |||
|input=j.236B > X | |||
|description= | |||
Important filler for combos. | |||
Crescent Slash has Youske slash in the opposite direction Moonsault came from (e.g if you do {{clr|2|j.236B}} > he'll slash to the left even if you don't cross the enemy). The 3rd Crescent Slash in an air action set will cause a {{keyword|hard knockdown}}. These attributes allow a variety of combo routes while doing good damage. After the 3rd one, you can end it there for oki or go into V-slash for more damage. | |||
Moonsault's left/right mixup potential applies to Crescent Slash as it hits overhead forcing them to block high instead of either direction. | |||
*Press {{clr|1|A}} for V-Slash, {{clr|2|B}} for Moonsualt and {{clr|3|C}} for EX Moonsault on hit/block. | |||
{| | |||
{{ | |||
| | |||
| | |||
| | |||
}} | |||
}} | |||
==Extra Skills== | ==Extra Skills== | ||
===<big>EX Dash Spring</big>=== | ===<big>EX Dash Spring</big>=== | ||
{{InputBadge|{{clr|3|236C}}}} | |||
{{BBTag Move Card|game=BBTag | |||
|input=236C | |||
|description= | |||
EX Run has slower startup than the {{clr|1|A}} version but faster than {{clr|2|B}} one while still having its range and higher bounce, allowing | |||
full conversions off moves like {{clr|3|2C}} that would only allow a short combo. It also deals the most damage out of the 3 versions, making it good in [[BBTag/Mechanics#Resonance Blaze| Resonance Blaze]] where you have excess meter to burn. | |||
| | |||
{{ | |||
{{ | |||
| | |||
| | |||
| | |||
}} | }} | ||
<br style="clear:both;"/> | |||
= | |||
</ | ===<big>EX Moonsault</big>=== | ||
{{InputBadge|{{clr|3|j.236C}}}} {{InputBadge|{{clr|3|j.214C}}}} | |||
{{BBTag Move Card|game=BBTag | |||
|input=j.236C | |||
|description= | |||
An excellent mixup option and combo extender. | |||
EX Moonsault when {{keyword|tiger knee}}ed as fast as possible is a 25-frame overhead that's safe on block(-4) and leads to a 6K+ damage combo with the right routes which combined with Yosuke's flexible blockstring grants him great high/low mixups. | |||
It's also used as an extender or stabilizer in certain combos such as after landing {{clr|1|236A}}. | |||
*The slash will always be towards the opponent. | |||
*Youske will flip in place instead of left/right | |||
*Crescent Slash followup comes out automatically. | |||
}} | }} | ||
<br style="clear:both;"/> | <br style="clear:both;"/> | ||
==Partner Skills== | ==Partner Skills== | ||
===<big>5P</big>=== | ===<big>{{clr|5|5P}}</big>=== | ||
{{InputBadge|Dash Spring}} | |||
{{BBTag Move Card|game=BBTag | |||
|input=5P | |||
|description= | |||
Combo and {{keyword|block string}} extender. | |||
{{clr|5|5P}} has decent hitstun working, primarily as a basic but effective combo extender. However, it can work in blockstrings where you don't have enough time to set {{clr|5|6P}}. | |||
It can also be used as a less consistent but more rewarding [[BBTag/Mechanics#Cross_Burst| Cross Burst]] punish instead of {{clr|5|4P}} | |||
{{ | |||
{{ | |||
| | |||
| | |||
}} | }} | ||
</ | ===<big>{{clr|5|6P}}</big>=== | ||
{{InputBadge|P4A {{clr|4|5D}}}} | |||
{{BBTag Move Card|game=BBTag | |||
|input=6P | |||
|description= | |||
A wonderful pressure and neutral option. | |||
Yosuke sends Jiraya fullscreen to attack the opponent. It has the most blockstun of all his assists and since it's a persona attack, it can't be negated with [[BBTag/Mechanics#Reject Guard| Push Block.]] in the corner. Likewise, with proper spacing, if the opponent uses a {{keyword|reversal}} during a blockstring and you switch to Yosuke, he'll usually be too far to punish, making [[BBTag/Mechanics#Active_Change| Active Switch]] mixups hard to counter. All these properties make it one of the best assists for pressure. | |||
{{clr|5|6P}} can help in neutral as it locks down the opponent, lets your {{keyword|point}} approach and can give a long option to characters that lack them. Projectiles and pokes can stop Jiraya (which will deal damage to Yosuke) so use your own to cover it. | |||
Finally, {{clr|5|6P}} can let your point convert long-range hits into full combos with oki or cover backward {{keyword|tech}}s that {{keyword|safejump}}s can't. | |||
*Jiraya only performs the uppercut follow up if {{clr|5|6P}} connects on the point character. | |||
*Jiraya will disappear if you switch to Yosuke at any point. | |||
}} | }} | ||
< | ===<big>{{clr|5|4P}}</big>=== | ||
</ | {{InputBadge|{{clr|1|5AAA}}}} | ||
{{BBTag Move Card|game=BBTag | |||
|input=4P | |||
|description= | |||
A standard but effective defensive assist. | |||
{{clr|5|4P}} has fast startup, large hitbox and long active frames, letting stop jump-ins and punish bursts. It also the best assist for combos when you want to switch to Yosuke and have him continue it. | |||
}} | }} | ||
<br style="clear:both;"/> | <br style="clear:both;"/> | ||
| Line 861: | Line 422: | ||
==Distortion Skills== | ==Distortion Skills== | ||
===<big>Garudyne</big>=== | ===<big>Garudyne</big>=== | ||
{{InputBadge|{{clr|2|236B}}+{{clr|3|C}} (Air OK)}} | |||
{{BBTag Move Card|game=BBTag | |||
|input=236BC | |||
|description= | |||
Cashout for short combos and happy birthday. | |||
{{clr|2|236B}}+{{clr|3|C}} deals more base damage than Whoo and properly hit both point & assist but less [[BBTag/Mechanics#Minimum Damage| minimum damage]]. | |||
| | When combined with short {{keyword|DHC}}, the long duration can let your assist get multiple mix-ups on block and high damage on hit. It also hits both sides of Yosuke. All of the above makes it a powerful defensive option. | ||
*Enhanced version deals more damage, visually nothing changes. | |||
*Invul goes away after the 2nd {{keyword|active}} frame. | |||
*Tracks the opponent's location but deals less damage the more time it takes to get to them. | |||
{| | |||
}} | }} | ||
===<big>Shippu - Nagareboshi</big>=== | ===<big>Shippu - Nagareboshi</big>=== | ||
{{InputBadge|{{clr|2|214B}}+{{clr|3|C}} (Air OK)}} | |||
{{BBTag Move Card|game=BBTag | |||
|input=214BC | |||
|description= | |||
The super you use for literally everything else. | |||
{{clr|2|214B}}+{{clr|3|C}} has 5 {{keyword|startup}} frames, goes slightly over '''HALF SCREEN''', has 15 actives frames and has invul nearly all of them and has a larger {{keyword|hitbox}} than you would expect. | |||
All of this makes it amazing for combos, {{keyword|sashikaeshi}} and {{keyword|reversal}}s. The fast startup, range and hitbox make it easy to attach to the end of combos even when {{keyword|hitstun}} is low. It can {{keyword|punish}} long {{keyword|recovery}} attacks like projectiles and beat weaker safejumps. | |||
| | |||
Like most supers though, it's unsafe on block so don't be careless. | |||
{| | |||
{{ | |||
| | |||
{{ | |||
| | |||
| | |||
}} | }} | ||
<br style="clear:both;"/> | <br style="clear:both;"/> | ||
| Line 934: | Line 456: | ||
==Distortion Skill Duo== | ==Distortion Skill Duo== | ||
===<big>Garudyne</big>=== | ===<big>Garudyne</big>=== | ||
{{InputBadge|{{clr|5|P}} during Partner's Distortion Skill}} | |||
{{BBTag Move Card|game=BBTag | |||
|input=Distortion Skill Duo | |||
|description= | |||
Standard {{keyword|DHC}}. Use it if it will kill the opponent or if your point is low on life and needs to heal. | |||
*Like the point version, tracks the opponent's location but deals less damage the more time it takes to get to them. | |||
*Do this out of {{MiniMoveCard|game=BBTag|chara=Hazama|input=236BC|label=Houtenjin}} it'll be funny | |||
{| | |||
| | |||
| | |||
| | |||
}} | }} | ||
<br style="clear:both;"/> | <br style="clear:both;"/> | ||
==Astral Heat== | ==Astral Heat== | ||
===<big>Brave Blade</big>=== | ===<big>Brave Blade</big>=== | ||
{{InputBadge|{{clr|2|222B}}+{{clr|3|C}} when [[BBTag/Mechanics#Astral Heat|Astral Conditions]] are met}} | |||
{{BBTag Move Card|game=BBTag | |||
|input=222BC | |||
|description= | |||
An average astral. Although its slow startup limits its use as a reversal it can be used to go through attacks with long startup. | |||
Your main astral {{keyword|hit confirm}}s are throw,{{clr|3|2C}} and V-Slash. After you input V-Slash, immediately input the astral so it will come out after the first hit but before the second. | |||
{| | |||
{{ | |||
| | |||
| | |||
}} | }} | ||
<br style="clear:both;"/> | <br style="clear:both;"/> | ||
== | ==Colors== | ||
*[https://blazblue.wiki/wiki/Yosuke_Hanamura#Palettes Color Palettes on https://blazblue.wiki] | |||
==Navigation== | ==Navigation== | ||
{{ | <center>{{Character Label|BBTag|Yosuke Hanamura|size=36px}}</center> | ||
{{BBTag/CharacterLinks}} | |||
{{notice|To edit frame data, edit values in [[{{PAGENAME}}/Data]].}} | {{notice|To edit frame data, edit values in [[{{PAGENAME}}/Data]].}} | ||
{{ | |||
{{BBTag/Navigation}} | |||

The BBTag wiki has major gaps in information. The game has gone through numerous significant changes since its release. As a result, many BBTag pages on Dustloop Wiki are out of date or lacking important information.
We need your help expanding the content for this game. If you have knowledge to share, or know people who can help, please contribute to the wiki by editing sections where you can.Yosuke Hanamura is rushdown Style of play where you constantly attack the opponent in close range fighting, never giving them an opportunity to retaliate. character specilzing speed & mobitily.
Yosuke is tied with ![]() Seth for the fastest character in the game which combined with his excellent air movement, lets him move around the field in different ways to change his approach and confuse the opponent.
Seth for the fastest character in the game which combined with his excellent air movement, lets him move around the field in different ways to change his approach and confuse the opponent.
He has flexible gatling The special category of cancels that describe how each character can cancel normals into other normals and specials. options which keep his blockstring varied and easily transition from ground to air-based offence and vice versa. He can set up left/right mixups both solo and with his partner thanks to his specials which are layered with fast overhead An attack that the opponent must block high.s, frame trap An offensive technique where the attacker leaves a small opening in their offense, goading the defender into performing an attack. This opening is designed such that the attacker can easily counter the defender's attack with their own.s and good stagger pressure.
He's not with flaws though. His normals are short and he lacks a projectile making him reliant on assists to get in certain matchups. This also gives him a lack of midrange presence. He struggles against characters with strong air control like ![]() Nine due to his additionally poor air presence in neutral and his low health means you can't make too many mistakes.
Nine due to his additionally poor air presence in neutral and his low health means you can't make too many mistakes.
 |
| Health |
| 16,000 |
| Prejump |
| 4F |
| Backdash |
| 23F (1~7F Inv All) |
| Fastest Attack |
| 4A (5F) |
| Reversals |
| A+D (Catch 1~25F) 236B+C (16F) 214B+C (5F) |
![]() Yosuke Hanamura is a rushdown character that can overwhelm the opponent with speed and left-right mixups
Yosuke Hanamura is a rushdown character that can overwhelm the opponent with speed and left-right mixups
Yosuke can chain multiple specials while in the air. He can string these together during combos, to mix up his aerial approach or bait anti-airs.
3 Moonsaults and 1 V Slash can be used after he jumps and can only be refreshed by landing. You can combine them however you want as long as the actions are available. V Slash can’t be cancelled into any air actions but you can manually input Moonsault/normals after recovery while in the air.

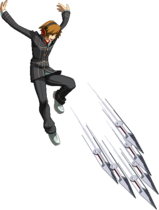
Anti-Airs, Neutral, Pressure, Confirms. This normal does it all!

Cool poses for hitconfirming a situation.


| Version | Damage | Guard | Startup | Active | Recovery | On-Block | Attribute | Invuln |
|---|---|---|---|---|---|---|---|---|
| 4A | 1000 | All | 5 | 6 | 8 | -2 | B | |
| 4AA | 1300 | All | 8 | 3 | 20 | -6 | B | |
| 4AAA | 1700 | All | 10 | 3 | 22+0L | -6 | H | |
| 4AAAA | 600×6 | All | 14 | Total: Until L+6L | P |
A versatile normal useful for just about anything.
4A's fast startup The time before an attack is active including the first active frame. For example, an attack with 10F startup means the attack will do nothing for 9 frames, then hit the opponent on the 10th frame., recovery The recovery of an attack refers to the amount of time an attacker must wait before they may perform another action, even blocking. and long active The active frames of an attack refers to the amount of time an attack can hit the opponent. frames make it a low commitment poke An attack that's thrown out to occupy the space in front of you and remind your opponent not to try and come closer. Usually, this is a far-reaching and safe normal move with little risk. in neutral When neither player is in an advantageous position in terms of stage position..
It has every cancel option so it's good for starting pressure To attack the opponent continuously and leave little room for counter attacks. and the hitbox and speed can let it be an anti-air A grounded attack that hits the opponent out of the air at certain heights. It can be used at the end of combo A sequence offensive executions where if the first attack hits and meets specific conditions (such as range, position, gauges, etc.), the correct executions guarantee you to land all the follow-up on the opponent. to do a reset Purposefully ending a combo early in order to perform a mixup in order to deal more damage..
A good option for stagger pressure The use of intentionally delaying gatlings or cancels in order to create frame traps with the intent of catching your opponent mashing or jumping. Loses to reversals., frame trap An offensive technique where the attacker leaves a small opening in their offense, goading the defender into performing an attack. This opening is designed such that the attacker can easily counter the defender's attack with their own.s and hit confirm To perform the first hit of a combo, and performing follow up attacks if the first hit successfully hits the opponent..
4A has a long window to gatling The special category of cancels that describe how each character can cancel normals into other normals and specials. into 4AA letting you bait the opponent and 4AA still has plenty cancels making it good for confirming hits.
An occasional but still good pressure tool and combo piece.
4AAA makes Yosuke airborne, letting you use Moonsault GuardStartupRecoveryUntil L+9LAdvantage- for left\right mix-up To perform a maneuver that forces a defending opponent to choose between two or more options. If the opponent chooses incorrectly, then they are hit by an attack. There are many different types of mix-ups such as crossup(left/right), high/low, and strike/throw.s especially with an assist.
You can link To perform a second action after the first action completely finishes its animation. a microdash The act of doing a quick dash, usualy seen in combos or pressure, by quickly tapping forward twice (66) or tapping a dash button. 5A after 4AAA letting you get decent damage for a 4A starter.
While somewhat minus on block, 4AAA sends Youske backwards making it hard to punish Attacking someone when they are unable to block, making the damage guaranteed. for most characters so you can safely end blockstring with it.
Identical to 5AAAA except it can't go into Cross Raid so its useless. Just use 4AA or 4AAA to go into 5A for better damage and okizeme From Japanese "起き攻め". Attacking an opponent about to wake up after they were knocked down, usually with meaty attacks or mix-ups.
| Version | Level | P1 | P2 |
|---|---|---|---|
| 4A | 1 | 100 | 70 |
| 4AA | 3 | 100 | 80 |
| 4AAA | 4 | 100 | 75 |
| 4AAAA | 2 | 100 | 75 |
4A:
4AA:
4AAA:
4AAAA:

3 times the hitboxes for 3 times the fun.


| Version | Damage | Guard | Startup | Active | Recovery | On-Block | Attribute | Invuln |
|---|---|---|---|---|---|---|---|---|
| 5A | 630×3 | All | 7 | 2,2,2 | 16 | -1 | B | |
| 5AA | 1300 | All | 9 | 4 | 14 | -1 | B | |
| 5AAA | 750×3 | All | 10 | 2,2,2 | 27+3L | -13 | B | |
| 5AAAA | 600×6 | All | 14 | Total: Until L+6L | P |
Your best combo starter and flexible blockstring option.
5A is jump and throw cancellable on all three hits, goes into all your other normals excluding 4A and is only -1 on block so it's excellent for starting pressure. It's particularly good for aerial offense like doing 5A >TK An input method to perform a special move in the air as fast as possible after you leave the ground. Short for "Tiger Knee". For Example: 2369 for a j.236 input. EX Moonsault GuardHighStartup20RecoveryUntil L+15LAdvantage-.
It's also Youske's best starter damage-wise which combined with its fast startup makes it your go-to DP Dragon Punch A move that has invulnerability during its startup, long recovery, and a rising motion. punish option.
An important combo piece and branching point for pressure.
5AA causes a ground bounce on airborne opponents which makes it important for certain combos.
5AA can go into 2A and back to 5A but you wont be able to use 5AA a second time so use 5B instead. Mixing up and delaying these options will help make your blockstrings less predictable.
An important part in his combo loops but otherwise outclassed by other options.
5AAA makes Yosuke airborne like 4AAA letting you use air specials, however, it can be jump cancelled on hit. Still, besides the aforementioned loops,5AAA sees little use due to there being better options, both for combos and pressure.
As with most 5A autocombo enders, 5AAAA's only real use is as a combo ender so you can use Cross Raid. Outside of that, almost all of your other combo options are preferred.
| Version | Level | P1 | P2 |
|---|---|---|---|
| 5A | 3 | 100 | 80 |
| 5AA | 3 | 100 | 80 |
| 5AAA | 4 | 100 | 75 |
| 5AAAA | 2 | 100 | 75 |
5A:
5AA:
5AAA:
5AAAA:

A pretty underrated poke. Send a Boot straight to their heads.


Tentarafoo's more useful as a normal than as a special... kinda sad.


| Version | Damage | Guard | Startup | Active | Recovery | On-Block | Attribute | Invuln |
|---|---|---|---|---|---|---|---|---|
| 5B | 1500 | All | 12 | 3 | 30 | -14 | B | |
| 5BB | 1700 | All | 17 | 2 | 22 | -5 | B | |
| 5BBB | 0, 2400 | All | 18 | 2 | Total: 47 | F |
Another well-rounded button, mainly used in combos and pressure.
5B sees most use as combo filler as autocombo plays a large role in Yosuke's combo routing.
It also helps vary your pressure as it can be reverse beat The ability to ignore the typical Light > Medium > Heavy sequence of buttons, i.e. cancelling a medium attack into a light attack. It allows for a bit more freeform offense since riskier heavy moves can be cancelled into safer light or medium moves. into 5A. While not useful midscreen, it makes corner pressure better by letting you incorporate jump cancels.
5B is a servicable poke An attack that's thrown out to occupy the space in front of you and remind your opponent not to try and come closer. Usually, this is a far-reaching and safe normal move with little risk. with good range. However, it's long recovery, large hurtbox The hitbox specifically relating to where a character is vulnerable to an opponent's attack. Shown as blue or cyan in visualizations. due to being a persona move and extra damage should you get hit make it risky to throw carelessly so use with caution.
Mainly combo and blockstring filler.
Landing 5BBB on airborne enemies can be tricky so doing 5BB> Dash Spring GuardAllStartup20~29Recovery18 [26+13L]Advantage-23 is usually preferred, making it one of your most common routes.
Like 5B, 5BB can be reverse beat into 5A so the same pressure uses apply.
By delaying the 3rd B press, Yosuke will do 5B again instead of doing 5BBB. You can do this up to 4 times. If the opponent pushblocks or tries to jump out after 5BB, the next 5B can potentially catch them.
A combo tool and nothing else.
5BBB stuns and then relaunches the opponents letting you combo into 236B on grounded opponents making it one of your main routes.
It also disables Cross Burst which combined with the long animation make it perfect for an Active Switch to your partner to either extend the combo or go into a super for unburstable damage.
| Version | Level | P1 | P2 |
|---|---|---|---|
| 5B | 4 | 90 | 85 |
| 5BB | 4 | 90 | 85 |
| 5BBB | 4 | 90 | 85 |
5B:
5BB:
5BBB:


| Damage | Guard | Startup | Active | Recovery | On-Block | Attribute | Invuln |
|---|---|---|---|---|---|---|---|
| 800+ | High | 22 | 3 | 24 | -10 | B |
Universal Overhead. Like most Blazblue and Persona characters, it's decently fast but is punishable on block. Due to Yosuke jumping forward, it has slightly more range compared to many others in the same category.
It is a decent mixup to use now and again when the opponent expects your other, stronger options but don't rely on it.
| Level | P1 | P2 |
|---|---|---|
| 3 | 100 | 100 |

It's like Yosuke 4A, except it hits LOW!

| Damage | Guard | Startup | Active | Recovery | On-Block | Attribute | Invuln |
|---|---|---|---|---|---|---|---|
| 1000 | Low | 6 | 3 | 15 | -4 | F |
Your main low, another good pressure button and second best abare option.
2A's fast startup and decent range makes it good for stagger pressure The use of intentionally delaying gatlings or cancels in order to create frame traps with the intent of catching your opponent mashing or jumping. Loses to reversals. and setting up tick throw A throw done after attacks, very soon after if not exactly when throw invulnerability expires on the opponent. A Tick Throw take advantage of that the opponent naturally expect a Frame Trap coming, making it very hard to react to or escape from.as well as a poke.
It has slightly more range than 4A and only has 1 more frame of startup making it your next best option for mashing out of blockstrings.
| Level | P1 | P2 |
|---|---|---|
| 2 | 90 | 75 |

Remember when Hazama 5C was jump cancellable on block?

| Damage | Guard | Startup | Active | Recovery | On-Block | Attribute | Invuln |
|---|---|---|---|---|---|---|---|
| 1500 | All | 9 | 4 | 26 | -13 | B | 6~12 H |
Your main anti-air A grounded attack that hits the opponent out of the air and an amazing one.
2B has fast startup, early head invul Short for InvulnerabilityA state where a character cannot be hit. A common component of reversal moves. and a great vertical hitbox A general term showing where an attack can hit the opponent and where the character is vulnerable to attack. that even reaches behind, letting you catch crossup Attacking your opponent after changing which horizontal side you are on, typically by jumping over them.s attempts. Its only weaknesses are its short horizontal range and long recovery.
| Level | P1 | P2 |
|---|---|---|
| 3 | 90 | 80 |

Slides under moves like sliding into their DMs.

| Damage | Guard | Startup | Active | Recovery | On-Block | Attribute | Invuln |
|---|---|---|---|---|---|---|---|
| 1700 | Low | 11 | 3 | 24 | -8 | F |
A situational neutral When neither player is in an advantageous position in terms of stage position. option.
2C moves Youske forward and low profile When a character's hurtbox is entirely beneath an opponent's attack. This can be caused by crouching, certain moves, and being short.s letting him go under certain attacks such as ![]() Vatista's 214A
Vatista's 214A GuardAllStartup15RecoveryTotal 49Advantage-7 or
 ![]() Hakumen's 5B
Hakumen's 5B GuardAllStartup15Recovery22Advantage-6.
On normal hit, you can only go into 236A/C with different combo options for both. On counter A move wherein your character pre-empts the opponent's attack, and attacks if hit by the opponent. hit you cancel into 236B.
| Level | P1 | P2 |
|---|---|---|
| 4 | 90 | 85 |

The Jump In everyone learned to hate.

Just mash the A button, he'll keep on swingin.


| Version | Damage | Guard | Startup | Active | Recovery | On-Block | Attribute | Invuln |
|---|---|---|---|---|---|---|---|---|
| j.A | 1000 | High | 10 | 4 | 10 | H | ||
| j.AA | 1000 | High | 7 | 3 | 11 | H |
Your primary air button.
j.A has a nice hitbox A general term showing where an attack can hit the opponent and where the character is vulnerable to attack. making it your best air-to-air A jumping attack that hits the opponent out of the air, jump in and normal for safejump A very well-timed jump attack on a character who is rising from a knockdown. Your goal is to attack extremely close to when you land so that, if the character performs an invincible reversal attack, you will land and be able to block. The opponent is then forced to block your jumping attack, since reversaling doesn't work, which will give you some nice pressure and hopefully an opening.s.
j.A is also great setting up mix-up To perform a maneuver that forces a defending opponent to choose between two or more options. If the opponent chooses incorrectly, then they are hit by an attack. There are many different types of mix-ups such as crossup(left/right), high/low, and strike/throw.s. Against tall characters like ![]() Hakumen, j.A can be used as a fuzzy overhead An offensive technique where the attacker exploits a common system mechanic in Fighting Games where a crouching opponent can be hit by a rising overhead as their hurtbox is expanded to be standing even though they are crouch blocking.. If the opponents blocks j.A in the air you can use Moonsault to cross them up potentially.
Hakumen, j.A can be used as a fuzzy overhead An offensive technique where the attacker exploits a common system mechanic in Fighting Games where a crouching opponent can be hit by a rising overhead as their hurtbox is expanded to be standing even though they are crouch blocking.. If the opponents blocks j.A in the air you can use Moonsault to cross them up potentially.
Combo and blockstring filler especially against airborne opponents.
| Version | Level | P1 | P2 |
|---|---|---|---|
| j.A | 3 | 80 | 80 |
| j.AA | 3 | 80 | 80 |
j.A:
j.AA:
}}
Flying Kunai

| Damage | Guard | Startup | Active | Recovery | On-Block | Attribute | Invuln |
|---|---|---|---|---|---|---|---|
| 600×6 | All | 14 | Until Hit | Total: Until L + 21L | P1 |
A piece in air combos and occasional neutral option.
j.2A has long hitstun When a character is hit while standing or crouching, the defender is forced into a stun animation for a set period of time where they are vulnerable to further attacks. This period of time is called hitstun. compared to Yosuke's other air normals, letting you do MoonsualtGuardStartupRecoveryUntil L+9LAdvantage- to Cresent Slash on airborne opponents.
Due to the angle it goes, j.2A isn't the best for neutral but it's his only projectile. If the kunai miss you can't act until landing and you still have landing recovery. But if they land you cancel into specials to avoid being punished.
| Level | P1 | P2 |
|---|---|---|
| 2 | 80 | 75 |


| Damage | Guard | Startup | Active | Recovery | On-Block | Attribute | Invuln |
|---|---|---|---|---|---|---|---|
| 720×3 | All | 15 | 3×11 | Total: 40 | H |
A normal mainly used when j.A's faster startup isn't needed.
j.B can only be canceled into j.C and can't be jump canceled but it has very long active The active frames of an attack refers to the amount of time an attack can hit the opponent. frames making it a good landing option to start pressure.
| Level | P1 | P2 |
|---|---|---|
| 3 | 80 | 80 |

Either hit the floor, or flip out! Be that annoying fly everyone can't hit.

| Damage | Guard | Startup | Active | Recovery | On-Block | Attribute | Invuln |
|---|---|---|---|---|---|---|---|
| 1700 | Low | 36 | 7 | 25 | -13 | F | 7~31 All |
An excellent pressure option for baiting your opponent due to the cancel options.
Jiraya causes a puff of smoke where Youske disappears and reappears on the ground while doing a sliding low attack. As soon as the smoke effect appears, you can cancel the startup into any air specials and both supers. This makes it extremely versatile as you can use this to bait anti-airs, throws, most reversal To perform an attack as soon as possible after getting knocked down or leaving hitstun/blockstun.s, cross up the opponent with Moonsault or go for a high/low with j.236C and the low.
Although the sliding attack is unsafe, you can cancel into 236A to stay mostly safe. Jumping back and doing a falling air normal can punish the attack recovery but you don't have to commit to the low and potentially punish the enemy's attack.
Mix up your options with j.C to keep the opponent guessing.
| Level | P1 | P2 |
|---|---|---|
| 4 | 80 | 85 |
5B+C

What if this throw poisoned again... But special cancels are nice!

| Damage | Guard | Startup | Active | Recovery | On-Block | Attribute | Invuln |
|---|---|---|---|---|---|---|---|
| 0, 1000×2 | Throw | 7-30 | 3 | 23 | T |
Yosuke's pressure is mostly air-based but mixing in throws occasionally helps make pressure less predictable.
Your main throw confirm is a dashing 5A but if you're not confident in your timing, you can cancel the 2nd hit into 236B/C for an easier combo.
| Level | P1 | P2 |
|---|---|---|
| 0, 4×2 | 100 | 50 |
5A+D

"Come get som---YIKES!".


| Version | Damage | Guard | Startup | Active | Recovery | On-Block | Attribute | Invuln |
|---|---|---|---|---|---|---|---|---|
| AD | 45 | 1~25 Catch All | ||||||
| AD Attack | 2200 | Air Unblockable | 15 | 3 | 28 | -12 | B | 1~22 All |
Yosuke’s Reversal Action has 2 parts, “Taunt” and “Kick”. “Taunt” is the initial action when the DP is pressed (Kunai Swing) where Yosuke is in his counter A move wherein your character pre-empts the opponent's attack, and attacks if hit by the opponent. state. “Kick” is when Yosuke’s Reversal Action is triggered causing Jiraiya to come out and kick the opponent away. If it’s not triggered, Yosuke sighs and becomes punishable.
A decent counter but not the best. It can beat most safejump A very well-timed jump attack on a character who is rising from a knockdown. Your goal is to attack extremely close to when you land so that, if the character performs an invincible reversal attack, you will land and be able to block. The opponent is then forced to block your jumping attack, since reversaling doesn't work, which will give you some nice pressure and hopefully an opening.s and is triggered by all attacks including projectiles but the startup of the kick isn't that fast and it can lose to moves with armour such as ![]() Yang's 5B
Yang's 5B GuardAllStartup10Recovery25Advantage-11.
| Version | Level | P1 | P2 |
|---|---|---|---|
| AD | |||
| AD Attack | 4 | 80 | 60 |
AD:
AD Attack:
236A/B
Don't use this as a command dash. That ALWAYS ends poorly.


| Version | Damage | Guard | Startup | Active | Recovery | On-Block | Attribute | Invuln |
|---|---|---|---|---|---|---|---|---|
| 236A | 900×2 | All | 14~25 | 3 [(10)3] | 18 [26+4L] | -16 | B | |
| 236B | 1100×2 | All | 20~29 | 3 [(10)3] | 18 [26+13L] | -23 | B |
 GuardAllStartup13RecoveryUntil LAdvantage-11 using A, Moonsault using B and EX Moonsault using C.
Travels goes a little over half-screen and slightly bounces the opponent.
Due to the small bounce, you can only combo into V-Slash or EX Moonsault, limiting its use in combos.
Has more startup but goes nearly fullscreen and bounces the opponent higher.
The higher bounce lets you go into Moonsualt giving you a variety of combos options making it your go-to for almost all of your combo routes.
The landing recovery can be canncelled by doing Moonsalut (aka pressing B) letting do 5B immedtialy after 236B.
| Version | Level | P1 | P2 |
|---|---|---|---|
| 236A | 3 | 80 | 90 |
| 236B | 4 | 80 | 75 |
236A:
236B:
j.236A j.214A
V SLASH!! Now an actual knockdown.


| Damage | Guard | Startup | Active | Recovery | On-Block | Attribute | Invuln |
|---|---|---|---|---|---|---|---|
| 1200×2 | All | 13 | Until L(10)5 | Until L | -11 | H |
Your primary combo ender and counter against overly aggressive enemies.
While V Slash doesn't give the best knockdown, it can still give strong oki Short for "Okizeme" Attacking an opponent about to wake up after they were knocked down, usually with meaty attacks or mix-ups. with the use of meaty Hitting an opponent to cover the moment as they lose invincibility. The most common one is performing an attack early on okizeme to gain frame advantage and bait reversals. assists. It also useful catching opponents during j.C startup.
After the second slash, Yosuke can't double jump or airdash but after a short pause, he can use air normals, specials and supers. So while it possible to punish him (especially on whiff An attack that completely misses the opponent, such as when the opponent is out of range of the attack.), the window is short and if missed can result in them being punished by Yosuke.
| Level | P1 | P2 |
|---|---|---|
| 4 | 80 | 85×2 |
j.236B j.214B
"Is this neutral?"
| Damage | Guard | Startup | Active | Recovery | On-Block | Attribute | Invuln |
|---|---|---|---|---|---|---|---|
| Until L+9L | 4~11 All |
A versatile move for mobility, combos and mixups.
Moonsault makes Yosuke jump in a wide arc in the air. You can cancel it into itself thrice so you can cross up multiple times and it will switch sides even in the corner. This lets you easily do left/rights both with and without an assist. making it one of your best mixup options. It also has 7 frames of invul Short for InvulnerabilityA state where a character cannot be hit. A common component of reversal moves. letting it dodge attacks with good timing.
It's also used in conjunction with Crescent Slash for nearly all of Yosuke's combos.
| Level | P1 | P2 |
|---|---|---|
Moonsault -> A/B/C
I heard that the EX version of Crescent makes for a rather nasty surprise overhead.

| Damage | Guard | Startup | Active | Recovery | On-Block | Attribute | Invuln |
|---|---|---|---|---|---|---|---|
| 1700 | High | 5 | 8 | Until L+9L | H |
Important filler for combos.
Crescent Slash has Youske slash in the opposite direction Moonsault came from (e.g if you do j.236B > he'll slash to the left even if you don't cross the enemy). The 3rd Crescent Slash in an air action set will cause a hard knockdown A knockdown that forces the character into a prolonged knockdown state. After a hard knockdown, teching is disabled briefly, allowing the player who is on the offensive more time to set up a meaty, a mix-up, etc.. These attributes allow a variety of combo routes while doing good damage. After the 3rd one, you can end it there for oki or go into V-slash for more damage.
Moonsault's left/right mixup potential applies to Crescent Slash as it hits overhead forcing them to block high instead of either direction.
| Level | P1 | P2 |
|---|---|---|
| 4 | 80 | 85 |
236C
Remember when this was projectile invuln??


| Damage | Guard | Startup | Active | Recovery | On-Block | Attribute | Invuln |
|---|---|---|---|---|---|---|---|
| 1300×2 | All | 19~27 | 3 [(10)3] | 18 [18+13L] | -15 | B |
EX Run has slower startup than the A version but faster than B one while still having its range and higher bounce, allowing full conversions off moves like 2C that would only allow a short combo. It also deals the most damage out of the 3 versions, making it good in Resonance Blaze where you have excess meter to burn.
| Level | P1 | P2 |
|---|---|---|
| 4 | 80 | 85 |
j.236C j.214C
When you want to flip in place instead of everywhere at once.
This comes out automatically! No timing required!

| Damage | Guard | Startup | Active | Recovery | On-Block | Attribute | Invuln |
|---|---|---|---|---|---|---|---|
| 2000 | High | 20 | 8 | Until L+15L | H | 4~10 All |
An excellent mixup option and combo extender.
EX Moonsault when tiger knee An input method to perform a special move in the air as fast as possible after you leave the ground. Almost always abbreviated to TK. For Example: 2369 for a j.236 input.ed as fast as possible is a 25-frame overhead that's safe on block(-4) and leads to a 6K+ damage combo with the right routes which combined with Yosuke's flexible blockstring grants him great high/low mixups.
It's also used as an extender or stabilizer in certain combos such as after landing 236A.
| Level | P1 | P2 |
|---|---|---|
| 4 | 80 | 85 |
Dash Spring


| Damage | Guard | Startup | Active | Recovery | On-Block | Attribute | Invuln |
|---|---|---|---|---|---|---|---|
| 1500×2 | All | (18)+13~24 | 3 [3(10)3] | 18 [26+12L] | -14 | B |
Combo and block string A series of multiple attacks that work well against a blocking opponent. Generally, a block string will be composed of several plus on block or cancelable attacks performed in quick sequence. When blocked, these will slowly push your character out of range and prevent the opponent from counter-attacking, which makes them a very good default, low-risk option when trying to apply offense. extender.
5P has decent hitstun working, primarily as a basic but effective combo extender. However, it can work in blockstrings where you don't have enough time to set 6P.
It can also be used as a less consistent but more rewarding Cross Burst punish instead of 4P
| Level | P1 | P2 |
|---|---|---|
| 3 | 70 | 85 |
P4A 5D


| Damage | Guard | Startup | Active | Recovery | On-Block | Attribute | Invuln |
|---|---|---|---|---|---|---|---|
| 700×4 | All | (18)+31 | 15 [(9)3,3,4] | Total: 94 [Total: +70] | B |
A wonderful pressure and neutral option.
Yosuke sends Jiraya fullscreen to attack the opponent. It has the most blockstun of all his assists and since it's a persona attack, it can't be negated with Push Block. in the corner. Likewise, with proper spacing, if the opponent uses a reversal To perform an attack as soon as possible after getting knocked down or leaving hitstun/blockstun. during a blockstring and you switch to Yosuke, he'll usually be too far to punish, making Active Switch mixups hard to counter. All these properties make it one of the best assists for pressure.
6P can help in neutral as it locks down the opponent, lets your point In a 3v3 fighting game, Point refers to the 1st character up to fight out of the 3 selected by the player. approach and can give a long option to characters that lack them. Projectiles and pokes can stop Jiraya (which will deal damage to Yosuke) so use your own to cover it.
Finally, 6P can let your point convert long-range hits into full combos with oki or cover backward tech To recover from a knockdown or air hitstun state, usually by pressing a button.s that safejump A very well-timed jump attack on a character who is rising from a knockdown. Your goal is to attack extremely close to when you land so that, if the character performs an invincible reversal attack, you will land and be able to block. The opponent is then forced to block your jumping attack, since reversaling doesn't work, which will give you some nice pressure and hopefully an opening.s can't.
| Level | P1 | P2 |
|---|---|---|
| 4 | 70 | 85 |
5AAA

| Damage | Guard | Startup | Active | Recovery | On-Block | Attribute | Invuln |
|---|---|---|---|---|---|---|---|
| 1700 | All | (18)+10 | 6 | 29+3L | -19 | B |
A standard but effective defensive assist.
4P has fast startup, large hitbox and long active frames, letting stop jump-ins and punish bursts. It also the best assist for combos when you want to switch to Yosuke and have him continue it.
| Level | P1 | P2 |
|---|---|---|
| 4 | 70 | 85 |
236B+C (Air OK)

A Giant Spinny Projectile. What could POSSIBLY go wrong??

| Damage | Guard | Startup | Active | Recovery | On-Block | Attribute | Invuln |
|---|---|---|---|---|---|---|---|
| 360×31 [430×31] | All | 9+(53 Flash)+7 | 5×31 | Total: Until L+38L | -31 | P2 | 1~17 All |
Cashout for short combos and happy birthday.
236B+C deals more base damage than Whoo and properly hit both point & assist but less minimum damage.
When combined with short DHC A term that describes when a character performs a super attack in a team game and tags into another characters super., the long duration can let your assist get multiple mix-ups on block and high damage on hit. It also hits both sides of Yosuke. All of the above makes it a powerful defensive option.
| Level | P1 | P2 |
|---|---|---|
| 4 | 80 | 98×31 |
214B+C (Air OK)


| Damage | Guard | Startup | Active | Recovery | On-Block | Attribute | Invuln |
|---|---|---|---|---|---|---|---|
| 2000×2, 250×18 [2000×2, 200×36] |
All | 4+(39 Flash)+1 | 15 | Until L+18L | -21 | H | 1~19 All |
The super you use for literally everything else.
214B+C has 5 startup The time before an attack is active including the first active frame. For example, an attack with 10F startup means the attack will do nothing for 9 frames, then hit the opponent on the 10th frame. frames, goes slightly over HALF SCREEN, has 15 actives frames and has invul nearly all of them and has a larger hitbox A general term showing where an attack can hit the opponent and where the character is vulnerable to attack. than you would expect.
All of this makes it amazing for combos, sashikaeshi From Japanese "差し返し", meaning "return the strike". To reactively hit an opponent as punishment for their attempt to use an attack. and reversal To perform an attack as soon as possible after getting knocked down or leaving hitstun/blockstun.s. The fast startup, range and hitbox make it easy to attach to the end of combos even when hitstun When a character is hit while standing or crouching, the defender is forced into a stun animation for a set period of time where they are vulnerable to further attacks. This period of time is called hitstun. is low. It can punish Attacking someone when they are unable to block, making the damage guaranteed. long recovery The recovery of an attack refers to the amount of time an attacker must wait before they may perform another action, even blocking. attacks like projectiles and beat weaker safejumps.
Like most supers though, it's unsafe on block so don't be careless.
| Level | P1 | P2 |
|---|---|---|
| 5 | 80 | 100 |
P during Partner's Distortion Skill
Didn't get the kill? Try spinning. I hear it's a good trick.

| Damage | Guard | Startup | Active | Recovery | On-Block | Attribute | Invuln |
|---|---|---|---|---|---|---|---|
| 100×20 [100×25] | All | 1+(92 Flash)+1 | 10×11,5×9 [10×6,5×19] | Total: Until L+38L | P2 | 1~3 All |
Standard DHC A term that describes when a character performs a super attack in a team game and tags into another characters super.. Use it if it will kill the opponent or if your point is low on life and needs to heal.
 GuardAllStartup4+(40 Flash)+1Recovery19+31LAdvantage-32 it'll be funny
| Level | P1 | P2 |
|---|---|---|
| 4 | 100 | 100 |
222B+C when Astral Conditions are met

EVERYDAY'S GREAT AT JUNES!!

"At Junes, everyday is Customer Appreciation Day. Come see for yourself, and get in touch with our products! Every day's great at your Junes!"

| Damage | Guard | Startup | Active | Recovery | On-Block | Attribute | Invuln |
|---|---|---|---|---|---|---|---|
| All | 4+(78 Flash)+16 | 10 | Total: 119 | -68 | 1~44 All |
An average astral. Although its slow startup limits its use as a reversal it can be used to go through attacks with long startup.
Your main astral hit confirm To perform the first hit of a combo, and performing follow up attacks if the first hit successfully hits the opponent.s are throw,2C and V-Slash. After you input V-Slash, immediately input the astral so it will come out after the first hit but before the second.
| Level | P1 | P2 |
|---|---|---|
| 5 |