< GGML
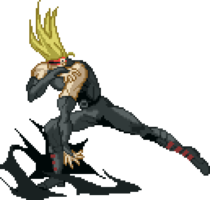
m (Dark Heel is the name of his 6K Move) |
m (→j.K) |
||
| (26 intermediate revisions by 8 users not shown) | |||
| Line 1: | Line 1: | ||
{{ | ==Overview== | ||
= | {{GGML/CharacterLinks}} | ||
{{ | <div id="home-content" class="home-grid"> | ||
| | {{card|width=4 | ||
| | |header= | ||
| | |content=Players familiar with Zato from later games may be expecting a puppet character. However, Zato and his shadow cannot move independently. Instead, he functions as a zoning character, with a variety of strong pokes and projectiles to both wall the opponent out and harass them from far away. He also boasts solid buttons all around, many of which having the speed and range to turn nearly any stray poke into a Charge Cancel infinite. This makes him a somewhat basic but effective enough character, with some uniquely strong tools like air drill. | ||
}} | |||
{{GGML/Infobox | |||
|fastestAttack={{MMC|input=5H|label=5H}} (whiffs up close, 4F)<br/> {{MMC|input=2P|label=2P}} (7F) <br/> {{MMC|input=623P|label=Rise And Fall}} (6F)<br/> {{MMC|input=P+K > 236X|label=Instant Kill}} (common crouch whiff, 6F) | |||
|reversal={{MMC|input=623P|label=Rise And Fall}} (6F) | |||
}} | |||
{{ProsAndCons | |||
|intro = outspaces the opponent with large normals, varied projectiles, and anti-zoning tools, looking to convert his pokes into a long-ranged infinite. | |||
|pros= | |pros= | ||
* '''Break the Law''': Break the Law is obscenely strong in Missing Link with only 6 vulnerable frames on startup, 4 vulnerable frames during recovery, and great speed. Combined with guard cancels it's very hard to deal with and lets Zato gain space from the opponent without much risk. | * '''Break the Law''': Break the Law is obscenely strong in Missing Link with only 6 vulnerable frames on startup, 4 vulnerable frames during recovery, and great speed. Combined with guard cancels it's very hard to deal with and lets Zato gain space from the opponent without much risk. | ||
* '''Good Zoning Options''': With Invite Hell, Climb Darkness, Break the Law, and huge normals like j.S and 5H, Zato is a powerful zoner. | * '''Good Zoning Options''': With Aerial Invite Hell, Climb Darkness, Break the Law, and huge normals like j.S and 5H, Zato is a powerful zoner. | ||
* '''Strong Anti-Zoning''': Invite Hell is good at catching opponents trying to zone and Drunkard Shade is an incredibly effective projectile reflector. | * '''Strong Anti-Zoning''': Invite Hell is good at catching opponents trying to zone and Drunkard Shade is an incredibly effective projectile reflector. | ||
* '''Honest Footsies?''': Zato has a variety of relatively safe long-range normals for poking, including {{clr|2|5K}}, {{clr|3|f.S}}, {{clr|3|2S}}, and {{clr|3|j.S}}. Combined with his fast and long-ranged {{clr|4|5H}}, this lets him turn stray hits into Charge Cancel infinites from remarkably far away. | * '''Honest Footsies?''': Zato has a variety of relatively safe long-range normals for poking, including {{clr|2|5K}}, {{clr|3|f.S}}, {{clr|3|2S}}, and {{clr|3|j.S}}. Combined with his fast and long-ranged {{clr|4|5H}}, this lets him turn stray hits into Charge Cancel infinites from remarkably far away. | ||
|cons= | |cons= | ||
* '''Long Vulnerability on Invite Hell''': Invite Hell lasts for a very long duration and Zato is open to a full ground punish the entire time. This is partially helped by Aerial Invite Hell, but comes at the cost of nerfed hitboxes. | * '''Long Vulnerability on Invite Hell''': Invite Hell lasts for a very long duration and Zato is open to a full ground punish the entire time. This is partially helped by Aerial Invite Hell, but comes at the cost of nerfed hitboxes and is still punishable if misplaced. | ||
* '''Incredibly Weak Reversal''': Zato's 623P, Rise and Fall, is fully invincible on startup. However, it's fully punishable by an infinite on block '''and hit''', making it useless outside of kills. | * '''Incredibly Weak Reversal''': Zato's 623P, Rise and Fall, is fully invincible on startup. However, it's fully punishable by an infinite on block '''and hit''', making it useless outside of kills. | ||
* ''' | * '''Big Hurtboxes''': Zato's normals are strong, but unlike most of the cast, tend to have equally big hurtboxes. This gives him a tendency to lose neutral interactions other characters wouldn't. | ||
* '''Small Instant Kill''': Zato's instant kill, while fairly fast, has barely any range and can be crouched by most of the cast. | * '''Small Instant Kill''': Zato's instant kill, while fairly fast, has barely any range and can be crouched by most of the cast. This makes it tough to use outside specific circumstances. | ||
}} | }} | ||
</div> | |||
==Normals== | ==Normals== | ||
| Line 24: | Line 30: | ||
{{GGML_Move_Card | {{GGML_Move_Card | ||
|input=5P | |input=5P | ||
|description=A | |description=A bit slower than you'd think, but has decent range. Plus on block even without Charge Cancelling, and fairly rewarding on hit due to Zato's long-ranged conversions. Outclassed in most situations, however. | ||
}} | }} | ||
| Line 30: | Line 36: | ||
{{GGML_Move_Card | {{GGML_Move_Card | ||
|input=5K | |input=5K | ||
|description=A fairly large footsies button which is + on block. Despite the animation it is not a low, | |description=A fairly large and active footsies button which is + on block. Despite the animation, it is not a low, though luckily {{clr|P|2P}} is. It remains useful for abare and tick throws, and having a self-gatling on a normal this long never hurts. Reactively converts into an infinite on hit due to this, as well. | ||
}} | }} | ||
| Line 42: | Line 48: | ||
{{GGML_Move_Card | {{GGML_Move_Card | ||
|input=f.S | |input=f.S | ||
|description=This move has | |description=This move has very solid range & speed, but it's horribly unsafe. The multiple hits luckily easily allow you to react & cancel it into {{clr|H|5H}} or Charge, alleviating its poor recovery. Don't miss. | ||
}} | }} | ||
| Line 48: | Line 54: | ||
{{GGML_Move_Card | {{GGML_Move_Card | ||
|input=5H | |input=5H | ||
|description=5H is Zato's fastest normal, and has enough hitstun to structure into a CC infinite. | |description=5H is Zato's fastest normal, and has enough hitstun to structure into a CC infinite. Enables Zato to begin charge cancel infinites from the maximum range of his ground pokes, giving his footsies deadly reward. That being said, it comes with some notable issues: | ||
*The Hitbox to Hurtbox ratio is very poor. | *The Hitbox to Hurtbox ratio is very poor. | ||
*Whiffs on most crouching opponents. Characters' hurtboxes extending upwards when hit generally remedies this in combos, but not always. You can't use 5H to structure into infinites on crouching Millia, Baldhead, or Zato, and whether you can use it on Baiken is range-dependent(you can't be too close or too far). | *Whiffs on most crouching opponents. Characters' hurtboxes extending upwards when hit generally remedies this in combos, but not always. You can't use 5H to structure into infinites on crouching Millia, Baldhead, or Zato, and whether you can use it on Baiken is range-dependent(you can't be too close or too far). | ||
*Lengthy recovery and poor frame advantage uncanceled. | *Lengthy recovery and poor frame advantage uncanceled make this risky to throw out on its own. | ||
}} | }} | ||
===<big>Fierce | ===<big>Fierce Strike</big>=== | ||
{{GGML_Move_Card | {{GGML_Move_Card | ||
|input=6P | |input=6P | ||
|description=6P | |description=6P is decently fast with virtually no recovery, and is significantly advantageous on block even uncancelled. Lacks the upper body invulnerability that it has in later games, so it isn't an anti-air. The frame data makes this less committal than most things Zato can do, making this a solid poke and pressure tool. | ||
}} | }} | ||
| Line 63: | Line 69: | ||
{{GGML_Move_Card | {{GGML_Move_Card | ||
|input=6K | |input=6K | ||
|description=Zato's classic overhead, except it's painfully slow in this game. You're more likely to be hit out of it than to ever land it. Bizarrely, it can be special canceled or | |description=Zato's classic overhead, except it's painfully slow in this game. You're more likely to be hit out of it than to ever land it. Bizarrely, it can be special canceled or Charge Canceled at any point in the move's duration. Although he lacks low-hitting specials, the charge cancel lets him go low with 2P or even go for a throw, although this is not much better against mashing than raw 6K. Some characters, notably {{Character Label|GGML|Baldhead}}, can crouch under 6K. | ||
For some baffling reason, the command list gets the input for this move wrong. It says "Press forwards when holding K" but that doesn't even work. Instead of doing [K]6, like the command list implies, you just do a normal 6K input. | For some baffling reason, the command list gets the input for this move wrong. It says "Press forwards when holding K" but that doesn't even work. Instead of doing [K]6, like the command list implies, you just do a normal 6K input. | ||
| Line 71: | Line 77: | ||
{{GGML_Move_Card | {{GGML_Move_Card | ||
|input=2P | |input=2P | ||
|description=Unlike in later games, 2P is a low. | |description=Unlike in later games, 2P is a low. Fairly useful for mixups and occasionally close-up abare, though be wary that the hitbox doesn't extend as far as the graphic does, making it an unfortunately average jab overall. | ||
}} | }} | ||
| Line 77: | Line 83: | ||
{{GGML_Move_Card | {{GGML_Move_Card | ||
|input=2K | |input=2K | ||
|description=Zato's classic | |description=Definitely a normal you can press. It's got the animation that would later turn into Zato's classic {{clr|5|2D}}, but unfortunately it's techable. It's slow, jointed, leads to nothing on hit, and doesn't go very far. {{clr|S|2S}} is binarily better but even that won't see an extreme amount of use. | ||
}} | }} | ||
| Line 83: | Line 89: | ||
{{GGML_Move_Card | {{GGML_Move_Card | ||
|input=2S | |input=2S | ||
|description= | |description=It's quite slow at 12 frames, though it's a decent low poke which can catch low profile attempts where {{clr|S|f.S}} or {{clr|H|5H}} would fail. It isn't incredibly committal on whiff, which helps also. Unfortunately hard to fit into CC infinite confirms since it's on the slow side, especially in comparison to {{clr|S|f.S}}. | ||
}} | }} | ||
| Line 89: | Line 95: | ||
{{GGML_Move_Card | {{GGML_Move_Card | ||
|input=2H | |input=2H | ||
|description=Big vertical hitbox. | |description=Big vertical hitbox. Solid but relatively slow as an anti-air option, covers a more vertical angle than {{clr|H|5H}} but still loses to crossups. It's also necessary for infinites on characters 5H won't work on. | ||
Still a low, which is silly. Has about as much range as {{clr|P|2P}}, but using it for intentional mixups is not recommended. | |||
}} | }} | ||
| Line 95: | Line 103: | ||
{{GGML_Move_Card | {{GGML_Move_Card | ||
|input=j.P | |input=j.P | ||
|description=j.P is really slow for an air jab, but it only has 1 frame of recovery. | |description=j.P is really slow for an air jab, but it only has 1 frame of recovery. If you need an air-to-air, press {{clr|H|j.H}}. | ||
}} | }} | ||
| Line 101: | Line 109: | ||
{{GGML_Move_Card | {{GGML_Move_Card | ||
|input=j.K | |input=j.K | ||
|description=j.K has the same startup as j.P, but with way more recovery. Generally, it's worse than j.S as a jump-in and j.H as an air-to-air due to its pretty bad frame data. | |description={{clr|K|j.K}} has the same slower-than-{{clr|H|j.H}} startup as {{clr|P|j.P}}, but with way more recovery. Generally, it's worse than {{clr|S|j.S}} as a jump-in and {{clr|H|j.H}} as an air-to-air due to its pretty bad frame data. Typically goes unpressed. | ||
}} | }} | ||
| Line 107: | Line 115: | ||
{{GGML_Move_Card | {{GGML_Move_Card | ||
|input=j.S | |input=j.S | ||
|description=Giant landing normal with a tiny bit of invuln on startup. Useful for hitting opponents below you. Has a big hurtbox accompanying it so it is whiff punishable and can lose trades to disjoints. Will sometimes win trades against disjointed moves thanks to the startup invincibility. | |description=Giant landing normal with a tiny bit of invuln on startup. Useful for hitting opponents below you. Has a big hurtbox accompanying it so it is whiff punishable and can lose trades to disjoints. Will sometimes win trades against disjointed moves thanks to the startup invincibility. Generally good to use before cancelling into an air drill, though be wary that this will lose to stronger guard cancels and depending on opponent and scenario can leave large gaps for them to escape through. | ||
Due to this move's hitbox being so incredibly deep, it will often fail to hit in situations that aren't a strict air-to-ground scenario. If opponents are frequently meeting you in the air, opting for {{clr|H|j.H}} isn't a bad idea. | |||
}} | }} | ||
| Line 141: | Line 151: | ||
{{GGML_Move_Card | {{GGML_Move_Card | ||
|input=P+K > 236X | |input=P+K > 236X | ||
|description= | |description=Instant kill on the weaker end of the spectrum. It's crouched by everyone but Potemkin and Justice, though it's quite fast and has very good low profile while being quite safe if whiffed, so it's still good at AA. Sees little use in neutral or against tiny characters in general. | ||
}} | }} | ||
| Line 166: | Line 176: | ||
Once the first followup is used, the shadow will begin its return to Zato regardless of whether or not it reached the edge of the screen. | Once the first followup is used, the shadow will begin its return to Zato regardless of whether or not it reached the edge of the screen. | ||
---- | |||
In terms of actual use, Climb Darkness is a committal but very decent zoning tool to mix in with your other options. All of the followups are overheads arbitrarily, and Climb Darkness is Zato's only air unblockable move. It's difficult to use this move to reactively command parts of the screen depending on what your opponent does, as the shadow immediately recalls upon using the first followup and it does so very quickly, making it hard to "stagger" out the followups to wall out big areas of space. | |||
The hits combo into eachother depending on where they hit while being fully disjointed. They are techable in the air, though any subsequent followups will be air unblockable and Zato's far from punishable due to the brisk recovery even if they did manage to get out. | |||
*Air Unblockable | *Air Unblockable | ||
*The earliest valid followup input is on the 10th frame of | *The earliest valid followup input is on the 10th frame of the animation, right after the shadow becomes visible on the animation. | ||
*There must be at least 1 frame without an input between the end of one Climb Darkness Followup and the start input of the next. | *There must be at least 1 frame without an input between the end of one Climb Darkness Followup and the start input of the next. | ||
*After the shadow returns to Zato the recovery of the move is 3 frames. | *After the shadow returns to Zato, the recovery of the move is 3 frames. | ||
}} | }} | ||
| Line 178: | Line 194: | ||
|description=Invite Hell locks Zato in place and produces a drill a set distance away. The S button places the drill near Zato, and the H version places the drill far away. | |description=Invite Hell locks Zato in place and produces a drill a set distance away. The S button places the drill near Zato, and the H version places the drill far away. | ||
The drill hits once when coming out of the ground, once when erect, and once more when retracting into the ground. It has enough vertical range to reach the apex of Potemkin's jump arch, which means that some characters will be forced to superjump or double jump to get around it. Invite Hell is | The drill hits once when coming out of the ground, once when erect, and once more when retracting into the ground. There is an extremely sizeable gap between the second and final hits, which depending on circumstance can lock people down for longer or let people escape pressure while the drill's on them. | ||
It has enough vertical range to reach the apex of Potemkin's jump arch, which means that some characters will be forced to superjump or double jump to get around it. Invite Hell is quite awkward as a zoning tool due to it making Zato immobile and unable to do much with its otherwise strong properties. It generally only sees usage to get mileage out of its stronger, higher-charge variants. Otherwise, using the air version instead is highly preferred. | |||
---- | ---- | ||
At Level 2, the drill gains massive hitboxes on its sides which make it considerably harder to contest, avoid, and deal with in general. The hitbox also goes under the bottom of the stage, for some reason. | At Level 2, the drill gains massive hitboxes on its sides which make it considerably harder to contest, avoid, and deal with in general. The hitbox also goes under the bottom of the stage, for some reason. | ||
| Line 188: | Line 206: | ||
{{GGML_Move_Card | {{GGML_Move_Card | ||
|input=j.22S or j.22H|versioned=yes | |input=j.22S or j.22H|versioned=yes | ||
|description=Aerial Invite hell is | |description=Aerial Invite hell is a significantly improved version of the grounded variant. It instantly spawns a drill the first frame it's inputted at the target location and has much less cumbersome recovery, potentially actually letting you move around while the drill's sticking people in blockstun unlike the grounded version. The S button places the drill near Zato, and the H version places the drill far away. | ||
Zato's momentum is preserved which can let you move away from or towards your drill by using backwards or forwards jumps. Because this move is in recovery until landing + 29 frames you want to use it | Zato's main strength, aside from his solid neutral buttons, is throwing out air Invite Hells frequently and safely against any character who spends the majority of their time on the ground. Use and abuse this move. | ||
Zato's momentum is preserved which can let you move away from or towards your drill by using backwards or forwards jumps. Because this move is in recovery until landing + 29 frames you want to use it right before hitting the ground. this will give you the most actionable time before the drill disappears. | |||
---- | ---- | ||
Level 2 is identical to level 1 in all known ways. | Level 2 is identical to level 1 in all known ways, wasting your charge. Being liberal with your placements of air Invite Hell is still preferable over keeping charge. | ||
Level 3 Aerial Invite Hell spawns 3 level 1 drills, which makes it cover considerably less space than the ground version. | Level 3 Aerial Invite Hell spawns 3 level 1 drills, which makes it cover considerably less space than the ground version. It's still difficult to contest and occupies a third of the screen at worst, however. | ||
}} | }} | ||
| Line 224: | Line 244: | ||
==Colors== | ==Colors== | ||
{{GGMLColors|Character=Zato|Size= | {{GGMLColors|Character=Zato|Size=220}} | ||
==Navigation== | ==Navigation== | ||
{{notice|To edit frame data, edit values in [[{{#titleparts:{{PAGENAME}}| 1 | 1}}/{{#titleparts:{{PAGENAME}}| 1 | 2 }}/Data]].}} | |||
{{# | {{GGML/Navigation | ||
{{ | |summary=Zato's debut in Guilty Gear is actually not a puppet character, rather a zoner with comically unsafe framedata. | ||
}} | |||
[[Category:Guilty Gear|Zato]] | |||
Revision as of 01:00, 15 February 2024
Overview
Players familiar with Zato from later games may be expecting a puppet character. However, Zato and his shadow cannot move independently. Instead, he functions as a zoning character, with a variety of strong pokes and projectiles to both wall the opponent out and harass them from far away. He also boasts solid buttons all around, many of which having the speed and range to turn nearly any stray poke into a Charge Cancel infinite. This makes him a somewhat basic but effective enough character, with some uniquely strong tools like air drill.
Zato
 |
| Defense |
| 100%Raw Value: 10 |
| Jump Startup |
| 3f |
| Backdash |
| 22f |
| Meter Gain Mod |
| 100%Raw Value: 10 |
| Charge Time |
| 70f |
| Forward Walk Speed |
| 73%Raw Value: 563 |
| Backward Walk Speed |
| 65%Raw Value: 384 |
| Dizzy Resistance |
| 100%Raw Value: 30 |
| Fastest Attack |
5H GuardAllStartup4Recovery25Advantage-10 (whiffs up close, 4F) GuardAllStartup4Recovery25Advantage-10 (whiffs up close, 4F)2P  GuardLowStartup7Recovery11Advantage0 (7F) GuardLowStartup7Recovery11Advantage0 (7F) Rise And Fall  GuardAll,OverheadStartup6Recovery29Advantage-60 (6F) GuardAll,OverheadStartup6Recovery29Advantage-60 (6F)Instant Kill  GuardAllStartup6Recovery10AdvantageN/A (common crouch whiff, 6F) GuardAllStartup6Recovery10AdvantageN/A (common crouch whiff, 6F) |
| Reversals |
| Rise And FallGuardAll,OverheadStartup6Recovery29Advantage-60 (6F) |
![]() Zato outspaces the opponent with large normals, varied projectiles, and anti-zoning tools, looking to convert his pokes into a long-ranged infinite.
Zato outspaces the opponent with large normals, varied projectiles, and anti-zoning tools, looking to convert his pokes into a long-ranged infinite.
Pros
Cons
- Break the Law: Break the Law is obscenely strong in Missing Link with only 6 vulnerable frames on startup, 4 vulnerable frames during recovery, and great speed. Combined with guard cancels it's very hard to deal with and lets Zato gain space from the opponent without much risk.
- Good Zoning Options: With Aerial Invite Hell, Climb Darkness, Break the Law, and huge normals like j.S and 5H, Zato is a powerful zoner.
- Strong Anti-Zoning: Invite Hell is good at catching opponents trying to zone and Drunkard Shade is an incredibly effective projectile reflector.
- Honest Footsies?: Zato has a variety of relatively safe long-range normals for poking, including 5K, f.S, 2S, and j.S. Combined with his fast and long-ranged 5H, this lets him turn stray hits into Charge Cancel infinites from remarkably far away.
- Long Vulnerability on Invite Hell: Invite Hell lasts for a very long duration and Zato is open to a full ground punish the entire time. This is partially helped by Aerial Invite Hell, but comes at the cost of nerfed hitboxes and is still punishable if misplaced.
- Incredibly Weak Reversal: Zato's 623P, Rise and Fall, is fully invincible on startup. However, it's fully punishable by an infinite on block and hit, making it useless outside of kills.
- Big Hurtboxes: Zato's normals are strong, but unlike most of the cast, tend to have equally big hurtboxes. This gives him a tendency to lose neutral interactions other characters wouldn't.
- Small Instant Kill: Zato's instant kill, while fairly fast, has barely any range and can be crouched by most of the cast. This makes it tough to use outside specific circumstances.
Normals
How to Read Frame Data
- Damage
- A quantification of how a character's health bar is reduced when they are hit.
- Guard
- The act of defending against incoming attacks. Guarding either negates the damage from an attack entirely or reduces it to minor chip damage.
- Low
- Guarded against while crouching
- Mid
- Guarded against in either the crouching or standing state, but not while airborne
- High
- Guarded against in the standing state
- All
- Guarded against while crouching, standing, or while airborne
- Throw
- Cannot be guarded against, but only applies to grounded opponents
- Unblockable
- Cannot be guarded against
- Startup
- The time before an attack is active including the first active frame. For example, an attack with 10F startup means the attack will do nothing for 9 frames, then hit the opponent on the 10th frame.
- Active
- The active frames of an attack refers to the amount of time an attack can hit the opponent.
- Recovery
- The recovery of an attack refers to the amount of time an attacker must wait before they may perform another action, even blocking.
- On-Block
- A measure of frame advantage when the opponent blocks an attack. Positive values indicate that the attacker can act first. Negative values indicate that the defender can act first.
- On-Hit
- A measure of frame advantage when the opponent is hit by an attack. Positive values indicate that the attacker can act first. Negative values indicate that the defender can act first.
- Invuln
- Short for InvulnerabilityA state where a character cannot be hit. A common component of reversal moves.
5P
5P


| Damage | Guard | Startup | Active | Recovery | On-Block | On-Hit | Invuln |
|---|---|---|---|---|---|---|---|
| 5 | All | 7 | 4 | 12 | +2 | 0 | none |
A bit slower than you'd think, but has decent range. Plus on block even without Charge Cancelling, and fairly rewarding on hit due to Zato's long-ranged conversions. Outclassed in most situations, however.
5K
5K
stanky leg


| Damage | Guard | Startup | Active | Recovery | On-Block | On-Hit | Invuln |
|---|---|---|---|---|---|---|---|
| 9 | All | 8 | 9 | 8 | +1 | -1 | none |
A fairly large and active footsies button which is + on block. Despite the animation, it is not a low, though luckily 2P is. It remains useful for abare and tick throws, and having a self-gatling on a normal this long never hurts. Reactively converts into an infinite on hit due to this, as well.
c.S
c.S


| Damage | Guard | Startup | Active | Recovery | On-Block | On-Hit | Invuln |
|---|---|---|---|---|---|---|---|
| 9 | All | 10 | 4 | 12 | +1 | -1 | none |
c.S is used as filler for CC infinites, but is otherwise unremarkable. The frame data isn't particularly outstanding, nor is the hitbox interesting, so it's just something to stuff combos with at close range.
f.S
f.S


| Damage | Guard | Startup | Active | Recovery | On-Block | On-Hit | Invuln |
|---|---|---|---|---|---|---|---|
| 8x2 | All | 6 | 4,4,7 | 30 | -20 | -22 | none |
This move has very solid range & speed, but it's horribly unsafe. The multiple hits luckily easily allow you to react & cancel it into 5H or Charge, alleviating its poor recovery. Don't miss.
5H
5H


| Damage | Guard | Startup | Active | Recovery | On-Block | On-Hit | Invuln |
|---|---|---|---|---|---|---|---|
| 16 | All | 4 | 10 | 25 | -10 | -8 | none |
5H is Zato's fastest normal, and has enough hitstun to structure into a CC infinite. Enables Zato to begin charge cancel infinites from the maximum range of his ground pokes, giving his footsies deadly reward. That being said, it comes with some notable issues:
- The Hitbox to Hurtbox ratio is very poor.
- Whiffs on most crouching opponents. Characters' hurtboxes extending upwards when hit generally remedies this in combos, but not always. You can't use 5H to structure into infinites on crouching Millia, Baldhead, or Zato, and whether you can use it on Baiken is range-dependent(you can't be too close or too far).
- Lengthy recovery and poor frame advantage uncanceled make this risky to throw out on its own.
Fierce Strike
6P


| Damage | Guard | Startup | Active | Recovery | On-Block | On-Hit | Invuln |
|---|---|---|---|---|---|---|---|
| 9x2 | All | 8 | 4,5 | 5 | +7 | +5 | none |
6P is decently fast with virtually no recovery, and is significantly advantageous on block even uncancelled. Lacks the upper body invulnerability that it has in later games, so it isn't an anti-air. The frame data makes this less committal than most things Zato can do, making this a solid poke and pressure tool.
Dark Heel
6K

even stankier leg


| Damage | Guard | Startup | Active | Recovery | On-Block | On-Hit | Invuln |
|---|---|---|---|---|---|---|---|
| 9 | Overhead | 31 | 4 | 16 | -3 | -5 | none |
Zato's classic overhead, except it's painfully slow in this game. You're more likely to be hit out of it than to ever land it. Bizarrely, it can be special canceled or Charge Canceled at any point in the move's duration. Although he lacks low-hitting specials, the charge cancel lets him go low with 2P or even go for a throw, although this is not much better against mashing than raw 6K. Some characters, notably ![]() Baldhead, can crouch under 6K.
Baldhead, can crouch under 6K.
2P
2P

| Damage | Guard | Startup | Active | Recovery | On-Block | On-Hit | Invuln |
|---|---|---|---|---|---|---|---|
| 4 | Low | 7 | 5 | 11 | 0 | -2 | none |
Unlike in later games, 2P is a low. Fairly useful for mixups and occasionally close-up abare, though be wary that the hitbox doesn't extend as far as the graphic does, making it an unfortunately average jab overall.
2K
2K


| Damage | Guard | Startup | Active | Recovery | On-Block | On-Hit | Invuln |
|---|---|---|---|---|---|---|---|
| 8 | Low | 12 | 10 | 16 | -4 | -2 | none |
Definitely a normal you can press. It's got the animation that would later turn into Zato's classic 2D, but unfortunately it's techable. It's slow, jointed, leads to nothing on hit, and doesn't go very far. 2S is binarily better but even that won't see an extreme amount of use.
2S
2S


| Damage | Guard | Startup | Active | Recovery | On-Block | On-Hit | Invuln |
|---|---|---|---|---|---|---|---|
| 12 | Low | 12 | 4 | 13 | -1 | -3 | none |
It's quite slow at 12 frames, though it's a decent low poke which can catch low profile attempts where f.S or 5H would fail. It isn't incredibly committal on whiff, which helps also. Unfortunately hard to fit into CC infinite confirms since it's on the slow side, especially in comparison to f.S.
2H
2H


| Damage | Guard | Startup | Active | Recovery | On-Block | On-Hit | Invuln |
|---|---|---|---|---|---|---|---|
| 18 | Low | 8 | 9 | 13 | 0 | +4 | none |
Big vertical hitbox. Solid but relatively slow as an anti-air option, covers a more vertical angle than 5H but still loses to crossups. It's also necessary for infinites on characters 5H won't work on.
Still a low, which is silly. Has about as much range as 2P, but using it for intentional mixups is not recommended.j.P
j.P


| Damage | Guard | Startup | Active | Recovery | On-Block | On-Hit | Invuln |
|---|---|---|---|---|---|---|---|
| 5 | Overhead | 10 | 4 | 1 | N/A | N/A | none |
j.P is really slow for an air jab, but it only has 1 frame of recovery. If you need an air-to-air, press j.H.
j.K
j.K

What is going on with this frame data


| Damage | Guard | Startup | Active | Recovery | On-Block | On-Hit | Invuln |
|---|---|---|---|---|---|---|---|
| 16 | Overhead | 10 | 4 | 26 | N/A | N/A | none |
j.K has the same slower-than-j.H startup as j.P, but with way more recovery. Generally, it's worse than j.S as a jump-in and j.H as an air-to-air due to its pretty bad frame data. Typically goes unpressed.
j.S
j.S


| Damage | Guard | Startup | Active | Recovery | On-Block | On-Hit | Invuln |
|---|---|---|---|---|---|---|---|
| 11 | Overhead | 15 | 5 | 11 | N/A | N/A | none |
Giant landing normal with a tiny bit of invuln on startup. Useful for hitting opponents below you. Has a big hurtbox accompanying it so it is whiff punishable and can lose trades to disjoints. Will sometimes win trades against disjointed moves thanks to the startup invincibility. Generally good to use before cancelling into an air drill, though be wary that this will lose to stronger guard cancels and depending on opponent and scenario can leave large gaps for them to escape through.
Due to this move's hitbox being so incredibly deep, it will often fail to hit in situations that aren't a strict air-to-ground scenario. If opponents are frequently meeting you in the air, opting for j.H isn't a bad idea.j.H
j.H


| Damage | Guard | Startup | Active | Recovery | On-Block | On-Hit | Invuln |
|---|---|---|---|---|---|---|---|
| 14 | Overhead | 8 | 11 | 19 | N/A | N/A | none |
Giant dedicated air to air normal. The hitbox is big but so is the hurtbox, so be careful with it. Very active, meaning you can throw it out pre-emptively to an extent.
Universal Mechanics
Dust Attack
S+H


| Damage | Guard | Startup | Active | Recovery | On-Block | On-Hit | Invuln |
|---|---|---|---|---|---|---|---|
| 16 | Overhead | 16 | 5 | 9 | +10 | none |
Fast overhead that whiffs on over half the cast crouching. Useful in the few matchups you can use it in for mixups, little use otherwise.
Throw
4H or 6H

| Damage | Guard | Startup | Active | Recovery | On-Block | On-Hit | Invuln |
|---|---|---|---|---|---|---|---|
| 20 | Throw | 1 | N/A | N/A | N/A | +17 | none |
It's a grab, and has the usual properties of one. Zato's throw is decently plus on hit, even if they tech. If they do tech they are left very high in the air for you to catch their landing.
- Sideswitches on hit
- Sends the opponent flying very far horizontally as well as vertically
Dash Attack
6[6]


| Damage | Guard | Startup | Active | Recovery | On-Block | On-Hit | Invuln |
|---|---|---|---|---|---|---|---|
| 13 | All | +16 | +2 |
Pretty standard dash attack. Moderate hitbox, and pretty plus on block.
Instant Kill
Fear of the Dark
P+K > 236X


| Damage | Guard | Startup | Active | Recovery | On-Block | On-Hit | Invuln |
|---|---|---|---|---|---|---|---|
| FATAL | All | 6 | 6 | 10 | N/A | N/A | Above Knees 1~11, 15~40 |
Instant kill on the weaker end of the spectrum. It's crouched by everyone but Potemkin and Justice, though it's quite fast and has very good low profile while being quite safe if whiffed, so it's still good at AA. Sees little use in neutral or against tiny characters in general.
Specials
Drunkard Shade
214K or 214P


| Damage | Guard | Startup | Active | Recovery | On-Block | On-Hit | Invuln |
|---|---|---|---|---|---|---|---|
| 9 | All | 12 | 40 | 13 | -32 | -32 | Upper Body |
Drunkard Shade is pretty cool. First of all, the move is invulnerable above the knees and has a tall hitbox that extends up from the ground.
The K version will immediately reflect any projectile which contacts it.
The P version will instead absorb the last projectile to contact it. After a couple seconds, that projectile will then automatically fire out of Zato's face, even if he is in hitstun.
Drunkard Shade does not work on the following projectiles:
 Justice's Imperial Ray or Gamma Ray
Climb Darkness
41236H


Followup


| Version | Damage | Guard | Startup | Active | Recovery | On-Block | On-Hit | Invuln |
|---|---|---|---|---|---|---|---|---|
| Climb Darkness | N/A | N/A | 19 | N/A | 3 | N/A | N/A | none |
| Climb Darkness Followup | 15 | Overhead | 2 | 17 | 2 | N/A | N/A | none |
Climb Darkness sends Zato's shadow forwards to the edge of the screen, then calls it back to him. During this time, Zato's only valid actions are the followups to Climb Darkness.
The followups to climb darkness are all the same, but are input with distinct buttons. They are done by pressing H, S, and P in that order. You can use the 3 followup hits at any time that the shadow is away from Zato so long as the order is respected.
Once the first followup is used, the shadow will begin its return to Zato regardless of whether or not it reached the edge of the screen.
In terms of actual use, Climb Darkness is a committal but very decent zoning tool to mix in with your other options. All of the followups are overheads arbitrarily, and Climb Darkness is Zato's only air unblockable move. It's difficult to use this move to reactively command parts of the screen depending on what your opponent does, as the shadow immediately recalls upon using the first followup and it does so very quickly, making it hard to "stagger" out the followups to wall out big areas of space.
The hits combo into eachother depending on where they hit while being fully disjointed. They are techable in the air, though any subsequent followups will be air unblockable and Zato's far from punishable due to the brisk recovery even if they did manage to get out.
- Air Unblockable
- The earliest valid followup input is on the 10th frame of the animation, right after the shadow becomes visible on the animation.
- There must be at least 1 frame without an input between the end of one Climb Darkness Followup and the start input of the next.
- After the shadow returns to Zato, the recovery of the move is 3 frames.
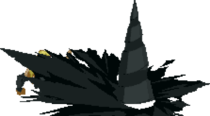
Invite Hell
22S or 22H
level 1
level 2

level 3


| Version | Damage | Guard | Startup | Active | Recovery | On-Block | On-Hit | Invuln |
|---|---|---|---|---|---|---|---|---|
| Invite Hell | 9x2,1 | All | 17 | 8,60,5 | 15 | +3 | -55 | none |
| Invite Hell Level 2 | All | 17 | 15 | -15 | -27 | none | ||
| Invite Hell Level 3 | All | 17 | 15 | -1 | -41 | none |
Invite Hell locks Zato in place and produces a drill a set distance away. The S button places the drill near Zato, and the H version places the drill far away.
The drill hits once when coming out of the ground, once when erect, and once more when retracting into the ground. There is an extremely sizeable gap between the second and final hits, which depending on circumstance can lock people down for longer or let people escape pressure while the drill's on them.
It has enough vertical range to reach the apex of Potemkin's jump arch, which means that some characters will be forced to superjump or double jump to get around it. Invite Hell is quite awkward as a zoning tool due to it making Zato immobile and unable to do much with its otherwise strong properties. It generally only sees usage to get mileage out of its stronger, higher-charge variants. Otherwise, using the air version instead is highly preferred.
At Level 2, the drill gains massive hitboxes on its sides which make it considerably harder to contest, avoid, and deal with in general. The hitbox also goes under the bottom of the stage, for some reason.
At Level 3, the move spawns three drills and occupies virtually the entire floor, making it borderline uncontestable.Aerial Invite Hell
j.22S or j.22H

level 1 and 2

level 3


| Version | Damage | Guard | Startup | Active | Recovery | On-Block | On-Hit | Invuln |
|---|---|---|---|---|---|---|---|---|
| Aerial Invite Hell | 9x2,1 | All | 1 | 9,59,18 | Until Landing+29 | +16 | -38 | none |
| Aerial Invite Hell Level 2 | 9x2,1 | All | 1 | 9,59,18 | Until Landing+29 | +16 | -38 | none |
| Aerial Invite Hell Level 3 | 9x2,1 | All | 1 | 9,59,18 | Until Landing+29 | +16 | -50 | none |
Aerial Invite hell is a significantly improved version of the grounded variant. It instantly spawns a drill the first frame it's inputted at the target location and has much less cumbersome recovery, potentially actually letting you move around while the drill's sticking people in blockstun unlike the grounded version. The S button places the drill near Zato, and the H version places the drill far away.
Zato's main strength, aside from his solid neutral buttons, is throwing out air Invite Hells frequently and safely against any character who spends the majority of their time on the ground. Use and abuse this move.
Zato's momentum is preserved which can let you move away from or towards your drill by using backwards or forwards jumps. Because this move is in recovery until landing + 29 frames you want to use it right before hitting the ground. this will give you the most actionable time before the drill disappears.
Level 2 is identical to level 1 in all known ways, wasting your charge. Being liberal with your placements of air Invite Hell is still preferable over keeping charge.
Level 3 Aerial Invite Hell spawns 3 level 1 drills, which makes it cover considerably less space than the ground version. It's still difficult to contest and occupies a third of the screen at worst, however.Rise and Fall
623P
Cringe nae nae Eddie

"Oh, monkey's paw, how I wish Zato had a reversal"


| Damage | Guard | Startup | Active | Recovery | On-Block | On-Hit | Invuln |
|---|---|---|---|---|---|---|---|
| 9,12 | All,Overhead | 6 | 7(25)28 | 29 | -60 | -58 | Full 1~12, 34~37 |
Invincible on startup DP with a decent hitbox and damage. It has a huge amount of recovery, making it very unsafe on block.
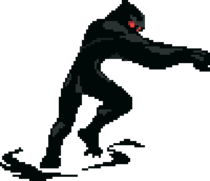
Initially looks like a useful reversal and combo ender, especially considering Zato's status as a zoner, but it has a major flaw. It's fully punishable ON HIT. By teching the second hit of the move, the opponent lands next to Zato fully recovered while he's still going through the move's long recovery. This leaves it fully open to a punish with anything you want, be it an IK or an infinite. This unfortunately renders the move mostly useless.Break the Law
63214S

| Damage | Guard | Startup | Active | Recovery | On-Block | On-Hit | Invuln |
|---|---|---|---|---|---|---|---|
| N/A | N/A | 30 | N/A | 15 | N/A | N/A | Strike 5~30; Full Until Exiting BTL; Strike 1~11 of Recovery |
Zato schlorps into the ground making him completely invulnerable. While underground Zato's only valid actions are to move left and right at incredible speeds. Coming out of the ground has a brief animation before Zato becomes actionable.
- Startup represents the time it takes to enter the ground from first input. Recovery represents time that it takes to come out of the ground.
- Zato has 4 frames of vulnerability on either side of the animation. 4 Frames at the start when he goes into the ground, and 4 frames at the end after he comes out of the ground.
- Pressing S will cause Zato to come out of the ground early.
- Pressing P will fake coming out by playing the first 11 frames of the animation.
Supers
Dark Sentinel
412363214H


| Damage | Guard | Startup | Active | Recovery | On-Block | On-Hit | Invuln |
|---|---|---|---|---|---|---|---|
| 63 | All | 39 | Until Reaches Enemy/Wall | 75 | -65 | -65 | none |
An advancing attack with a single hit of huge damage. The startup isn't great and the recovery is incredibly long. As a result this is isn't particularly useful because why try to combo into a weird slow unsafe super when you could go infinite with Charge Cancel.
Colors

Default

Alt. 1

Alt. 2

Alt. 3

Mirror


To edit frame data, edit values in GGML/Zato/Data.

Axl

Baldhead

Chipp

Kliff

Ky

May

Millia

Potemkin

Sol

Zato

Baiken

Justice

Testament
Systems Pages