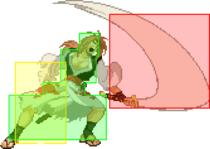
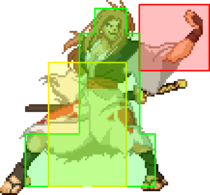
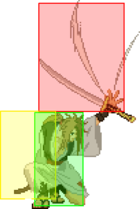
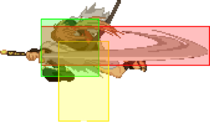
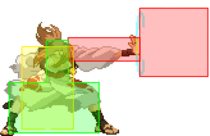
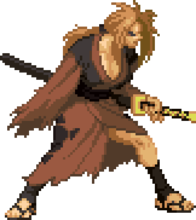
Overview
Baiken is one of the 3 unlockable boss characters in Missing Link, and holds the esteemed position of being the secret boss. However, unlike an Akuma or Nightmare Geese, she's a very typical character, or at least typical for Missing Link.
Baiken is rather dry compared to her later incarnations - her main notable areas are that she has a set of solid buttons which, while not blisteringly GuardMidStartup6Recovery24Advantage-7 fast
 GuardAllStartup5Recovery20Advantage-15, are mostly fully disjointed, big, and can flexibly convert into an infinite. She also has the best version of air tatami she's ever had with no recovery and no limit to how many can be on screen, allowing her to make literal walls of tatamis. She's also able to timer scam & air stall with Youzansen indefinitely, though this is a gimmick against most characters.
![]() Baiken controls neutral with air tatamis and disjointed pokes along with a situational timer scam strategy.
Baiken controls neutral with air tatamis and disjointed pokes along with a situational timer scam strategy.
- Youzansen Stall: Baiken can stall off of the top of the screen using Youzansen, making it difficult for opponents to hit her if she has a life lead.
- Disjointed Normals: Almost all of Baiken's normals are disjoints, making her harder to counter poke. This strength is significantly less valuable than it would be in other Gear games due to the unique Clash system present in GGML.
- Air Tatami: Air Tatami is just as good at controlling space as it always is, only there's no limit to how many she can put on screen. Walling out opponents is easy, if a bit poor in terms of reward or potential threat to discourage dashbug blocking.
- Unblockable Super: While it has flaws, her super is completely unblockable, meaning if she's in a round ending position a block string into it has few counters.
- Weak Anti-Air: While attacks like 2H are solid anti-airs, none are air unblockable, making it hard for her to deal with chicken blocking and air footsies. She lacks otherwise-universal options to hit air blocking opponents like Instant Kill and Dash Attack.
- Bad Comeback Potential: Baiken lacks tools to mix up the opponent, having a weak overhead, a poor throw, and the worst IK in the game. Even through Instant Blocking, her IK dodge and attack data is terrible. Combined with the aforementioned weak anti-air, it's hard for her to make a comeback.
- Mixed Normals: While they are often very disjointed with little hurtbox extensions to speak of, Baiken's normals are often slower compared to the majority of the cast's. Her CC infinite can be quite difficult to perform at longer ranges, which combined with the prevalence of dashing normals in neutral make her disjoints much less appealing than they'd let on.
- Unimpressive Defense: Unlike later iterations, she doesn't offer much defensively. Her best abare button is a proximity normal with others being very slow, her guard cancel options are poor, her throw is potentially punishable on hit, and she also suffers uniquely from having no invuln on her backdash along with being a poor user of IB Sakkai.
Normals
- Damage
- A quantification of how a character's health bar is reduced when they are hit.
- Guard
- The act of defending against incoming attacks. Guarding either negates the damage from an attack entirely or reduces it to minor chip damage.
- Low
- Guarded against while crouching
- Mid
- Guarded against in either the crouching or standing state, but not while airborne
- High
- Guarded against in the standing state
- All
- Guarded against while crouching, standing, or while airborne
- Throw
- Cannot be guarded against, but only applies to grounded opponents
- Unblockable
- Cannot be guarded against
- Startup
- The time before an attack is active including the first active frame. For example, an attack with 10F startup means the attack will do nothing for 9 frames, then hit the opponent on the 10th frame.
- Active
- The active frames of an attack refers to the amount of time an attack can hit the opponent.
- Recovery
- The recovery of an attack refers to the amount of time an attacker must wait before they may perform another action, even blocking.
- On-Block
- A measure of frame advantage when the opponent blocks an attack. Positive values indicate that the attacker can act first. Negative values indicate that the defender can act first.
- On-Hit
- A measure of frame advantage when the opponent is hit by an attack. Positive values indicate that the attacker can act first. Negative values indicate that the defender can act first.
- Invuln
- Short for InvulnerabilityA state where a character cannot be hit. A common component of reversal moves.
5P
| Damage | Guard | Startup | Active | Recovery | On-Block | On-Hit | Invuln |
|---|---|---|---|---|---|---|---|
| 4 | All | 6 | 4 | 9 | -5 | +2 | none |
5K
| Damage | Guard | Startup | Active | Recovery | On-Block | On-Hit | Invuln |
|---|---|---|---|---|---|---|---|
| 9 | Low | 7 | 3 | 14 | -9 | -2 | none |
c.S
| Damage | Guard | Startup | Active | Recovery | On-Block | On-Hit | Invuln |
|---|---|---|---|---|---|---|---|
| 13x2 | All | 4 | 8(4)4 | 15 | -9 | +2 | none |
f.S
| Damage | Guard | Startup | Active | Recovery | On-Block | On-Hit | Invuln |
|---|---|---|---|---|---|---|---|
| 14 | All | 13 | 12 | 17 | -19 | -8 | none |
5H
| Damage | Guard | Startup | Active | Recovery | On-Block | On-Hit | Invuln |
|---|---|---|---|---|---|---|---|
| 18 | All | 16 | 8 | 18 | -12 | +1 | none |
Fierce Strike
| Damage | Guard | Startup | Active | Recovery | On-Block | On-Hit | Invuln |
|---|---|---|---|---|---|---|---|
| 5x2 | All | 8 | 4(8)13 | 0 | -5 | +2 | none |
2P
| Damage | Guard | Startup | Active | Recovery | On-Block | On-Hit | Invuln |
|---|---|---|---|---|---|---|---|
| 5 | All | 8 | 8 | 9 | -10 | -3 | none |
2K
| Damage | Guard | Startup | Active | Recovery | On-Block | On-Hit | Invuln |
|---|---|---|---|---|---|---|---|
| 9 | Low | 10 | 4 | 21 | -17 | -11 | none |
2S
| Damage | Guard | Startup | Active | Recovery | On-Block | On-Hit | Invuln |
|---|---|---|---|---|---|---|---|
| 14 | All | 16 | 8 | 9 | -9 | +3 | none |
2H
| Damage | Guard | Startup | Active | Recovery | On-Block | On-Hit | Invuln |
|---|---|---|---|---|---|---|---|
| 18x3 | All | 8 | 4,4(4)4 | 5 | -2 | +16 | none |
j.P
| Damage | Guard | Startup | Active | Recovery | On-Block | On-Hit | Invuln |
|---|---|---|---|---|---|---|---|
| 5 | Overhead | 6 | 8 | 9 | none |
j.K
| Damage | Guard | Startup | Active | Recovery | On-Block | On-Hit | Invuln |
|---|---|---|---|---|---|---|---|
| 7 | Overhead | 8 | 8 | 5 | none |
j.S
| Damage | Guard | Startup | Active | Recovery | On-Block | On-Hit | Invuln |
|---|---|---|---|---|---|---|---|
| 14 | Overhead | 10 | 14 | 4 | none |
j.H
| Damage | Guard | Startup | Active | Recovery | On-Block | On-Hit | Invuln |
|---|---|---|---|---|---|---|---|
| 16 | Overhead | 4 | 8 | 15 | none |
Universal Mechanics
Dust Attack
| Damage | Guard | Startup | Active | Recovery | On-Block | On-Hit | Invuln |
|---|---|---|---|---|---|---|---|
| 14,5 | All,Low | 7 | 15 | 7 | -6 | +24 | Full 25~28 |
Despite how the move looks, it's very fast and the first hitbox comes out before the ball appears. For some reason, the projectile is a low?
It's a decently solid button to press in neutral, stopping many approaches while being fairly safe to whiff, but it has much lower reward than other pokes due to the Dust launch it causes. It hits twice, once on Baiken's palm thrust and once for the projectile, but if both hits connect it cancels the dust launch and doesn't allow you any followup or much pressure. Holding 8 while Dust is active mitigates this by immediately HJCing. Occasionally worth pressing in pressure, when spaced it's difficult for many guard cancels and abare options to beat it, & you might tag upbackers with the low.Throw
| Damage | Guard | Startup | Active | Recovery | On-Block | On-Hit | Invuln |
|---|---|---|---|---|---|---|---|
| 20 | Throw | 1 | N/A | N/A | N/A | -17 | none |
Instant Kill
Single Stroke Battle
| Damage | Guard | Startup | Active | Recovery | On-Block | On-Hit | Invuln |
|---|---|---|---|---|---|---|---|
| FATAL | Low | 16 | 8 | 7 | N/A | N/A | none |
Worst IK in the game.
Baiken's IK is slow, small, and does not have the usual upper body invulnerabilty of an IK. Technically Baiken's IK hits low, but it does not matter because IKs trigger Sakkai state both on hit and on block. Occupying approximately the same space as your 5K, it's tiny to a point where it hits a mere few pixels in front of Baiken's foot during her idle pose. On top of that, her IK attack is the slowest in the game, making punishing it on successful IK dodges pitifully easy.Specials
Tatami Gaeshi
| Version | Damage | Guard | Startup | Active | Recovery | On-Block | On-Hit | Invuln |
|---|---|---|---|---|---|---|---|---|
| Tatami Gaeshi | 1,14,5 | All | 12 | -32 [-10] | -33 [-2] | none | ||
| Tatami Gaeshi Level 2 | All | 12 | -38 [-31] | -7 | none | |||
| Tatami Gaeshi Level 3 | All | 47 | -38 [-36] | -11 | none |
Ground tatami is a pseudo-projectile which is a rarely used but long poke with strange hitboxes. All versions have a deadzone between Baiken's pushbox and her foot when it makes contact with the ground.
Higher levels of Tatami control larger amounts of screen space, with each making an additional Tatami. Level 2 reaches fullscreen against the entire cast with the same speed as level 1; while not an amazing counterzoning option since Baiken still steps forward enough to put her face into a hitbox, the threat of it is respectable.
Level 3 is four times as slow as the previous two versions and adds an additional tatami mat which will almost certainly go outside of the maximum screen length, making it a largely worse version than either of the previous two. Avoid charging to level 3 when possible. At fullscreen distance, the 2nd and 3rd mat will combo into each other for slightly increased damage, assuming someone's willing to sit there and get hit by a 47F move.
Air Tatami is a significantly more useful version of ground Tatami, as it falls all the way to the ground as usual while also allowing air actions from Baiken as soon as its short duration is done. Tatami walls can be made with relative ease and they occupy a great amount of screen space while carrying little to no risk in most matchups.
Level 3 Tatami Gaeshi can only be used in the air after a superjump or Dust launch since it's so horribly slow, but it's still terrible. Ignoring that it's strictly worse than level 2, the extra range of even the second tatami mat will often go to waste since your opponent probably ran past it before it began falling to the ground. You lose your charge level as soon as it's input, though, so cancelling level 3 with landing recovery is actually its best use.
- Standard advantage is for the kick portion of the attack
- Advantage in [brackets] is for the mat portion of the attack
Youzansen
| Damage | Guard | Startup | Active | Recovery | On-Block | On-Hit | Invuln |
|---|---|---|---|---|---|---|---|
| 9x2 | All | 10 | 4,16 | 0 | +4 | -5 | none |
Doesn't hit overhead but can be executed on the ground. Useless in combos due to it having very short range and a launch but thankfully its calling lies in pressure and stalling. The move recovers incredibly quickly, and with all air options available after, it's possible to continue your pressure from it with j.P into an air string into a ground string, although this is weak to guard cancels.
Thanks to this fast recovery, it's possible to execute another Youzansen almost immediately to gain more height. This can be repeated ad infinitum for air stall & timer scams, but most characters in the cast can reach her and hit her out of this (typically with SJ > some rising or high-up attack in the air).
It also serves the purpose of being Baiken's de-facto best guard cancel barring super, though it's slower than what most characters can threaten, its range isn't very impressive, and has no invulnerability to speak of.Kamaitachi
| Damage | Guard | Startup | Active | Recovery | On-Block | On-Hit | Invuln |
|---|---|---|---|---|---|---|---|
| 9,10 | Overhead | 23 | 54 | 20 | -14 | -44 | none |
Supers
Tsurane Sanzu Watari
| Damage | Guard | Startup | Active | Recovery | On-Block | On-Hit | Invuln |
|---|---|---|---|---|---|---|---|
| 22x3 | Unblockable | 6 | 3(17)3(17)6 | 18 | N/A | -8 | none |
Baiken's typical three slash super, except it has some issues in this game. The fact it's unblockable may sound appealing and combined with it's fast startup, this can be effective for finishing off opponents. However, it has a major weakness in that the hits don't combo into each other. While this may not immediately sound like a problem, this means opponents can backdash away or do an invincible reversal to hit Baiken out of it.
Thanks to ML lacking super freeze, you can often get the first and even second hit without worry which is solid damage. However, it's not normally worth getting punished. In the corner it's particularly hard to avoid but this rarely comes up. As it's an unblockable strike, there's nothing stopping Baiken from doing a blockstring into it to finish off a weak opponent.
- Leaves opponents standing on hit.


