< GGML
Overview
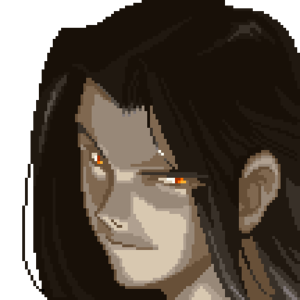
Faust, known as Dr. Baldhead in this game, makes his debut as a monster of a character who's unreasonably versatile for his intended archetype. Not to fret; he's also like this in other Guilty Gear games, so this is just the beginning of an innocent fact of reality that people have been forced to come to terms with instead of some silly ML screw-up.
However, Baldhead does indeed play more the serial killer part to Faust's zany doctor. While still sporting the incredible buttons and low profile as his future self, Baldhead is blazing fast and can uniquely enforce mixups that most of the ML cast are noticeably lacking. This isn't typically necessary of him since he can infinite you much like everyone else, but the more the merrier. The speed and normals are frankly more than enough to make Baldhead a menace against a majority of the cast, especially in a one-touch game like ML. Baldhead
 |
| Defense |
| 90%Raw Value: 9 |
| Jump Startup |
| 9f |
| Backdash |
| 31f |
| Meter Gain Mod |
| 150%Raw Value: 15 |
| Charge Time |
| 45f |
| Forward Walk Speed |
| 83%Raw Value: 640 |
| Backward Walk Speed |
| 174%Raw Value: 1024 |
| Dizzy Resistance |
| 117%Raw Value: 35 |
| Fastest Attack |
6P GuardMidStartup2Recovery25Advantage-25 (2F, whiffs on crouching) GuardMidStartup2Recovery25Advantage-25 (2F, whiffs on crouching)2S  GuardAllStartup5Recovery20Advantage-15 (5F) GuardAllStartup5Recovery20Advantage-15 (5F)Mad Operation  GuardThrowStartupRecoveryAdvantageN/A (1F) GuardThrowStartupRecoveryAdvantageN/A (1F) |
| Reversals |
| Mad OperationGuardThrowStartupRecoveryAdvantageN/A (1F) |
![]() Baldhead is, unlike Faust, a speeding bullet of destruction who functions best at mid-to-close range.
Baldhead is, unlike Faust, a speeding bullet of destruction who functions best at mid-to-close range.
Pros
Cons
- Godlike Normals: Baldhead has arguably the best normals in the game, with his moves like 2S and f.S being fast, disjointed, and leading to infinites.
- Aerial Offense: Baldhead possesses a longer and slower airdash than the rest of the cast, allowing for prolonged aerial offense which pairs well with GMW for a safe way to land and potentially continue pressure on the ground.
- Good Conversions: 2S and 2H are some of the furthest-reaching ground normals, giving Baldhead the furthest-reaching charge cancel infinite.
- Low-Profiling Crouch: Baldhead is the character with the shortest crouching hurtbox in the game, allowing him to avoid a lot of attacks by simply ducking under them. Most notably
 Justice's Gamma Ray.
 - Adaptable: in Missing Link, matchups usually matter more than raw strength, given the accessibility of infinites. Baldhead's reach and low profile traits help him navigate matchups against dominant characters while retaining the grime that most characters have.
- Grabs: With the largest throw range in the game alongside Re-re-re no Tsuki, you can enforce resets and punish the tiniest gaps in blockstrings wherever you wish.
- Weak Guard Cancels: Baldhead has no reliable guard cancels. His best is Mad Operation due to it being an instant command grab, but this requires either a full super meter or desperation and the input can leave him open. Otherwise, he usually relies on his abare normals, which are admittedly incredible, but still weak compared to a strong guard cancel.
Starter Guide
Need help getting started? Go to this page for information targeted at new players. It covers easy combos, key moves, and what to do after you knock the opponent down.
Normals
How to Read Frame Data
- Damage
- A quantification of how a character's health bar is reduced when they are hit.
- Guard
- The act of defending against incoming attacks. Guarding either negates the damage from an attack entirely or reduces it to minor chip damage.
- Low
- Guarded against while crouching
- Mid
- Guarded against in either the crouching or standing state, but not while airborne
- High
- Guarded against in the standing state
- All
- Guarded against while crouching, standing, or while airborne
- Throw
- Cannot be guarded against, but only applies to grounded opponents
- Unblockable
- Cannot be guarded against
- Startup
- The time before an attack is active including the first active frame. For example, an attack with 10F startup means the attack will do nothing for 9 frames, then hit the opponent on the 10th frame.
- Active
- The active frames of an attack refers to the amount of time an attack can hit the opponent.
- Recovery
- The recovery of an attack refers to the amount of time an attacker must wait before they may perform another action, even blocking.
- On-Block
- A measure of frame advantage when the opponent blocks an attack. Positive values indicate that the attacker can act first. Negative values indicate that the defender can act first.
- On-Hit
- A measure of frame advantage when the opponent is hit by an attack. Positive values indicate that the attacker can act first. Negative values indicate that the defender can act first.
- Invuln
- Short for InvulnerabilityA state where a character cannot be hit. A common component of reversal moves.
5P
5P


| Damage | Guard | Startup | Active | Recovery | On-Block | On-Hit | Invuln |
|---|---|---|---|---|---|---|---|
| 5 | All | 7 | 4 | 9 | -5 | +2 | none |
Fairly slow 5P without much range. Works well as a combo starter and can lead to decent damage but generally not great.
5K
5K


| Damage | Guard | Startup | Active | Recovery | On-Block | On-Hit | Invuln |
|---|---|---|---|---|---|---|---|
| 11 | All | 4 | 14 | 6 | -11 | -4 | none |
Very big anti-air button with an extremely janky hitbox that can even hit crouching opponents. Can be followed up with grounded normals. Shockingly fast so it can be used for abare.
c.S
c.S


| Damage | Guard | Startup | Active | Recovery | On-Block | On-Hit | Invuln |
|---|---|---|---|---|---|---|---|
| 9,2 | All | 8 | 14 | 13 | -14 | -2 | none |
Combo filler. Use with caution however. Using c.S as a dash-in will cause Baldhead to throw out f.S instead, which completely whiffs on up-close opponents. In fact, even c.S will whiff against up-close opponents in certain situations, making it a risky button to use.
f.S
f.S


| Damage | Guard | Startup | Active | Recovery | On-Block | On-Hit | Invuln |
|---|---|---|---|---|---|---|---|
| 12 | All | 12 | 4 | 21 | -16 | -4 | none |
Gigantic normal with unholy reach. Contests almost fullscreen at a mere 12 frames. It does come with a set of caveats, however: It fails to convert into anything meaningful besides 41236H at its typical range, it has an equally massive hurtbox extension, and it has a large blind spot in the area where Baldhead steps forward.
It's generally excellent at stopping people from charging or trying to do anything in neutral in general. If Baldhead does get hit out of it, in 90% of cases the opponent will get no conversion through punishing him simply because he probably pressed f.S on the other edge of the screen. 2S is used more often in typical Guilty Gear f.S range, but this move's still stupid.
On hit, you can convert into an infinite from 5H or 2H, with 2H generally being preferred but sometimes awkward on the hands. The range at which f.S combos into 5H without either button whiffing is very specific, and it becomes even more unstable if you add dash momentum to the mix.5H
5H


| Damage | Guard | Startup | Active | Recovery | On-Block | On-Hit | Invuln |
|---|---|---|---|---|---|---|---|
| 16 | All | 10 | 8 | 17 | -12 | +6 | none |
Essentially a shorter ranged f.S, though it still whiffs when close like that button, making it a bit of an awkward and middling pick for footsies & conversions. It has enough hitstun to work as an infinite component, but 2H is usually much more stable for that. It's marginally safer and better at catching aerial approaches than 2H. Sees occasional use, but doesn't stand out.
Fierce Strike
6P

Signature pose is only hurtboxes.

| Damage | Guard | Startup | Active | Recovery | On-Block | On-Hit | Invuln |
|---|---|---|---|---|---|---|---|
| 9 | Mid | 2 | 7 | 25 | -25 | -20 | none |
Decent anti-air. Although this move appears big, it actually seems to have a very small hitbox. However, it's his only air unblockable option, so it has to be used under some circumstances.
- Air unblockable
2P
2P


| Damage | Guard | Startup | Active | Recovery | On-Block | On-Hit | Invuln |
|---|---|---|---|---|---|---|---|
| 9 | Low | 7 | 5 | 11 | -10 | -2 | none |
Baldhead's fastest low, useful for mixups and mashing although he has better buttons for abare.
2K
2K


| Damage | Guard | Startup | Active | Recovery | On-Block | On-Hit | Invuln |
|---|---|---|---|---|---|---|---|
| 7x3 | All | 11 | 4,4,8 | 9 | -10 | +2 | none |
Big close range button with long active frames. Unfortunately unlike in later Guilty Gear games, all three hits of this attack hit mid. It's still a decent move and can gatling into S and HS normals. Because the first hit goes at an upward angle this move can also function as an anti-air, but he has better options.
2S
2S

| Damage | Guard | Startup | Active | Recovery | On-Block | On-Hit | Invuln |
|---|---|---|---|---|---|---|---|
| 11 | All | 5 | 3 | 20 | -15 | -3 | none |
This is the button. The other normal movecards can note on any niche usage or particular strength a move has all they want, but this is the thing you're pressing. 2S is generally your best bet to press in almost every scenario due to its strong, fully disjointed hitbox extending upwards and far away, making it your best choice for anti-air, punishing and footsies. This, coupled with its other "best in class" attributes such as an absurd 5 frames of startup and comfortably and very leniently converting into Baldhead's CC infinite make it generally overshadow anything else you can do on the ground.
Whereas later incarnations of Faust tend to pick one specific area to strongly deny with an attack, 2S instead does almost everything except not reach near-fullscreen like f.S does. It hits mid, but autopilot chains into 2H for both a low and continuation of your CC infinite. The only negative thing that could be said about 2S is that it isn't terribly active and is susceptible to whiff punishes, but even if you somehow manage to whiff it, it's difficult for most to capitalize on reactively due to the multipurpose space it covers.
Its hitbox on its own would already be strong, but this normal also low profiles a ton during startup and keeps Baldhead's hurtbox very low to the ground even when active, which furthermore just makes it win against whatever else the opponent was doing and makes it more difficult to stuff and punish.2H
2H


| Damage | Guard | Startup | Active | Recovery | On-Block | On-Hit | Invuln |
|---|---|---|---|---|---|---|---|
| 16 | Low | 16 | 21 | 14 | -13 | -8 | none |
2H is a long range poke that hits low even though it doesn't look like it should. It's incredibly disjointed and far-reaching, though in most cases pressing it raw is ill-advised, and its strengths are best abused by chaining into it from f.S or 2S. It'll also occasionally catch opponents walking back or attempting to jump during pressure as a low, and that'll also let you confirm into the most lenient CC infinite in the game on hit. Generally unparalleled combo filler.
Autopiloting into 2H from 2S would seem like a bad idea if it hit anti-air as 2H's hitbox is incredibly low to the ground, but 2H is so disgustingly active that it'll just catch the opponent when they land with a low that either converts or leads into CC pressure immediately after.j.P
j.P


| Damage | Guard | Startup | Active | Recovery | On-Block | On-Hit | Invuln |
|---|---|---|---|---|---|---|---|
| 5 | Overhead | 9 | 4 | 5 | none |
A somewhat slow jumping attack for that's only really good for air to air or hitting opponents above you.
j.K
j.K

Spin move!


| Damage | Guard | Startup | Active | Recovery | On-Block | On-Hit | Invuln |
|---|---|---|---|---|---|---|---|
| 7 | Overhead | 8 | 14 | 4 | none |
j.K is a strange normal where Baldhead swings 360 degrees around his scalpel, hitting all around him. This normal is great to simply put out during a jump or airdash as it quickly enters and occupies an obnoxious space before immediately retracting. Being quick enough to be used several times during a jump or airdash for even better coverage also helps.
j.K knocks down on hit, which can be a tricky tech if used against a grounded opponent, and slams the opponent down so quickly that teching it from an air combo isn't easy either. This of course means it can't lead to a combo, so be aware of the risk/reward involved when using it as a jump-in. Cancelling to Going My Way can keep it advantageous from an IAD sequence, and j.S isn't the worst idea either.
This normal makes up for Baldhead's typical lack of "standard" jumping buttons with j.P and j.H hitting above baldhead while having difficulty hitting grounded opponents and j.S having minimal cancel options and a short active period. Throw this out a lot.j.S
j.S


| Damage | Guard | Startup | Active | Recovery | On-Block | On-Hit | Invuln |
|---|---|---|---|---|---|---|---|
| 14 | Overhead | 5 | 4 | 13 | none |
Incredibly fast and big air button. Controls a lot of vertical and horizontal space, and is a useful jump in. Fully disjointed.
j.H
j.H


| Damage | Guard | Startup | Active | Recovery | On-Block | On-Hit | Invuln |
|---|---|---|---|---|---|---|---|
| 18 | Overhead | 13 | 9 | 9 | none |
Very strong aerial poke that does a lot of damage, though it's a tad slow. Not suited to being used rising or on reaction, but it's good after a backwards jump or tagging people who are directly in front of you or diagonally above you during an airdash. Less versatile than j.K but still useful. Not totally disjointed but this'll rarely matter.
Universal Mechanics
Dust Attack
S+H

Poster child for this game's hitboxes


Throw
6H or 4H

| Damage | Guard | Startup | Active | Recovery | On-Block | On-Hit | Invuln |
|---|---|---|---|---|---|---|---|
| 18 | Throw | 1 | N/A | N/A | N/A | -15 | none |
Is a Guilty Gear throw. Launches the opponent high up into the air, so be ready to chase them after landing this.
Instant Kill
What Goes Up Must Go Down to Hell
P+K > 236X


| Damage | Guard | Startup | Active | Recovery | On-Block | On-Hit | Invuln |
|---|---|---|---|---|---|---|---|
| FATAL | All | 8 | 14 | 3 | N/A | N/A | Above Knees 4~7; Above Feet 8~24 |
Great instant kill with excellent invuln while active (slightly worse on startup, but still workable) and extreme range. Can whiff point blank against certain characters, though this will rarely occur.
Due to Baldhead's unconventional defense, defensive IK is a solid way to get out of pressure that's difficult to meaningfully punish. Doing Dash > IK from fullscreen or roundstart distances can beat almost any attempt at projectile zoning in the game, making it also another solid use case.Specials
Souten Enshin Ranbu
236P


| Damage | Guard | Startup | Active | Recovery | On-Block | On-Hit | Invuln |
|---|---|---|---|---|---|---|---|
| 7x2 | All | 10 | 12 | 8 | +2 | 0 | none |
The titular Pogo stance move where Baldhead swings forward on his scalpel, hitting the opponent and then entering Pogo stance. Unfortunately, Baldhead has minimal uses for this special at higher levels of play, since any Pogo-related combos fall out in favor of CC infinites, and it still comes with the primary drawbacks of no blocking with limited movement & attacks.
The initial attack is capable of going over many low pokes, but it struggles to have any meaningful reward or combo potential afterwards. The only really notable move in Pogo stance is Forward Movement, a 1 frame, long range attack that nudges Baldhead forward, but similarly it's low reward and will usually just result in you annoying the opponent for a couple hits.
Actually being in neutral Pogo stance is weird in this game. Baldhead lacks a hurtbox on his scalpel, allowing him to dodge a wide swathe of attacks.Going My Way
214S or j.214S
Spin move...2!!


startup of ground version only

traveling hitbox for ground and air versions

| Version | Damage | Guard | Startup | Active | Recovery | On-Block | On-Hit | Invuln |
|---|---|---|---|---|---|---|---|---|
| Going My Way | 8 | All | 24 | 26 | 20 | -3 | -28 | none |
| Aerial Going My Way | 8 | All | 1 | 25 | 4 | none |
Dr. Baldhead launches himself off of his scalpel and zips across the stage. This special covers a decent amount of air-space and comes out quickly enough to catch your opponent off-guard. Doing 66 during startup causes Baldhead to fly further forwards.
The air version is an incredibly powerful and versatile tool in Baldhead's arsenal. It has very little recovery and leaves Baldhead fully air active once it's done, allowing him to move around in the air while being an active hitbox and mixup his air movement. It can also be used to get extra damage out of air hits. It also has no landing recovery, meaning he can use it to land faster and even TK it for unseeable left/rights.Re-re-re no Tsuki
41236H


| Damage | Guard | Startup | Active | Recovery | On-Block | On-Hit | Invuln |
|---|---|---|---|---|---|---|---|
| 9 | All | -21 | +6 | none |
A hit-grab move and Baldhead's longest range attack, though just by a smidge over f.S. Sprite is deceptive, the hitbox actually only extends to approximately half of the scalpel's length. Still rather large considering the big forward step Baldhead takes. Follow up this attack with 44 to pull your opponent back and deal a bit more damage with a safe-on-hit launch. Although this move can hit airborne opponents, you won't be able to pull them back.
Occasionally the only way to convert off of f.S, though confirming it is impractical. Worth doing every now and again. Baldhead retracting backwards after 41236H gets blocked typically makes it safe, at least to infinites.Hack 'n Slash
623S


| Damage | Guard | Startup | Active | Recovery | On-Block | On-Hit | Invuln |
|---|---|---|---|---|---|---|---|
| ~18? idk | All | 14 | [6(2)]x8,5 | 30 | -17 | -17 | none |
High damage special that works well as a close-range combo-ender. This move can also be charged by holding 623[R].
Unlike most chargeable specials, this one doesn't gain better hitboxes or properties. Instead it just gains additional damage. The Level 3 version does some really great damage, and is fairly accessible thanks to Baldhead's fast charge time. Useful for chip damage and combo ending if you aren't going for an infinite.
Would normally be guard cancel bait, though from most spacings Hack N' Slash seems to make a lot of GCs whiff or otherwise not behave favorably if they have invuln, and smack things that don't. A number of characters can have difficulty punishing this, though it's not something you should do very often.
You can walk forwards and backwards while using it.Pogo Stance
Moves accessed through Souten Enshin Ranbu.
Forward Movement
Pogo > 66

| Damage | Guard | Startup | Active | Recovery | On-Block | On-Hit | Invuln |
|---|---|---|---|---|---|---|---|
| 14 | All | 1 | 20 | 6 | +2 | 0 | none |
Baldhead flings himself forward to hit the opponent. This move comes out instantly, though the initial hitbox is too high up to hit most grounded opponents. It's not terribly rewarding as it doesn't combo into anything at all, nor does it lead to much pressure besides checking the opponent's options with another Forward Movement. If you're interested in not winning (read: being in Pogo stance), this is usually the reason you're here.
Backward Movement
Pogo > 44

| Damage | Guard | Startup | Active | Recovery | On-Block | On-Hit | Invuln |
|---|---|---|---|---|---|---|---|
| All | 1 | 20 | 6 | +2 | 0 | none |
Baldhead flings himself backwards. This move can be used to hit opponents that are behind you, and can also be used to avoid attacks in some situations.
Above
Pogo > P

Hentai Zutuki (It's called that in the code)


| Damage | Guard | Startup | Active | Recovery | On-Block | On-Hit | Invuln |
|---|---|---|---|---|---|---|---|
| 18 | All | 11 | 15 | 5 | -12 | none |
The Pogo Stance anti-air. It's almost straight vertical and doesn't shift your hurtbox much, but it's solid if someone manages to get high enough to be above you during Pogo Stance. It's unfortunately minus on hit and a bit slow on startup, so if it does manage to land you'll likely need to end Pogo stance immediately after to remain safe.
Below
Pogo > K


| Damage | Guard | Startup | Active | Recovery | On-Block | On-Hit | Invuln |
|---|---|---|---|---|---|---|---|
| 9 | All | 8 | 11 | 5 | +10 | none |
Another keep-away move. This attack hits too high up to connect on any crouching character and most standing characters, making it suited for when an opponent is directly at your head level vertically. It combos into Forward movement reliably, but rarely sees much use due to the specificity of its hitbox placement.
Supers
Mad Operation
2363214H
| Damage | Guard | Startup | Active | Recovery | On-Block | On-Hit | Invuln |
|---|---|---|---|---|---|---|---|
| 45 | Throw | N/A | -38 | none |
One of the few command grabs in Missing Link. Baldhead slams the opponent onto an operating table and performs surgery on them. As a fairly traditional command grab, this super is instant and unblockable but has very short reach so you need to be extremely close to your opponent in order to land it.
Deals a fair amount of damage but doesn't lead to pressure, making it best used when it will kill.
It's also a very solid guard cancel, and Baldhead's only real good option there. Comes out instantly as with other command grabs like Potemkin Buster, making it very difficult to play around or deal with aside from constantly being airborne. It's significantly more rewarding than the average GC command grab like those found onColors

Default

Alt. 1

Alt. 2

Alt. 3

Mirror


To edit frame data, edit values in GGML/Baldhead/Data.

Axl

Baldhead

Chipp

Kliff

Ky

May

Millia

Potemkin

Sol

Zato

Baiken

Justice
Testament
Systems Pages