m (→Instant Kill) |
|||
| Line 104: | Line 104: | ||
===<big>Instant Kill</big>=== | ===<big>Instant Kill</big>=== | ||
==== | ====Zwei Voltage==== | ||
{{GGML_Move_Card | {{GGML_Move_Card | ||
|input=P+K > 236X | |input=P+K > 236X | ||
Revision as of 05:38, 29 January 2022
Ky Kiske is a well rounded character with tools that fundamentally lean into Missing Link's core mechanics. On top of that, he has a checkmate with his Instant Kill Sakkai loop. Although he is on the simple side, he is very potent.
- Instant Kill Checkmate: Ky has the best instant kill in the game. It's fast, has great range, anti-airs, whiff punishes, and most importantly, loops into itself on successful escape. This means that on block, unless a character has a reversal, they're stuck for the rest of the match, and on hit, they're just stuck.
- Long Normals: Ky has among the longest normals in the game and most are partially, albeit not fully, disjointed.
- Good Fireball: Stun edge is a strong tool in neutral and pressure, especially when charged.
- Strong Throw: Ky's throw is one of the few that launches opponents at a low angle, allowing him to get pressure off it a lot of the time.
- Long Recovery on Normals: While they're long ranged, many of Ky's normals also have ludicrously long recovery. Whiffing his slashes can be a death sentence.
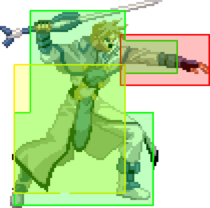
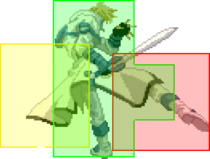
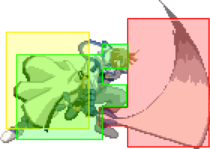
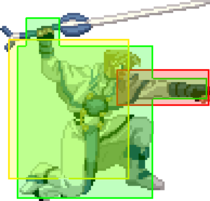
- Wide Hurtbox: While it's not the tallest, Ky has one of the widest hurtboxes in the game, making him susceptible to counter pokes and whiff punishes. He's also one of the only characters in the game that can be crossed up in corner.
| Ky | |
|---|---|
 | |
| Defense | |
| 90%Raw Value: 9 | |
| Jump Startup | |
| 2f | |
| Backdash | |
| 22f | |
| Meter Gain Mod | |
| 50%Raw Value: 5 | |
| Charge Time | |
| 52f | |
| Forward Walk Speed | |
| 113%Raw Value: 870 | |
| Backward Walk Speed | |
| 109%Raw Value: 640 | |
| Dizzy Resistance | |
| 100%Raw Value: 30 | |
| Fastest Attack | |
| Reversals | |
Normals
5P
| Damage | Guard | Startup | Active | Recovery | On-Block | On-Hit | Invuln |
|---|---|---|---|---|---|---|---|
| 4 | All | 9 | 7 | 10 | -10 | -2 | none |
Add a description to this move using the |description= field
Describe what the move is used for.
Explain the basics of why the initial purpose of the move is worth knowing or worth doing. Mention downsides that are important to know. If the move is particularly important it might have a spot on the stategy page—an important anti-air will likely be mentioned in the neutral section, or an important combo move will be mentioned in the combo theory.5K
| Damage | Guard | Startup | Active | Recovery | On-Block | On-Hit | Invuln |
|---|---|---|---|---|---|---|---|
| 9 | All | 9 | 6 | 17 | -16 | -8 | none |
Add a description to this move using the |description= field
Describe what the move is used for.
Explain the basics of why the initial purpose of the move is worth knowing or worth doing. Mention downsides that are important to know. If the move is particularly important it might have a spot on the stategy page—an important anti-air will likely be mentioned in the neutral section, or an important combo move will be mentioned in the combo theory.c.S
| Damage | Guard | Startup | Active | Recovery | On-Block | On-Hit | Invuln |
|---|---|---|---|---|---|---|---|
| 11 | All | 9 | 3 | 30 | -23 | -5 | none |
Add a description to this move using the |description= field
Describe what the move is used for.
Explain the basics of why the initial purpose of the move is worth knowing or worth doing. Mention downsides that are important to know. If the move is particularly important it might have a spot on the stategy page—an important anti-air will likely be mentioned in the neutral section, or an important combo move will be mentioned in the combo theory.f.S
| Damage | Guard | Startup | Active | Recovery | On-Block | On-Hit | Invuln |
|---|---|---|---|---|---|---|---|
| 12 | All | 12 | 3(3)10 | 13 | -20 | -8 | none |
Add a description to this move using the |description= field
Describe what the move is used for.
Explain the basics of why the initial purpose of the move is worth knowing or worth doing. Mention downsides that are important to know. If the move is particularly important it might have a spot on the stategy page—an important anti-air will likely be mentioned in the neutral section, or an important combo move will be mentioned in the combo theory.5H
| Damage | Guard | Startup | Active | Recovery | On-Block | On-Hit | Invuln |
|---|---|---|---|---|---|---|---|
| 13,17 | All | 26 | 12 | 1 | +6 | +23 | none |
Add a description to this move using the |description= field
Describe what the move is used for.
Explain the basics of why the initial purpose of the move is worth knowing or worth doing. Mention downsides that are important to know. If the move is particularly important it might have a spot on the stategy page—an important anti-air will likely be mentioned in the neutral section, or an important combo move will be mentioned in the combo theory.6P
| Damage | Guard | Startup | Active | Recovery | On-Block | On-Hit | Invuln |
|---|---|---|---|---|---|---|---|
| 5x2 | Mid | 6 | 8 | 17 | -12 | -10 | none |
- Air Unblockable
2P
| Damage | Guard | Startup | Active | Recovery | On-Block | On-Hit | Invuln |
|---|---|---|---|---|---|---|---|
| 4 | Low | 6 | 4 | 9 | -7 | +1 | none |
Add a description to this move using the |description= field
Describe what the move is used for.
Explain the basics of why the initial purpose of the move is worth knowing or worth doing. Mention downsides that are important to know. If the move is particularly important it might have a spot on the stategy page—an important anti-air will likely be mentioned in the neutral section, or an important combo move will be mentioned in the combo theory.2K
| Damage | Guard | Startup | Active | Recovery | On-Block | On-Hit | Invuln |
|---|---|---|---|---|---|---|---|
| 7 | Low | 10 | 8 | 13 | -13 | -1 | none |
Add a description to this move using the |description= field
Describe what the move is used for.
Explain the basics of why the initial purpose of the move is worth knowing or worth doing. Mention downsides that are important to know. If the move is particularly important it might have a spot on the stategy page—an important anti-air will likely be mentioned in the neutral section, or an important combo move will be mentioned in the combo theory.2S
| Damage | Guard | Startup | Active | Recovery | On-Block | On-Hit | Invuln |
|---|---|---|---|---|---|---|---|
| 12 | Low | 6 | 4 | 35 | -31 | -19 | none |
Add a description to this move using the |description= field
Describe what the move is used for.
Explain the basics of why the initial purpose of the move is worth knowing or worth doing. Mention downsides that are important to know. If the move is particularly important it might have a spot on the stategy page—an important anti-air will likely be mentioned in the neutral section, or an important combo move will be mentioned in the combo theory.2H
| Damage | Guard | Startup | Active | Recovery | On-Block | On-Hit | Invuln |
|---|---|---|---|---|---|---|---|
| 16x2 | All | 12 | 8 | 13 | -9 | +9 | none |
Add a description to this move using the |description= field
Describe what the move is used for.
Explain the basics of why the initial purpose of the move is worth knowing or worth doing. Mention downsides that are important to know. If the move is particularly important it might have a spot on the stategy page—an important anti-air will likely be mentioned in the neutral section, or an important combo move will be mentioned in the combo theory.j.P
| Damage | Guard | Startup | Active | Recovery | On-Block | On-Hit | Invuln |
|---|---|---|---|---|---|---|---|
| 4 | Overhead | 9 | 5 | 11 | N/A | N/A | none |
Add a description to this move using the |description= field
Describe what the move is used for.
Explain the basics of why the initial purpose of the move is worth knowing or worth doing. Mention downsides that are important to know. If the move is particularly important it might have a spot on the stategy page—an important anti-air will likely be mentioned in the neutral section, or an important combo move will be mentioned in the combo theory.j.K
| Damage | Guard | Startup | Active | Recovery | On-Block | On-Hit | Invuln |
|---|---|---|---|---|---|---|---|
| 9 | Overhead | 6 | 8 | 9 | N/A | N/A | none |
Add a description to this move using the |description= field
Describe what the move is used for.
Explain the basics of why the initial purpose of the move is worth knowing or worth doing. Mention downsides that are important to know. If the move is particularly important it might have a spot on the stategy page—an important anti-air will likely be mentioned in the neutral section, or an important combo move will be mentioned in the combo theory.j.S
| Damage | Guard | Startup | Active | Recovery | On-Block | On-Hit | Invuln |
|---|---|---|---|---|---|---|---|
| 12 | Overhead | 11 | 12 | 16 | N/A | N/A | none |
j.H
| Damage | Guard | Startup | Active | Recovery | On-Block | On-Hit | Invuln |
|---|---|---|---|---|---|---|---|
| 22 | Overhead | 9 | 3 | 22 | N/A | N/A | none |
Add a description to this move using the |description= field
Describe what the move is used for.
Explain the basics of why the initial purpose of the move is worth knowing or worth doing. Mention downsides that are important to know. If the move is particularly important it might have a spot on the stategy page—an important anti-air will likely be mentioned in the neutral section, or an important combo move will be mentioned in the combo theory.Universal Mechanics
Dust Attack
| Version | Damage | Guard | Startup | Active | Recovery | On-Block | On-Hit | Invuln |
|---|---|---|---|---|---|---|---|---|
| Dust | 15 | All | 6 | 6 | 10 | -7 | +90 | none |
Add a description to this move using the |description= field
Describe what the move is used for.
Explain the basics of why the initial purpose of the move is worth knowing or worth doing. Mention downsides that are important to know. If the move is particularly important it might have a spot on the stategy page—an important anti-air will likely be mentioned in the neutral section, or an important combo move will be mentioned in the combo theory.Throw
| Damage | Guard | Startup | Active | Recovery | On-Block | On-Hit | Invuln |
|---|---|---|---|---|---|---|---|
| 18 | Throw | 1 | N/A | N/A | N/A | -22 | N/A |
Add a description to this move using the |description= field
Describe what the move is used for.
Explain the basics of why the initial purpose of the move is worth knowing or worth doing. Mention downsides that are important to know. If the move is particularly important it might have a spot on the stategy page—an important anti-air will likely be mentioned in the neutral section, or an important combo move will be mentioned in the combo theory.Instant Kill
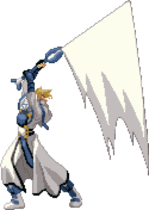
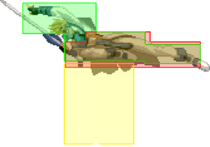
Zwei Voltage
| Damage | Guard | Startup | Active | Recovery | On-Block | On-Hit | Invuln |
|---|---|---|---|---|---|---|---|
| FATAL | All | 8 | 8 | 5 | N/A | N/A | Above Knees |
Specials
Stun Edge
| Version | Damage | Guard | Startup | Active | Recovery | On-Block | On-Hit | Invuln |
|---|---|---|---|---|---|---|---|---|
| Stun Edge | 9 | All | 15 | Until contact | 26 | -4 | +1 | none |
| Stun Edge Level 2 | 22 | All | 15 | Until contact | 28 | -6 | -1 | none |
| Stun Edge Level 3 | 16x5 | All | 15 | Until contact | 58 | -35 | -30 | none |
Add a description to this move using the |description= field
Describe what the move is used for.
Explain the basics of why the initial purpose of the move is worth knowing or worth doing. Mention downsides that are important to know. If the move is particularly important it might have a spot on the stategy page—an important anti-air will likely be mentioned in the neutral section, or an important combo move will be mentioned in the combo theory.Aerial Stun Edge
| Damage | Guard | Startup | Active | Recovery | On-Block | On-Hit | Invuln |
|---|---|---|---|---|---|---|---|
| 14 | All | 12 | Until contact | 22 | N/A | N/A | none |
Add a description to this move using the |description= field
Describe what the move is used for.
Explain the basics of why the initial purpose of the move is worth knowing or worth doing. Mention downsides that are important to know. If the move is particularly important it might have a spot on the stategy page—an important anti-air will likely be mentioned in the neutral section, or an important combo move will be mentioned in the combo theory.Vapor Thrust
| Version | Damage | Guard | Startup | Active | Recovery | On-Block | On-Hit | Invuln |
|---|---|---|---|---|---|---|---|---|
| S Vapor Thrust | 5,12 | All | 6 | 14 | 32 | -34 | -28 | Full 1~5; Above Knees 6~9; Above Thighs 10~13; Above Waist 14~24 |
| H Vapor Thrust | 5,12 | All | 6 | 14 | 46 | -48 | -42 | Full 1~5; Above Knees 6~9; Above Thighs 10~13; Above Waist 14~31 |
Add a description to this move using the |description= field
Describe what the move is used for.
Explain the basics of why the initial purpose of the move is worth knowing or worth doing. Mention downsides that are important to know. If the move is particularly important it might have a spot on the stategy page—an important anti-air will likely be mentioned in the neutral section, or an important combo move will be mentioned in the combo theory.Aerial Vapor Thrust
Add a description to this move using the |description= field
Describe what the move is used for.
Explain the basics of why the initial purpose of the move is worth knowing or worth doing. Mention downsides that are important to know. If the move is particularly important it might have a spot on the stategy page—an important anti-air will likely be mentioned in the neutral section, or an important combo move will be mentioned in the combo theory.Stun Dipper
| Damage | Guard | Startup | Active | Recovery | On-Block | On-Hit | Invuln |
|---|---|---|---|---|---|---|---|
| 11,14 | Low, All | 19 | Variable,12 | 13 | -16 | -14 | really low profile during first hitbox; less low profile during second hitbox |
Add a description to this move using the |description= field
Describe what the move is used for.
Explain the basics of why the initial purpose of the move is worth knowing or worth doing. Mention downsides that are important to know. If the move is particularly important it might have a spot on the stategy page—an important anti-air will likely be mentioned in the neutral section, or an important combo move will be mentioned in the combo theory.Needle Spike
| Damage | Guard | Startup | Active | Recovery | On-Block | On-Hit | Invuln |
|---|---|---|---|---|---|---|---|
| 14,11 | Overhead | 15 | 9,23 | 14 | -28 | -27 | none |
Add a description to this move using the |description= field
Describe what the move is used for.
Explain the basics of why the initial purpose of the move is worth knowing or worth doing. Mention downsides that are important to know. If the move is particularly important it might have a spot on the stategy page—an important anti-air will likely be mentioned in the neutral section, or an important combo move will be mentioned in the combo theory.Super
Ride the Lightning
| Damage | Guard | Startup | Active | Recovery | On-Block | On-Hit | Invuln |
|---|---|---|---|---|---|---|---|
| 29,21x2,29 | Mid | 15 | 84 | 0 | -23 | -19 | none |
Add a description to this move using the |description= field
Describe what the move is used for.
Explain the basics of why the initial purpose of the move is worth knowing or worth doing. Mention downsides that are important to know. If the move is particularly important it might have a spot on the stategy page—an important anti-air will likely be mentioned in the neutral section, or an important combo move will be mentioned in the combo theory.
