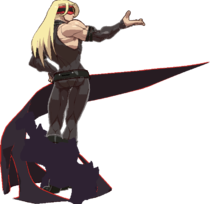
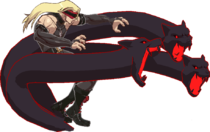
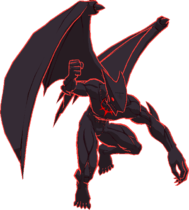
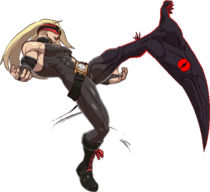
| Line 732: | Line 732: | ||
</div> | </div> | ||
===<big>Shadow | ===<big>Shadow Dive (Moguru)</big>=== | ||
<span class="input-badge">'''Release H with Shadow'''</span> | <span class="input-badge">'''Release H with Shadow'''</span> | ||
<div class="attack-container"> | <div class="attack-container"> | ||
| Line 747: | Line 747: | ||
|} | |} | ||
==== ==== | ==== ==== | ||
Eddie dips underground for a set period of time while advancing forwards. | |||
<br> | |||
Full Invulnerability begins on frame 1. Offers very strong maneuverability around opponents' projectiles and pokes. | |||
<br> | |||
Eddie's movement speed during {{clr|4|-H-}} is slightly faster than its walk speed, making it useful after certain knockdown situations for setting up sandwich pressure. | |||
<br> | |||
Learning how to use {{clr|4|-H-}} to dodge hitboxes is essential to playing Zato. | |||
</div> | </div> | ||
</div> | </div> | ||
Revision as of 01:12, 15 April 2021
This can be for a variety of reasons including but not limited to: spelling mistakes, unnecessary information, poor formatting, and other metrics per common sense reasoning.
Consider helping rewrite it.
Normal Moves
5P
Zato's fastest normal. Has good range for a 5P, and is commonly seen comboing into 2D for knockdown and okizeme.
Can situationally be used as an anti-air - for example, against I-no's hover dash or Raven's airdash.
5P is a fairly safe roundstart opener that can also cleanly beat specific moves from the opponent, such as Johnny's Coin.
5K
Standing low with decent range. One of the 2 jump cancel-able lows Zato has, alongside 2D.
While 2K has 1f faster startup, 5K is often used as the empty jump low option during flight mixups.
c.S
Primarily a combo/blockstring filler, and occasionally used for punishes.
Can cancel into 2D (or somewhat situationally, 5H > 22S/22H) for a knockdown.
Also used to continue combos against airborne opponents in hitstun (most commonly from meaty 22S, counterhit Nobiru, corner counterhit 2H, and corner counterhit j.D).
f.S
Primarily a combo/blockstring tool. 50 tension is required in order to combo into knockdown (fS > 2S > RRC > 22H).
Can gatling into the next normal after any of its 4 hits, allowing for modular spacing at which to end your combos and blockstrings.
Being a multi-hit normal, fS can be very effective against moves with armor (most notably, Potemkin's Hammer Fall).
- added As of Ver.2.10, can gatling into 6H.
5H
Another move with multiple (3) hits. Unlike in XX, the 3rd hit can be special cancelled.
Needs proper spacing for a 22S/22H knockdown. Without running momentum, certain gatlings into 5H will leave a gap and fail to combo.
2P
An alternative poke to 5P. Likewise, 2P can combo into 2D for knockdown.
Has some unique use cases apart from 5P due to the lower positioning of its hitbox.
2K
Candidate for Zato's best normal. 2K is one of his only plus-on-block normals alongside 5H, and can be used to begin strike/throw mindgames.
2K > 5P creates a 2f gap frametrap, and can usually knock down afterwards via 2D.
On normal hit, can crouch confirm into f.S > 5H > 22H or be linked to 5P > 2D.
On counterhit, can be linked to 5P > 2D, or be cancelled into 22S for a knockdown.
- added As of Ver.2.10, gatlings into 5D.
2S
Zato's main ground-to-ground poke normal. Decent range, but has a somewhat lengthy startup and recovery.
2S's (rather large) hurtbox appears well before its hitbox, making it risky to throw out carelessly in neutral. (Exhibit A)
Can combo into 22H for a knockdown if you either Eddie is summoned or on counterhit.
Additionally, this move enables Zato to establish mind games between frametrap 22H or 236H summon.
2H
Primarily used as a pressure tool (frametraps into Summon > Nobiru) and as a preemptive anti-air.
Counterhit 2H guarantees a knockdown. Works well in tandem with Eddie as a frametrap tool, and can catch jump outs in the corner.
Similarly to 2S, 2H's hurtbox appears before its hitbox; take caution when using it as an anti-air. However, unlike 6P, it covers a much larger area, has 2 frames faster startup, and knocks down on counterhit.
Also similarly to 2S, 2H is often YRC'd in order to prevent it from being whiffpunished.
j.P
Similar to j.K but hits higher up. Useful for capitalizing off of awkward air-to-air j.K hits, as it will gatling into j.D for a decent combo.
j.K
Covers a decent range. Begins Zato's F-Shiki Mawaru mixups using its jump-cancellable property.
j.S
Covers a unique range. The hitbox reaches well below Zato, but also extends way upwards after a few frames.
Like j.K, j.S can begin Zato's F-Shiki Mawaru mixups thanks to the newly added jump-cancellable property of Patch 2.10.
Good normal to use after IADs - can knockdown standing opponents via IAD > j.S > j.H > 5P > 2D.
j.S hits slightly behind Zato and can therefore be used to crossup the opponent in niche situations.
- added As of Ver.2.10, can be jump-cancelled.
j.H
Primarily a combo filler. Not jump-cancellable.
Most frequently seen being used in Zato's BnB air combo (... > j.K/j.S > j.H > j.D).
j.D
Amazing air-to-air normal. j.D covers a huge amount of space and is especially useful against characters with strong aerial approaches such as Chipp and Millia.
On regular hit, buys enough time for Zato to run forwards and summon Eddie.
On counterhit, a knockdown is guaranteed as long as the opponent does not hit the wall. If the opponent does hit the wall, a wallbounce will occur and consequently may be given enough time to airtech.
6P
One of Zato's primary anti-airs. Has upper body invulnerability on frames 1-16.
6P is a 2-hit move, and its upper body invulnerability is lost by the time the second hit is active.
Can very situationally be used to punish long-ranged pokes such as Faust's f.S.
Similarly to c.S, 6P can be used to continue combos against airborne opponents in hitstun.
6K
Overhead normal. Staggers on hit.
Against experienced players, 6K is mostly unreliable as a mixup option due to its relatively lengthy startup and should be used sparingly - especially if Eddie is not summoned.
On hit, should you be willing to spend meter, RRC > Damned Fang or 5D6 are excellent options to stall for Eddie gauge recovery.
Unlike in XX, 6K is not special cancelable.
6H
The big arm. Has a deceptively small hitbox which follows only the hand, rather than the entire arm.
6H's hurtbox covers a third of the entire screen, is exceptionally unsafe on block, and has a somewhat lengthy startup.
The move does reach quite far and knocks down on counterhit, but usage is advised to be kept to a minimum due to its risks.
Very niche use cases exist by exploiting its massive hurtbox (e.g. causing Faust's Love (bomb bag) to explode in range of himself).
- added As of Ver.2.10, horizontal knockback on hit increased & horizontal knockback on counterhit increased slightly.
2D
Zato's most stable knockdown option from normals such as 5P. Very frequently cancelled into Summon (236H) on hit in order to prepare Eddie mixups/pressure.
Highest damage option from a low mixup; in the corner, can lead to the following combo if Eddie is summoned: -S- > j.HD > -S- > Shadow Gallery > ...
Note that while 2D is a stable knockdown option for Zato standards, its somewhat poor reach can sometimes cause even very simple gatlings such as c.S > 2D, or heaven forbid, 5P > 2D, to drop.
5D
The universal overhead.
Uniquely to Zato, 5D is commonly used as a corner combo extender with the help of Eddie - e.g. (2K > -P- > 5D6), (-K- > 5D6), (5P > c.S > -P- > 5D6).
Has foot invulnerability on frames 1~51, and Zato is treated as airborne for the duration. This can lead to highly specific counterplay against Potemkin's Slide Head (Example).
Provides some interesting but niche combo applications midscreen when used alongside Eddie. (Example 1, Example 2)
Universal Mechanics
Ground Throw
Standard universal ground throw.
Can't be combo'd off of, but provides enough time to set up Mawaru pressure midscreen after a short forward run.
Air Throw
Frame advantage for Zato decreases the higher up the air throw occurs.
In most cases, Zato's air throw unfortunately does not provide Zato with as much time as he'd like for proper setups afterwards.
That being said, due to his relatively poor anti-air options without Eddie, this move plays a very major role in catching aerial approaches.
Dead Angle Attack
Same animation as 2H. Slightly slower startup than your average Dead Angle Attack.
Note that this DAA can be low profiled, but also reaches quite far diagonally upwards.
Knocks down on counterhit only.
Blitz Attack
One of Zato's few reversal options.
Thanks to Eddie, Zato has some unique combo routes that incorporate Blitz Attack. (Midscreen Example, Corner Example)
Special Moves
Invite Hell
22S/H
Zato's most important neutral tool.
22S summons a drill close to Zato, and 22H further away. Differences between the two versions end here; both drills must be blocked low.
Drills can be combo'd into for knockdown (mainly via 5H > 22S/22H and CH 2S > 22H), as well as be set up meaty for followup pressure.
Drills cannot be YRC'd in the conventional sense of YRCing a projectile - this requires a PRC. Attempting to Drill > YRC will only leave behind a puddle, which has its own uses even considering the meter cost.
Each drill creates a "puddle" of shadow which Eddie can be summoned from via 214H, albeit costing a small amount of Eddie gauge. Puddles are destroyed when they are attacked by the opponent.
Break the Law
214[K]
Zato dips underground, becoming fully invulnerable on frame 13.
Holding the K button extends the time spent underground. Take caution as the move's recovery will increase alongside the duration of the hold.
A strong neutral option to consider if Eddie is summoned and you predict the enemy to commit to an approach.
Generally speaking, avoid using this in neutral for extended durations if Eddie is not summoned, as its recovery is fairly easily punishable without Eddie around to protect yourself.
Used frequently as a cancel from 2D in order to create a burst-safe point. K must be held for a very small duration for this to be the case. Example
Break the Law can be YRC'd out of, significantly reducing its recovery.
Summon Eddie (Recall)
236P/236K/236S/236H
Summons Eddie.
Inputting 236P/236K/236S will summon Eddie and have it immediately perform the respective button's attack. Inputting 236H will simply summon, and nothing else.
If 236P/236K/236S/236H is performed while Eddie is summoned, it will be Recalled.
Note the Overview above for details on Eddie.
- added As of Ver.2.10, unsummon no longer depletes Eddie meter if the P, K, or S buttons are released while unsummoning.
Shadow Puddle Eddie Summon
214H
Summons Eddie from the puddle's location. Consumes a small amount of Eddie Gauge to preform.
Unlike a regular Summon, using different buttons such as 214P will not result in a summon followed by an attack - for that matter, it will not result in a summon, period.
If no puddles are present, 214H will simply result in a regular Summon. This will not consume the initial amount of Eddie Gauge that a Puddle Summon normally costs.
Small Attack (Shou)
Release P with Shadow
Shou! A deceptively far-reaching poke. Advances Eddie slightly forwards.
Excellent multi-purpose tool, made even stronger with Zato's accompaniment.
Sees usage in combos, hitconfirms, blockstrings, pokes, frametraps, tick throws - just about anything you can imagine. Becoming familiar with the usage of -P- will result in a massive jump in performance.
Traversing Attack (Mawaru)
Release K with Shadow
Mawaru! The buzzsaw.
When blocked, locks the opponent in enough blockstun to set up Zato's signature Buzzsaw mixup. Details
Mostly used as a pressure tool and a combo extender. Raw usage in neutral is typically not recommended, as it considerably expands Eddie's hurtbox forwards.
Anti-Air Attack (Nobiru)
Release S with Shadow
Nobiru! Eddie's anti-air.
Possibly the single strongest anti-air move in the game in a vacuum. Covers an incredible amount of vertical space.
Aside from anti-air purposes, -S- can also be used as a frametrap; 5H/2H > -S- has a 2f gap, and has massive reward on counterhit. Example
Used in an incredibly easy Option Select - inputting 623S (tap S) while Eddie is summoned and on top of the opponent. If the opponent stays blocking, they will get command grabbed. If they jump, Nobiru will catch it.
Shadow Dive (Moguru)
Release H with Shadow
Eddie dips underground for a set period of time while advancing forwards.
Full Invulnerability begins on frame 1. Offers very strong maneuverability around opponents' projectiles and pokes.
Eddie's movement speed during -H- is slightly faster than its walk speed, making it useful after certain knockdown situations for setting up sandwich pressure.
Learning how to use -H- to dodge hitboxes is essential to playing Zato.
Drill Special
Release D with Shadow
The shadow goes into the ground and later comes out with a very big invite to hell. Hits low and can be used in unblockables. Drains all of the shadow gauge so it is only used in combos. When unblockable is preformed correctly, the low hit will always connect first, making a low blitz an effective response. -D- can be delayed slightly in anticipation of this to make Zato's overhead connect first.
Dead Man's Hand
214D with Shadow
Eddie command grab. This move is very slow and drains a lot of shadow gauge. However, it has a couple of interesting properties that make it an excellent move to use. As long as you have the opponent in hitstun or blockstun, you can unsummon the shadow even when it is in recovery and gain Eddie meter back without losing usage of the shadow. You can use this in a bunch of set ups that leave you at advantage such as 5P>2K ~ 214-D- >2H. If the opponent doesn't jump out, they get hit with the command grab. If they jump out, they can get hit with the 2H and you can unsummon and gain full meter back.
Damned Fang
623S
Command grab. Best special move that doesn't involve the shadow. If it hits you are +63. Can combo in the corner.
Damned Fang has a very long animation, which serves two purposes:
- Refilling the Eddie gauge if you unsummon.
- Allowing you time to position Eddie to use -D-, fly with Zato, and set up an unblockable.
Drunkard Shade
214S
Reflects specific projectiles. Frames 1-18 throw invulnerably and reflects stuff frames 3-18. Wall bounces on counter hit.
Reflectable projectiles include:
- Sol's Gunflame
- Ky's Stun Edge S and H (Fortified versions cannot be reflected.)
- May's beach ball P and K
- Millia's Tandem Top S and H
- Venom's cue balls (Including QV charged balls.)
- I-No's Antidepressant Scale
- I-No's Chemical Love K and S
- Leo's Graviert Wurde S and H
- Kum Haehyun's Tuning Ball S and H
- Raven's Needles
- Baiken's Yashagatana
Shadow Gallery
j.41236S
Air special move. Mostly used as combo filler but can be used for mix up with YRC and RC. Second hit knocks down depending on spacing. If it's midscreen it will usually knockdown, in very rare cases it won't because of screen spacing. Near the corner it will wall splat for additional combos. Can also be used in conjunction with Eddie to bait burst and dead angles.
Flight
double jump
Overdrives
Amorphous
632146H [632146D]
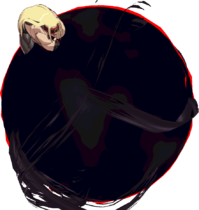
Zato's only real reversal. Not a very good one though. Slow start up and can easily be avoided as there is a dead zone directly in front of Zato. However it is actually kind of safe on block due to how far back it can push people. Be careful if you use it because if you get baited you will get hit. Shark is active when YRC'd. Strike invulnerable 1-12f.
- Burst Overdrive increases damage to 90×2 and improves invulnerable frames [1-12f fully invulnerable, 13-20f throw invulnerable]
Executor
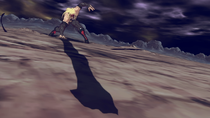
j.236236S
Zato's air super. It can take someone corner to corner and gives knockdown. Perfect for getting a knockdown off of an air combo.
Great White
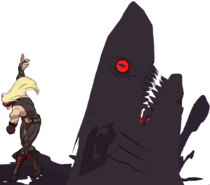
632146S with Shadow
The shark comes and hits the opponent. Can combo on hit. Also has uses to end the round with 50 tension left.
- As of 2.10, consumes 50% Eddie gauge, and if Eddie gauge remains after the move, Eddie appears summoned. Also now attacks 3 times no matter how much Eddie gauge left.
Instant Kill
Guzmania Magnifica
in IK mode: 236236H
- [ ] Indicates when match point for you, opponent in Hell Fire state, and you have 50% Tension
- Uses the animation of the first hit of his 5H.
- Can combo into it in a corner j41236S>RC>IK activation>IK in Hellfire state.
- Additionally, Damned Fang RRC, Deadman's Hand, and Mawaru in the corner will lead to IK
