No edit summary |
|||
| Line 594: | Line 594: | ||
|} | |} | ||
==== ==== | ==== ==== | ||
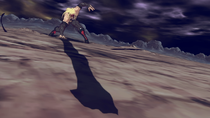
Nobiru! Eddie's anti-air. Can be used to control space, as a launcher and combo-filler for air-combos, and has an OS with Damned Fang (catches attempts to jump out of command throw). Used to control vertical space alongside Shou controlling horizontal space. | Nobiru! Eddie's anti-air. Can be used to control space, as a launcher and combo-filler for air-combos, and has an OS with Damned Fang (catches attempts to jump out of command throw). Used to control vertical space alongside Shou controlling horizontal space. Very useful for frame trap pressure and combo extensions, especially in the corner. | ||
</div> | </div> | ||
</div> | </div> | ||
Revision as of 22:15, 22 February 2021
| Overview | Combos | Strategy/Counter Strategy | Okizeme | Full Frame Data | Forums | Videos |
This can be for a variety of reasons including but not limited to: spelling mistakes, unnecessary information, poor formatting, and other metrics per common sense reasoning.
Consider helping rewrite it.
Normal Moves
5P

Zato's fastest move in this game. Has good range for a 5p. Combos into sweep for a knockdown and oki. In very few situations, it can be used as an anti air such as against I-no's hover dash or Raven's airdash. Combos from Damned Fang in corner and set ups used with Eddie Drill Special. Useful for hitconfirms at a close range: 5P > c.S will allow enough time to transition into 2D for knockdown on hit and f.S 2S for frametrap/summon on block.
5K

A standing low with short good range. Used as combo filler. One of the 2 jump cancelable lows he has. While 1f slower than 2K, it is often used as the empty jump low option during flight pressure.
c.S

Zato's punish. It's even on block and can chain into lots of different moves, making this a deadly tool for Zato. Can combo into 2d or 22h for a knockdown.
f.S

Don't whiff

Once a good move, now not so much because of nerfs. 50 tension is needed to do a combo that causes knockdown on normal hit (2K/c.S > f.S > 2S RRC > 22H). This move has multiple hits so it is good against moves like Pot's Hammer Falls. Can gatling into the next normal after any of the 4 hits, allowing for modular spacing at which to end your blockstrings.
- As of 2.10, gatlings into 6H
5H

Another move with many hits (3 hits). You can now special cancel the third hit. Needs proper spacing for a 22s/22h knockdown. Without running momentum, many gatlings into 5H will leave a gap, as the first active will not connect with the opponent.
2P

Has good range. Can combo into a 2d for knockdown or at some ranges do a combo ending in 22h for a knockdown farther away from Zato. It hits out slightly farther than 5P but isn't as disjointed nor hits as fast.
2K

Shadow Foot

Zato's best low mix up option. It is + and is perfect for setting up throws. Can do a combo into 22S for a knockdown if it's counter hit. Can crouch confirm into f.S>5H(3)>22H or into 5P>2D. Great use along with Eddie in tandem for certain setups such as Eddie -p- sandwich combos.
- As of 2.10, gatlings into 5D
2S

Zato's main ground to ground poke. Nice range, but has somewhat lengthy start up and recovery. Zato can be hit out of this move before it connects with opponent, making it risky to use when at a disadvantage. Can do a combo that ends in 22h for a knockdown far away from Zato if you either have Eddie out or if you get a counter hit. Good normal to use in tandem with Eddie. Additionally, this move allows Zato to establish a blockstring system between frametrap 22H or 236H summon on block.
2H

One of Zato's Anti Airs. Has a huge untechable time. On CH it basically knocks the other person down no matter what height they are at. It has many great uses in tandem with Eddie such as being a frame trap and is able to catch jumps outs when using it with Nobiru. One thing to note is that the hurtbox comes out before the hitbox so can be hit out of it during start up. However, it hits at a very good horizontal and vertical range for the type of normal it is and it is faster than 6P and has excellent benefits on hit. RC is often used after preforming this move to make it safer to use preemptively. If the move whiffs, 25% tension will be spent on a YRC to cancel out of its recovery. If the move connects, 50% tension will be spent on a RRC, allowing for a combo on normal hit.
j.P

Basic air normal. Similar to jk but hits higher up. Useful for capitalizing off of awkward air to air j.K hits, as it will gatling into j.D for a decent combo.
j.K

Good range. Your main mix up option when doing a shadow -K- or a shadow -S- in the corner This is the staple for Zato's amazing fuzzy guard. jK>jump cancel >jK/jS>jH or jK>jump cancel>jH or jK>2K/2d are some of your great mix up options starting from jK.
j.S

Very good for IADs. Does have a cross up hit box and can be used for cross ups. Hits in fairly deep so it is used a lot to score knockdowns when doing j.S>jH>5/2P>2D. It is also another button that doesn't gattle into Dust so it is can also be used for Dead Man's Hand set ups. I.E jK>jK>jS ~ 214 -D- As of Rev 2.1, it is jump cancelable
j.H

Similar to jk but not jump cancel able. Combo filler for the most part.
j.D

This move is amazing. Very good Air to Air normal. Covers a good amount of space and is pretty disjointed. On regular hit, it pushes the opponent far away for you to summon Eddie in neutral. On CH it wallsticks near the corner and you can combo after it for good damage. Mid screen CH it will knockdown face up for good oki and setplay options.
6P

An Anti-Air for Zato. Has invincibility for the upper body frames 1-16. Can be good against Iad's but must be done a bit early because of start up. Hits twice. The second hit does not have upper body invincibility, so only the first hit is a reliable Anti-Air. On ground hit can combo into 5cs 2d for a knockdown or 5h 22h for a knockdown farther away from Zato. Can be used as a situational footsies tool such as against Faust's f.S. It is also jump cancelable and leaves the opponent in a lot of block stun so you can cover Eddie when going in tandem when attacking.
6K

Overhead. Staggers on hit. Can't really do anything off of it without meter or if you have Eddie set up prior to using it. You can use either -K- or -P- to combo from it. If the opponent doesn't recover in time you can hit them with 5p and combo into knockdown. Note that it is not special cancelable so unless you have 25% tension or Eddie to cover, you are committed to it.
6H

The big arm. Has a pretty bad hit box due to the hurt box coming out before its hitbox. Can be used as an Anti air but situational. On CH it gives knockdown. The downsides are slow start up and very bad on block. Not used as much as 6p or 2h. Mostly used in tandem with Eddie to catch jump outs depending on the spacing but you're mostly better off doing either 2H or even jD.
2D

Basic sweep. Jump/special cancelable and is slightly disjointed by the tip of the foot. Gives Zato knockdown and good oki options. Can be followed up with a 22S/236H on block for a high risk/reward drill/summon system. Can use it after Damned Fang to combo on certain characters such as Johnny, Faust, Potemkin, Haehyun and Axl.
5D

Combo filler. Can be used after a shadow -K- to do massive amounts of damage or can link from Eddie -p- to converse Eddie meter and still keep damage up. Also has frames 1~51 Foot invulnerably. Can do very interesting combos with raw midscreen side Dust in tandem with Eddie due to the properties it has, so combos such as 5D>6>6H>236S>2H>214S>-S->2H, 214S>-S->2H>214S>-S->2H>236H work.
Universal Mechanics
Ground Throw

Normal throw. You are almost +40 off of it. Perfect for summoning. Can follow up in the corner with 2k 5fs 22s for more damage and summon.
Air Throw

Grants knockdown in the corner. Can summon or do meaty drill for pressure.
Dead Angle Attack
Same animation as 2H. Can be low profiled very easily and can be baited just as easy. It can be good to get the other person off you and summon the shadow.
Blitz Attack

One of Zato's few reversal options. Max Charge against a cornered opponent leads into SG loops.
Special Moves
Invite Hell
22S/H

RIP +2

The drills. Low hitting move. 22s hits closer to Zato than 22h. Both can be used for knockdown and meaty pressure. Each drill will also create a "puddle" of shadow which Eddie can be summoned from. This puddle can be destroyed if the opponent attacks it.
Break the Law
214[K]

Zato goes underground. A good defensive option if you YRC to decrease the recovery of it. With Eddie, you use this for different pressure mix ups and even in neutral so they have to deal with just the shadow.
Summon Eddie (Recall)
236P/K/S/H

The summon. The Staple of Zato. If you do 236P/K/S Eddie will come out and do an attack. If you do 236H Eddie will come out and do nothing. If 236P/K/S/H is done with the shadow out the shadow will be called back and regenerate the shadow gauge.
- as of 2.10, unsummon doesn't take Eddie meter if you release P, K or S while unsummoning
Shadow Puddle Shadow Summon
214H

Summon from the puddle. The shadow will come out in the spot the drill was. No moves will be done straight from the summon. Consumes shadow gauge to preform.
Small Attack
Release P with Shadow

Shou! This attack moves Eddie forward, allowing for more space control. It's great for when you have the opponent sandwiched and can be very strong to keep them in block stun with 2K -P-. Similar pressure is possible even with Eddie and Zato on the same side as the opponent, but requires a microdash from Zato during each release -P- to maintain. If you opponent is expecting a -K- then you can do a -P- 623s to catch them off guard.
Traversing Attack (Mawaru)
Release K with Shadow

回る

Mawaru! The buzz saw. The best to make your opponent be in block stun. It allows you to perform a fuzzy mix up and allows you to combo into 5d. Much stronger when preformed meaty, as defenders can trade with the move as it comes at them in neutral, killing Eddie while taking very little damage and at very little risk for a strong punish from Zato.
Anti-Air Attack (Nobiru)
Release S with Shadow

Rip off their shins!

Nobiru! Eddie's anti-air. Can be used to control space, as a launcher and combo-filler for air-combos, and has an OS with Damned Fang (catches attempts to jump out of command throw). Used to control vertical space alongside Shou controlling horizontal space. Very useful for frame trap pressure and combo extensions, especially in the corner.
Shadow Puddle
Release H with Shadow
The shadow goes underground for a small amount of time. Can be used to move the shadow forward and avoid attacks.
Drill Special
Release D with Shadow

Set Play Drill

The shadow goes into the ground and later comes out with a very big invite to hell. Hits low and can be used in unblockables. Drains all of the shadow gauge so it is only used in combos. When unblockable is preformed correctly, the low hit will always connect first, making a low blitz an effective response. -D- can be delayed slightly in anticipation of this to make Zato's overhead connect first.
Dead Man's Hand
63214D with Shadow

EVO winning command grab

Eddie command grab. This move is very slow and drains a lot of shadow gauge. However, it has a couple of interesting properties that make it an excellent move to use. As long as you have the opponent in hitstun or blockstun, you can unsummon the shadow even when it is in recovery and gain Eddie meter back without losing usage of the shadow. You can use this in a bunch of set ups that leave you at advantage such as 5P>2K ~ 214-D- >2H. If the opponent doesn't jump out, they get hit with the command grab. If they jump out, they can get hit with the 2H and you can unsummon and gain full meter back.
Damned Fang
623S

"Are you scared?"


Command grab. Best special move that doesn't involve the shadow. If it hits you are +63. Can combo in the corner.
Damned Fang has a very long animation, which serves two purposes:
- Refilling the Eddie gauge if you unsummon.
- Allowing you time to position Eddie to use -D-, fly with Zato, and set up an unblockable.
Drunkard Shade
214S

Reflects some projectiles. Frames 1-18 throw invulnerably and reflects stuff frames 3-18. Wall bounces on counter hit.
Projectiles able to be reflected include:
- Sol's Gunflame
- Ky's Stun Edge S and H (Fortified versions cannot be reflected.)
- May's beach ball
- Millia's Tandem Top S and H
- Venom's cue balls (Including QV charged balls.)
- I-No's Antidepressant Scale
- I-No's H Chemical Love
- Elphelt's Berry Pine (Doesn't damage Elphelt.)
- Leo's Graviert Wurde S and H
- Raven's Needles
- Baiken's Yashagatana
Shadow Gallery
j.41236S


Air special move. Mostly used as combo filler but can be used for mix up with YRC and RC. Second hit knocks down depending on spacing. If it's midscreen it will usually knockdown, in very rare cases it won't because of screen spacing. Near the corner it will wall splat for additional combos. Can also be used in conjunction with Eddie to bait burst and dead angles.
Flight
double jump

Zato has flight mode instead of double jump. He can briefly fly around the screen. This is helpful for escaping the corner and stalling time for Eddie to recover. Huge staple in Zato's mix up, allowing him to perform his fuzzy guard mix ups.
Overdrives
Amorphous
632146H [632146D]
Dinner time for Eddie

Zato's only real reversal. Not a very good one though. Slow start up and can easily be avoided as there is a dead zone directly in front of Zato. However it is actually kind of safe on block due to how far back it can push people. Be careful if you use it because if you get baited you will get hit. Shark is active when YRC'd. Strike invulnerable 1-12f.
- Burst Overdrive increases damage to 90×2 and improves invulnerable frames [1-12f fully invulnerable, 13-20f throw invulnerable]
Executor
j.236236S

Zato's air super. It can take someone corner to corner and gives knockdown. Perfect for getting a knockdown off of an air combo.
Great White
632146S with Shadow

This man right here officer


The shark comes and hits the opponent. Can combo on hit. Also has uses to end the round with 50 tension left.
- As of 2.10, consumes 50% Eddie gauge, and if Eddie gauge remains after the move, Eddie appears summoned. Also now attacks 3 times no matter how much Eddie gauge left.
Instant Kill
Guzmania Magnifica
in IK mode: 236236H
"I shall remember you!"

...But not your shadow


- [ ] Indicates when match point for you, opponent in Hell Fire state, and you have 50% Tension
- Uses the animation of the first hit of his 5H.
- Can combo into it in a corner j41236S>RC>IK activation>IK in Hellfire state.
- Additionally, Damned Fang RRC, Deadman's Hand, and Mawaru in the corner will lead to IK
External References
move and the move Full sections. One is shown on the character page, while the other is shown on the frame data page.