Please feel free to make edits, but include edit summaries and sources where applicable.
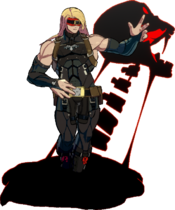
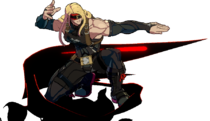
Zato-One is the former leader of the Assassin's Guild who traded his vision with the power to control his shadow, namely Eddie. New to Strive, Zato possesses the ability to command Eddie to cancel his moves into each other, allowing the two to launch even more coordinated attacks. Zato's unique controls can make him hard to master, and playing as him can require higher execution and character knowledge than average.
![]() Zato-1
Zato-1 ![]() Zato-1 , classified as a Technical type, is a shadow wielder who can pressure his opponent with simultaneous attacks. Frame data in parenthesis is based on frame counts from pre-release footage and may be inaccurate.
Zato-1 , classified as a Technical type, is a shadow wielder who can pressure his opponent with simultaneous attacks. Frame data in parenthesis is based on frame counts from pre-release footage and may be inaccurate.
- Eddie Offense: Zato is essentially two characters in one. Eddie can keep the opponent locked down while Zato goes for a mixup option, and Eddie can keep Zato safe should it not work out or start a combo if Zato was right.
- Eddie Neutral: Their partnership in pressure also extends to neutral. Eddie's Oppose can tank attacks while Zato runs in to punish. Drunkard Shade also launches Eddie very far, allowing Zato to threaten with fullscreen Leap.
- Unconventional Movement: Zato has a fly instead of a double jump, which he can also use to approach while covering the ground with Eddie. Zato can also descend into the ground with Break the Law, letting him go under most things the opponent can throw at him.
- Very Weak Defense: Zato has no reliable reversals, metered or not. Additionally, Zato has weak abare as nothing combos from his P buttons if more than one is used.
- Eddie Reliant: Zato is incredibly weak without Eddie to cover his mixups and neutral.
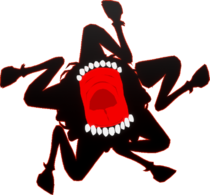
Zato has a gauge above his tension gauge for Eddie. The gauge signifies Eddie's health. When Eddie is summoned, it will gradually decrease, and each of Eddie's attacks use up a chunk of the gauge.
If Eddie is unsummoned before the gauge runs out, the gauge will turn white, and quickly recover. Eddie can be summoned again at any time during this.
If Eddie or Zato is hit by an attack, or the shadow gauge is depleted fully, the gauge will turn red and will recover at a slower rate. During this time, Zato cannot summon Eddie until the gauge is full again. Avoiding this as much as possible is important to preserving Eddie.
![]()
Full Eddie Gauge
![]()
White Eddie Gauge
![]()
When summoned with either 214H, 632146S, or 236X, Zato will summon Eddie. Eddie can be moved backwards or forwards with the 4/6 directions respectively (you can also use 1/3 if you only want to move Eddie while keeping Zato stationary). To have Eddie attack, you can release P, K, S, or H, or doing 236X for the respective Eddie attack. Eddie attacks can be canceled into each other by using 236X, even into themselves, but make Zato vulnerable as he does a clapping animation for a short period of time. Because of this, using the 236X versions of specials is not suitable outside of summoning Eddie to do an immediate attack or cancelling other Eddie attacks. Therefore to master Zato, you will have to master holding and releasing specific buttons while Eddie is out.
For more information on how to practice controlling Eddie, refer to novriltataki's How to Zato video below. (While the video uses Xrd for the example, most tips stated in the video are applicable to Zato in Strive.)
| Zato-1 |
|---|
Normal Moves
5P
Tied for Zato's fastest button with 2P. Most commonly used in stagger pressure or to mash out of gaps in the opponent's pressure. Pretty good range for a jab, however, the reward on it is abysmal, as the best you can get usually is repeated 5P/2Ps.
5K
Standing low. Can combo into 2D after for a knockdown, allowing you to summon Eddie safely and start your okizeme. Most commonly seen in solo pressure to catch fuzzy jump, or high/low mixups incorporating Eddie as a low option.
c.S
Combo/blockstring filler. c.S is a cornerstone of Zato's combos with Eddie, as it is used a lot in Leap loop combos (-S- > c.S > 2H > ...). When blocked, you can go into c.S > 5H > 22H or 236P to create a frametrap, the latter of which is a great way to summon Eddie safely in pressure.
f.S
Long range 2 hit poke. Not used often due to the lengthy recovery it has when whiffed compared to 2S, but can be useful to beat attacks like Potemkin's Hammer Fall or Slide Head.
5H
Combo/blockstring filler. On hit, can combo into 22H for a soft knockdown. On block, you can cancel it into either 22H or 236P for a frametrap, the latter being a great way to summon Eddie in pressure safely.
5D
Standard dust attack. Uncharged, it is slightly faster than 6K. Cannot be converted off of without Eddie in play or RC. When you hit a grounded opponent with it charged, you can chase them by inputting 7/8/9, and follow up with a combo afterwards. Use this to open up crouching opponents.
6P
Universal anti-air with upper body invul. Great anti-air for opponents that like to airdash a lot. On normal air hit, you can follow up with 22H for a soft knockdown. On counter air hit, it will cause a hard knockdown, allowing you to cancel into empty summon (214H) and set up your okizeme.
6K
Overhead command normal. This overhead can be good for opening up the opponent however it requires them to be blocking and respecting Zato to get hit. Can be converted with either a roman cancel or Eddie. Be sure to use this once in a while to catch them by surprise.
6H
Command normal where Zato leaps into the air and does an attack. Great way to bait lower hitting attacks or throw attempts, as you can combo after on counter hit. Because you can airdash out of this move, it is a great mixup tool at your disposal. This can be mashed out of so it is best often used in sync with Eddie to ensure the opponent cannot punish you.
2P
Crouching jab. Great range for a jab, and most commonly used in stagger pressure or to mash out of gaps in the opponent's pressure. It has the same issue as 5P in that the reward on hit is abysmal, usually leaving Zato only with the option to string multiple 2P/5Ps.
2K
Low poke where Zato sticks his foot in the ground. Good low poke at closer ranges, and can combo into 2D, granting a hard knockdown to set up okizeme. Also used in high/low mixups with Eddie as a low option.
2S
One of your best pokes. Fairly fast, covers good range, and not too bad on whiff. This on block can allow you to setup drill, summon Eddie, or just wait and determine what your opponent is going to do after. Do note that it does have an extended hurtbox when used so exercising caution when throwing out this move is important.
2H
Anti-air attack. While it does not have any upper body invul like 6P, 2H is great at catching opponents above Zato, and has ridiculously good reward on counter hit, allowing you to do Leap loops anywhere on the screen, or cancel into 214S to secure a hard knockdown. On normal hit, can combo into 22H for a soft knockdown. Also an integral combo filler piece in many of Zato's combos incorporating Eddie. Do note that 2H does extend Zato's hurtbox.
2D
Low sweep. Connecting this attack while naked allows Zato to bring Eddie into play safely, as well as start okizeme with Eddie afterwards. If you can combo into this attack and Eddie is ready to be summoned, it is best to go into it. Also seen as a low option in Zato's high/low mixups with Eddie.
j.P
3 hit air attack. Has good range, and the horizontal hitboxes make it a good move to hit opponents out of the air.
j.K
Zato kicks towards the ground. This move is primarily used as a high option after 6H (6H > 66 > j.K), or to set up an F-Shiki/low mixup after Eddie Drill (-K- > j.K > j.D/land > 2K > 2D). Can also be used as a jump in, but j.S or j.H generally do that better.
j.S
One of Zato's best air normals. Hits all around Zato, making it good in air to air and air to ground situations. Overall a solid jump in.
j.H
Zato swings a blade off of a chain. While the hitbox does not hit all around Zato like j.S, it is an amazing jump in for air to ground situations just because of how large it is. A staple jump in attack.
j.D
Zato moves horizontally while doing a biting attack. This move can be a really good movement tool, acting as an alternate airdash, allowing Zato to move around in the air more freely, whilst also putting out an attack. It also has the tendency to beat out a lot of other air attacks, so it is a great way to check people in the air from farther away.
Universal Mechanics
Ground Throw
Zato claws the opponent's chest and throws them after, granting hard knockdown. Great oppurtunity to summon Eddie afterwards.
Air Throw
Zato bites through the opponent's chest. Grants hard knockdown, but how advantageous you are depends on how low you did the airthrow. Good anti air option.
Special Moves
Flight
Dash in any direction (Air only)
By inputting the same direction quickly twice while airborne or pressing the dash button while holding a direction, Zato will fly in the specified direction (e.g. 66 to fly forwards). If you dash directly up, Zato will fly in place. While flight is activated, Zato can be move around freely in 8 different directions and ends either when an attack is inputted during flight, Zato lands, or Zato has been flying for too long. Zato can cancel 6H and all air normals into flight on hit or block as long as he still has an air action available.
Summon Eddie
214H
Integral move to playing Zato. Zato summons Eddie, which can then use all of his following attacks by releasing P, K, S or H, or by doing 236P/K/S/H, the latter input allowing you to cancel Eddie attacks into other attacks (e.g. 236P > 236S), but leaves Zato vulnerable fot a short period of time.
Use this summon after a knockdown to set up your okizeme or if you want to summon Eddie in neutral without doing an attack immediately, so you can decide how to respond to what the opponent is doing after.
To unsummon Eddie, do 214H while Eddie is already summoned, allowing you to preserve Eddie's longevity and allow you to summon him again much faster.
"Pierce"
]P[ when summoned or 236P
- ]P[ only works when Eddie is already summoned, whereas 236P can be done regardless if Eddie is summoned or not
Primary Eddie attack to control ground space. Can be used to push your offense on grounded opponents from neutral. Bear in mind there's a gap between the two hits. Keep this in mind because smart opponents can mash during this and kill Eddie if you do not condition them to respect it. You can cover this gap by attacking in-between the two hits.
You can use 236P after a blocked 5H to create a frametrap that summons in Eddie. If you have 50% tension, you can do 66RC after the 236P to make both hits of Pierce a true blockstring, and set up a mixup afterwards.
"That's a lot"
]K[ when summoned or 236K
- ]K[ only works when Eddie is already summoned, whereas 236K can be done regardless if Eddie is summoned or not
Eddie creates 4 drills that go across the screen horizontally, and pushes the opponent away from Eddie's position. While not great in neutral, it is a cornerstone of Zato's okizeme with Eddie, shining when used after a knockdown to set up ambiguous high/low mixups.
"Leap"
]S[ when summoned or 236S
- ]S[ only works when Eddie is already summoned, whereas 236S can be done regardless if Eddie is summoned or not
Arguably Eddie's best attack. Anti air attack that drags the opponent back to the ground when blocked, allowing you to continue your offense. In addition, it is a staple in Zato's higher damage combos, as Zato can loop into this move so long as he has enough Eddie gauge available. Example of the loop would be (corner) c.S > 2H > -S- > ...
"Oppose"
]H[ when summoned or 236H
- ]H[ only works when Eddie is already summoned, whereas 236H can be done regardless if Eddie is summoned or not
Eddie can armor multiple hits (anything but Overdrives) before going active and attacking back. Be careful not to throw out pokes carelessly, as Eddie only absorbs 1 active frame of the opponent's move, meaning they can still hit you afterwards. Use this attack to bait predictable approaches or attempts from the opponent to gain offense, and punish afterwards, usually with 623S.
It is also a great anti air option when you know the opponent will approach from the air, but exactly sure what angle they will approach from. use 214S after Oppose blocks the jump in to punish with a damaging Leap Loop.
Invite Hell
22H
Good move for controlling neutral. This move has a ton of active frames, which make it easy to meaty people on wakeup and can be very advantageous if it meaties on later active frames. Combining this with Dash Input RC allows Zato to cover the ground, while also being able to react to what the opponent is doing, such as anti airing an opponent who jumped over the drill, making this a good use of meter.
Break The Law
214[K]
Zato goes into the ground, and is invincible to all attacks the as long as he is doing this move. Zato stays in the ground as long as K is held down. However, the longer Zato does this move, the more recovery it will have when he comes back up, and Zato will be forced out of the move after a certain period of time. This move synergizes well with Eddie out, as you can control him while Zato is safe from any danger.
Damned Fang
623S
Command grab. Does more damage than his regular throw and refills the Eddie gauge when it connects, but does not grant good okizeme afterwards. If Eddie is already summoned when this move connects, he will be unsummoned as the Eddie gauge is refilled. With 50% tension, you can follow up after with a respectable damage combo.
Mix this in your pressure to punish opponents respecting you too much.
Drunkard Shade
214S
Can reflect certain, non-overdrive projectiles, such as Sol's Gunflame or Ky's Stun Edge. In addition, if Eddie is summoned, when using this move, Eddie will do a swift dash forwards, making it a great way to quickly reposition Eddie.
Overdrives
Amorphous
632146H
- GGST Zato-1 Amorphous 1.png
How did they animate something so beautiful?????
- GGST Zato-1 Amorphous 2.png
- Costs 50% tension
Damage super. Has no invincibility, meaning Zato cannot use this to get the opponent off of him. However, it is great for securing knockdowns before a wallbreak when you don't need to refill the Eddie Gauge with 632146S, or closing out rounds. Can also serve as a situational anti air due to how high the attack hits.
Sun Void
632146S (air OK)
- Costs 50% tension
Utility super. When used, the sword will track the opponent's location and attack. Eddie gauge will be refilled and will summon him where the sword lands. If Eddie was already summoned when the attack was inputted, the attack will start from Eddie's position. Use this super to continue your offense with Eddie or to end a combo with a full shadow gauge.


