| Line 178: | Line 178: | ||
<gallery widths="210px" heights="210px" mode="nolines"> | <gallery widths="210px" heights="210px" mode="nolines"> | ||
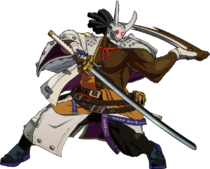
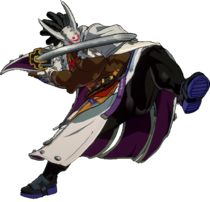
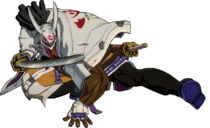
GGST_Nagoriyuki_5H.png | | GGST_Nagoriyuki_5H.png | | ||
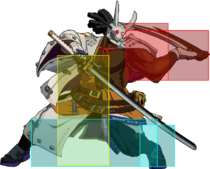
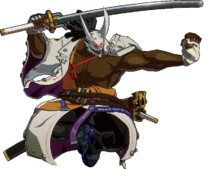
GGST_Nagoriyuki_5H2.png |Nago's Blade of Judgment to Susanoo's Michael Sword | GGST_Nagoriyuki_5H2.png |Nago's Blade of Judgment to Susanoo's Michael Sword. | ||
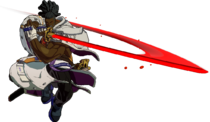
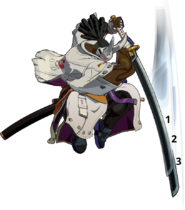
GGST_Nagoriyuki_5HComparison.png | | GGST_Nagoriyuki_5HComparison.png | Get really comfortable with the range of #3, as it's a vital tool | ||
</gallery> | </gallery> | ||
|-| | |-| | ||
| Line 208: | Line 208: | ||
* With each bar of Blood Gauge, range, damage and startup improve. | * With each bar of Blood Gauge, range, damage and startup improve. | ||
Horizontal slash forwards. At 1 and 2 blood bars, this outranges {{clr|3|f.S}}. At 2 it is especially useful, as it has the same startup as {{clr|3|f.S}} but with less disadvantage on block. This makes it an ideal tool to keep the opponent at bay, and an option they're going to have to respect due to its damage. | Horizontal slash forwards. At 1 and 2 blood bars, this outranges {{clr|3|f.S}}. At 2 it is especially useful, as it has the same startup as {{clr|3|f.S}} but with less disadvantage on block. This makes it an ideal tool to keep the opponent at bay at a blood level where your options are limited, and an option they're going to have to respect due to its damage and blood drain. A counterhit from this usually allows you to lead into {{clr|4|6H}} with the aid of Fukyo for good, stable damage. | ||
</div> | </div> | ||
Revision as of 18:46, 27 June 2021
Please feel free to make edits, but include edit summaries and sources where applicable.
Nagoriyuki is a mid-range, high damage powerhouse that can excel in extended pressure strings which threaten dangerous strike/throw mixups granted his limiting unique mechanic Blood Rage allows it. His above average special-to-special cancelable special moves have the downside of building up his unique resource the Blood Gauge. Upon filling up completely Nagoriyuki will be forced into the punishing Blood Rage state. Both Nagoriyuki's long range, disjointed HS normals and his command grab Bloodsucking Universe drain the Blood Gauge when they connect allowing players to keep the Blood Gauge under control and prevent their untimely demise to Blood Rage.
In order to excel with Nagoriyuki, one must maintain constant situational awareness and a keen internalization of the Blood Gauge's draining behavior. Players skilled enough to manage the Blood Gauge to just above two bars will be rewarded with disproportionately fast and long ranged enhanced HS normals while still having the leeway to utilize his stellar special moves.
![]() Nagoriyuki
Nagoriyuki ![]() Nagoriyuki (名残雪), classified as a One Shot type, is a noble vampire samurai whose vampiric blade delivers devastating blows.
Nagoriyuki (名残雪), classified as a One Shot type, is a noble vampire samurai whose vampiric blade delivers devastating blows.
- Blood Rage: The higher his Blood Gauge the better his HS normals are. In Blood Rage he gains ehanced S normals, near full screen HS normals, and a special Overdrive.
- Incredible Normals: His giant katana lets him control the screen from far ranges. Each button does a sizable chunk of damage on its own, being able to dissipate the opponent's health quickly.
- Special Cancels: Has the unique ability to cancel specials into themselves, allowing for monster conversions off the right counter-hit.
- Chip Damage: Nagoriyuki's S and HS normals on block deal chip damage increasing with higher Blood Gauge levels culminating in obscene chip damage in Blood Rage.
- Good Super Jump: Super jump covers more horizontal and vertical distance than most, if not all of the rest of the cast.
- Blood Rage: Entering Blood Rage forces a transformation attack that can be easily punished. It also takes away access to special moves and rapidly drains health over time.
- Limited Mobility: Does not have a normal dash, air-dash or double jump. Fukyo forces him to spend blood meter in order to approach quickly.
| Nagoriyuki |
|---|
Normal Moves
- Data in [ ] refers to Nagoriyuki in Blood Rage (BR).
- Some move properties change depending on how many bars of Blood Rage Nagoriyuki has built up. These values will be comma separated in increasing order.
5P
- Nagoriyuki's fastest normal
- Initial Proration for combo : 80%
This, along with 2P can be mashed to keep Blood Rage from activating. This allows for some sort of mindgame. Otherwise, this is a standard 5P and a serviceable anti-air in some scenarios, a strength accentuated by its ability to cancel into 6P.
5K
- Amazing poke for its speed.
- On hit, gatling 6H combos at 1 blood bar or higher.
- Initial Proration for combo : 90%
A fast button with respectable range. Juggles the opponent on aerial hit, which is useful for certain combos. Since this is 0 on block, you can often get away with doing two of these in a blockstring to further keep the opponent guessing.
c.S
- Does not interact with the Blood Gauge in any way.
- On hit, gatlings 5H, 2H and 6H combo at any Blood Gauge level. On block, gatlings 6H and 2S are a true blockstring at any Blood Gauge level and 5H and 2H are a true blockstring at more than 1 blood bar or more.
Nagoriyuki uses his shortsword for a quick slash. Lifts the opponent into the air on hit, which means you can often get multiple hits of these when hit at certain distances. This can also be used as an anti-air due to its speed, but getting within the activation range may prove to be a challenge. The fact that this move is +3 makes it an excellent button to use for either pressure or as a meaty, since all of Nago's options after this can lead to deadly damage on counterhit.
f.S
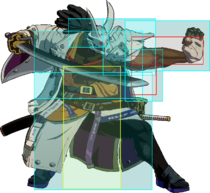
- GGST Nagoriyuki f.S.png
Neutral.
- GGST Nagoriyuki FS-Hitbox-1.jpg
With hurtboxes like these, Guilty Gear teaches us that it's actually fine to try and punch swords
- GGST Nagoriyuki FSS-Hitbox-1.jpg
- GGST Nagoriyuki FSSS-Hitbox-1.jpg
- One of Nagoriyuki's biggest pokes.
- Has follow-ups if you keep pressing
 .
. - Last follow-up knocks down.
- f.S and f.SS decreases Blood Gauge on hit (-7.2/300).
- Final hit of f.SSS decreases Blood Gauge on hit/block (OH -57.6/300, OB -7.2/300).
- Total Blood Gauge recovery for the full f.SSS on hit is (-72/300).
- Blood Gauge reduction applies as 3 separate instances each lasting 6 seconds.
Nagoriyuki first stabs, then slashes with his sword twice, advancing forward with every strike. The first and second hits can be special cancelled, but the third hit cannot.
- On hit, gatlings 5H and 2H combo at 2 blood bars and higher.
- Initial Proration for combo : 90%
f.SS is quite the valuable mixup tool. If nothing is pressed afterwards, Nagoriyuki will feint out the animation for f.SSS, which can easily keep the opponent on their toes and often let you get away with escaping a punish. What helps this is that there's a natural frame trap in between the two moves, which will hit an opponent mindlessly pressing buttons if you opt for f.SSS. However, since f.SSS is -25 on block, cannot be special cancelled, and leads to little reward on hit, it's best to use specials to punish instead. An example is Shizuriyuki, as it gives great reward on counterhit.
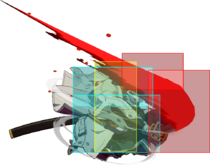
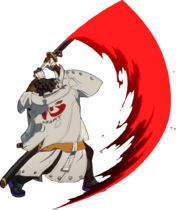
5H
- Massive reach and massive damage.
- Hits nearly fullscreen in Blood Rage.
- Decreases Blood Gauge on hit/block (OH -57.6/300, OB -7.2/300).
- Blood Gauge reduction applies over 6 seconds.
- With each bar of Blood Gauge, range, damage and startup improve.
Horizontal slash forwards. At 1 and 2 blood bars, this outranges f.S. At 2 it is especially useful, as it has the same startup as f.S but with less disadvantage on block. This makes it an ideal tool to keep the opponent at bay at a blood level where your options are limited, and an option they're going to have to respect due to its damage and blood drain. A counterhit from this usually allows you to lead into 6H with the aid of Fukyo for good, stable damage.
5D
- Does not reduce Blood Gauge on hit or block.
- j.S, j.HS, and j.D follow ups after the launch recover the Blood Gauge like normal.
- Initial Proration for combo : 80%
Nagoriyuki uses his long sword for a quick overhead. Charged 5D + ![]() will give you the cinematic launch. Even though Nagoriyuki lacks a double jump normally, you can double jump during the launch. j.HS drains 8 times as much of the blood gauge as j.S or j.D do, so route into as many as possible after the cinematic launch to maximize recovery of the Blood Gauge.
will give you the cinematic launch. Even though Nagoriyuki lacks a double jump normally, you can double jump during the launch. j.HS drains 8 times as much of the blood gauge as j.S or j.D do, so route into as many as possible after the cinematic launch to maximize recovery of the Blood Gauge.
6P
- One of Nago's main anti-airs.
- Invulnerability on upper half of body
- Initial Proration for combo : 90%
Much faster than 2H at the cost of being much smaller. Comes with the benefit of being a lot easier to use in a pinch, and actually having upper body invulnerability. This is your main tool to stop opponents from trying to engage with air attacks on reaction, though this can also be used to completely shut down certain offensive moves from the opponent during their pressure, such as Gio's Trovão or Sol Poente.
6K
- Initial Proration for combo : 90%
- Pulls back lower hurt box on frame 3 up until the first active frame
- Ground bounces on air hit, such as after c.S
Stomp on the ground. Main way to lead into 623H after a 5K. Due to pulling back the lower hurtbox this can be a rewarding move to throw out in anticipation of a low poke.
6H
- Can be used to OTG; opponent will tech instantly on connect.
- Decreases Blood Gauge on hit/block (OH -57.6/300, OB -7.2/300).
- Blood Gauge reduction applies over 6 seconds.
- With each bar of Blood Gauge, range, damage and startup improve.
A sword slash downwards. Due to its damage, knockdown, and the rate that it decreases the Blood Gauge, this is a good ender for certain combos. This is also an amazing button to catch people who try and mash during your pressure after certain buttons, as it leads to big damage off of a counterhit.
When ending a combo with 6H as an OTG, canceling into Fukyo (236K) results in favorable okizeme. If you're not in a distance to use c.S, you'll usually at least be within distance to use 2S.
2P
- Initial Proration for combo : 80%
Quick jab to mash out of pressured can be mashed to keep Blood Rage from activating
2K
- Initial Proration for combo : 70%
A simple kick. Its speed means that you can sometimes use this to open up an opponent expecting an aerial attack to hit them high, but this is otherwise your standard low option.
2S
- Decreases Blood Gauge on hit (-7.2/300).
- Blood Gauge reduction applies over 6 seconds.
- On hit, gatling 5H combos at 2 blood bars or higher.
- Initial Proration for combo : 90%
A slash low to the ground. Its relatively swift startup and seemingly low recovery means that you can throw this out for multiple uses, such as preventing the opponent from dashing in or trying to low profile your other moves.
2H
- Decreases Blood Gauge on hit/block (OH -57.6/300, OB -7.2/300).
- Blood Gauge reduction applies over 6 seconds.
- With each bar of Blood Gauge, range, damage and startup improve.
An absolutely massive anti-air that somehow gets even bigger during Blood Rage. A move this huge will teach you how to anti-air - just don't be too predictable with it, as the move has its fair share of weaknesses. Unlike 6P, this move has no upper body invulnerability, so a slow or improper read can make you eat a counter hit. The immense amount of recovery on this move also means your turn ends if it whiffs. However, a counterhit on this can lead to a good combo, and even if this move is blocked, the blockstun is usually enough to start your offense if you cancel into Fukyo.
2D
- Initial Proration for combo : 90%
Decent sweep. Pairs well with Nagoriyuki's great oki. On CH can convert into a c.S combo
j.P
- Quick air to air for stopping air approaches
- Initial Proration for combo : 80%
j.K
- Has a cross-up hitbox, which can be utilized very well by doing j.HS paired with drift RC
- Initial Proration for combo : 80%
j.S
Standard air-to-air poke. Gets longer in Blood Rage, making it less standard and more bloody.
- Decreases Blood Gauge on hit (-7.2/300).
- Blood Gauge reduction applies over 6 seconds.
- Initial Proration for combo : 80%
j.H
- A jumping with a massive vertical hitbox that gets even larger in Blood Rage.
- Decreases Blood Gauge on hit/block (OH -57.6/300, OB -7.2/300).
- Blood Gauge reduction applies over 6 seconds.
- With each bar of Blood Gauge, range, damage and startup improve.
- Initial Proration for combo : 80%
j.D
- Causes wall bounce on hit.
- Decreases Blood Gauge on hit (-7.2/300).
- Blood Gauge reduction applies over 6 seconds.
- Initial Proration for combo : 80%
A stab that hits diagonally upwards in front of Nagoriyuki. This also briefly stalls his air momentum on use. Can work both as an air-to-air for opponents above you, and sometimes as a way to alter the time when you hit the ground to confuse the opponent.
Universal Mechanics
Ground Throw
6D or 4D
- Forced prorate for combo : 50%
Nagoriyuki throws his opponent down to the ground like the trash they are. Like other characters' throws, this is useful for disrespecting pressure, and even moreso for a character whose moves are usually on the slower side.
Air Throw
j.6D or j.4D
- Useful tool to stop air approaches. Leads into OTG 6H.
- Forced prorate for combo : 50%
Special Moves
Zarameyuki / 粒雪
236S
- Mid-range poke
- Cancels single-hit projectiles.
- Increases Bloodgauge (+90/300).
- Persists if Nago gets hit.
- Can be cancellable into other specials.
- Initial Proration for combo : 80%
Nagoriyuki's only projectile tool. Cancelling it into 236K can end his recovery much quicker. This can help you advance towards your opponent more if you follow up with his dash. This special can give multiple mix-up routes when the opponent is blocking given it's advantage on block. For example, you can use c.5S if the opponent tries to mash your projectile or if they proceed to block, you can punish them with your command grab, (623P).
Fukyo / 不香
236K or 214K
- Command dash.
- 236K goes forwards, 214K goes backwards.
- Cancelable into itself with a
 or
or  input while holding
  .
. - Increases Bloodgauge(+43.2/300) over 3 seconds.
- Leaves Nagoriyuki with significant sliding momentum.
Fukyo is Nagoriyuki's compensation for dashing. Though, beware of using this too much because it increases your Bloodgauge. There are a few advantages when using it. Given it's same animation, you can trick the opponent to think you're either staying on the defense or engaging. Ex. You can bait a throw on recovery by going backwards, or condition the opponent to think you're moving backwards before moving forwards to open them up.
The forward momentum can be used to keep you in range for multiple c.S or for a followup 623P after c.S on block. The momentum can also be imparted to Nagoriyuki's jumps, giving him access to a slow but full screen gap close option. The momentum can be canceled at anytime after the dash recovery by walking in the opposite direction. This allows you to fine tune the range you want to end up at. Canceling the momentum after 214K is key to getting in the optimal range to continue pressure with Nagoriyuki's long range pokes.
Proper use of this move is one of the things that defines your pressure, so get comfortable with it.
Kamuriyuki / 冠雪
214H
- A lunging attack that can knock down the opponent on hit
- Can cancel into any special on hit or block
- Increases Bloodgauge (+90/300)
- Airborne 5~12F
This move may seem aggressive and looks rather unsafe if you were to use it on the opponent on block but given that both of you are set to neutral, you could actually attempt other moves such as a throw and other sorts of mind games on your opponent. This moves yields great reward on counterhit, giving it a good use when you feel an opponent is trying to press buttons during your pressure.
A knockdown from this usually allows you to hit the opponent with 6H, which can help deal with the cost to the Bloodgauge this move has.
Shizuriyuki / 垂雪
623H
- Anti-Air
- Second hit only comes out on hit or block.
- Increases Bloodgauge (+90/300)
- First hit can be cancelled into a special
The move you'll be using to extend your combos. The most notable one is 623H > 236K for Midscreen, and 623H(2) > 214H in the corner.
Bloodsucking Universe
623P
- Command grab.
- Greatly reduces the Blood Gauge (-280.8/300) and recovers some health on successful grab (15% of damage dealt rounded down).
- Removes all Blood Gauge increases/decreases before applying its own drain effect.
- Blood Gauge drain lasts 3 seconds.
- With Blood Gauge(100-200,200-300), damage increases.
- Forced Proration for combo : 50%
If this successfully hits, the Bloodgauge's progression is completely halted, no matter how fast it was previously filling (or emptying!). Useful for preventing Blood Rage at the last second.
The heal is based on the damage dealt. Considering the guts mechanic, this means the heal will have a greater effect when Nagoriyuki is at low health, the opponent is at high health, and/or the opponent has a low defense modifier.
Thanks to its speed, it's very easy to surprise the opponent with this after a few moves, such as a forward-moving Fukyo or the second hit of f.SS.
Given its dramatic decrease on your Blood Gauge, you can use Nagoriyuki's other specials more freely after it lands. Even if the Blood Gauge is empty the drain effect will still last its full 3 second duration. For instance, if you land Bloodsucking Universe while having a low Blood Gauge and follow up with Fukyo(236K) to pressure the opponent's wakeup, the Blood Gauge cost of Fukyo will be negated by the residual drain effect.
A primary component of Nagoriyuki's offense. Use this move to punish overly respectful blocking and to condition the opponent to challenge your blockstrings.
Blood Rage
- Activation does not break the wall. If opponent is in wall splat, will simply knock them down.
- S and HS moves are heavily buffed.
- Grants access to a powerful Overdrive: Zansetsu.
- Disables special moves.
- Faultless defense(FD) can prevent the activation as long as you have tension.
Activation happens when the gauge gets full, deactivation happens when you use Zansetsu or after enough time passes. You will steadily lose life while in this state, up to half your health.
The activation has a hitbox that does no damage. If it hits, the opponent is launched far away and forced into a knockdown. If blocked, the opponent is put into a lengthy guard break animation and pushed back a fair distance if not in the corner. These can both help to make the recovery of the activation safer, but this isn't perfect. If the opponent blocks this while their back is in the corner, neither of you will be pushed away, which gives them a free punish. If this whiffs, disconnect from the match and blame the lobby system as an excuse: you are dead.
Overdrives
Wasureyuki / 忘れ雪
632146S
- Enters a cinematic if it hits up close.
- Reduces Blood Gauge (-194.4/300).
- Blood Gauge reduction applies over 6 seconds.
- If the opponent is hit at about the tip of the blade, it will launch them into the air, but will not cause the consecutive slashes and instead grant a knockdown. However, you can still extend after they fall to the ground, such as by using f.SSS.
Nagoriyuki does a swift, large slash that lifts the opponent up into a series of further slashes. The Blood Gauge will be temporarily paused during the cinematic but will continue increasing or decreasing after the cinematic ends. The Blood Gauge reduction will only be applied if the final blow of the cinematic lands.
Zansetsu / 残雪
632146H (while in Blood Rage)
- Hits fullscreen.
- Deals MASSIVE damage raw, and still does plenty after a scaled combo.
- Exits Blood Rage mode on use(on blocked/on hit).
When you enter Blood Rage mode, Zansetsu is the only overdrive move you can use. It's generally used quickly as possible to avoid your health from drastically decreasing overtime due to Blood Rage. Using it raw can be risky as you have a lot of recovery frames after activating. Some characters can run up to you in time.
| 95% complete | ||
|
|
| Page | Status | % |
|---|---|---|
| Overview | Complete | 20/20 |
| Combos | Complete | 10/10 |
| Strategy | Could use some video examples/tutorials | 17/20 |
| Frame Data | Missing some prorate info (initial vs forced, empty fields should probably be listed as N/A or None instead of being empty) | 48/50 |
External References
Guilty Gear Strive Nagoriyuki Introduction( https://www.guiltygear.com/ggst/en/character/nag/ )
Guilty Gear Strive Nagoriyuki Starter Guide ( https://youtu.be/zfTyAZkVgQM )
Guilty Gear Strive Nagoriyuki Hitbox movies( https://www.youtube.com/watch?v=zD5swjW178c )

