No edit summary |
No edit summary |
||
| Line 7: | Line 7: | ||
An explanation of how I personally play Anji in Guilty Gear <span style="white-space: nowrap;">-Strive-</span>. | An explanation of how I personally play Anji in Guilty Gear <span style="white-space: nowrap;">-Strive-</span>. | ||
Of course, many other valid (and better) playstyles exist, and this is just one interpretation of how to play the character. | Of course, many other valid (and better) playstyles exist, and this is just one interpretation of how to play the character. | ||
<div>{{ TOC limit|3 }}</div> | <div>{{ TOC limit|3 }}</div> | ||
| Line 57: | Line 55: | ||
|} | |} | ||
--> | --> | ||
== Neutral, and getting the opponent to play it == | == Neutral, and getting the opponent to play it == | ||
| Line 295: | Line 273: | ||
If you do manage to get the butterfly out, the two hits can enable some huge staggers that let you back into close range to restart pressure. | If you do manage to get the butterfly out, the two hits can enable some huge staggers that let you back into close range to restart pressure. | ||
== Miscellaneous == | |||
=== How autoguard works === | |||
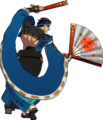
Anji enters a twirling animation during Suigetsu no Hakobi (“Spin”) and the held versions of Fuujin and Kou. | |||
During this time, getting hit by any strike or projectile will activate autoguard. It grants no protection from throws or Burst. | |||
<gallery widths="128px" mode="nolines" style="display: flex; align-items: flex-end; flex-wrap: wrap;"> | |||
GGST_Anji_Mito_236K_1.png | Spin, invuln {{#cargo_query:tables=MoveData_GGST|fields=invuln|where=chara="Anji Mito" and name="Suigetsu no Hakobi"|format=list}} | |||
GGST_Anji_Mito_236H.png | Fuujin, invuln {{#cargo_query:tables=MoveData_GGST|fields=invuln|where=chara="Anji Mito" and name="Fuujin"|format=list}} | |||
GGST_Anji_Mito_236S.png | Kou, same invuln as Fuujin | |||
GGST_Anji_Mito_236K_2.png | Autoguard activation | |||
</gallery> | |||
On a successful autoguard activation, Anji enters a fully invulnerable animation for 38 frames. | |||
This animation has no recovery and Anji is able to block or perform any action on the first frame after it ends. | |||
If the activating move was not a projectile, the opponent is also frozen for 28 frames. | |||
While this does give the opponent an effective frame advantage of +10, most or all of this time will be spent on the remaining active and recovery frames of their attack. | |||
However, the opponent can PRC at any point after the autoguard activation to maintain frame advantage. | |||
Anji cannot cancel his own animation in any way, but will still remain invulnerable for the full duration. | |||
Revision as of 14:06, 5 July 2022
An explanation of how I personally play Anji in Guilty Gear -Strive-. Of course, many other valid (and better) playstyles exist, and this is just one interpretation of how to play the character.
Neutral, and getting the opponent to play it
The primary goal of neutral is to find a small foothold from which you can swing the game state from “roughly equal” to “marginally in your favor”. Only once you've found that foothold (e.g. landing a poke or whiff punish) have you earned the chance to begin your pressure or combo. Overextending and fishing for high-reward combo starters is an easy way to give your opponent undeserved opportunities.
When characters' effective ranges overlap, it creates RPS-like “footsies” situations. As described in the three-structure concept and Satsu's guide to neutral, each player is generally playing to one of three objectives, explained in the sections below. None of these three playstyles are complete on their own, and are meant to be switched between frequently to identify and respond to the opponent's intentions.
Part I: Playing preemptively
Preemptive play involves the use of ranged pokes to control space between you and the opponent.
By placing fast and safe pokes in front of you, you make yourself likely to stuff out any sudden approaches that would otherwise be difficult to stop purely on reaction. The intent is not to hit the opponent directly, but rather to cover where the opponent could hypothetically move in the time it would take to react.
Controlling space this way creates the expectation that if the opponent enters that area recklessly, they'll get hit. In response, an opponent who becomes hesitant to run at you may start trying to bait and punish your pokes. You can deal with this by taking advantage of the space they respect and switching to proactive play.
What this means for Anji
- Anji's 5K should be your go-to button for controlling space with a good tradeoff between range, speed, and safety. Some approach options will low-profile it, however.
- 2K and 2S are alternatives to 5K that can hedge against low-profile approaches but are shorter and slower respectively.
- 2P has the least commitment but also less range. It has its use against characters that stick to closer ranges before they run in.

5K, frame 8 (recovery: 9, onBlock: -2)

2K, frame 7 (recovery: 11, onBlock: -2)

2S, frame 10 (recovery: 16, onBlock: -6)

2P, frame 5 (recovery: 10, onBlock: -2)


Part II: Playing reactively
Reactive play creates opportunities to whiff punish, such as by walking in and out of the opponent's range to bait pokes.
An opponent wanting to control space will attempt to enforce that control when they think you're going to challenge it. By tiptoeing their max range, you keep things ambiguous for them, giving them the chance to mess up and whiff something.
It's easier to react and punish when you're consciously looking for certain responses, but in doing so you open yourself up to unexpected approaches. This can be mitigated using preemptive play to make the opponent hesitant to approach when you're being passive.
What this means for Anji
- Anji's 2D grants hard knockdown or, on counterhit at closer ranges, allows for a combo.
- 6P can counterpoke moves that would be otherwise difficult to punish due to long range and/or low recovery.
- f.S has some extra reach and leads into Fuujin on hit or block (except when f.S clips an extended hurtbox).
- Fuujin is a good gap closer that's rewarding on counterhit at all but the furthest ranges.

2D, frame 10 (recovery: 22, onBlock: -11)

6P, frame 10 (recovery: 25, onBlock: -17)

f.S, frame 11 (recovery: 21, onBlock: -9)
![Fuujin, frame 16 [32] (recovery: 21, onBlock: -8 [-6])](/wiki/images/thumb/1/12/GGST_Anji_Mito_Fuujin_Hitbox.png/128px-GGST_Anji_Mito_Fuujin_Hitbox.png)
Fuujin, frame 16 [32] (recovery: 21, onBlock: -8 [-6])


![Fuujin, frame 16 [32] (recovery: 21, onBlock: -8 [-6])](/w/File:GGST_Anji_Mito_Fuujin_Hitbox.png)
Part III: Playing proactively
Proactive play capitalizes on the space a passive opponent has conceded to allow for calculated aggression.
An opponent wanting to whiff punish tends to focus on reacting to what they expect you to do rather than exerting control over the space in front of them. You can take advantage of this behaviour to get away with things you otherwise wouldn't, like suddenly dashing in while they're anticipating a defensive poke.
If your approaches become predictable, the opponent will likely redirect their attention towards keeping you out with preemptive pokes. The threat of aggression makes reactive play stronger in response by giving your baits more leverage, making them more likely to swing with something punishable on reaction.
What this means for Anji
- Dashing before using established pokes such as 5K allows you to claim more space while throwing off the opponent's positioning.
- Low-profile counterpokes like 2D and 6P can beat out some attempts to stuff your approach.
- Once the opponent becomes unwilling to take initiative, you can mix in harder callouts like run-up c.S or throw.
5K, frame 8 (recovery: 9, onBlock: -2)
2D, frame 10 (recovery: 22, onBlock: -11)
6P, frame 10 (recovery: 25, onBlock: -17)

c.S, frame 7 (recovery: 11, onBlock: +1)

Throw, frame 2 (recovery: 38)


Keeping the opponent on the ground
The opponent is under no obligation to actually play grounded footsies with you; they must be conditioned to do so by presenting a reliable anti-air game. Jumping in or airdashing can be seen as “skipping” neutral by forcefully testing a player's readiness to react and punish.
While jumping in is risky, the notion that nobody should ever do so is incorrect. Discouraging the opponent from jumping lets you focus more on footsies and other neutral interactions. However, by writing off the possibility of an aerial approach too much, you render yourself more susceptible to them. By developing solid anti-air reactions, you can minimize the amount of brainpower required to remain aware of jump-ins.
What this means for Anji
- 5P and retreating j.K are a safe bet in most situations.
- j.D is a strong air-to-air that halts jump momentum, letting Anji land quickly even when used rising.
- 6P and Kou carry a big punish window on whiff, but can beat out big airborne attacks that would be otherwise troublesome.
- Air throw is especially good against ambiguous cross-ups and approaches from above.

5P, frame 6 (recovery: 9)

j.K, frame 6 (recovery: 15)

j.D, frame 8 (recovery: 18)
6P, frame 10 (recovery: 25)
![Kou, frame 12 [28] (recovery: 14)](/wiki/images/thumb/6/64/GGST_Anji_Mito_Kou_2_Hitbox.png/128px-GGST_Anji_Mito_Kou_2_Hitbox.png)
Kou, frame 12 [28] (recovery: 14)

Air throw


![Kou, frame 12 [28] (recovery: 14)](/w/File:GGST_Anji_Mito_Kou_2_Hitbox.png)

Autoguard in neutral
Autoguard (see how autoguard works) introduces an additional dynamic to neutral by letting Anji close gaps and create advantage after correctly reading the opponent's attempts to poke him out. Proper use of autoguard is essential for finding your way in against characters that dominate neutral with long-range buttons.
- Advancing with Spin will activate autoguard against preemptive pokes, although depending on the move, Anji may not actually have frame advantage. Study what your punishes are after autoguard in the matchup.
- Autoguard can also hedge against proactive approaches, but Anji risks being counterhit if the opponent reaches him during the startup. Be aware of mid-range burst options and establish preemptive space control to discourage their use.
- The duration of Spin can be varied to throw off the opponent's timing, such as holding Spin to catch delayed pokes, throwing them after a short Spin, etc.
Using Spin this way will (hopefully) encourage opponents to take on a more reactive playstyle, as Anji remains open to the opponent running in for a free throw or other punish.
Once the opponent respects Spin and is looking out for it, Anji can start mixing in fully or partially held Fuujin to open them up. This relies on the fact that the startup animations of Spin and held Fuujin are indistinguishable until it's too late to reliably react and punish both.
While held Kou also has autoguard, these options' preemptive nature doesn't lend itself well to how punishable Kou is on whiff. However, if an opponent is trying to avoid Spin/held Fuujin altogether by jumping over it, Kou may be an option worth representing to discourage that.
All about block pressure
Block pressure revolves around instilling fear of certain options, and then taking advantage of that fear to get away with pressure resets and aggressive mixups.
It can be helpful to think of pressure and frame advantage in terms of “turns”.
- When it's your turn, it means you have access to more options and/or more time than your opponent, so you generally get to decide what happens next. You extend your turn using plus frames (largely from gatlings or other cancels) to maintain the upper hand while restricting the opponent's ability to do something about it.
- Your turn ends when you use a move without cancellable recovery (such as a special move) that forces you to remain minus on block. In this case, you want to create as much space between you and the opponent as possible to return to neutral; otherwise, the opponent may be able to punish and begin their turn immediately.
However, if you just do tight blockstrings and frame traps every time, the opponent has no incentive to do anything except block until your turn ends naturally. For pressure to actually be scary, you need to implement resets and mixups to keep them on their toes and encourage them to challenge apparent gaps in your pressure.
- Reset
- Taking your turn back in a situation where it should have ended, often by capitalizing on your opponent's hesitation to get away with something slower but more advantageous.
- Frame trap
- A small opening between two blocked moves that grants enough time for the opponent to begin an attack, but not long enough for their attack to come out, getting you a counterhit. Punishes opponents for trying to interrupt and teaches them to hold your pressure and stay blocking, enabling you to reset.
- Stagger
- Uses the threat of a frame trap to recover from a blocked attack, dash in, and use another attack at closer range. If the opponent respects your frame traps, they are less likely to use abare options to interrupt your staggers.
- Tick throw
- Similar idea to a stagger but with a throw instead of another button. Calls out opponents who are content to stay blocking your frame traps and staggers, goading them into pressing buttons on defense.
Starting pressure off of far pokes
The opponent blocking a longer poke is not necessarily a rewarding outcome for Anji, and requires some additional effort to convert into something favourable.
- 5K on block opens up the most options for Anji when in range. 2D and 6H gatlings threaten big counterhits that can let you get away with transitioning to close-range pressure once the opponent respects them.
- Further ranges offer more limited options and may be worth just ending your turn and noting how the opponent responds. Once you've established intent to return to neutral, or if the opponent tries to punish or force their own turn afterwards, you can start cancelling your longer pokes like f.S, 2S, and 2D into Fuujin or Spin to take advantage.

5K, frame 8 (onBlock: -2)

f.S, frame 11 (onBlock: -9)

2S, frame 10 (onBlock: -6)

2D, frame 10 (onBlock: -11)


Starting pressure off of close hits
Once you've closed the gap between you and the opponent, Anji is finally able to apply his strongest block pressure.
The key for effective pressure, as mentioned above, is leaving intentional openings to bait your opponent into trying to interrupt your pressure. Without the threat of staggers and tick throws, there is no incentive to mash out of gaps and the opponent can comfortably hold your blockstrings and frame traps until your turn ends naturally.
- c.S is Anji's premier block pressure tool. The threat of rewarding counterhits such as 2S, 5H, and 2H makes preemptive mashing a risky endeavour for the opponent, allowing you to go to for tight tick throws and staggers.
- 2K and 2P are also effective for tick throws and staggers, due to the threat of 2D and 6H respectively. Solid options when you're not quite in c.S proximity.
c.S, frame 7 (onBlock: +1)

2K, frame 7 (onBlock: -2)

2P, frame 5 (onBlock: -2)
Throw, frame 2


6H with Spin and Fuujin
6H acts as a frame trap out of 2P, 2K, and 5K that advances towards the opponent with each hit. It's an important option to represent, as its existence makes 2P staggers scarier for the opponent to challenge.
A useful property of 6H is its ability to be cancelled into a special move after any of the hits connect or are blocked.
- The gaps between the three hits of 6H are 3 and 4 frames respectively, frame trapping many abare options. Fuujin also acts as a frame trap immediately after any of the hits.
- Varying the hold duration makes Fuujin and Spin tricky to reliably hedge against. The threat of being counterhit by 6H or Fuujin allows for some greedier options like throwing after a short Spin or holding Spin to catch delayed attacks.

6H, frame 12 (onBlock: -8)
![Fuujin, frame 16 [32]](/wiki/images/thumb/9/93/GGST_Anji_Mito_236H.png/128px-GGST_Anji_Mito_236H.png)
Fuujin, frame 16 [32]

Spin, Total 34~50 frames

![Fuujin, frame 16 [32]](/w/File:GGST_Anji_Mito_236H.png)

Fuujin on block, aka Chance Time
Blocking Fuujin puts both players into a pseudo-RPS situation where every one of Anji's options is technically punishable or interruptible on a correct response from the opponent, but in order to do so the opponent must leave themselves susceptible to the other options. This interaction carries some risk but is necessary to represent Fuujin as a consistent threat and give Anji the leeway to reset and mix up elsewhere.
Fuujin, -8 [-6]

Nagiha, -7

Rin, -9

Shin, +7

Hop


By effectively applying the threat of Fuujin and its associated options, you can force your opponent to have to guess more times than you do, skewing the risk-reward in your favour.
Will you use Fuujin at all?
- Cancelling laggier moves like f.S, 5H, 6H, 2D, and 6P into Fuujin can stuff out opponents who show aggression or intent to punish after blocking.
- Once the opponent respects the threat of Fuujin and remains passive after blocking an unsafe normal, that's a sign that you can start resetting pressure or just return to neutral.
Will you use a followup?
- Fuujin with no followup is reversal-safe and demands respect once Nagiha is an established threat, letting you end your turn safely or go for staggers/resets. This should be your primary option to gather info about the opponent's defensive habits.
- Nagiha is your most reliable followup, being the safest option and a true blockstring if done immediately. Vary your timing to catch attempts to interrupt the other followups, punish empty Fuujin, jump, or block Rin.
- Rin is an advancing overhead that calls out opponents focusing on empty Fuujin and Nagiha. Less safe than frame advantage indicates due to low pushback.
- Shin is interruptible on reaction but lets you restart your turn if the opponent is preoccupied with blocking the other options.
- Hop is typically not worth the risk in pressure; simply dashing in after empty Fuujin opens up more options for less commitment.
Will the followup come early or after Fuujin?
- Kara cancelled Fuujin followups create a large gap that the opponent can interrupt, though they will have to do so basically on prediction. The main reason to use them in pressure is to trip up opponents that base their reaction cues on the big green “I am about to use a followup” indicator.
- Namely, kara cancelling makes Rin, Shin, and Hop more viable against opponents that are good at dealing with post-Fuujin followups. Conversely, kara Nagiha becomes a riskier option because the momentum reduces the pushback that otherwise makes it relatively safe.
Resetting with Shitsu
Once heavy conditioning and respect have been established, you can start to include Shitsu as a greedy pressure reset in situations where the opponent is expecting Fuujin. Shitsu is punishable on reaction, so first consider your spacing and whether the opponent has a low-profile or burst option that can reach you.
If you do manage to get the butterfly out, the two hits can enable some huge staggers that let you back into close range to restart pressure.
Miscellaneous
How autoguard works
Anji enters a twirling animation during Suigetsu no Hakobi (“Spin”) and the held versions of Fuujin and Kou. During this time, getting hit by any strike or projectile will activate autoguard. It grants no protection from throws or Burst.
Spin, invuln 10-25~41 Guard Point
Fuujin, invuln [10-25 Guard Point]

Kou, same invuln as Fuujin

Autoguard activation


On a successful autoguard activation, Anji enters a fully invulnerable animation for 38 frames. This animation has no recovery and Anji is able to block or perform any action on the first frame after it ends.
If the activating move was not a projectile, the opponent is also frozen for 28 frames. While this does give the opponent an effective frame advantage of +10, most or all of this time will be spent on the remaining active and recovery frames of their attack. However, the opponent can PRC at any point after the autoguard activation to maintain frame advantage. Anji cannot cancel his own animation in any way, but will still remain invulnerable for the full duration.