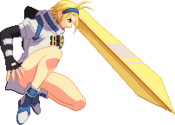
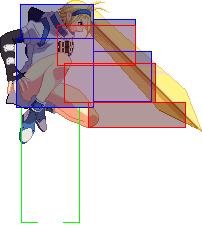
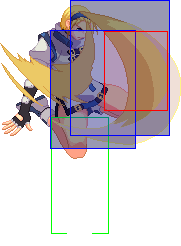
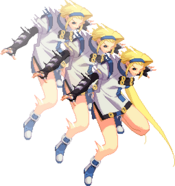
Pivotkraner (talk | contribs) m (→Silent Force) |
m (→Navigation) |
||
| (22 intermediate revisions by 3 users not shown) | |||
| Line 1: | Line 1: | ||
{{InvisibleHeader}}{{NavTabs|game=GGReload|chara=Millia Rage}} | |||
{| class="wikitable" style="float:right; margin-left: 10px; width:400px" | {| class="wikitable" style="float:right; margin-left: 10px; width:400px" | ||
|- | |- | ||
| Line 49: | Line 50: | ||
==== Tandem Top ==== | ==== Tandem Top ==== | ||
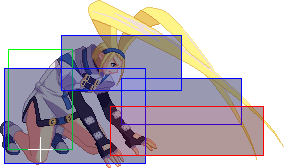
:The other reason Millia is infamous for. '''H Tandem Top''' is a static disc-shaped projectile with lots of active frames that is placed on top of or near the opponent during their wake-up and causes long blockstun in addition to masking your mixups, giving you free reign to apply your powerful okizeme and loop the situation over and over. | :The other, main reason Millia is infamous for. '''H Tandem Top''' is a static disc-shaped projectile with lots of active frames that is placed on top of or near the opponent during their wake-up and causes long blockstun in addition to masking your mixups, giving you free reign to apply your powerful okizeme and loop the situation over and over. | ||
{{#lst:GGReload/Millia Rage/Data|Links}} | |||
==Normals== | ==Normals== | ||
====== ====== | ====== ====== | ||
{{MoveData | {{MoveData | ||
|name=5P | |name=5P | ||
|image=GGAC_Millia_5P.png |caption= | |image=GGAC_Millia_5P.png |caption= | ||
<div class="mw-collapsible mw-collapsed"><br> | <div class="mw-collapsible mw-collapsed" data-expandtext="Show hitboxes" data-collapsetext="Hide hitboxes"><br> | ||
[[File:GGReload_Millia_5P.png|center]] | [[File:GGReload_Millia_5P.png|center]] | ||
</div> | </div> | ||
| Line 67: | Line 68: | ||
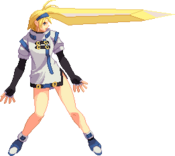
{{Description|7|text= | {{Description|7|text= | ||
Millia jabs with her hair. Jump-cancellable on hit or block. One of her best anti airs: as it has remarkably fast startup and recovery, it can be very versatile and is a very useful tool in preemptively checking your opponent's air approaches. Will whiff on crouching opponents. | Millia jabs with her hair. Jump-cancellable on hit or block. One of her best anti airs: as it has remarkably fast startup and recovery, it can be very versatile and is a very useful tool in preemptively checking your opponent's air approaches. Will whiff on crouching opponents. | ||
*[[GGReload/Millia_Rage/Frame_Data#Gatling_Table|Gatling Options]]: 5P, 2P, 6P, 5K, 2K, c.S, f.S, 2S, 5H, 2H, 6H, 5D, 2D | |||
}} | }} | ||
}} | }} | ||
| Line 74: | Line 77: | ||
|name=5K | |name=5K | ||
|image=GGAC_Millia_5K.png |caption= | |image=GGAC_Millia_5K.png |caption= | ||
<div class="mw-collapsible mw-collapsed"><br> | <div class="mw-collapsible mw-collapsed" data-expandtext="Show hitboxes" data-collapsetext="Hide hitboxes"><br> | ||
[[File:GGReload_Millia_5K-1.png|center]] | [[File:GGReload_Millia_5K-1.png|center]] | ||
Frame 5 | Frame 5 | ||
| Line 90: | Line 93: | ||
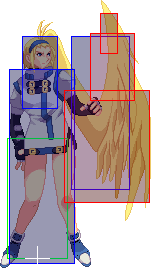
A kick upward. Primarily used for pressure for 2K>5K>2K string. This also gatlings into 6K and 2S for a high/low. Also jump cancellable on both hit and block; as such, it allows for a myriad of pressure options, such as an even faster overhead followup with TKBM. | A kick upward. Primarily used for pressure for 2K>5K>2K string. This also gatlings into 6K and 2S for a high/low. Also jump cancellable on both hit and block; as such, it allows for a myriad of pressure options, such as an even faster overhead followup with TKBM. | ||
Attack is fully extended on 7F. | *Attack is fully extended on 7F | ||
*[[GGReload/Millia_Rage/Frame_Data#Gatling_Table|Gatling Options]]: 6P, 5K, 2K, c.S, f.S, 2S, 5H, 2H, 5D, 2D | |||
}} | }} | ||
}} | }} | ||
| Line 98: | Line 102: | ||
|name=c.S | |name=c.S | ||
|image=GGAC_Millia_cS.png |caption= | |image=GGAC_Millia_cS.png |caption= | ||
<div class="mw-collapsible mw-collapsed"><br> | <div class="mw-collapsible mw-collapsed" data-expandtext="Show hitboxes" data-collapsetext="Hide hitboxes"><br> | ||
[[File:GGReload_Millia_cS-1.png|center]] | [[File:GGReload_Millia_cS-1.png|center]] | ||
Frames 1~3 | Frames 1~3 | ||
| Line 111: | Line 115: | ||
{{Description|7|text= | {{Description|7|text= | ||
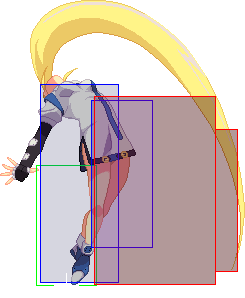
Situational anti-air to use if you are under your opponent as it goes straight, can be used to stop the opponent from jumping out of the corner. Jump cancellable on hit, which leads to some staple combos, and on block, which leads to mixups. | Situational anti-air to use if you are under your opponent as it goes straight, can be used to stop the opponent from jumping out of the corner. Jump cancellable on hit, which leads to some staple combos, and on block, which leads to mixups. | ||
*[[GGReload/Millia_Rage/Frame_Data#Gatling_Table|Gatling Options]]: 6P, f.S, 2S, 5H, 2H, 5D | |||
}} | }} | ||
}} | }} | ||
| Line 118: | Line 124: | ||
|name=f.S | |name=f.S | ||
|image=GGAC_Millia_fS.png |caption= | |image=GGAC_Millia_fS.png |caption= | ||
<div class="mw-collapsible mw-collapsed"><br> | <div class="mw-collapsible mw-collapsed" data-expandtext="Show hitboxes" data-collapsetext="Hide hitboxes"><br> | ||
[[File:GGReload_Millia_fS.png|center]] | [[File:GGReload_Millia_fS.png|center]] | ||
</div> | </div> | ||
| Line 128: | Line 134: | ||
{{Description|7|text= | {{Description|7|text= | ||
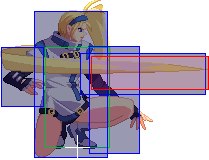
Millia's main ground to ground poke. Gatlings into 5H which goes to 2D. Doesn't confirm into knockdown at far range or launch, but can go into Emerald Rain. Also a staple in f.S>2H relaunch combos. | Millia's main ground to ground poke. Gatlings into 5H which goes to 2D. Doesn't confirm into knockdown at far range or launch, but can go into Emerald Rain. Also a staple in f.S>2H relaunch combos. | ||
*[[GGReload/Millia_Rage/Frame_Data#Gatling_Table|Gatling Options]]: 2S, 5H, 2H, 5D | |||
}} | }} | ||
}} | }} | ||
| Line 135: | Line 143: | ||
|name=5H | |name=5H | ||
|image=GGAC_Millia_5H.png |caption= | |image=GGAC_Millia_5H.png |caption= | ||
<div class="mw-collapsible mw-collapsed"><br> | <div class="mw-collapsible mw-collapsed" data-expandtext="Show hitboxes" data-collapsetext="Hide hitboxes"><br> | ||
[[File:GGReload_Millia_5H.png|center]] | [[File:GGReload_Millia_5H.png|center]] | ||
</div> | </div> | ||
| Line 145: | Line 153: | ||
{{Description|7|text= | {{Description|7|text= | ||
Slightly faster than f.S, but mostly combo filler. | Slightly faster than f.S, but mostly combo filler. | ||
*[[GGReload/Millia_Rage/Frame_Data#Gatling_Table|Gatling Options]]: 5D, 2D | |||
}} | }} | ||
}} | }} | ||
| Line 152: | Line 162: | ||
|name=6P | |name=6P | ||
|image=GGAC_Millia_6P.png |caption= | |image=GGAC_Millia_6P.png |caption= | ||
<div class="mw-collapsible mw-collapsed"><br> | <div class="mw-collapsible mw-collapsed" data-expandtext="Show hitboxes" data-collapsetext="Hide hitboxes"><br> | ||
[[File:GGReload_Millia_6P-1.png|center]] | [[File:GGReload_Millia_6P-1.png|center]] | ||
Frames 7~16 | Frames 7~16 | ||
| Line 166: | Line 176: | ||
One of her main anti-airs with upper body invulnerability with a good sized hitbox. Staggers on counter-hit on ground making it not bad for ground to ground. Gatlings into 6H, but only combos on hit, but it still makes for a decent frame trap otherwise. Horrible on whiff so be careful if the opponent still has double-jump or movement options. | One of her main anti-airs with upper body invulnerability with a good sized hitbox. Staggers on counter-hit on ground making it not bad for ground to ground. Gatlings into 6H, but only combos on hit, but it still makes for a decent frame trap otherwise. Horrible on whiff so be careful if the opponent still has double-jump or movement options. | ||
Upper body | *Upper body invul 1~12F | ||
*Staggers opponent on ground CH (Max 39F) | |||
*[[GGReload/Millia_Rage/Frame_Data#Gatling_Table|Gatling Options]]: c.S, f.S, 2S, 5H, 2H, 6H, 5D | |||
}} | }} | ||
}} | }} | ||
| Line 174: | Line 186: | ||
|name=6K | |name=6K | ||
|image=GGAC_Millia_6K.png |caption= | |image=GGAC_Millia_6K.png |caption= | ||
<div class="mw-collapsible mw-collapsed"><br> | <div class="mw-collapsible mw-collapsed" data-expandtext="Show hitboxes" data-collapsetext="Hide hitboxes"><br> | ||
[[File:GGReload_Millia_6K-1.png|center]] | [[File:GGReload_Millia_6K-1.png|center]] | ||
Frames 1~2 | Frames 1~2 | ||
| Line 188: | Line 200: | ||
One of your main overheads. Lower body invul from frame 1. If blocked you can still keep pressure up as it is +3. Has a 3F link into 5K on crouching opponents, allowing for conversions into 2D or Emerald Rain at closer ranges. | One of your main overheads. Lower body invul from frame 1. If blocked you can still keep pressure up as it is +3. Has a 3F link into 5K on crouching opponents, allowing for conversions into 2D or Emerald Rain at closer ranges. | ||
1-18F Lower body invul | *1-18F Lower body invul | ||
*19-20F Foot invul | |||
*Initial proration 80% | |||
*Hits crouching opponents on 20F (tested on Sol) | |||
}} | }} | ||
}} | }} | ||
| Line 196: | Line 211: | ||
|name=6H | |name=6H | ||
|image=GGAC_Millia_6H.png |caption= | |image=GGAC_Millia_6H.png |caption= | ||
<div class="mw-collapsible mw-collapsed"><br> | <div class="mw-collapsible mw-collapsed" data-expandtext="Show hitboxes" data-collapsetext="Hide hitboxes"><br> | ||
[[File:GGReload_Millia_6H.png|center]] | [[File:GGReload_Millia_6H.png|center]] | ||
</div> | </div> | ||
| Line 207: | Line 222: | ||
Slow startup, bad on whiff. Nevertheless, it shouldn't be ignored, as it still has its uses as a long range poke, as long as care is taken as to not make it whiff. Knocks opponent down on hit. Special cancellable. Can stop jumpouts, but is mainly used to score a knockdown from corner carry combos. | Slow startup, bad on whiff. Nevertheless, it shouldn't be ignored, as it still has its uses as a long range poke, as long as care is taken as to not make it whiff. Knocks opponent down on hit. Special cancellable. Can stop jumpouts, but is mainly used to score a knockdown from corner carry combos. | ||
Slams down and knocks down opponent on hit | *Slams down and knocks down opponent on hit | ||
}} | }} | ||
}} | }} | ||
| Line 215: | Line 230: | ||
|name=5D | |name=5D | ||
|image=GGAC_Millia_5D.png |caption= | |image=GGAC_Millia_5D.png |caption= | ||
<div class="mw-collapsible mw-collapsed"><br> | <div class="mw-collapsible mw-collapsed" data-expandtext="Show hitboxes" data-collapsetext="Hide hitboxes"><br> | ||
[[File:GGReload_Millia_5D.png|center]] | [[File:GGReload_Millia_5D.png|center]] | ||
</div> | </div> | ||
| Line 226: | Line 241: | ||
Universal overhead. Rarely used as an overhead option. | Universal overhead. Rarely used as an overhead option. | ||
Low profile 8~23F | *Low profile 8~23F | ||
*Foot invul 30~41F | |||
*Millia is in CH state during entire move | |||
}} | }} | ||
}} | }} | ||
| Line 234: | Line 251: | ||
|name=2P | |name=2P | ||
|image=GGAC_Millia_2P.png |caption= | |image=GGAC_Millia_2P.png |caption= | ||
<div class="mw-collapsible mw-collapsed"><br> | <div class="mw-collapsible mw-collapsed" data-expandtext="Show hitboxes" data-collapsetext="Hide hitboxes"><br> | ||
[[File:GGReload_Millia_2P.png|center]] | [[File:GGReload_Millia_2P.png|center]] | ||
</div> | </div> | ||
| Line 245: | Line 262: | ||
Shorter range than 2K. Hits mid and is primarily used after throw for burst baiting. Good for tick throwing as it is 1F more positive on block than 2K. Gatlings into 6P for a great frame trap as 6P staggers on counter-hit which will then allow it to combo into 6H for a Secret Garden setup. | Shorter range than 2K. Hits mid and is primarily used after throw for burst baiting. Good for tick throwing as it is 1F more positive on block than 2K. Gatlings into 6P for a great frame trap as 6P staggers on counter-hit which will then allow it to combo into 6H for a Secret Garden setup. | ||
Initial prorate 85%. | *Initial prorate 85% | ||
*[[GGReload/Millia_Rage/Frame_Data#Gatling_Table|Gatling Options]]: 5P, 2P, 6P, 5K, 2K, c.S, f.S, 2S, 5H, 2H, 5D, 2D | |||
}} | }} | ||
}} | }} | ||
| Line 253: | Line 271: | ||
|name=2K | |name=2K | ||
|image=GGAC_Millia_2K.png |caption= | |image=GGAC_Millia_2K.png |caption= | ||
<div class="mw-collapsible mw-collapsed"><br> | <div class="mw-collapsible mw-collapsed" data-expandtext="Show hitboxes" data-collapsetext="Hide hitboxes"><br> | ||
[[File:GGReload_Millia_2K.png|center]] | [[File:GGReload_Millia_2K.png|center]] | ||
</div> | </div> | ||
| Line 264: | Line 282: | ||
Primary pressure starter and hits low. Good for frame trapping and tick throwing. Not jump-cancellable on block or hit. but it is special-cancellable on block. | Primary pressure starter and hits low. Good for frame trapping and tick throwing. Not jump-cancellable on block or hit. but it is special-cancellable on block. | ||
Initial prorate 75%. | *Initial prorate 75% | ||
*[[GGReload/Millia_Rage/Frame_Data#Gatling_Table|Gatling Options]]: 6P, 5K, 2K, c.S, f.S, 2S, 2H, 5D, 2D | |||
}} | }} | ||
}} | }} | ||
| Line 272: | Line 291: | ||
|name=2S | |name=2S | ||
|image=GGAC_Millia_2S.png |caption= | |image=GGAC_Millia_2S.png |caption= | ||
<div class="mw-collapsible mw-collapsed"><br> | <div class="mw-collapsible mw-collapsed" data-expandtext="Show hitboxes" data-collapsetext="Hide hitboxes"><br> | ||
[[File:GGReload_Millia_2S.png|center]] | [[File:GGReload_Millia_2S.png|center]] | ||
</div> | </div> | ||
| Line 282: | Line 301: | ||
{{Description|7|text= | {{Description|7|text= | ||
Low hit and has better proration than 2K but starts up slower. Can be used as part of high/low mixup pressure. | Low hit and has better proration than 2K but starts up slower. Can be used as part of high/low mixup pressure. | ||
*[[GGReload/Millia_Rage/Frame_Data#Gatling_Table|Gatling Options]]: 5H, 2H, 5D | |||
}} | }} | ||
}} | }} | ||
| Line 289: | Line 310: | ||
|name=2H | |name=2H | ||
|image=GGAC_Millia_2H.png |caption= | |image=GGAC_Millia_2H.png |caption= | ||
<div class="mw-collapsible mw-collapsed"><br> | <div class="mw-collapsible mw-collapsed" data-expandtext="Show hitboxes" data-collapsetext="Hide hitboxes"><br> | ||
[[File:GGReload_Millia_2H-1.png|center]] | [[File:GGReload_Millia_2H-1.png|center]] | ||
Frames 1~?? | Frames 1~?? | ||
| Line 305: | Line 326: | ||
Your primary launcher for combos. It also has uses as an anti-air, but its slow startup and anti-air hitbox spawning later into the active frames hamper its usage as such. Has a good amount of untechable time on counter-hit. | Your primary launcher for combos. It also has uses as an anti-air, but its slow startup and anti-air hitbox spawning later into the active frames hamper its usage as such. Has a good amount of untechable time on counter-hit. | ||
Floats opponent on hit (untechable for 20F, on CH for 48F) | *Floats opponent on hit (untechable for 20F, on CH for 48F) | ||
*[[GGReload/Millia_Rage/Frame_Data#Gatling_Table|Gatling Options]]: 5D, 2D | |||
}} | }} | ||
}} | }} | ||
| Line 313: | Line 335: | ||
|name=2D | |name=2D | ||
|image=GGAC_Millia_2D.png |caption= | |image=GGAC_Millia_2D.png |caption= | ||
<div class="mw-collapsible mw-collapsed"><br> | <div class="mw-collapsible mw-collapsed" data-expandtext="Show hitboxes" data-collapsetext="Hide hitboxes"><br> | ||
[[File:GGReload_Millia_2D.png|center]] | [[File:GGReload_Millia_2D.png|center]] | ||
</div> | </div> | ||
| Line 324: | Line 346: | ||
Another main ground to ground move besides 2K because of its long range, making it good for fishing for knockdowns and whiff punishes. | Another main ground to ground move besides 2K because of its long range, making it good for fishing for knockdowns and whiff punishes. | ||
Foot | *Foot invul 10~21F | ||
}} | }} | ||
}} | }} | ||
| Line 332: | Line 354: | ||
|name=j.P | |name=j.P | ||
|image=GGAC_Millia_jP.png |caption= | |image=GGAC_Millia_jP.png |caption= | ||
<div class="mw-collapsible mw-collapsed"><br> | <div class="mw-collapsible mw-collapsed" data-expandtext="Show hitboxes" data-collapsetext="Hide hitboxes"><br> | ||
[[File:GGReload_Millia_jP.png|center]] | [[File:GGReload_Millia_jP.png|center]] | ||
</div> | </div> | ||
| Line 342: | Line 364: | ||
{{Description|7|text= | {{Description|7|text= | ||
Very fast air normal, but short range. Chains into itself and gatlings into j.K, j.S, j.H and j.D (only combos into j.D on counter-hit). Useful in air to air and air to ground. Throw it out preemptively to keep the space right in front of and below you in check. If your opponent is keeping themselves in the air at a distance dash jump (669) at him to try and catch them with j.PxN>j.H. Go into j.K and back for pressure on block. | Very fast air normal, but short range. Chains into itself and gatlings into j.K, j.S, j.H and j.D (only combos into j.D on counter-hit). Useful in air to air and air to ground. Throw it out preemptively to keep the space right in front of and below you in check. If your opponent is keeping themselves in the air at a distance dash jump (669) at him to try and catch them with j.PxN>j.H. Go into j.K and back for pressure on block. | ||
*[[GGReload/Millia_Rage/Frame_Data#Gatling_Table|Gatling Options]]: j.P, j.K, j.S, j.H, j.D | |||
}} | }} | ||
}} | }} | ||
| Line 349: | Line 373: | ||
|name=j.K | |name=j.K | ||
|image=GGAC_Millia_jK.png |caption= | |image=GGAC_Millia_jK.png |caption= | ||
<div class="mw-collapsible mw-collapsed"><br> | <div class="mw-collapsible mw-collapsed" data-expandtext="Show hitboxes" data-collapsetext="Hide hitboxes"><br> | ||
[[File:GGReload_Millia_jK.png|center]] | [[File:GGReload_Millia_jK.png|center]] | ||
Frames 1~?? | Frames 1~?? | ||
| Line 364: | Line 388: | ||
{{Description|7|text= | {{Description|7|text= | ||
Useful for catching opponents above you. Impressively fast at 4f, gatlings into j.P, j.S and j.D (only combos into j.D on counter-hit). Also very useful in fuzzy guard strings with j.P and other mixups. | Useful for catching opponents above you. Impressively fast at 4f, gatlings into j.P, j.S and j.D (only combos into j.D on counter-hit). Also very useful in fuzzy guard strings with j.P and other mixups. | ||
*[[GGReload/Millia_Rage/Frame_Data#Gatling_Table|Gatling Options]]: j.P, j.S, j.D | |||
}} | }} | ||
}} | }} | ||
| Line 371: | Line 397: | ||
|name=j.S | |name=j.S | ||
|image=GGAC_Millia_jS.png |caption= | |image=GGAC_Millia_jS.png |caption= | ||
<div class="mw-collapsible mw-collapsed"><br> | <div class="mw-collapsible mw-collapsed" data-expandtext="Show hitboxes" data-collapsetext="Hide hitboxes"><br> | ||
[[File:GGReload_Millia_jS.png|center]] | [[File:GGReload_Millia_jS.png|center]] | ||
</div> | </div> | ||
| Line 381: | Line 407: | ||
{{Description|7|text= | {{Description|7|text= | ||
Combo filler. Your main air to ground move, however it does a pretty poor job at that, as it is slow, has a low attack level, and is easily punishable. | Combo filler. Your main air to ground move, however it does a pretty poor job at that, as it is slow, has a low attack level, and is easily punishable. | ||
*[[GGReload/Millia_Rage/Frame_Data#Gatling_Table|Gatling Options]]: j.P, j.H | |||
}} | }} | ||
}} | }} | ||
| Line 388: | Line 416: | ||
|name=j.H | |name=j.H | ||
|image=GGAC_Millia_j2H.png |caption= | |image=GGAC_Millia_j2H.png |caption= | ||
<div class="mw-collapsible mw-collapsed"><br> | <div class="mw-collapsible mw-collapsed" data-expandtext="Show hitboxes" data-collapsetext="Hide hitboxes"><br> | ||
<!-- pictures are displayed in the order the hitboxes appear despite what the filenames might indicate. --> | <!-- pictures are displayed in the order the hitboxes appear despite what the filenames might indicate. --> | ||
[[File:GGReload_Millia_jH-3.png|center]] | [[File:GGReload_Millia_jH-3.png|center]] | ||
| Line 413: | Line 441: | ||
|name=j.D | |name=j.D | ||
|image=GGAC_Millia_jD.png |caption= | |image=GGAC_Millia_jD.png |caption= | ||
<div class="mw-collapsible mw-collapsed"><br> | <div class="mw-collapsible mw-collapsed" data-expandtext="Show hitboxes" data-collapsetext="Hide hitboxes"><br> | ||
[[File:GGReload_Millia_jD.png|center]] | [[File:GGReload_Millia_jD.png|center]] | ||
</div> | </div> | ||
| Line 424: | Line 452: | ||
Your go to air-to-air from far distances. Fast startup and large hitbox make it ideal for jumping and IAD'ing around with this to hamper the opponent's approach and control their air space. Untechable knockdown on CH far away allowing for Secret Garden or dash f.S>2H on wallbounce or disc otherwise. Horrible air to ground move due to its hitbox and landing recovery. | Your go to air-to-air from far distances. Fast startup and large hitbox make it ideal for jumping and IAD'ing around with this to hamper the opponent's approach and control their air space. Untechable knockdown on CH far away allowing for Secret Garden or dash f.S>2H on wallbounce or disc otherwise. Horrible air to ground move due to its hitbox and landing recovery. | ||
Untechable on air hit for 38F, on CH for 84F | *Untechable on air hit for 38F, on CH for 84F | ||
*Knocks down opponent on ground hit | |||
*Wall bounces opponent on CH | |||
}} | }} | ||
}} | }} | ||
| Line 453: | Line 483: | ||
{{!}}- | {{!}}- | ||
{{Description|7|text= | {{Description|7|text= | ||
Sends opponent flying away. Fullscreen gives you a Secret Garden setup allowing you to rushdown safely. If you | Sends opponent flying away. Fullscreen gives you a Secret Garden setup allowing you to rushdown safely. If you air throw opponent near the corner, you can dash up and do H disc. | ||
}} | }} | ||
}} | }} | ||
| Line 460: | Line 490: | ||
|name=Dead Angle Attack | |name=Dead Angle Attack | ||
|image=GGAC_Millia_cS.png |caption= | |image=GGAC_Millia_cS.png |caption= | ||
<div class="mw-collapsible mw-collapsed"><br> | <div class="mw-collapsible mw-collapsed" data-expandtext="Show hitboxes" data-collapsetext="Hide hitboxes"><br> | ||
[[File:GGReload_Millia_DAA.png|center]] | [[File:GGReload_Millia_DAA.png|center]] | ||
</div> | </div> | ||
| Line 469: | Line 499: | ||
{{!}}- | {{!}}- | ||
{{Description|7|text= | {{Description|7|text= | ||
Knocks down opponent right next to you on ground hit, allowing for a disc mixup immediately after. | |||
*1~12F Full invul | |||
*13~36F Throw invul | |||
*Initial prorate 40% | |||
}} | }} | ||
}} | }} | ||
==Specials== | ==Specials== | ||
| Line 480: | Line 514: | ||
|input=214S, SxN | |input=214S, SxN | ||
|image=GGAC_Millia_214S.png |caption= | |image=GGAC_Millia_214S.png |caption= | ||
<div class="mw-collapsible mw-collapsed"><br> | <div class="mw-collapsible mw-collapsed" data-expandtext="Show hitboxes" data-collapsetext="Hide hitboxes"><br> | ||
[[File:GGReload_Millia_214S-1.png|center]] | [[File:GGReload_Millia_214S-1.png|center]] | ||
Frame 1 | Frame 1 | ||
| Line 496: | Line 530: | ||
Good for frame trap pressure on the ground. | Good for frame trap pressure on the ground. | ||
Hitstop 6F | *Hitstop 6F | ||
*Listed Frame Adv is for no repeated hits | |||
*Does a maximum of 30 hits | |||
}} | }} | ||
}} | }} | ||
| Line 517: | Line 553: | ||
Mainly a wall combo tool. Has its limited uses as a poke due to Millia's hurtbox not extending, but beware of the long recovery and forced counter-hit state. Being -1 on block it can be used to extend corner pressure by sneaking a 5K or f.S in to IAD/roll back in, if the opponent lets you. | Mainly a wall combo tool. Has its limited uses as a poke due to Millia's hurtbox not extending, but beware of the long recovery and forced counter-hit state. Being -1 on block it can be used to extend corner pressure by sneaking a 5K or f.S in to IAD/roll back in, if the opponent lets you. | ||
Hard knockdown except on lights | *Hard knockdown except on lights | ||
*Wall bounces opponent on hit (untechable for 34F) | |||
*Millia is in CH state during move | |||
*Total duration 38F | |||
*Disc disappears if Millia gets hit | |||
*Cannot use Tandem Top or Secret Garden until 42F after disc disappears | |||
}} | }} | ||
{{!}}- | {{!}}- | ||
| Line 526: | Line 567: | ||
Longer startup but longer active frames too. This is your primary staple for your mixups. You will be using this mainly for your setups to mask your high/low mixups. Can be FRC'd on 15~17F which allows for improved setups or, if the opponent is sleeping, it can even be used in blockstrings due to how early it cancels. | Longer startup but longer active frames too. This is your primary staple for your mixups. You will be using this mainly for your setups to mask your high/low mixups. Can be FRC'd on 15~17F which allows for improved setups or, if the opponent is sleeping, it can even be used in blockstrings due to how early it cancels. | ||
*Knocks down opponent on hit | |||
*Wall bounces opponent on hit (untechable for 41F) | |||
*Millia is in CH state during move | |||
*FRC timing 15~17F | |||
*Disc disappears if Millia gets hit | |||
*Cannot use Tandem Top or Secret Garden until 42F after disc disappears | |||
}} | }} | ||
}} | }} | ||
| Line 535: | Line 581: | ||
|input=j.236P | |input=j.236P | ||
|image=GGAC_Millia_j236P.png |caption= | |image=GGAC_Millia_j236P.png |caption= | ||
<div class="mw-collapsible mw-collapsed"><br> | <div class="mw-collapsible mw-collapsed" data-expandtext="Show hitboxes" data-collapsetext="Hide hitboxes"><br> | ||
[[File:GGReload_Millia_j236P.png|center]] | [[File:GGReload_Millia_j236P.png|center]] | ||
</div> | </div> | ||
| Line 546: | Line 592: | ||
This is your main high mixup when TK'd (2369P). It becomes a nigh unreactable 16F overhead. Very punishable on block so don't throw this out too often in neutral. | This is your main high mixup when TK'd (2369P). It becomes a nigh unreactable 16F overhead. Very punishable on block so don't throw this out too often in neutral. | ||
Floats opponent on hit (untechable for 30F) | *Floats opponent on hit (untechable for 30F) | ||
*Millia is crouching upon landing | |||
*Hitstop 6F | |||
*Initial prorate 80% | |||
*FRC timing 5~7F after landing or being blocked | |||
*Listed Recovery is on whiff | |||
*On whiff, Recovery 1~15F are airborne | |||
*Listed Frame Adv is for fastest possible Bad Moon performed from standing (Startup 16F) | |||
*Has minimum height requirement | |||
}} | }} | ||
}} | }} | ||
| Line 554: | Line 608: | ||
|name=Turbo Fall | |name=Turbo Fall | ||
|input=j.236K |caption= | |input=j.236K |caption= | ||
<div class="mw-collapsible mw-collapsed"><br> | <div class="mw-collapsible mw-collapsed" data-expandtext="Show hitboxes" data-collapsetext="Hide hitboxes"><br> | ||
[[File:GGReload_Millia_j.236K.png|center]] | [[File:GGReload_Millia_j.236K.png|center]] | ||
</div> | </div> | ||
| Line 566: | Line 620: | ||
Her command fastfall which lets Millia alter her trajectory in the air making it hard to anti-air her. Millia dives down in a 45 degree angle. Can also be used for mixups. | Her command fastfall which lets Millia alter her trajectory in the air making it hard to anti-air her. Millia dives down in a 45 degree angle. Can also be used for mixups. | ||
Can pass through opponent during fall | *Can pass through opponent during fall | ||
*Fastest possible Turbo Fall performed from standing has total duration 36F | |||
*Has minimum height requirement | |||
*Landing recovery is cancellable into Special Moves | |||
}} | }} | ||
}} | }} | ||
| Line 575: | Line 632: | ||
|input=214K | |input=214K | ||
|image=GGAC_Millia_214K.png |caption= | |image=GGAC_Millia_214K.png |caption= | ||
<div class="mw-collapsible mw-collapsed"><br> | <div class="mw-collapsible mw-collapsed" data-expandtext="Show hitboxes" data-collapsetext="Hide hitboxes"><br> | ||
[[File:GGReload_Millia_214K.png|center]] | [[File:GGReload_Millia_214K.png|center]] | ||
Frames 4~15</div> | Frames 4~15</div> | ||
| Line 586: | Line 643: | ||
A roll that shrinks her hitbox and go under some attacks. Used mainly in pressure and tick throw setup. It is not throw invul though and can be punished on reaction if too predictable. | A roll that shrinks her hitbox and go under some attacks. Used mainly in pressure and tick throw setup. It is not throw invul though and can be punished on reaction if too predictable. | ||
Above feet invul | *4~15F Above feet invul | ||
*16~24F Low profile | |||
*1~15F can pass through opponent | |||
*Millia is in CH state 1~15F | |||
}} | }} | ||
}} | }} | ||
| Line 595: | Line 655: | ||
|input=214P | |input=214P | ||
|image=GGAC_Millia_214P.png |caption= | |image=GGAC_Millia_214P.png |caption= | ||
<div class="mw-collapsible mw-collapsed"><br> | <div class="mw-collapsible mw-collapsed" data-expandtext="Show hitboxes" data-collapsetext="Hide hitboxes"><br> | ||
[[File:GGReload_Millia_214P.png|center]] | [[File:GGReload_Millia_214P.png|center]] | ||
</div> | </div> | ||
| Line 606: | Line 666: | ||
Haircar that hits low. The startup looks identical to going into a TK Bad Moon, so it looks like an overhead but she goes low. Your main low mixup choice. Avoid using this from fullscreen as it is punishable. | Haircar that hits low. The startup looks identical to going into a TK Bad Moon, so it looks like an overhead but she goes low. Your main low mixup choice. Avoid using this from fullscreen as it is punishable. | ||
Millia is airborne from 7F onwards | *Millia is airborne from 7F onwards | ||
*Blows back and knocks down opponent on hit | |||
*Initial prorate 90% | |||
*FRC timing 17~22F | |||
}} | }} | ||
}} | }} | ||
| Line 623: | Line 686: | ||
{{Description|8|text= | {{Description|8|text= | ||
This is your primary projectile and is extremely crucial to your neutral game. Allows you to control the pace of the matchup as opponents will have to keep the threat of it in mind when you have it. Fish for counter-hits with this to force your way in. If they block it, you will be able to continue pressuring your opponent. To pick up the pin on the floor, walk up to it and crouch. | This is your primary projectile and is extremely crucial to your neutral game. Allows you to control the pace of the matchup as opponents will have to keep the threat of it in mind when you have it. Fish for counter-hits with this to force your way in. If they block it, you will be able to continue pressuring your opponent. To pick up the pin on the floor, walk up to it and crouch. | ||
Staggers opponent on ground CH (Max 49F) | |||
*Staggers opponent on ground CH (Max 49F) | |||
*Untechable on air hit for 33F | |||
*Millia is inn CH state during entire move | |||
*Initial prorate 90% | |||
*Has minimum height requirement | |||
}} | }} | ||
}} | }} | ||
| Line 636: | Line 704: | ||
{{AttackDataHeader-GGReload}} | {{AttackDataHeader-GGReload}} | ||
{{!}}- | {{!}}- | ||
{{#lsth:GGReload/Millia Rage/Data|214H | {{#lsth:GGReload/Millia Rage/Data|214H}} | ||
{{!}}- | {{!}}- | ||
{{Description|7|text= | {{Description|7|text= | ||
3F after inputting the special notation, you're allowed up to 4 directional inputs from. Summons a bubble out that will go the direction you input it after the notation. Best places to use would be fullscreen and far from your opponent. Great for mixups and covering your rushdown when trying to get in, but slow startup. | 3F after inputting the special notation, you're allowed up to 4 directional inputs from. Summons a bubble out that will go the direction you input it after the notation. Best places to use would be fullscreen and far from your opponent. Great for mixups and covering your rushdown when trying to get in, but slow startup. | ||
Millia is in CH state 1~55F | *Millia is in CH state 1~55F | ||
*Bubble guaranteed to come out after 52F | |||
*Accepts up to 4 additional inputs to control direction of sphere from 2~55F | |||
}} | }} | ||
}} | }} | ||
==Overdrives== | ==Overdrives== | ||
| Line 652: | Line 722: | ||
|input=2141236H | |input=2141236H | ||
|image=GGAC_Millia_214236H.png |caption= | |image=GGAC_Millia_214236H.png |caption= | ||
<div class="mw-collapsible mw-collapsed"><br> | <div class="mw-collapsible mw-collapsed" data-expandtext="Show hitboxes" data-collapsetext="Hide hitboxes"><br> | ||
[[File:GGReload_Millia_214236H-1.png|center]] | [[File:GGReload_Millia_214236H-1.png|center]] | ||
Frames 1~?? | Frames 1~?? | ||
| Line 670: | Line 740: | ||
Her only reversal move that has invincible startup. It is not advised to rely on this to get out of pressure all the time. | Her only reversal move that has invincible startup. It is not advised to rely on this to get out of pressure all the time. | ||
1~7F Full invul | *1~7F Full invul | ||
*Falling portion wallbounces opponent on hit | |||
*Rising portion has hitstop 7F | |||
}} | }} | ||
}} | }} | ||
| Line 687: | Line 759: | ||
Throws 3 big discs. Hitconfirms from any poke. The last disc causes wallbounce. | Throws 3 big discs. Hitconfirms from any poke. The last disc causes wallbounce. | ||
1~5F Strike invul | *1~5F Strike invul | ||
*Wall bounces opponent on hit | |||
*2nd disc has startup 26F, 3rd disc has startup 46F | |||
}} | }} | ||
}} | }} | ||
==Instant Kill== | ==Instant Kill== | ||
| Line 707: | Line 781: | ||
}} | }} | ||
}} | }} | ||
== | ==Navigation== | ||
{{#lsth:GGReload/Millia Rage/Data|Links}} | |||
{{Navbar-GGReload}} | {{Navbar-GGReload}} | ||
[[Category:Millia Rage]] | [[Category:Guilty Gear|Millia Rage]] | ||
Latest revision as of 04:15, 24 December 2023
| Overview | Combos | Strategy/Counter Strategy | Full Frame Data |
| Millia Rage | |||||||||||||||||||||
|---|---|---|---|---|---|---|---|---|---|---|---|---|---|---|---|---|---|---|---|---|---|
|
Defense Modifier: x1.21 Guts Rating: 3 Weight: Light (x1.05) Stun Resistance: 55 Jump Startup: 3F Backdash Time: 11F / Invul: 1~5F Wake-Up (Face Up/Down): 36F / 34F
|
Overview
- Millia is a very versatile character with arguably one of the best okizeme and mixups in the game with her Tandem Top and Secret Garden mixups.
She is the second fastest character in the game below Chipp, with 2 airdashes and a turbofall which allow her to alter her trajectory in the air quite easily. These options also make it difficult for the opponent to anti-air her. On top of that, she also has her staple projectile, Silent Force, which makes it difficult for her opponents to anti-air her or approach her. This projectile is what helps her get in and start her oppressive rushdown and keep the opponent guessing in neutral.
Despite being the second fastest character, she also has the second worst defense modifier and will take heavy damage. She also lacks a reliable reversal out of pressure, so you will need to rely on Instant Blocking, Dead Angle, or backdashes to get out of pressure. You will need to move around constantly and avoid getting hit while fishing for hits to get a knockdown. You will need to be smart with your approaches, movement options and pin management, and rushdown with care.
Strengths and Weaknesses
| Strengths | Weaknesses |
|---|---|
|
|
Unique Mechanics
Silent Force
- One of the two reasons Millia is notorious, or rather infamous, for. Everyone who has played against Akuma in Street Fighter recognises the overwhelming ability of his air fireball to control space, zone and apply pressure. Silent Force is an air projectile that shoots extremely fast at a 45 degree angle, is very positive on block allowing you to force your way in and staggers on counter-hit guaranteeing you a free combo and forcing your opponent to think twice before trying to anti-air you. One caveat: it's single use, once you throw it you have to pick it up from the ground by crouching over it.
Tandem Top
- The other, main reason Millia is infamous for. H Tandem Top is a static disc-shaped projectile with lots of active frames that is placed on top of or near the opponent during their wake-up and causes long blockstun in addition to masking your mixups, giving you free reign to apply your powerful okizeme and loop the situation over and over.
Normals
| 5P |
|---|
| 5K |
|---|
| c.S |
|---|
| f.S |
|---|
| 5H |
|---|
| 6P |
|---|
| 6K |
|---|
| 6H |
|---|
| 5D |
|---|
| 2P |
|---|
| 2K |
|---|
| 2S |
|---|
| 2H |
|---|
| 2D |
|---|
| j.P |
|---|
| j.K |
|---|
| j.S |
|---|
| j.H |
|---|
| j.D |
|---|
Universal Mechanics
| Ground Throw |
|---|
| Air Throw |
|---|
| Dead Angle Attack |
|---|
Specials
| Lust Shaker 214S, SxN |
|---|
Tandem Top
| Tandem Top 236S/H S version hits immediately, used for combos and pressure H version is delayed, used for okizeme |
|---|
| Bad Moon j.236P |
|---|
| Turbo Fall j.236K |
|---|
| Forward Roll 214K |
|---|
Iron Savior
| Iron Savior 214P |
|---|
Silent Force
| Silent Force j.214S |
|---|
| Secret Garden 214H > Direction + H |
|---|
Overdrives
| Winger 2141236H |
|---|
| Emerald Rain 236236S |
|---|
Instant Kill
| Iron Maiden 236236H |
|---|


