Pivotkraner (talk | contribs) No edit summary |
m (→Navigation) |
||
| (42 intermediate revisions by 4 users not shown) | |||
| Line 1: | Line 1: | ||
{{InvisibleHeader}}{{NavTabs|game=GGReload|chara=Johnny}} | |||
{| class="wikitable" style="float:right; margin-left: 10px; width:400px" | {| class="wikitable" style="float:right; margin-left: 10px; width:400px" | ||
|- | |- | ||
| Line 9: | Line 10: | ||
{{#lsth:GGReload/Johnny/Data|SystemData}} | {{#lsth:GGReload/Johnny/Data|SystemData}} | ||
;Movement Options | ;Movement Options | ||
:Double Jump, 1 Air Dash, Dash Type: Step, Divine Blade Transport | :Double Jump, 1 Air Dash, Dash Type: Step<sup>1</sup>, Divine Blade Transport<br> | ||
<sup>1: Note that Johnny's dashes put him in an airborne state and allow him to dodge moves with hitboxes very low to the ground and Potemkin's Slide Head. Consequently, he is also air throwable while dashing.</sup> | |||
<center>'''Colors'''</center> | <center>'''Colors'''</center> | ||
{{GGReloadColors|Character=Johnny}} | {{GGReloadColors|Character=Johnny}} | ||
| Line 17: | Line 19: | ||
</div> | </div> | ||
==Overview== | ==Overview== | ||
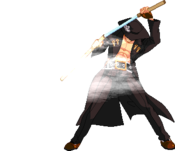
:Johnny is an iaido style swordsman who completely dominates the neutral and offense game thanks to his famous Mist Finer stance (236P/K/S). His pokes are among the best in the entire game when utilizing his Mist Stance cancels (H to exit stance) which can also be made faster by landing some of the 8 coins that he naturally starts each match with. Any coin that hits an opponent completely buffs each version of his Mist Finers (up to level 3) which in turn gives them deadly properties for combos as well as making them faster all together, ultimately shortening the recovery of his base attacks and granting him incredible pressure on offense. Johnny's above average execution combined with his movement options can certainly seem daunting to inexperienced players, but in the right hands, he's | :Johnny is an iaido style swordsman who completely dominates the neutral and offense game thanks to his famous Mist Finer stance (236P/K/S). His pokes are among the best in the entire game when utilizing his Mist Stance cancels (H to exit stance) which can also be made faster by landing some of the 8 coins that he naturally starts each match with. Any coin that hits an opponent completely buffs each version of his Mist Finers (up to level 3) which in turn gives them deadly properties for combos as well as making them faster all together, ultimately shortening the recovery of his base attacks and granting him incredible pressure on offense. Johnny's above average execution combined with his movement options can certainly seem daunting to inexperienced players, but in the right hands, he's a dangerous and threatening characters to face. | ||
<div class="center" style="width:auto; margin-left:auto; margin-right:auto;"> | <div class="center" style="width:auto; margin-left:auto; margin-right:auto;"> | ||
| Line 36: | Line 38: | ||
* Snowballs extremely well with unblockable setups, strong throw mixups, and high-damage burst-safe combos. | * Snowballs extremely well with unblockable setups, strong throw mixups, and high-damage burst-safe combos. | ||
* Has one of the best backdashes in the game with 7/11 frames of invincibility. | * Has one of the best backdashes in the game with 7/11 frames of invincibility. | ||
* Decent disjointed hitboxes. | * Decent disjointed hitboxes. | ||
* High effective health. | * High effective health. | ||
| Line 53: | Line 54: | ||
---- | ---- | ||
====Coin==== | ====Coin==== | ||
Johnny has a unique resource in the form of coins. The number of coins that Johnny has is displayed above his tension meter. Johnny starts every round with 8 coins and does not get more coins until the start of the next round | Johnny has a unique resource in the form of coins. The number of coins that Johnny has is displayed above his tension meter. Johnny starts every round with 8 coins and does not get more coins until the start of the next round. Every time Johnny uses his Glitter Is Gold special one coin will be subtracted from his remaining coin total. When Johnny has 0 coins remaining, he will be unable to throw coins at the enemy with his Glitter Is Gold special. When a coin hits the enemy, Johnny's Mist Finer special will Level Up to a maximum of Level 3 form a starting level of Level 1. Hitting an enemy with a coin when Johnny has level 3 Mist Finer will still do damage, but will not level up Mist Finer further. Whenever Mist Finer is used, Mist Finer will return to Level 1, and can be leveled up again. | ||
{{#lst:GGReload/Johnny/Data|Links}} | {{#lst:GGReload/Johnny/Data|Links}} | ||
| Line 62: | Line 63: | ||
|image=GGAC_Johnny_5P.png | |image=GGAC_Johnny_5P.png | ||
|caption= | |caption= | ||
<div class="mw-collapsible mw-collapsed" data-expandtext=" | <div class="mw-collapsible mw-collapsed" data-expandtext="Show hitboxes" data-collapsetext="Hide hitboxes"> | ||
[[File:GGXXACPR_Johnny-5P-Hitbox.png|center|175px]] | [[File:GGXXACPR_Johnny-5P-Hitbox.png|center|175px]] | ||
</div> | </div> | ||
| Line 80: | Line 81: | ||
|image=GGAC_Johnny_5K.png | |image=GGAC_Johnny_5K.png | ||
|caption= | |caption= | ||
<div class="mw-collapsible mw-collapsed" data-expandtext=" | <div class="mw-collapsible mw-collapsed" data-expandtext="Show hitboxes" data-collapsetext="Hide hitboxes"> | ||
[[File:GGXXACPR_Johnny-5K-Hitbox.png|center|175px]] | [[File:GGXXACPR_Johnny-5K-Hitbox.png|center|175px]] | ||
</div> | </div> | ||
| Line 89: | Line 90: | ||
{{!}}- | {{!}}- | ||
{{Description|7|text= | {{Description|7|text= | ||
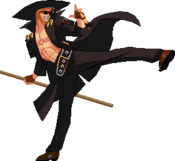
Johnny's most all-purpose and well rounded normal. Does not prorate, making it a good hit-confirm for combos. On block, can cancel to a number of higher level moves to then Mist Cancel for greater frame advantage. One of his best normals for delay chaining, usually into 5H or 2S as a frame trap. This move should be the centerpiece of your close range gameplan. | |||
}} | }} | ||
}} | }} | ||
====== ====== | ====== ====== | ||
{{MoveData | {{MoveData | ||
| Line 97: | Line 99: | ||
|image=GGAC_Johnny_cS.png | |image=GGAC_Johnny_cS.png | ||
|caption= | |caption= | ||
<div class="mw-collapsible mw-collapsed" data-expandtext=" | <div class="mw-collapsible mw-collapsed" data-expandtext="Show hitboxes" data-collapsetext="Hide hitboxes"> | ||
[[File:GGXXACPR_Johnny-cS-Hitbox.png|center|175px]] | [[File:GGXXACPR_Johnny-cS-Hitbox.png|center|175px]] | ||
</div> | </div> | ||
| Line 109: | Line 111: | ||
}} | }} | ||
}} | }} | ||
====== ====== | ====== ====== | ||
{{MoveData | {{MoveData | ||
| Line 114: | Line 117: | ||
|image=GGAC_Johnny_fS.png | |image=GGAC_Johnny_fS.png | ||
|caption= | |caption= | ||
<div class="mw-collapsible mw-collapsed" data-expandtext=" | <div class="mw-collapsible mw-collapsed" data-expandtext="Show hitboxes" data-collapsetext="Hide hitboxes"> | ||
[[File:GGXXACPR_Johnny-fS-Hitbox.png|center|175px]] | [[File:GGXXACPR_Johnny-fS-Hitbox.png|center|175px]] | ||
</div> | </div> | ||
| Line 123: | Line 126: | ||
{{!}}- | {{!}}- | ||
{{Description|7|text= | {{Description|7|text= | ||
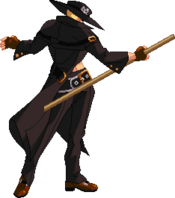
f.S is a top class long range poke in terms of range and speed. It has poor recovery, so avoid whiffing it when poking if you can, as you can easily be whiffed punished for it. Particularly against very mobile ground characters like Millia or Jam, avoid falling for FD stop attempts to bait this move. f.S also has a blind spot low to the ground, and will lose to most low profile / upper body invincible moves, such as Ky's Stun Dipper and many sweeps. Some characters can even run under it. Because of f.S's limited gatling options, it is very important to be consistent with mist cancelling f.S when needed. | |||
}} | }} | ||
}} | }} | ||
====== ====== | ====== ====== | ||
{{MoveData | {{MoveData | ||
| Line 131: | Line 135: | ||
|image=GGAC_Johnny_5H.png | |image=GGAC_Johnny_5H.png | ||
|caption= | |caption= | ||
<div class="mw-collapsible mw-collapsed" data-expandtext=" | <div class="mw-collapsible mw-collapsed" data-expandtext="Show hitboxes" data-collapsetext="Hide hitboxes"> | ||
[[File:GGXXACPR_Johnny-5H-1-Hitbox.png|center|175px]] | [[File:GGXXACPR_Johnny-5H-1-Hitbox.png|center|175px]] | ||
Frame 11 | Frame 11 | ||
| Line 143: | Line 147: | ||
{{!}}- | {{!}}- | ||
{{Description|7|text= | {{Description|7|text= | ||
Big reach. Controls a lot of space, ground-wise and air-wise. Extends your hitbox forward, be mindful of this and it's startup. Easily backdashed, and horrible if whiffed. Can be low profiled. Great for stopping jump outs and as a pressure tool. | Big reach. Controls a lot of space, ground-wise and air-wise. Extends your hitbox forward, be mindful of this and it's startup. Easily backdashed, and horrible if whiffed. Can be low profiled. Great for stopping jump outs and as a pressure tool. Can be special-cancelled very late in its animation. | ||
}} | |||
}} | |||
====== ====== | |||
{{MoveData | |||
|name=5D | |||
|image=GGAC_Johnny_5D.png | |||
|caption= | |||
<div class="mw-collapsible mw-collapsed" data-expandtext="Show hitboxes" data-collapsetext="Hide hitboxes"> | |||
[[File:GGXXACPR_Johnny-5D-Hitbox.png|center|175px]] | |||
</div> | |||
|data= | |||
{{AttackDataHeader-GGReload}} | |||
{{!}}- | |||
{{#lsth:GGReload/Johnny/Data|5D}} | |||
{{!}}- | |||
{{Description|7|text= | |||
Very slow overhead. Johnny's only true standing overhead. On block, neutral at worst, +7 at best. Deceptive reach. | |||
}} | }} | ||
}} | }} | ||
====== ====== | ====== ====== | ||
{{MoveData | {{MoveData | ||
| Line 151: | Line 174: | ||
|image=GGAC_Johnny_6P.png | |image=GGAC_Johnny_6P.png | ||
|caption= | |caption= | ||
<div class="mw-collapsible mw-collapsed" data-expandtext=" | <div class="mw-collapsible mw-collapsed" data-expandtext="Show hitboxes" data-collapsetext="Hide hitboxes"> | ||
[[File:GGXXACPR_Johnny-6P-Hitbox.png|center|175px]] | [[File:GGXXACPR_Johnny-6P-Hitbox.png|center|175px]] | ||
</div> | </div> | ||
| Line 171: | Line 194: | ||
|image=GGAC_Johnny_6K.png | |image=GGAC_Johnny_6K.png | ||
|caption= | |caption= | ||
<div class="mw-collapsible mw-collapsed" data-expandtext=" | <div class="mw-collapsible mw-collapsed" data-expandtext="Show hitboxes" data-collapsetext="Hide hitboxes"> | ||
[[File:GGXXACPR_Johnny-6K-Hitbox.png|center|175px]] | [[File:GGXXACPR_Johnny-6K-Hitbox.png|center|175px]] | ||
</div> | </div> | ||
| Line 191: | Line 214: | ||
|image=GGAC_Johnny_6H.png | |image=GGAC_Johnny_6H.png | ||
|caption= | |caption= | ||
<div class="mw-collapsible mw-collapsed" data-expandtext=" | <div class="mw-collapsible mw-collapsed" data-expandtext="Show hitboxes" data-collapsetext="Hide hitboxes"> | ||
[[File:GGXXACPR_Johnny-6H-1-Hitbox.png|center|175px]] | [[File:GGXXACPR_Johnny-6H-1-Hitbox.png|center|175px]] | ||
Frame 18 | Frame 18 | ||
| Line 204: | Line 227: | ||
{{Description|7|text= | {{Description|7|text= | ||
Hit box moves back slightly at startup. Long range poke, controls a lot of ground space. The highest damage you can get in a single hit. Also your slowest poke. Jump cancellable. | Hit box moves back slightly at startup. Long range poke, controls a lot of ground space. The highest damage you can get in a single hit. Also your slowest poke. Jump cancellable. | ||
}} | }} | ||
}} | }} | ||
| Line 229: | Line 235: | ||
|image=GGAC_Johnny_2P.png | |image=GGAC_Johnny_2P.png | ||
|caption= | |caption= | ||
<div class="mw-collapsible mw-collapsed" data-expandtext=" | <div class="mw-collapsible mw-collapsed" data-expandtext="Show hitboxes" data-collapsetext="Hide hitboxes"> | ||
[[File:GGXXACPR_Johnny-2P-Hitbox.png|center|175px]] | [[File:GGXXACPR_Johnny-2P-Hitbox.png|center|175px]] | ||
</div> | </div> | ||
| Line 249: | Line 255: | ||
|image=GGAC_Johnny_2K.png | |image=GGAC_Johnny_2K.png | ||
|caption= | |caption= | ||
<div class="mw-collapsible mw-collapsed" data-expandtext=" | <div class="mw-collapsible mw-collapsed" data-expandtext="Show hitboxes" data-collapsetext="Hide hitboxes"> | ||
[[File:GGXXACPR_Johnny-2K-Hitbox.png|center|175px]] | [[File:GGXXACPR_Johnny-2K-Hitbox.png|center|175px]] | ||
</div> | </div> | ||
| Line 258: | Line 264: | ||
{{!}}- | {{!}}- | ||
{{Description|7|text= | {{Description|7|text= | ||
Hits low. Compliments your 5K. Good frame advantage on block, and has a long cancel window. Naturally strong pressure tool, but is slow for its range, making it a poor choice when poking at neutral. Properly meatied, 2K is reversal safe against many reversals. | Hits low. Compliments your 5K. Good frame advantage on block, and has a long cancel window. Naturally strong pressure tool, but is slow for its range, making it a poor choice when poking at neutral. Properly meatied, 2K is reversal safe against many reversals. | ||
Notably, it gatlings into 2D but doesn't combo into it. Fill with c.S beforehand if you want to convert into 2D knockdown. | |||
Initial proration 75%. | Initial proration 75%. | ||
| Line 269: | Line 277: | ||
|image=GGAC_Johnny_2S.png | |image=GGAC_Johnny_2S.png | ||
|caption= | |caption= | ||
<div class="mw-collapsible mw-collapsed" data-expandtext=" | <div class="mw-collapsible mw-collapsed" data-expandtext="Show hitboxes" data-collapsetext="Hide hitboxes"> | ||
[[File:GGXXACPR_Johnny-2S-1-Hitbox.png|center|175px]] | [[File:GGXXACPR_Johnny-2S-1-Hitbox.png|center|175px]] | ||
Frames 9-10 | Frames 9-10 | ||
| Line 282: | Line 290: | ||
{{Description|7|text= | {{Description|7|text= | ||
What 2K is to 5K, 2S is to f.S. Hits low. Good active frames, good meaty, good neutral poke when f.S would whiff. Prorates a lot. Proper use of 2S is essential to many matchups. | What 2K is to 5K, 2S is to f.S. Hits low. Good active frames, good meaty, good neutral poke when f.S would whiff. Prorates a lot. Proper use of 2S is essential to many matchups. | ||
Only gatlings into 2HS, but combos into Lv2Mistfiner if you have it. | |||
Initial proration 75%. | Initial proration 75%. | ||
| Line 292: | Line 302: | ||
|image=GGAC_Johnny_2H.png | |image=GGAC_Johnny_2H.png | ||
|caption= | |caption= | ||
<div class="mw-collapsible mw-collapsed" data-expandtext=" | <div class="mw-collapsible mw-collapsed" data-expandtext="Show hitboxes" data-collapsetext="Hide hitboxes"> | ||
[[File:GGXXACPR_Johnny-2H-Hitbox.png|center|175px]] | [[File:GGXXACPR_Johnny-2H-Hitbox.png|center|175px]] | ||
</div> | </div> | ||
| Line 301: | Line 311: | ||
{{!}}- | {{!}}- | ||
{{Description|7|text= | {{Description|7|text= | ||
Very fast and lots of reach, both horizontally and a little bit vertically. Staggers on CH. Moves you backwards. Atrocious on whiff. A very specific move. | Very fast and lots of reach, both horizontally and a little bit vertically. Staggers on CH. Moves you backwards. Atrocious on whiff. A very specific move. The only move it gatlings into is 5D. Punishable on normal hit. | ||
Staggers opponent on CH (max 35F). Johnny is in CH state during recovery. | Staggers opponent on CH (max 35F). Johnny is in CH state during recovery. | ||
| Line 312: | Line 322: | ||
|image=GGAC_Johnny_2D.png | |image=GGAC_Johnny_2D.png | ||
|caption= | |caption= | ||
<div class="mw-collapsible mw-collapsed" data-expandtext=" | <div class="mw-collapsible mw-collapsed" data-expandtext="Show hitboxes" data-collapsetext="Hide hitboxes"> | ||
[[File:GGXXACPR_Johnny-2D-1-Hitbox.png|center|175px]] | [[File:GGXXACPR_Johnny-2D-1-Hitbox.png|center|175px]] | ||
Frames 9-10 | Frames 9-10 | ||
| Line 327: | Line 337: | ||
}} | }} | ||
}} | }} | ||
====== ====== | ====== ====== | ||
{{MoveData | {{MoveData | ||
| Line 332: | Line 343: | ||
|image=GGAC_Johnny_jP.png | |image=GGAC_Johnny_jP.png | ||
|caption= | |caption= | ||
<div class="mw-collapsible mw-collapsed" data-expandtext=" | <div class="mw-collapsible mw-collapsed" data-expandtext="Show hitboxes" data-collapsetext="Hide hitboxes"> | ||
[[File:GGXXACPR_Johnny-jP-Hitbox.png|center|175px]] | [[File:GGXXACPR_Johnny-jP-Hitbox.png|center|175px]] | ||
</div> | </div> | ||
| Line 341: | Line 352: | ||
{{!}}- | {{!}}- | ||
{{Description|7|text= | {{Description|7|text= | ||
Your fastest air normal. Decent air-to-air, often used to start airdash strings. Chains. | Your fastest air normal. Decent air-to-air, often used to start airdash strings. Chains. Sets up tick throws from Divine Blade Oki. | ||
}} | }} | ||
}} | }} | ||
| Line 350: | Line 361: | ||
|image=GGAC_Johnny_jK.png | |image=GGAC_Johnny_jK.png | ||
|caption= | |caption= | ||
<div class="mw-collapsible mw-collapsed" data-expandtext=" | <div class="mw-collapsible mw-collapsed" data-expandtext="Show hitboxes" data-collapsetext="Hide hitboxes"> | ||
[[File:GGXXACPR_Johnny-jK-1-Hitbox.png|center|175px]] | [[File:GGXXACPR_Johnny-jK-1-Hitbox.png|center|175px]] | ||
Frames 8-9 | Frames 8-9 | ||
| Line 371: | Line 382: | ||
|image=GGAC_Johnny_jS.png | |image=GGAC_Johnny_jS.png | ||
|caption= | |caption= | ||
<div class="mw-collapsible mw-collapsed" data-expandtext=" | <div class="mw-collapsible mw-collapsed" data-expandtext="Show hitboxes" data-collapsetext="Hide hitboxes"> | ||
[[File:GGXXACPR_Johnny-jS-Hitbox.png|center|175px]] | [[File:GGXXACPR_Johnny-jS-Hitbox.png|center|175px]] | ||
</div> | </div> | ||
| Line 389: | Line 400: | ||
|image=GGAC_Johnny_jH.png | |image=GGAC_Johnny_jH.png | ||
|caption= | |caption= | ||
<div class="mw-collapsible mw-collapsed" data-expandtext=" | <div class="mw-collapsible mw-collapsed" data-expandtext="Show hitboxes" data-collapsetext="Hide hitboxes"> | ||
[[File:GGXXACPR_Johnny-jH-Hitbox.png|center|175px]] | [[File:GGXXACPR_Johnny-jH-Hitbox.png|center|175px]] | ||
</div> | </div> | ||
| Line 398: | Line 409: | ||
{{!}}- | {{!}}- | ||
{{Description|7|text= | {{Description|7|text= | ||
j.H has a very strong downward hitbox, making it difficult to anti-air. When using it as a jump in, be careful of your horizontal positioning, as it has absolutely no backwards hitbox. If it hits an airborne opponent, it will often be a hard knockdown, making it a very useful air combo ender. Be careful of using j.H too high up on block - you'll need to gatling into j.D. | |||
Staggers opponent on ground CH (max 39F). Slams down opponent on air hit. | |||
}} | }} | ||
}} | }} | ||
====== ====== | ====== ====== | ||
{{MoveData | {{MoveData | ||
| Line 406: | Line 420: | ||
|image=GGAC_Johnny_jD.png | |image=GGAC_Johnny_jD.png | ||
|caption= | |caption= | ||
<div class="mw-collapsible mw-collapsed" data-expandtext=" | <div class="mw-collapsible mw-collapsed" data-expandtext="Show hitboxes" data-collapsetext="Hide hitboxes"> | ||
[[File:GGXXACPR_Johnny-jD-1-Hitbox.png|center|175px]] | [[File:GGXXACPR_Johnny-jD-1-Hitbox.png|center|175px]] | ||
Frames 8-10 | Frames 8-10 | ||
| Line 418: | Line 432: | ||
{{!}}- | {{!}}- | ||
{{Description|7|text= | {{Description|7|text= | ||
Primarily used as a combo filler due to its wall bounce property. Also can be used as an air combo ender due to its high untech, allowing you to land and tech chase. Can be used in air(dash) blockstrings, as it can lead to high reward on hit. Since j.D is the only air normal that hits above him, j.D can be very effective to deal with opponents who are high above him, especially when combined with Johnny's top class superjump. Be aware, however, that j.D has a lot of recovery. If you miss the air to air attempt, you will often lose your priority at neutral. j.D as a tech chase option is fairly strong when the opponent is teching high in the air. | |||
Wall bounces opponent on hit. | |||
}} | }} | ||
}} | }} | ||
| Line 433: | Line 449: | ||
{{!}}- | {{!}}- | ||
{{Description|7|text= | {{Description|7|text= | ||
Slightly above average range. Causes techable float. Heavy forced proration. Due to its aggressive proration, it is advised to either coin, go for knockdown, or both | Great throw overall, although its conversions afterwards are very matchup-specific. Slightly above average range. Causes techable float. Heavy forced proration. Due to its aggressive proration, it is advised to either coin, go for knockdown, or both if possible. Following up with damage combos is generally not worth it. Unfortunately, it doesn't combo into Coin on some lighter characters, like Millia. Comboing into Coin in corner is also not possible on all characters, and the timing is sometimes different. | ||
Initial proration 40% | |||
}} | }} | ||
}} | }} | ||
====== ====== | ====== ====== | ||
{{MoveData | {{MoveData | ||
| Line 446: | Line 465: | ||
{{!}}- | {{!}}- | ||
{{Description|7|text= | {{Description|7|text= | ||
One of the best airthrows in the game. Always knocks down. It wallbounces in the corner, allowing you to either go 2P > Coin, or you can go for Bacchus Sigh' for unblockable. You can also go for damage, although the proration usually makes it not worth it. If done at midscreen, you can chase the opponent afterwards with Divine Blade Transport. | |||
Initial proration 50%. | |||
}} | }} | ||
}} | }} | ||
====== ====== | ====== ====== | ||
{{MoveData | {{MoveData | ||
| Line 459: | Line 481: | ||
{{!}}- | {{!}}- | ||
{{Description|7|text= | {{Description|7|text= | ||
One of Johnny's only defensive options, but unfortunately it can be low profiled under. The frame advantage is the best among DAA's of the game with Johnny's only being -6. | |||
1~13F Full invul. 14~23F Upper body invul. 15~28F Throw invul. Wall bounces opponent on hit, allowing you to combo afterwards. Initial proration 50%. | |||
}} | }} | ||
}} | }} | ||
==Specials== | ==Specials== | ||
====== ====== | ====== ====== | ||
{{MoveData | {{MoveData | ||
| Line 473: | Line 497: | ||
{{!}}- | {{!}}- | ||
{{AttackVersion|name=Stance|subtitle=236[P/K/S]}} | {{AttackVersion|name=Stance|subtitle=236[P/K/S]}} | ||
{{#lsth:GGReload/Johnny/Data|236[ | {{#lsth:GGReload/Johnny/Data|236[X]}} | ||
{{!}}- | {{!}}- | ||
{{AttackVersion|name=Step Forward|subtitle=MF Stance -> 66}} | {{AttackVersion|name=Step Forward|subtitle=MF Stance -> 66}} | ||
| Line 485: | Line 509: | ||
{{!}}- | {{!}}- | ||
{{Description|8|text= | {{Description|8|text= | ||
Johnny can use Mist Stance and immediate Mist Stance Cancel (AKA Mist Cancel) in order to drastically reduce the recovery of his normals. This often leaves Johnny at frame advantage, and is essential to Johnny's offensive game. Refer to [[GGReload/Johnny/Strategy#Mist_Cancel|Mist Cancel]] section for details. Entering Mist Stance at neutral can also be a useful tactic, combined with using Mist Step, in order to punish an opponent's reckless approach, especially against characters that Johnny wants to keep away. | |||
Stance startup depends on Mist Level. Lv1: 10F, Lv2: 7F, Lv3: 5F | |||
}} | }} | ||
}} | }} | ||
====== ====== | ====== ====== | ||
{{MoveData | {{MoveData | ||
| Line 500: | Line 527: | ||
{{!}}- | {{!}}- | ||
{{Description|8|text= | {{Description|8|text= | ||
Good anti-air for when your opponent is out of 6P range and/or is doing a move that will beat 6P. Scores knockdown on air CH. | |||
}} | }} | ||
{{!}}- | {{!}}- | ||
| Line 507: | Line 534: | ||
{{!}}- | {{!}}- | ||
{{Description|8|text= | {{Description|8|text= | ||
Reduces Mist Level to 1. Knocks down opponent on hit. | |||
}} | }} | ||
{{!}}- | {{!}}- | ||
| Line 513: | Line 540: | ||
{{#lsth:GGReload/Johnny/Data|236P Lv3}} | {{#lsth:GGReload/Johnny/Data|236P Lv3}} | ||
{{!}}- | {{!}}- | ||
{{Description|8|text= | {{Description|8|text= 9 hits. Reduces Mist Level to 1. Floats opponent on hit, but doesn't knock down. Active frames: {4(3)}*3,{3(3)4}*2,3(4)4 | ||
}} | }} | ||
}} | }} | ||
| Line 530: | Line 556: | ||
{{!}}- | {{!}}- | ||
{{Description|8|text= | {{Description|8|text= | ||
Floats opponent on hit. Initial proration 85%. | |||
}} | }} | ||
{{AttackVersion|name=Level 2}} | {{AttackVersion|name=Level 2}} | ||
| Line 536: | Line 562: | ||
{{!}}- | {{!}}- | ||
{{Description|8|text= | {{Description|8|text= | ||
Reduces Mist Level to 1. | Reduces Mist Level to 1. Floats and knocks down opponent on hit. Initial proration 85%. | ||
}} | }} | ||
{{AttackVersion|name=Level 3}} | {{AttackVersion|name=Level 3}} | ||
| Line 542: | Line 568: | ||
{{!}}- | {{!}}- | ||
{{Description|8|text= | {{Description|8|text= | ||
9 hits | 9 hits. Reduces Mist Level to 1. 9th hit floats opponent. 3rd, 5th, 6th, and 9th hits must be blocked low, all other hits can be blocked mid. Active frames: 3(4)4(4)2(4)3(5)2(5)2(4)3(4)3(5)2 | ||
}} | }} | ||
}} | }} | ||
| Line 558: | Line 584: | ||
{{!}}- | {{!}}- | ||
{{Description|8|text= | {{Description|8|text= | ||
Knocks down opponent on ground hit. Initial proration 85%. | |||
}} | }} | ||
{{AttackVersion|name=Level 2}} | {{AttackVersion|name=Level 2}} | ||
| Line 564: | Line 590: | ||
{{!}}- | {{!}}- | ||
{{Description|8|text= | {{Description|8|text= | ||
Reduces Mist Level to 1. Floats and knocks down opponent on ground hit. Initial proration 85%. | |||
}} | }} | ||
{{AttackVersion|name=Level 3}} | {{AttackVersion|name=Level 3}} | ||
| Line 570: | Line 596: | ||
{{!}}- | {{!}}- | ||
{{Description|8|text= | {{Description|8|text= | ||
9 hits | 9 hits. Reduces Mist Level to 1. 9th hit floats opponent on hit. 7th, 8th hits can be blocked mid. All other hits must be blocked low. Active frames: {2(5)}*5,2(4)3(4)3(5)2. | ||
}} | }} | ||
}} | }} | ||
| Line 578: | Line 604: | ||
|name=Glitter Is Gold | |name=Glitter Is Gold | ||
|input=236H | |input=236H | ||
|image= | |image=GGAC_Johnny_236H.png | ||
|data= | |data= | ||
{{AttackDataHeader-GGReload}} | {{AttackDataHeader-GGReload}} | ||
| Line 585: | Line 611: | ||
{{!}}- | {{!}}- | ||
{{Description|7|text= | {{Description|7|text= | ||
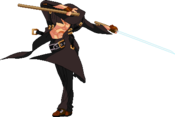
Glitter is Gold, AKA Coin, is an all around excellent move at almost any point in the game, and also serves as an essential combo piece. Landing a coin powers up Johnny's Mist Finer, drastically increasing his combo potential and offensive power. Because of this, when at Mist Finer Level 1, landing a Coin or combo'ing into a Coin is extremely crucial. Coin is an extremely powerful tool outside of combos, and often allows Johnny an easy way out of many difficult situations. However, because Coins are limited, knowing how to plan ahead and pace your coin usage properly is key to mastering Johnny. Having no coins left severely limits Johnny's combo potential - even with a significant life lead, being stuck with no coins puts Johnny in a severely disadvantageous position. On the other hand, one should avoid being overly conservative with Coins - losing a round with tons of coins left is generally considered a waste. | |||
}} | |||
}} | }} | ||
====== ====== | ====== ====== | ||
{{MoveData | {{MoveData | ||
| Line 599: | Line 626: | ||
{{!}}- | {{!}}- | ||
{{Description|7|text= | {{Description|7|text= | ||
Bacchus Sigh, AKA Mist, is used to create Johnny's infamous unblockable setups. It creates a mist at Johnny's location that slowly travels forward for a few seconds. If the mist gets close enough to the opponent, it attaches to the opponent for 358F. about 5 seconds. During this time period Mist Finer becomes entirely unblockable. Disappears when a Mist Finer makes contact with the opponent (does not disappear if you whiff a Mist Finer) or if Johnny is hit (persists while Johnny is blocking) Because of Bacchus Sigh's extremely slow startup, a knockdown is generally required to guarantee application. Even when applying Bacchus Sigh on a downed opponent, because of its slow travel time, you generally must force an opponent to block 1-2 attacks before the Bacchus Sigh can apply properly. | |||
}} | }} | ||
}} | }} | ||
====== ====== | ====== ====== | ||
{{MoveData | {{MoveData | ||
| Line 613: | Line 641: | ||
{{!}}- | {{!}}- | ||
{{Description|7|text= | {{Description|7|text= | ||
Overhead. Not a projectile. First hit does a base damage of 6, scores knockdown at most heights against the entire cast. Second hit does a base damage of 62 | Overhead. Not a projectile. First hit does a base damage of 6, scores knockdown at most heights against the entire cast. Second hit does a base damage of 62. Note that when both hits connect, the knockdown of the first hit is cancelled out. | ||
}} | }} | ||
}} | }} | ||
====== ====== | ====== ====== | ||
{{MoveData | {{MoveData | ||
| Line 627: | Line 656: | ||
{{AttackVersion|name=Transport|subtitle=623S}} | {{AttackVersion|name=Transport|subtitle=623S}} | ||
{{#lsth:GGReload/Johnny/Data|623S}} | {{#lsth:GGReload/Johnny/Data|623S}} | ||
{{!}}- | |||
{{Description|8|text=8F onwards airborne. Johnny is in CH state during recovery. 9~31F can cancel into Divine Blade. The FRC is mostly used to surprise opponents from full screen distance, but it can also be used to air throw enemies that tech backwards after being hit with Coin. | |||
}} | |||
{{!}}- | {{!}}- | ||
{{AttackVersion|name=Attack|subtitle=623S > S}} | {{AttackVersion|name=Attack|subtitle=623S > S}} | ||
{{#lsth:GGReload/Johnny/Data|623S > S}} | {{#lsth:GGReload/Johnny/Data|623S > S}} | ||
{{!}}- | {{!}}- | ||
{{Description|8|text= | {{Description|8|text=Floats the opponent on hit. Great combo tool. When FRC'd leads to 50/50s, especially when Divine Blade Transport was Neutral Jump Installed. | ||
}} | }} | ||
}} | }} | ||
====== ====== | ====== ====== | ||
{{MoveData | {{MoveData | ||
|name=Air Divine Blade | |name=Air Divine Blade | ||
| | |image=GGAC_Johnny_623SS.png | ||
|input=j.236S | |input=j.236S | ||
|data= | |data= | ||
{{AttackDataHeader-GGReload}} | {{AttackDataHeader-GGReload}} | ||
{{!}}- | {{!}}- | ||
{{#lsth:GGReload/Johnny/Data|j. | {{#lsth:GGReload/Johnny/Data|j.623S}} | ||
{{!}}- | {{!}}- | ||
{{Description|7|text= | {{Description|7|text= | ||
FRC | The existence of this move makes countering Johnny's jump-ins risky, as it stuffs any standing anti-air that would beat your j.HS. Extremely rewarding damage if it starts a combo in the corner. | ||
Frame adv listed on fastest TK version. Floats opponent on hit. FRC point 15~16F. | |||
}} | }} | ||
}} | }} | ||
| Line 663: | Line 697: | ||
{{!}}- | {{!}}- | ||
{{Description|7|text= | {{Description|7|text= | ||
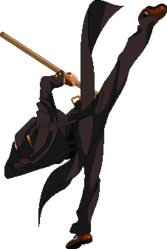
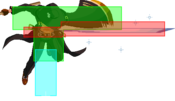
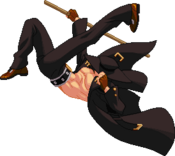
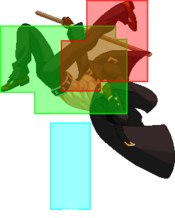
One of Johnny's only defensive options. Difficult for opponents to punish on block, but can be stuffed by many low profile/upper body invincible attacks, such as Slayer's 6P or I-No's Stroke The Big Tree. It can also be stuffed on rare occasion by moves that push the opponent towards Johnny, regardless of low profile. Often used as a combo ender, especially to kill. | |||
1-8F Full invul. 9F Throw invul and upper body invul. 10-17F above knees invul. Knocks down opponent on hit. On hit, Johnny ends up on Player 1 side. | |||
}} | }} | ||
}} | }} | ||
==Instant Kill== | ==Instant Kill== | ||
{{MoveData | {{MoveData | ||
| Line 698: | Line 721: | ||
==Navigation== | ==Navigation== | ||
{{#lsth:GGReload/Johnny/Data|Links}} | {{#lsth:GGReload/Johnny/Data|Links}} | ||
{{Navbar-GGReload}} | {{Navbar-GGReload}} | ||
[[Category:Guilty Gear | [[Category:Guilty Gear|Johnny]] | ||
Latest revision as of 04:13, 24 December 2023
| Overview | Combos | Strategy/Counter Strategy | Full Frame Data |
| Johnny | |||||||||||||||||||||
|---|---|---|---|---|---|---|---|---|---|---|---|---|---|---|---|---|---|---|---|---|---|
|
Defense Modifier: x1.00 Guts Rating: 4 Weight: Mid-Heavy (x0.98) Stun Resistance: 70 Jump Startup: 4F Backdash Time: 11F / Invul: 1~7F Wake-Up (Face Up/Down): 36F / 35F
1: Note that Johnny's dashes put him in an airborne state and allow him to dodge moves with hitboxes very low to the ground and Potemkin's Slide Head. Consequently, he is also air throwable while dashing.
|
Overview
- Johnny is an iaido style swordsman who completely dominates the neutral and offense game thanks to his famous Mist Finer stance (236P/K/S). His pokes are among the best in the entire game when utilizing his Mist Stance cancels (H to exit stance) which can also be made faster by landing some of the 8 coins that he naturally starts each match with. Any coin that hits an opponent completely buffs each version of his Mist Finers (up to level 3) which in turn gives them deadly properties for combos as well as making them faster all together, ultimately shortening the recovery of his base attacks and granting him incredible pressure on offense. Johnny's above average execution combined with his movement options can certainly seem daunting to inexperienced players, but in the right hands, he's a dangerous and threatening characters to face.
Strengths and Weaknesses
| Strengths | Weaknesses |
|---|---|
|
|
Unique Mechanics
Coin
Johnny has a unique resource in the form of coins. The number of coins that Johnny has is displayed above his tension meter. Johnny starts every round with 8 coins and does not get more coins until the start of the next round. Every time Johnny uses his Glitter Is Gold special one coin will be subtracted from his remaining coin total. When Johnny has 0 coins remaining, he will be unable to throw coins at the enemy with his Glitter Is Gold special. When a coin hits the enemy, Johnny's Mist Finer special will Level Up to a maximum of Level 3 form a starting level of Level 1. Hitting an enemy with a coin when Johnny has level 3 Mist Finer will still do damage, but will not level up Mist Finer further. Whenever Mist Finer is used, Mist Finer will return to Level 1, and can be leveled up again.
Normals
| 5P |
|---|
| 5K |
|---|
| c.S |
|---|
| f.S |
|---|
| 5H |
|---|
| 5D |
|---|
| 6P |
|---|
| 6K |
|---|
| 6H |
|---|
| 2P |
|---|
| 2K |
|---|
| 2S |
|---|
| 2H |
|---|
| 2D |
|---|
| j.P |
|---|
| j.K |
|---|
| j.S |
|---|
| j.H |
|---|
| j.D |
|---|
Universal Mechanics
| Ground Throw |
|---|
| Air Throw |
|---|
| Dead Angle Attack |
|---|
Specials
| Mist Finer Stance 236P/K/S |
|---|
| Mist Finer: Upper 236P |
|---|
| Mist Finer: Middle 236K |
|---|
| Mist Finer: Lower 236S |
|---|
| Glitter Is Gold 236H |
|---|
| Bacchus Sigh 214P |
|---|
| Ensenga j.41236H |
|---|
| Divine Blade 623S -> S |
|---|
| Air Divine Blade j.236S |
|---|
Overdrives
| That's My Name 632146H |
|---|
Instant Kill
| Joker Trick in IK Mode: 236236H |
|---|


