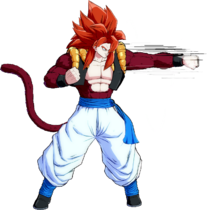
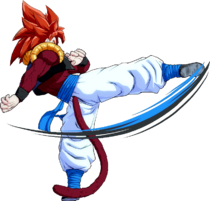
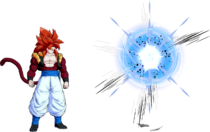
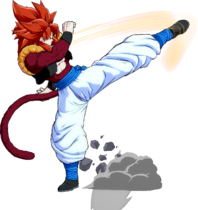
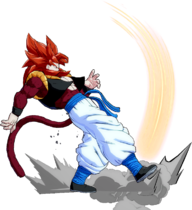
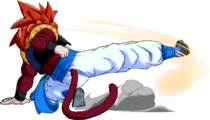
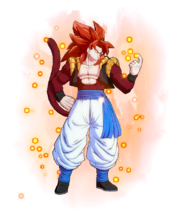
| Overview | Combos | Strategy/Counter Strategy | Full Frame Data |
Normal Moves
5L
- 5L
- Great range.
- Hits high enough to check opponents after a blocked superdash.
Standard speed 5L. Very nice for stagger pressure.
- 5LL
- Instant 5LL will double reflect, pushing Gogeta back to full screen.
- Catches buttons after reflected 5L if delayed.
Insane button. Large, sweeping high hitbox that can catch opponents behind Gogeta too, which can then lead straight into his 5LLL. Since it's a 5LL, it is a medium unscaled starter. It can be low profiled by some 2L and 2Ms, but that's just about its only fault.
- 5LLL
- Always triggers cinematic.
- Switches sides on hit, not on block.
- Has head invul.
5M
- Catches any jump except Superjump Back at round start.
Long range, high hitting 5M with fast startup. An overall excellent 5M, one of the best in the game along with Krillin, Adult Gohan and Kid Buu's.
5H
- Does not truestring from any of Gogeta's normals, can be used as a frametrap.
Mostly combo filler or a frametrap on demand. Ground normals aren't all that useful as neutral tools in DBFZ and this one is no exception. As a frametrap, it will catch anything in the game that isn't invincible frame 1.
5S
- Tracks in front of Gogeta up until half-screen.
- Combos into superdash anywhere.
Not as useful as it's airborne counterpart, but still good as a tool to control space.
2L
- 6-frame mid.
- Big range like it's 5L counterpart.
2L comes out a frame faster than the average, best used for staggering or mashing out of pressure. Very comparable to the Goku shotos in this regard. Gogeta's main mixups are left/right, not high/low, and this button is a strong reason why. If you want to create a high/low situation, you're better off using his 6H chain.
2M
- Good anti-reflect tool.
- Catches reflect > raw tag after 5L.
- Punishable up close but safe if spaced.
Gogeta's main low and combo starter. Spacing this move out will leave you -5 and at an ideal spacing to bully Gogeta's other buttons.
2H
- Moves Gogeta very far forwards.
- Catches airdash back after blocked superdash.
6M
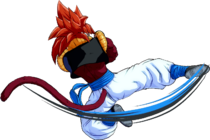
- DBFZ SS4Gogeta 6M.png
eSports kick
- Can be spaced to be plus.
Usually can be followed after with 5L if it's +2 and 5M if it's +3 to maintain pressure. If used up close, Gogeta can use the threat of his 22S or 214S to scare the opponent into blocking and maintain his turn.
6H
Saiyan Kick
- 6H
- Jump cancelable on hit.
- Chains into follow-ups for conditioning the opponent.
- 6H and it's derivative follow-ups all cancel into special moves.
- Huge hitstun on air hit, but leaves standing on ground hit.
Very high hitting normal. Although unsafe on block, the threat of the followups will make opponents respect it. The followup chain is a big part of Gogeta's pressure, as he can do a lot here to either reset pressure or go for a mixup. Followups can be backdashed midscreen, so it's wise to use 5H to catch people attempting to do that.
Other than that, it can be good for Gogeta blockstrings to extend them a little further, or for his corner rejumps as 6H hits somewhat high, which allows him to convert off of his corner strings.
- 6H~6H
- Overhead.
- Frame trap from 6H.
- Ground bounces on hit, can be converted with H/S normals or specials.
Fast overhead, will automatically catch people attempting to mash out of the chain. Delaying the button can make it harder to react to this and 3H, but doing so leaves Gogeta wide open. Decent combo filler if you want to keep your opponent close to the ground for assists, but using this forces you to spend your Superdash earlier than 6H > jumpcancel does.
- 6H~3H
- Low.
- Launches on hit just like a 2M, but has very high hitstun. You can either convert just like how you would with 6H, or link into other normals like 2M.
Considerably slower than the overhead and leaves a large gap. Fortunately, it's very safe on block and has high hitstun. If your opponent blocks this, then they are respecting you too much and you should absolutely take advantage of it.
6S
Finish Sign
- Gogeta taunts and gains some meter and a level, maxing out at 7.
- Level is gained on frame 4.
- Each level gained adds ~50 damage to his next lvl1 and ~100 damage to his next lvl3.
- Can cancel taunt recovery frames into an attack, can even buffer attacks. Data in [] refers to fastest cancel.
Character defining taunt. If there's a rest in neutral and you're not at risk of being blasted, feel free to taunt. Finish Sign builds meter, levels up your supers, and more. Don't be afraid to cash out and use your supers either, since it's not all that hard to build levels back up especially if you have assists to cover you. In pressure, you can cancel any normal into 6S for an unexpected level build and pressure reset. You can cancel out of 6S very quickly, with M normals usually leaving only an 11f window to counterattack. That sounds like a lot, but it goes by so fast your opponent is not likely to notice unless you're overusing it.
Level 7 is likely what you're aiming for with this. The good news is if you're at Level 7 and taunt again, you'll get a quarter bar. Perfect if you need that last extra punch to help combo into the IK. Once Gogeta is at Level 7, maximum respect must be given to him at all times lest the opponent be deleted the next time they so much as get tapped, or even just hit with a reversal.
j.L
- Cannot be repeated twice on whiff
Gargantuan hitbox. Will win lots of air-to-air trades.
j.M
- Very big, will cross up after an IAD in a blockstring from most ranges.
j.H
- 5LLLLLLL
- Smash hit can wall bounce.
- j.H
- Smash hit causes a sliding knockdown.
Gogeta's biggest jump-in and best oki ender. Soft knockdown setups are a lot easier than usual due to his second airdash being usable after his double jump. Use this to safejump if you don't have air options left, as j.M can threaten with an IAD j.LM fuzzy on grounded opponents.
j.S
Sit down, bitch!
- Tracks in front of Gogeta up until half-screen.
- Combos into superdash in the corner and close by midscreen.
- Can combo after j.H at certain heights.
Gogeta loses all of his momentum after using this in the air, bringing him to a dead halt. If you're not using it in a combo, it's best used to stop air-to-air attempts, but be careful as an expectant opponent can superdash preemptively and catch you wide open. It can also be used as a post-superdash option on characters with 2H normals slower than 13 frames.
j.2H
- Jump cancelable.
Pretty much every Saiyan's j.2H. Good upwards hitbox, otherwise it's a bog-standard air launcher.
Special Moves
Lightning Hammer
236L/M/H (Air OK)
- All
Gogeta's lariat-style move. All versions have Ki Blast invulnerability during their startup. Weirdly enough, they also have very good scaling when used as combo starters.
- 236L
- Travels 1/3 of the screen.
Mostly a roundstart option if you want to meme on someone, as 5M is generally a better choice. Also doubles as a movement tool in the air, but it's much more committal than simply airdashing.
- 236M
- Travels 1/2 of the screen.
- Wallbounces with Smash, giving a combo in the corner. If Smash is used, gives a mediocre SKD instead.
- Can also extend combos midscreen with an airdash.
- Gives a sliding knockdown if U1 has been used and D1 has not.
- Opponent can airtech if both Smashes have been used.
Gogeta's primary combo extender besides j.2H. Air version leads to a rejump on every character but Krillin midscreen and the ground version gives a full combo in the corner.
- 236H
- Travels 1/2 of the screen.
- Ground bounces with Smash, giving a combo anywhere.
- Gives a bounce sliding knockdown if U1 has been used and D1 has not.
- Opponent can airtech if both Smashes have been used.
6H-6H is a good way to follow this up after a delay. If your back is to the corner, you can instantly pin the opponent, 6H-6H 5H to 5S then superdash/assist. Midscreen, 6H-6H then 5S and SD/assist. Good get out of jail free card against projectile heavy characters with fantastic follow up potential, key of Gogeta's whole design.
Meteor Strike
214L/M/H (Air OK)
- All
- Overhead.
- Uses D Smash on hit.
- All versions can be anti aired, only the M version is reactable.
- 214L
- -2 on block, allowing for a safe backdash.
- In the ballpark of +33 on most knockdowns, letting you SJ IAD j.H for a safejump.
Functions as blockstring ender and combo ender. Use after j.H > j.S when you don't have smash for a knockdown.
- 214M
- +2 on block, allowing for RPS midscreen and pressure in the corner.
- In the ballpark of +55 on most knockdowns, giving you a similar setup to a Smash j.H.
A sometimes move due to it's startup, but good to use nonetheless as it's +2 on block. It's also Gogeta's best okizeme ender if he still has D1 Smash available, usually in corner combos. You'll most likely use j.DR instead, but it's there nonetheless.
- 214H
- +2 on block, allowing for RPS midscreen and pressure in the corner.
IAD j.214H can get Gogeta in from fullscreen and be +2 on block, but getting predictable will end up with you getting 2H'd. It's +2 like 214M and 24f startup like 214L, so using it to continue pressure isn't a bad idea.
Bluff Kamehameha
236S
- Command grab.
- Switches sides on hit.
- Allows for a combo with Gogeta's back to the corner.
This has pretty good range for a command grab, as well as decent speed, so you can use it if you think your opponent is blocking a bit too much to throw them off guard. Don't get reliant on it, as it is still a command grab - and if the opponent catches on, they can backdash or jump out and punish you.
Punisher Guard
214S (Air OK)
- Frame 4 counter.
- Combos into superdash anywhere.
- Will not counter Ki Blast and beams, but will invul through if timed correct.
- Loses to command grabs and Dragon rush.
- Combos into Gogeta's Instant Kill.
Excellent as a defensive tool. It's usable anytime that Gogeta is -2 or better, which is a wide range of opportunities in DBFZ. The most prominent of which are after a blocked 6M or an opponent's blocked vanish. Getting predictable with this move will get you killed, but it's great when unexpected.
Plus Energy of Justice
22S
- Frame 1 reversal.
- Gains a Dragon Ball on hit, block, or whiff.
- Dragon Ball cycle is different than that of the Dynamic! property: Two-Star → Five-Star → Six-Star → Seven-Star → Four-Star → Three-Star → One-Star
- This is actually the order in which the Shadow Dragons were killed
The Dragon balls that appear also for a split second are the black star dragon balls, in reference to, well, the black star dragon balls
Can hit opponents crossing up Gogeta, which is always nice.
Z Assists
Assist A
Finish Sign
- Grants half a bar
- Levels Gogeta up, but cannot go past Level 5 for obvious reasons.
Effectively a worse version of Base Goku's B assist due to the lesser meter build and only making Gogeta's supers stronger instead of giving him something like a Spirit Bomb. While you can hold Gogeta in the back and greatly reduce the risk it takes to get his instant kill, it's somewhat of a gimmicky gameplan. Still, if your characters don't really need frame advantage and are better off with meter, this can be a good choice.
Assist B
Lightning Hammer
- Generic strike assist with good advantage, beating most assists
- Holds the opponent in the air for a bit on hit
Practical assist with nothing wrong with it. Very basic, but very reliable.
Assist C
Plus Energy of Justice
- Gains a Dragon Ball on hit, block, or whiff.
- Dragon Ball cycle is different than that of the Dynamic! property: Two-Star → Five-Star → Six-Star → Seven-Star → Four-Star → Three-Star → One-Star
- Unfathomably less advantageous than every other C assist and some normal assists.
Just remember, Dragon Balls can be used against you too.
Super Moves
Ultimate Impact
236L+M (Air OK)
- DBFZ SS4Gogeta UltimateImpactGround.png
Ground finisher
"Back to the corner with you!" - DBFZ SS4Gogeta UltimateImpactAir.png
Air finisher
Gogeta channels his inner Xrd Sol
- Minimum damage: 754 → 808 → 862 → 916 → 970 → 1024 → 1078 → 1154
- Has Head property, making it vulnerable to 2H.
- Tracks the entire screen.
- Side switches on hit for ground version. Regains side for air version.
- Ground version corner carries.
Tracks anywhere on the screen, but deals rather poor damage without levels. At Level 3 or so, it might actually be more worthwhile to use this than continue going for the Instant Kill as this becomes one of the most solidly damaging Level 1s in the game.
Ultra Big Bang Kamehameha
214L+M (Air OK)
- Minimum damage: 1654 → 1708 → 1762 → 1816 → 1870 → 1924 → 1978 → 2054
- Adv. on hit: +44
Like most beam lvl3 supers, it's hard to get consistent pressure midscreen. The corner is a whole different story. Gogeta doesn't have access to a fast low, but he does have access to an easy fuzzy overhead thanks to his double airdash. After a lvl3 in the corner, [9]j.M (whiff) > j.M will leave you at the perfect height to either IAD j.LM or land 2M. On most characters, the IAD j.LM will be a true blockstring as well as a combo if the j.M connected. You're also free to go for a DR or 236S after the j.M for additional layers.
x100 Big Bang Kamehameha
214H+S while Level 7 (Air OK)
- Instant Kill.
- If you can read an assist, it will be even more devastating and will kill both characters
- Tends to deal to 19980 damage regardless of scaling, but can deal "more" if an assist is on-screen.
- Appears to deal 29160 damage raw based on what was calculated from this video https://youtu.be/XbV3YBRsAYk
- Extremely high startup, will not combo after a regular slide knockdown and not good for reversals.
This move is an instant kill that can only be used once Gogeta reaches Level 7. It doesn't matter how you combo into it, how scaled the combo is, or if you even only hit with the final hit of the beam. It will always kill.
Only Teen Gohan's Level 5 can evenly match this super move and evade being Instant Killed.
