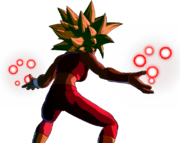
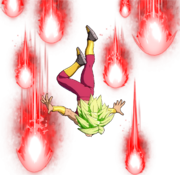
Tag: Undo |
(moved to new formatting) |
||
| Line 41: | Line 41: | ||
==Normal Moves== | ==Normal Moves== | ||
======< | ===<big>5L</big>=== | ||
<div class="attack-container"> | |||
<div class="attack-gallery"> | |||
<gallery widths="180px" heights="180px"> | |||
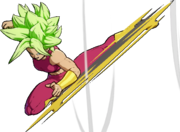
DBFZ_Kefla_5L.png | | |||
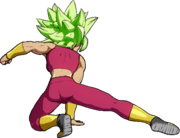
DBFZ_Kefla_5LL.png |Potara Kicks | |||
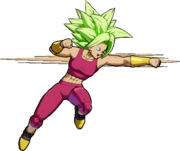
|data | DBFZ_Kefla_5LLL.png |Shades of R. Mika. | ||
</gallery> | |||
</div> | |||
<div class="attack-info"> | |||
{| class="wikitable attack-data" | |||
{{AttackDataHeader-DBFZ|version=yes}} | {{AttackDataHeader-DBFZ|version=yes}} | ||
|- | |||
{{AttackVersion|name=5L}} | {{AttackVersion|name=5L}} | ||
{{#lst:{{PAGENAME}}/Data|5L}} | {{#lst:{{PAGENAME}}/Data|5L}} | ||
|- | |||
{{AttackVersion|name=5LL}} | {{AttackVersion|name=5LL}} | ||
{{#lst:{{PAGENAME}}/Data|5LL}} | {{#lst:{{PAGENAME}}/Data|5LL}} | ||
|- | |||
{{AttackVersion|name=5LLL}} | {{AttackVersion|name=5LLL}} | ||
{{#lst:{{PAGENAME}}/Data|5LLL}} | {{#lst:{{PAGENAME}}/Data|5LLL}} | ||
|} | |||
==== ==== | |||
* | * 5L slides forward, 4LL doesn't. | ||
** Good frame advantage. | |||
---- | |||
* On hit, 5LL forces crouching opponent to stand up, holds airborne opponent mostly in place for all hits to connect. | |||
---- | |||
* 5LLL always whiffs against crouching characters, even if they're visually standing. | |||
* Recovers in midair. | * Recovers in midair. | ||
* Has 5f of landing recovery on block, 7f on whiff or hit. | * Has 5f of landing recovery on block, 7f on whiff or hit. | ||
| Line 73: | Line 75: | ||
* 5LLL > j.214S is -6 on block. | * 5LLL > j.214S is -6 on block. | ||
If you somehow make them block this, the 5f of landing recovery is still in the way of high-low mixs. | If you somehow make them block this, the 5f of landing recovery is still in the way of high-low mixs. | ||
</div> | |||
</div> | |||
======< | ===<big>5M</big>=== | ||
<div class="attack-container"> | |||
<div class="attack-gallery"> | |||
<gallery widths="180px" heights="180px"> | |||
|data | DBFZ_Kefla_5M.png | | ||
</gallery> | |||
</div> | |||
<div class="attack-info"> | |||
{| class="wikitable attack-data" | |||
{{AttackDataHeader-DBFZ}} | {{AttackDataHeader-DBFZ}} | ||
|- | |||
{{#lst:{{PAGENAME}}/Data|5M}} | {{#lst:{{PAGENAME}}/Data|5M}} | ||
|} | |||
==== ==== | |||
* Multiple hits, lower than average damage. Does 666 damage raw, so you know this normal is going to be cursed. | * Multiple hits, lower than average damage. Does 666 damage raw, so you know this normal is going to be cursed. | ||
* All hits are jump cancellable on hit | * All hits are jump cancellable on hit | ||
* Goes just over halfscreen | * Goes just over halfscreen | ||
5L > 5M or 2L > 5M on reflect will put Kefla right back in their face, forcing them to block or gamble a second reflect. | 5L > 5M or 2L > 5M on reflect will put Kefla right back in their face, forcing them to block or gamble a second reflect. | ||
</div> | |||
</div> | |||
======< | ===<big>5H</big>=== | ||
<div class="attack-container"> | |||
<div class="attack-gallery"> | |||
<gallery widths="180px" heights="180px"> | |||
|data | DBFZ_Kefla_5H.png |The armless dab kick | ||
</gallery> | |||
</div> | |||
<div class="attack-info"> | |||
{| class="wikitable attack-data" | |||
{{AttackDataHeader-DBFZ}} | {{AttackDataHeader-DBFZ}} | ||
|- | |||
{{#lst:{{PAGENAME}}/Data|5H}} | {{#lst:{{PAGENAME}}/Data|5H}} | ||
|} | |||
==== ==== | |||
* Smash hit wall splats, combos into SD. | * Smash hit wall splats, combos into SD. | ||
* Tall hitbox, making it good for corner combos. | * Tall hitbox, making it good for corner combos. | ||
* Kefla can perform the rejump combo, it's much like Bardock's but harder. | * Kefla can perform the rejump combo, it's much like Bardock's but harder. | ||
Kefla was blessed with a 5H that is better than most other characters. Besides the points mentioned above, it also travels far enough forward to catch reflect and cancels into 214X, which hit low and also beat reflect. It should be mentioned again that this move is great for corner combos, as '''2M > delay 5M > 5H''' is very consistent and highly damaging compared to other characters. | Kefla was blessed with a 5H that is better than most other characters. Besides the points mentioned above, it also travels far enough forward to catch reflect and cancels into 214X, which hit low and also beat reflect. It should be mentioned again that this move is great for corner combos, as '''2M > delay 5M > 5H''' is very consistent and highly damaging compared to other characters. | ||
</div> | |||
</div> | |||
======< | ===<big>5S</big>=== | ||
<div class="attack-container"> | |||
<div class="attack-gallery"> | |||
<gallery widths="180px" heights="180px"> | |||
|data | DBFZ_Kefla_5S.png | | ||
</gallery> | |||
</div> | |||
<div class="attack-info"> | |||
{| class="wikitable attack-data" | |||
{{AttackDataHeader-DBFZ}} | {{AttackDataHeader-DBFZ}} | ||
|- | |||
{{#lst:{{PAGENAME}}/Data|5S}} | {{#lst:{{PAGENAME}}/Data|5S}} | ||
|} | |||
==== ==== | |||
* Hold or mash S to shoot all 6 Ki Blasts. | * Hold or mash S to shoot all 6 Ki Blasts. | ||
* One of the fastest Ki Blasts in the game at 11 frames. | * One of the fastest Ki Blasts in the game at 11 frames. | ||
Kefla's Ki Blast is the same speed as Teen Gohan's, but she can fire off two more Ki Blasts than he can. | Kefla's Ki Blast is the same speed as Teen Gohan's, but she can fire off two more Ki Blasts than he can. | ||
</div> | |||
</div> | |||
======< | ===<big>2L</big>=== | ||
<div class="attack-container"> | |||
<div class="attack-gallery"> | |||
<gallery widths="180px" heights="180px"> | |||
|data | DBFZ_Kefla_2L.png | | ||
</gallery> | |||
</div> | |||
<div class="attack-info"> | |||
{| class="wikitable attack-data" | |||
{{AttackDataHeader-DBFZ}} | {{AttackDataHeader-DBFZ}} | ||
|- | |||
{{#lst:{{PAGENAME}}/Data|2L}} | {{#lst:{{PAGENAME}}/Data|2L}} | ||
|} | |||
==== ==== | |||
* Short low. | * Short low. | ||
Kefla's fastest low normal. Decent frame advantage, so also good for pressure. | Kefla's fastest low normal. Decent frame advantage, so also good for pressure. | ||
</div> | |||
</div> | |||
======< | ===<big>2M</big>=== | ||
<div class="attack-container"> | |||
<div class="attack-gallery"> | |||
<gallery widths="180px" heights="180px"> | |||
|data | DBFZ_Kefla_2M.png | | ||
</gallery> | |||
</div> | |||
<div class="attack-info"> | |||
{| class="wikitable attack-data" | |||
{{AttackDataHeader-DBFZ}} | {{AttackDataHeader-DBFZ}} | ||
|- | |||
{{#lst:{{PAGENAME}}/Data|2M}} | {{#lst:{{PAGENAME}}/Data|2M}} | ||
|} | |||
==== ==== | |||
* Rather short, but fast sweep. | * Rather short, but fast sweep. | ||
</div> | |||
</div> | |||
======< | ===<big>2H</big>=== | ||
<div class="attack-container"> | |||
<div class="attack-gallery"> | |||
<gallery widths="180px" heights="180px"> | |||
|data | DBFZ_Kefla_2H.png | SHORYUKEN! | ||
</gallery> | |||
</div> | |||
<div class="attack-info"> | |||
{| class="wikitable attack-data" | |||
{{AttackDataHeader-DBFZ}} | {{AttackDataHeader-DBFZ}} | ||
|- | |||
{{#lst:{{PAGENAME}}/Data|2H}} | {{#lst:{{PAGENAME}}/Data|2H}} | ||
|} | |||
==== ==== | |||
* Smash hit combos into SD. | * Smash hit combos into SD. | ||
* Puts her airborne. If cancelled early, stays grounded. | * Puts her airborne. If cancelled early, stays grounded. | ||
</div> | |||
</div> | |||
======< | ===<big>6M</big>=== | ||
<div class="attack-container"> | |||
<div class="attack-gallery"> | |||
<gallery widths="180px" heights="180px"> | |||
|data | DBFZ_Kefla_6M.png | B O N K | ||
</gallery> | |||
</div> | |||
<div class="attack-info"> | |||
{| class="wikitable attack-data" | |||
{{AttackDataHeader-DBFZ}} | {{AttackDataHeader-DBFZ}} | ||
|- | |||
{{#lst:{{PAGENAME}}/Data|6M}} | {{#lst:{{PAGENAME}}/Data|6M}} | ||
|} | |||
==== ==== | |||
* Universal overhead. | * Universal overhead. | ||
Faster than 6H by 3 frames, although unlike 6H you can't combo off of it without assists. | Faster than 6H by 3 frames, although unlike 6H you can't combo off of it without assists. | ||
</div> | |||
</div> | |||
=== | ===<big>6H</big> <span class="input-badge"><small>Double Hammer</small></span>=== | ||
<div class="attack-container"> | |||
<div class="attack-gallery"> | |||
<gallery widths="180px" heights="180px"> | |||
DBFZ_Kefla_6H.png |Watch yo dome | |||
|data | </gallery> | ||
</div> | |||
<div class="attack-info"> | |||
{| class="wikitable attack-data" | |||
{{AttackDataHeader-DBFZ}} | {{AttackDataHeader-DBFZ}} | ||
|- | |||
{{#lst:{{PAGENAME}}/Data|6H}} | {{#lst:{{PAGENAME}}/Data|6H}} | ||
|} | |||
==== ==== | |||
* Extendable overhead thanks to its gatling options and high hitstun. | * Extendable overhead thanks to its gatling options and high hitstun. | ||
* Versatile combo filler after assists, '''6H > 5H > 214M''' does a ton of damage. | * Versatile combo filler after assists, '''6H > 5H > 214M''' does a ton of damage. | ||
* Scales poorly. | * Scales poorly. | ||
The mixup tool. Midscreen you're going to want to cancel this into 2H and hitconfirm SD or 214L from there, but in the corner you should route immediately into 214M for max damage. | The mixup tool. Midscreen you're going to want to cancel this into 2H and hitconfirm SD or 214L from there, but in the corner you should route immediately into 214M for max damage. | ||
</div> | |||
</div> | |||
===<big>j.L</big>=== | |||
<div class="attack-container"> | |||
<div class="attack-gallery"> | |||
<gallery widths="180px" heights="180px"> | |||
|data | DBFZ_Kefla_jL.png | | ||
</gallery> | |||
</div> | |||
<div class="attack-info"> | |||
{| class="wikitable attack-data" | |||
{{AttackDataHeader-DBFZ}} | {{AttackDataHeader-DBFZ}} | ||
|- | |||
{{#lst:{{PAGENAME}}/Data|j.L}} | {{#lst:{{PAGENAME}}/Data|j.L}} | ||
|} | |||
==== ==== | |||
* A high jab with some range. | * A high jab with some range. | ||
* Very easy to snipe superdashes with. | * Very easy to snipe superdashes with. | ||
</div> | |||
</div> | |||
===<big>j.M</big>=== | |||
<div class="attack-container"> | |||
<div class="attack-gallery"> | |||
<gallery widths="180px" heights="180px"> | |||
|data | DBFZ_Kefla_jM.png | | ||
</gallery> | |||
</div> | |||
<div class="attack-info"> | |||
{| class="wikitable attack-data" | |||
{{AttackDataHeader-DBFZ}} | {{AttackDataHeader-DBFZ}} | ||
|- | |||
{{#lst:{{PAGENAME}}/Data|j.M}} | {{#lst:{{PAGENAME}}/Data|j.M}} | ||
|} | |||
==== ==== | |||
* Very active with good range. | * Very active with good range. | ||
* Basically Bardocks j.M. | * Basically Bardocks j.M. | ||
* Very low knockback, some basic combos don't work as a result. | * Very low knockback, some basic combos don't work as a result. | ||
This is your primary air combo filler thanks to j.H's massive hitbox. | This is your primary air combo filler thanks to j.H's massive hitbox. | ||
</div> | |||
</div> | |||
===<big>j.H</big>=== | |||
<div class="attack-container"> | |||
<div class="attack-gallery"> | |||
<gallery widths="180px" heights="180px"> | |||
|data | DBFZ_Kefla_jH.png | | ||
</gallery> | |||
</div> | |||
<div class="attack-info"> | |||
{| class="wikitable attack-data" | |||
{{AttackDataHeader-DBFZ|version=yes}} | {{AttackDataHeader-DBFZ|version=yes}} | ||
|- | |||
{{AttackVersion|name=5LLLLLLL}} | {{AttackVersion|name=5LLLLLLL}} | ||
{{#lst:{{PAGENAME}}/Data|5LLLLLLL}} | {{#lst:{{PAGENAME}}/Data|5LLLLLLL}} | ||
|- | |||
{{AttackVersion|name=j.H}} | {{AttackVersion|name=j.H}} | ||
{{#lst:{{PAGENAME}}/Data|j.H}} | {{#lst:{{PAGENAME}}/Data|j.H}} | ||
|} | |||
==== ==== | |||
* Smash hit causes SKD. | * 5LLLLLLL Smash hit can wall bounce. | ||
* j.H Smash hit causes SKD. | |||
</div> | |||
</div> | |||
===<big>j.S</big>=== | |||
<div class="attack-container"> | |||
<div class="attack-gallery"> | |||
|data | <gallery widths="180px" heights="180px"> | ||
DBFZ_Kefla_jS.png | | |||
</gallery> | |||
</div> | |||
<div class="attack-info"> | |||
{| class="wikitable attack-data" | |||
{{AttackDataHeader-DBFZ}} | {{AttackDataHeader-DBFZ}} | ||
|- | |||
{{#lst:{{PAGENAME}}/Data|j.S}} | {{#lst:{{PAGENAME}}/Data|j.S}} | ||
|} | |||
==== ==== | |||
* Hold or mash S to shoot all 4 Ki blasts. | * Hold or mash S to shoot all 4 Ki blasts. | ||
* Stops all air momentum. | * Stops all air momentum. | ||
* Really mean crossup tool. | * Really mean crossup tool. | ||
</div> | |||
</div> | |||
===<big>j.2H</big>=== | |||
<div class="attack-container"> | |||
<div class="attack-gallery"> | |||
<gallery widths="180px" heights="180px"> | |||
|data | DBFZ_Kefla_j2H.png |Potara Knee | ||
</gallery> | |||
</div> | |||
<div class="attack-info"> | |||
{| class="wikitable attack-data" | |||
{{AttackDataHeader-DBFZ}} | {{AttackDataHeader-DBFZ}} | ||
|- | |||
{{#lst:{{PAGENAME}}/Data|j.2H}} | {{#lst:{{PAGENAME}}/Data|j.2H}} | ||
|} | |||
==== ==== | |||
* Push Kefla forward, keeps some momentum. | * Push Kefla forward, keeps some momentum. | ||
</div> | |||
</div> | |||
==Special Moves== | ==Special Moves== | ||
=== | ===<big>Super Cannonball</big> <span class="input-badge"><small>236L/M/H</small></span>=== | ||
<div class="attack-container"> | |||
<div class="attack-gallery"> | |||
<gallery widths="180px" heights="180px"> | |||
DBFZ_Kefla_SuperCannonball.png | | |||
DBFZ_Kefla_SuperCannonball2.png | | |||
|data | </gallery> | ||
</div> | |||
<div class="attack-info"> | |||
{| class="wikitable attack-data" | |||
{{AttackDataHeader-DBFZ|version=yes}} | {{AttackDataHeader-DBFZ|version=yes}} | ||
|- | |||
{{AttackVersion|name=L}} | {{AttackVersion|name=L}} | ||
{{#lst:{{PAGENAME}}/Data|236L}} | {{#lst:{{PAGENAME}}/Data|236L}} | ||
|- | |||
{{AttackVersion|name=M}} | {{AttackVersion|name=M}} | ||
{{#lst:{{PAGENAME}}/Data|236M}} | {{#lst:{{PAGENAME}}/Data|236M}} | ||
|- | |||
{{AttackVersion|name=H}} | {{AttackVersion|name=H}} | ||
{{#lst:{{PAGENAME}}/Data|236H}} | {{#lst:{{PAGENAME}}/Data|236H}} | ||
|} | |||
==== ==== | |||
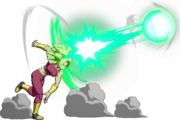
* | * Beam property projectile. | ||
Is +4 on block, meaning the opponent can't backdash out of 5L. | * Jails into Vanish | ||
* 236L throws a projectile forward. | |||
* 236M throws it angled upward. | |||
* 236H throws 2 projectiles forward. | |||
** Is +4 on block, meaning the opponent can't backdash out of 5L. | |||
**On hit, can link into SD even from midscreen, or into air normals in the corner. | |||
</div> | |||
</div> | |||
===<big>Ain't nobody that can stop me!</big> <span class="input-badge"><small>214L/M/H</small></span>=== | |||
<div class="attack-container"> | |||
<div class="attack-gallery"> | |||
<gallery widths="180px" heights="180px"> | |||
DBFZ_Kefla_Aintnobody.png |LOW HITTING LARIAT AWAAAY | |||
</gallery> | |||
</div> | |||
<div class="attack-info"> | |||
{| class="wikitable attack-data" | |||
|data | |||
{{AttackDataHeader-DBFZ|version=yes}} | {{AttackDataHeader-DBFZ|version=yes}} | ||
|- | |||
{{AttackVersion|name=L}} | {{AttackVersion|name=L}} | ||
{{#lst:{{PAGENAME}}/Data|214L}} | {{#lst:{{PAGENAME}}/Data|214L}} | ||
|- | |||
{{AttackVersion|name=M}} | {{AttackVersion|name=M}} | ||
{{#lst:{{PAGENAME}}/Data|214M}} | {{#lst:{{PAGENAME}}/Data|214M}} | ||
|- | |||
{{AttackVersion|name=H}} | {{AttackVersion|name=H}} | ||
{{#lst:{{PAGENAME}}/Data|214H}} | {{#lst:{{PAGENAME}}/Data|214H}} | ||
|} | |||
==== ==== | |||
* | * 5L goes half screen forward. | ||
* Smash hit wall splats really high up, forces a soft knockdown. | * 5LL goes 75% of the screen. | ||
* Absolutely terrifying. | ** Smash hit can wall splat, has enough frame adv to link into 5H in the corner. | ||
* 5LLL goes 80% of the screen. | |||
** Smash hit wall splats really high up, forces a soft knockdown. | |||
=== | ** Absolutely terrifying. | ||
</div> | |||
</div> | |||
===<big>Gigantic Breaker</big> <span class="input-badge"><small>236S (Air OK)</small></span>=== | |||
<div class="attack-container"> | |||
<div class="attack-gallery"> | |||
|data | <gallery widths="180px" heights="180px"> | ||
DBFZ_Kefla_GiganticBreaker.png | | |||
DBFZ_Kefla_GiganticBreaker2.png |RASENGAN!!!!! | |||
</gallery> | |||
</div> | |||
<div class="attack-info"> | |||
{| class="wikitable attack-data" | |||
{{AttackDataHeader-DBFZ|version=yes}} | {{AttackDataHeader-DBFZ|version=yes}} | ||
|- | |||
{{AttackVersion|name=Ground Uncharged}} | {{AttackVersion|name=Ground Uncharged}} | ||
{{#lst:{{PAGENAME}}/Data|236S}} | {{#lst:{{PAGENAME}}/Data|236S}} | ||
|- | |||
{{AttackVersion|name=Ground Charged}} | {{AttackVersion|name=Ground Charged}} | ||
{{#lst:{{PAGENAME}}/Data|236[S]}} | {{#lst:{{PAGENAME}}/Data|236[S]}} | ||
{{ | |- | ||
{{ | {{AttackVersion|name=Air Uncharged}} | ||
{{#lst:{{PAGENAME}}/Data|j.236S}} | |||
|- | |||
{{AttackVersion|name=Air Charged}} | |||
{{#lst:{{PAGENAME}}/Data|j.236[S]}} | |||
|} | |||
==== ==== | |||
* Kefla stands still to charge her attack, then dashes forward 80% of the screen and throw a beam projectile. | * Kefla stands still to charge her attack, then dashes forward 80% of the screen and throw a beam projectile. | ||
* Smash on the dash. Smash hit causes SKD. | * Smash on the dash. Smash hit causes SKD. | ||
| Line 363: | Line 417: | ||
* Projectile jails into Vanish, but there's a gap between charge > dash and charge > projectile. | * Projectile jails into Vanish, but there's a gap between charge > dash and charge > projectile. | ||
* Grounded Smash version can combo into 236H+S. | * Grounded Smash version can combo into 236H+S. | ||
---- | |||
* j.LL(2) > j.236S is Kefla's anywhere sliding knockdown. Can combo into any Super afterward beside Gigantic Ray. | * j.LL(2) > j.236S is Kefla's anywhere sliding knockdown. Can combo into any Super afterward beside Gigantic Ray. | ||
</div> | |||
</div> | |||
===<big>Time to test this power out!</big> <span class="input-badge"><small>214S (Air OK)</small></span>=== | |||
<div class="attack-container"> | |||
<div class="attack-gallery"> | |||
<gallery widths="180px" heights="180px"> | |||
DBFZ_Kefla_Timetotestthisout.png |zoooooooom | |||
|data | </gallery> | ||
</div> | |||
<div class="attack-info"> | |||
{| class="wikitable attack-data" | |||
{{AttackDataHeader-DBFZ|version=yes}} | {{AttackDataHeader-DBFZ|version=yes}} | ||
|- | |||
{{AttackVersion|name=Ground}} | {{AttackVersion|name=Ground}} | ||
{{#lst:{{PAGENAME}}/Data|214S}} | {{#lst:{{PAGENAME}}/Data|214S}} | ||
{{ | |- | ||
{{ | {{AttackVersion|name=Air}} | ||
{{#lst:{{PAGENAME}}/Data|j.214S}} | |||
|} | |||
==== ==== | |||
* Dashes forward, tracks horizontally and always sides switches. | * Dashes forward, tracks horizontally and always sides switches. | ||
* Has a minimum distance she has to travel. At close range, the dash will leave her slightly away from the opponent, at far range she'll stay right behind them. | * Has a minimum distance she has to travel. At close range, the dash will leave her slightly away from the opponent, at far range she'll stay right behind them. | ||
* Fully invincible from frame 4. | * Fully invincible from frame 4. | ||
Allows her to sneak past beams, or other things that may be annoying for her to deal with. | Allows her to sneak past beams, or other things that may be annoying for her to deal with. | ||
---- | |||
* j.214S dashes diagonally downward, can also steal the corner like the grounded version. | |||
* Fully invincible from frame 4. | * Fully invincible from frame 4. | ||
</div> | |||
</div> | |||
==Z Assists== | ==Z Assists== | ||
=== | ===<big>Super Cannonball</big> <span class="input-badge"><small>Assist A</small></span>=== | ||
<div class="attack-container"> | |||
<div class="attack-gallery"> | |||
<gallery widths="180px" heights="180px"> | |||
DBFZ_Kefla_SuperCannonball.png | | |||
|data | </gallery> | ||
</div> | |||
<div class="attack-info"> | |||
{| class="wikitable attack-data" | |||
{{AttackDataHeader-DBFZ}} | {{AttackDataHeader-DBFZ}} | ||
|- | |||
{{#lst:{{PAGENAME}}/Data|Assist A}} | {{#lst:{{PAGENAME}}/Data|Assist A}} | ||
|} | |||
==== ==== | |||
* Stands still and does 236L. | * Stands still and does 236L. | ||
A great assist. It's fast, has almost a second of hitstun, isn't too bad on block, and has beam properties allowing it to smack superdash and Ki Blasts. Good for neutral and combos, although her B assist has it beat in the blockstun department. | A great assist. It's fast, has almost a second of hitstun, isn't too bad on block, and has beam properties allowing it to smack superdash and Ki Blasts. Good for neutral and combos, although her B assist has it beat in the blockstun department. | ||
</div> | |||
</div> | |||
=== | ===<big>Mighty Kick</big> <span class="input-badge"><small>Assist B</small></span>=== | ||
<div class="attack-container"> | |||
<div class="attack-gallery"> | |||
<gallery widths="180px" heights="180px"> | |||
DBFZ_Kefla_5LL.png |YOSHA, wait, wrong fusion | |||
|data | </gallery> | ||
</div> | |||
<div class="attack-info"> | |||
{| class="wikitable attack-data" | |||
{{AttackDataHeader-DBFZ}} | {{AttackDataHeader-DBFZ}} | ||
|- | |||
{{#lst:{{PAGENAME}}/Data|Assist B}} | {{#lst:{{PAGENAME}}/Data|Assist B}} | ||
|} | |||
==== ==== | |||
* Slides forward and does 5LL. | * Slides forward and does 5LL. | ||
* On ground hit, the opponent is kept grounded. On air hit, they are sent away slightly. | * On ground hit, the opponent is kept grounded. On air hit, they are sent away slightly. | ||
Incredibly good blockstun, but slow with not that much range. It's hard to use in neutral as a result, and even using it in combos can be a bit tricky. Still, it's very good for jailing opponents and keeping them guessing due to it's high blockstun, and it's reward on hit isn't awful either. | Incredibly good blockstun, but slow with not that much range. It's hard to use in neutral as a result, and even using it in combos can be a bit tricky. Still, it's very good for jailing opponents and keeping them guessing due to it's high blockstun, and it's reward on hit isn't awful either. | ||
</div> | |||
</div> | |||
=== | ===<big>Gigantic Breaker</big> <span class="input-badge"><small>Assist C</small></span>=== | ||
<div class="attack-container"> | |||
<div class="attack-gallery"> | |||
<gallery widths="180px" heights="180px"> | |||
DBFZ_Kefla_GiganticBreaker.png | | |||
DBFZ_Kefla_GiganticBreaker2.png | | |||
|data | </gallery> | ||
</div> | |||
<div class="attack-info"> | |||
{| class="wikitable attack-data" | |||
{{AttackDataHeader-DBFZ}} | {{AttackDataHeader-DBFZ}} | ||
|- | |||
{{#lst:{{PAGENAME}}/Data|Assist C}} | {{#lst:{{PAGENAME}}/Data|Assist C}} | ||
|} | |||
==== ==== | |||
* Slides forward and does 236S. | * Slides forward and does 236S. | ||
* There's a gap between charge > projectile. | * There's a gap between charge > projectile. | ||
* On hit, teleports behind the opponent and knocks them down into a ground bounce SKD. | * On hit, teleports behind the opponent and knocks them down into a ground bounce SKD. | ||
</div> | |||
</div> | |||
==Super Moves== | ==Super Moves== | ||
=== | ===<big>Ultra Cannonball</big> <span class="input-badge"><small>236L+M (Air OK)</small></span>=== | ||
<div class="attack-container"> | |||
<div class="attack-gallery"> | |||
<gallery widths="180px" heights="180px"> | |||
DBFZ_Kefla_UltraCannonball.png | | |||
DBFZ_Kefla_UltraCannonball2.png |EX EX Super Cannonball | |||
|data | </gallery> | ||
</div> | |||
<div class="attack-info"> | |||
{| class="wikitable attack-data" | |||
{{AttackDataHeader-DBFZ|version=yes}} | {{AttackDataHeader-DBFZ|version=yes}} | ||
|- | |||
{{AttackVersion|name=Ground}} | {{AttackVersion|name=Ground}} | ||
{{#lst:{{PAGENAME}}/Data|236LM}} | {{#lst:{{PAGENAME}}/Data|236LM}} | ||
|- | |||
{{AttackVersion|name=Air}} | {{AttackVersion|name=Air}} | ||
{{#lst:{{PAGENAME}}/Data|j.236LM}} | {{#lst:{{PAGENAME}}/Data|j.236LM}} | ||
|} | |||
==== ==== | |||
* Shoots 6 projectiles forward. | * Shoots 6 projectiles forward. | ||
* Air version tracks the opponent vertically. | * Air version tracks the opponent vertically. | ||
| Line 470: | Line 531: | ||
Can be hard to get all the hits off, so it's hard to get the best damage out of this since the opponent may fall out a bit early be hit by only one set of the projectiles. On SKD, all of the projectiles will connect, however. | Can be hard to get all the hits off, so it's hard to get the best damage out of this since the opponent may fall out a bit early be hit by only one set of the projectiles. On SKD, all of the projectiles will connect, however. | ||
</div> | |||
</div> | |||
=== | ===<big>Gigantic Ray</big> <span class="input-badge"><small>236H+S</small></span>=== | ||
<div class="attack-container"> | |||
<div class="attack-gallery"> | |||
<gallery widths="180px" heights="180px"> | |||
DBFZ_Kefla_GiganticRay.png | | |||
DBFZ_Kefla_GiganticRay2.png | | |||
|data | </gallery> | ||
</div> | |||
<div class="attack-info"> | |||
{| class="wikitable attack-data" | |||
{{AttackDataHeader-DBFZ}} | {{AttackDataHeader-DBFZ}} | ||
|- | |||
{{#lst:{{PAGENAME}}/Data|236HS}} | {{#lst:{{PAGENAME}}/Data|236HS}} | ||
|} | |||
==== ==== | |||
* Hellzone Grenade-style Super: slow startup, very plus on hit or block, no post-Super scaling, low minimum damage, disappears on DHC, cannot be SD'd through, cannot GC Reflect or SD. | * Hellzone Grenade-style Super: slow startup, very plus on hit or block, no post-Super scaling, low minimum damage, disappears on DHC, cannot be SD'd through, cannot GC Reflect or SD. | ||
* +50 on block. | * +50 on block. | ||
| Line 491: | Line 555: | ||
On hit, allows Kefla to get some decent damage since it can be followed up with her air super, or even her level 3. | On hit, allows Kefla to get some decent damage since it can be followed up with her air super, or even her level 3. | ||
</div> | |||
</div> | |||
=== | ===<big>Gigantic Chaser</big> <span class="input-badge"><small>j.236H+S</small></span>=== | ||
<div class="attack-container"> | |||
<div class="attack-gallery"> | |||
<gallery widths="180px" heights="180px"> | |||
DBFZ_Kefla_GiganticChaser.png | | |||
|data | </gallery> | ||
</div> | |||
<div class="attack-info"> | |||
{| class="wikitable attack-data" | |||
{{AttackDataHeader-DBFZ}} | {{AttackDataHeader-DBFZ}} | ||
|- | |||
{{#lst:{{PAGENAME}}/Data|j.236HS}} | {{#lst:{{PAGENAME}}/Data|j.236HS}} | ||
|} | |||
==== ==== | |||
* Kefla's DHC Super. | * Kefla's DHC Super. | ||
* Tracks the opponent anywhere on screen, then dives straight down. | * Tracks the opponent anywhere on screen, then dives straight down. | ||
* Launches, the opponent can tech before they touch the ground. | * Launches, the opponent can tech before they touch the ground. | ||
* Minimum Damage: 765. | * Minimum Damage: 765. | ||
</div> | |||
</div> | |||
=== | ===<big>Gigantic Burst</big> <span class="input-badge"><small>214L+M or 214H+S</small></span>=== | ||
<div class="attack-container"> | |||
<div class="attack-gallery"> | |||
<gallery widths="180px" heights="180px"> | |||
DBFZ_Kefla_GiganticBurst.png | | |||
DBFZ_Kefla_GiganticBurst2.png |'''''"I..."''''' | |||
DBFZ_Kefla_GiganticBurst3.png |'''''"WINNNNNNNNNNNNNNNNNN!"''''' | |||
|data | </gallery> | ||
</div> | |||
<div class="attack-info"> | |||
{| class="wikitable attack-data" | |||
{{AttackDataHeader-DBFZ}} | {{AttackDataHeader-DBFZ}} | ||
|- | |||
{{#lst:{{PAGENAME}}/Data|214LM}} | {{#lst:{{PAGENAME}}/Data|214LM}} | ||
|} | |||
==== ==== | |||
* Minimum Damage: 1668. | * Minimum Damage: 1668. | ||
* '''Full-screen''', frame 1 invincible Super. | * '''Full-screen''', frame 1 invincible Super. | ||
| Line 532: | Line 602: | ||
Distance and overall okizeme she gets from this allows for a dash jump safejump (669 > j.[4]H). | Distance and overall okizeme she gets from this allows for a dash jump safejump (669 > j.[4]H). | ||
</div> | |||
</div> | |||
==External References== | ==External References== | ||
Revision as of 01:14, 8 November 2020
| Overview | Combos | Strategy/Counter Strategy | Full Frame Data | Discord |
This can be for a variety of reasons including but not limited to: spelling mistakes, unnecessary information, poor formatting, and other metrics per common sense reasoning.
Consider helping rewrite it.
Kefla is a powerful ground-based rushdown character with an emphasis on winning chaotic scrambles with her strong frame data and variety of suppressive moves. Kefla's mobility on the ground is very strong thanks to her teleport which both crosses up and can be used for left/right mixups with assists, as well as her variety of useful moves like 3 lows and a long overhead. She's also able to keep up the pressure, with an excellent suite of powerful zoning tools like ki blasts and beams. She even takes a page from Piccolo and steals his Hellzone Grenade move, renaming it to Gigantic Ray. It's strong on Piccolo, and on a rushdown character like Kefla, it's a deadly pressure tool to lock opponents down while you zip all about the screen. While Kefla does well in neutral and in the corner, she's able to be beaten out thanks to her poor aerial game and her strange air attacks. Gigantic Ray is also guard cancellable, making it difficult to use multiple times in a row without getting punished. If you like setting up chaotic messes of attacks and wearing down your opponent with sheer tenacity, look no further than this teenage fusion.
| "This power just keeps comin' and comin'! Damn, it feels good to be a Saiyan!" | |
| Lore: | Kale and Caulifla are a pair of Saiyan women from Universe 6. Caulfila is an extremely powerful Saiyan prodigy (who unlocked Super Saiyan and Super Saiyan 2 in the same week) who runs a gang on Planet Sadala. Kale is a very passive, shy Saiyan girl, who unlocked her own form of Super Saiyan in a similar style to that of Broly. During the Tournament of Power, they performed a Potara Fusion to become Kefla, the most powerful Saiyan from their Universe. With Kale's legendary power and Caulifla's cunning, she proved to be an even match for Goku before he unlocked the power of Ultra Instinct. |
- Blockstrings: Great frame data with almost all special moves being safe on block, as well as having solid high/low with an extendable overhead and 3 lows.
- Anti Reflect: Many of her normals move far distances and hit multiple times, giving ample time to hit-confirm.
- Gigantic Ray: Enables Kelfa's mix-up game to shine, and is extremely strong when blocked in the air.
- Teleport: 214S is a command dash that crosses up, leads to instant left/right mix-ups with assists, and can also serve as an escape.
- Zoning: Many zoning tools like ki blasts, beam projectile Super Cannonball, and psuedo-shield Gigantic Breaker.
- Aerial Game: Almost zero air presence as most of her special moves aren't air-ok, despite decent air buttons.
- Left/Right: Cross-ups can be difficult to set up due to the nature of her air attacks.
- Vs. Guard Cancel: Her pressure tool, Gigantic Ray, is guard cancellable.
Normal Moves
5L
| 5L |
|---|
| 5LL |
| 5LLL |
- 5L slides forward, 4LL doesn't.
- Good frame advantage.
- On hit, 5LL forces crouching opponent to stand up, holds airborne opponent mostly in place for all hits to connect.
- 5LLL always whiffs against crouching characters, even if they're visually standing.
- Recovers in midair.
- Has 5f of landing recovery on block, 7f on whiff or hit.
- Jails into Vanish.
- 5LLL > j.214S is -6 on block.
If you somehow make them block this, the 5f of landing recovery is still in the way of high-low mixs.
5M
- Multiple hits, lower than average damage. Does 666 damage raw, so you know this normal is going to be cursed.
- All hits are jump cancellable on hit
- Goes just over halfscreen
5L > 5M or 2L > 5M on reflect will put Kefla right back in their face, forcing them to block or gamble a second reflect.
5H
- Smash hit wall splats, combos into SD.
- Tall hitbox, making it good for corner combos.
- Kefla can perform the rejump combo, it's much like Bardock's but harder.
Kefla was blessed with a 5H that is better than most other characters. Besides the points mentioned above, it also travels far enough forward to catch reflect and cancels into 214X, which hit low and also beat reflect. It should be mentioned again that this move is great for corner combos, as 2M > delay 5M > 5H is very consistent and highly damaging compared to other characters.
5S
- Hold or mash S to shoot all 6 Ki Blasts.
- One of the fastest Ki Blasts in the game at 11 frames.
Kefla's Ki Blast is the same speed as Teen Gohan's, but she can fire off two more Ki Blasts than he can.
2L
- Short low.
Kefla's fastest low normal. Decent frame advantage, so also good for pressure.
2M
2H
- Smash hit combos into SD.
- Puts her airborne. If cancelled early, stays grounded.
6M
- DBFZ Kefla 6M.png
B O N K
- Universal overhead.
Faster than 6H by 3 frames, although unlike 6H you can't combo off of it without assists.
6H Double Hammer
- Extendable overhead thanks to its gatling options and high hitstun.
- Versatile combo filler after assists, 6H > 5H > 214M does a ton of damage.
- Scales poorly.
The mixup tool. Midscreen you're going to want to cancel this into 2H and hitconfirm SD or 214L from there, but in the corner you should route immediately into 214M for max damage.
j.L
j.M
- Very active with good range.
- Basically Bardocks j.M.
- Very low knockback, some basic combos don't work as a result.
This is your primary air combo filler thanks to j.H's massive hitbox.
j.H
| 5LLLLLLL |
|---|
| j.H |
- 5LLLLLLL Smash hit can wall bounce.
- j.H Smash hit causes SKD.
j.S
- Hold or mash S to shoot all 4 Ki blasts.
- Stops all air momentum.
- Really mean crossup tool.
j.2H
Special Moves
Super Cannonball 236L/M/H
| L |
|---|
| M |
| H |
- Beam property projectile.
- Jails into Vanish
- 236L throws a projectile forward.
- 236M throws it angled upward.
- 236H throws 2 projectiles forward.
- Is +4 on block, meaning the opponent can't backdash out of 5L.
- On hit, can link into SD even from midscreen, or into air normals in the corner.
Ain't nobody that can stop me! 214L/M/H
| L |
|---|
| M |
| H |
- 5L goes half screen forward.
- 5LL goes 75% of the screen.
- Smash hit can wall splat, has enough frame adv to link into 5H in the corner.
- 5LLL goes 80% of the screen.
- Smash hit wall splats really high up, forces a soft knockdown.
- Absolutely terrifying.
Gigantic Breaker 236S (Air OK)
| Ground Uncharged |
|---|
| Ground Charged |
| Air Uncharged |
| Air Charged |
- Kefla stands still to charge her attack, then dashes forward 80% of the screen and throw a beam projectile.
- Smash on the dash. Smash hit causes SKD.
- Projectile guard point from frame 4 to when she throws her projectile.
- Holding S will extend the first part, but lose the dash.
- Projectile jails into Vanish, but there's a gap between charge > dash and charge > projectile.
- Grounded Smash version can combo into 236H+S.
- j.LL(2) > j.236S is Kefla's anywhere sliding knockdown. Can combo into any Super afterward beside Gigantic Ray.
Time to test this power out! 214S (Air OK)
| Ground |
|---|
| Air |
- Dashes forward, tracks horizontally and always sides switches.
- Has a minimum distance she has to travel. At close range, the dash will leave her slightly away from the opponent, at far range she'll stay right behind them.
- Fully invincible from frame 4.
Allows her to sneak past beams, or other things that may be annoying for her to deal with.
- j.214S dashes diagonally downward, can also steal the corner like the grounded version.
- Fully invincible from frame 4.
Z Assists
Super Cannonball Assist A
- Stands still and does 236L.
A great assist. It's fast, has almost a second of hitstun, isn't too bad on block, and has beam properties allowing it to smack superdash and Ki Blasts. Good for neutral and combos, although her B assist has it beat in the blockstun department.
Mighty Kick Assist B
- Slides forward and does 5LL.
- On ground hit, the opponent is kept grounded. On air hit, they are sent away slightly.
Incredibly good blockstun, but slow with not that much range. It's hard to use in neutral as a result, and even using it in combos can be a bit tricky. Still, it's very good for jailing opponents and keeping them guessing due to it's high blockstun, and it's reward on hit isn't awful either.
Gigantic Breaker Assist C
- Slides forward and does 236S.
- There's a gap between charge > projectile.
- On hit, teleports behind the opponent and knocks them down into a ground bounce SKD.
Super Moves
Ultra Cannonball 236L+M (Air OK)
| Ground |
|---|
| Air |
- Shoots 6 projectiles forward.
- Air version tracks the opponent vertically.
- Minimum Damage: 834.
Can be hard to get all the hits off, so it's hard to get the best damage out of this since the opponent may fall out a bit early be hit by only one set of the projectiles. On SKD, all of the projectiles will connect, however.
Gigantic Ray 236H+S
- Hellzone Grenade-style Super: slow startup, very plus on hit or block, no post-Super scaling, low minimum damage, disappears on DHC, cannot be SD'd through, cannot GC Reflect or SD.
- +50 on block.
- Can be combo'd from essentially every ground Smash: 5H, 2H, 214H, 236S, and also 236H.
- Will true blockstring from 5H with an assist with 24 or more frames of blockstun.
On hit, allows Kefla to get some decent damage since it can be followed up with her air super, or even her level 3.
Gigantic Chaser j.236H+S
- Kefla's DHC Super.
- Tracks the opponent anywhere on screen, then dives straight down.
- Launches, the opponent can tech before they touch the ground.
- Minimum Damage: 765.
Gigantic Burst 214L+M or 214H+S
- Minimum Damage: 1668.
- Full-screen, frame 1 invincible Super.
- Autocorrects on hit.
- Value in [ ] is when the opponent is in any hitstun.
- +44 on hit.
Being full-screen, punishes the opponent for almost anything they do, even if they vanish. Has somewhat slower startup than other level 3s do.
Distance and overall okizeme she gets from this allows for a dash jump safejump (669 > j.[4]H).
External References
move and the move Full sections. One is shown on the character page, while the other is shown on the frame data page.


