This can be for a variety of reasons including but not limited to: spelling mistakes, unnecessary information, poor formatting, and other metrics per common sense reasoning.
Consider helping rewrite it.
Normal Moves
5L

I am justice given form! I am the world!

Now venerate, the most noble! Most splendid! Immortal!

And supremely powerful God... Zamasu!


- 5L
Good range and frame advantage. Staggering from 2L, into 2L, back into itself, or for setting up a dragon rush is all quite simple and powerful thanks to the range.
- 5LL
Advances forward slightly, but mostly just blockstring and combo filler.
- 5LLL
- Grab
Can be used as a tick throw setup with a low blockstun assist, or with a properly timed use of his orbs. You can do some silly stuff like using this to style on people trying to reflect delayed normals in your strings, but if you're gambling on them respecting so much you should just try to get away with orbs instead.
5M

- Long range, but very punishable on whiff.
- Hits 2 frames meaty at roundstart distance with 10f startup and being -5 on block.
- As Zamasu lacks a slide, this is his best advancing normal.
This normal is amazing. It's one of the fastest medium buttons in the game and even though it's -7 on block, in most cases it'll hit later and be safe. In cases where it is -7 it can gatling into 2M.
5H

- Basic combo blockstring filler.
- Useful for combo extensions, but generally outclassed by 236S.
Zamasu does a swinging midair kick that smashes, useful in pressure and combos. Cancelling 5H into Orbs and calling a beam assist allows an airtight blockstring and further pressure and mixups.
5S

- Combos into 236S reliably.
- Can go over low high-priority beam attacks such as Goku's Kamehameha.
A single shot ki blast doesn't sound great in neutral, but it has absolutely crazy hitstun, making this better as a combo and pressure tool. You shouldn't be on the ground for long as Zamasu any way.
2L

- Can be chained twice.
- Great stagger tool in Season 3. 5L2L or 2L5L are great ways to prep your opponent for a dragon rush. 2L-4L will also work, with the added benefit of beating most low-hitting 2Ls.
Access to two lows is a key part of Zamasu's pressure. Having orbs set up turns blocking high or low into a nightmare.
2M

- Zamasu maintains a small amount of momentum if executed during a dash, allowing this to advance forward slightly.
- Has a smaller hitbox than it seems.
- It's a fantastic stagger button when a bit further away.
2H

the Anti-Kid Buu RPS normal

- Small horizontal range.
- Large spherical hitbox above Zamasu's head, but will not hit crossups.
- Has crazy guardpoint making it an amazing tool for throwing out.
- Has invul to all projectiles
6M
- DBFZ Zamasu 6M.png
- Unlike many, Zamasu's universal overhead can be deadly thanks to orbs.
j.L

Mean crossup button

- The aggressive angle makes it perfect for instant air dash mixups and sniping SD attempts.
- Allows for a double overhead after IAD j.M.
- Crossup IAD j.L can be converted out of with 5M.
j.M

- Decently active and good range for air-to-airs.
- Allows for a double IAD overhead in conjunction with j.L.
j.H

- [] is on Smash hit.
- Flight cancels allow for multiple overheads.
- Deceptive horizontal reach.
j.S

Neutral

- Can be repeated 3 times in total.
- Basic lv. 1 projectile.
- Completely resets your momentum, making you fall straight down afterward.
Better used in flight but still not terrible on its own since you can just go into flight on block or if you recover fast enough.
j.2H

- [] is on Smash hit.
- Spikes the opponent at a slightly more vertical angle than j.H.
- Ground bounces grounded opponent, though can't be extended with Vanish.
- Combos off of j.S.
- Only normal that can be done while in flight.
- Can be used as another overhead making him even tricker to block.
Special Moves
Eternal Justice
236L/M/H (Air OK)

The worst lariat

- All Versions
- All versions keep dash momentum so you can 2366L/M/H to cover ground.
- Press S on hit, block, or whiff to trigger Heaven's Flash.
- 236L
- In the corner it reliably sets up a 50/50 with certain assists or on hit leads into his BoJ routes.
- 214S~L gives sliding knockdown on hit.
- 236L~S keeps Zamasu in place.
Your safe, gapless blockstring ender. 2M > 5H > 236L is your main grounded assist combo filler due to its high overall damage.
- 236M
- Important combo tool, gives a sliding knockdown.
- Combos reliably after a 236S wallbounce.
- Air version starts up 1f SLOWER than grounded version.
- 214S~M provides a lengthy sliding knockdown.
- 236M~S pushes him back.
Your goal in corner combos is to cancel into this move from flight. The best way to do this is set up a combo into an assist, then do 214S~[S]~M. Flight version gives plenty of advantage on hit and combos into Blades of Judgement. Also gives plenty of time to set up Wall of Light.
- 236H
- Functionally a faster 236M with a slightly longer knockdown.
- 214S~H provides a ground bounce sliding knockdown.
- 236H~S shoots him forward, going over the opponent.
Used for when you can't combo into M version, gives a sliding knockdown. Combos into Blades of Judgement midscreen and can give Zamasu his corner 236L~S mixups midscreen for the cost of half a bar.
Wall of Light
214L/M/H (Air OK)

The Oki™ tool

The Pressure™ tool


- All Versions
- Freezes Zamasu in place while preserving (some of) his momentum.
- The orbs disappear if you take damage, block anything, activate a super, or land or break a Dragon Rush.
- Slow startup but whiff cancelable into Heaven's Flash.
- 214L
- Orbs hit on frame 126.
5L > 5H > 236M right after the ending of this move will ensure lightning hits, extending the combo. Alternatively, IAD j.ML > land > 5L > slight delay 5LL (lightning hits) > slight delay 5LLL will result in a tick throw. It can also be a low if you use 2M instead of 5LLL, making a strong 50/50 but can be fuzzy jumped. Use 2H to beat fuzzy jump and mash if the opponent knows about this.
- 214M
- Orbs hit on frame 219.
Even slower than L version, useful for tricky mixups after an assist has been called or extending your turn after a longer solo blockstring.
- 214H
- Orbs will shoot out twice, first wave on frame 126, the second on frame 216.
Can allow for unique combo extensions, especially when used in conjunction with flight combos.
Divine Order
236S (Air OK)

You should REALLY think about pressing Super Dash

- 236S
- Has smash properties and will trigger a wallbounce, even midscreen.
- The blade's hitboxes can deflect Ki blasts.
- Always leaves a <4 gap on block if chained into from medium or heavy attacks.
Zamasu's primary midscreen combo extender.
- 236[S]
- Shoots a projectile that clashes with beams and can not be superdashed through.
- At close range the slash and projectile will both hit. Maintains the smash and wallbounce properties from the uncharged version.
- Links into 5L in the corner.
The awkward startup means Zamasu can not use this to win a prolonged projectile struggle against characters with reliable beams. Instead, use this tool to force a jump, and then jail your opponent with an assist.
Heaven's Flash
214S (Air OK)

I can fly, what can you do?

Zamasu's flight. The single most important tool in his arsenal. A Zamasu who can't fly is a dead Zamasu.
- You can only fly once per jump.
- You can move around while doing attacks during flight.
- Attacking or blocking will end the flight.
- Assists will not begin cooldown until your flight ends.
- Grounded flight puts you at a set height in the air.
- Aerial flight keeps you in place and starts up 9f faster. You can use tiger knee motion (2147S) to take advantage of this.
- Flying can still be cancelled into superdash, as well as a special airdash that warps Zamasu forward and can pass through the opponent.
- Buttons will now give you special attacks without having to manually input them. All attacks in flight will end flight.
Inputs done in flight are referred to as "fl.(input)"
- fl.L/M/H trigger the corresponding Eternal Justice (236X), with different properties. All versions can be cancelled into dash, even on whiff.
- fl.4L/M/H give Wall of Light (214X) and end flight. It will also leave Zamasu with 7 frames of landing recovery.
- fl.1/2/3H cancel the flight into a downward j.2H. Will give a knockdown even on grounded hit, and is very plus on block.
- fl.S does j.S, except Zamasu can move freely while firing. Leaves Zamasu with 7f of landing recovery. On block or hit, it can be cancelled into dash which will remove the landing recovery.
- Benefits particularly well from flight's recovery since it effectively lets Zamasu keep moving and stay safe after firing ki blasts in neutral.
- fl.6S gives Divine Order (236S), this version can also be charged.
- Partially charged fl.[6S] is the same, except it'll also fire a projectile.
- Fully charged fl.[6S] will cancel into dash automatically on block, hit, or whiff.
- Dash cancelling removes the landing recovery from fl.6S much like it does fl.S
- fl.4S cancels flight without attacking, leaving you vulnerable for 10 frames.
- All attacks only have the recovery of flight its self, which is very quick. You can still airdash, superdash, or use normals or other specials on your way down.
Movement during flight is superb, and you can still block so there's very few downsides. Being locked only using mid-hitting special moves is absolutely nothing to worry about given your extremely speedy dash that crosses up. If you need to high/low someone, fly/unfly with an assist is a quick and easy way to do it.
Flight lasts extremely long and has no landing recovery. If your approach doesn't seem great, just dash out, land, and start flying again. Although there's so little reason for doing this.
Z Assists
Assist A
Divine Order
"You summon a god!"
- Can't be super-dashed through.
- Only the projectile has hitboxes.
- Excellent hitstun and average blockstun.
Amazing assist. Pierces theough opponents, allowing it to shut down assist calls as well as being a massive wall. Tall enough that most characters have to superjump to avoid it.
Assist B
Eternal Justice
- Quick lariat assist, that's about it
This assist managed to go over a year on the Dustloop Wiki without anyone ever adding a description or caption to it. That should tell you how noteworthy it is.
In truth, it's not a bad assist at all. Its quick startup and decent blockstun lend it to similar use as Bardock A, but it still suffers from the strange hitbox of Zamasu's own lariat, combined with his A assist being somewhat harder to pass up for this. A bunch of characters have strike assists like this, but Zamasu's massive projectile wall from his A assist is unique.
Assist C
Divine Authority
Mediocre, even for a C assist
- Has head and projectile invul after the teleport, just like 2H
Super Moves
Divine Wrath
236L+M (Air OK)
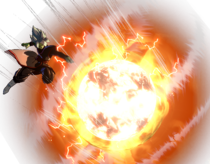
- DBFZ Zamasu DivineWrath2.png
DHC early for funky setups

- On the way down the ball hits for 700, explosion does 400*3, 800.
- Minimum damage is 210, 120*3, 240 (810)
- Descending ball super. If done high enough, DHC'ing into a faster super allows for Frieza-esque extensions thanks to the long descent and explosion animation.
- If you setup his Blades of Judgment super during a combo and input this immediately after, the blades will catch as the ball ends, allowing for extension.
Blades of Judgment
236H+S (Air OK)
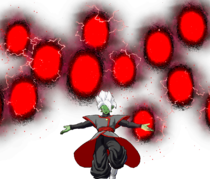

Lockdown in an image


- The blades obscure Zamasu significantly on the ground, allowing for ambiguous mix-ups while the opponent is locked down.
- Wormholes disappear as soon as Zamasu tags out.
- Each blade does 100 damage and ground bounces airborne opponent.
- Each explosion does 350 damage and pops the opponent up.
- Always shoots down at the same angle, activating Blades of Judgment at various heights on screen can yield different results and unique situations.
- Mediocre and inconsistent damage, every hit perpetuates scaling, but has the initial scaling of M normals (uses the least scaling table). Combos following after this super will have 15% minimum damage.
- Doesn't have a high minimum damage like other supers, and will inherit the scaling of the current combo.
- Can be comboed into solo after 236H, though do so closer to the ground to ensure it connects.
- Most assists can also combo into this super in the corner. Some need Divine Order, others need a 5H, and some require a smash.
- Most C assists as well as Bardock B assist allows for combos that use two of these in one combo
Lightning of Absolution
214L+M or 214H+S (Air OK)


- Minimum damage is 12, 280*6 (1692)
- Zamasu's only invincible reversal. Is quite slow for a Level 3 super.
- Tracks the opponent anywhere on screen as long as they are in front of Zamasu.
- Quite good against assists, as he'll still do the entire lighting barrage even when it's blocked or whiffs.
- Can whiff if opponent is actively super dashing.
While it has below-average damage for a level 3 super, it is very reliable as a DHC super with its tracking.