Slayer Oki section I'm working on
Okizeme
Basic Okizeme options
This section is meant for people who don't really care about the specifics just yet. Slayer's oki is very in-depth but this is just some simple options to get you started. From good knockdown (2D, j.D, etc.)
- Do Dandy Step(P
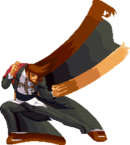 GuardStartupRecoveryTotal 30Advantage- /K
 GuardStartupRecoveryTotal 38Advantage- /S
 GuardStartupRecoveryTotal 30Advantage-) > It's Late
 GuardHighStartup18Recovery9Advantage+4(HS) as an overhead that is plus on block. Delay It's Late
 GuardHighStartup18Recovery9Advantage+4 a bit to beat throws
 - Do Dandy Step(P
 GuardStartupRecoveryTotal 30Advantage- /K
 GuardStartupRecoveryTotal 38Advantage- /S
 GuardStartupRecoveryTotal 30Advantage-) (whiff) > 2K
 GuardLowStartup6Recovery11Advantage-1 as a low to condition people to throw and block low. Follow up the 2K with 2K > 2S > 2D for a knockdown
 - You can also do dandy (whiff), Bite
 Guard92 pixelsStartup7Recovery29Advantage- for a throw option on wakeup, it does have to be delayed slightly due to wakeup throw invul
 - Use S Dandy
 GuardStartupRecoveryTotal 30Advantage- sometimes to throw people off and mixup reversal inputs. Use the same followups as P and K dandy step.
 - 6K
 GuardHigh/AirStartup21Recovery1+3 after landingAdvantage+5/2K
 GuardLowStartup6Recovery11Advantage-1 is also a good option for okizeme. 6K is an overhead with very low recovery so it can be safe to some reversals
From bad knockdown (throw)
- Dash c.S
 GuardMidStartup7Recovery10Advantage0/2K
 GuardLowStartup6Recovery11Advantage-1, Beats a lot of reversals, hard to block, makes people want to throw you
 - c.S
 GuardMidStartup7Recovery10Advantage0/2K
 GuardLowStartup6Recovery11Advantage-1, Beats mashing on wakeup and also beats throw on wakeup due to spacing
 - Dash throw, catches people trying to block your mix (loses to mashing)
Introduction
Slayer has very strong Okizeme that usually requires some kind of read on the opponents defensive habits. Many of his okizeme options can be beaten by backdash, throw, or a reversal. Slayer generally has to do specific Oki options to beat these defensive tools, but on a good read, you get great reward. As Slayer, one wants to try to condition the opponent into committing to options that can lead to massive damage. For example, using throwable oki may condition the opponent to start throwing on wakeup, if you read when they do this you can use It's Late GuardHighStartup18Recovery9Advantage+4 on oki for its throw invincibility to get one of Slayer's best counter hit starters.
There are oki "Starters" and oki "Enders". The oki starters are things that you can do that give different types of startup to your oki, usually allowing for crossups, feints, or access to powerful options. Oki enders are the options that you use once the opponent is waking up, usually used as a meaty or late meaty. Off of some knockdowns, like throw, you are more limited in your oki options. You can also get greedy with longer oki starters if the opponent is respecting your oki a lot, allowing you to mix and confuse your opponent.
Different types of knockdowns
Different knockdowns have different advantage on different characters meaning that the oki starters you do are largely dependant on knockdown type and sometimes dependent on the opponents wakeup speed. There are also some oki options that only work on certain knockdowns, and some oki options that won't work at all on other knockdowns. You also want to keep in mind that distance and screen position can effect what you can and can't do on oki. For example, if you are too far away or the opponent is in the corner you lose access to forward dash cross up oki options. It's going to be next to impossible to know all of the character's wake up times and advantage after every knockdown so the timing of a lot of Slayer's oki is done generally by feel. Either way, below are some guidlines on what kinds of knockdowns are good, and what kinds are bad.
2D GuardLowStartup7Recovery12Advantage-8 Knockdown
2D is your most common and most standard knockdown. Most of the times you will be knocking down with 2D when looping oki without meter or counterhit. 2D leaves you at pretty decent advantage, allowing for quite a few different oki starters and setups. 2D knockdown is also mildly affected by distance to the opponent when you hit them with 2D. If you hit them from farther range, you are going to have more advantage on knockdown. If you hit them from closer range, you will have less advantage. Even so, 2D knockdown almost always allows Slayer to get dandy step oki.
j.D GuardHigh/AirStartup7Recovery19+5 after landingAdvantage- Knockdown
Falling j.D is a great knockdown for Slayer. Falling j.D gives Slayer a good bit more advantage than 2D, allowing for certain oki options to work that previously wouldn't. You can usually be free to get creative with your knockdowns after j.D, as you have quite a bit of time to crossup or feint.
Rising j.D is less advantageous than 2D, but you normally won't be hitting j.D in this way. There are some specific combos on certain characters or situations which may require a rising j.D to achieve a knockdown, but you want to avoid it if you can
Pilebunker Knockdown
Pilebunker isn't a very advantageous knockdown for Slayer, and you only get oki if you are in the corner. The benefit of using Pilebunker as a combo ender is simply for damage. Some players prefer to prioritize damage over oki, some prefer to prioritize knockdowns over damage. It's generally not suggested to use pilebunker as a knockdown tool, but it is Slayer's biggest damage combo ender.
Throw Knockdown
Slayer's throw is his worst knockdown, usually only allowing for simple oki. Throw knockdown is most effected by character wakeup speed given that you can vastly more options with a bit more frame advantage. The table for Throw Oki frame advantage is below. At around +20 (Faust and Zappa) you can probably get crossup dash oki or 6K oki and be relatively safe.
| Character | Face Down Recovery | Throw Frame advantage |
|---|---|---|
| A.B.A | 52 | +17 |
| Anji | 50 | +15 |
| Axl | 49 | +14 |
| Baiken | 50 | +15 |
| Bridget | 48 | +13 |
| Chipp | 46 | +11 |
| Dizzy | 49 | +14 |
| Eddie | 49 | +14 |
| Faust | 54 | +19 |
| I-No | 50 | +15 |
| Jam | 50 | +15 |
| Johnny | 49 | +14 |
| Justice | 45 | +10 |
| Kliff | 46 | +11 |
| Ky | 49 | +14 |
| May | 50 | +15 |
| Millia | 48 | +13 |
| Order-Sol | 49 | +14 |
| Potemkin | 50 | +15 |
| Robo-Ky | 49 | +14 |
| Slayer | 48 | +13 |
| Sol | 49 | +14 |
| Testament | 51 | +16 |
| Venom | 51 | +16 |
| Zappa | 55 | +20 |
Oki Starters
Dandy Step Basic oki starter
P dandy step GuardStartupRecoveryTotal 30Advantage-
- This is your standard Oki starter giving access to the It's Late/2K mixup which is very strong. Using P dandy step can condition people to block and it has short enough recovery to go for other options after a whiffed P dandy step. Even so, P dandy is still somewhat committal.
- You can also BDC P dandy in order to space yourself out of throw range, making your oki safer.
- You can do P dandy 6FRC6 to get a tricky crossup, depending on spacing it may not crossup, however
K dandy step GuardStartupRecoveryTotal 38Advantage-
- K dandy step is slower than P dandy step but it allows you to delay your followups more and it gives you more forward movement.
S dandy step GuardStartupRecoveryTotal 30Advantage-
- S dandy step is used to cross up reversal inputs and re-position out of the corner. S dandy isn't too hard to react to by good opponents, but it can still open people up when it's unexpected, and it still gives you access to overhead/low mixups.
- After a j.D knockdown you can get away with double S dandy
D dandy step GuardStartupRecoveryTotal 30Advantage-
- FB dandy step isn't used much on oki but it can help on scramble knockdown situations.
- You can do FDC FB dandy for a quick crossup
Extra notes/options:
- You can FDC any of your dandy step options to cross up or double cross up with S dandy.
- You can have time after dandy step to go for a forward dash.
Forward dash/normal stuff Safer options with generally less reward but more mixup potential
Walk back/do nothing
- You can walk back to space yourself outside of throw range before going for an oki option such as 6K or 2K.
Forward dash
- Forward dash is a very strong cross up. You usually have enough time to forward dash 6K/2K/Bite. You can also do forward dash cancels into options such as dandy steps or IAD for another cross up. If you do BDC dandy on oki the startup of forward dash is the same as the Backdash startup so your cross up will be more ambiguous.
Double forward dash
- Double forward dash is a double cross up that is pretty fast (forward dash is 18f total duration). After double forward dash you only have time for a 2K, c.S, Bite, or another quick oki option.
You lose access to forward dash cross up in the corner but you get more reward off of everything, especially with meter
Oki Enders
It's Late GuardHighStartup18Recovery9Advantage+4 Throw invul overhead
It's late is a fast overhead that can open people up if used well. It has throw invulnerability only on startup, making it a great counter to wakeup throw if slightly delayed. It's late will lead to huge damage counter hit combos on a good read. Beware however, as this move can lose to reversals and wakeup backdash.
Raw It's late and It's late after Under pressure have different properties to them that effects your decision making when using either. Raw it's late is +4 on block and +8 on hit meaning you almost always get good pressure on block and a combo on hit. Raw it's late leads to ground slide on counter hit, which can be hard to combo off of at midscreen, and followups are usually character specific. Under Pressure > It's Late is 4 frames faster and leads to a huge ground bounce on hit which is much easier to combo after. Under Pressure > It's Late has the weakness of being only +1 on block and +2 on hit making it hard to get pressure or a combo from it.
2K GuardLowStartup6Recovery11Advantage-1 Low option
K is most commonly used after an empty Dandy Step or as an alternative to 6K. 2K is mostly there to condition, mix people up, and make it harder for the opponent to block It's Late. 2K has pretty low reward on block or hit, and most extended combos with meter scale a lot. 2K also loses to throw at close range, meaning if used after an empty dandy step you will usually be close enough to be vulnerable to throw. This can be good to condition people to throw you after Dandy Step startup, meaning if you make a good read you can get a heavy counter hit punish with It's Late.
6K GuardHigh/AirStartup21Recovery1+3 after landingAdvantage+5 Reversal-safe Overhead
6K is a very low recovery airborne overhead that can safejump and option select many reversals if done meaty. 6K > 6S+H is a common option select to beat backdashes and throwable reversals. 6K is +5 on block and +6 on hit allowing for strong pressure afterwards or combos into knockdown if it hits. 6K's biggest weakness is that it has pretty low reward midscreen, even with a counter hit or meter.
6P GuardMidStartup18Recovery14Advantage-1 Backdash Callout
6P is a strong backdash callout option with 6 active frames and good reward in the corner. Depending on the backdash you may have to delay the 6P to hit the recovery of the opponents backdash. 6P can also beat a few reversals with it's low profile. It's only -1 on block meaning you don't completely sacrifice your pressure to go for a backdash read. 6P loses to reversal throw and most other reversals, making it more risky to use against characters with meterless reversals.
5H GuardMidStartup13Recovery18Advantage-4 Another Backdash callout
5H Is a decent backdash callout and can also beat high and low profile reversals. 5H can also catch jump outs in many cases due to it's tall hitbox. Despite being minus on block, 5H has a lot of good cancels and high blockstun, allowing you to continue pressure afterwards. 5H is weak to invulnerable reversals and wakeup throw. 5H has great reward if it catches an airborne backdash in the corner.
2D GuardLowStartup7Recovery12Advantage-8 Risky but Reliable Backdash Callout
2D is a more committal but more reliable backdash callout than 6P. 2D has 15 active frames making it very easy to hit almost any backdash in the game. Against characters like Potemkin and Justice, you will need to slightly delay 2D. 2D is also good as a reliable meaty to punish people for missing wakeup reversal timings. 2D can also be up to +8 if you make it meaty enough, although doing this will not catch backdashes. If you are wrong on your backdash read you could be left point blank at -8, making 2D quite risky to use. 2D has pretty good reward with RC in the corner or if you catch an airborne late hit of a backdash.
c.S GuardMidStartup7Recovery10Advantage0 Simple meaty
C.S is a fast, simple meaty to use in situations where you don't have much advantage to do a mixup. C.S has good cancels for strong pressure afterwards, but is just a mid on block making it weak as a mixup option.
2P GuardMidStartup4Recovery5Advantage+3 Fast Oki Option
2P is used in similar spots to c.S but is faster and has better frame advantage. 2P is very fast in both startup and recovery, making it safe to a lot of different reversal options including backdash. 2P has no cancels and only 2 active frames making it difficult to use as a meaty, but is useful in unusual knockdown situations or after long oki starters.
Bite Guard92 pixelsStartup7Recovery29Advantage- Risky Command Grab
Bite is a useful command grab to use for when people are instant blocking, slash backing, or fuzzy guarding your oki options to open people up and get them to use different defensive options. You can do FDC Bite (236569H) to make the bite invuln. You also have to make sure that you delay bite enough to go past throw invuln on wake up. Bite has counter hit recovery and doesn't lead to much reward (usually just a reset), so use it sparingly as an oki option.
Specific Oki Options
BDC IAD j.H or IAD j.H GuardHigh/AirStartup14Recovery7Advantage- Corner Safe Jump
After j.D knockdown in the corner, you can do Backdash cancelled instant airdash j.H as a safe jump against most characters. This is most reliable after a j.D knockdown because you have more time on oki to set it up. The backdash cancel is there so that you delay your airdash properly and space yourself at a good range for the instant airdash j.H. This oki option can safejump reversals, beats wakeup throw, and can also be used to option select backdashes.
P Dandy > TK Direct Hit Dandy GuardMid [All]Startup7+2Recovery20 after landingAdvantage- High Reward Reversal Callout
You can do this off of any knockdown where you get dandy step oki. The P dandy step is there to framekill so that you time your tiger knee'd Direct Hit Dandy where the invincibility of the super goes through the reversal, getting a counter hit punish. If done right, you can instantly stun off of a 2-Hit DHD counter hit on a reversal read. This is quite difficult to execute properly though, and you can get punished if they don't reversal.
Undertow GuardMidStartup28Recovery13Advantage-2 Character Specific Reversal Callout
Undertow isn't a very good oki option but can be used against character specific reversal options such as riot stamp or 1-hit reversals. Undertow is pretty committal as it has a lot of startup that a keen opponent will throw. After throw, Undertow can be useful spaced out as it will beat most wakeup mash options including most character's 6H.