< P4U2R
mNo edit summary |
|||
| (161 intermediate revisions by 13 users not shown) | |||
| Line 1: | Line 1: | ||
{{ | ==Overview== | ||
= | {{P4U2R/CharacterLinks}} | ||
{{ | <div id="home-content" class="home-grid"> | ||
{{card|width=4 | |||
| | |header=Overview | ||
| | |content= Not satisfied with merely fighting with a Persona, '''Labrys''' elects to drag a gigantic axe into the ring to cleave her opponents in two with only one swing. Labrys operates as a damage-dealing machine, but she doesn't start the match at her full power. Instead, she has a unique mechanic where her axe gets charged the more hits she lands with her axe, regardless if they're hit or blocked. The goal? Get to Red Axe, where nearly every single tool she has becomes a Fatal Counter, and a single misstep from the opponent will spell their doom. Best of all, the axe level carries over across rounds, so if she closes one round in Red Axe, the next can be over in the blink of an eye. | ||
Sporting massive reach with the majority of her normals, Labrys can be a menace in neutral with or without a Persona. In the air, her {{MMC|input=j.B|label={{clr|2|j.B}}}} alone can make dealing with her extremely difficult, and on the ground she has numerous options to counter zoning attempts and put up walls to stop careless approaches. | |||
Reverse the situation, however, and Labrys reverts from a combat robot to a schoolgirl. Outside of her reliance on snowballing, Labrys' defensive options are very poor—with slow jabs, a terrible Furious Action, and no decent reversal options without her Awakening Super. On the other end, her pressure is more about making the opponent block to build up Axe Gauge rather than directly opening them up. She doesn't have many strong mixup options outside of her Chain Knuckle, and even then will likely need meter to turn her mixups into any meaningful damage. | |||
| | |||
| | While she can be quite make-or-break, Labrys is one of few characters who can annihilate any unfortunate soul off of a jab. And she talks funny, so can you really say no to that? | ||
| pros = | }} | ||
*''' | {{P4U2R/infobox | ||
*''' | |fastestAttack = {{clr|1|5A}}, {{clr|1|2A}} (7F) | ||
*''' | |reversalType = Attack (26F) | ||
|fatalStarter = {{clr|1|236A}}/{{clr|2|B}}/{{clr|1|A}}+{{clr|2|B}} | |||
| cons = | }} | ||
*''' | {{ProsAndCons | ||
*''' | |intro= charges in and swings her axe at any problem she faces, powering up her next attacks all the while. | ||
*''' | |pros = | ||
| | *'''TOD Machine''': In Red Axe, Labrys can kill off of any well-placed hit. Axe levels also carry over between rounds to keep the snowballing going, allowing her to end some games the moment she wins the second roundstart scramble. | ||
| | *'''Gigantic Axe''': And gigantic range. All of her normals sport excellent reach and hitstun, and {{clr|2|j.B}} might be worth an entire pro by itself. Not very reliant on her Persona thanks to this. | ||
*'''Assembly Not Required''': Even without Red Axe, Labrys deals a hefty amount of damage, sports great corner carry and has decent okizeme setups. She's in no hurry for mix-ups as she builds axe level on block as well, and her normals start dealing chip damage once she's in Red Axe. | |||
|cons = | |||
*'''Slow''': Fastest button clocks in at 7F, with the rest carrying hefty startup, and unimpressive movement speed. Struggles against zoning. | |||
*'''Mids Dispenser''': Few natural mixup options. Moreover, she cannot gatling her crouching normals into her standing normals, along with her normal mode having an unsafe autocombo. Proper pressure requires patience. | |||
*'''Short Battery Life''': Constantly wants meter to build axe level, create a mixup, confirm off of said mixup, or escape from pressure. | |||
*'''#1 Guard Point Fangirl''': Labrys' Furious Action is atrocious as a reversal, with heavy startup and guardpoint instead of invincibility making it very reactable. Her only solid defensive option is her [[P4U2R/Labrys#Weaver's_Art:_Breaking_Wheel|"Gear" super]], which requires Awakening. | |||
}} | |||
</div> | |||
===Unique Mechanics=== | |||
{{card|width=4 | |||
|header=Axe Levels | |||
|content= | |||
<center> [[File:P4U2R_Axe_Lv1_Icon.png]] [[File:P4U2R_Axe_Lv2_Icon.png]] [[File:P4U2R_Axe_Lv3_Icon.png]] [[File:P4U2R_Axe_Lv4_Icon.png]] [[File:P4U2R_Axe_Lv5_Icon.png]] </center> | <center> [[File:P4U2R_Axe_Lv1_Icon.png]] [[File:P4U2R_Axe_Lv2_Icon.png]] [[File:P4U2R_Axe_Lv3_Icon.png]] [[File:P4U2R_Axe_Lv4_Icon.png]] [[File:P4U2R_Axe_Lv5_Icon.png]] </center> | ||
Labrys has a special axe icon above her SP Gauge that levels up after using attacks that utilize Labrys' massive axe (even on block or whiff). It will slowly level down over time you don't attack with the axe, and decreases even more when Labrys is hit. The levels are broken down into the following colors with 1 being the lowest, 5 being the highest: | Labrys has a special axe icon above her SP Gauge that levels up after using attacks that utilize Labrys' massive axe (even on block or whiff). It will slowly level down over time you don't attack with the axe, and decreases even more when Labrys is hit. The levels are broken down into the following colors with 1 being the lowest, 5 being the highest: | ||
* No Color (Gray) > Blue > Green > Yellow > Red | *No Color (Gray) > Blue > Green > Yellow > Red | ||
* The higher the level of the Axe Gauge is, the more damage her axe attacks do. | *The higher the level of the Axe Gauge is, the more damage her axe attacks do. | ||
** Lv 1: 60%, Lv 2: 80%, Lv 3: 100%, Lv 4: 110%, Lv 5: 120% | **Lv 1: 60%, Lv 2: 80%, Lv 3: 100%, Lv 4: 110%, Lv 5: 120% | ||
** Note her supers follows a unique formula, and will be mentioned in those sections. | **Note her supers follows a unique formula, and will be mentioned in those sections. | ||
At red axe level, she gains the following special properties in addition to extra damage: | At red axe level, she gains the following special properties in addition to extra damage: | ||
*Added Hitstun for axe attacks | *Added Hitstun for axe attacks | ||
| Line 37: | Line 50: | ||
;Management | ;Management | ||
*At the start of each match, the axe gauge starts at level | *At the start of each match, the axe gauge starts at Level 3 (Green) and always drifts to this level. | ||
**At Level 4 (Yellow) and Level 5 (Red), the axe level will steadily decrease down to Green over time. | |||
**If Labrys sinks to Level 1 (Grey) or Level 2 (Blue), it will slowly drift ''up'' to Green without Labrys doing anything. | |||
*The higher Labrys' axe level, the quicker the gauge decreases. In Yellow, it will take 7 seconds to hit Green, but only 4 in Red. | |||
*Labrys' axe level does ''not'' decrease while she is in blockstun. | |||
*Using certain special moves, such as Guillotine Axe, will build the gauge faster than normal moves. | |||
*Axe level will carry over to all subsequent rounds. | *Axe level will carry over to all subsequent rounds. | ||
Knowing this, don't focus too much on reaching red axe status, instead just look for ways to get in on your opponent first and know your proper BnB's after getting that first hit in. After that first hit happens you'll usually be at least at yellow axe status, with the followup okizeme pushing you up to red axe. At this point, it's merely keeping up that momentum and finishing the job with Beast. If your opponent blocks your mix up and pushes you back, don't fret about the axe level declining as it can be built back up just as fast. | Knowing this, don't focus too much on reaching red axe status, instead just look for ways to get in on your opponent first and know your proper BnB's after getting that first hit in. After that first hit happens you'll usually be at least at yellow axe status, with the followup okizeme pushing you up to red axe. At this point, it's merely keeping up that momentum and finishing the job with Beast. If your opponent blocks your mix up and pushes you back, don't fret about the axe level declining as it can be built back up just as fast. | ||
}} | }} | ||
< | |||
==Starter Guide== | |||
{{card| | |||
|header=Starter Guide | |||
|content=<center><div class="fpvideo">{{#ev:youtube|_nUbx9HJZoM|450}}{{Closediv}}</center> | |||
}} | |||
==Normal Attacks== | ==Normal Attacks== | ||
| Line 54: | Line 74: | ||
</div> | </div> | ||
<div id="movelist-1" class="movelist"> | <div id="movelist-1" class="movelist"> | ||
{{P4U2R Move Card | |||
|input=5A,5AA Normal,5AAA Normal|versioned=yes | |||
|description= | |||
;{{clr|1|5A}} | |||
{{#invoke:FrameChart|drawFrameData | |||
|startup = 7 | |||
|active = 3 | |||
|recovery = 19 | |||
}} | |||
Labrys' massive jab. Her fastest, lowest commitment axe normal that outranges many characters' medium buttons. | |||
{{clr|1|5A}} does carry a few weaknesses. It's slow, unsafe and doesn't chain into {{clr|1|2A}}. In its stead it carries all the benefits of a typical Labrys axe move, commanding a wide range for its startup and leading to excellent damage on a counterhit. Labrys can poke and challenge from many ranges other characters would need to spend those extra frames on dashing in, or not attempting at all. With spacing, {{clr|1|5A}} is also perfectly usable for pressure since many characters can't contest the distance. | |||
{{ | ---- | ||
{{ | ;{{clr|1|5AA}} | ||
| | {{#invoke:FrameChart|drawFrameData | ||
|startup = 11 | |||
| | |active = 3 | ||
|recovery = 20 | |||
}} | }} | ||
|- | A simple and respectable followup from {{clr|1|5A}}. Labrys moves forward while attacking, which carries innumerable benefits for the rest of her buttons. Despite its apparent lack of safety at -6, the pushback still tends to leave the opponent just a bit too far away to punish Labrys or successfully evade another {{clr|1|5A}}. The only downside is that it's not jump cancellable, which can make dealing with bursts very annoying. | ||
{{ | ---- | ||
{{# | ;{{clr|1|5AAA}} | ||
| | {{#invoke:FrameChart|drawFrameData | ||
| | |startup = 12 | ||
| | |active = 2 | ||
|inactive2 = 6 | |||
|active3 = 3 | |||
|inactive4 = 23 | |||
|active4 = 6 | |||
|recovery = 10 | |||
}} | }} | ||
{{clr|1|5AAA}} is almost as good as it gets for an autocombo ender. Excellent corner carry both on hit and block, easy to confirm into and hits reliably after any awkward stray hit. Hideously unsafe on block, so this should always be cancelled. Outside of the obvious {{clr|1|214A}} autocombo ender, Labrys can also chain into sweep. | |||
{{ | |||
{{ | |||
| | |||
| | |||
}} | }} | ||
</div> | </div> | ||
<div id="movelist-2" class="movelist"> | <div id="movelist-2" class="movelist"> | ||
{{P4U2R Move Card | |||
|input=5A,5AA Shadow,5AAA Shadow|versioned=yes | |||
|description= | |||
;{{clr|1|5A}} | |||
{{#invoke:FrameChart|drawFrameData | |||
|startup = 7 | |||
|active = 3 | |||
|recovery = 19 | |||
{{ | |||
| | |||
{{# | |||
| | |||
| | |||
| | |||
}} | }} | ||
Labrys' massive jab. Her fastest, lowest commitment axe normal that outranges many characters' medium buttons. | |||
{{ | |||
{{ | {{clr|1|5A}} does carry a few weaknesses. It's slow, unsafe and doesn't chain into {{clr|1|2A}}. In its stead it carries all the benefits of a typical Labrys axe move, commanding a wide range for its startup and leading to excellent damage on a counterhit. Labrys can poke and challenge from many ranges other characters would need to spend those extra frames on dashing in, or not attempting at all. With spacing, {{clr|1|5A}} is also perfectly usable for pressure since many characters can't contest the distance. | ||
| | ---- | ||
;{{clr|1|5AA}} | |||
| | {{#invoke:FrameChart|drawFrameData | ||
|startup = 13 | |||
|active = 3 | |||
|recovery = 15 | |||
}} | }} | ||
| | Depending on who you are, this is either nice or annoying to have compared to normal Labrys. | ||
{{ | |||
{{ | Moves forward with good reach and launches the opponent up on hit. It's much safer on block, but doesn't chain into any {{clr|2|B}} normals, which heavily restricts future pressure. Also not jump cancellable, again, but you're a Shadow this time around so fighting bursts isn't as hard. | ||
| | |||
A subtle, but major weakness of Shadow {{clr|1|5AA}} comes from Instant Block. If {{clr|1|5A}} is IB'd, {{clr|1|5AA}} will not be a true blockstring and can be avoided or DP'd, creating a very easy window to escape Labrys' pressure. This doesn't help {{clr|A|5AA}}'s predictability at all, especially when the next hit of her autocombo is too slow to chain on its own as well. The extra frame advantage is nice regardless, but how much it truly helps pressure is debatable. | |||
| | ---- | ||
;{{clr|1|5AAA}} | |||
{{#invoke:FrameChart|drawFrameData | |||
|startup = 22 | |||
|active = 4 | |||
|recovery = 23 | |||
}} | }} | ||
|} | A significantly slower but more combo-friendly autocombo ender. | ||
Launches high on hit with a lot of hitstun, allowing for hop {{clr|2|j.2B}} routes with Yellow/Red Axe level. The downside, outside of the loss of raw corner carry, is the horribly slow speed. {{clr|1|5AAA}} will always leave a large, mashable gap if used in pressure, and with the issues mentioned about {{clr|1|5AA}} earlier, this only further compounds blockstring problems for S. Labrys. | |||
{{ | |||
In essence, despite the seemingly better frame advantage on block, S. Labrys' autocombo is actually geared for stronger combos than pressure. Since Labrys already gets high damage on her own, it's questionably helpful, and perhaps a defining example as to why S. Labrys is very underplayed and typically viewed as redundant. | |||
</div> | </div> | ||
}} | |||
===<big>{{clr|1|2A}}</big>=== | ===<big>{{clr|1|2A}}</big>=== | ||
{{P4U2R Move Card | |||
|input=2A | |||
|description= | |||
{{#invoke:FrameChart|drawFrameData | |||
|startup = 7 | |||
|active = 2 | |||
|recovery = 14 | |||
{{# | |||
| | |||
| | |||
| | |||
}} | }} | ||
A crouching jab that forfeits the axe benefits for the sake of pressure and safety. | |||
Unlike many of Labrys' buttons, {{clr|1|2A}} is remarkably safe and can chain into itself. This gives it a very different application than what's standard for Labrys, being stagger pressure and tick throws. However, {{clr|1|2A}} does NOT chain into {{clr|1|5A}}, nor is it considered an axe move. This poses a choice between using either normal; do you go for the damage and reach of {{clr|1|5A}} or the better pressure and safety of {{clr|1|2A}}? The latter carries more benefits than its standing counterpart if Labrys is up close and making her opponent block, so make the decision based on your current needs and goals. | |||
}} | |||
===<big>{{clr|2|5B}}</big>=== | ===<big>{{clr|2|5B}}</big>=== | ||
{{P4U2R Move Card | |||
|input=5b,5{B},5[B]|versioned=yes | |||
|description= | |||
{{#invoke:FrameChart|drawFrameData | |||
|startup = 15 | |||
|active = 2 | |||
|recovery = 25 | |||
{{ | |||
| | |||
| | |||
| | |||
}} | }} | ||
|} | Although it has a slow startup, {{clr|2|5B}} is a good ground poke when spaced well. In pressure, {{clr|2|5B}} has several follow up options such as dash and hop cancels, as well as chaining into other moves such as {{clr|3|2C}}, Sweep or Chain Knuckle that make it very useful for varying your pressure. | ||
*Dash cancel is -3 on block | *Dash cancel is -3 on block | ||
*Backdash cancel is -2 on block | *Backdash cancel is -2 on block | ||
---- | ---- | ||
;Half Charge | |||
Mostly useful for combos, but still somewhat useful elsewhere. Launches with sliding knockback on hit, comboing into chain knuckle midscreen and gives Labrys lots of time to do other things in the corner. It's also sometimes good to use in a blockstring, followed by the forward dash cancel to take advantage of being +4 and reset pressure. | |||
*Dash Cancel is +4 on block | *Dash Cancel is +4 on block | ||
*Backdash cancel is +5 on block | *Backdash cancel is +5 on block | ||
---- | |||
;Full Charge | |||
It's unblockable, and it's also worthless! Extremely slow with a noticeable superflash, glow effect and an unblockable warning. Absolutely nobody will get hit by this if their controller is plugged in and knows Labrys can do this. Also has terrible starting proration. | |||
Labrys has multiple charged unblockable moves and none of them are helpful for her. Setting them up is highly situational, very costly, beaten by DPs or guard cancels while only giving subpar reward. Due to their lack of practical applications, they won't be given much attention on the page beyond ridicule. | |||
}} | |||
===<big>{{clr|2|2B}}</big>=== | ===<big>{{clr|2|2B}}</big>=== | ||
{{P4U2R Move Card | |||
|input=2B,2{B},2[B]|versioned=yes | |||
|description= | |||
{{#invoke:FrameChart|drawFrameData | |||
|startup = 17 | |||
|active = 4 | |||
|recovery = 26 | |||
{{ | |||
| | |||
| | |||
| | |||
}} | }} | ||
A great anti-air due to its wide hitbox, disjointed and hitting all around Labrys. A bit slow to head invincibility which makes it less useful for catching jump-ins for pressure, but Labrys has a short crouching hurtbox during the move which makes it still worthwhile everywhere else. | |||
A great anti-air due to its wide hitbox. | In Red Axe, a counterhit {{clr|2|2B}} is Labrys' easiest and most infamous TOD starter. Opponents aware of the threat will most likely avoid jumping in as much as possible because of this, but if not then throw this at them to make them regret it. | ||
Jump and dash cancellable on connect, but due to Labrys' lack of options afterwards most players will fully expect a cancel, so choose your options wisely. | |||
The | *Dash cancel is -3 on block | ||
---- | |||
;Half Charge | |||
Increases the damage and gives a wallbounce if your opponent reaches the corner. Very useful as delaying the move retains invincibility, letting Labrys catch opponents attempting to stall their momentum for a brutal punish. The reward is great, especially on counterhit, but going for a charged {{clr|2|2B}} starter is not necessary at a higher axe level to dish out extreme damage. | |||
*Dash cancel is +1 on block | |||
---- | |||
;Full Charge | |||
Unblockable, and carries all of the problems as the fully charged {{clr|2|5B}}. Maybe your grandma will get hit by a move that has two full seconds of startup and no armor. Don't bother. | |||
}} | |||
===<big>{{clr|1|j.A}}</big>=== | ===<big>{{clr|1|j.A}}</big>=== | ||
{{P4U2R Move Card | |||
|input=j.A | |||
|description= | |||
{{#invoke:FrameChart|drawFrameData | |||
|startup = 9 | |||
|active = 2 | |||
|recovery = 6 | |||
}} | |||
{{ | 9F startup air "kick" with leg nubs. An underrated move for many reasons: not an axe move, not the ''greatest'' hitbox, competes with {{clr|2|j.B}}. | ||
{{ | Despite those apparent problem, it's unwise to neglect this. {{clr|1|j.A}}'s role is in the air-to-air wars against opponents who are using their own jabs to attempt to catch Labrys using {{clr|2|j.B}} and confirming off of counterhits quickly. It has almost no recovery which makes it quite safe to toss out at times to check for air-to-air attempts without risking the slow speed of her other tools. The hitbox isn't too shabby either, hitting at a very generous angle and giving {{clr|1|j.A}} applications in fuzzy overhead setups. | ||
| | |||
| | |||
}} | }} | ||
===<big>{{clr|2|j.B}}</big>=== | ===<big>{{clr|2|j.B}}</big>=== | ||
{{P4U2R Move Card | |||
|input=j.B | |||
|description= | |||
{{#invoke:FrameChart|drawFrameData | |||
|startup = 15 | |||
|active = 4 | |||
|recovery = 14 | |||
}} | |||
{{ | Incredible normal that hits all around Labrys in a "J" motion, covering tons of angles. Great for both jump ins and air-to-airs. The reach is so ridiculous, you can use it as a cross-up without having to turn around (but may find it hard to convert off if you used a forward airdash). Like most jump attacks, predictable {{clr|2|j.B}}s do lose to {{clr|2|2B}} Anti-Airs but so long as you aren't being predictable, you'll find this normal to be one of your most valuable tools. | ||
| | |||
| | |||
| | |||
| | |||
}} | }} | ||
===<big>{{clr|2|j. | ===<big>{{clr|2|j.BB}} and {{clr|2|j.2B}}</big>=== | ||
{{P4U2R Move Card | |||
|input=j.BB,j.2B|versioned=yes | |||
|description= | |||
{{#invoke:FrameChart|drawFrameData | |||
|startup = 13 | |||
|active = 6 | |||
|recovery = 22 | |||
{{# | |||
| | |||
| | |||
| | |||
}} | }} | ||
{{#invoke:FrameChart|drawFrameData | |||
|startup = 18 | |||
|active = 5 | |||
|recovery = 25 | |||
{{ | |||
}} | }} | ||
Wallbouncing axe swing. Has slightly better horizontal range than {{clr|2|j.B}}, but worse vertical range and very slow startup when used as {{clr|2|j.2B}}. Fortunately, it's incredible in combos especially with Red Axe, acting as both corner carry and a high hitstun extension. Keep note of the high SMP, however {{clr|2|j.BB}} and {{clr|2|j.2B}} are fortunately considered different moves, so it's not too hard to work around. | |||
{{ | |||
{{clr|2|j.BB}} adds a bit of landing recovery to Labrys, which is especially detrimental if it whiffs. {{clr|2|j.2B}} does NOT add the landing recovery. | |||
}} | }} | ||
==Persona Attacks== | ==Persona Attacks== | ||
===<big>{{clr|3|5C}}</big>=== | ===<big>{{clr|3|5C}}</big>=== | ||
{{P4U2R Move Card | |||
|input=5C | |||
|description= | |||
{{#invoke:FrameChart|drawFrameData | |||
|startup = 31 | |||
|isProjectile = true | |||
|active = 20 | |||
|recovery = 66 | |||
{{# | |||
| | |||
| | |||
| | |||
}} | }} | ||
Huge, multi-hitting projectile poke which vacuums opponents towards Labrys. | |||
{{clr|3|5C}} has heavy startup, but it's a strong tool if she can get it out. It's extremely active, safe, and difficult to roll past. Still chains into Sweep, or {{clr|3|2C}} to make yourself plus or launch for a damaging combo on counterhit. Like Labrys' other Persona buttons, it has somewhat limited use in pressure thanks to its linearity and slow speed, but it can still get the job done to beat rolls or pull people in. | |||
}} | |||
===<big>{{clr|3|2C}}</big>=== | ===<big>{{clr|3|2C}}</big>=== | ||
{{P4U2R Move Card | |||
|input=2C | |||
|description= | |||
{{#invoke:FrameChart|drawFrameData | |||
|startup = 28 | |||
|isProjectile = true | |||
|active = 18 | |||
|recovery = 14 | |||
}} | |||
Although {{clr|3|2C}} has a gigantic hitbox, it's most commonly seen in pressure and combos. For the latter use, {{clr|3|2C}} has very high hitstun and launches opponents into the air for simple followups, which even include Labrys' charged Furious Action to turn the combo into a Fatal Counter. Followups become more freeform in the corner, notably allowing Labrys to whiff the first hit of Guillotine Axe for extreme damage on the second. | |||
{{ | |||
| | {{clr|3|2C}} is dash cancellable and becomes +1 on block when done so, allowing pressure resets. However, she'll lose to characters mashing 5f normals, and also has a hard time catching people jumping before and after the move connects. It's not as strong as you'd might want, but it's not bad either. | ||
}} | }} | ||
===<big>{{clr|4|5D}}</big>=== | ===<big>{{clr|4|5D}}</big>=== | ||
{{P4U2R Move Card | |||
|input=5D,5DD|versioned=yes | |||
|description= | |||
A highly damaging combo and occasional pressure tool, which works significantly better in the corner. {{clr|4|5D}} has limited practical applications, but it gets said applications done with flying colors. | |||
Pressing {{clr|4|5D}} once will cause Ariadne to shoot 2 arrows that travel a short distance and if pressed a second time Ariadne will shoot more of these arrows continuously. The arrows lock the opponent down and deal high damage, frequently seeing use in corner combos and especially Fatal Counter combos to maximize Labrys' damage and meterbuild. For pressure, it can be easily explained as just being an inferior version of other characters like {{MMC|chara=Yu Narukami|input=5D|label=Narukami's}}, as the pushback is less than ideal and not much advantage is provided without {{clr|4|5DD}}. Still decent and highly active, and the pushback isn't an issue in the corner. | |||
{{ | |||
{{ | |||
| | |||
| | |||
}} | }} | ||
===<big>{{clr|3|j.C}}</big>=== | ===<big>{{clr|3|j.C}}</big>=== | ||
{{P4U2R Move Card | |||
|input=j.C | |||
|description= | |||
{{#invoke:FrameChart|drawFrameData | |||
|startup = 13 | |||
|isProjectile = true | |||
|active = 18 | |||
|recovery = 33 | |||
{{# | |||
| | |||
| | |||
| | |||
}} | }} | ||
|} | {{clr|3|j.C}} acts as a staple combo tool and otherwise very niche matchup-specific air option. | ||
Instantly halts Labrys' air momentum upon use while the hitbox completely surrounds her, and vacuums opponents in on hit or block. Sadly, it carries extreme recovery making it very easy to punish on whiff and block, damning it to the combo food bin. There are some additional uses for it in certain matchups or for stalling air momentum, Labrys resumes her previous momentum once the move recovers and gives it leverage as a creative movement option. Can also be used for some crossups, but without meter this is a terrible idea which can end up with Labrys being punished on hit. | |||
Ultimately, this is most commonly going to be seen used to drag opponents in for a {{clr|2|j.214B}} combo ender. | |||
}} | |||
===<big>{{clr|4|j.D}}</big>=== | ===<big>{{clr|4|j.D}}</big>=== | ||
{{P4U2R Move Card | |||
|input=j.D | |||
|description= | |||
{{clr|4|j.D}} carries many similarities to Labrys' other Persona buttons. It's another slow, highly active poke for Labrys to help cover neutral. | |||
As a poke, you could almost treat this as an aerial {{clr|3|5C}}. Most of the risk is loaded into the startup, with Labrys recovering quite quickly once the gears start appearing. Said gears last for a considerable amount of time and control a very large portion of the air. Against primarily airborne characters, {{clr|4|j.D}} can do quite a lot in limiting their movement options and forcing them to play slower against Labrys, especially if mixed in with {{clr|2|j.B}} or orbs. | |||
Also sees use in certain combos, but not nearly as much as its grounded counterpart. | |||
{{ | |||
{{ | |||
| | |||
}} | }} | ||
==Universal Mechanics== | ==Universal Mechanics== | ||
===<big>[[P4U2R/Mechanics#All_Out_Attack|All Out Attack]]</big>=== | |||
{{InputBadge|{{clr|1|5A}}+{{clr|2|B}}}} | |||
{{P4U2R Move Card | |||
|input=5AB | |||
|description= | |||
{{#invoke:FrameChart|drawFrameData | |||
|startup = 27 | |||
|active = 4 | |||
|recovery = 33 | |||
}} | |||
Standard all out attack. Has good range compared to most other AoA's, but like all AoA's, the startup is slow enough to block high on reaction and it is very punishable on block unless you OMC. Best used very sparingly. | |||
}} | |||
===<big>Sweep</big>=== | |||
{{InputBadge|{{clr|1|2A}}+{{clr|2|B}}}} | |||
{{P4U2R Move Card | |||
|input=2AB | |||
|description= | |||
{{#invoke:FrameChart|drawFrameData | |||
|startup = 15 | |||
|active = 3 | |||
|recovery = 20 | |||
}} | |||
Good range sweep that slides Labrys forward, usually used to end combos at lower axe levels so that you can go for Weaver Arts: Sword oki and keep building your momentum/axe gauge level, but can also be good for beating pokes because of the chest invuln. Not too bad in corner combos when backed behind {{clr|4|5D}} either. | |||
}} | |||
===<big>Ground Throw</big>=== | ===<big>Ground Throw</big>=== | ||
{{InputBadge|{{clr|3|C}}+{{clr|4|D}}}} | |||
{{P4U2R Move Card | |||
|input=CD | |||
|description= | |||
{{#invoke:FrameChart|drawFrameData | |||
|startup = 5 | |||
|active = 3 | |||
|recovery = 19 | |||
{{# | |||
| | |||
| | |||
| | |||
}} | }} | ||
|} | Good mixup tool when combined with {{clr|1|2A}} stagger pressure to do tick throws. As Labrys' fastest ground action, it can be a good defensive option in some instances where her other normals would otherwise be too slow. | ||
Obviously being a throw, it can OMC'd to convert it into a full combo, or just go straight into Beast super for axe meter and damage. On CH ''with Red Axe,'' you can convert it into a combo with {{clr|1|5A}} or {{clr|1|2A}}. | |||
}} | |||
===<big>Air Throw</big>=== | ===<big>Air Throw</big>=== | ||
{{InputBadge|{{clr|3|j.C}}+{{clr|4|D}}}} | |||
{{P4U2R Move Card | |||
|input=j.CD | |||
|description= | |||
{{#invoke:FrameChart|drawFrameData | |||
|startup = 4 | |||
|active = 3 | |||
|recovery = 19 | |||
{{# | |||
| | |||
| | |||
| | |||
}} | }} | ||
|} | Vaults the opponent away with her axe. Similar to her ground throw, Labrys' air throw is her fastest air option, making it good in up close air battles where {{clr|1|j.A}} and {{clr|2|j.B}} are too slow to use. | ||
Wall bounces in the corner, and it's possible to get a combo afterwards with Yellow Axe or higher. | |||
}} | |||
===<big>5th Gen Axe Slash</big>=== | ===<big>5th Gen Axe Slash</big>=== | ||
{{InputBadge|{{clr|2|B}}+{{clr|4|D}}}} | |||
{{P4U2R Move Card | |||
|input=BD,BD Full Charge|versioned=yes | |||
|description= | |||
{{#invoke:FrameChart|drawFrameData | |||
|startup = 26 | |||
|active = 4 | |||
< | |recovery = 42 | ||
{| | }} | ||
{{ | Guardpoint reversal that carries heavy startup. Every time Labrys is hit, hitstop is generated and adds to Labrys' startup. Has a decent hitbox, significant pushback, and forward movement. | ||
{{ | The pain and suffering behind everyone playing Labrys. The easily reactable startup and guardpoint lets opponents cancel whatever they're doing into a DP or worse to counter her. P4AU is balanced around everyone having a reversal, so Labrys being stuck with a bad one ends up defining many matchups against characters who can easily exploit her lacking defensive options. | ||
{{ | |||
| | Sometimes the situation necessitates using this and it can still work sometimes, preferably when opponents aren't mashing {{clr|1|2A}} to fish it out. The guardpoint and chargeable startup also makes it ideal for punishing bursts or Guard Cancels on Labrys' non-jump cancellable moves. Be warned, being a reversal it will leave her at extreme risk on a wrong guess. | ||
| | ---- | ||
| | ;Half Charge | ||
Now this is where things look a bit better. Always inflicts Counter Hit and wallbounces, even if used as a combo part. This property lets Labrys convert convert her combo of choice into a Fatal during Red Axe, such as <span class="MockCodeBlock">{{clr|3|5C}} > {{clr|3|2C}} > {{clr|2|B}}+{{clr|4|D}}</span>. Still not going to be seen in the majority of her combo routes due to the startup and specifics behind its use, but it's there for when it's needed. | |||
---- | |||
;Full Charge | |||
Obligatory Labrys fully charged unblockable. For people who thought this move wasn't bad enough. Awful starter and the moment anyone sees Labrys charging her Furious Action (or likely using it at all) they're probably going to roll behind her any way, so it's a great way to lose the round. Will catch one person who decided to sit there and block for a full two seconds in response to your DP out of a million. | |||
}} | |||
===<big>[[P4U2R/Mechanics#Guard_Cancel_Attack|Guard Cancel Attack]]</big>=== | |||
{{InputBadge|{{clr|1|6A}}+{{clr|2|B}} while blocking}} | |||
{{P4U2R Move Card | |||
|input=6AB | |||
|description= | |||
{{#invoke:FrameChart|drawFrameData | |||
|startup = 19 | |||
|active = 4 | |||
|recovery = 25 | |||
}} | }} | ||
Based on her Shadow {{clr|1|5AAA}} normal. Slow as Guard Cancels are known to be, but at least the hitbox is gigantic. A lot of meter will be going towards this since her Furious Action is so bad for escaping pressure. | |||
{{ | |||
}} | }} | ||
==[[P4U2R/Mechanics#Skills|Skill Attacks]]== | |||
===<big>Chain Knuckle</big>=== | |||
{{InputBadge|{{clr|1|236A}}/{{clr|2|B}}}} | |||
{{P4U2R Move Card | |||
|input=236A,236B,236AB|versioned=yes | |||
|description= | |||
Labrys' "projectile" meant to remind you that she is, in fact, a robot. Doubles as a tool to control space on the ground and a pressure tool. | |||
Both versions cover a good amount of distance, with the {{clr|1|A}} version going 2/3rds of the screen and the {{clr|2|B}}/SB versions going just short of fullscreen. The punch ignores projectiles, while SB also has Labrys invincible to them entirely, and is also considered a chest attribute strike instead of a real projectile (meaning sweeps will beat it). Be warned that there's some nasty recovery on whiff, so don't use it too often. | |||
The real kicker is [[P4U2R/Labrys#Winch_Dash|Winch Dash]], done by pressing/holding 6 after Chain Knuckle connects with the opponent. This turns the move from a mere poke to Labrys' mainstay pressure option. | |||
Can Fatal Counter, which goes great with Winch Dash. | |||
}} | }} | ||
===<big>Winch Dash</big>=== | |||
===<big> | {{InputBadge|Chain Knuckle > 6}} | ||
{{P4U2R Move Card | |||
|input=Chain Knuckle > 6,Chain Knuckle > 4|versioned=yes | |||
|description= | |||
Winch Dash is Chain Knuckle's claim to fame. Lunges Labrys quickly towards the opponent, and cancels into Chain Knuckle Extra Attack followups. | |||
Extremely useful for pressure, mixup, combos, you name it, Winch Dash gives it. Confirms off of a fatal counter chain knuckle, continuing combos, use the followups for whatever she wants, sky's the limit. Labrys recovers quickly after the dash, which also allows for throw mixups and even jumps. | |||
Things get even nastier when you incorporate Brake, done by pressing 4 at any point during the dash, which lets you bait any reversal options or just freak people out for some added psychic damage. Brake can also be cancelled into other special moves besides Chain Knuckle (e.g. {{clr|1|214A}}) or hops at any point, only furthering its usefulness. | |||
{| | |||
Keep in mind that the strength of Winch Dash being locked behind Chain Knuckle (which has 20f startup at minimum) can result in Labrys' pressure becoming predictable and exploitable if not used cautiously. Use this as one of many options in your pressure instead of rushing in for mixups every time. | |||
}} | }} | ||
{{ | ===<big>Chain Knuckle Extra Attack</big>=== | ||
{{ | {{InputBadge|Winch Dash > {{clr|1|A}}/{{clr|2|B}}}} | ||
| | {{P4U2R Move Card | ||
| | |input=Winch Dash > A,Winch Dash > B,Winch Dash > AB|versioned=yes | ||
| | |description= | ||
;{{clr|1|A}} Followup | |||
{{#invoke:FrameChart|drawFrameData | |||
|startup = 20 | |||
|active = 10 | |||
|recovery = 36 | |||
}} | }} | ||
|- | Hits overhead, and is the most common Winch Dash followup. Resembles the final hit of her autocombo, and is not a true blockstring from Chain Knuckle/Winch Dash at close range, so wary opponents will look to DP it. This, however, just lets you incorporate Winch Dash Brake to mess with people, or use the B followup instead. | ||
{{ | |||
{{# | On hit, convert into {{clr|1|214A}} immediately for a knockdown. Really you should be doing this always thanks to how unsafe it is. With Red Axe, you can combo into SB Axe for catastrophic damage. | ||
| | ---- | ||
| | ;{{clr|2|B}} Followup | ||
| | {{#invoke:FrameChart|drawFrameData | ||
|startup = 13 | |||
|active = 3 | |||
|recovery = 20 | |||
}} | }} | ||
Basic low followup similar to Labrys' sweep. | |||
A | Compared to the A followup, B tacks on several mediocrities. It's not special cancellable, not safe, rarely hits airborne opponents, and needs to be delayed if Chain Knuckle connected at a distance. It's at least gapless, but overall unexciting on its own. Combined with meter however, and Labrys can now enforce a very scary high/low/throw mixup with great reward behind it. Simply OMC the B followup after it connects for a combo or a pressure reset. | ||
B | |||
---- | ---- | ||
;SB Followup | |||
{{#invoke:FrameChart|drawFrameData | |||
|startup = 11 | |||
|active = 4 | |||
|recovery = 15 | |||
{{# | |||
| | |||
| | |||
| | |||
}} | }} | ||
A strong contender for Labrys' least useful SP skill. | |||
Hits mid, but is fast and 0 on block for quick damage in a pinch while granting some safety. Although it's 0 on block and leaves Labrys at good spacing for her {{clr|1|5A}} at close range, it both requires a gap beforehand from Chain Knuckle and isn't plus enough to let Labrys do much more than jab. On hit, it causes spin state for easy followups, but if you have Red Axe since you could've just done A into SB Axe instead. Ultimately, it can pay off in some situations, but it's not seen as a great use of meter. | |||
Interestingly, this can cross opponents up on hit and block if done close enough, but don't try to use this as a mixup because your opponent will always be able to autoguard it. | |||
}} | |||
===<big>Guillotine Axe</big>=== | ===<big>Guillotine Axe</big>=== | ||
{{InputBadge|{{clr|1|214A}}/{{clr|2|B}}}} | |||
{{P4U2R Move Card | |||
|input=214A,214B,214AB|versioned=yes | |||
|description= | |||
Guillotine Axe is Labrys' basic combo and blockstring ender, often referred to as just "Axe." Safe and pushes the opponent back far, which can make it difficult to punish even on IB. | |||
{{ | |||
| | |||
| | |||
In all versions, the first hit is a mid while the second is an overhead. The second hit also deals considerably higher damage if the first hit misses. | |||
Used for some creative metered mixup options or in 22X oki. Whiffing the first hit will give Labrys a quicker overhead that's trickier to see than her AOA, and can be confirmed with meter or more ideally with 22X backing her up meterlessly. However, if the first hit is blocked, you can exploit the knowledge that the second hit is a high and OMC into {{clr|1|2A}} for a simplistic yet disgustingly effective mixup option. | |||
Can also be used in some fuzzy overhead setups against some characters, but these are only worth it if Labrys is loaded on resources. | |||
---- | |||
;{{clr|1|214A}} | |||
{{#invoke:FrameChart|drawFrameData | |||
|startup = 11 | |||
|active = 5 | |||
|inactive2 = 9 | |||
|active3 = 12 | |||
|recovery = 17 | |||
}} | |||
Mostly used to end combos on the ground, ending strings, and for the aforementioned mixups. Does a good amount of damage and gives the axe gauge a nice boost. | |||
---- | |||
;{{clr|2|214B}} | |||
{{#invoke:FrameChart|drawFrameData | |||
|startup = 18 | |||
|active = 5 | |||
|inactive2 = 9 | |||
|active3 = 12 | |||
|recovery = 20 | |||
}} | |||
Longer startup but does more damage, and is 0 on block. Disgustingly high damage combo tool seen in Labrys' many death combos, done by launching the opponent and then whiffing the first hit so the opponent gets hit only by the second. If the opponent is high enough to get hit by the late active frames, it's even possible for Labrys to link after this to continue the combo. | |||
{{ | 0 on block is much less awesome than it sounds for Labrys due to her slow normals, but the pushback works very favorably with {{clr|1|5A}}, so you can use it as a pressure reset any way. | ||
---- | |||
;SB Version | |||
{{#invoke:FrameChart|drawFrameData | |||
|startup = 17 | |||
|active = 5 | |||
|inactive2 = 9 | |||
|active3 = 12 | |||
|recovery = 20 | |||
}} | |||
Key move in a ton of combos, and fittingly where a lot of Labrys' meter goes towards. Special cancelable and causes a small ground bounce. The cancel is what really matters here, letting Labrys chain into {{clr|1|22A}}/{{clr|3|236C}} to trap opponent mid-combo and lead to corner-carry. | |||
}} | |||
===<big>Guillotine Aerial</big>=== | ===<big>Guillotine Aerial</big>=== | ||
{{InputBadge|{{clr|1|j.214A}}/{{clr|2|B}}}} | |||
{{P4U2R Move Card | |||
|input=j.214A,j.214B,j.214AB|versioned=yes | |||
|description= | |||
Air combo ender with occasional use as an anti-anti-air or divebomb. Creates a small shockwave slightly after Labrys hits the ground that launches opponents very slightly into the air and improves her frame advantage—Labrys is typically punishable if it misses. | |||
Good for ending combos due to its ability to bring the opponent back down to the ground for oki or to be comboed into a Beast super for damage. Labrys can actually super cancel before the shockwave comes out since she's already considered grounded, which is absolutely awful since the shockwave is important for any kind of followup, so remember to delay your super input just a tad. | |||
If Labrys travels for a bit without hitting anything, the shockwave becomes significantly larger and will launch the opponent into the air on hit for a free combo. The easiest way to get this version is to superjump or double jump and use Guillotine Aerial at the apex. | |||
{{ | ---- | ||
;{{clr|1|j.214A}} | |||
{{# | {{#invoke:FrameChart|drawFrameData | ||
| | |startup = 12 | ||
| | |active = 2 | ||
| | |inactive2 = 4 | ||
| | |active3 = 1 | ||
|specialRecovery = 10 | |||
}} | }} | ||
The quickest and arguably least helpful of the bunch, most frequently seen as an "I messed up my combo" move. Can be used to safely end any combo without relying on corner or Persona moves, so in situations where spacing is awkward, scaling is too high or Labrys is Persona Broken, this gets the job done. | |||
Its speed makes it tempting to use as a divebomb, but it's both unsafe on block and the recovery makes any combo or oki you'd get afterwards less than stellar. | |||
---- | |||
;{{clr|2|j.214B}} | |||
{{#invoke:FrameChart|drawFrameData | |||
|startup = 17 | |||
|active = 3 | |||
|inactive2 = 6 | |||
|active3 = 1 | |||
|specialRecovery = 10 | |||
}} | |||
Labrys' main air combo ender. On the slower end, but Labrys has high enough hitstun on most of her attacks keeping this from being a problem. Most commonly seen following {{clr|3|j.C}}, but sometimes just follows up {{clr|2|j.2B}} in highly scaled corner routes. | |||
---- | |||
;SB Version | |||
{{#invoke:FrameChart|drawFrameData | |||
|startup = 12 | |||
|active = 2 | |||
|inactive2 = 4 | |||
|active3 = 1 | |||
|specialRecovery = 10 | |||
}} | |||
Effectively the same as the A version, but mysteriously invincible and plus on block as long as the shockwave hits. Gets people off of Labrys in the air while doubling as a quick divebomb to start turns. Throwing this puppy out in a "JUST DO IT" fashion can work wonders against certain characters. | |||
The armor will still lose to Air Unblockables, but the stall helps in baiting anti-airs any way. | |||
}} | |||
===<big>Weaver's Art: Sword</big>=== | ===<big>Weaver's Art: Sword</big>=== | ||
{{PersonaRequired}} | {{PersonaRequired}} {{InputBadge|{{clr|1|22A}}/{{clr|2|B}}/{{clr|3|C}}/{{clr|4|D}}}} | ||
{{P4U2R Move Card | |||
|input=22A,22AB|versioned=yes | |||
|description= | |||
Weaver's Art: Sword, also called "Spike" or "Strings", is Labrys' commonly used oki tool at lower axe levels from sweep combo enders. B version is optimal after sweep, while A version will be good in corner. | |||
While it's not a safejump, and none of them are true meaties, it grants Labrys many mixups and she still has the choice of blocking or backdashing to bait reversals. Keen opponents will attempt to exploit the lack of advantage and attempt numerous escape options, so build respect with {{clr|1|5A}}. Once the opponent respects it, Labrys has access to a ton of layered mixup options, or just a dash-up jab. | |||
{{(!}} class="mw-collapsible mw-collapsed" style="border-collapse: collapse;" data-expandtext="Some mixup concepts after 22X" data-collapsetext="Yup time to ignore all of this and 5A every time" | |||
{{ | {{!}}+ style="white-space: nowrap; text-align: left;" {{!}} | ||
{{!}}- | |||
{{ | {{!}} | ||
---- | |||
Nearly all of these give a full combo on hit if used after Spike. Not safe to reversal actions like DPs, backdashes and rolls. This is not a free mixup. | |||
| | *Dashing in and grabbing before the spike hits. This is the only one that does not give a combo (without meter). | ||
*{{clr|1|2A}} or Sweep for low options to catch opponents expecting overheads. | |||
*Whiff {{clr|1|214A}} for a sneaky overhead, or just use AOA once they start looking for Labrys spinning around. | |||
*Airdashing over or rolling for a crossup | |||
---- | |||
{{!)}} | |||
SB automatically tracks opponent's location. Great for counterzoning or catching people flailing around to make your approaches annoying. Do note they can just run past it if they remain on the ground, but their approach will at least be a bit more linear. | |||
}} | }} | ||
Weaver's Art: | ===<big>Weaver's Art: Orb</big>=== | ||
{{PersonaRequired}} {{InputBadge|{{clr|3|236C}}/{{clr|4|D}}}} | |||
{{P4U2R Move Card | |||
|input=236C,236D,236CD|versioned=yes | |||
|description= | |||
Orb is a prime neutral tool for dealing with characters who enjoy buzzing over Labrys' head to exploit her slow {{clr|2|2B}}, or just to make it harder to keep running away from her. | |||
As a projectile on its own, it's not half bad. The orb is a bit slow, but it destroys other projectiles, and there's no limit to how many Labrys can have out. On hit, the opponent is trapped in place for a bit similar to 22X, and is trapped for even longer if the orb counterhits. The real selling point of orb comes into its long active time and Labrys herself already sporting massive normals to control space with. If Labrys can find an opening in neutral, the orb can cover the few places she can't already reach. | |||
Dash cancellable very early into startup, which alleviates the risk in using the move a bit. Can also be used as a silly pressure reset this way, as the animation combined with the quick dash cancel can catch people off-guard. | |||
---- | |||
;{{clr|3|236C}} | |||
{{#invoke:FrameChart|drawFrameData | |||
|startup = 46 | |||
|isProjectile = true | |||
|recovery = 35 | |||
{{ | |||
{{# | |||
| | |||
| | |||
| | |||
}} | }} | ||
Travels at air dash height and weaves around. Good for denying the air to the opponent with little risk to yourself after it's out, or just making it harder for people to maneuver around {{clr|2|j.B}}. | |||
Thanks to the orb weaving back around to the ground level briefly, {{clr|3|236C}} has some under-explored applications for a creative Labrys looking to play the long con in her pressure. Do note that if the orb goes off-screen from the corner, it will not turn around and come back. | |||
---- | ---- | ||
;{{clr|4|236D}} | |||
{{#invoke:FrameChart|drawFrameData | |||
|startup = 91 | |||
|isProjectile = true | |||
|recovery = 35 | |||
}} | |||
Falls to the ground and goes across the screen at ground level. It takes a while for the orb to fall to ground level before it starts traveling, but it's good at covering an approach. If you can manage to keep the opponent blocking long enough, it can give Labrys a pressure reset later on, so it sees use in some safejump setups or in the aforementioned silly dash-in reset. | |||
One of the best uses for this is as actually as a throw mixup in pressure. Using {{clr|4|236D}} while very close to the opponent, then grabbing them without dashing will cause the orb to hit the opponent and give Labrys a combo after her grab. It's a bit slow and telegraphed however. | |||
---- | ---- | ||
;SB Version | |||
{{#invoke:FrameChart|drawFrameData | |||
|startup = 46 | |||
|isProjectile = true | |||
|recovery = 25 | |||
}} | |||
A fantastic use of meter. Labrys recovers ten frames faster than the other versions, almost entirely mitigating the risk in using this. The orb itself is the same as the {{clr|4|D}} version, but it falls to the ground much quicker. The speed lets Labrys incorporate all the grime the D version has more efficiently, such as making her aforementioned the grab mixup quicker, nastier, and more lenient with spacing. | |||
}} | |||
==[[ | ==[[P4U2R/Mechanics#SP_Skills|SP Skill Attacks]]== | ||
===<big>Weaver's Art: Beast | ===<big>Weaver's Art: Beast</big>=== | ||
{{PersonaRequired}} {{InputBadge|{{clr|3|236236C}}/{{clr|4|D}}}} | |||
{{P4U2R Move Card | |||
|input=236236C,236236D,236236CD|versioned=yes | |||
|description= | |||
Beast is a staple of Labrys' gameplan, and plays a big part in why everyone fears Labrys with axe levels. | |||
All versions of Beast deal more damage based on Labrys' axe level, and can reach truly ridiculous levels once Red Axe is reached. Many low damaging combos can be turned into 50% or worse just by tacking on Beast at the end, or alternatively Labrys can use Beast to build up a lot of axe level and immediately prime her win condition from square one. This makes Beast into one of the meanest combo enders Labrys has to offer, and it's seen very frequently as a result. | |||
{{ | |||
| | |||
| | |||
| | |||
Usage as a reversal is possible, but highly inadvisable. Labrys has guardpoint once she starts traveling, which unfortunately gives wary opponents several ways to evade the attack and punish Labrys without her being able to OMC to save herself. This is matchup specific, but unfavorable more often than not. | |||
---- | ---- | ||
;{{clr|3|236236C}} | |||
The investment. Very quick, damaging, and simple. A very effective combo ender that works at nearly any hitstun level, and more importantly builds axe level, which makes it great to throw out when you want to leave someone deep in Awakening or ending rounds while still building/retaining Red Axe. | |||
---- | ---- | ||
;{{clr|4|236236D}} | |||
{{ | The embezzlement. Cashes out on the axe gauge, boosting the damage output of the SP Skill proportional to your current axe level. Adds a huge amount of damage if Labrys is in Red Axe, incredible for closing out rounds especially before opponents reach Awakening, and is a very common ender in Labrys' many death combos. The startup is pretty slow, but it still reliably combos after {{clr|2|j.214B}}. | ||
On the first round, it may not be worth losing your axe level going into the second. Depending on how confident you are on landing that potential final hit, using the {{clr|3|C}} version to kill or leave your opponent one hit away from the grave will benefit Labrys a lot more since she'll be carrying Red Axe over to the next. Levy the options carefully. | |||
---- | |||
;SB Version | |||
The billionaire's investment. It's a steep price to pay for 75 meter, but it's very worth it. Hits as many times as the {{clr|4|D}} version while building axe level on every hit, oftentimes pushing Labrys instantly up two whole levels for a Green Axe game-changer. As a generous bonus, it also comes out just as fast as the {{clr|3|C}} version while traveling very far and leaves the opponent in a ton of untech for oki setups. | |||
}} | |||
==[[P4U2.5/Damage#Awakening|Awakened]] SP Skill Attacks== | ==[[P4U2.5/Damage#Awakening|Awakened]] SP Skill Attacks== | ||
===<big>Weaver's Art: Breaking Wheel</big>=== | ===<big>Weaver's Art: Breaking Wheel</big>=== | ||
{{PersonaRequired}} | {{PersonaRequired}} {{InputBadge|{{clr|3|214214C}}/{{clr|4|D}}}} | ||
{{P4U2R Move Card | |||
|input=214214C/D,214214CD|versioned=yes | |||
|description= | |||
Often nicknamed "gears", Breaking Wheel is one of P4AU's many "make me plus" projectile supers. Acts as Labrys' only true reversal, and occasionally a lockdown tool. | |||
{{ | |||
| | |||
| | |||
Covers the floor in a set of five massive multi-hitting gears, locking the opponent down for further pressure or a momentum shift. Although the move itself only hits on the ground, it can be difficult for airborne opponents to escape falling into the gears if they lack good positioning or have used up their air movement options. All versions stay even if you hit Labrys, so attempts to mash something fullscreen usually won't end well. Although it's plus on block, the move still carries heavy recovery on whiff to the point of being IK punishable by several characters, and it's simple to roll past midscreen. | |||
Because of the shortcomings of Labrys' DP and other supers, Gear super is her best reversal. The startup invincibility, screen coverage, and advantage on block easily outclass her alternatives. This can act as a major deciding factor between whether to play Normal Labrys or S-Labrys, as Labrys only gets this in Awakening but S-Labrys has this available as long as she has the meter for it. | |||
{{clr|3|214214C}} places the gears appear in front of Labrys, while {{clr|4|214214D}} places them 2/3rds of the screen away. The {{clr|3|C}} version sees the most use as a reversal. | |||
---- | |||
;SB Version | |||
Spawns eight wheels instead of five, appearing in front of Labrys and expanding out to almost fullscreen distance. Very plus on block, but also incredibly expensive on an already meter hungry character. The cost alone is hard to justify, sticking to the {{clr|3|C}} version and saving the remaining 25 meter for an SP skill will likely pay off better than the extra frames here. | |||
}} | |||
' | ===<big>Brutal Impact</big>=== | ||
{{InputBadge|{{clr|1|214214A}}/{{clr|2|B}}}} | |||
{{P4U2R Move Card | |||
|input=214214A,214214B,214214AB|versioned=yes | |||
|description= | |||
{{(!}} class="mw-collapsible mw-collapsed" style="border-collapse: collapse;" data-expandtext="what you look like using brutal impact" data-collapsetext="this is actually you being let off easy" | |||
{{!}}+ style="white-space: nowrap; text-align: left;" {{!}} | |||
{{!}}- | |||
{{!}} | |||
[[File:P4Arena_Labrys_BrutalImpact_Reality.webm|loop|autoplay|muted]] | |||
{{!)}} | |||
Brutal Impact is Labrys' unblockable super, dealing ridiculously high damage and allegedly being usable in setups. With that out of the way, do not think of using super ever. | |||
Terrible move, one of the worst in the game. Only available in Awakening, horrible startup, huge telegraph, dozens of ways to avoid it, and it's IK punishable. Has guardpoint against everything during the startup, and Labrys will attack much quicker if she receives a hit. (It will be instantly set off if hit by a [[P4U2R/Mechanics#Furious_Action|Furious Action]] or [[P4U2R/Mechanics#Normal_Throws|Normal Throws]].) But joke's on you, it's still so slow that your opponent can just jump over Labrys and make her cry. And nobody likes watching robot girls cry. | |||
{{ | ---- | ||
;{{clr|1|A}} Version | |||
The fastest and least bad one. Still unusable against any opponent, ''except'' if you're S-Labrys. | |||
Tempting to use in unblockable setups such as <span class="MockCodeBlock">{{clr|3|214214C}} -> OMC -> {{clr|1|214214A}}</span>, however this requires full meter, Awakening, and a high axe level to deal any meaningful damage at all. These setups are also easily defeated by Guard Cancels, rendering it almost never worth the attempt. | |||
<span class=" | |||
S-Labrys can use it in Frenzy combos for damage rivaling {{clr|4|D}} Beast, except it doesn't cost your axe level. This may be knocking off {{Character Label|P4U2R|Shadow Labrys|label=the real deal}}, but at least it gives this move ''something'' in terms of use. | |||
---- | |||
;{{clr|2|B}} Version | |||
Even worse than the {{clr|1|A}} version. Way too slow, you're never going to hit anyone competent with this in your wildest dreams. Best used against players who try to stand still and block unblockables. | |||
Deals more damage than the A version, but who cares? | |||
---- | |||
;SB Version | |||
Since you insist on spending 75 meter to lose the round, you'll be glad to hear that Labrys at least is able to oneshot every character in the game if she's in Red Axe while using this version. Even against Awakening, it does 7,500 damage. As a result, this version has slightly more use than the other two, and that is to flex your ability to read DPs in the most disrespectful way imaginable, and utterly embarrassing yourself if you read incorrectly. Throw this in the garbage unless you're some sicko who actually does enjoy watching robot girls cry. | |||
}} | |||
==[[ | ==[[P4U2R/Mechanics#Instant_Kill|Instant Kill]]== | ||
===<big>Weaver's Art: Inquisition</big>=== | ===<big>Weaver's Art: Inquisition</big>=== | ||
{{PersonaRequired}} | {{PersonaRequired}} {{InputBadge|{{clr|3|222C}}+{{clr|4|D}} when [[P4U2R/Mechanics#Instant Kill|IK Conditions]] are met}} | ||
{{P4U2R Move Card | |||
|input=222CD | |||
|description= | |||
Fullscreen instant kill. Costs 100 SP, reaches fullscreen, invincible until recovery, very standard IK stuff. | |||
Labrys summons Ariadne to shoot an arrow across the screen, and if successful, proceeds to trap the opponent, throws her axe at them, and with an extended chain arm, barrages the opponent with axe strikes, cultivating in dropping the axe on top of them. This IK at least has the benefit of hitting full screen. However, it still suffers from a long reactable startup and the ability to be blocked, all while requiring 100 SP, making it hardly worth it to use. Could potentially be used to counter certain supers on super flash like Adachi's Atom Smasher or Akihiko's Maziodyne, but practical instances for this IK are few and far between. | |||
}} | }} | ||
== | ==Colors== | ||
{{P4U2RColors | |||
|Size=180 | |||
|Character=Labrys | |||
|reference2=[https://megamitensei.fandom.com/wiki/Lisa_Silverman ''Lisa Silverman (P2)''] | |||
|reference9={{Character_Label|P4U2R|Aigis|size=42px}} in school uniform | |||
|P_reference9=[https://megamitensei.fandom.com/wiki/Palladion ''Palladion (P3)''] | |||
|reference10={{Character_Label|BBCF|Lambda|size=42px}} | |||
|P_reference10={{Character_Label|BBCF|Lambda|size=42px}} | |||
|reference11={{Character Label|GGACR|Baiken|size=42px}} | |||
|P_reference11={{Character_Label|GGACR|Baiken|size=42px}} | |||
|reference15=[https://megamitensei.fandom.com/wiki/Female_protagonist_(Persona_3_Portable) ''Kotone Shiomi (P3P)''] | |||
|reference23=''Velvet Room Attendant'' | |||
|P_reference23=''Velvet Room Attendant'' | |||
|reference25=''Christmas'' | |||
|P_reference25=''Christmas'' | |||
|reference27=''Dengeki'' | |||
|P_reference27=''Dengeki'' | |||
}} | |||
==Navigation== | ==Navigation== | ||
<center>{{Character Label|P4U2R|Labrys|36px | <center>{{Character Label|P4U2R|Labrys|size=36px}}</center> | ||
{{ | {{P4U2R/CharacterLinks}} | ||
{{notice|To edit frame data, edit values in [[{{PAGENAME}}/Data]].}} | {{notice|To edit frame data, edit values in [[{{PAGENAME}}/Data]].}} | ||
{{#lst:P4U2R/Navigation}} | {{#lst:P4U2R/Navigation}} | ||
Latest revision as of 17:42, 22 March 2024
Overview
Overview
Not satisfied with merely fighting with a Persona, Labrys elects to drag a gigantic axe into the ring to cleave her opponents in two with only one swing. Labrys operates as a damage-dealing machine, but she doesn't start the match at her full power. Instead, she has a unique mechanic where her axe gets charged the more hits she lands with her axe, regardless if they're hit or blocked. The goal? Get to Red Axe, where nearly every single tool she has becomes a Fatal Counter, and a single misstep from the opponent will spell their doom. Best of all, the axe level carries over across rounds, so if she closes one round in Red Axe, the next can be over in the blink of an eye.
Sporting massive reach with the majority of her normals, Labrys can be a menace in neutral with or without a Persona. In the air, her j.B GuardHighStartup15Recovery14Advantage- alone can make dealing with her extremely difficult, and on the ground she has numerous options to counter zoning attempts and put up walls to stop careless approaches.
Reverse the situation, however, and Labrys reverts from a combat robot to a schoolgirl. Outside of her reliance on snowballing, Labrys' defensive options are very poor—with slow jabs, a terrible Furious Action, and no decent reversal options without her Awakening Super. On the other end, her pressure is more about making the opponent block to build up Axe Gauge rather than directly opening them up. She doesn't have many strong mixup options outside of her Chain Knuckle, and even then will likely need meter to turn her mixups into any meaningful damage.
While she can be quite make-or-break, Labrys is one of few characters who can annihilate any unfortunate soul off of a jab. And she talks funny, so can you really say no to that?
 |
| Health |
| 9,500 |
| Backdash |
| 21F (1~6F Inv All) |
| Persona Cards |
| 3 |
| Combo Rate |
| 60% |
| Fastest Attack |
| 5A, 2A (7F) |
| Reversal Type |
| Attack (26F) |
| Fatal Starters |
| 236A/B/A+B |
| Fatal RecoveryAny moves that put this character in a state where any Counter Hit will force a Fatal Counter. |
| - |
![]() Labrys charges in and swings her axe at any problem she faces, powering up her next attacks all the while.
Labrys charges in and swings her axe at any problem she faces, powering up her next attacks all the while.
Pros
Cons
- TOD Machine: In Red Axe, Labrys can kill off of any well-placed hit. Axe levels also carry over between rounds to keep the snowballing going, allowing her to end some games the moment she wins the second roundstart scramble.
- Gigantic Axe: And gigantic range. All of her normals sport excellent reach and hitstun, and j.B might be worth an entire pro by itself. Not very reliant on her Persona thanks to this.
- Assembly Not Required: Even without Red Axe, Labrys deals a hefty amount of damage, sports great corner carry and has decent okizeme setups. She's in no hurry for mix-ups as she builds axe level on block as well, and her normals start dealing chip damage once she's in Red Axe.
- Slow: Fastest button clocks in at 7F, with the rest carrying hefty startup, and unimpressive movement speed. Struggles against zoning.
- Mids Dispenser: Few natural mixup options. Moreover, she cannot gatling her crouching normals into her standing normals, along with her normal mode having an unsafe autocombo. Proper pressure requires patience.
- Short Battery Life: Constantly wants meter to build axe level, create a mixup, confirm off of said mixup, or escape from pressure.
- #1 Guard Point Fangirl: Labrys' Furious Action is atrocious as a reversal, with heavy startup and guardpoint instead of invincibility making it very reactable. Her only solid defensive option is her "Gear" super, which requires Awakening.
Unique Mechanics
Axe Levels
Labrys has a special axe icon above her SP Gauge that levels up after using attacks that utilize Labrys' massive axe (even on block or whiff). It will slowly level down over time you don't attack with the axe, and decreases even more when Labrys is hit. The levels are broken down into the following colors with 1 being the lowest, 5 being the highest:
- No Color (Gray) > Blue > Green > Yellow > Red
- The higher the level of the Axe Gauge is, the more damage her axe attacks do.
- Lv 1: 60%, Lv 2: 80%, Lv 3: 100%, Lv 4: 110%, Lv 5: 120%
- Note her supers follows a unique formula, and will be mentioned in those sections.
At red axe level, she gains the following special properties in addition to extra damage:
- Added Hitstun for axe attacks
- All Counter Hits by attacks that increase the Axe Gauge become Fatal Counters
- Added chip damage with axe attacks
Under Red Axe, Labrys also does significant chip damage with her axe normals and Skills, such as Guillotine Axe. See her frame data for exact values, as her moves scale slightly differently.

- Management
- At the start of each match, the axe gauge starts at Level 3 (Green) and always drifts to this level.
- At Level 4 (Yellow) and Level 5 (Red), the axe level will steadily decrease down to Green over time.
- If Labrys sinks to Level 1 (Grey) or Level 2 (Blue), it will slowly drift up to Green without Labrys doing anything.
- The higher Labrys' axe level, the quicker the gauge decreases. In Yellow, it will take 7 seconds to hit Green, but only 4 in Red.
- Labrys' axe level does not decrease while she is in blockstun.
- Using certain special moves, such as Guillotine Axe, will build the gauge faster than normal moves.
- Axe level will carry over to all subsequent rounds.
Starter Guide
Starter Guide
Normal Attacks
5A
Normal
Shadow


- 5A
Total: 28
Labrys' massive jab. Her fastest, lowest commitment axe normal that outranges many characters' medium buttons.
5A does carry a few weaknesses. It's slow, unsafe and doesn't chain into 2A. In its stead it carries all the benefits of a typical Labrys axe move, commanding a wide range for its startup and leading to excellent damage on a counterhit. Labrys can poke and challenge from many ranges other characters would need to spend those extra frames on dashing in, or not attempting at all. With spacing, 5A is also perfectly usable for pressure since many characters can't contest the distance.
- 5AA
Total: 33
A simple and respectable followup from 5A. Labrys moves forward while attacking, which carries innumerable benefits for the rest of her buttons. Despite its apparent lack of safety at -6, the pushback still tends to leave the opponent just a bit too far away to punish Labrys or successfully evade another 5A. The only downside is that it's not jump cancellable, which can make dealing with bursts very annoying.
- 5AAA
Total: 61
5AAA is almost as good as it gets for an autocombo ender. Excellent corner carry both on hit and block, easy to confirm into and hits reliably after any awkward stray hit. Hideously unsafe on block, so this should always be cancelled. Outside of the obvious 214A autocombo ender, Labrys can also chain into sweep.


| Version | DamageThe raw damage value(s) of the listed move that the game's combo system calculates combo damage from. | GuardHow this attack can be guarded. All non-throws can be air blocked unless otherwise stated, and all "Air Unblockable" moves can be blocked in either grounded stance unless otherwise stated. Throw-type moves will have their ranges listed instead, and other cases will be explicitly noted. |
StartupNumber of frames for this move to reach the first active frame (includes the first active frame). | ActiveNumber of active frames in this attack. Values in () are for gaps between hits of an attack. | RecoveryNumber of frames this move is in a recovery state before returning to neutral. "Total (x)" indicates this for moves where the attacker has inactionable animation independent of active frames (i.e. projectiles and some Persona attacks). |
Frame AdvThe difference between the attacker's recovery and the period that the opponent is in blockstun. This frame advantage value is based off the fact that the very first active frame touches the opponent. | AttributeSome attacks are invulnerable to attacks with specific attributes. This notes what attributes each attack possesses. H - Head B - Body C - Chest F - Foot P - Projectile. Independent Projectiles will have their Durability level listed. For example a projectile that his Durability level 2 will show P2 T - Throw |
Inv.Attribute and Hitbox Invincibility information that will be notated via abbreviation or other indicators. Guard - Move autoguards against the attacks instead of making them whiff. Strike - Invulnerable to all attributes except for Throws, and SP Skills. Low Profile - Character's hurtbox shrinks to go under many attacks. Persona - Only the Persona carries this invulnerability. |
|---|---|---|---|---|---|---|---|---|
| 5A | 200 | All | 7 | 3 | 19 | -7 | Body | |
| 5AA Shadow | 600 | All | 13 | 3 | 15 | -1 | Body | |
| 5AAA Shadow | 1000 | All | 22 | 4 | 23 | -8 | Body |
- 5A
Total: 28
Labrys' massive jab. Her fastest, lowest commitment axe normal that outranges many characters' medium buttons.
5A does carry a few weaknesses. It's slow, unsafe and doesn't chain into 2A. In its stead it carries all the benefits of a typical Labrys axe move, commanding a wide range for its startup and leading to excellent damage on a counterhit. Labrys can poke and challenge from many ranges other characters would need to spend those extra frames on dashing in, or not attempting at all. With spacing, 5A is also perfectly usable for pressure since many characters can't contest the distance.
- 5AA
Total: 30
Depending on who you are, this is either nice or annoying to have compared to normal Labrys.
Moves forward with good reach and launches the opponent up on hit. It's much safer on block, but doesn't chain into any B normals, which heavily restricts future pressure. Also not jump cancellable, again, but you're a Shadow this time around so fighting bursts isn't as hard.
A subtle, but major weakness of Shadow 5AA comes from Instant Block. If 5A is IB'd, 5AA will not be a true blockstring and can be avoided or DP'd, creating a very easy window to escape Labrys' pressure. This doesn't help 5AA's predictability at all, especially when the next hit of her autocombo is too slow to chain on its own as well. The extra frame advantage is nice regardless, but how much it truly helps pressure is debatable.
- 5AAA
Total: 48
A significantly slower but more combo-friendly autocombo ender.
Launches high on hit with a lot of hitstun, allowing for hop j.2B routes with Yellow/Red Axe level. The downside, outside of the loss of raw corner carry, is the horribly slow speed. 5AAA will always leave a large, mashable gap if used in pressure, and with the issues mentioned about 5AA earlier, this only further compounds blockstring problems for S. Labrys.
In essence, despite the seemingly better frame advantage on block, S. Labrys' autocombo is actually geared for stronger combos than pressure. Since Labrys already gets high damage on her own, it's questionably helpful, and perhaps a defining example as to why S. Labrys is very underplayed and typically viewed as redundant.
| Version | P1Also known as the starter proration. If this move starts a combo, this value will be added to the Proration Tally on top of P2's addition (P1 + P2). | P2Also known as the mid-combo proration. If this move is used at all in a combo, this value will be added to the Proration Tally. | SMPShorthand for "Same Move Proration". If this move is used more than once in a combo, this value will be added to the Proration Tally on top of P2's addition (P2 + SMP). | Level
| ||||||||||||||||||||||||||||||||||||
|---|---|---|---|---|---|---|---|---|---|---|---|---|---|---|---|---|---|---|---|---|---|---|---|---|---|---|---|---|---|---|---|---|---|---|---|---|---|---|---|---|
| 5A | 200 | 200 | 50 | 3 | ||||||||||||||||||||||||||||||||||||
| 5AA Shadow | 0 | 100 | 50 | 4 | ||||||||||||||||||||||||||||||||||||
| 5AAA Shadow | 0 | 400 | 50 | 5 |
2A


| DamageThe raw damage value(s) of the listed move that the game's combo system calculates combo damage from. | GuardHow this attack can be guarded. All non-throws can be air blocked unless otherwise stated, and all "Air Unblockable" moves can be blocked in either grounded stance unless otherwise stated. Throw-type moves will have their ranges listed instead, and other cases will be explicitly noted. |
StartupNumber of frames for this move to reach the first active frame (includes the first active frame). | ActiveNumber of active frames in this attack. Values in () are for gaps between hits of an attack. | RecoveryNumber of frames this move is in a recovery state before returning to neutral. "Total (x)" indicates this for moves where the attacker has inactionable animation independent of active frames (i.e. projectiles and some Persona attacks). |
Frame AdvThe difference between the attacker's recovery and the period that the opponent is in blockstun. This frame advantage value is based off the fact that the very first active frame touches the opponent. | AttributeSome attacks are invulnerable to attacks with specific attributes. This notes what attributes each attack possesses. H - Head B - Body C - Chest F - Foot P - Projectile. Independent Projectiles will have their Durability level listed. For example a projectile that his Durability level 2 will show P2 T - Throw |
Inv.Attribute and Hitbox Invincibility information that will be notated via abbreviation or other indicators. Guard - Move autoguards against the attacks instead of making them whiff. Strike - Invulnerable to all attributes except for Throws, and SP Skills. Low Profile - Character's hurtbox shrinks to go under many attacks. Persona - Only the Persona carries this invulnerability. |
|---|---|---|---|---|---|---|---|
| 160 | Low | 7 | 2 | 14 | -1 | Foot |
Total: 22
A crouching jab that forfeits the axe benefits for the sake of pressure and safety.
Unlike many of Labrys' buttons, 2A is remarkably safe and can chain into itself. This gives it a very different application than what's standard for Labrys, being stagger pressure and tick throws. However, 2A does NOT chain into 5A, nor is it considered an axe move. This poses a choice between using either normal; do you go for the damage and reach of 5A or the better pressure and safety of 2A? The latter carries more benefits than its standing counterpart if Labrys is up close and making her opponent block, so make the decision based on your current needs and goals.
| P1Also known as the starter proration. If this move starts a combo, this value will be added to the Proration Tally on top of P2's addition (P1 + P2). | P2Also known as the mid-combo proration. If this move is used at all in a combo, this value will be added to the Proration Tally. | SMPShorthand for "Same Move Proration". If this move is used more than once in a combo, this value will be added to the Proration Tally on top of P2's addition (P2 + SMP). | Level
| ||||||||||||||||||||||||||||||||||||
|---|---|---|---|---|---|---|---|---|---|---|---|---|---|---|---|---|---|---|---|---|---|---|---|---|---|---|---|---|---|---|---|---|---|---|---|---|---|---|---|
| 500 | 100 | 50 | 3 |
5B


| Version | DamageThe raw damage value(s) of the listed move that the game's combo system calculates combo damage from. | GuardHow this attack can be guarded. All non-throws can be air blocked unless otherwise stated, and all "Air Unblockable" moves can be blocked in either grounded stance unless otherwise stated. Throw-type moves will have their ranges listed instead, and other cases will be explicitly noted. |
StartupNumber of frames for this move to reach the first active frame (includes the first active frame). | ActiveNumber of active frames in this attack. Values in () are for gaps between hits of an attack. | RecoveryNumber of frames this move is in a recovery state before returning to neutral. "Total (x)" indicates this for moves where the attacker has inactionable animation independent of active frames (i.e. projectiles and some Persona attacks). |
Frame AdvThe difference between the attacker's recovery and the period that the opponent is in blockstun. This frame advantage value is based off the fact that the very first active frame touches the opponent. | AttributeSome attacks are invulnerable to attacks with specific attributes. This notes what attributes each attack possesses. H - Head B - Body C - Chest F - Foot P - Projectile. Independent Projectiles will have their Durability level listed. For example a projectile that his Durability level 2 will show P2 T - Throw |
Inv.Attribute and Hitbox Invincibility information that will be notated via abbreviation or other indicators. Guard - Move autoguards against the attacks instead of making them whiff. Strike - Invulnerable to all attributes except for Throws, and SP Skills. Low Profile - Character's hurtbox shrinks to go under many attacks. Persona - Only the Persona carries this invulnerability. |
|---|---|---|---|---|---|---|---|---|
| 5B | 1000 | All | 15 | 2 | 25 | -8 | Body | |
| 5{B} | 1200 | All | 36~87 | 2 | 35 | -11 | Body | |
| 5[B] | 1500 | Unblockable | 120 | 2 | 25 | Body |
Total: 41
Although it has a slow startup, 5B is a good ground poke when spaced well. In pressure, 5B has several follow up options such as dash and hop cancels, as well as chaining into other moves such as 2C, Sweep or Chain Knuckle that make it very useful for varying your pressure.
- Dash cancel is -3 on block
- Backdash cancel is -2 on block
- Half Charge
Mostly useful for combos, but still somewhat useful elsewhere. Launches with sliding knockback on hit, comboing into chain knuckle midscreen and gives Labrys lots of time to do other things in the corner. It's also sometimes good to use in a blockstring, followed by the forward dash cancel to take advantage of being +4 and reset pressure.
- Dash Cancel is +4 on block
- Backdash cancel is +5 on block
- Full Charge
It's unblockable, and it's also worthless! Extremely slow with a noticeable superflash, glow effect and an unblockable warning. Absolutely nobody will get hit by this if their controller is plugged in and knows Labrys can do this. Also has terrible starting proration.
Labrys has multiple charged unblockable moves and none of them are helpful for her. Setting them up is highly situational, very costly, beaten by DPs or guard cancels while only giving subpar reward. Due to their lack of practical applications, they won't be given much attention on the page beyond ridicule.
| Version | P1Also known as the starter proration. If this move starts a combo, this value will be added to the Proration Tally on top of P2's addition (P1 + P2). | P2Also known as the mid-combo proration. If this move is used at all in a combo, this value will be added to the Proration Tally. | SMPShorthand for "Same Move Proration". If this move is used more than once in a combo, this value will be added to the Proration Tally on top of P2's addition (P2 + SMP). | Level
| ||||||||||||||||||||||||||||||||||||
|---|---|---|---|---|---|---|---|---|---|---|---|---|---|---|---|---|---|---|---|---|---|---|---|---|---|---|---|---|---|---|---|---|---|---|---|---|---|---|---|---|
| 5B | 300 | 100 | 1000 | 5 | ||||||||||||||||||||||||||||||||||||
| 5{B} | 200 | 100 | 1000 | 5 | ||||||||||||||||||||||||||||||||||||
| 5[B] | 900 | 100 | 1000 | 5 |
5B:
- Dash cancel is -3 on block
- Backdash cancel is -2 on block
5{B}:
- Dash Cancel is +4 on block
- Backdash cancel is +5 on block
- Untech increases by 4 at Axe Level 3, and another 4 at Axe Level 4
5[B]:
- Untech increases by 4 at Axe Level 3, and another 4 at Axe Level 4
2B


| Version | DamageThe raw damage value(s) of the listed move that the game's combo system calculates combo damage from. | GuardHow this attack can be guarded. All non-throws can be air blocked unless otherwise stated, and all "Air Unblockable" moves can be blocked in either grounded stance unless otherwise stated. Throw-type moves will have their ranges listed instead, and other cases will be explicitly noted. |
StartupNumber of frames for this move to reach the first active frame (includes the first active frame). | ActiveNumber of active frames in this attack. Values in () are for gaps between hits of an attack. | RecoveryNumber of frames this move is in a recovery state before returning to neutral. "Total (x)" indicates this for moves where the attacker has inactionable animation independent of active frames (i.e. projectiles and some Persona attacks). |
Frame AdvThe difference between the attacker's recovery and the period that the opponent is in blockstun. This frame advantage value is based off the fact that the very first active frame touches the opponent. | AttributeSome attacks are invulnerable to attacks with specific attributes. This notes what attributes each attack possesses. H - Head B - Body C - Chest F - Foot P - Projectile. Independent Projectiles will have their Durability level listed. For example a projectile that his Durability level 2 will show P2 T - Throw |
Inv.Attribute and Hitbox Invincibility information that will be notated via abbreviation or other indicators. Guard - Move autoguards against the attacks instead of making them whiff. Strike - Invulnerable to all attributes except for Throws, and SP Skills. Low Profile - Character's hurtbox shrinks to go under many attacks. Persona - Only the Persona carries this invulnerability. |
|---|---|---|---|---|---|---|---|---|
| 2B | 800 | Air Unblockable | 17 | 4 | 26 | -6 | Body | 8~26 H |
| 2{B} | 1200 | Air Unblockable | 38~98 | 4 | 34 | -14 | Body | 9~(41~101) Head |
| 2[B] | 1200 | Unblockable | 122 | 4 | 34 | Body | 9~125 Head |
Total: 46
A great anti-air due to its wide hitbox, disjointed and hitting all around Labrys. A bit slow to head invincibility which makes it less useful for catching jump-ins for pressure, but Labrys has a short crouching hurtbox during the move which makes it still worthwhile everywhere else.
In Red Axe, a counterhit 2B is Labrys' easiest and most infamous TOD starter. Opponents aware of the threat will most likely avoid jumping in as much as possible because of this, but if not then throw this at them to make them regret it.
Jump and dash cancellable on connect, but due to Labrys' lack of options afterwards most players will fully expect a cancel, so choose your options wisely.
- Dash cancel is -3 on block
- Half Charge
Increases the damage and gives a wallbounce if your opponent reaches the corner. Very useful as delaying the move retains invincibility, letting Labrys catch opponents attempting to stall their momentum for a brutal punish. The reward is great, especially on counterhit, but going for a charged 2B starter is not necessary at a higher axe level to dish out extreme damage.
- Dash cancel is +1 on block
- Full Charge
Unblockable, and carries all of the problems as the fully charged 5B. Maybe your grandma will get hit by a move that has two full seconds of startup and no armor. Don't bother.
| Version | P1Also known as the starter proration. If this move starts a combo, this value will be added to the Proration Tally on top of P2's addition (P1 + P2). | P2Also known as the mid-combo proration. If this move is used at all in a combo, this value will be added to the Proration Tally. | SMPShorthand for "Same Move Proration". If this move is used more than once in a combo, this value will be added to the Proration Tally on top of P2's addition (P2 + SMP). | Level
| ||||||||||||||||||||||||||||||||||||
|---|---|---|---|---|---|---|---|---|---|---|---|---|---|---|---|---|---|---|---|---|---|---|---|---|---|---|---|---|---|---|---|---|---|---|---|---|---|---|---|---|
| 2B | 0 | 300 | 50 | 5 | ||||||||||||||||||||||||||||||||||||
| 2{B} | 0 | 300 | 500 | 5 | ||||||||||||||||||||||||||||||||||||
| 2[B] | 700 | 300 | 500 | 5 |
2{B}:
- Untech increases by 4 at Axe Level 3, and another 4 at Axe Level 4
2[B]:
- Untech increases by 4 at Axe Level 3, and another 4 at Axe Level 4
j.A


| DamageThe raw damage value(s) of the listed move that the game's combo system calculates combo damage from. | GuardHow this attack can be guarded. All non-throws can be air blocked unless otherwise stated, and all "Air Unblockable" moves can be blocked in either grounded stance unless otherwise stated. Throw-type moves will have their ranges listed instead, and other cases will be explicitly noted. |
StartupNumber of frames for this move to reach the first active frame (includes the first active frame). | ActiveNumber of active frames in this attack. Values in () are for gaps between hits of an attack. | RecoveryNumber of frames this move is in a recovery state before returning to neutral. "Total (x)" indicates this for moves where the attacker has inactionable animation independent of active frames (i.e. projectiles and some Persona attacks). |
Frame AdvThe difference between the attacker's recovery and the period that the opponent is in blockstun. This frame advantage value is based off the fact that the very first active frame touches the opponent. | AttributeSome attacks are invulnerable to attacks with specific attributes. This notes what attributes each attack possesses. H - Head B - Body C - Chest F - Foot P - Projectile. Independent Projectiles will have their Durability level listed. For example a projectile that his Durability level 2 will show P2 T - Throw |
Inv.Attribute and Hitbox Invincibility information that will be notated via abbreviation or other indicators. Guard - Move autoguards against the attacks instead of making them whiff. Strike - Invulnerable to all attributes except for Throws, and SP Skills. Low Profile - Character's hurtbox shrinks to go under many attacks. Persona - Only the Persona carries this invulnerability. |
|---|---|---|---|---|---|---|---|
| 300 | High | 9 | 2 | 6 | Head |
Total: 16
9F startup air "kick" with leg nubs. An underrated move for many reasons: not an axe move, not the greatest hitbox, competes with j.B.
Despite those apparent problem, it's unwise to neglect this. j.A's role is in the air-to-air wars against opponents who are using their own jabs to attempt to catch Labrys using j.B and confirming off of counterhits quickly. It has almost no recovery which makes it quite safe to toss out at times to check for air-to-air attempts without risking the slow speed of her other tools. The hitbox isn't too shabby either, hitting at a very generous angle and giving j.A applications in fuzzy overhead setups.
| P1Also known as the starter proration. If this move starts a combo, this value will be added to the Proration Tally on top of P2's addition (P1 + P2). | P2Also known as the mid-combo proration. If this move is used at all in a combo, this value will be added to the Proration Tally. | SMPShorthand for "Same Move Proration". If this move is used more than once in a combo, this value will be added to the Proration Tally on top of P2's addition (P2 + SMP). | Level
| ||||||||||||||||||||||||||||||||||||
|---|---|---|---|---|---|---|---|---|---|---|---|---|---|---|---|---|---|---|---|---|---|---|---|---|---|---|---|---|---|---|---|---|---|---|---|---|---|---|---|
| 200 | 100 | 50 | 2 |
j.B

This is the neutral


| DamageThe raw damage value(s) of the listed move that the game's combo system calculates combo damage from. | GuardHow this attack can be guarded. All non-throws can be air blocked unless otherwise stated, and all "Air Unblockable" moves can be blocked in either grounded stance unless otherwise stated. Throw-type moves will have their ranges listed instead, and other cases will be explicitly noted. |
StartupNumber of frames for this move to reach the first active frame (includes the first active frame). | ActiveNumber of active frames in this attack. Values in () are for gaps between hits of an attack. | RecoveryNumber of frames this move is in a recovery state before returning to neutral. "Total (x)" indicates this for moves where the attacker has inactionable animation independent of active frames (i.e. projectiles and some Persona attacks). |
Frame AdvThe difference between the attacker's recovery and the period that the opponent is in blockstun. This frame advantage value is based off the fact that the very first active frame touches the opponent. | AttributeSome attacks are invulnerable to attacks with specific attributes. This notes what attributes each attack possesses. H - Head B - Body C - Chest F - Foot P - Projectile. Independent Projectiles will have their Durability level listed. For example a projectile that his Durability level 2 will show P2 T - Throw |
Inv.Attribute and Hitbox Invincibility information that will be notated via abbreviation or other indicators. Guard - Move autoguards against the attacks instead of making them whiff. Strike - Invulnerable to all attributes except for Throws, and SP Skills. Low Profile - Character's hurtbox shrinks to go under many attacks. Persona - Only the Persona carries this invulnerability. |
|---|---|---|---|---|---|---|---|
| 600 | High | 15 | 4 | 14 | Head |
Total: 32
Incredible normal that hits all around Labrys in a "J" motion, covering tons of angles. Great for both jump ins and air-to-airs. The reach is so ridiculous, you can use it as a cross-up without having to turn around (but may find it hard to convert off if you used a forward airdash). Like most jump attacks, predictable j.Bs do lose to 2B Anti-Airs but so long as you aren't being predictable, you'll find this normal to be one of your most valuable tools.
| P1Also known as the starter proration. If this move starts a combo, this value will be added to the Proration Tally on top of P2's addition (P1 + P2). | P2Also known as the mid-combo proration. If this move is used at all in a combo, this value will be added to the Proration Tally. | SMPShorthand for "Same Move Proration". If this move is used more than once in a combo, this value will be added to the Proration Tally on top of P2's addition (P2 + SMP). | Level
| ||||||||||||||||||||||||||||||||||||
|---|---|---|---|---|---|---|---|---|---|---|---|---|---|---|---|---|---|---|---|---|---|---|---|---|---|---|---|---|---|---|---|---|---|---|---|---|---|---|---|
| 200 | 100 | 50 | 3 |
j.BB and j.2B


| Version | DamageThe raw damage value(s) of the listed move that the game's combo system calculates combo damage from. | GuardHow this attack can be guarded. All non-throws can be air blocked unless otherwise stated, and all "Air Unblockable" moves can be blocked in either grounded stance unless otherwise stated. Throw-type moves will have their ranges listed instead, and other cases will be explicitly noted. |
StartupNumber of frames for this move to reach the first active frame (includes the first active frame). | ActiveNumber of active frames in this attack. Values in () are for gaps between hits of an attack. | RecoveryNumber of frames this move is in a recovery state before returning to neutral. "Total (x)" indicates this for moves where the attacker has inactionable animation independent of active frames (i.e. projectiles and some Persona attacks). |
Frame AdvThe difference between the attacker's recovery and the period that the opponent is in blockstun. This frame advantage value is based off the fact that the very first active frame touches the opponent. | AttributeSome attacks are invulnerable to attacks with specific attributes. This notes what attributes each attack possesses. H - Head B - Body C - Chest F - Foot P - Projectile. Independent Projectiles will have their Durability level listed. For example a projectile that his Durability level 2 will show P2 T - Throw |
Inv.Attribute and Hitbox Invincibility information that will be notated via abbreviation or other indicators. Guard - Move autoguards against the attacks instead of making them whiff. Strike - Invulnerable to all attributes except for Throws, and SP Skills. Low Profile - Character's hurtbox shrinks to go under many attacks. Persona - Only the Persona carries this invulnerability. |
|---|---|---|---|---|---|---|---|---|
| j.BB | 800 | All | 13 | 6 | 22 | Head | ||
| j.2B | 800 | High | 18 | 5 | 25 | Head |
Total: 40
Total: 47
Wallbouncing axe swing. Has slightly better horizontal range than j.B, but worse vertical range and very slow startup when used as j.2B. Fortunately, it's incredible in combos especially with Red Axe, acting as both corner carry and a high hitstun extension. Keep note of the high SMP, however j.BB and j.2B are fortunately considered different moves, so it's not too hard to work around.
j.BB adds a bit of landing recovery to Labrys, which is especially detrimental if it whiffs. j.2B does NOT add the landing recovery.
| Version | P1Also known as the starter proration. If this move starts a combo, this value will be added to the Proration Tally on top of P2's addition (P1 + P2). | P2Also known as the mid-combo proration. If this move is used at all in a combo, this value will be added to the Proration Tally. | SMPShorthand for "Same Move Proration". If this move is used more than once in a combo, this value will be added to the Proration Tally on top of P2's addition (P2 + SMP). | Level
| ||||||||||||||||||||||||||||||||||||
|---|---|---|---|---|---|---|---|---|---|---|---|---|---|---|---|---|---|---|---|---|---|---|---|---|---|---|---|---|---|---|---|---|---|---|---|---|---|---|---|---|
| j.BB | 200 | 100 | 100 | 5 | ||||||||||||||||||||||||||||||||||||
| j.2B | 200 | 100 | 500 | 4 |
Persona Attacks
5C

| DamageThe raw damage value(s) of the listed move that the game's combo system calculates combo damage from. | GuardHow this attack can be guarded. All non-throws can be air blocked unless otherwise stated, and all "Air Unblockable" moves can be blocked in either grounded stance unless otherwise stated. Throw-type moves will have their ranges listed instead, and other cases will be explicitly noted. |
StartupNumber of frames for this move to reach the first active frame (includes the first active frame). | ActiveNumber of active frames in this attack. Values in () are for gaps between hits of an attack. | RecoveryNumber of frames this move is in a recovery state before returning to neutral. "Total (x)" indicates this for moves where the attacker has inactionable animation independent of active frames (i.e. projectiles and some Persona attacks). |
Frame AdvThe difference between the attacker's recovery and the period that the opponent is in blockstun. This frame advantage value is based off the fact that the very first active frame touches the opponent. | AttributeSome attacks are invulnerable to attacks with specific attributes. This notes what attributes each attack possesses. H - Head B - Body C - Chest F - Foot P - Projectile. Independent Projectiles will have their Durability level listed. For example a projectile that his Durability level 2 will show P2 T - Throw |
Inv.Attribute and Hitbox Invincibility information that will be notated via abbreviation or other indicators. Guard - Move autoguards against the attacks instead of making them whiff. Strike - Invulnerable to all attributes except for Throws, and SP Skills. Low Profile - Character's hurtbox shrinks to go under many attacks. Persona - Only the Persona carries this invulnerability. |
|---|---|---|---|---|---|---|---|
| 300,150×3 | All | 31 | 4,4,6,6 | Total 66 | -3 | Chest, Projectile | Persona 1~Until Active All |
Total: 116
Huge, multi-hitting projectile poke which vacuums opponents towards Labrys.
5C has heavy startup, but it's a strong tool if she can get it out. It's extremely active, safe, and difficult to roll past. Still chains into Sweep, or 2C to make yourself plus or launch for a damaging combo on counterhit. Like Labrys' other Persona buttons, it has somewhat limited use in pressure thanks to its linearity and slow speed, but it can still get the job done to beat rolls or pull people in.
| P1Also known as the starter proration. If this move starts a combo, this value will be added to the Proration Tally on top of P2's addition (P1 + P2). | P2Also known as the mid-combo proration. If this move is used at all in a combo, this value will be added to the Proration Tally. | SMPShorthand for "Same Move Proration". If this move is used more than once in a combo, this value will be added to the Proration Tally on top of P2's addition (P2 + SMP). | Level
| ||||||||||||||||||||||||||||||||||||
|---|---|---|---|---|---|---|---|---|---|---|---|---|---|---|---|---|---|---|---|---|---|---|---|---|---|---|---|---|---|---|---|---|---|---|---|---|---|---|---|
| 300 | 100 | 50 | 3 |
2C

| DamageThe raw damage value(s) of the listed move that the game's combo system calculates combo damage from. | GuardHow this attack can be guarded. All non-throws can be air blocked unless otherwise stated, and all "Air Unblockable" moves can be blocked in either grounded stance unless otherwise stated. Throw-type moves will have their ranges listed instead, and other cases will be explicitly noted. |
StartupNumber of frames for this move to reach the first active frame (includes the first active frame). | ActiveNumber of active frames in this attack. Values in () are for gaps between hits of an attack. | RecoveryNumber of frames this move is in a recovery state before returning to neutral. "Total (x)" indicates this for moves where the attacker has inactionable animation independent of active frames (i.e. projectiles and some Persona attacks). |
Frame AdvThe difference between the attacker's recovery and the period that the opponent is in blockstun. This frame advantage value is based off the fact that the very first active frame touches the opponent. | AttributeSome attacks are invulnerable to attacks with specific attributes. This notes what attributes each attack possesses. H - Head B - Body C - Chest F - Foot P - Projectile. Independent Projectiles will have their Durability level listed. For example a projectile that his Durability level 2 will show P2 T - Throw |
Inv.Attribute and Hitbox Invincibility information that will be notated via abbreviation or other indicators. Guard - Move autoguards against the attacks instead of making them whiff. Strike - Invulnerable to all attributes except for Throws, and SP Skills. Low Profile - Character's hurtbox shrinks to go under many attacks. Persona - Only the Persona carries this invulnerability. |
|---|---|---|---|---|---|---|---|
| 500,250×2 | All | 28 | 6,6,6 | 14 | -2 | Projectile | Persona 1~Until Active All |
Total: 59
Although 2C has a gigantic hitbox, it's most commonly seen in pressure and combos. For the latter use, 2C has very high hitstun and launches opponents into the air for simple followups, which even include Labrys' charged Furious Action to turn the combo into a Fatal Counter. Followups become more freeform in the corner, notably allowing Labrys to whiff the first hit of Guillotine Axe for extreme damage on the second.
2C is dash cancellable and becomes +1 on block when done so, allowing pressure resets. However, she'll lose to characters mashing 5f normals, and also has a hard time catching people jumping before and after the move connects. It's not as strong as you'd might want, but it's not bad either.
| P1Also known as the starter proration. If this move starts a combo, this value will be added to the Proration Tally on top of P2's addition (P1 + P2). | P2Also known as the mid-combo proration. If this move is used at all in a combo, this value will be added to the Proration Tally. | SMPShorthand for "Same Move Proration". If this move is used more than once in a combo, this value will be added to the Proration Tally on top of P2's addition (P2 + SMP). | Level
| ||||||||||||||||||||||||||||||||||||
|---|---|---|---|---|---|---|---|---|---|---|---|---|---|---|---|---|---|---|---|---|---|---|---|---|---|---|---|---|---|---|---|---|---|---|---|---|---|---|---|
| 200 | 100 | 200 | 3 |
- Dash cancel is +1 on block
5D

| Version | DamageThe raw damage value(s) of the listed move that the game's combo system calculates combo damage from. | GuardHow this attack can be guarded. All non-throws can be air blocked unless otherwise stated, and all "Air Unblockable" moves can be blocked in either grounded stance unless otherwise stated. Throw-type moves will have their ranges listed instead, and other cases will be explicitly noted. |
StartupNumber of frames for this move to reach the first active frame (includes the first active frame). | ActiveNumber of active frames in this attack. Values in () are for gaps between hits of an attack. | RecoveryNumber of frames this move is in a recovery state before returning to neutral. "Total (x)" indicates this for moves where the attacker has inactionable animation independent of active frames (i.e. projectiles and some Persona attacks). |
Frame AdvThe difference between the attacker's recovery and the period that the opponent is in blockstun. This frame advantage value is based off the fact that the very first active frame touches the opponent. | AttributeSome attacks are invulnerable to attacks with specific attributes. This notes what attributes each attack possesses. H - Head B - Body C - Chest F - Foot P - Projectile. Independent Projectiles will have their Durability level listed. For example a projectile that his Durability level 2 will show P2 T - Throw |
Inv.Attribute and Hitbox Invincibility information that will be notated via abbreviation or other indicators. Guard - Move autoguards against the attacks instead of making them whiff. Strike - Invulnerable to all attributes except for Throws, and SP Skills. Low Profile - Character's hurtbox shrinks to go under many attacks. Persona - Only the Persona carries this invulnerability. |
|---|---|---|---|---|---|---|---|---|
| 5D | 300×2 | All | 38 | 16 | Total 53 | +5 | Projectile | |
| 5DD | 200×5 | All | 18 | P(13)P(11)P(6)P(8)P | Projectile |
A highly damaging combo and occasional pressure tool, which works significantly better in the corner. 5D has limited practical applications, but it gets said applications done with flying colors.
Pressing 5D once will cause Ariadne to shoot 2 arrows that travel a short distance and if pressed a second time Ariadne will shoot more of these arrows continuously. The arrows lock the opponent down and deal high damage, frequently seeing use in corner combos and especially Fatal Counter combos to maximize Labrys' damage and meterbuild. For pressure, it can be easily explained as just being an inferior version of other characters like Narukami's GuardAllStartup39RecoveryTotal 52Advantage+28, as the pushback is less than ideal and not much advantage is provided without 5DD. Still decent and highly active, and the pushback isn't an issue in the corner.
| Version | P1Also known as the starter proration. If this move starts a combo, this value will be added to the Proration Tally on top of P2's addition (P1 + P2). | P2Also known as the mid-combo proration. If this move is used at all in a combo, this value will be added to the Proration Tally. | SMPShorthand for "Same Move Proration". If this move is used more than once in a combo, this value will be added to the Proration Tally on top of P2's addition (P2 + SMP). | Level
| ||||||||||||||||||||||||||||||||||||
|---|---|---|---|---|---|---|---|---|---|---|---|---|---|---|---|---|---|---|---|---|---|---|---|---|---|---|---|---|---|---|---|---|---|---|---|---|---|---|---|---|
| 5D | 400 | 100 | 50 | 3 | ||||||||||||||||||||||||||||||||||||
| 5DD | 400 | 100 | 50 | 2 |
5DD:
- Each P in active frames represents a projectile spawned
- Each projectile after startup has 9 active frames
j.C

| DamageThe raw damage value(s) of the listed move that the game's combo system calculates combo damage from. | GuardHow this attack can be guarded. All non-throws can be air blocked unless otherwise stated, and all "Air Unblockable" moves can be blocked in either grounded stance unless otherwise stated. Throw-type moves will have their ranges listed instead, and other cases will be explicitly noted. |
StartupNumber of frames for this move to reach the first active frame (includes the first active frame). | ActiveNumber of active frames in this attack. Values in () are for gaps between hits of an attack. | RecoveryNumber of frames this move is in a recovery state before returning to neutral. "Total (x)" indicates this for moves where the attacker has inactionable animation independent of active frames (i.e. projectiles and some Persona attacks). |
Frame AdvThe difference between the attacker's recovery and the period that the opponent is in blockstun. This frame advantage value is based off the fact that the very first active frame touches the opponent. | AttributeSome attacks are invulnerable to attacks with specific attributes. This notes what attributes each attack possesses. H - Head B - Body C - Chest F - Foot P - Projectile. Independent Projectiles will have their Durability level listed. For example a projectile that his Durability level 2 will show P2 T - Throw |
Inv.Attribute and Hitbox Invincibility information that will be notated via abbreviation or other indicators. Guard - Move autoguards against the attacks instead of making them whiff. Strike - Invulnerable to all attributes except for Throws, and SP Skills. Low Profile - Character's hurtbox shrinks to go under many attacks. Persona - Only the Persona carries this invulnerability. |
|---|---|---|---|---|---|---|---|
| 300,150×3 | All | 13 | 6,6,6 | 33 | Projectile | Persona 1~Until Active All |
Total: 63
j.C acts as a staple combo tool and otherwise very niche matchup-specific air option.
Instantly halts Labrys' air momentum upon use while the hitbox completely surrounds her, and vacuums opponents in on hit or block. Sadly, it carries extreme recovery making it very easy to punish on whiff and block, damning it to the combo food bin. There are some additional uses for it in certain matchups or for stalling air momentum, Labrys resumes her previous momentum once the move recovers and gives it leverage as a creative movement option. Can also be used for some crossups, but without meter this is a terrible idea which can end up with Labrys being punished on hit.
Ultimately, this is most commonly going to be seen used to drag opponents in for a j.214B combo ender.
| P1Also known as the starter proration. If this move starts a combo, this value will be added to the Proration Tally on top of P2's addition (P1 + P2). | P2Also known as the mid-combo proration. If this move is used at all in a combo, this value will be added to the Proration Tally. | SMPShorthand for "Same Move Proration". If this move is used more than once in a combo, this value will be added to the Proration Tally on top of P2's addition (P2 + SMP). | Level
| ||||||||||||||||||||||||||||||||||||
|---|---|---|---|---|---|---|---|---|---|---|---|---|---|---|---|---|---|---|---|---|---|---|---|---|---|---|---|---|---|---|---|---|---|---|---|---|---|---|---|
| 200 | 100 | 50 | 3 |
j.D

| DamageThe raw damage value(s) of the listed move that the game's combo system calculates combo damage from. | GuardHow this attack can be guarded. All non-throws can be air blocked unless otherwise stated, and all "Air Unblockable" moves can be blocked in either grounded stance unless otherwise stated. Throw-type moves will have their ranges listed instead, and other cases will be explicitly noted. |
StartupNumber of frames for this move to reach the first active frame (includes the first active frame). | ActiveNumber of active frames in this attack. Values in () are for gaps between hits of an attack. | RecoveryNumber of frames this move is in a recovery state before returning to neutral. "Total (x)" indicates this for moves where the attacker has inactionable animation independent of active frames (i.e. projectiles and some Persona attacks). |
Frame AdvThe difference between the attacker's recovery and the period that the opponent is in blockstun. This frame advantage value is based off the fact that the very first active frame touches the opponent. | AttributeSome attacks are invulnerable to attacks with specific attributes. This notes what attributes each attack possesses. H - Head B - Body C - Chest F - Foot P - Projectile. Independent Projectiles will have their Durability level listed. For example a projectile that his Durability level 2 will show P2 T - Throw |
Inv.Attribute and Hitbox Invincibility information that will be notated via abbreviation or other indicators. Guard - Move autoguards against the attacks instead of making them whiff. Strike - Invulnerable to all attributes except for Throws, and SP Skills. Low Profile - Character's hurtbox shrinks to go under many attacks. Persona - Only the Persona carries this invulnerability. |
|---|---|---|---|---|---|---|---|
| 400×3 | All | 33 | P(8)P(8)P | Total 40+9L | Projectile |
j.D carries many similarities to Labrys' other Persona buttons. It's another slow, highly active poke for Labrys to help cover neutral.
As a poke, you could almost treat this as an aerial 5C. Most of the risk is loaded into the startup, with Labrys recovering quite quickly once the gears start appearing. Said gears last for a considerable amount of time and control a very large portion of the air. Against primarily airborne characters, j.D can do quite a lot in limiting their movement options and forcing them to play slower against Labrys, especially if mixed in with j.B or orbs.
Also sees use in certain combos, but not nearly as much as its grounded counterpart.
| P1Also known as the starter proration. If this move starts a combo, this value will be added to the Proration Tally on top of P2's addition (P1 + P2). | P2Also known as the mid-combo proration. If this move is used at all in a combo, this value will be added to the Proration Tally. | SMPShorthand for "Same Move Proration". If this move is used more than once in a combo, this value will be added to the Proration Tally on top of P2's addition (P2 + SMP). | Level
| ||||||||||||||||||||||||||||||||||||
|---|---|---|---|---|---|---|---|---|---|---|---|---|---|---|---|---|---|---|---|---|---|---|---|---|---|---|---|---|---|---|---|---|---|---|---|---|---|---|---|
| 200 | 100 | 50 | 4 |
- Each P in active frames represents a projectile spawned
- Each gear is active for 40F
Universal Mechanics
All Out Attack
5A+B


| DamageThe raw damage value(s) of the listed move that the game's combo system calculates combo damage from. | GuardHow this attack can be guarded. All non-throws can be air blocked unless otherwise stated, and all "Air Unblockable" moves can be blocked in either grounded stance unless otherwise stated. Throw-type moves will have their ranges listed instead, and other cases will be explicitly noted. |
StartupNumber of frames for this move to reach the first active frame (includes the first active frame). | ActiveNumber of active frames in this attack. Values in () are for gaps between hits of an attack. | RecoveryNumber of frames this move is in a recovery state before returning to neutral. "Total (x)" indicates this for moves where the attacker has inactionable animation independent of active frames (i.e. projectiles and some Persona attacks). |
Frame AdvThe difference between the attacker's recovery and the period that the opponent is in blockstun. This frame advantage value is based off the fact that the very first active frame touches the opponent. | AttributeSome attacks are invulnerable to attacks with specific attributes. This notes what attributes each attack possesses. H - Head B - Body C - Chest F - Foot P - Projectile. Independent Projectiles will have their Durability level listed. For example a projectile that his Durability level 2 will show P2 T - Throw |
Inv.Attribute and Hitbox Invincibility information that will be notated via abbreviation or other indicators. Guard - Move autoguards against the attacks instead of making them whiff. Strike - Invulnerable to all attributes except for Throws, and SP Skills. Low Profile - Character's hurtbox shrinks to go under many attacks. Persona - Only the Persona carries this invulnerability. |
|---|---|---|---|---|---|---|---|
| 300 | High | 27 | 4 | 33 | -18 | Body | 10~27 Guard Strike |
Total: 63
Standard all out attack. Has good range compared to most other AoA's, but like all AoA's, the startup is slow enough to block high on reaction and it is very punishable on block unless you OMC. Best used very sparingly.
| P1Also known as the starter proration. If this move starts a combo, this value will be added to the Proration Tally on top of P2's addition (P1 + P2). | P2Also known as the mid-combo proration. If this move is used at all in a combo, this value will be added to the Proration Tally. | SMPShorthand for "Same Move Proration". If this move is used more than once in a combo, this value will be added to the Proration Tally on top of P2's addition (P2 + SMP). | Level
| ||||||||||||||||||||||||||||||||||||
|---|---|---|---|---|---|---|---|---|---|---|---|---|---|---|---|---|---|---|---|---|---|---|---|---|---|---|---|---|---|---|---|---|---|---|---|---|---|---|---|
| 0 | 800 | 10000 | 5 |
Sweep
2A+B


| DamageThe raw damage value(s) of the listed move that the game's combo system calculates combo damage from. | GuardHow this attack can be guarded. All non-throws can be air blocked unless otherwise stated, and all "Air Unblockable" moves can be blocked in either grounded stance unless otherwise stated. Throw-type moves will have their ranges listed instead, and other cases will be explicitly noted. |
StartupNumber of frames for this move to reach the first active frame (includes the first active frame). | ActiveNumber of active frames in this attack. Values in () are for gaps between hits of an attack. | RecoveryNumber of frames this move is in a recovery state before returning to neutral. "Total (x)" indicates this for moves where the attacker has inactionable animation independent of active frames (i.e. projectiles and some Persona attacks). |
Frame AdvThe difference between the attacker's recovery and the period that the opponent is in blockstun. This frame advantage value is based off the fact that the very first active frame touches the opponent. | AttributeSome attacks are invulnerable to attacks with specific attributes. This notes what attributes each attack possesses. H - Head B - Body C - Chest F - Foot P - Projectile. Independent Projectiles will have their Durability level listed. For example a projectile that his Durability level 2 will show P2 T - Throw |
Inv.Attribute and Hitbox Invincibility information that will be notated via abbreviation or other indicators. Guard - Move autoguards against the attacks instead of making them whiff. Strike - Invulnerable to all attributes except for Throws, and SP Skills. Low Profile - Character's hurtbox shrinks to go under many attacks. Persona - Only the Persona carries this invulnerability. |
|---|---|---|---|---|---|---|---|
| 1000 | Low | 15 | 3 | 20 | -6 | Foot | 4~17 Chest |
Total: 37
Good range sweep that slides Labrys forward, usually used to end combos at lower axe levels so that you can go for Weaver Arts: Sword oki and keep building your momentum/axe gauge level, but can also be good for beating pokes because of the chest invuln. Not too bad in corner combos when backed behind 5D either.
| P1Also known as the starter proration. If this move starts a combo, this value will be added to the Proration Tally on top of P2's addition (P1 + P2). | P2Also known as the mid-combo proration. If this move is used at all in a combo, this value will be added to the Proration Tally. | SMPShorthand for "Same Move Proration". If this move is used more than once in a combo, this value will be added to the Proration Tally on top of P2's addition (P2 + SMP). | Level
| ||||||||||||||||||||||||||||||||||||
|---|---|---|---|---|---|---|---|---|---|---|---|---|---|---|---|---|---|---|---|---|---|---|---|---|---|---|---|---|---|---|---|---|---|---|---|---|---|---|---|
| 200 | 100 | 50 | 4 |
Ground Throw
C+D

| DamageThe raw damage value(s) of the listed move that the game's combo system calculates combo damage from. | GuardHow this attack can be guarded. All non-throws can be air blocked unless otherwise stated, and all "Air Unblockable" moves can be blocked in either grounded stance unless otherwise stated. Throw-type moves will have their ranges listed instead, and other cases will be explicitly noted. |
StartupNumber of frames for this move to reach the first active frame (includes the first active frame). | ActiveNumber of active frames in this attack. Values in () are for gaps between hits of an attack. | RecoveryNumber of frames this move is in a recovery state before returning to neutral. "Total (x)" indicates this for moves where the attacker has inactionable animation independent of active frames (i.e. projectiles and some Persona attacks). |
Frame AdvThe difference between the attacker's recovery and the period that the opponent is in blockstun. This frame advantage value is based off the fact that the very first active frame touches the opponent. | AttributeSome attacks are invulnerable to attacks with specific attributes. This notes what attributes each attack possesses. H - Head B - Body C - Chest F - Foot P - Projectile. Independent Projectiles will have their Durability level listed. For example a projectile that his Durability level 2 will show P2 T - Throw |
Inv.Attribute and Hitbox Invincibility information that will be notated via abbreviation or other indicators. Guard - Move autoguards against the attacks instead of making them whiff. Strike - Invulnerable to all attributes except for Throws, and SP Skills. Low Profile - Character's hurtbox shrinks to go under many attacks. Persona - Only the Persona carries this invulnerability. |
|---|---|---|---|---|---|---|---|
| 0,1400 | Throw | 5 | 3 | 19 | Throw |
Total: 26
Good mixup tool when combined with 2A stagger pressure to do tick throws. As Labrys' fastest ground action, it can be a good defensive option in some instances where her other normals would otherwise be too slow.
Obviously being a throw, it can OMC'd to convert it into a full combo, or just go straight into Beast super for axe meter and damage. On CH with Red Axe, you can convert it into a combo with 5A or 2A.
| P1Also known as the starter proration. If this move starts a combo, this value will be added to the Proration Tally on top of P2's addition (P1 + P2). | P2Also known as the mid-combo proration. If this move is used at all in a combo, this value will be added to the Proration Tally. | SMPShorthand for "Same Move Proration". If this move is used more than once in a combo, this value will be added to the Proration Tally on top of P2's addition (P2 + SMP). | Level
| ||||||||||||||||||||||||||||||||||||
|---|---|---|---|---|---|---|---|---|---|---|---|---|---|---|---|---|---|---|---|---|---|---|---|---|---|---|---|---|---|---|---|---|---|---|---|---|---|---|---|
| 0 | 1000 | 50 | 0, 4 |
Air Throw
j.C+D

| DamageThe raw damage value(s) of the listed move that the game's combo system calculates combo damage from. | GuardHow this attack can be guarded. All non-throws can be air blocked unless otherwise stated, and all "Air Unblockable" moves can be blocked in either grounded stance unless otherwise stated. Throw-type moves will have their ranges listed instead, and other cases will be explicitly noted. |
StartupNumber of frames for this move to reach the first active frame (includes the first active frame). | ActiveNumber of active frames in this attack. Values in () are for gaps between hits of an attack. | RecoveryNumber of frames this move is in a recovery state before returning to neutral. "Total (x)" indicates this for moves where the attacker has inactionable animation independent of active frames (i.e. projectiles and some Persona attacks). |
Frame AdvThe difference between the attacker's recovery and the period that the opponent is in blockstun. This frame advantage value is based off the fact that the very first active frame touches the opponent. | AttributeSome attacks are invulnerable to attacks with specific attributes. This notes what attributes each attack possesses. H - Head B - Body C - Chest F - Foot P - Projectile. Independent Projectiles will have their Durability level listed. For example a projectile that his Durability level 2 will show P2 T - Throw |
Inv.Attribute and Hitbox Invincibility information that will be notated via abbreviation or other indicators. Guard - Move autoguards against the attacks instead of making them whiff. Strike - Invulnerable to all attributes except for Throws, and SP Skills. Low Profile - Character's hurtbox shrinks to go under many attacks. Persona - Only the Persona carries this invulnerability. |
|---|---|---|---|---|---|---|---|
| 0,1800 | Throw | 4 | 3 | 19 | Throw |
Total: 25
Vaults the opponent away with her axe. Similar to her ground throw, Labrys' air throw is her fastest air option, making it good in up close air battles where j.A and j.B are too slow to use.
Wall bounces in the corner, and it's possible to get a combo afterwards with Yellow Axe or higher.
| P1Also known as the starter proration. If this move starts a combo, this value will be added to the Proration Tally on top of P2's addition (P1 + P2). | P2Also known as the mid-combo proration. If this move is used at all in a combo, this value will be added to the Proration Tally. | SMPShorthand for "Same Move Proration". If this move is used more than once in a combo, this value will be added to the Proration Tally on top of P2's addition (P2 + SMP). | Level
| ||||||||||||||||||||||||||||||||||||
|---|---|---|---|---|---|---|---|---|---|---|---|---|---|---|---|---|---|---|---|---|---|---|---|---|---|---|---|---|---|---|---|---|---|---|---|---|---|---|---|
| 0 | 1200 | 100 | 0, 4 |
5th Gen Axe Slash
B+D
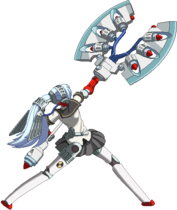
Judge Gauntlet


| Version | DamageThe raw damage value(s) of the listed move that the game's combo system calculates combo damage from. | GuardHow this attack can be guarded. All non-throws can be air blocked unless otherwise stated, and all "Air Unblockable" moves can be blocked in either grounded stance unless otherwise stated. Throw-type moves will have their ranges listed instead, and other cases will be explicitly noted. |
StartupNumber of frames for this move to reach the first active frame (includes the first active frame). | ActiveNumber of active frames in this attack. Values in () are for gaps between hits of an attack. | RecoveryNumber of frames this move is in a recovery state before returning to neutral. "Total (x)" indicates this for moves where the attacker has inactionable animation independent of active frames (i.e. projectiles and some Persona attacks). |
Frame AdvThe difference between the attacker's recovery and the period that the opponent is in blockstun. This frame advantage value is based off the fact that the very first active frame touches the opponent. | AttributeSome attacks are invulnerable to attacks with specific attributes. This notes what attributes each attack possesses. H - Head B - Body C - Chest F - Foot P - Projectile. Independent Projectiles will have their Durability level listed. For example a projectile that his Durability level 2 will show P2 T - Throw |
Inv.Attribute and Hitbox Invincibility information that will be notated via abbreviation or other indicators. Guard - Move autoguards against the attacks instead of making them whiff. Strike - Invulnerable to all attributes except for Throws, and SP Skills. Low Profile - Character's hurtbox shrinks to go under many attacks. Persona - Only the Persona carries this invulnerability. |
|---|---|---|---|---|---|---|---|---|
| BD | 900 | All | 26~85 | 4 | 42 | -29 | Body | 1~(29~88) Guard All |
| BD Full Charge | 900 | Unblockable | 100 | 4 | 42 | Body | 1~103 Guard All |
Total: 71
Guardpoint reversal that carries heavy startup. Every time Labrys is hit, hitstop is generated and adds to Labrys' startup. Has a decent hitbox, significant pushback, and forward movement.
The pain and suffering behind everyone playing Labrys. The easily reactable startup and guardpoint lets opponents cancel whatever they're doing into a DP or worse to counter her. P4AU is balanced around everyone having a reversal, so Labrys being stuck with a bad one ends up defining many matchups against characters who can easily exploit her lacking defensive options.
Sometimes the situation necessitates using this and it can still work sometimes, preferably when opponents aren't mashing 2A to fish it out. The guardpoint and chargeable startup also makes it ideal for punishing bursts or Guard Cancels on Labrys' non-jump cancellable moves. Be warned, being a reversal it will leave her at extreme risk on a wrong guess.
- Half Charge
Now this is where things look a bit better. Always inflicts Counter Hit and wallbounces, even if used as a combo part. This property lets Labrys convert convert her combo of choice into a Fatal during Red Axe, such as 5C > 2C > B+D. Still not going to be seen in the majority of her combo routes due to the startup and specifics behind its use, but it's there for when it's needed.
- Full Charge
Obligatory Labrys fully charged unblockable. For people who thought this move wasn't bad enough. Awful starter and the moment anyone sees Labrys charging her Furious Action (or likely using it at all) they're probably going to roll behind her any way, so it's a great way to lose the round. Will catch one person who decided to sit there and block for a full two seconds in response to your DP out of a million.
| Version | P1Also known as the starter proration. If this move starts a combo, this value will be added to the Proration Tally on top of P2's addition (P1 + P2). | P2Also known as the mid-combo proration. If this move is used at all in a combo, this value will be added to the Proration Tally. | SMPShorthand for "Same Move Proration". If this move is used more than once in a combo, this value will be added to the Proration Tally on top of P2's addition (P2 + SMP). | Level
| ||||||||||||||||||||||||||||||||||||
|---|---|---|---|---|---|---|---|---|---|---|---|---|---|---|---|---|---|---|---|---|---|---|---|---|---|---|---|---|---|---|---|---|---|---|---|---|---|---|---|---|
| BD | 1000 | 100 | 50 | 4 | ||||||||||||||||||||||||||||||||||||
| BD Full Charge | 900 | 100 | 50 | 4 |
BD:
- Hold button to charge attack
- Forces counter hit if attack has startup 51F
BD Full Charge:
- Red Axe forces Fatal Counter on hit, otherwise forces Counter Hit
Guard Cancel Attack
6A+B while blocking
| DamageThe raw damage value(s) of the listed move that the game's combo system calculates combo damage from. | GuardHow this attack can be guarded. All non-throws can be air blocked unless otherwise stated, and all "Air Unblockable" moves can be blocked in either grounded stance unless otherwise stated. Throw-type moves will have their ranges listed instead, and other cases will be explicitly noted. |
StartupNumber of frames for this move to reach the first active frame (includes the first active frame). | ActiveNumber of active frames in this attack. Values in () are for gaps between hits of an attack. | RecoveryNumber of frames this move is in a recovery state before returning to neutral. "Total (x)" indicates this for moves where the attacker has inactionable animation independent of active frames (i.e. projectiles and some Persona attacks). |
Frame AdvThe difference between the attacker's recovery and the period that the opponent is in blockstun. This frame advantage value is based off the fact that the very first active frame touches the opponent. | AttributeSome attacks are invulnerable to attacks with specific attributes. This notes what attributes each attack possesses. H - Head B - Body C - Chest F - Foot P - Projectile. Independent Projectiles will have their Durability level listed. For example a projectile that his Durability level 2 will show P2 T - Throw |
Inv.Attribute and Hitbox Invincibility information that will be notated via abbreviation or other indicators. Guard - Move autoguards against the attacks instead of making them whiff. Strike - Invulnerable to all attributes except for Throws, and SP Skills. Low Profile - Character's hurtbox shrinks to go under many attacks. Persona - Only the Persona carries this invulnerability. |
|---|---|---|---|---|---|---|---|
| 0 | All | 19 | 4 | 25 | -12 | 1~21 Guard All |
Total: 47
Based on her Shadow 5AAA normal. Slow as Guard Cancels are known to be, but at least the hitbox is gigantic. A lot of meter will be going towards this since her Furious Action is so bad for escaping pressure.
| P1Also known as the starter proration. If this move starts a combo, this value will be added to the Proration Tally on top of P2's addition (P1 + P2). | P2Also known as the mid-combo proration. If this move is used at all in a combo, this value will be added to the Proration Tally. | SMPShorthand for "Same Move Proration". If this move is used more than once in a combo, this value will be added to the Proration Tally on top of P2's addition (P2 + SMP). | Level
| ||||||||||||||||||||||||||||||||||||
|---|---|---|---|---|---|---|---|---|---|---|---|---|---|---|---|---|---|---|---|---|---|---|---|---|---|---|---|---|---|---|---|---|---|---|---|---|---|---|---|
| 4 |
Skill Attacks
Chain Knuckle
236A/B

| Version | DamageThe raw damage value(s) of the listed move that the game's combo system calculates combo damage from. | GuardHow this attack can be guarded. All non-throws can be air blocked unless otherwise stated, and all "Air Unblockable" moves can be blocked in either grounded stance unless otherwise stated. Throw-type moves will have their ranges listed instead, and other cases will be explicitly noted. |
StartupNumber of frames for this move to reach the first active frame (includes the first active frame). | ActiveNumber of active frames in this attack. Values in () are for gaps between hits of an attack. | RecoveryNumber of frames this move is in a recovery state before returning to neutral. "Total (x)" indicates this for moves where the attacker has inactionable animation independent of active frames (i.e. projectiles and some Persona attacks). |
Frame AdvThe difference between the attacker's recovery and the period that the opponent is in blockstun. This frame advantage value is based off the fact that the very first active frame touches the opponent. | AttributeSome attacks are invulnerable to attacks with specific attributes. This notes what attributes each attack possesses. H - Head B - Body C - Chest F - Foot P - Projectile. Independent Projectiles will have their Durability level listed. For example a projectile that his Durability level 2 will show P2 T - Throw |
Inv.Attribute and Hitbox Invincibility information that will be notated via abbreviation or other indicators. Guard - Move autoguards against the attacks instead of making them whiff. Strike - Invulnerable to all attributes except for Throws, and SP Skills. Low Profile - Character's hurtbox shrinks to go under many attacks. Persona - Only the Persona carries this invulnerability. |
|---|---|---|---|---|---|---|---|---|
| 236A | 500 | All | 20 | 8 | 25~32 | -1 | Chest | |
| 236B | 500 | All | 24 | 13 | 25~37 | -1 | Chest | |
| 236AB | 500 | All | 24 | 8 | 25~37 | -1 | Chest | 9~(24~31) P |
Labrys' "projectile" meant to remind you that she is, in fact, a robot. Doubles as a tool to control space on the ground and a pressure tool.
Both versions cover a good amount of distance, with the A version going 2/3rds of the screen and the B/SB versions going just short of fullscreen. The punch ignores projectiles, while SB also has Labrys invincible to them entirely, and is also considered a chest attribute strike instead of a real projectile (meaning sweeps will beat it). Be warned that there's some nasty recovery on whiff, so don't use it too often.
The real kicker is Winch Dash, done by pressing/holding 6 after Chain Knuckle connects with the opponent. This turns the move from a mere poke to Labrys' mainstay pressure option.
Can Fatal Counter, which goes great with Winch Dash.
| Version | P1Also known as the starter proration. If this move starts a combo, this value will be added to the Proration Tally on top of P2's addition (P1 + P2). | P2Also known as the mid-combo proration. If this move is used at all in a combo, this value will be added to the Proration Tally. | SMPShorthand for "Same Move Proration". If this move is used more than once in a combo, this value will be added to the Proration Tally on top of P2's addition (P2 + SMP). | Level
| ||||||||||||||||||||||||||||||||||||
|---|---|---|---|---|---|---|---|---|---|---|---|---|---|---|---|---|---|---|---|---|---|---|---|---|---|---|---|---|---|---|---|---|---|---|---|---|---|---|---|---|
| 236A | 300 | 100 | 50 | 3 | ||||||||||||||||||||||||||||||||||||
| 236B | 300 | 100 | 50 | 3 | ||||||||||||||||||||||||||||||||||||
| 236AB | 300 | 100 | 50 | 3 |
236A:
- Fatal Counter
- Immediately enters recovery on hit/block
- Recovery increases with how long it takes for opponent to get hit/block the attack
- On whiff, recovery is 36F
- Opponent experiences 5F extra hitstop on hit/counter hit
236B:
- Fatal Counter
- Immediately enters recovery on hit/block
- Recovery increases with how long it takes for opponent to get hit/block the attack
- On whiff, recovery is 41F
- Opponent experiences 5F extra hitstop on hit/counter hit
236AB:
- Fatal Counter
- Immediately enters recovery on hit/block
- Recovery increases with how long it takes for opponent to get hit/block the attack
- On whiff, recovery is 41F
- Opponent experiences 10F extra hitstop on hit/counter hit
- Invincibility ends when Labrys enters recovery
Winch Dash
Chain Knuckle > 6

Dash

Brake


| Version | DamageThe raw damage value(s) of the listed move that the game's combo system calculates combo damage from. | GuardHow this attack can be guarded. All non-throws can be air blocked unless otherwise stated, and all "Air Unblockable" moves can be blocked in either grounded stance unless otherwise stated. Throw-type moves will have their ranges listed instead, and other cases will be explicitly noted. |
StartupNumber of frames for this move to reach the first active frame (includes the first active frame). | ActiveNumber of active frames in this attack. Values in () are for gaps between hits of an attack. | RecoveryNumber of frames this move is in a recovery state before returning to neutral. "Total (x)" indicates this for moves where the attacker has inactionable animation independent of active frames (i.e. projectiles and some Persona attacks). |
Frame AdvThe difference between the attacker's recovery and the period that the opponent is in blockstun. This frame advantage value is based off the fact that the very first active frame touches the opponent. | AttributeSome attacks are invulnerable to attacks with specific attributes. This notes what attributes each attack possesses. H - Head B - Body C - Chest F - Foot P - Projectile. Independent Projectiles will have their Durability level listed. For example a projectile that his Durability level 2 will show P2 T - Throw |
Inv.Attribute and Hitbox Invincibility information that will be notated via abbreviation or other indicators. Guard - Move autoguards against the attacks instead of making them whiff. Strike - Invulnerable to all attributes except for Throws, and SP Skills. Low Profile - Character's hurtbox shrinks to go under many attacks. Persona - Only the Persona carries this invulnerability. |
|---|---|---|---|---|---|---|---|---|
| Chain Knuckle > 6 | 31~36 Total | 1~(14~19) P | ||||||
| Chain Knuckle > 4 | Total 21 | 1~4 P |
Winch Dash is Chain Knuckle's claim to fame. Lunges Labrys quickly towards the opponent, and cancels into Chain Knuckle Extra Attack followups.
Extremely useful for pressure, mixup, combos, you name it, Winch Dash gives it. Confirms off of a fatal counter chain knuckle, continuing combos, use the followups for whatever she wants, sky's the limit. Labrys recovers quickly after the dash, which also allows for throw mixups and even jumps.
Things get even nastier when you incorporate Brake, done by pressing 4 at any point during the dash, which lets you bait any reversal options or just freak people out for some added psychic damage. Brake can also be cancelled into other special moves besides Chain Knuckle (e.g. 214A) or hops at any point, only furthering its usefulness.
Keep in mind that the strength of Winch Dash being locked behind Chain Knuckle (which has 20f startup at minimum) can result in Labrys' pressure becoming predictable and exploitable if not used cautiously. Use this as one of many options in your pressure instead of rushing in for mixups every time.
| Version | P1Also known as the starter proration. If this move starts a combo, this value will be added to the Proration Tally on top of P2's addition (P1 + P2). | P2Also known as the mid-combo proration. If this move is used at all in a combo, this value will be added to the Proration Tally. | SMPShorthand for "Same Move Proration". If this move is used more than once in a combo, this value will be added to the Proration Tally on top of P2's addition (P2 + SMP). | Level
| ||||||||||||||||||||||||||||||||||||
|---|---|---|---|---|---|---|---|---|---|---|---|---|---|---|---|---|---|---|---|---|---|---|---|---|---|---|---|---|---|---|---|---|---|---|---|---|---|---|---|---|
| Chain Knuckle > 6 | ||||||||||||||||||||||||||||||||||||||||
| Chain Knuckle > 4 |
Chain Knuckle > 6:
- Recovery value changes based on distance between Labrys and opponent
Chain Knuckle Extra Attack
Winch Dash > A/B

A Followup

B Followup

SB Followup


| Version | DamageThe raw damage value(s) of the listed move that the game's combo system calculates combo damage from. | GuardHow this attack can be guarded. All non-throws can be air blocked unless otherwise stated, and all "Air Unblockable" moves can be blocked in either grounded stance unless otherwise stated. Throw-type moves will have their ranges listed instead, and other cases will be explicitly noted. |
StartupNumber of frames for this move to reach the first active frame (includes the first active frame). | ActiveNumber of active frames in this attack. Values in () are for gaps between hits of an attack. | RecoveryNumber of frames this move is in a recovery state before returning to neutral. "Total (x)" indicates this for moves where the attacker has inactionable animation independent of active frames (i.e. projectiles and some Persona attacks). |
Frame AdvThe difference between the attacker's recovery and the period that the opponent is in blockstun. This frame advantage value is based off the fact that the very first active frame touches the opponent. | AttributeSome attacks are invulnerable to attacks with specific attributes. This notes what attributes each attack possesses. H - Head B - Body C - Chest F - Foot P - Projectile. Independent Projectiles will have their Durability level listed. For example a projectile that his Durability level 2 will show P2 T - Throw |
Inv.Attribute and Hitbox Invincibility information that will be notated via abbreviation or other indicators. Guard - Move autoguards against the attacks instead of making them whiff. Strike - Invulnerable to all attributes except for Throws, and SP Skills. Low Profile - Character's hurtbox shrinks to go under many attacks. Persona - Only the Persona carries this invulnerability. |
|---|---|---|---|---|---|---|---|---|
| Winch Dash > A | 1000 | High | 20 | 10 | 36 | -29 | Head | -4-20 |
| Winch Dash > B | 800 | Low | 13 | 3 | 20 | -6 | Foot | |
| Winch Dash > AB | 1000 | All | 11 | 4 | 15 | 0 | Body |
- A Followup
Total: 65
Hits overhead, and is the most common Winch Dash followup. Resembles the final hit of her autocombo, and is not a true blockstring from Chain Knuckle/Winch Dash at close range, so wary opponents will look to DP it. This, however, just lets you incorporate Winch Dash Brake to mess with people, or use the B followup instead.
On hit, convert into 214A immediately for a knockdown. Really you should be doing this always thanks to how unsafe it is. With Red Axe, you can combo into SB Axe for catastrophic damage.
- B Followup
Total: 35
Basic low followup similar to Labrys' sweep.
Compared to the A followup, B tacks on several mediocrities. It's not special cancellable, not safe, rarely hits airborne opponents, and needs to be delayed if Chain Knuckle connected at a distance. It's at least gapless, but overall unexciting on its own. Combined with meter however, and Labrys can now enforce a very scary high/low/throw mixup with great reward behind it. Simply OMC the B followup after it connects for a combo or a pressure reset.
- SB Followup
Total: 29
A strong contender for Labrys' least useful SP skill.
Hits mid, but is fast and 0 on block for quick damage in a pinch while granting some safety. Although it's 0 on block and leaves Labrys at good spacing for her 5A at close range, it both requires a gap beforehand from Chain Knuckle and isn't plus enough to let Labrys do much more than jab. On hit, it causes spin state for easy followups, but if you have Red Axe since you could've just done A into SB Axe instead. Ultimately, it can pay off in some situations, but it's not seen as a great use of meter.
Interestingly, this can cross opponents up on hit and block if done close enough, but don't try to use this as a mixup because your opponent will always be able to autoguard it.
| Version | P1Also known as the starter proration. If this move starts a combo, this value will be added to the Proration Tally on top of P2's addition (P1 + P2). | P2Also known as the mid-combo proration. If this move is used at all in a combo, this value will be added to the Proration Tally. | SMPShorthand for "Same Move Proration". If this move is used more than once in a combo, this value will be added to the Proration Tally on top of P2's addition (P2 + SMP). | Level
| ||||||||||||||||||||||||||||||||||||
|---|---|---|---|---|---|---|---|---|---|---|---|---|---|---|---|---|---|---|---|---|---|---|---|---|---|---|---|---|---|---|---|---|---|---|---|---|---|---|---|---|
| Winch Dash > A | 300 | 100 | 50 | 4 | ||||||||||||||||||||||||||||||||||||
| Winch Dash > B | 500 | 100 | 50 | 4 | ||||||||||||||||||||||||||||||||||||
| Winch Dash > AB | 300 | 100 | 1000 | 5 |
Guillotine Axe
214A/B


| Version | DamageThe raw damage value(s) of the listed move that the game's combo system calculates combo damage from. | GuardHow this attack can be guarded. All non-throws can be air blocked unless otherwise stated, and all "Air Unblockable" moves can be blocked in either grounded stance unless otherwise stated. Throw-type moves will have their ranges listed instead, and other cases will be explicitly noted. |
StartupNumber of frames for this move to reach the first active frame (includes the first active frame). | ActiveNumber of active frames in this attack. Values in () are for gaps between hits of an attack. | RecoveryNumber of frames this move is in a recovery state before returning to neutral. "Total (x)" indicates this for moves where the attacker has inactionable animation independent of active frames (i.e. projectiles and some Persona attacks). |
Frame AdvThe difference between the attacker's recovery and the period that the opponent is in blockstun. This frame advantage value is based off the fact that the very first active frame touches the opponent. | AttributeSome attacks are invulnerable to attacks with specific attributes. This notes what attributes each attack possesses. H - Head B - Body C - Chest F - Foot P - Projectile. Independent Projectiles will have their Durability level listed. For example a projectile that his Durability level 2 will show P2 T - Throw |
Inv.Attribute and Hitbox Invincibility information that will be notated via abbreviation or other indicators. Guard - Move autoguards against the attacks instead of making them whiff. Strike - Invulnerable to all attributes except for Throws, and SP Skills. Low Profile - Character's hurtbox shrinks to go under many attacks. Persona - Only the Persona carries this invulnerability. |
|---|---|---|---|---|---|---|---|---|
| 214A | 300, 480 [1200] | All, High | 11 | 5(9)12 | 17 | -2 | Body | |
| 214B | 300,800 [1600] | All, High | 18 | 5(9)12 | 20 | 0 | Body | |
| 214AB | 300, 640 [1600] | All, High | 17 | 5(9)12 | 20 | -5 | Body |
Guillotine Axe is Labrys' basic combo and blockstring ender, often referred to as just "Axe." Safe and pushes the opponent back far, which can make it difficult to punish even on IB.
In all versions, the first hit is a mid while the second is an overhead. The second hit also deals considerably higher damage if the first hit misses.
Used for some creative metered mixup options or in 22X oki. Whiffing the first hit will give Labrys a quicker overhead that's trickier to see than her AOA, and can be confirmed with meter or more ideally with 22X backing her up meterlessly. However, if the first hit is blocked, you can exploit the knowledge that the second hit is a high and OMC into 2A for a simplistic yet disgustingly effective mixup option.
Can also be used in some fuzzy overhead setups against some characters, but these are only worth it if Labrys is loaded on resources.
- 214A
Total: 53
Mostly used to end combos on the ground, ending strings, and for the aforementioned mixups. Does a good amount of damage and gives the axe gauge a nice boost.
- 214B
Total: 63
Longer startup but does more damage, and is 0 on block. Disgustingly high damage combo tool seen in Labrys' many death combos, done by launching the opponent and then whiffing the first hit so the opponent gets hit only by the second. If the opponent is high enough to get hit by the late active frames, it's even possible for Labrys to link after this to continue the combo.
0 on block is much less awesome than it sounds for Labrys due to her slow normals, but the pushback works very favorably with 5A, so you can use it as a pressure reset any way.
- SB Version
Total: 62
Key move in a ton of combos, and fittingly where a lot of Labrys' meter goes towards. Special cancelable and causes a small ground bounce. The cancel is what really matters here, letting Labrys chain into 22A/236C to trap opponent mid-combo and lead to corner-carry.
| Version | P1Also known as the starter proration. If this move starts a combo, this value will be added to the Proration Tally on top of P2's addition (P1 + P2). | P2Also known as the mid-combo proration. If this move is used at all in a combo, this value will be added to the Proration Tally. | SMPShorthand for "Same Move Proration". If this move is used more than once in a combo, this value will be added to the Proration Tally on top of P2's addition (P2 + SMP). | Level
| ||||||||||||||||||||||||||||||||||||
|---|---|---|---|---|---|---|---|---|---|---|---|---|---|---|---|---|---|---|---|---|---|---|---|---|---|---|---|---|---|---|---|---|---|---|---|---|---|---|---|---|
| 214A | 500 | 100 | 50 | 3,5 | ||||||||||||||||||||||||||||||||||||
| 214B | 500 | 100 | 50 | 3,5 | ||||||||||||||||||||||||||||||||||||
| 214AB | 100 | 500 | 1000 | 3,5 |
214A:
- Value in [] refers to when only 2nd part of attack hits the opponent
- Does 4F extra hitstun/untech at Yellow Axe, and another 4F extra hitstun/untech at Red Axe
214B:
- Value in [] refers to when only 2nd part of attack hits the opponent
- Does 4F extra hitstun/untech at Yellow Axe, and another 4F extra hitstun/untech at Red Axe
214AB:
- Value in [] refers to when only 2nd part of attack hits the opponent
- Does 4F extra hitstun/untech at Yellow Axe, and another 4F extra hitstun/untech at Red Axe
Guillotine Aerial
j.214A/B


| Version | DamageThe raw damage value(s) of the listed move that the game's combo system calculates combo damage from. | GuardHow this attack can be guarded. All non-throws can be air blocked unless otherwise stated, and all "Air Unblockable" moves can be blocked in either grounded stance unless otherwise stated. Throw-type moves will have their ranges listed instead, and other cases will be explicitly noted. |
StartupNumber of frames for this move to reach the first active frame (includes the first active frame). | ActiveNumber of active frames in this attack. Values in () are for gaps between hits of an attack. | RecoveryNumber of frames this move is in a recovery state before returning to neutral. "Total (x)" indicates this for moves where the attacker has inactionable animation independent of active frames (i.e. projectiles and some Persona attacks). |
Frame AdvThe difference between the attacker's recovery and the period that the opponent is in blockstun. This frame advantage value is based off the fact that the very first active frame touches the opponent. | AttributeSome attacks are invulnerable to attacks with specific attributes. This notes what attributes each attack possesses. H - Head B - Body C - Chest F - Foot P - Projectile. Independent Projectiles will have their Durability level listed. For example a projectile that his Durability level 2 will show P2 T - Throw |
Inv.Attribute and Hitbox Invincibility information that will be notated via abbreviation or other indicators. Guard - Move autoguards against the attacks instead of making them whiff. Strike - Invulnerable to all attributes except for Throws, and SP Skills. Low Profile - Character's hurtbox shrinks to go under many attacks. Persona - Only the Persona carries this invulnerability. |
|---|---|---|---|---|---|---|---|---|
| j.214A | 400,200 [600/800] | All, High, [All] | 12 | 2(4)Until L,[10] | 35 | -13/-6 | Head, Body, [Projectile] | |
| j.214B | 600,300 [600/800] | All, High, [All] | 17 | 3(6)Until L,[10] | 30 | -8/-1 | Head, Body, [Projectile] | |
| j.214AB | 500,250 [600/800] | All, High, [All] | 12 | 2(4)Until L,[10] | 25 | -3/+4 | Head, Body, [Projectile] | 1~18 Guard All |
Air combo ender with occasional use as an anti-anti-air or divebomb. Creates a small shockwave slightly after Labrys hits the ground that launches opponents very slightly into the air and improves her frame advantage—Labrys is typically punishable if it misses.
Good for ending combos due to its ability to bring the opponent back down to the ground for oki or to be comboed into a Beast super for damage. Labrys can actually super cancel before the shockwave comes out since she's already considered grounded, which is absolutely awful since the shockwave is important for any kind of followup, so remember to delay your super input just a tad.
If Labrys travels for a bit without hitting anything, the shockwave becomes significantly larger and will launch the opponent into the air on hit for a free combo. The easiest way to get this version is to superjump or double jump and use Guillotine Aerial at the apex.
- j.214A
Total: 28
The quickest and arguably least helpful of the bunch, most frequently seen as an "I messed up my combo" move. Can be used to safely end any combo without relying on corner or Persona moves, so in situations where spacing is awkward, scaling is too high or Labrys is Persona Broken, this gets the job done.
Its speed makes it tempting to use as a divebomb, but it's both unsafe on block and the recovery makes any combo or oki you'd get afterwards less than stellar.
- j.214B
Total: 36
Labrys' main air combo ender. On the slower end, but Labrys has high enough hitstun on most of her attacks keeping this from being a problem. Most commonly seen following j.C, but sometimes just follows up j.2B in highly scaled corner routes.
- SB Version
Total: 28
Effectively the same as the A version, but mysteriously invincible and plus on block as long as the shockwave hits. Gets people off of Labrys in the air while doubling as a quick divebomb to start turns. Throwing this puppy out in a "JUST DO IT" fashion can work wonders against certain characters.
The armor will still lose to Air Unblockables, but the stall helps in baiting anti-airs any way.
| Version | P1Also known as the starter proration. If this move starts a combo, this value will be added to the Proration Tally on top of P2's addition (P1 + P2). | P2Also known as the mid-combo proration. If this move is used at all in a combo, this value will be added to the Proration Tally. | SMPShorthand for "Same Move Proration". If this move is used more than once in a combo, this value will be added to the Proration Tally on top of P2's addition (P2 + SMP). | Level
| ||||||||||||||||||||||||||||||||||||
|---|---|---|---|---|---|---|---|---|---|---|---|---|---|---|---|---|---|---|---|---|---|---|---|---|---|---|---|---|---|---|---|---|---|---|---|---|---|---|---|---|
| j.214A | 400 [0] | 100 [100] | 50 [50] | 3×2,[5] | ||||||||||||||||||||||||||||||||||||
| j.214B | 400 [0] | 100 [100] | 50 [50] | 3×2,[5] | ||||||||||||||||||||||||||||||||||||
| j.214AB | 400 [0] | 100 [100] | 50 [50] | 3×2,[5] |
j.214A:
- Values in [] refer to the quake attack. After an unspecified amount of time quake does more damage and stun
- Red Axe does not inflict Fatal Counter if only the quake hits the opponent
j.214B:
- Values in [] refer to the quake attack. After an unspecified amount of time quake does more damage and stun
- Red Axe does not inflict Fatal Counter if only the quake hits the opponent
j.214AB:
- Values in [] refer to the quake attack. After an unspecified amount of time quake does more damage and stun
- Red Axe does not inflict Fatal Counter if only the quake hits the opponent
Weaver's Art: Sword
![]() 22A/B/C/D
22A/B/C/D

A is closest, D is furthest

| Version | DamageThe raw damage value(s) of the listed move that the game's combo system calculates combo damage from. | GuardHow this attack can be guarded. All non-throws can be air blocked unless otherwise stated, and all "Air Unblockable" moves can be blocked in either grounded stance unless otherwise stated. Throw-type moves will have their ranges listed instead, and other cases will be explicitly noted. |
StartupNumber of frames for this move to reach the first active frame (includes the first active frame). | ActiveNumber of active frames in this attack. Values in () are for gaps between hits of an attack. | RecoveryNumber of frames this move is in a recovery state before returning to neutral. "Total (x)" indicates this for moves where the attacker has inactionable animation independent of active frames (i.e. projectiles and some Persona attacks). |
Frame AdvThe difference between the attacker's recovery and the period that the opponent is in blockstun. This frame advantage value is based off the fact that the very first active frame touches the opponent. | AttributeSome attacks are invulnerable to attacks with specific attributes. This notes what attributes each attack possesses. H - Head B - Body C - Chest F - Foot P - Projectile. Independent Projectiles will have their Durability level listed. For example a projectile that his Durability level 2 will show P2 T - Throw |
Inv.Attribute and Hitbox Invincibility information that will be notated via abbreviation or other indicators. Guard - Move autoguards against the attacks instead of making them whiff. Strike - Invulnerable to all attributes except for Throws, and SP Skills. Low Profile - Character's hurtbox shrinks to go under many attacks. Persona - Only the Persona carries this invulnerability. |
|---|---|---|---|---|---|---|---|---|
| 22A | 300, 200 | All | 82 | 14 | Total 38 | Projectile | ||
| 22AB | 300, 200 | All | 66 | 14 | Total 38 | Projectile |
Weaver's Art: Sword, also called "Spike" or "Strings", is Labrys' commonly used oki tool at lower axe levels from sweep combo enders. B version is optimal after sweep, while A version will be good in corner.
While it's not a safejump, and none of them are true meaties, it grants Labrys many mixups and she still has the choice of blocking or backdashing to bait reversals. Keen opponents will attempt to exploit the lack of advantage and attempt numerous escape options, so build respect with 5A. Once the opponent respects it, Labrys has access to a ton of layered mixup options, or just a dash-up jab.
|
Nearly all of these give a full combo on hit if used after Spike. Not safe to reversal actions like DPs, backdashes and rolls. This is not a free mixup.
|
SB automatically tracks opponent's location. Great for counterzoning or catching people flailing around to make your approaches annoying. Do note they can just run past it if they remain on the ground, but their approach will at least be a bit more linear.
| Version | P1Also known as the starter proration. If this move starts a combo, this value will be added to the Proration Tally on top of P2's addition (P1 + P2). | P2Also known as the mid-combo proration. If this move is used at all in a combo, this value will be added to the Proration Tally. | SMPShorthand for "Same Move Proration". If this move is used more than once in a combo, this value will be added to the Proration Tally on top of P2's addition (P2 + SMP). | Level
| ||||||||||||||||||||||||||||||||||||
|---|---|---|---|---|---|---|---|---|---|---|---|---|---|---|---|---|---|---|---|---|---|---|---|---|---|---|---|---|---|---|---|---|---|---|---|---|---|---|---|---|
| 22A | 300, 400 | 100, 200 | 50 | 4, 1 | ||||||||||||||||||||||||||||||||||||
| 22AB | 300, 400 | 100, 200 | 50 | 4, 1 |
Weaver's Art: Orb
![]() 236C/D
236C/D

| Version | DamageThe raw damage value(s) of the listed move that the game's combo system calculates combo damage from. | GuardHow this attack can be guarded. All non-throws can be air blocked unless otherwise stated, and all "Air Unblockable" moves can be blocked in either grounded stance unless otherwise stated. Throw-type moves will have their ranges listed instead, and other cases will be explicitly noted. |
StartupNumber of frames for this move to reach the first active frame (includes the first active frame). | ActiveNumber of active frames in this attack. Values in () are for gaps between hits of an attack. | RecoveryNumber of frames this move is in a recovery state before returning to neutral. "Total (x)" indicates this for moves where the attacker has inactionable animation independent of active frames (i.e. projectiles and some Persona attacks). |
Frame AdvThe difference between the attacker's recovery and the period that the opponent is in blockstun. This frame advantage value is based off the fact that the very first active frame touches the opponent. | AttributeSome attacks are invulnerable to attacks with specific attributes. This notes what attributes each attack possesses. H - Head B - Body C - Chest F - Foot P - Projectile. Independent Projectiles will have their Durability level listed. For example a projectile that his Durability level 2 will show P2 T - Throw |
Inv.Attribute and Hitbox Invincibility information that will be notated via abbreviation or other indicators. Guard - Move autoguards against the attacks instead of making them whiff. Strike - Invulnerable to all attributes except for Throws, and SP Skills. Low Profile - Character's hurtbox shrinks to go under many attacks. Persona - Only the Persona carries this invulnerability. |
|---|---|---|---|---|---|---|---|---|
| 236C | 400 | All | 46 | 235 | Total 35 | Projectile | ||
| 236D | 400 | All | 91 | 225 | Total 35 | Projectile | ||
| 236CD | 400 | All | 46 | 225 | Total 25 | Projectile |
Orb is a prime neutral tool for dealing with characters who enjoy buzzing over Labrys' head to exploit her slow 2B, or just to make it harder to keep running away from her.
As a projectile on its own, it's not half bad. The orb is a bit slow, but it destroys other projectiles, and there's no limit to how many Labrys can have out. On hit, the opponent is trapped in place for a bit similar to 22X, and is trapped for even longer if the orb counterhits. The real selling point of orb comes into its long active time and Labrys herself already sporting massive normals to control space with. If Labrys can find an opening in neutral, the orb can cover the few places she can't already reach.
Dash cancellable very early into startup, which alleviates the risk in using the move a bit. Can also be used as a silly pressure reset this way, as the animation combined with the quick dash cancel can catch people off-guard.
- 236C
Total: 80
Travels at air dash height and weaves around. Good for denying the air to the opponent with little risk to yourself after it's out, or just making it harder for people to maneuver around j.B.
Thanks to the orb weaving back around to the ground level briefly, 236C has some under-explored applications for a creative Labrys looking to play the long con in her pressure. Do note that if the orb goes off-screen from the corner, it will not turn around and come back.
- 236D
Total: 125
Falls to the ground and goes across the screen at ground level. It takes a while for the orb to fall to ground level before it starts traveling, but it's good at covering an approach. If you can manage to keep the opponent blocking long enough, it can give Labrys a pressure reset later on, so it sees use in some safejump setups or in the aforementioned silly dash-in reset.
One of the best uses for this is as actually as a throw mixup in pressure. Using 236D while very close to the opponent, then grabbing them without dashing will cause the orb to hit the opponent and give Labrys a combo after her grab. It's a bit slow and telegraphed however.
- SB Version
Total: 70
A fantastic use of meter. Labrys recovers ten frames faster than the other versions, almost entirely mitigating the risk in using this. The orb itself is the same as the D version, but it falls to the ground much quicker. The speed lets Labrys incorporate all the grime the D version has more efficiently, such as making her aforementioned the grab mixup quicker, nastier, and more lenient with spacing.
| Version | P1Also known as the starter proration. If this move starts a combo, this value will be added to the Proration Tally on top of P2's addition (P1 + P2). | P2Also known as the mid-combo proration. If this move is used at all in a combo, this value will be added to the Proration Tally. | SMPShorthand for "Same Move Proration". If this move is used more than once in a combo, this value will be added to the Proration Tally on top of P2's addition (P2 + SMP). | Level
| ||||||||||||||||||||||||||||||||||||
|---|---|---|---|---|---|---|---|---|---|---|---|---|---|---|---|---|---|---|---|---|---|---|---|---|---|---|---|---|---|---|---|---|---|---|---|---|---|---|---|---|
| 236C | 300 | 100 | 50 | 4 | ||||||||||||||||||||||||||||||||||||
| 236D | 300 | 100 | 50 | 4 | ||||||||||||||||||||||||||||||||||||
| 236CD | 300 | 100 | 50 | 4 |
236C:
- Opponent experices 30F extra hitstop on hit/counter hit
SP Skill Attacks
Weaver's Art: Beast
![]() 236236C/D
236236C/D


| Version | DamageThe raw damage value(s) of the listed move that the game's combo system calculates combo damage from. | GuardHow this attack can be guarded. All non-throws can be air blocked unless otherwise stated, and all "Air Unblockable" moves can be blocked in either grounded stance unless otherwise stated. Throw-type moves will have their ranges listed instead, and other cases will be explicitly noted. |
StartupNumber of frames for this move to reach the first active frame (includes the first active frame). | ActiveNumber of active frames in this attack. Values in () are for gaps between hits of an attack. | RecoveryNumber of frames this move is in a recovery state before returning to neutral. "Total (x)" indicates this for moves where the attacker has inactionable animation independent of active frames (i.e. projectiles and some Persona attacks). |
Frame AdvThe difference between the attacker's recovery and the period that the opponent is in blockstun. This frame advantage value is based off the fact that the very first active frame touches the opponent. | AttributeSome attacks are invulnerable to attacks with specific attributes. This notes what attributes each attack possesses. H - Head B - Body C - Chest F - Foot P - Projectile. Independent Projectiles will have their Durability level listed. For example a projectile that his Durability level 2 will show P2 T - Throw |
Inv.Attribute and Hitbox Invincibility information that will be notated via abbreviation or other indicators. Guard - Move autoguards against the attacks instead of making them whiff. Strike - Invulnerable to all attributes except for Throws, and SP Skills. Low Profile - Character's hurtbox shrinks to go under many attacks. Persona - Only the Persona carries this invulnerability. |
|---|---|---|---|---|---|---|---|---|
| 236236C | 1200,1000,500 | All | 4+(39 Flash)+9 | Until Hit,(8)6,9 | 33+14L | -43 | Body | 1~(End of Active) Guard All |
| 236236D | 1200,600,300×8 | All | 4+(55 Flash)+12 | Until Hit(8)6,3×8 | 29+19L | -59 | Body | 1~(End of Active) Guard All |
| 236236CD | 1200,250,125×12 | All | 4+(39 Flash)+9 | Until Hit(8)6,3×11 | 56+19L | -95 | Body | 1~(End of Active) Guard All |
Beast is a staple of Labrys' gameplan, and plays a big part in why everyone fears Labrys with axe levels.
All versions of Beast deal more damage based on Labrys' axe level, and can reach truly ridiculous levels once Red Axe is reached. Many low damaging combos can be turned into 50% or worse just by tacking on Beast at the end, or alternatively Labrys can use Beast to build up a lot of axe level and immediately prime her win condition from square one. This makes Beast into one of the meanest combo enders Labrys has to offer, and it's seen very frequently as a result.
Usage as a reversal is possible, but highly inadvisable. Labrys has guardpoint once she starts traveling, which unfortunately gives wary opponents several ways to evade the attack and punish Labrys without her being able to OMC to save herself. This is matchup specific, but unfavorable more often than not.
- 236236C
The investment. Very quick, damaging, and simple. A very effective combo ender that works at nearly any hitstun level, and more importantly builds axe level, which makes it great to throw out when you want to leave someone deep in Awakening or ending rounds while still building/retaining Red Axe.
- 236236D
The embezzlement. Cashes out on the axe gauge, boosting the damage output of the SP Skill proportional to your current axe level. Adds a huge amount of damage if Labrys is in Red Axe, incredible for closing out rounds especially before opponents reach Awakening, and is a very common ender in Labrys' many death combos. The startup is pretty slow, but it still reliably combos after j.214B.
On the first round, it may not be worth losing your axe level going into the second. Depending on how confident you are on landing that potential final hit, using the C version to kill or leave your opponent one hit away from the grave will benefit Labrys a lot more since she'll be carrying Red Axe over to the next. Levy the options carefully.
- SB Version
The billionaire's investment. It's a steep price to pay for 75 meter, but it's very worth it. Hits as many times as the D version while building axe level on every hit, oftentimes pushing Labrys instantly up two whole levels for a Green Axe game-changer. As a generous bonus, it also comes out just as fast as the C version while traveling very far and leaves the opponent in a ton of untech for oki setups.
| Version | P1Also known as the starter proration. If this move starts a combo, this value will be added to the Proration Tally on top of P2's addition (P1 + P2). | P2Also known as the mid-combo proration. If this move is used at all in a combo, this value will be added to the Proration Tally. | SMPShorthand for "Same Move Proration". If this move is used more than once in a combo, this value will be added to the Proration Tally on top of P2's addition (P2 + SMP). | Level
| ||||||||||||||||||||||||||||||||||||
|---|---|---|---|---|---|---|---|---|---|---|---|---|---|---|---|---|---|---|---|---|---|---|---|---|---|---|---|---|---|---|---|---|---|---|---|---|---|---|---|---|
| 236236C | 0 | 500, 600 | 50 | 5 | ||||||||||||||||||||||||||||||||||||
| 236236D | 0 | 500, 600 | 50 | 5 | ||||||||||||||||||||||||||||||||||||
| 236236CD | 0 | 500, 600 | 50 | 5 |
236236C:
- Damage of hits 2~3 change with Axe Level
- Gray 80%, Blue 90%, Green 100%, Yellow 130%, Red 200%
- First hit continues until Labrys reaches the corner or comes into contact with the opponent
- Opponent experiences 10F extra hitstop on hit/counter hit for the first hit
- Total Minimum damage per Axe level: 720/765/810/945/1360
- Minimum damage for individual hits Gray: 360, 240, 120. Blue: 360, 270, 135. Green 360, 300, 150. Yellow: 360, 390, 195. Red: 360, 600, 400
236236D:
- Damage of hits 2~10 change with Axe Level
- Gray 80%, Blue 90%, Green 100%, Yellow 130%, Red 200%
- First hit continues until Labrys reaches the corner or comes into contact with the opponent
- Opponent experiences 10F extra hitstop on hit/counter hit for the first hit
- Does 4F extra untech at Yellow Axe, and another 4F extra untech at Red Axe
- Total Minimum damage per Axe level: 1080/1170/1260/1530/2160
- Minimum damage for individual hits Gray: 360, 144, 72×8. Blue: 360, 162, 81×8. Green: 360, 180, 90×8. Yellow: 360, 234, 117×8. Red: 360, 360, 180×8
236236CD:
- Damage of hits 2~13 change with Axe Level
- Gray 80%, Blue 90%, Green 100%, Yellow 130%, Red 200%
- Attack continues until Labrys reaches the corner or comes into contact with the opponent
- Opponent experiences 10F extra hitstop on hit/counter hit for the first hit
- Does 4F extra hitstun/untech at Yellow Axe, and another 4F extra hitstun/untech at Red Axe
- Total Minimum damage per Axe level: 750/790/842/985/1335
- Gray Axe: 360, 60, 30×11. Blue Axe: 360, 67, 33×11. Green: 360, 75, 37×11. Yellow: 360, 97, 48×11. Red: 360, 150, 75×11
Awakened SP Skill Attacks
Weaver's Art: Breaking Wheel
![]() 214214C/D
214214C/D

| Version | DamageThe raw damage value(s) of the listed move that the game's combo system calculates combo damage from. | GuardHow this attack can be guarded. All non-throws can be air blocked unless otherwise stated, and all "Air Unblockable" moves can be blocked in either grounded stance unless otherwise stated. Throw-type moves will have their ranges listed instead, and other cases will be explicitly noted. |
StartupNumber of frames for this move to reach the first active frame (includes the first active frame). | ActiveNumber of active frames in this attack. Values in () are for gaps between hits of an attack. | RecoveryNumber of frames this move is in a recovery state before returning to neutral. "Total (x)" indicates this for moves where the attacker has inactionable animation independent of active frames (i.e. projectiles and some Persona attacks). |
Frame AdvThe difference between the attacker's recovery and the period that the opponent is in blockstun. This frame advantage value is based off the fact that the very first active frame touches the opponent. | AttributeSome attacks are invulnerable to attacks with specific attributes. This notes what attributes each attack possesses. H - Head B - Body C - Chest F - Foot P - Projectile. Independent Projectiles will have their Durability level listed. For example a projectile that his Durability level 2 will show P2 T - Throw |
Inv.Attribute and Hitbox Invincibility information that will be notated via abbreviation or other indicators. Guard - Move autoguards against the attacks instead of making them whiff. Strike - Invulnerable to all attributes except for Throws, and SP Skills. Low Profile - Character's hurtbox shrinks to go under many attacks. Persona - Only the Persona carries this invulnerability. |
|---|---|---|---|---|---|---|---|---|
| 214214C/D | 130,75×7 per Wheel | All | 4+(63 Flash)+12 | 10×7,5 per wheel | Total 100 | +21 | Projectile | 1~27 All |
| 214214CD | 130,75×7 per Wheel | All | 4+(63 Flash)+12 | 10×7,5 per wheel | Total 100 | +63 | Projectile | 1~27 All |
Often nicknamed "gears", Breaking Wheel is one of P4AU's many "make me plus" projectile supers. Acts as Labrys' only true reversal, and occasionally a lockdown tool.
Covers the floor in a set of five massive multi-hitting gears, locking the opponent down for further pressure or a momentum shift. Although the move itself only hits on the ground, it can be difficult for airborne opponents to escape falling into the gears if they lack good positioning or have used up their air movement options. All versions stay even if you hit Labrys, so attempts to mash something fullscreen usually won't end well. Although it's plus on block, the move still carries heavy recovery on whiff to the point of being IK punishable by several characters, and it's simple to roll past midscreen.
Because of the shortcomings of Labrys' DP and other supers, Gear super is her best reversal. The startup invincibility, screen coverage, and advantage on block easily outclass her alternatives. This can act as a major deciding factor between whether to play Normal Labrys or S-Labrys, as Labrys only gets this in Awakening but S-Labrys has this available as long as she has the meter for it.
214214C places the gears appear in front of Labrys, while 214214D places them 2/3rds of the screen away. The C version sees the most use as a reversal.
- SB Version
Spawns eight wheels instead of five, appearing in front of Labrys and expanding out to almost fullscreen distance. Very plus on block, but also incredibly expensive on an already meter hungry character. The cost alone is hard to justify, sticking to the C version and saving the remaining 25 meter for an SP skill will likely pay off better than the extra frames here.
| Version | P1Also known as the starter proration. If this move starts a combo, this value will be added to the Proration Tally on top of P2's addition (P1 + P2). | P2Also known as the mid-combo proration. If this move is used at all in a combo, this value will be added to the Proration Tally. | SMPShorthand for "Same Move Proration". If this move is used more than once in a combo, this value will be added to the Proration Tally on top of P2's addition (P2 + SMP). | Level
| ||||||||||||||||||||||||||||||||||||
|---|---|---|---|---|---|---|---|---|---|---|---|---|---|---|---|---|---|---|---|---|---|---|---|---|---|---|---|---|---|---|---|---|---|---|---|---|---|---|---|---|
| 214214C/D | 0 | 1000 | 50 | 4 | ||||||||||||||||||||||||||||||||||||
| 214214CD | 0 | 1000 | 50 | 4 |
214214C/D:
- Shoots 5 Wheels, each followup Wheel comes out 12F after the previous
- Minimum damage 39, 22×7 (193) per Wheel
214214CD:
- Shoots 8 Wheels, each followup Wheel comes out 12F after the previous
- Minimum damage 39, 22×7 (193) per Wheel
Brutal Impact
214214A/B

One of the worst supers in the game. Slow and unblockable.


| Version | DamageThe raw damage value(s) of the listed move that the game's combo system calculates combo damage from. | GuardHow this attack can be guarded. All non-throws can be air blocked unless otherwise stated, and all "Air Unblockable" moves can be blocked in either grounded stance unless otherwise stated. Throw-type moves will have their ranges listed instead, and other cases will be explicitly noted. |
StartupNumber of frames for this move to reach the first active frame (includes the first active frame). | ActiveNumber of active frames in this attack. Values in () are for gaps between hits of an attack. | RecoveryNumber of frames this move is in a recovery state before returning to neutral. "Total (x)" indicates this for moves where the attacker has inactionable animation independent of active frames (i.e. projectiles and some Persona attacks). |
Frame AdvThe difference between the attacker's recovery and the period that the opponent is in blockstun. This frame advantage value is based off the fact that the very first active frame touches the opponent. | AttributeSome attacks are invulnerable to attacks with specific attributes. This notes what attributes each attack possesses. H - Head B - Body C - Chest F - Foot P - Projectile. Independent Projectiles will have their Durability level listed. For example a projectile that his Durability level 2 will show P2 T - Throw |
Inv.Attribute and Hitbox Invincibility information that will be notated via abbreviation or other indicators. Guard - Move autoguards against the attacks instead of making them whiff. Strike - Invulnerable to all attributes except for Throws, and SP Skills. Low Profile - Character's hurtbox shrinks to go under many attacks. Persona - Only the Persona carries this invulnerability. |
|---|---|---|---|---|---|---|---|---|
| 214214A | 3000 | Unblockable | 111+(34 Flash)+5 | 6 | 88 | Body | 1~121 Guard All | |
| 214214B | 4500 | Unblockable | 234+(44 Flash)+5 | 6 | 88 | Body | 1~244 Guard All | |
| 214214AB | 6000 | Unblockable | 246+(44 Flash)+5 | 6 | 88 | Body | 1~274 Guard All |
|
|
Brutal Impact is Labrys' unblockable super, dealing ridiculously high damage and allegedly being usable in setups. With that out of the way, do not think of using super ever.
Terrible move, one of the worst in the game. Only available in Awakening, horrible startup, huge telegraph, dozens of ways to avoid it, and it's IK punishable. Has guardpoint against everything during the startup, and Labrys will attack much quicker if she receives a hit. (It will be instantly set off if hit by a Furious Action or Normal Throws.) But joke's on you, it's still so slow that your opponent can just jump over Labrys and make her cry. And nobody likes watching robot girls cry.
- A Version
The fastest and least bad one. Still unusable against any opponent, except if you're S-Labrys.
Tempting to use in unblockable setups such as 214214C -> OMC -> 214214A, however this requires full meter, Awakening, and a high axe level to deal any meaningful damage at all. These setups are also easily defeated by Guard Cancels, rendering it almost never worth the attempt.
S-Labrys can use it in Frenzy combos for damage rivaling D Beast, except it doesn't cost your axe level. This may be knocking off ![]() the real deal, but at least it gives this move something in terms of use.
the real deal, but at least it gives this move something in terms of use.
- B Version
Even worse than the A version. Way too slow, you're never going to hit anyone competent with this in your wildest dreams. Best used against players who try to stand still and block unblockables.
Deals more damage than the A version, but who cares?
- SB Version
Since you insist on spending 75 meter to lose the round, you'll be glad to hear that Labrys at least is able to oneshot every character in the game if she's in Red Axe while using this version. Even against Awakening, it does 7,500 damage. As a result, this version has slightly more use than the other two, and that is to flex your ability to read DPs in the most disrespectful way imaginable, and utterly embarrassing yourself if you read incorrectly. Throw this in the garbage unless you're some sicko who actually does enjoy watching robot girls cry.
| Version | P1Also known as the starter proration. If this move starts a combo, this value will be added to the Proration Tally on top of P2's addition (P1 + P2). | P2Also known as the mid-combo proration. If this move is used at all in a combo, this value will be added to the Proration Tally. | SMPShorthand for "Same Move Proration". If this move is used more than once in a combo, this value will be added to the Proration Tally on top of P2's addition (P2 + SMP). | Level
| ||||||||||||||||||||||||||||||||||||
|---|---|---|---|---|---|---|---|---|---|---|---|---|---|---|---|---|---|---|---|---|---|---|---|---|---|---|---|---|---|---|---|---|---|---|---|---|---|---|---|---|
| 214214A | 0 | 2000 | 50 | 5 | ||||||||||||||||||||||||||||||||||||
| 214214B | 0 | 2000 | 50 | 5 | ||||||||||||||||||||||||||||||||||||
| 214214AB | 0 | 2000 | 50 | 5 |
214214A:
- Damage changes with Axe Level
- Gray-Green: 100%, Yellow 130%, Red 200%
- If opponent hits Labrys before superflash, Labrys immediately goes into superflash. Startup in this case is (45 Flash)+28
- Minimum damage per Axe Level: 900/900/900/1365/2400
214214B:
- Damage changes with Axe Level
- Gray-Green: 100%, Yellow 130%, Red 200%
- If opponent hits Labrys during Guard before superflash, Labrys immediately goes into superflash. Startup in this case is (55 Flash)+38
- Minimum damage per Axe Level: 1350/1350/1350/2047/3600
214214AB:
- Damage changes with Axe Level
- Gray-Green: 100%, Yellow 130%, Red 200%
- If opponent hits Labrys before superflash, Labrys immediately goes into superflash. Startup in this case is (55 Flash)+38
- Minimum damage per Axe Level: 1800/1800/1800/2730/4800
Instant Kill
Weaver's Art: Inquisition
![]() 222C+D when IK Conditions are met
222C+D when IK Conditions are met


| DamageThe raw damage value(s) of the listed move that the game's combo system calculates combo damage from. | GuardHow this attack can be guarded. All non-throws can be air blocked unless otherwise stated, and all "Air Unblockable" moves can be blocked in either grounded stance unless otherwise stated. Throw-type moves will have their ranges listed instead, and other cases will be explicitly noted. |
StartupNumber of frames for this move to reach the first active frame (includes the first active frame). | ActiveNumber of active frames in this attack. Values in () are for gaps between hits of an attack. | RecoveryNumber of frames this move is in a recovery state before returning to neutral. "Total (x)" indicates this for moves where the attacker has inactionable animation independent of active frames (i.e. projectiles and some Persona attacks). |
Frame AdvThe difference between the attacker's recovery and the period that the opponent is in blockstun. This frame advantage value is based off the fact that the very first active frame touches the opponent. | AttributeSome attacks are invulnerable to attacks with specific attributes. This notes what attributes each attack possesses. H - Head B - Body C - Chest F - Foot P - Projectile. Independent Projectiles will have their Durability level listed. For example a projectile that his Durability level 2 will show P2 T - Throw |
Inv.Attribute and Hitbox Invincibility information that will be notated via abbreviation or other indicators. Guard - Move autoguards against the attacks instead of making them whiff. Strike - Invulnerable to all attributes except for Throws, and SP Skills. Low Profile - Character's hurtbox shrinks to go under many attacks. Persona - Only the Persona carries this invulnerability. |
|---|---|---|---|---|---|---|---|
| K.O | All | 1+(30 Flash)+59 | Until Hit | 114 Total | -37 | Projectile | 1~78 All |
Fullscreen instant kill. Costs 100 SP, reaches fullscreen, invincible until recovery, very standard IK stuff.
Labrys summons Ariadne to shoot an arrow across the screen, and if successful, proceeds to trap the opponent, throws her axe at them, and with an extended chain arm, barrages the opponent with axe strikes, cultivating in dropping the axe on top of them. This IK at least has the benefit of hitting full screen. However, it still suffers from a long reactable startup and the ability to be blocked, all while requiring 100 SP, making it hardly worth it to use. Could potentially be used to counter certain supers on super flash like Adachi's Atom Smasher or Akihiko's Maziodyne, but practical instances for this IK are few and far between.
| P1Also known as the starter proration. If this move starts a combo, this value will be added to the Proration Tally on top of P2's addition (P1 + P2). | P2Also known as the mid-combo proration. If this move is used at all in a combo, this value will be added to the Proration Tally. | SMPShorthand for "Same Move Proration". If this move is used more than once in a combo, this value will be added to the Proration Tally on top of P2's addition (P2 + SMP). | Level
| ||||||||||||||||||||||||||||||||||||
|---|---|---|---|---|---|---|---|---|---|---|---|---|---|---|---|---|---|---|---|---|---|---|---|---|---|---|---|---|---|---|---|---|---|---|---|---|---|---|---|
| 0 | 100 | 50 | 5 |
Colors

Color 1

Color 2
Lisa Silverman (P2)
Color 3

Color 4

Color 5

Color 6
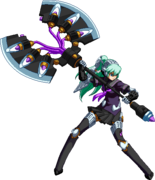
Color 7

Color 8

Color 9
 Aigis in school uniform

Color 10
 Lambda
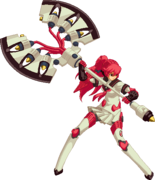
Color 11
 Baiken

Color 12

Color 13

Color 14

Color 15
Kotone Shiomi (P3P)
Color 16

Color 17

Color 18

Color 19

Color 20

Color 21

Color 22

Color 23
Velvet Room Attendant
Color 24

Color 25
Christmas
Color 26

Color 27
Dengeki
Color 28

Color 30

Color 31


Color 1

Color 2

Color 3

Color 4

Color 5

Color 6

Color 7

Color 8

Color 9
Palladion (P3)
Color 10
Lambda

Color 11
Baiken

Color 12

Color 13

Color 14

Color 15

Color 16

Color 17

Color 18

Color 19

Color 20

Color 21

Color 22

Color 23
Velvet Room Attendant
Color 24

Color 25
Christmas
Color 26

Color 27
Dengeki
Color 28

Color 30

Color 31


To edit frame data, edit values in P4U2R/Labrys/Data.
 Aigis[★]
 Akihiko Sanada[★]
 Chie Satonaka[★]
 Elizabeth[★]
 Junpei Iori[★]
 Kanji Tatsumi[★]
 Ken Amada[★]
 Labrys[★]
 Margaret[★]
 Marie[★]
 Minazuki[★]
 Mitsuru Kirijo[★]
 Naoto Shirogane[★]
 Rise Kujikawa[★]
 Shadow Labrys[★]
 Sho[★]
 Teddie[★]
 Tohru Adachi[★]
 Yosuke Hanamura[★]
 Yu Narukami[★]
 Yukari Takeba[★]
 Yukiko Amagi[★]
Click [★] for character's full frame data
System Explanations
Mechanics
Application & Advanced Information
Archived Information