Scatteraxis (talk | contribs) |
Scatteraxis (talk | contribs) |
||
| Line 2: | Line 2: | ||
======<span style="visibility:hidden;font-size:0">Overview</span>====== | ======<span style="visibility:hidden;font-size:0">Overview</span>====== | ||
{{MFlag|update}} | {{MFlag|update}} | ||
{{notice|While Adachi's page here may be moderately out of date, there exists some complete resources covering the character in this version: <br/> | |||
Adachi gitbook: https://heliman.gitbook.io/adachi-guide-p4u2.5/ <br/> | |||
Information from these resources will be transcribed here in due time, or you could possibly help transcribe it yourself.}} | |||
{{Overview | {{Overview | ||
| overview = Adachi is a rushdown and pseudo-grappler character, that by nature makes himself a threat at all times with his excellent Persona usage and being able to snowball from many of his openings. He typically plays neutral out with his {{MiniMoveCard|chara=Tohru Adachi|input=j.C|game=P4U2|label='''great Persona normals'''}} and various other moves that cover a lot of possible bases. Once he gets in, he can play a pseudo-grappling game at any time with one of his {{MiniMoveCard|chara=Tohru Adachi|input=214C|game=P4U2|label='''command grabs'''}} for handsome reward out of strike/throw pressure. This is on top of using his many unique special cancels to both keep an opponent locked down with unpredictable frame-traps, ''and'' open them up eventually if they attempt to escape incorrectly. A good Adachi player is guaranteed to make good use of his more easily-accessible buffing super, {{MiniMoveCard|chara=Tohru Adachi|input=236236A|game=P4U2|label='''Heat Riser'''}}, to bolster the threat of just about any of his options in numerous situations on both offense and defense. | | overview = Adachi is a rushdown and pseudo-grappler character, that by nature makes himself a threat at all times with his excellent Persona usage and being able to snowball from many of his openings. He typically plays neutral out with his {{MiniMoveCard|chara=Tohru Adachi|input=j.C|game=P4U2|label='''great Persona normals'''}} and various other moves that cover a lot of possible bases. Once he gets in, he can play a pseudo-grappling game at any time with one of his {{MiniMoveCard|chara=Tohru Adachi|input=214C|game=P4U2|label='''command grabs'''}} for handsome reward out of strike/throw pressure. This is on top of using his many unique special cancels to both keep an opponent locked down with unpredictable frame-traps, ''and'' open them up eventually if they attempt to escape incorrectly. A good Adachi player is guaranteed to make good use of his more easily-accessible buffing super, {{MiniMoveCard|chara=Tohru Adachi|input=236236A|game=P4U2|label='''Heat Riser'''}}, to bolster the threat of just about any of his options in numerous situations on both offense and defense. | ||
Revision as of 20:21, 23 May 2022
This can be due to patches to the game, or developments in the metagame. You can help by updating it.
Adachi gitbook: https://heliman.gitbook.io/adachi-guide-p4u2.5/
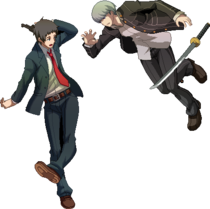
![]() Tohru Adachi
Tohru Adachi ![]() Tohru Adachi is a rushdown character with great Persona buttons and comeback potential when Heat Riser and Mandala have been activated.
Tohru Adachi is a rushdown character with great Persona buttons and comeback potential when Heat Riser and Mandala have been activated.
- Obnoxious Persona: Magatsu Izanagi's moves are generally very strong. j.C in particular is a massive air normal that is difficult to contest. In addition to this, it is one of only two of his Persona moves that are burstable.
- Buffs: His Heat Riser and Magatsu Mandala supers both apply unique buffs that allow him to deal more damage and gain significantly greater reward off of stray hits, while also taking less damage.
- Comeback Potential: During Awakening, Adachi can inflict numerous status effects that can quickly rack up damage and restrict the opponent's options to make way for a comeback, helping him bring the game back into his favor at almost any deficit.
- Extremely Persona-Reliant: Adachi is uniquely crippled when Persona broken. He loses access to his best neutral moves and others that set up his win conditions, so he can't command grab you, debuff you, zone you, or really do much of anything. Most importantly, it removes his buffs if he has any active, making the meter spent on them a waste.
- Meter Reliant: Adachi needs meter for SB Skills to continue combos or keep his pressure safe. Most of his status ailments and buffs to himself are also locked behind meter.
- Limited Defense: Adachi's DP is 23F, making it one of the slowest DPs in the game, and his other metered defensive options are very flawed. His defense is only objectively improved with Awakening status.
Two of Adachi's supers, Heat Riser and Magatsu Mandala, apply unique buffs to Adachi for the remainder of the round or until he gets Persona Broken. Both buffs can be used at the same time.
The Magatsu Mandala buff can be acquired even if the super whiffs or is blocked, while Heat Riser must hit the opponent.
- Heat Riser Buff: Adachi receives a 10% damage boost to all of his attacks, along with a 10% defense boost. When active, a red icon of Adachi's face appears above Adachi's meter.
- Magatsu Mandala Buff: Adachi's Persona will apply different status ailments on all Persona-related normals, specials and supers. When active, a purple icon of Magatsu Izanagi appears above Adachi's meter. The ailments are:
- Poison: 5C, 2C, j.2C, Heat Riser.
- Shock: 5D, 2D, j.2D, Megidola.
- Panic: Atom Smasher, Magatsu Mandala.
- Silence: Ghastly Wail, Magatsu Mandala.
- Fear: j.C, 2C (ground slam), j.2C (ground slam), Atom Smasher, Heat Riser, Ghastly Wail.
- Additionally, Ghastly Wail will always do extra damage, as if the opponent was feared.
- All of these statuses last for 300F, except for Poison which now only lasts 180F as of 2.0.
- Lastly, you'll be reading a lot of "displacing" Adachi's persona, Magatsu Izanagi. By "displacing", we mean the fact that Magatsu Izanagi can do a lot of moves from the position he's in, not Adachi's. This is frequent after a 2D or a 2C, as you can attack the opponent from fullscreen to catch him off guard.
 | |
| Health | |
| 9,500 | |
| Backdash | |
| 20F (1~6F Inv All) | |
| Persona Cards | |
| 4 | |
| Combo Rate | |
| 60% | |
| Fastest Attack | |
| Reversal Type | |
| Fatal Starters | |
| Fatal RecoveryAny moves that put this character in a state where any Counter Hit will force a Fatal Counter. | |
Normal Moves
5A

Knock 'em in the head, pseudo-anti air normal

Advancing arm swing, good button for combos and pressure

Make 'em check their shins!


5A is Adachi's fastest ground normal tied with 2A. Has a fairly good vertical hitbox, which helps with air confirms. Significantly negative on block, so it's best chained into 2A to remain safe. One of his two jump cancelable moves on block.
5AA moves forward during the attack. A good button to confirm into for both combos and pressure. Since it moves you forward enough to continue pressure, this button can be used to set up tick throws to see if the opponent is sleeping on you.
5AAA is a low attack. If the opponent is too high after 5AA, 5AAA will not connect. A good button for meterless crouch confirms since you get the bonus SP and some of your burst back when you cancel into the rest of your autocombo. Sweep Cancellable, making it a good button to use every once in a while in pressure to keep your opponent in check and see if they are blocking low.
Note: 5AAA is not a true blockstring.
2A

"Seriously guys, why isn't this a low" -Adachi players

Upwards gun swing. Small damage. Can combo into itself up to three times. Unlike most 2As, Adachi's is not a low attack. -2 on block, giving it utility in stagger pressure and allowing you to do tick throws. Used in certain Magatsu Mandala routes to pick up an opponent after Mandala.
5B

slap 'em with a p4 reference

Quick hand swipe. Two additional hits that move you forward are performed automatically if the move is not cancelled after the first hit, which makes 5B especially bad on whiff. Any of the three hits are forward dash-cancellable on hit or block. While very punishable on whiff, the attack's range is good and often underestimated, especially after its range was increased in the 2.0 patch.
- Dash Cancel is -5 on block for the first hit, -7 for the additional hits.
2B

Amazing on CH, don't whiff this

An upward kick. Adachi moves forward during the attack.
Like most 2Bs, Adachi's is an anti-air attack that's both air unblockable and has a period of Head invuln.
On counter-hit, the opponent is launched upward, allowing for very damaging follow-up combos.
However, 2B shouldn't be used randomly due to its lengthy recovery and Adachi's forward movement; if poorly spaced, Adachi's 2B will whiff. Very negative on block, but it's jump-cancellable on both hit and block, so jump-cancel to remain safe.
j.A

please actually use this move, it's not bad

Fast gun jab, but limited range. Can combo into itself up to three times. Overhead.
j.B

The other good air normal

Long range kick. Only one frame slower start-up than j.A and has much better horizontal range than j.A, making j.B a good tool for air-to-air battles. On CH, one can link it into 5B for a tennis combo. Overhead.
All Out Attack
5A+B

The other overhead, with meter gain!

A jumping strike. Adachi runs forward during the start-up. Covers good range and has a faster startup than its 1.1 equivalent, so feel free to use it once in a while. On block, Adachi will recover in front of the opponent, vulnerable to a punish combo.
Sweep
2A+B

Watch your feet!

- Full Counter Hit recovery.
A sweep that has a similar start-up animation to his AoA, which can be used to trick people if they aren't paying attention. Adachi runs forward during start-up but due to how long it takes, it can only be comboed into under certain conditions. Any A/B normal and j.C can, on CH, FCH, or crouch confirm, can be linked into sweep, allowing for tennis combos [j.A only works when really low to the ground.]
Has a period of Chest invuln, allowing it to low-profile Chest attribute attacks.
Persona Moves
5C

Really good poke and combo tool for the extra damage.

If 5C isn't cancelled into anything, slam 'em down, can be comboed into 236A or 214A.


- Three-part attack: Magatsu Izanagi performs a stab, followed by a grab, then throws the opponent to the ground and stomps them.
- If the opponent is hit by the tip of the move, or Adachi cancels the move, M.Izanagi will only do the first hit.
A multi-hitting attack that can be special-canceled after the first hit. During the grab portion of the attack, Adachi can still move and attack while M.Izanagi is active, but he can not use any persona attacks until the move is completed (Fourth hit, M.Izanagi's stomp).
Covers good range but significantly negative on block. A strong poke and combo tool, particularly when cancelled after the first hit, but beware of whiffs, as both the start-up and recovery for the move leave both Adachi and his persona vulnerable. In combos, Adachi will generally only use the first hit, as the hit-grab portion of this move has terrible hitstun scaling.
In 2.0, this move was given persona invulnerability until the active frames, increasing its effectiveness as a poke.
- Magatsu Mandala Buff: 1st hit: Poison. 2nd hit: Fear.
2C

Good anti-air and amazing combo tool, starts Tennis.

Spin 'em in the air, then slam them down.


Two-part attack that can be cancelled after the first hit. Magatsu-Izanagi performs an upward dive for the first hit, able to grab airborne opponents. Air Unblockable. Very similar to Kanji's "Gotcha!" but with a smaller hitbox.
On hit, the opponent will be grabbed, then slammed onto the ground by Magatsu Izanagi if the attack is not cancelled. While the start-up is significant, 2C is still a strong preemptive anti-air, and it is useful for displacing Magatsu Izanagi for some long-range gimmicks.
The first hit can be cancelled with Persona normals, specials and supers and hop. Adachi's recovery ends before the final slam if not cancelled, allowing you to confirm 2C into any move or a super.
Note: The move functions as an AUB hit first, then a hitgrab. When doing tennis, hop-cancel before the green grab effect in order to make M.Izanagi not grab the opponent.
- Magatsu Mandala Buff: 1st hit: Poison. 2nd hit: Fear.
5D

Fullscreen projectile, helps get your pressure started

Multi-hit full screen projectile, similar to Elizabeth's Maziodyne special and Yu's Ziodyne super. While the attack has a full second of start-up, Adachi can move once the attack is out. 5D is extremely plus on block, but due to the attack's slow start-up, opponents can easily run up and hit Adachi for a counter-hit and break a Persona card, so it's best used wisely.
On block or on hit, it carries the opponent greatly as long as they are in the beam, but it's one of the easiest attacks to Instant Block, so beware giving opponents (particularly Shadow-Type characters) free meter. That being said, the amount of meter given to the opponent was reduced in the 2.0 patch, making this move more usable overall. On full IB, opponents will get 50 meter.
This move is typically used to control the screen and to get your turn back, don't autopilot and use it all the time and let the opponent counter you because of the long startup it has.
- Magatsu Mandala Buff: Shock.
2D

Great anti-zoning tool

Diving sword plunge, similar to the second hit of Narukami's Cross Slash super. It will appear wherever the opponent was when you pressed the button. Fatal Counters, but not terribly useful as a starter.
Adachi can move as soon as Magatsu Izanagi lands on the ground. Huge damage (2378 on FC), enormous ground-splash hitbox, great for punishing opponents at range after Magatsu Izanagi has been displaced, and a good combo ender in the corner; however, the move has significant start-up. On block, however, this move leaves Adachi plus and can restart his pressure.
Additionally, there is a gap during which Magatsu Izanagi is vulnerable: when he first appears above the opponent, they can easily tag the persona with a fast jab to break a card and stop the attack. As mentioned, failing at doing so will remove 1/4 of their health.
Again, 2D's hitbox is not active when Magatsu Izanagi first appears, so don't autopilot using the move all the time and get your persona broken because of it.
- Magatsu Mandala Buff: Shock
j.C

One of Adachi's best moves, obnoxious for the opponent to deal with

Magatsu Izanagi slashes in front of him. Large hitbox and carries momentum. Key part in Adachi's hop-cancel juggles, which allow for combo extensions. Very good air normal, as it's relatively fast, controls huge amounts of space.
In 2.5, it no longer groundslides on air-to-air counter-hit that can lead into a full combo. In exchange, Magatsu Izanagi is now invincible when appearing until active frames, Adachi can still be hit out of this.
However, this attack only has one cancel option (Excluding OMC). Adachi has to either cancel j.D/j.2D or wait until he lands to continue pressure. Also at some higher ranges Adachi will not be plus if the opponent blocks the move, so be careful.
- Magatsu Mandala Buff: Poison.
j.2C

ball is love
ball is life

Same as 2C. Your go to meterless combo ender, but it can lead into Mandala or Ghastly Wail in the corner if you have the meter. It's also a better tool to use for Persona Displacement gimmicks, as Adachi recovers quicker when you do J.2C close to the ground than when you do 2C normally.
- Magatsu Mandala Buff: 1st hit: Poison. 2nd hit: Fear
j.D

Same as 5D. Use this to control the air on people that have really good air normals or for those who prefer to be in the air than on the ground. Although a bit weird to do, you can do an air unblockable set up in the corner but some characters can escape that quite easily.
This move still carries the risk as 5D as if you get hit during its long start-up you lose a card, so don't throw this out mindlessly and use it with a purpose. If opponents IB it, they can get a good chunk of meter which can be very useful for a lot of characters, though like 5D it doesn't give as much meter as it did in 1.1.
- Magatsu Mandala Buff: Shock
j.2D

You...got hit by a 41 frame mid?

Same as 2D. Perfect for interruptions, dealing with zoners, and as an anti anti-air. Also useful for his land cancels. Can be used after displacing Magatsu Izanagi, but carries the same risks as 2D.
- Magatsu Mandala Buff: Shock
Universal Mechanics
Ground Throw
C+D
Laugh at their misery for free meter

Adachi grabs the opponent, trips them, and then laughs. Awful damage, but in exchange you get 17 SP. If you OMC the throw as early as possible into 5D, you can OTG with 2A and corner carry really well. Can also be followed up with B Heat Riser, One More! Cancel or One More! Burst.
While throw OMC cancels are outdated due to throws being super cancellable as part of 2.0 changes, OMC, 2A>5B>2C routing still works.
Air Throw
j.C+D

Snap crackle pop their spine

Adachi tosses the opponent to the ground, crushes their back with his feet on landing, then hops back. Deceptive hitbox. Same rules as with his ground throw to get followups, although combos are more limited midscreen, as very few characters can get hit by 5B>2C. The 2A>5B>2C pickup does not work with his air throw.
Get Lost!
B+D

Jumping gun slam, followed by a kick that knocks the opponent away. First hit is an overhead, the second hit is low. It has a hitbox behind Adachi on the second part. No longer takes 10% of Adachi's health as blue health, but meterless conversions on counterhit have been removed.
On hit, causes wallstick. Can be super-cancelled on hit and block. At 23 frames, it's one of the faster standing overheads, but as a reversal, it has significant start-up and can be option-selected easily, so be careful. Highly punishable on block and whiff.
Guard Cancel Attack
6A+B while blocking
"Yeah? Whatever!"
Same animation as 5AA. Fairly good hitbox. Often underused in 1.1 due to Adachi having one of the best reversal supers in the game, but it's still a reliable guard cancel that should see more use in 2.5.
Skill Attacks
Pain in the Ass!
236A/B followed by A/B

Walk Stance

A Followup

B & SB Followup


- Often referred to as "Tackle"
Note: The attack performed depends on what version of "Calm Down" is used. Pressing A/B will do the same thing. All versions can be super cancelled.
During the walking animation, Adachi's non-Persona moves are replaced with a tackle followup. He can still do AOA, Throw, DP, Specials (including hop cancel) and Persona normals, but he cannot jump, dash nor roll.
Side Note: On the very last frames, if the opponent has switched sides with Adachi, the followup will correct itself and tackle the opponent.
A: Ram attack which knocks the opponent away. Slow walk speed.
It also has projectile invulnerability for a good while, so it's good for dealing with midscreen zoning. You can also walk through burst or in some cases DPs (Kanji's for example). You can walk through supers like Akihiko's Maziodyne and then counter with your own super once their invulnerability is gone. Although, it isn't recommended to use this move to deal with fullscreen zoning. You won't get much reward off if you aren't be in range to counter with a move of your own.
Due to its slower walk speed, it's very ambiguous and useful for close tick grab setups.
B: When the move hits, Adachi will grab them and throw them backwards spinning.
Useful tool when you want to extend combos and get out of the corner.
At a certain part on the hitbox, around the top part, it will not auto-grab the opponent but instead cause the opponent to slide which can be followed up, doing an extra chunk of damage in many corner combos.
There are a few character that can't / are really hard to cause slide on. Said characters are Kanji (can be done but it's pretty hard) Yukiko, Sho and Minazuki.
SB: You walk faster and farther than all of the other versions. Once the move connects, you leave the opponent in a spinning state right next to you, allowing for microdash 5B/236B to continue the combo or combo into Ghastly Wail as a finisher.
As part of 2.0 balance patch, Adachi can cancel into other specials a bit after he sideswitches the opponent. This move is very useful in corner combos when you do not have enough meter for heat riser routing.
Can also cause slide but shouldn't be used for it as B does the same damage and proration but without the meter use.
It also has some invuln frames that is only weak against throws. Everything else will go right through. However, said invuln does not kick immediately nor does it last the whole duration. Adachi is only invuln the time he's flashing on blue.
This property is not carried to the tackle followup.
Scared?
214A/B

"I always wanted to shoot a gun like this..."

- Often referred to as "Gunshot"
Downward-aimed gun shot. Fast attack. Mostly used as a combo finisher to force tech or in the middle of a combo because it can be super canceled. It can also be used to keep the opponent in check. Since the 2.0 patch, it is now Special Cancellable INTO ITSELF once in a string, and can also be special cancelable into any of Adachi's other specials.
A: Adachi shoots in-front of himself. Really good move for pressure as you can do a lot of options afterwards. Can hit OTG, but will force tech if that's the case. It will always hit if done at point blank on the corner.
B: Adachi shoots around 1/3rd away from himself. Same effects as the A version, but it can whiff on close opponents. Will go off screen if your opponent is on the corner.
SB: Adachi shoots at a farther distance that can track and hit the opponent in the area of the bullet, which can go up to 2/3rds of the screen. Massively + on block, Longer recovery for opponent so it's easy to follow up, ground bounces on air hit (opponent has to be very close to the ground for this to hit in the air). Often used after sweep for j.C hop combos and lots of corner carry, or during blockstrings as it is obscenely + on block, basically resetting pressure if you're close enough.
Evil Smile
![]() 236C/D
236C/D

Inflicts Fear, SB is your best friend

Magatsu Izanagi appears behind Adachi and summons a ghost to hit the opponent. If the ghost hits, the opponent is inflicted with Fear. Deals no damage, no meter gain. Whiffs on crouching opponents. Since the 2.0 patch, it's now possible to special cancel into Evil Smile from Scared?, even if Adachi has already special canceled Scared? once.
Being capable of doing fear at any time is very good, and being able to recover quickly afterwards means that throwing it out in neutral isn't a bad idea. Getting one good hit in after hitting someone with Evil Smile could actually win you the game.
C: Ghost appears about halfscreen distance from Adachi, whiffs on close opponents, doesn't even appear when too close to a cornered opponent.
D: Ghost appears about fullscreen distance from Adachi, doesn't even appear unless the opponent is at fullscreen distance or Adachi is backed in a corner.
SB: Ghost homes in on opponent's location regardless of distance. Amazing in pressure since it can hit people crouching and can actually bait DPs/reversals. Does not home vertically so will whiff on opponents high enough in the air.
- Teddie will not get hit by Evil Smile when crouching.
Megidola
![]() 214C/D
214C/D

"Your attention please!"

"Tadah! Megidola!"


- Cannot be cancelled into from normals.
- Unusually good P1 (starter proration) for a throw.
- Launches the opponent higher on Counter Hit, but uniquely, damage does not increase on Counter Hit.
- All versions Fatal Counter on Counter Hit.
- Full Counter Hit recovery.
Adachi grabs the opponent, and then Magatsu-Izanagi smites them with an almighty bolt. This move is a command grab that can be used to help open up turtling opponents. Can be super canceled on normal hit into Heat Riser to start a combo, or Magatsu Mandala for the buffs. Long recovery on whiff like most command grabs and is also complete Counter Hit state during that, so beware the punishment on failure.
All versions launch the opponent higher on CH, so you can convert into a combo without needing to spend resources, and possibilities get even better in the corner.
- Magatsu Mandala Buff: Shock.
- 214C
Has the shortest range and damage out of all of the command grabs, but also has quicker start-up than the D version. This is your basic command grab for tick throws and fast punishes.
- 214D
- Has mid start-up throw invincibility.
Has a longer start-up than both of the other versions, but in exchange has better range than the C version and has some throw invincibility (that does not start on frame 1, but goes all the way through its active frames). As a result, if timed well enough, it can counter defensive throws and throw OS for a handsome reward, as it will Fatal, making Adachi's strike/throw game all that much stronger. The range also makes it very effective mid-pressure, as Adachi can use it to go for throws after more unique strings when paired with his other tools.
- 214C+D
- Has throw invincibility all throughout start-up and active frames.
Best of both worlds between the C and D versions; SB version deals the most raw damage and has the short start-up of the C version, plus the extended range of the D version. On top of that, it sports frame 1 throw invincibility all the way through its active, allowing it to counter throws more often and be more potent of a mix-up in many situations, and also has faster recovery so it's slightly safer on whiff.
SP Skill Attacks
Heat Riser
![]() 236236A/B
236236A/B

Versatile combo tool. Applies a helpful buff. Extremely useful when the Magatsu Mandala buff is active

A fiery upwards slash that appears in Izanagi's location. Can be comboed into 2C. On hit, an icon of Adachi's head in red with a positive up arrow appears on top of his meter bar and he gains a 10% attack boost to all of his attacks as well as a 10% defense boost. (Example: Adachi's j.C deals 880 damage with the buff, as opposed to dealing 800.) All versions are Fatal Recovery.
- Magatsu Mandala Buff: Fear & Poison
A: Fast Start-up, opponent can tech sooner.
B: Slower than A version but more untech time, allowing for 5B or 2C juggle combos. Your go to launcher when you have 50 meter.
SB: The buff is applied even if Heat Riser whiffs or is blocked. Short recovery and a lot of untech time, more follow ups are possible afterwards because of this. When not in awakening, it's the best move to super cancel into if your DP is blocked.
Atom Smasher
![]() 236236C/D (air OK)
236236C/D (air OK)

we actually have to think now :/

A fullscreen multi-slash which is similar to Akihiko's Maziodyne. The move can be used as a combo-ender in some scenarios with tons of damage involved, but leaves Adachi open if the opponent blocks. Fatal Recovery. Since the 2.0 patch, the C/SB versions of the super have increased startup, with the C version getting increased recovery as well. If Adachi does any version of this super in the air, he's stuck on Fatal Counter recovery until he lands.
- Magatsu Mandala Buff: Fear & Panic
C: Fast but Adachi has a lot of recovery. Very punishable on block.
D: Slower start-up but Adachi's recovery is faster. +2 on block, making it the default reversal if he does not have 75 meter.
SB: No longer the same move it used to be. It's now a few frames slower than the C version, but it's still +2 on block. Really good damage on counterhit. If you see or read the enemy doing something that has long recovery, use this and get a combo afterwards. However, it's possible to backdash it on reaction, allowing for a FC punish.
Awakened SP Skill Attacks
Magatsu Mandala
![]() 214214A/B
214214A/B

Robbery defined in a single move

Magatsu Izanagi creates a red vortex. If the attack hits, the opponent will be sucked into the vortex and they will be thrown up to the air. When Adachi uses the attack, a purple icon of Magatsu Izanagi's head with a positive up arrow appears on top of his meter bar and his persona attacks now inflicts several status effects. The buff is applied even if Magatsu Mandala whiffs or is blocked, but NOT if you get hit on the first frames. Only B/SB versions lead into a safejump.
- Magatsu Mandala Buff: Mute & Panic
A: The super comes out at Magatsu Izanagi's current location, useful followup after 2C/j.2C.
B: The super comes out at Adachi's current location. Comboable in the corner with 2A/5A/5B depending on height. Also has combo potential midscreen. Has some invuln on the first frames but will not kick in immediately.
SB: The super comes out at Magatsu Izanagi's current location. In the corner, this super has no height restriction, allowing Adachi to combo off grounded opponents (throw, megidola, DP, etc). Since it's -1, it is the best super to cancel into after a blocked DP.
Ghastly Wail
![]() 214214C/D
214214C/D

Great reversal and deals huge damage as a combo ender

Stab them relentlessly like there's no tomorrow


Downwards claw slash. 0F Command grab. If you see it and you weren't jumping you got hit. If the attack hits, the opponent gets inflicted with Fear. Similar to Elizabeth's Ghastly Wail, additional damage is done if the opponent is already afflicted by Fear. When Izanagi is on the screen (ie. after 2D or 2C), the throw is relative to his position, not Adachi's. If displaced with 2C or 2D, all versions of Ghastly Wail will autocorrect to face the opponent.
- Magatsu Mandala Buff: Huge damage increase on opponents as if they were Feared, also applies Mute & Fear
C: Insanely fast, but deals the least damage. 0F after super flash, really good reversal
D: Slower than the C version, but deals more damage.
SB: It has the same speed as the C version and the same damage as the D version
| Version | Hit State | Max Damage |
|---|---|---|
| C | Neutral | 1000,180,300*2,720 (2500) |
| C | Magatsu Mandala Buff | 1000,180,300*4,1020 (3400) |
| C | Fatal Counter (Fear) | 1300,180,300*4,1020 (3700) |
| D/SB | Neutral | 1000,180,300*2,1200 (2980) |
| D/SB | Magatsu Mandala Buff | 1000,180,300*4,1600 (3980) |
| D/SB | Fatal Counter (Fear) | 1300,180,300*4,1600 (4280) |
Instant Kill
Yomi Drop
![]() 222C+D
222C+D


"How does it feel when I beat you? Are you pissed? Miserable? Frustrated? That's what it's like to lose."


Adachi summons Magatsu Izanagi as he clutches his head in pain, while Magatsu Inaba's entrance starts to form on the ground. If the attack lands, Adachi's IK illustration will appear as Magatsu Izanagi drags the opponent down with him. Magatsu Izanagi strikes the opponent with a devastating blow from his sword and the attack will end. The screen will then cut back to Adachi as he and Magatsu Izanagi disappear in a blanket of red fog. While the start up is fast compared to the other Instant Kills, it can be easily avoided by either jumping or blocking.
External References
 Aigis[★]
 Akihiko Sanada[★]
 Chie Satonaka[★]
 Elizabeth[★]
 Junpei Iori[★]
 Kanji Tatsumi[★]
 Ken Amada[★]
 Labrys[★]
 Margaret[★]
 Marie[★]
 Minazuki[★]
 Mitsuru Kirijo[★]
 Naoto Shirogane[★]
 Rise Kujikawa[★]
 Shadow Labrys[★]
 Sho[★]
 Teddie[★]
 Tohru Adachi[★]
 Yosuke Hanamura[★]
 Yu Narukami[★]
 Yukari Takeba[★]
 Yukiko Amagi[★]
Click [★] for character's full frame data