Scatteraxis (talk | contribs) |
(→Burn To A Crisp!: Added colour to inputs.) |
||
| (11 intermediate revisions by 2 users not shown) | |||
| Line 12: | Line 12: | ||
*'''High Health:''' Taking stray hits as Kanji doesn't mean the end of the world and lets him use his health as a resource to get in. | *'''High Health:''' Taking stray hits as Kanji doesn't mean the end of the world and lets him use his health as a resource to get in. | ||
*'''Comeback Potential:''' In addition to the last two points, Kanji in Awakening is a new kind of beast since the extra defense buffs his already high health, and he gains a fast track to the one of the most damaging and punishing supers in the game. | *'''Comeback Potential:''' In addition to the last two points, Kanji in Awakening is a new kind of beast since the extra defense buffs his already high health, and he gains a fast track to the one of the most damaging and punishing supers in the game. | ||
*'''Furious Action:''' Kanji's Furious Action can trigger both early and in some situations ''unavoidably'' upon being struck, allowing him to use it as a counter on top of a highly invulnerable reversal. It also applies Shock, so he can begin offense. | *'''Furious Action:''' Kanji's Furious Action can trigger both early and in some situations ''unavoidably'' upon being struck at ''any'' range, allowing him to use it as a counter on top of a highly invulnerable and active reversal. It also applies Shock, so he can begin offense. | ||
*'''Shock:''' Numerous Persona moves (5C, 5D, B+D) apply Shock on hit. This restricts the opponent's movement and non-committal escape options, leaving them dangerously at the mercy of Kanji's approach and grappler mix-up. | *'''Shock:''' Numerous Persona moves (5C, 5D, B+D) apply Shock on hit. This restricts the opponent's movement and non-committal escape options, leaving them dangerously at the mercy of Kanji's approach and grappler mix-up. | ||
| cons = | | cons = | ||
| Line 433: | Line 433: | ||
==== ==== | ==== ==== | ||
* Unusual throw; slower than average, but with forward movement | * Unusual throw; slower than average, but with forward movement | ||
* Can be cancelled into from B and C normals | * Can be cancelled into from {{clr|2|B}} and {{clr|3|C}} normals | ||
* Always throws the opponent behind Kanji | * Always throws the opponent behind Kanji | ||
Kanji lunges forward a fair distance before grabbing the opponent. It is slower than other characters' throws and Kanji's C command grab, but has range comparable his D command grab without being terribly risky. Combos into A Additional Cruel Attack. In the corner, you can add a sweep before the Additional Cruel Attack. | Kanji lunges forward a fair distance before grabbing the opponent. It is slower than other characters' throws and Kanji's {{clr|3|C}} command grab, but has range comparable his {{clr|4|D}} command grab without being terribly risky. Combos into {{clr|1|A}} Additional Cruel Attack. In the corner, you can add a sweep before the Additional Cruel Attack. | ||
</div> | </div> | ||
</div> | </div> | ||
| Line 481: | Line 481: | ||
|} | |} | ||
==== ==== | ==== ==== | ||
* Cannot be used during Persona Break | * Cannot be used during Persona Break. | ||
* Skips straight to the attack if hit on start-up. | |||
* Applies Shock on hit. | * Applies Shock on hit. | ||
* Fatal Recovery | * '''Fatal Recovery. | ||
Kanji's DP is a guardpoint attack | Kanji's {{keyword|DP}} is both an attack-type ''and'' a guardpoint attack. Regarding the latter property, it will shock the opponent for almost any attack they land on him at ''any'' distance, throw-types included, as long as it is not stored in a completely separate file from the character. This means that you must be hitting him with Persona attacks to avoid getting counter-shocked from the guardpoint. | ||
The properties of Kanji's DP makes it very obnoxious to deal with; numerous safe-jump setups have to be changed and thus lose strength, or are outright not possible on him at all. It is also very valuable for many match-ups to punish the opponent using their characters' favorite space-control or neutral options such as {{Character Label|P4U2.5|Labrys|30px|label=Labrys}}'s {{MMC|game=P4U2|chara=Labrys|input=236A|label=Chain Knuckle}} or {{Character Label|P4U2.5|Teddie|30px|label=Teddie}}'s {{MMC|game=P4U2|chara=Teddie|input=5B|label={{clr|2|5B}}}}, but at the same time is very risky as any whiffed or baited DP results in Kanji being punished with a Fatal combo. | |||
</div> | </div> | ||
</div> | </div> | ||
| Line 533: | Line 536: | ||
|} | |} | ||
==== ==== | ==== ==== | ||
;236A | ;{{clr|1|236A}} | ||
A poke that can potentially hop over hitboxes to force crouch, and give a 5AA 2B 236C combo on counterhit. Not very useful otherwise. | A poke that can potentially hop over hitboxes to force crouch, and give a {{clr|1|5AA}} > {{clr|2|2B}} > {{clr|3|236C}} combo on counterhit. Not very useful otherwise. | ||
---- | ---- | ||
;236B | ;{{clr|2|236B}} | ||
Pressure reset move that causes massive damage in combos, but will jack up the proration quite quickly with multiple uses. Can be canceled into j.214A/B/ | Pressure reset move that causes massive damage in combos, but will jack up the proration quite quickly with multiple uses. Can be canceled into {{clr|1|j.214A}}/{{clr|2|B}}/{{clr|1|A}}+{{clr|2|B}} on startup. | ||
---- | ---- | ||
; | ;{{clr|1|236A}}+{{clr|2|B}} | ||
Long, horizontal hop that is plus on block, which does not share same move proration wtih 236B, and can be canceled into j.214A/B/ | Long, horizontal hop that is plus on block, which does not share same move proration wtih {{clr|2|236B}}, and can be canceled into {{clr|1|j.214A}}/{{clr|2|B}}/{{clr|1|A}}+{{clr|2|B}} for a different angle than {{clr|2|236B}}~{{clr|1|j.214A}}/{{clr|2|B}}/{{clr|1|A}}+{{clr|2|B}} | ||
---- | ---- | ||
;Air Versions | ;Air Versions | ||
| Line 570: | Line 573: | ||
Added Cruel Attack is an altered version of Cruel Attack that serves as Kanji's own take on other grapplers' OTG (off/on the ground) or advantage-pressing specials. It will home in on a knocked down opponent's position, regardless of distance and hit them OTG for extra damage. Obviously, it is used to let him get back in on the opponent after combos and command grabs, to keep the pressure up and loop his offense. | Added Cruel Attack is an altered version of Cruel Attack that serves as Kanji's own take on other grapplers' OTG (off/on the ground) or advantage-pressing specials. It will home in on a knocked down opponent's position, regardless of distance and hit them OTG for extra damage. Obviously, it is used to let him get back in on the opponent after combos and command grabs, to keep the pressure up and loop his offense. | ||
---- | ---- | ||
;Knockdown > 236A | ;Knockdown > {{clr|1|236A}} | ||
* Minimum damage: 200 | * Minimum damage: 200 | ||
* Recovery is reduced if the attack is whiffed | * Recovery is reduced if the attack is whiffed | ||
| Line 578: | Line 581: | ||
If this move whiffs due to the opponent's delayed tech, the recovery is greatly shortened, so Kanji will not be made open to a punish if such a situation were to happen and can still go on offense. | If this move whiffs due to the opponent's delayed tech, the recovery is greatly shortened, so Kanji will not be made open to a punish if such a situation were to happen and can still go on offense. | ||
---- | ---- | ||
;Knockdown > 236B | ;Knockdown > {{clr|2|236B}} | ||
* Can be cancelled to j.214X during start-up | * Can be cancelled to j.214X during start-up | ||
* Recovery can be cancelled into attacks if the attack connects | * Recovery can be cancelled into attacks if the attack connects | ||
A more damaging version of OTG 236A with normal and special cancels in the recovery on hit, but unfortunately is slower so it does not combo after any knockdown unless it is in a Fatal Counter combo. If the opponent chooses not to tech or delays their tech for too long, this can hit and allow Kanji to deal great damage by continuing a combo afterwards, but that does not happen often or in some cases even at all, thus raw OTG 236B lacks a lot of use. | A more damaging version of OTG {{clr|1|236A}} with normal and special cancels in the recovery on hit, but unfortunately is slower so it does not combo after any knockdown unless it is in a Fatal Counter combo. If the opponent chooses not to tech or delays their tech for too long, this can hit and allow Kanji to deal great damage by continuing a combo afterwards, but that does not happen often or in some cases even at all, thus raw OTG {{clr|2|236B}} lacks a lot of use. | ||
However, OTG 236B is a very strong Fatal Counter combo tool that is used in almost every FC combo for its high damage and OTG properties. It can land after a FC command grab on moves with Fatal recovery, or after sweep hitting an airborne opponent in a Fatal combo. | However, OTG {{clr|2|236B}} is a very strong Fatal Counter combo tool that is used in almost every FC combo for its high damage and OTG properties. It can land after a FC command grab on moves with Fatal recovery, or after sweep hitting an airborne opponent in a Fatal combo. | ||
As of 2.0, it shares the same gimmick of regular 236B in that it can be cancelled to j.214X during its start-up, although putting two gimmicks together doesn't help this move much. | As of 2.0, it shares the same gimmick of regular {{clr|2|236B}} in that it can be cancelled to j.214X during its start-up, although putting two gimmicks together doesn't help this move much. | ||
---- | ---- | ||
;Knockdown > 236A+B | ;Knockdown > {{clr|1|236A}}+{{clr|2|B}} | ||
* Minimum damage: 450 | * Minimum damage: 450 | ||
A variation of OTG 236A with higher minimum damage and faster recovery, allowing Kanji to punishing the opponent refusing to tech after this hits. Typically used to squeeze the very last bit of damage out of a combo if it will kill, else this is generally not the best use of meter for Kanji. | A variation of OTG {{clr|1|236A}} with higher minimum damage and faster recovery, allowing Kanji to punishing the opponent refusing to tech after this hits. Typically used to squeeze the very last bit of damage out of a combo if it will kill, else this is generally not the best use of meter for Kanji. | ||
</div> | </div> | ||
</div> | </div> | ||
| Line 618: | Line 621: | ||
* Can be combo'd into if the opponent is in spin state | * Can be combo'd into if the opponent is in spin state | ||
* Often referred to as just "Grab" | * Often referred to as just "Grab" | ||
Kanji grabs the opponent and throws them across the screen, before Take-Mikazuchi appears to stab and electrocute them. His command grab series serves as his main mix-up and an alternative punish tool in his lack of traditional high-low mix-up and fast Fatal starters. All versions set up for 5D oki or a 236A followup. afterward. | Kanji grabs the opponent and throws them across the screen, before Take-Mikazuchi appears to stab and electrocute them. His command grab series serves as his main mix-up and an alternative punish tool in his lack of traditional high-low mix-up and fast Fatal starters. All versions set up for {{clr|4|5D}} oki or a {{clr|1|236A}} followup. afterward. | ||
All versions can also be extended in the corner by linking a 2B > 236C for extra damage. | All versions can also be extended in the corner by linking a {{clr|2|2B}} > {{clr|3|236C}} for extra damage. | ||
---- | ---- | ||
;214C | ;{{clr|3|214C}} | ||
* Fast, bread and butter command grab | * Fast, bread and butter command grab | ||
* No invulnerability | * No invulnerability | ||
Kanji's 214C is the main command grab you will be using, as it is the fastest meterless version, making it great for his RPS mix-up game and is even generally more useful than his strange normal throw. Also has relatively good range compared to the other command grabs in this game. Beware the long recovery on whiff, as if the opponent jumps your grab, they can punish with a full combo. | Kanji's {{clr|3|214C}} is the main command grab you will be using, as it is the fastest meterless version, making it great for his RPS mix-up game and is even generally more useful than his strange normal throw. Also has relatively good range compared to the other command grabs in this game. Beware the long recovery on whiff, as if the opponent jumps your grab, they can punish with a full combo. | ||
---- | ---- | ||
;214D | ;{{clr|4|214D}} | ||
* Delayed command grab with mid-startup invincibility | * Delayed command grab with mid-startup invincibility | ||
* Holding [6] increases forward movement at the cost of startup | * Holding [6] increases forward movement at the cost of startup | ||
Kanji's slower command grab, designed to go through gaps in offense or pressure with its invincibility, and can grab from even further if you choose to extend the range while also dealing more damage than the C version. It's only invulnerable from frame 4? onwards, preventing it from being used on wakeup or on just any gap in pressure. This, alongside its even longer whiff recovery than C grab makes it very situational and risky to use without a read or as a match-up solution, and should not be your first choice of a defensive option. | Kanji's slower command grab, designed to go through gaps in offense or pressure with its invincibility, and can grab from even further if you choose to extend the range while also dealing more damage than the {{clr|3|C}} version. It's only invulnerable from frame 4? onwards, preventing it from being used on wakeup or on just any gap in pressure. This, alongside its even longer whiff recovery than {{clr|3|C}} grab makes it very situational and risky to use without a read or as a match-up solution, and should not be your first choice of a defensive option. | ||
---- | ---- | ||
;214C+D | ;{{clr|3|214C}}+{{clr|4|D}} | ||
* Kanji's fastest grab | * Kanji's fastest grab | ||
* Retains some invulnerability like the D version | * Retains some invulnerability like the {{clr|4|D}} version | ||
* Applies Shock on hit | * Applies Shock on hit | ||
Now THIS is the great defensive option, if you have the meter for it. SB grab is a good mix of his other two grabs: very fast start-up and moves Kanji forward a bit to give it some extra range, while also having invincibility on start-up, allowing Kanji to punish even 1F gaps in pressure without needing his super command grab. The only catch is that it still does not have frame 1 invincibility, so cannot be used as a wake-up reversal against meaties. This grab causes Shock on hit, so the mix-up situation afterward will be a knowledge check and truest possible RPS situation for the opponent, as it seals off their conventional and non-committal options for escaping. | Now THIS is the great defensive option, if you have the meter for it. SB grab is a good mix of his other two grabs: very fast start-up and moves Kanji forward a bit to give it some extra range, while also having invincibility on start-up, allowing Kanji to punish even 1F gaps in pressure without needing his super command grab. The only catch is that it still does not have frame 1 invincibility, so cannot be used as a wake-up reversal against meaties. This grab causes Shock on hit, so the mix-up situation afterward will be a knowledge check and truest possible RPS situation for the opponent, as it seals off their conventional and non-committal options for escaping. | ||
| Line 664: | Line 667: | ||
Take-Mikazuchi grabs the opponent out of the air and electrocutes them. This is Kanji's set of grappler anti-air specials to deal with opponents in the air space in neutral, which he can't cover well otherwise. They can also allow Kanji to convert into extended combos or consistently land a knockdown at the end of combos. | Take-Mikazuchi grabs the opponent out of the air and electrocutes them. This is Kanji's set of grappler anti-air specials to deal with opponents in the air space in neutral, which he can't cover well otherwise. They can also allow Kanji to convert into extended combos or consistently land a knockdown at the end of combos. | ||
---- | ---- | ||
;236C | ;{{clr|3|236C}} | ||
* Fastest version | * Fastest version | ||
Take-Mikazuchi leaps immediately upward a steep angle. Is faster than his 2B, has less recovery on whiff and reaches higher, but lacks horizontal range and most importantly lacks head invulnerability, so it is not recommended to use this over 2B as an anti-air. The C version is typically used as a more reliable ender to Kanji's combos, as it is easy to land and less prone to dropping at the end of longer or worse prorating combos compared to 236B~j.214B. It can also be used as a hard call-out on opponents trying to shimmy Kanji's defensive command throws by jumping backwards. | Take-Mikazuchi leaps immediately upward a steep angle. Is faster than his {{clr|2|2B}}, has less recovery on whiff and reaches higher, but lacks horizontal range and most importantly lacks head invulnerability, so it is not recommended to use this over {{clr|2|2B}} as an anti-air. The {{clr|3|C}} version is typically used as a more reliable ender to Kanji's combos, as it is easy to land and less prone to dropping at the end of longer or worse prorating combos compared to {{clr|2|236B}}~{{clr|2|j.214B}}. It can also be used as a hard call-out on opponents trying to shimmy Kanji's defensive command throws by jumping backwards. | ||
Another combo quirk is that 236C is more advantageous the higher in the air the opponent is when they are grabbed, allowing for a pick up with 5A afterwards if the opponent is launched high enough in a corner combo. | Another combo quirk is that {{clr|3|236C}} is more advantageous the higher in the air the opponent is when they are grabbed, allowing for a pick up with {{clr|1|5A}} afterwards if the opponent is launched high enough in a corner combo. | ||
---- | ---- | ||
;236D | ;{{clr|4|236D}} | ||
* Kanji can move after the initial placement | * Kanji can move after the initial placement | ||
* Automatically triggers on airborne opponents after 43F | * Automatically triggers on airborne opponents after 43F | ||
Take-Mikazuchi is set down instead of leaping immediately, and after a long startup, it will leap out and attempt to grab at the opponent, or automatically if they are airborne past about half the start-up time. D version makes Take-Mikazuchi also travel at a more shallow angle that covers more horizontal screen space. Not very useful as Kanji can't use Persona normals / moves while it's set, and thus Kanji cannot threaten much if they can't jump, but he can still move in at the same time and it can catch opponents while superjumping. Loses to opponents double jumping or air backdashing during their jump. | Take-Mikazuchi is set down instead of leaping immediately, and after a long startup, it will leap out and attempt to grab at the opponent, or automatically if they are airborne past about half the start-up time. {{clr|4|D}} version makes Take-Mikazuchi also travel at a more shallow angle that covers more horizontal screen space. Not very useful as Kanji can't use Persona normals / moves while it's set, and thus Kanji cannot threaten much if they can't jump, but he can still move in at the same time and it can catch opponents while superjumping. Loses to opponents double jumping or air backdashing during their jump. | ||
236D finds its use as Kanji's main OMB combo part, as that gives him enough time to set it up outside of CH 2B. | {{clr|4|236D}} finds its use as Kanji's main OMB combo part, as that gives him enough time to set it up outside of CH {{clr|2|2B}}. | ||
---- | ---- | ||
;236C+D | ;{{clr|3|236C}}+{{clr|4|D}} | ||
* Kanji can move after the initial placement | * Kanji can move after the initial placement | ||
* Automatically triggers on airborne opponents after 19F | * Automatically triggers on airborne opponents after 19F | ||
Faster version of 236D that will sit in place for longer, is angled even more horizontal, and tracks the opponent's jump much earlier but cannot catch any superjumping opponent. Great for catching moves like Mitsuru j.C or Liz j.B, but is still very reactable. | Faster version of {{clr|4|236D}} that will sit in place for longer, is angled even more horizontal, and tracks the opponent's jump much earlier but cannot catch any superjumping opponent. Great for catching moves like Mitsuru {{clr|3|j.C}} or Liz {{clr|2|j.B}}, but is still very reactable. | ||
236C+D also lets Kanji get an extended combo or conversion off of long range air hit 5C, or after normal hit 2B to help improve his damage output. | {{clr|3|236C}}+{{clr|4|D}} also lets Kanji get an extended combo or conversion off of long range air hit {{clr|3|5C}}, or after normal hit {{clr|2|2B}} to help improve his damage output. | ||
</div> | </div> | ||
</div> | </div> | ||
| Line 710: | Line 713: | ||
* Displaces Take-Mikazuchi | * Displaces Take-Mikazuchi | ||
* Often referred to as just "Tackle" | * Often referred to as just "Tackle" | ||
Kanji's Persona tackle. Kanji will cross his arms and pose while Take-Mikazuchi appears and tackles across the screen with full projectile armor. Long start-up but very plus on block, this is intended to plow through certain projectile attacks, and give an opportunity to get in if Kanji is close enough. Any Take-Mikazuchi attacks barring his D normals will make him attack from where he is on the screen rather than Kanji's location shortly after Primal Force. Can be 5A'd on reaction by most characters. | Kanji's Persona tackle. Kanji will cross his arms and pose while Take-Mikazuchi appears and tackles across the screen with full projectile armor. Long start-up but very plus on block, this is intended to plow through certain projectile attacks, and give an opportunity to get in if Kanji is close enough. Any Take-Mikazuchi attacks barring his {{clr|4|D}} normals will make him attack from where he is on the screen rather than Kanji's location shortly after Primal Force. Can be {{clr|1|5A}}'d on reaction by most characters. | ||
Can also be used in some corner combos as it launches the opponent pretty high on hit. | Can also be used in some corner combos as it launches the opponent pretty high on hit. | ||
;[4]6C | ;{{clr|3|[4]6C}} | ||
---- | ---- | ||
;[4]6D | ;{{clr|4|[4]6D}} | ||
---- | ---- | ||
;[4]6C+D | ;{{clr|3|[4]6C}}+{{clr|4|D}} | ||
</div> | </div> | ||
</div> | </div> | ||
| Line 744: | Line 747: | ||
* Invincible to throws | * Invincible to throws | ||
* Whiffs against crouching opponents | * Whiffs against crouching opponents | ||
* Can be cancelled into during the start-up of ground B Cruel Attack (236B) | * Can be cancelled into during the start-up of ground {{clr|2|B}} Cruel Attack ({{clr|2|236B}}) | ||
* Often referred to as just "Dive", among other colloquial names | * Often referred to as just "Dive", among other colloquial names | ||
Kanji's infamous air dive, a pseudo-low from the air as it hits standing and airborne opponents only. Kanji can use this as a way to mix up an opponent looking to block a j.B from him on his way down, or to fling himself at and punish an opponent setting up or playing air footsies in neutral. Not recommended to be used randomly without a read because the reactable start-up and long recovery makes it serve as just a knowledge check in most situations, as Kanji can be punished heavily by an opponent who knows how to defend against this. | Kanji's infamous air dive, a pseudo-low from the air as it hits standing and airborne opponents only. Kanji can use this as a way to mix up an opponent looking to block a {{clr|2|j.B}} from him on his way down, or to fling himself at and punish an opponent setting up or playing air footsies in neutral. Not recommended to be used randomly without a read because the reactable start-up and long recovery makes it serve as just a knowledge check in most situations, as Kanji can be punished heavily by an opponent who knows how to defend against this. | ||
On the other hand, this move is ''incredibly'' useful to end combos with, as it can be led into from most juggles thanks to the B Cruel Attack, and then leads to either OTG Cruel Attack okizeme or more unburstable damage if super cancelled. Alternatively, it can also be used to set up air reset situations with Kanji that are tricky to escape. | On the other hand, this move is ''incredibly'' useful to end combos with, as it can be led into from most juggles thanks to the {{clr|2|B}} Cruel Attack, and then leads to either OTG Cruel Attack okizeme or more unburstable damage if super cancelled. Alternatively, it can also be used to set up air reset situations with Kanji that are tricky to escape. | ||
---- | ---- | ||
;j.214A | ;{{clr|1|j.214A}} | ||
Kanji leaps forward a very short distance. Has a rare use as an anti-anti-air at close range or just changing Kanji's air trajectory, but poor safety and reward compared to just using j.C. | Kanji leaps forward a very short distance. Has a rare use as an anti-anti-air at close range or just changing Kanji's air trajectory, but poor safety and reward compared to just using {{clr|3|j.C}}. | ||
---- | ---- | ||
;j.214B | ;{{clr|2|j.214B}} | ||
Similar to j.214A, but goes further and deals more damage on a successful grab. The dive of choice for ending combos, and is a little better for catching the opponent in neutral situations. | Similar to {{clr|1|j.214A}}, but goes further and deals more damage on a successful grab. The dive of choice for ending combos, and is a little better for catching the opponent in neutral situations. | ||
---- | ---- | ||
;j.214A+B | ;{{clr|1|j.214A}}+{{clr|2|B}} | ||
Starts up considerably faster and does more damage than the other two versions, and will also uniquely track the opponent's position on execution from almost any range. This version is typically reversed for hard reads in neutral, or in a last ditch effort to reach the opponent. | Starts up considerably faster and does more damage than the other two versions, and will also uniquely track the opponent's position on execution from almost any range. This version is typically reversed for hard reads in neutral, or in a last ditch effort to reach the opponent. | ||
</div> | </div> | ||
| Line 786: | Line 789: | ||
Kanji's autocombo super, will either throw a chair at a distance or go into a 3 hit combo if the opponent is close enough. OMCing at the second hit allows you to combo into his grab or his supergrab. Fantastic damage and relatively good p1/p2 scaling, allowing for heavily damaging combos afterwards. | Kanji's autocombo super, will either throw a chair at a distance or go into a 3 hit combo if the opponent is close enough. OMCing at the second hit allows you to combo into his grab or his supergrab. Fantastic damage and relatively good p1/p2 scaling, allowing for heavily damaging combos afterwards. | ||
{{clr|1|236236A}}+{{clr|2|B}} will cause wallslams between both walls, similar to Naoto's reversal kick, allowing for Kanji to combo {{clr|3|236C}} or {{clr|3|5C}} afterwards. {{clr|1|236236A}}+{{clr|2|B}} also has very high minimum damage. | |||
</div> | </div> | ||
</div> | </div> | ||
| Line 818: | Line 821: | ||
If Kanji is Persona Broken, he can still use Burn to a Crisp. If the opponent is grabbed, instead of the normal animation, Kanji will perform a special version of Ass Whoopin', Tatsumi-Style. | If Kanji is Persona Broken, he can still use Burn to a Crisp. If the opponent is grabbed, instead of the normal animation, Kanji will perform a special version of Ass Whoopin', Tatsumi-Style. | ||
---- | ---- | ||
;214214C | ;{{clr|3|214214C}} | ||
Fast, invuln supergrab, slightly slower than his 214C. | Fast, invuln supergrab, slightly slower than his {{clr|3|214C}}. | ||
---- | ---- | ||
;214214D | ;{{clr|4|214214D}} | ||
Longer startup, longer invuln and goes further than 214214C. | Longer startup, longer invuln and goes further than {{clr|3|214214C}}. | ||
---- | ---- | ||
; | ;{{clr|3|214214C}}+{{clr|4|D}} | ||
Does an additional thousand damage over the other two variations, while being the slowest version of all 3 grabs. Moves further forward similarly to 214214D. | Does an additional thousand damage over the other two variations, while being the slowest version of all 3 grabs. Moves further forward similarly to {{clr|4|214214D}}. | ||
</div> | </div> | ||
</div> | </div> | ||
Revision as of 21:12, 19 May 2022
This can be due to patches to the game, or developments in the metagame. You can help by updating it.
This can be for a variety of reasons including but not limited to: spelling mistakes, unnecessary information, poor formatting, and other metrics per common sense reasoning.
Consider helping rewrite it.
- Punishing Hits: Kanji gets high damage off of landing Counter Hits and with meter usage, and his command grabs are both potent and un-burstable. They also make for excellent, fast punishes.
- High Health: Taking stray hits as Kanji doesn't mean the end of the world and lets him use his health as a resource to get in.
- Comeback Potential: In addition to the last two points, Kanji in Awakening is a new kind of beast since the extra defense buffs his already high health, and he gains a fast track to the one of the most damaging and punishing supers in the game.
- Furious Action: Kanji's Furious Action can trigger both early and in some situations unavoidably upon being struck at any range, allowing him to use it as a counter on top of a highly invulnerable and active reversal. It also applies Shock, so he can begin offense.
- Shock: Numerous Persona moves (5C, 5D, B+D) apply Shock on hit. This restricts the opponent's movement and non-committal escape options, leaving them dangerously at the mercy of Kanji's approach and grappler mix-up.
- Mobility: While keeping universal movement options is good for a grappler, it's still quite poor compared to the rest of the cast. His dash startup in particular makes his neutral and pressure worse, for example.
- Poor Midrange: Kanji severely lacks fast, safe pokes and anti-air options on par with the rest of the cast, requiring him to work a lot off of reads to accomplish things in neutral. This, paired with his less-than-average Persona cards limiting his poking options makes neutral a pain.
- Flawed Mix-up: His RPS mix-up is potent, but is obviously very flawed by nature, as it doesn't lend itself to the most success and strong opponents and characters can have numerous ways to outplay or even hard call it out if it doesn't succeed. He also severely lacks a good traditional high-low mix-up game to fall back on.
 | |
| Health | |
| 10,500 | |
| Backdash | |
| 26F (1~6F Inv All) | |
| Persona Cards | |
| 3 | |
| Combo Rate | |
| 60% | |
| Fastest Attack | |
| Reversal Type | |
| Fatal Starters | |
| Fatal RecoveryAny moves that put this character in a state where any Counter Hit will force a Fatal Counter. | |
Normal Attacks
5A


- 5A
- Kanji's fastest button
Solid 5A, serves as the main strike option in Kanji's RPS mix-up game due to its speed and chain options. Can't be low profiled in any way and has great horizontal range. Bad advantage on block though, so always try to cancel into 5AA or any other safer button.
- 5AA
- Moves Kanji forward
Kanji's 5AA is a great addition to his arsenal. While it does lack the vertical hitbox of his Shadow 5AA and is more negative on block than it, the fact it moves him forward ensures he won't be too far away to confirm on a grounded opponent, and leaves him at the perfect spacing to use other normals for frametraps or his grab to open them up. Also useful for combos as it combos directly into 2B on crouching hit.
- 5AAA
- Technically a strike.
- Leaves Kanji airborne on hit.
Kanji's Normal 5AAA is an incredible improvement over his Shadow one - while risky to use as a frametrap, the option is there, and thanks to the movement of 5AA you can confirm into this after almost every major combo route, ensuring you have the option to get meter and burst bonus at the end of your combo, or better damage from a cancel into j.214A.


- 5A
- 6 frame startup, 1f slower than the fastest jabs.
Solid 5A. Can't be low profiled in any way and has great horizontal range.
- 5AA
- Excellent frame advantage and vertical reach.
Surprisingly not as good for tick throws as his Normal 5AA, but still great for pressure resets due to its frame advantage.
- 5AAA
- Good proration for continuing combos.
5B

You want none

- Projectile attribute, clashes with 1-hit projectiles
- Range increases when charged
- Causes spin state on CH or if charged
- Has uniquely short hit/blockstun
Kanji's 5B is a projectile attack with no hurtbox that hits both in front of him and behind him, with relatively good numbers on block for setting up mixup. Full charging leaves you at +2, allowing you to stop the opponent from mashing on you quite easily. Another quirk about this move is that its hitstun and blockstun is abnormally short, even shorter than that of A normals. It's both a blessing and a curse, as it means Kanji can go for near immediate mix-ups / RPS on block, but also that his 5B > 2B chain combo on crouching hit is prone to dropping if not executed properly. 5B can also chain into 2B in juggle combos for some damage optimization.
If you're looking to do 5B, 5B in a pressure sequence, be careful not to press the second 5B too quickly, as if you do, the projectile will not come out since the old one will still be dissipating.
2A

- Kanji's fastest recovering normal
Standard low kick. Useful for meaties, hit-confirm strings, and for stopping the opponent from trying to upback during pressure strings. 0 on block just like 5B, allowing some more stagger pressure. However, if people are hopping to avoid Kanji's grabs, then 2A will whiff.
2B

Who the hell brings a chair to a fight anyways?

- Dash cancellable, -16 on block
Kanji swings his chair up for a slow, but high damage 2B. It can be difficult to anti air using this move due to it's speed, but it has very long head invulnerability frames, and on CH it can combo into 5C for high damage. You can forward dash cancel this move, but it's not all that useful. 2B > 5B whiff is one way to safely confirm whether your 2B anti aired in time or not.
j.A

- Cannot hit crouching opponents.
- Slower than average.
A slow, angled punch. While it is one of Kanji's fastest air to air options, it won't see too much use.
j.B

I take it back, a chair is better than a sword.

- Huge air button with a great hitbox.
Kanji's j.B is a fantastic poke, but its speed means it will lose to air-to-air buttons relatively often. j.236A/B can make it plus if he connects it at the tip or is too far away once he would land.
All Out Attack
5A+B

- Can increase range by holding [6] during startup
- Increasing range also increases guard point frames and startup, and worsens frame advantage on block
- Values in brackets [] are when AoA is range increased.
Kanji headbutts the opponent for a very manly universal overhead. Relatively fast AoA that is actually safe on block. Kanji has better mix-up surrounding his command grab, so his AoA is not used often. Uniquely, he can hold forward to increase the range on his AoA, making it similar to Sho/Minazuki's in that he can use it to blow through the opponent's mid-range attacks to score a combo. This is risky, but can still useful for him since his mobility and neutral are lacking.
Sweep
2A+B

- Now has Chest invulnerability!
- Low profiles during recovery.
Has gained new use in combo routes due to allowing for 236B followups when hitting an airborne opponent in Fatal combos.
Persona Attacks
5C

- Dash cancellable, -11 on block
- Can be held with [C], release after 50F for "just-frame" version that deals 1.5x damage and Fatal Counters on normal hit
- Alternatively, you can hold it until the move cancels itself
- Applies Shock status on hit, paralyzing the opponent
- Ground bounces on air hit
Take-Mikazuchi slams his lightning bolt forward. Kanji's 5C is relatively slow, but boasts high damage and long range. This is Kanji's closest thing to a normal ground poke among his numerous situational moves, so don't be afraid to throw it out occasionally to catch an opponent off guard as they try to space or zone you out. On any hit the opponent is Shocked, allowing Kanji to gain some ground or set up D button lightning to begin an offense, but on air hit Kanji can even spend meter to go into a full combo. Do note, the attack does not hit any higher than Kanji's head, allowing for the opponent to airdash over it.
5C's damage, hitstun, range, and ground bounce makes it a key combo part in a lot of combos for Kanji, as it can be chained into from any CH starter, and itself can basically go into any of his other moves on Counter Hit.
There's not much to be said about the "just-frame" version and the feint, and you can safely ignore them. They're both gimmicks that don't help Kanji at all, because in most if not all situations, you're going to want to let 5C rip immediately. They are not going to get hit by a 64-frame mid.
2C

- Dash cancellable, -16 on block
- Can be held with [C], release after 54F for "just-frame" version that deals 1.5x damage and Fatal Counters on normal hit
- Alternatively, you can hold it until the move cancels itself
- Vacuums the opponent on hit/block
- Forces Fatal Counter on Counter Hit
Take-Mikazuchi sweeps the opponent in towards Kanji. Incredibly long start-up, but is also incredibly plus on block, putting the opponent at Kanji's mercy in terms of mix-up. This can be used in extended blockstrings to feel out an opponent's habits, or to bring the opponent in range of Kanji after a blocked 5C to start pressure / RPS. Beware that 2C is Foot attribute, allowing for characters to hop over it. It is also Kanji's only Fatal starter, so 2C is vital for punishes.
Similar to 5C, you can safely ignore the "just-frame" and feint, even moreso since 2C is already a Fatal starter.
j.C

- Can be held with [C]
- Crumples on Counter Hit
Kanji jumps back as Take-Mikazuchi goes to crush the opponent. This is Kanji's primary anti-anti air; it can be used to bait out and punish an opponent attempting to 2B Kanji's jump, as it keeps him out of the way and the Persona will trade at worst. Unfortunately no longer causes Fatal Counter on Counter Hit, but can still allow Kanji to go into a nice combo.
5D, 2D, j.D

- Press D again to fire additional lightning bolts, up to 3 more times.
- 2D is the closest to Kanji, followed by 5D, with j.D being the farthest.
- Applies Shock on hit.
Kanji's D button makes Take-Mikazuchi appear and shoot lightning at one of 3 pre-set locations. No longer has projectile invuln during the lightning strikes. Primarily used to close the gap while also setting up projectile okizeme at the same time after either of his throws connect.
Universal Mechanics
Ground Throw
C+D

- Unusual throw; slower than average, but with forward movement
- Can be cancelled into from B and C normals
- Always throws the opponent behind Kanji
Kanji lunges forward a fair distance before grabbing the opponent. It is slower than other characters' throws and Kanji's C command grab, but has range comparable his D command grab without being terribly risky. Combos into A Additional Cruel Attack. In the corner, you can add a sweep before the Additional Cruel Attack.
Air Throw
j.C+D

What A Pain!
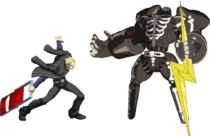
![]() B+D
B+D

You saying I like dudes?

- Cannot be used during Persona Break.
- Skips straight to the attack if hit on start-up.
- Applies Shock on hit.
- Fatal Recovery.
Kanji's DP Dragon Punch A move that has invulnerability during its startup, long recovery, and a rising motion. is both an attack-type and a guardpoint attack. Regarding the latter property, it will shock the opponent for almost any attack they land on him at any distance, throw-types included, as long as it is not stored in a completely separate file from the character. This means that you must be hitting him with Persona attacks to avoid getting counter-shocked from the guardpoint.
The properties of Kanji's DP makes it very obnoxious to deal with; numerous safe-jump setups have to be changed and thus lose strength, or are outright not possible on him at all. It is also very valuable for many match-ups to punish the opponent using their characters' favorite space-control or neutral options such as File:P4U2.5 Labrys Icon.png Labrys's Chain KnuckleGuard Cancel Attack
6A+B while blocking
Kanji's guard cancel attack. Has guard point, but slow and allows characters to jump over Kanji in blockstrings quite easily.
Skill Attacks
Cruel Attack
236A/B (air OK)

get bent get bent get bent

- 236A
A poke that can potentially hop over hitboxes to force crouch, and give a 5AA > 2B > 236C combo on counterhit. Not very useful otherwise.
- 236B
Pressure reset move that causes massive damage in combos, but will jack up the proration quite quickly with multiple uses. Can be canceled into j.214A/B/A+B on startup.
- 236A+B
Long, horizontal hop that is plus on block, which does not share same move proration wtih 236B, and can be canceled into j.214A/B/A+B for a different angle than 236B~j.214A/B/A+B
- Air Versions
Kanji leaps forward with his chair similar to the ground version. Button determines distance, all of them are plus on block. Be careful not to whiff!
Added Cruel Attack
236A/B after knockdown

Get them the hell back up for more!

- Special only comes out if the opponent is completely knocked down
Added Cruel Attack is an altered version of Cruel Attack that serves as Kanji's own take on other grapplers' OTG (off/on the ground) or advantage-pressing specials. It will home in on a knocked down opponent's position, regardless of distance and hit them OTG for extra damage. Obviously, it is used to let him get back in on the opponent after combos and command grabs, to keep the pressure up and loop his offense.
- Knockdown > 236A
- Minimum damage: 200
- Recovery is reduced if the attack is whiffed
- Cannot be cancelled into anything on hit
The fastest knockdown follow-up that deals a minimum of 200 damage, while setting Kanji up next to the opponent for more mix-ups. You will most likely be using this one after most knockdowns you land in the middle of a round if you aren't able to kill. Essential to Kanji's gameplan even with the high recovery on hit, as Kanji is still at an advantage and command throw range despite it.
If this move whiffs due to the opponent's delayed tech, the recovery is greatly shortened, so Kanji will not be made open to a punish if such a situation were to happen and can still go on offense.
- Knockdown > 236B
- Can be cancelled to j.214X during start-up
- Recovery can be cancelled into attacks if the attack connects
A more damaging version of OTG 236A with normal and special cancels in the recovery on hit, but unfortunately is slower so it does not combo after any knockdown unless it is in a Fatal Counter combo. If the opponent chooses not to tech or delays their tech for too long, this can hit and allow Kanji to deal great damage by continuing a combo afterwards, but that does not happen often or in some cases even at all, thus raw OTG 236B lacks a lot of use.
However, OTG 236B is a very strong Fatal Counter combo tool that is used in almost every FC combo for its high damage and OTG properties. It can land after a FC command grab on moves with Fatal recovery, or after sweep hitting an airborne opponent in a Fatal combo.
As of 2.0, it shares the same gimmick of regular 236B in that it can be cancelled to j.214X during its start-up, although putting two gimmicks together doesn't help this move much.
- Knockdown > 236A+B
- Minimum damage: 450
A variation of OTG 236A with higher minimum damage and faster recovery, allowing Kanji to punishing the opponent refusing to tech after this hits. Typically used to squeeze the very last bit of damage out of a combo if it will kill, else this is generally not the best use of meter for Kanji.
This'll Hurt!
214C/D

Stab 'em!


- All Versions
- Can be used while Persona broken, but deals much less damage
- Can be combo'd into if the opponent is in spin state
- Often referred to as just "Grab"
Kanji grabs the opponent and throws them across the screen, before Take-Mikazuchi appears to stab and electrocute them. His command grab series serves as his main mix-up and an alternative punish tool in his lack of traditional high-low mix-up and fast Fatal starters. All versions set up for 5D oki or a 236A followup. afterward.
All versions can also be extended in the corner by linking a 2B > 236C for extra damage.
- 214C
- Fast, bread and butter command grab
- No invulnerability
Kanji's 214C is the main command grab you will be using, as it is the fastest meterless version, making it great for his RPS mix-up game and is even generally more useful than his strange normal throw. Also has relatively good range compared to the other command grabs in this game. Beware the long recovery on whiff, as if the opponent jumps your grab, they can punish with a full combo.
- 214D
- Delayed command grab with mid-startup invincibility
- Holding [6] increases forward movement at the cost of startup
Kanji's slower command grab, designed to go through gaps in offense or pressure with its invincibility, and can grab from even further if you choose to extend the range while also dealing more damage than the C version. It's only invulnerable from frame 4? onwards, preventing it from being used on wakeup or on just any gap in pressure. This, alongside its even longer whiff recovery than C grab makes it very situational and risky to use without a read or as a match-up solution, and should not be your first choice of a defensive option.
- 214C+D
- Kanji's fastest grab
- Retains some invulnerability like the D version
- Applies Shock on hit
Now THIS is the great defensive option, if you have the meter for it. SB grab is a good mix of his other two grabs: very fast start-up and moves Kanji forward a bit to give it some extra range, while also having invincibility on start-up, allowing Kanji to punish even 1F gaps in pressure without needing his super command grab. The only catch is that it still does not have frame 1 invincibility, so cannot be used as a wake-up reversal against meaties. This grab causes Shock on hit, so the mix-up situation afterward will be a knowledge check and truest possible RPS situation for the opponent, as it seals off their conventional and non-committal options for escaping.
SB grab is also nice because it does not have Fatal recovery, unlike his DP which can also punish 1F gaps but will be punished with a Fatal combo if it is baited.
Gotcha!
![]() 236C/D
236C/D

Restricted airspace

Take-Mikazuchi grabs the opponent out of the air and electrocutes them. This is Kanji's set of grappler anti-air specials to deal with opponents in the air space in neutral, which he can't cover well otherwise. They can also allow Kanji to convert into extended combos or consistently land a knockdown at the end of combos.
- 236C
- Fastest version
Take-Mikazuchi leaps immediately upward a steep angle. Is faster than his 2B, has less recovery on whiff and reaches higher, but lacks horizontal range and most importantly lacks head invulnerability, so it is not recommended to use this over 2B as an anti-air. The C version is typically used as a more reliable ender to Kanji's combos, as it is easy to land and less prone to dropping at the end of longer or worse prorating combos compared to 236B~j.214B. It can also be used as a hard call-out on opponents trying to shimmy Kanji's defensive command throws by jumping backwards.
Another combo quirk is that 236C is more advantageous the higher in the air the opponent is when they are grabbed, allowing for a pick up with 5A afterwards if the opponent is launched high enough in a corner combo.
- 236D
- Kanji can move after the initial placement
- Automatically triggers on airborne opponents after 43F
Take-Mikazuchi is set down instead of leaping immediately, and after a long startup, it will leap out and attempt to grab at the opponent, or automatically if they are airborne past about half the start-up time. D version makes Take-Mikazuchi also travel at a more shallow angle that covers more horizontal screen space. Not very useful as Kanji can't use Persona normals / moves while it's set, and thus Kanji cannot threaten much if they can't jump, but he can still move in at the same time and it can catch opponents while superjumping. Loses to opponents double jumping or air backdashing during their jump.
236D finds its use as Kanji's main OMB combo part, as that gives him enough time to set it up outside of CH 2B.
- 236C+D
- Kanji can move after the initial placement
- Automatically triggers on airborne opponents after 19F
Faster version of 236D that will sit in place for longer, is angled even more horizontal, and tracks the opponent's jump much earlier but cannot catch any superjumping opponent. Great for catching moves like Mitsuru j.C or Liz j.B, but is still very reactable.
236C+D also lets Kanji get an extended combo or conversion off of long range air hit 5C, or after normal hit 2B to help improve his damage output.
Primal Force
![]() [4]6C/D
[4]6C/D

Nice zoning you got there bub.

- Causes wallslam on CH
- Button determines distance traveled and startup
- Displaces Take-Mikazuchi
- Often referred to as just "Tackle"
Kanji's Persona tackle. Kanji will cross his arms and pose while Take-Mikazuchi appears and tackles across the screen with full projectile armor. Long start-up but very plus on block, this is intended to plow through certain projectile attacks, and give an opportunity to get in if Kanji is close enough. Any Take-Mikazuchi attacks barring his D normals will make him attack from where he is on the screen rather than Kanji's location shortly after Primal Force. Can be 5A'd on reaction by most characters.
Can also be used in some corner combos as it launches the opponent pretty high on hit.
- [4]6C
- [4]6D
- [4]6C+D
Bet Ya Can't Take This!
j.214A/B

The Wayne Brady.

- Invincible to throws
- Whiffs against crouching opponents
- Can be cancelled into during the start-up of ground B Cruel Attack (236B)
- Often referred to as just "Dive", among other colloquial names
Kanji's infamous air dive, a pseudo-low from the air as it hits standing and airborne opponents only. Kanji can use this as a way to mix up an opponent looking to block a j.B from him on his way down, or to fling himself at and punish an opponent setting up or playing air footsies in neutral. Not recommended to be used randomly without a read because the reactable start-up and long recovery makes it serve as just a knowledge check in most situations, as Kanji can be punished heavily by an opponent who knows how to defend against this.
On the other hand, this move is incredibly useful to end combos with, as it can be led into from most juggles thanks to the B Cruel Attack, and then leads to either OTG Cruel Attack okizeme or more unburstable damage if super cancelled. Alternatively, it can also be used to set up air reset situations with Kanji that are tricky to escape.
- j.214A
Kanji leaps forward a very short distance. Has a rare use as an anti-anti-air at close range or just changing Kanji's air trajectory, but poor safety and reward compared to just using j.C.
- j.214B
Similar to j.214A, but goes further and deals more damage on a successful grab. The dive of choice for ending combos, and is a little better for catching the opponent in neutral situations.
- j.214A+B
Starts up considerably faster and does more damage than the other two versions, and will also uniquely track the opponent's position on execution from almost any range. This version is typically reversed for hard reads in neutral, or in a last ditch effort to reach the opponent.
SP Skill Attacks
Ass Whoopin', Tatsumi-Style
236236A/B

Blocked chair bounces and hits a second time

If close enough, Kanji beats them up


- Chair will fall ~60 frames after the attack ends.
Kanji's autocombo super, will either throw a chair at a distance or go into a 3 hit combo if the opponent is close enough. OMCing at the second hit allows you to combo into his grab or his supergrab. Fantastic damage and relatively good p1/p2 scaling, allowing for heavily damaging combos afterwards.
236236A+B will cause wallslams between both walls, similar to Naoto's reversal kick, allowing for Kanji to combo 236C or 5C afterwards. 236236A+B also has very high minimum damage.
Awakened SP Skill Attacks
Burn To A Crisp!
![]() 214214C/D
214214C/D
I'm livin' this

oh


- All Versions
Kanji's supergrab, he only has access to this in Awakening. Slams the opponent into the corner from anywhere on screen. Can potentially be followed up based on screen positioning.
If Kanji is Persona Broken, he can still use Burn to a Crisp. If the opponent is grabbed, instead of the normal animation, Kanji will perform a special version of Ass Whoopin', Tatsumi-Style.
- 214214C
Fast, invuln supergrab, slightly slower than his 214C.
- 214214D
Longer startup, longer invuln and goes further than 214214C.
- 214214C+D
Does an additional thousand damage over the other two variations, while being the slowest version of all 3 grabs. Moves further forward similarly to 214214D.
Instant Kill
The Man Series: Brofist
![]() 222C+D
222C+D


I'll give you 10 dollars if you land this.


- This move is invulnerable through frames 1-78, so practically the whole thing up until the recovery. It can be used to walk through other SP skills with lengthy recoveries.
Kanji walks towards his opponent and attempts to grab them. If it lands, he launches the opponent upwards where his persona throws a lightning bolt from above. The screen cuts to both Kanji and his persona preparing to punch the opponent from both sides, and the entire screen is flashed with white light and thunder-shocks the moment of impact. Unlike most other instant kills, Kanji actually moves during the animation. It's still an instant kill though, so unless you visualize the other player like a textbook, it isn't going to be that practical.
External References
- Japanese Name: 巽 完二 (たつみ かんじ)
- Japanese Wiki
- Japanese BBS
- Arcade Profile Dan Rankings
- Character Video Thread
 Aigis[★]
 Akihiko Sanada[★]
 Chie Satonaka[★]
 Elizabeth[★]
 Junpei Iori[★]
 Kanji Tatsumi[★]
 Ken Amada[★]
 Labrys[★]
 Margaret[★]
 Marie[★]
 Minazuki[★]
 Mitsuru Kirijo[★]
 Naoto Shirogane[★]
 Rise Kujikawa[★]
 Shadow Labrys[★]
 Sho[★]
 Teddie[★]
 Tohru Adachi[★]
 Yosuke Hanamura[★]
 Yu Narukami[★]
 Yukari Takeba[★]
 Yukiko Amagi[★]
Click [★] for character's full frame data