m (→Overview: wording in the first sentence) |
m (→Overview: Updating the pros to reflect dustloop quality standards) |
||
| Line 9: | Line 9: | ||
|summary=is a one shot character with a high skill floor that can convert almost any hit to a kill. | |summary=is a one shot character with a high skill floor that can convert almost any hit to a kill. | ||
|pros= | |pros= | ||
* | *'''You are Already Dead''': Raoh can, in theory, deal 100% damage off of any hit without meter. | ||
*Traveling combos recover a large amount of Boost and Aura while granting very little to his opponent | *'''Meter Advantage''': Traveling combos recover a large amount of Boost and Aura while granting very little to his opponent. | ||
* | *'''Star Reducer''': Raoh has decent star reduction ability, and has easy 3 star combos. | ||
|cons= | |cons= | ||
*Bad matchups against {{Character Label|HNK|Toki}} and {{Character Label|HNK|Rei}} | *Bad matchups against {{Character Label|HNK|Toki}} and {{Character Label|HNK|Rei}} | ||
Revision as of 00:47, 15 May 2022
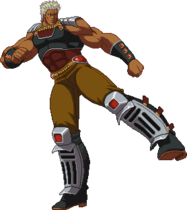
Raoh is slow, powerful, and more than anything else, a combo character. He is likely the most difficult character to learn; he has no 'basic' combos—his BnB A staple combo that is simple yet effective.s all being ToDs. Theoretically he could perhaps be the strongest character in the game, as he is capable of doing 100% combos from any hit with no meter. However, realistically, getting a 100% off of every hit is simply not possible, and due to the length and difficulty of his combos even top Raoh users will often make mistakes.
Also, while he is fairly good at applying pressure, his mixup is lacking due to his slow speed. This, along with his very poor defense(no backstep, no reliable reversal, guard lag), is why he is considered to be in the bottom end of the 'top tier.' All in all, Raoh is still a very strong character despite his weaknesses, but is not one that can be recommended to beginners.
![]() Raoh
Raoh ![]() Raoh is a one shot character with a high skill floor that can convert almost any hit to a kill.
Raoh is a one shot character with a high skill floor that can convert almost any hit to a kill.
- You are Already Dead: Raoh can, in theory, deal 100% damage off of any hit without meter.
- Meter Advantage: Traveling combos recover a large amount of Boost and Aura while granting very little to his opponent.
- Star Reducer: Raoh has decent star reduction ability, and has easy 3 star combos.
- Bad matchups against
 Toki and
  Rei
Rei - No backdash - his KOF95-esque 'fade' is useless and will often be the cause of your demise when you accidentally use it
- Switching guard from high to low/low to high takes 8 frames due to a hardware bug, making quick overheads extremely hard to block
- Can be crossed up in the corner
- Defense relies heavily on Musou or powerup stocks, has no way to get out of pressure without meter
- Relatively poor mixup
| Raoh | |
|---|---|
 | |
| Damage Taken | |
| 90% | |
| Jump Startup | |
| 4f | |
| Backdash | |
| 30f | |
Normals
c.A
| Guard | Damage | Startup | Active | Recovery | On-Block | Star Damage |
|---|---|---|---|---|---|---|
| All | 7 | 6 | -4 |
Add a description to this move using the |description= field
Describe what the move is used for.
Explain the basics of why the initial purpose of the move is worth knowing or worth doing. Mention downsides that are important to know. If the move is particularly important it might have a spot on the stategy page—an important anti-air will likely be mentioned in the neutral section, or an important combo move will be mentioned in the combo theory.
| On-Hit | Boost Gain | Aura Gain | GC | Level |
|---|---|---|---|---|
c.B
| Guard | Damage | Startup | Active | Recovery | On-Block | Star Damage |
|---|---|---|---|---|---|---|
| All | 8 | 7 | -5 |
Add a description to this move using the |description= field
Describe what the move is used for.
Explain the basics of why the initial purpose of the move is worth knowing or worth doing. Mention downsides that are important to know. If the move is particularly important it might have a spot on the stategy page—an important anti-air will likely be mentioned in the neutral section, or an important combo move will be mentioned in the combo theory.
| On-Hit | Boost Gain | Aura Gain | GC | Level |
|---|---|---|---|---|
c.C
| Guard | Damage | Startup | Active | Recovery | On-Block | Star Damage |
|---|---|---|---|---|---|---|
| High | 11 | 2 | -10 |
Add a description to this move using the |description= field
Describe what the move is used for.
Explain the basics of why the initial purpose of the move is worth knowing or worth doing. Mention downsides that are important to know. If the move is particularly important it might have a spot on the stategy page—an important anti-air will likely be mentioned in the neutral section, or an important combo move will be mentioned in the combo theory.
| On-Hit | Boost Gain | Aura Gain | GC | Level |
|---|---|---|---|---|
c.D
| Guard | Damage | Startup | Active | Recovery | On-Block | Star Damage |
|---|---|---|---|---|---|---|
| All,Low | 9 | 4()10 | -11 |
Add a description to this move using the |description= field
Describe what the move is used for.
Explain the basics of why the initial purpose of the move is worth knowing or worth doing. Mention downsides that are important to know. If the move is particularly important it might have a spot on the stategy page—an important anti-air will likely be mentioned in the neutral section, or an important combo move will be mentioned in the combo theory.
| On-Hit | Boost Gain | Aura Gain | GC | Level |
|---|---|---|---|---|
f.A
| Guard | Damage | Startup | Active | Recovery | On-Block | Star Damage |
|---|---|---|---|---|---|---|
| All | 7 | 6 | -6 |
Add a description to this move using the |description= field
Describe what the move is used for.
Explain the basics of why the initial purpose of the move is worth knowing or worth doing. Mention downsides that are important to know. If the move is particularly important it might have a spot on the stategy page—an important anti-air will likely be mentioned in the neutral section, or an important combo move will be mentioned in the combo theory.
| On-Hit | Boost Gain | Aura Gain | GC | Level |
|---|---|---|---|---|
f.B
| Guard | Damage | Startup | Active | Recovery | On-Block | Star Damage |
|---|---|---|---|---|---|---|
| All | 8 | 7 | -5 |
Add a description to this move using the |description= field
Describe what the move is used for.
Explain the basics of why the initial purpose of the move is worth knowing or worth doing. Mention downsides that are important to know. If the move is particularly important it might have a spot on the stategy page—an important anti-air will likely be mentioned in the neutral section, or an important combo move will be mentioned in the combo theory.
| On-Hit | Boost Gain | Aura Gain | GC | Level |
|---|---|---|---|---|
f.C
| Guard | Damage | Startup | Active | Recovery | On-Block | Star Damage |
|---|---|---|---|---|---|---|
| All | 18 | 4 | -13 |
Add a description to this move using the |description= field
Describe what the move is used for.
Explain the basics of why the initial purpose of the move is worth knowing or worth doing. Mention downsides that are important to know. If the move is particularly important it might have a spot on the stategy page—an important anti-air will likely be mentioned in the neutral section, or an important combo move will be mentioned in the combo theory.
| On-Hit | Boost Gain | Aura Gain | GC | Level |
|---|---|---|---|---|
| Launch |
- Chargeable with a Powerup Charge
f.D
| Guard | Damage | Startup | Active | Recovery | On-Block | Star Damage |
|---|---|---|---|---|---|---|
| All | 11 | 6 | -13 |
Add a description to this move using the |description= field
Describe what the move is used for.
Explain the basics of why the initial purpose of the move is worth knowing or worth doing. Mention downsides that are important to know. If the move is particularly important it might have a spot on the stategy page—an important anti-air will likely be mentioned in the neutral section, or an important combo move will be mentioned in the combo theory.
| On-Hit | Boost Gain | Aura Gain | GC | Level |
|---|---|---|---|---|
2A
| Guard | Damage | Startup | Active | Recovery | On-Block | Star Damage |
|---|---|---|---|---|---|---|
| All | 6 | 5 | 6 | 6 | -4 | 0 |
Add a description to this move using the |description= field
Describe what the move is used for.
Explain the basics of why the initial purpose of the move is worth knowing or worth doing. Mention downsides that are important to know. If the move is particularly important it might have a spot on the stategy page—an important anti-air will likely be mentioned in the neutral section, or an important combo move will be mentioned in the combo theory.
| On-Hit | Boost Gain | Aura Gain | GC | Level |
|---|---|---|---|---|
| 1 |
2B
| Guard | Damage | Startup | Active | Recovery | On-Block | Star Damage |
|---|---|---|---|---|---|---|
| low | 7 | 5 | -3 |
Add a description to this move using the |description= field
Describe what the move is used for.
Explain the basics of why the initial purpose of the move is worth knowing or worth doing. Mention downsides that are important to know. If the move is particularly important it might have a spot on the stategy page—an important anti-air will likely be mentioned in the neutral section, or an important combo move will be mentioned in the combo theory.
| On-Hit | Boost Gain | Aura Gain | GC | Level |
|---|---|---|---|---|
2C
| Guard | Damage | Startup | Active | Recovery | On-Block | Star Damage |
|---|---|---|---|---|---|---|
| All | 18 | 4 | -17 |
Add a description to this move using the |description= field
Describe what the move is used for.
Explain the basics of why the initial purpose of the move is worth knowing or worth doing. Mention downsides that are important to know. If the move is particularly important it might have a spot on the stategy page—an important anti-air will likely be mentioned in the neutral section, or an important combo move will be mentioned in the combo theory.
| On-Hit | Boost Gain | Aura Gain | GC | Level |
|---|---|---|---|---|
| Launch |
- Jump cancellable, chargeable with a Powerup Charge
2D
| Guard | Damage | Startup | Active | Recovery | On-Block | Star Damage |
|---|---|---|---|---|---|---|
| Low | 12 | 4 | -22 |
Add a description to this move using the |description= field
Describe what the move is used for.
Explain the basics of why the initial purpose of the move is worth knowing or worth doing. Mention downsides that are important to know. If the move is particularly important it might have a spot on the stategy page—an important anti-air will likely be mentioned in the neutral section, or an important combo move will be mentioned in the combo theory.
| On-Hit | Boost Gain | Aura Gain | GC | Level |
|---|---|---|---|---|
| Launch |
- Chargeable with a Powerup Charge
j.A
| Guard | Damage | Startup | Active | Recovery | On-Block | Star Damage |
|---|---|---|---|---|---|---|
| High | 3 | 8 |
Add a description to this move using the |description= field
Describe what the move is used for.
Explain the basics of why the initial purpose of the move is worth knowing or worth doing. Mention downsides that are important to know. If the move is particularly important it might have a spot on the stategy page—an important anti-air will likely be mentioned in the neutral section, or an important combo move will be mentioned in the combo theory.
| On-Hit | Boost Gain | Aura Gain | GC | Level |
|---|---|---|---|---|
j.B
| Guard | Damage | Startup | Active | Recovery | On-Block | Star Damage |
|---|---|---|---|---|---|---|
| High | 8 | 8 |
Add a description to this move using the |description= field
Describe what the move is used for.
Explain the basics of why the initial purpose of the move is worth knowing or worth doing. Mention downsides that are important to know. If the move is particularly important it might have a spot on the stategy page—an important anti-air will likely be mentioned in the neutral section, or an important combo move will be mentioned in the combo theory.
| On-Hit | Boost Gain | Aura Gain | GC | Level |
|---|---|---|---|---|
j.C
| Guard | Damage | Startup | Active | Recovery | On-Block | Star Damage |
|---|---|---|---|---|---|---|
| High | 11 | 8 |
Add a description to this move using the |description= field
Describe what the move is used for.
Explain the basics of why the initial purpose of the move is worth knowing or worth doing. Mention downsides that are important to know. If the move is particularly important it might have a spot on the stategy page—an important anti-air will likely be mentioned in the neutral section, or an important combo move will be mentioned in the combo theory.
| On-Hit | Boost Gain | Aura Gain | GC | Level |
|---|---|---|---|---|
- Chargeable with Powerup Charge
j.D
| Guard | Damage | Startup | Active | Recovery | On-Block | Star Damage |
|---|---|---|---|---|---|---|
| High | 11 | 4,4,4,3 |
Add a description to this move using the |description= field
Describe what the move is used for.
Explain the basics of why the initial purpose of the move is worth knowing or worth doing. Mention downsides that are important to know. If the move is particularly important it might have a spot on the stategy page—an important anti-air will likely be mentioned in the neutral section, or an important combo move will be mentioned in the combo theory.
| On-Hit | Boost Gain | Aura Gain | GC | Level |
|---|---|---|---|---|
Command Normals
6A
| Guard | Damage | Startup | Active | Recovery | On-Block | Star Damage |
|---|---|---|---|---|---|---|
| All | 29 | 10 | -24 |
Add a description to this move using the |description= field
Describe what the move is used for.
Explain the basics of why the initial purpose of the move is worth knowing or worth doing. Mention downsides that are important to know. If the move is particularly important it might have a spot on the stategy page—an important anti-air will likely be mentioned in the neutral section, or an important combo move will be mentioned in the combo theory.
| On-Hit | Boost Gain | Aura Gain | GC | Level |
|---|---|---|---|---|
6B
| Guard | Damage | Startup | Active | Recovery | On-Block | Star Damage |
|---|---|---|---|---|---|---|
| High | 27 | 4 | -14 |
Add a description to this move using the |description= field
Describe what the move is used for.
Explain the basics of why the initial purpose of the move is worth knowing or worth doing. Mention downsides that are important to know. If the move is particularly important it might have a spot on the stategy page—an important anti-air will likely be mentioned in the neutral section, or an important combo move will be mentioned in the combo theory.
| On-Hit | Boost Gain | Aura Gain | GC | Level |
|---|---|---|---|---|
Universal Mechanics
Throw
No results
Add a description to this move using the |description= field
Describe what the move is used for.
Explain the basics of why the initial purpose of the move is worth knowing or worth doing. Mention downsides that are important to know. If the move is particularly important it might have a spot on the stategy page—an important anti-air will likely be mentioned in the neutral section, or an important combo move will be mentioned in the combo theory.
No results
No resultsKick Throw
| Guard | Damage | Startup | Active | Recovery | On-Block | Star Damage |
|---|---|---|---|---|---|---|
| Throw | 9 | 4 |
Add a description to this move using the |description= field
Describe what the move is used for.
Explain the basics of why the initial purpose of the move is worth knowing or worth doing. Mention downsides that are important to know. If the move is particularly important it might have a spot on the stategy page—an important anti-air will likely be mentioned in the neutral section, or an important combo move will be mentioned in the combo theory.
| On-Hit | Boost Gain | Aura Gain | GC | Level |
|---|---|---|---|---|
| Launch |
- whiffs on crouch
Grave Shoot
| Guard | Damage | Startup | Active | Recovery | On-Block | Star Damage |
|---|---|---|---|---|---|---|
| All | 15 | 4 | -5 |
Add a description to this move using the |description= field
Describe what the move is used for.
Explain the basics of why the initial purpose of the move is worth knowing or worth doing. Mention downsides that are important to know. If the move is particularly important it might have a spot on the stategy page—an important anti-air will likely be mentioned in the neutral section, or an important combo move will be mentioned in the combo theory.
| On-Hit | Boost Gain | Aura Gain | GC | Level |
|---|---|---|---|---|
| Grave Launch |
Heavy Strike
| Guard | Damage | Startup | Active | Recovery | On-Block | Star Damage |
|---|---|---|---|---|---|---|
| Unblockable | 41 | 2 |
Add a description to this move using the |description= field
Describe what the move is used for.
Explain the basics of why the initial purpose of the move is worth knowing or worth doing. Mention downsides that are important to know. If the move is particularly important it might have a spot on the stategy page—an important anti-air will likely be mentioned in the neutral section, or an important combo move will be mentioned in the combo theory.
| On-Hit | Boost Gain | Aura Gain | GC | Level |
|---|---|---|---|---|
| Stagger |
Banishing Strike
| Guard | Damage | Startup | Active | Recovery | On-Block | Star Damage |
|---|---|---|---|---|---|---|
| All | 19-39 | 4 | -6 |
Add a description to this move using the |description= field
Describe what the move is used for.
Explain the basics of why the initial purpose of the move is worth knowing or worth doing. Mention downsides that are important to know. If the move is particularly important it might have a spot on the stategy page—an important anti-air will likely be mentioned in the neutral section, or an important combo move will be mentioned in the combo theory.
| On-Hit | Boost Gain | Aura Gain | GC | Level |
|---|---|---|---|---|
| Banishing Launch |


