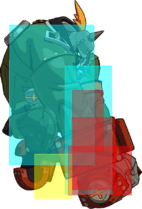
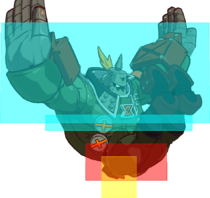
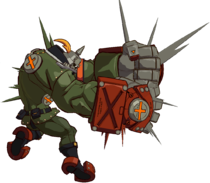
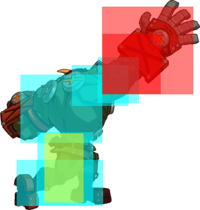
(mov) |
|||
| Line 25: | Line 25: | ||
===<big>{{clr|1|5P}}</big>=== | ===<big>{{clr|1|5P}}</big>=== | ||
{{GGXRD-R2 Move Card|game=GGXRD-R2 | |||
|input=5P | |||
|description= | |||
{ | |||
{ | |||
|- | |||
| | |||
| | |||
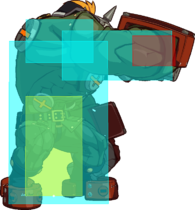
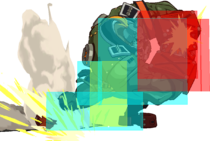
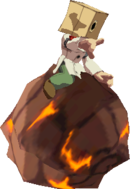
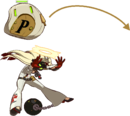
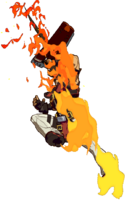
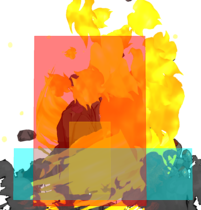
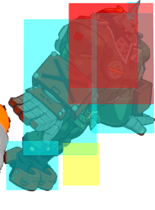
Jab. While this is your fastest normal, the punching animation is very high, causing it to whiff on crouchers. Because of this, {{clr|1|5P}} is mostly reserved for anti airing rather than abare and other standard {{clr|1|5P}} things | Jab. While this is your fastest normal, the punching animation is very high, causing it to whiff on crouchers. Because of this, {{clr|1|5P}} is mostly reserved for anti airing rather than abare and other standard {{clr|1|5P}} things | ||
[[GGXRD-R2/Potemkin/Frame Data#Gatling Table|Gatling Options:]] {{clr|1|5P}}, {{clr|1|2P}}, {{clr|1|6P}}, {{clr|2|5K}}, {{clr|2|2K}}, {{clr|2|6K}}, {{clr|3|c.S}}, {{clr|3|f.S}}, {{clr|3|2S}}, {{clr|4|5H}}, {{clr|4|2H}}, {{clr|4|6H}}, {{clr|5|5D}}, {{clr|5|2D}} | [[GGXRD-R2/Potemkin/Frame Data#Gatling Table|Gatling Options:]] {{clr|1|5P}}, {{clr|1|2P}}, {{clr|1|6P}}, {{clr|2|5K}}, {{clr|2|2K}}, {{clr|2|6K}}, {{clr|3|c.S}}, {{clr|3|f.S}}, {{clr|3|2S}}, {{clr|4|5H}}, {{clr|4|2H}}, {{clr|4|6H}}, {{clr|5|5D}}, {{clr|5|2D}} | ||
}} | |||
===<big>{{clr|2|5K}}</big>=== | ===<big>{{clr|2|5K}}</big>=== | ||
{{GGXRD-R2 Move Card|game=GGXRD-R2 | |||
|input=5K | |||
|description= | |||
{ | |||
{ | |||
|- | |||
| | |||
| | |||
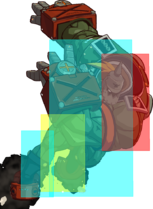
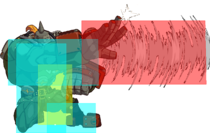
Low normal that works best as an oki tool due to its high number of active frames making it very easy to hit meaty. Also great for catching backdashes! | Low normal that works best as an oki tool due to its high number of active frames making it very easy to hit meaty. Also great for catching backdashes! | ||
[[GGXRD-R2/Potemkin/Frame Data#Gatling Table|Gatling Options:]] {{clr|2|6K}}, {{clr|3|c.S}}, {{clr|3|f.S}}, {{clr|3|2S}}, {{clr|4|5H}}, {{clr|4|2H}}, {{clr|5|5D}}, {{clr|5|2D}} | [[GGXRD-R2/Potemkin/Frame Data#Gatling Table|Gatling Options:]] {{clr|2|6K}}, {{clr|3|c.S}}, {{clr|3|f.S}}, {{clr|3|2S}}, {{clr|4|5H}}, {{clr|4|2H}}, {{clr|5|5D}}, {{clr|5|2D}} | ||
}} | |||
===<big>{{clr|3|c.S}}</big>=== | ===<big>{{clr|3|c.S}}</big>=== | ||
{{GGXRD-R2 Move Card|game=GGXRD-R2 | |||
|input=c.S | |||
|description= | |||
{ | |||
{ | |||
|- | |||
| | |||
| | |||
A quick, close range jump cancellable normal that sees most use as combo or blockstring filler due to its good gatlings and jump cancel. | A quick, close range jump cancellable normal that sees most use as combo or blockstring filler due to its good gatlings and jump cancel. | ||
[[GGXRD-R2/Potemkin/Frame Data#Gatling Table|Gatling Options:]] {{clr|2|6K}}, {{clr|3|f.S}}, {{clr|3|2S}}, {{clr|4|5H}}, {{clr|4|2H}}, {{clr|5|5D}}, {{clr|5|2D}} | [[GGXRD-R2/Potemkin/Frame Data#Gatling Table|Gatling Options:]] {{clr|2|6K}}, {{clr|3|f.S}}, {{clr|3|2S}}, {{clr|4|5H}}, {{clr|4|2H}}, {{clr|5|5D}}, {{clr|5|2D}} | ||
}} | |||
===<big>{{clr|3|f.S}}</big>=== | ===<big>{{clr|3|f.S}}</big>=== | ||
{{GGXRD-R2 Move Card|game=GGXRD-R2 | |||
|input=f.S | |||
|description= | |||
{{ | |||
|- | |||
| | |||
| | |||
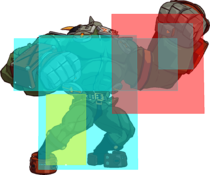
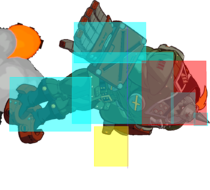
{{clr|4|5H}}'s higher hitting brother, {{clr|3|f.S}} is a long-range poke with a slight upward angle. Excellent at swatting IADs and distant air approaches as well as controlling the ground in front of you, even if the reward isn't always high on hit. | {{clr|4|5H}}'s higher hitting brother, {{clr|3|f.S}} is a long-range poke with a slight upward angle. Excellent at swatting IADs and distant air approaches as well as controlling the ground in front of you, even if the reward isn't always high on hit. | ||
| Line 150: | Line 60: | ||
[[GGXRD-R2/Potemkin/Frame Data#Gatling Table|Gatling Options:]] {{clr|3|2S}}, {{clr|4|5H}}, {{clr|4|2H}}, {{clr|5|5D}}, {{clr|5|2D}} | [[GGXRD-R2/Potemkin/Frame Data#Gatling Table|Gatling Options:]] {{clr|3|2S}}, {{clr|4|5H}}, {{clr|4|2H}}, {{clr|5|5D}}, {{clr|5|2D}} | ||
}} | |||
===<big>{{clr|4|5H}}</big>=== | ===<big>{{clr|4|5H}}</big>=== | ||
{{GGXRD-R2 Move Card|game=GGXRD-R2 | |||
|input=5H | |||
|description= | |||
{ | |||
{ | |||
|- | |||
| | |||
| | |||
One of Potemkin's best pokes. It is huge, has solid and easy reward on counterhit at most ranges, and is mostly safe on block at -4. Has a lower hitbox than {{clr|3|f.S}}, so it's not recommended to prevent air approaches in the same manner. Can be used to keep opponents honest at range, or to keep them blocking so you can approach with {{MiniMoveCard|game=GGXRDR2|chara=Potemkin|input=[4]6H|label=Hammerfall}}. | One of Potemkin's best pokes. It is huge, has solid and easy reward on counterhit at most ranges, and is mostly safe on block at -4. Has a lower hitbox than {{clr|3|f.S}}, so it's not recommended to prevent air approaches in the same manner. Can be used to keep opponents honest at range, or to keep them blocking so you can approach with {{MiniMoveCard|game=GGXRDR2|chara=Potemkin|input=[4]6H|label=Hammerfall}}. | ||
| Line 186: | Line 73: | ||
[[GGXRD-R2/Potemkin/Frame Data#Gatling Table|Gatling Options:]] {{clr|5|5D}}, {{clr|5|2D}} | [[GGXRD-R2/Potemkin/Frame Data#Gatling Table|Gatling Options:]] {{clr|5|5D}}, {{clr|5|2D}} | ||
}} | |||
===<big>{{clr|1|6P}}</big>=== | ===<big>{{clr|1|6P}}</big>=== | ||
{{GGXRD-R2 Move Card|game=GGXRD-R2 | |||
|input=6P | |||
|description= | |||
{ | |||
{ | |||
|- | |||
| | |||
| | |||
The go-to anti-air. It has impressive upper-body invulnerability and a sizable hitbox, which is good because it's really only any good when it counter hits. A normal hit will lead to pretty much nothing, except for a very close hit where you can link {{clr|1|5P}} into {{MiniMoveCard|game=GGXRDR2|chara=Potemkin|input=623H|label=Heat Knuckle}}. On counter hit, you can combo into Heat knuckle at most ranges and an air series into {{MiniMoveCard|game=GGXRDR2|chara=Potemkin|input=j.41236H|label=I.C.P.M}} at certain ranges | The go-to anti-air. It has impressive upper-body invulnerability and a sizable hitbox, which is good because it's really only any good when it counter hits. A normal hit will lead to pretty much nothing, except for a very close hit where you can link {{clr|1|5P}} into {{MiniMoveCard|game=GGXRDR2|chara=Potemkin|input=623H|label=Heat Knuckle}}. On counter hit, you can combo into Heat knuckle at most ranges and an air series into {{MiniMoveCard|game=GGXRDR2|chara=Potemkin|input=j.41236H|label=I.C.P.M}} at certain ranges | ||
Upper body invuln frames 1~22. | Upper body invuln frames 1~22. | ||
}} | |||
===<big>{{clr|2|6K}}</big>=== | ===<big>{{clr|2|6K}}</big>=== | ||
{{GGXRD-R2 Move Card|game=GGXRD-R2 | |||
|input=6K | |||
|description= | |||
{ | |||
{ | |||
|- | |||
| | |||
| | |||
An integral forward advancing normal, both in pressure and in corner combos. | An integral forward advancing normal, both in pressure and in corner combos. | ||
| Line 254: | Line 97: | ||
*On air hit, causes approximately 36f of wallsplat. | *On air hit, causes approximately 36f of wallsplat. | ||
*Staggers on counterhit | *Staggers on counterhit | ||
}} | |||
===<big>{{clr|4|6H}}</big>=== | ===<big>{{clr|4|6H}}</big>=== | ||
{{GGXRD-R2 Move Card|game=GGXRD-R2 | |||
|input=6H | |||
|description= | |||
{ | |||
{ | |||
|- | |||
| | |||
| | |||
His longest reaching normal, and his most damaging, but not suited to standard poking due to its slow startup. Instead, it can be seen as combo filler or as a situational combo starter | His longest reaching normal, and his most damaging, but not suited to standard poking due to its slow startup. Instead, it can be seen as combo filler or as a situational combo starter | ||
Midscreen, there is no meterless followup on normal hit, but they are launched a far distance towards the corner. On counterhit, the same applies. Closer to the corner, {{clr|4|6H}}'s value as a combo starter drastically increases. In the corner, a slightly spaced normal hit {{clr|4|6H}} has meterless followups on a majority of the cast that leads to dealing 50%, and a counterhit {{clr|4|6H}} will lead to a practical, meterless TOD on half the cast from slightly closer than round start position. As a result, {{clr|4|6H}} is most commonly used to fish for counterhits or as a combo starter after a stun. | Midscreen, there is no meterless followup on normal hit, but they are launched a far distance towards the corner. On counterhit, the same applies. Closer to the corner, {{clr|4|6H}}'s value as a combo starter drastically increases. In the corner, a slightly spaced normal hit {{clr|4|6H}} has meterless followups on a majority of the cast that leads to dealing 50%, and a counterhit {{clr|4|6H}} will lead to a practical, meterless TOD on half the cast from slightly closer than round start position. As a result, {{clr|4|6H}} is most commonly used to fish for counterhits or as a combo starter after a stun. | ||
*On hit, blows the opponent backwards. Grounded hits float upward slightly in addition to this. | *On hit, blows the opponent backwards. Grounded hits float upward slightly in addition to this. | ||
}} | |||
===<big>{{clr|5|5D}}</big>=== | ===<big>{{clr|5|5D}}</big>=== | ||
{{GGXRD-R2 Move Card|game=GGXRD-R2 | |||
|input=5D | |||
|description= | |||
{ | |||
{ | |||
|- | |||
| | |||
| | |||
Universal overhead. Punish tool, combo tool, and occasional surprise mixup tool. | Universal overhead. Punish tool, combo tool, and occasional surprise mixup tool. | ||
| Line 320: | Line 118: | ||
Much like other {{clr|5|5D}}s, it's fairly difficult to use in pressure due to its slow startup, obvious animation, and orange glow. However, its high reward on hit make it worth trying occasionally. | Much like other {{clr|5|5D}}s, it's fairly difficult to use in pressure due to its slow startup, obvious animation, and orange glow. However, its high reward on hit make it worth trying occasionally. | ||
}} | |||
===<big>{{clr|1|2P}}</big>=== | ===<big>{{clr|1|2P}}</big>=== | ||
{{GGXRD-R2 Move Card|game=GGXRD-R2 | |||
|input=2P | |||
|description= | |||
{ | |||
{ | |||
|- | |||
| | |||
| | |||
{{clr|1|2P}} is a great normal that does just about everything you could ask of a P normal, except anti air. | {{clr|1|2P}} is a great normal that does just about everything you could ask of a P normal, except anti air. | ||
| Line 354: | Line 129: | ||
[[GGXRD-R2/Potemkin/Frame Data#Gatling Table|Gatling Options:]] {{clr|1|5P}}, {{clr|1|2P}}, {{clr|1|6P}}, {{clr|2|5K}}, {{clr|2|2K}}, {{clr|2|6K}}, {{clr|3|c.S}}, {{clr|3|f.S}}, {{clr|3|2S}}, {{clr|4|5H}}, {{clr|4|2H}}, {{clr|5|5D}}, {{clr|5|2D}} | [[GGXRD-R2/Potemkin/Frame Data#Gatling Table|Gatling Options:]] {{clr|1|5P}}, {{clr|1|2P}}, {{clr|1|6P}}, {{clr|2|5K}}, {{clr|2|2K}}, {{clr|2|6K}}, {{clr|3|c.S}}, {{clr|3|f.S}}, {{clr|3|2S}}, {{clr|4|5H}}, {{clr|4|2H}}, {{clr|5|5D}}, {{clr|5|2D}} | ||
}} | |||
===<big>{{clr|2|2K}}</big>=== | ===<big>{{clr|2|2K}}</big>=== | ||
{{GGXRD-R2 Move Card|game=GGXRD-R2 | |||
|input=2K | |||
|description= | |||
{ | |||
{ | |||
|- | |||
| | |||
| | |||
{{clr|2|2K}} is a simple normal. It is faster than {{clr|2|5K}} and better range, making it more desirable in neutral and pressure while {{clr|2|5K}} remains preferable for oki. It has good gatlings, but it only combos into {{clr|3|c.S}}, {{clr|3|f.S}}, and {{clr|5|2D}}. | {{clr|2|2K}} is a simple normal. It is faster than {{clr|2|5K}} and better range, making it more desirable in neutral and pressure while {{clr|2|5K}} remains preferable for oki. It has good gatlings, but it only combos into {{clr|3|c.S}}, {{clr|3|f.S}}, and {{clr|5|2D}}. | ||
[[GGXRD-R2/Potemkin/Frame Data#Gatling Table|Gatling Options:]] {{clr|2|6K}}, {{clr|3|c.S}}, {{clr|3|f.S}}, {{clr|3|2S}}, {{clr|4|2H}}, {{clr|5|5D}}, {{clr|5|2D}} | [[GGXRD-R2/Potemkin/Frame Data#Gatling Table|Gatling Options:]] {{clr|2|6K}}, {{clr|3|c.S}}, {{clr|3|f.S}}, {{clr|3|2S}}, {{clr|4|2H}}, {{clr|5|5D}}, {{clr|5|2D}} | ||
}} | |||
===<big>{{clr|3|2S}}</big>=== | ===<big>{{clr|3|2S}}</big>=== | ||
{{GGXRD-R2 Move Card|game=GGXRD-R2 | |||
|input=2S | |||
|description= | |||
{ | |||
{ | |||
|- | |||
| | |||
| | |||
{{clr|3|2S}} is a fairly large button that sees use in pressure and in neutral as a poke. | {{clr|3|2S}} is a fairly large button that sees use in pressure and in neutral as a poke. | ||
| Line 418: | Line 149: | ||
[[GGXRD-R2/Potemkin/Frame Data#Gatling Table|Gatling Options:]] {{clr|2|6K}}, {{clr|4|2H}}, {{clr|5|5D}}, {{clr|5|2D}} | [[GGXRD-R2/Potemkin/Frame Data#Gatling Table|Gatling Options:]] {{clr|2|6K}}, {{clr|4|2H}}, {{clr|5|5D}}, {{clr|5|2D}} | ||
}} | |||
===<big>{{clr|4|2H}}</big>=== | ===<big>{{clr|4|2H}}</big>=== | ||
{{GGXRD-R2 Move Card|game=GGXRD-R2 | |||
|input=2H | |||
|description= | |||
{ | |||
{ | |||
|- | |||
| | |||
| | |||
{{clr|4|2H}} is a slow but high reaching normal with short horizontal range. One of Potemkin's best counterhit starters, and decent at anti airing too. | {{clr|4|2H}} is a slow but high reaching normal with short horizontal range. One of Potemkin's best counterhit starters, and decent at anti airing too. | ||
| Line 453: | Line 162: | ||
[[GGXRD-R2/Potemkin/Frame Data#Gatling Table|Gatling Options:]] {{clr|5|5D}}, {{clr|5|2D}} | [[GGXRD-R2/Potemkin/Frame Data#Gatling Table|Gatling Options:]] {{clr|5|5D}}, {{clr|5|2D}} | ||
}} | |||
===<big>{{clr|5|2D}}</big>=== | ===<big>{{clr|5|2D}}</big>=== | ||
{{GGXRD-R2 Move Card|game=GGXRD-R2 | |||
|input=2D | |||
|description= | |||
{ | |||
{ | |||
|- | |||
| | |||
| | |||
Complimentary low poke to {{clr|2|2K}} and key grounded knockdown button. | Complimentary low poke to {{clr|2|2K}} and key grounded knockdown button. | ||
Most grounded combos will end in this normal as it gives a safejump on hit, or just a normal meaty. In pressure, {{clr|5|2D}}'s lack of cancel options means that it ends your pressure on block, but it's nigh unpunishable at only -2 with decent pushback. It can also be used on oki when you're too far away for 5K but it's better to use a normal with special cancels, like {{clr|3|f.S}}, to continue pressure | Most grounded combos will end in this normal as it gives a safejump on hit, or just a normal meaty. In pressure, {{clr|5|2D}}'s lack of cancel options means that it ends your pressure on block, but it's nigh unpunishable at only -2 with decent pushback. It can also be used on oki when you're too far away for 5K but it's better to use a normal with special cancels, like {{clr|3|f.S}}, to continue pressure | ||
}} | |||
===<big>{{clr|1|j.P}}</big>=== | ===<big>{{clr|1|j.P}}</big>=== | ||
{{GGXRD-R2 Move Card|game=GGXRD-R2 | |||
|input=j.P | |||
|description= | |||
{ | |||
{ | |||
|- | |||
| | |||
| | |||
A quick elbow jab. Potemkin bunches up into a ball for this one, shrinking his hurtbox somewhat, but not enough to make a huge difference. Cancels into itself and all his other aerial attacks, and is a good choice for air-to-air combat. If the opponent blocks, keep pressing it until you both land and you can set up pressure or go straight for a grab. Additionally, since {{clr|3|j.S}} gatlings back into {{clr|1|j.P}}, you can use {{clr|3|j.S}} as a jump-in, cancel into {{clr|1|j.P}} if they block, then use the reduced blockstun to put them into a Buster (or bait their escape attempt!). | A quick elbow jab. Potemkin bunches up into a ball for this one, shrinking his hurtbox somewhat, but not enough to make a huge difference. Cancels into itself and all his other aerial attacks, and is a good choice for air-to-air combat. If the opponent blocks, keep pressing it until you both land and you can set up pressure or go straight for a grab. Additionally, since {{clr|3|j.S}} gatlings back into {{clr|1|j.P}}, you can use {{clr|3|j.S}} as a jump-in, cancel into {{clr|1|j.P}} if they block, then use the reduced blockstun to put them into a Buster (or bait their escape attempt!). | ||
[[GGXRD-R2/Potemkin/Frame Data#Gatling Table|Gatling Options:]] {{clr|1|j.P}}, {{clr|2|j.K}}, {{clr|3|j.S}}, {{clr|4|j.H}}, {{clr|5|j.D}} | [[GGXRD-R2/Potemkin/Frame Data#Gatling Table|Gatling Options:]] {{clr|1|j.P}}, {{clr|2|j.K}}, {{clr|3|j.S}}, {{clr|4|j.H}}, {{clr|5|j.D}} | ||
}} | |||
===<big>{{clr|2|j.K}}</big>=== | ===<big>{{clr|2|j.K}}</big>=== | ||
{{GGXRD-R2 Move Card|game=GGXRD-R2 | |||
|input=j.K | |||
|description= | |||
{ | |||
{ | |||
|- | |||
| | |||
| | |||
A Mario-esque jumping kick. Also like Mario, Potemkin can bounce off his opponents with this, since it's his only aerial attack that can be jump canceled. | A Mario-esque jumping kick. Also like Mario, Potemkin can bounce off his opponents with this, since it's his only aerial attack that can be jump canceled. | ||
[[GGXRD-R2/Potemkin/Frame Data#Gatling Table|Gatling Options:]] {{clr|1|j.P}}, {{clr|3|j.S}} | [[GGXRD-R2/Potemkin/Frame Data#Gatling Table|Gatling Options:]] {{clr|1|j.P}}, {{clr|3|j.S}} | ||
}} | |||
===<big>{{clr|3|j.S}}</big>=== | ===<big>{{clr|3|j.S}}</big>=== | ||
{{GGXRD-R2 Move Card|game=GGXRD-R2 | |||
|input=j.S | |||
|description= | |||
{{ | |||
|- | |||
| | |||
| | |||
An overhead hammer swing with both fists. Covers a good amount of space, going from slightly above to well below Potemkin as the active frames complete. Desirable as a jump-in for its hitbox, its ability to cancel into {{clr|1|j.P}} for grab setups, and the fact that it staggers grounded opponents on counter hit, allowing combos directly into Potemkin Buster (or anything else you might want to try). Air counter hits provide pretty decent untechable time, allowing you to combo into Heat Knuckle after landing, depending on the height. | An overhead hammer swing with both fists. Covers a good amount of space, going from slightly above to well below Potemkin as the active frames complete. Desirable as a jump-in for its hitbox, its ability to cancel into {{clr|1|j.P}} for grab setups, and the fact that it staggers grounded opponents on counter hit, allowing combos directly into Potemkin Buster (or anything else you might want to try). Air counter hits provide pretty decent untechable time, allowing you to combo into Heat Knuckle after landing, depending on the height. | ||
[[GGXRD-R2/Potemkin/Frame Data#Gatling Table|Gatling Options:]] {{clr|1|j.P}}, {{clr|4|j.H}}, {{clr|5|j.D}} | [[GGXRD-R2/Potemkin/Frame Data#Gatling Table|Gatling Options:]] {{clr|1|j.P}}, {{clr|4|j.H}}, {{clr|5|j.D}} | ||
}} | |||
===<big>{{clr|4|j.H}}</big>=== | ===<big>{{clr|4|j.H}}</big>=== | ||
{{GGXRD-R2 Move Card|game=GGXRD-R2 | |||
|input=j.H | |||
|description= | |||
Potemkin crosses his arms in front of him for a body splash. Massive horizontal hurtbox, hitting on both sides of his center line. The legs hit lower than the arms, making its usefulness as a jump-in dependent entirely on how ambiguous you can make it as a crossup. Can be canceled into ICPM, but only combos at certain heights. | |||
{ | |||
{ | |||
|- | |||
| | |||
| | |||
}} | }} | ||
===<big>{{clr|5|j.D}}</big>=== | ===<big>{{clr|5|j.D}}</big>=== | ||
{{GGXRD-R2 Move Card|game=GGXRD-R2 | |||
|input=j.D | |||
|description= | |||
Potemkin thrusts his arms out, hovering in the air briefly, then drops to the ground butt-first. His extended arms drastically widen his hurtbox, but his butt isn't part of it, making it more likely to clash than be anti-aired cleanly. Knocks down on ground hit, slams down on air hit, ground bounce on counterhit that can be followed up if you hit it high up in the air or RRC it. Can be blocked while crouching. | |||
| | |||
| | |||
}} | }} | ||
<br style="clear:both;"/> | |||
= | |||
==Universal Mechanics== | ==Universal Mechanics== | ||
===<big>Ground Throw</big>=== | ===<big>Ground Throw</big>=== | ||
{{GGXRD-R2 Move Card|game=GGXRD-R2 | |||
|input=Ground Throw | |||
|description= | |||
Potemkin channels his former self, and scoops his opponent up over his head, then slams them down like a ragdoll in front of him. This replaces his old over-the-shoulder throw, and comes with a few advantages in comparison. First and foremost, it keeps them much closer, and Potemkin recovers in time to attempt oki. Secondly, he now throws the opponent in the same direction as the lever is pressed, meaning he can more easily throw the opponent into the corner while on defense. These benefits come at a cost, and that's virtually no combo options. Can be followed in midscreen with RC {{clr|4|2H}}>HFB>sj {{clr|1|j.P}}>{{clr|2|j.K}}>{{clr|3|j.S}}>ICPM, and in corner RRC>{{clr|2|6K}}>HFB 4x>trishula>6k>trishula>{{clr|2|j.K}} JC {{clr|4|j.H}}>ICPM | |||
{| | |||
{{ | |||
{{ | |||
| | |||
| | |||
}} | }} | ||
===<big>Air Throw</big>=== | ===<big>Air Throw</big>=== | ||
{{GGXRD-R2 Move Card|game=GGXRD-R2 | |||
|input=Air Throw | |||
|description= | |||
Potemkin snatches up the opponent and plays whack-a-mole with their head, slamming them sharply to the ground. You can RC and follow up with a {{clr|5|j.D}} for more damage and longer knockdown. | |||
{ | |||
{ | |||
|- | |||
| | |||
| | |||
}} | }} | ||
===<big>Dead Angle Attack</big>=== | ===<big>Dead Angle Attack</big>=== | ||
{{GGXRD-R2 Move Card|game=GGXRD-R2 | |||
|input=DAA | |||
|description= | |||
{ | |||
{ | |||
|- | |||
| | |||
| | |||
The same animation of {{clr|5|5D}}, it wall bounces but unlike #R you cannot combo off it. Pretty generic mid hitting DA, has a dead zone up close. | The same animation of {{clr|5|5D}}, it wall bounces but unlike #R you cannot combo off it. Pretty generic mid hitting DA, has a dead zone up close. | ||
}} | |||
===<big>Blitz Attack</big>=== | ===<big>Blitz Attack</big>=== | ||
{{GGXRD-R2 Move Card|game=GGXRD-R2 | |||
|input=Blitz,[Blitz] | |||
|versioned=name | |||
|description= | |||
Universal Blitz Attack. | |||
GGXRD- | |||
GGXRD- | |||
| | |||
}} | }} | ||
<br style="clear:both;"/> | |||
==Special Moves== | ==Special Moves== | ||
===<big>Heat Knuckle</big>=== | ===<big>Heat Knuckle</big>=== | ||
{{InputBadge|{{clr|4|623H}}}} | |||
{{GGXRD-R2 Move Card|game=GGXRD-R2 | |||
|input=623H,Heat Knuckle > 63214H | |||
|description= | |||
{{ | |||
| | |||
| | |||
Heat Knuckle is Potemkin's anti-air grab. He reaches his hand up at about a 45-degree angle, and if the opponent is caught, they're locked into his hand to be set on fire. After three hits, they get blown away. In the corner, Potemkin can actually grab them with another Heat Knuckle if he's still close enough. | Heat Knuckle is Potemkin's anti-air grab. He reaches his hand up at about a 45-degree angle, and if the opponent is caught, they're locked into his hand to be set on fire. After three hits, they get blown away. In the corner, Potemkin can actually grab them with another Heat Knuckle if he's still close enough. | ||
| Line 798: | Line 260: | ||
Since Heat Knuckle always sends the opponent away, there's '''no''' reason not to use Heat Extend except in rare instances where you can combo Heat Knuckle into itself. | Since Heat Knuckle always sends the opponent away, there's '''no''' reason not to use Heat Extend except in rare instances where you can combo Heat Knuckle into itself. | ||
}} | |||
===<big>Megafist</big>=== | ===<big>Megafist</big>=== | ||
{{InputBadge|{{clr|1|236P}} or {{clr|1|214P}}}} | |||
{{GGXRD-R2 Move Card|game=GGXRD-R2 | |||
|input=236P,214P | |||
|versioned=input | |||
|description= | |||
{ | |||
{ | |||
| | |||
| | |||
| | |||
Potemkin leaps forward or backward with a heavy double-punch. Though he isn't airborne immediately, he does get some lower body invulnerability from frame 1 which persists all the way into Megafist's recovery. | Potemkin leaps forward or backward with a heavy double-punch. Though he isn't airborne immediately, he does get some lower body invulnerability from frame 1 which persists all the way into Megafist's recovery. | ||
| Line 837: | Line 276: | ||
*Forward: Lower body invuln frames 1~39, airborne from frame 3 onward. | *Forward: Lower body invuln frames 1~39, airborne from frame 3 onward. | ||
*Backward: Lower body invuln frames 1~39, airborne from frame 5 onward. | *Backward: Lower body invuln frames 1~39, airborne from frame 5 onward. | ||
}} | |||
===<big>Slide Head</big>=== | ===<big>Slide Head</big>=== | ||
{{InputBadge|{{clr|3|236S}}}} | |||
{{GGXRD-R2 Move Card|game=GGXRD-R2 | |||
|input=236S | |||
|description= | |||
{{ | |||
|- | |||
| | |||
| | |||
Potemkin rears back, then slams his massive body to the ground, creating a shockwave. This attack actually has two stages. The first is Potemkin's actual body, a standard attack that hits low and knocks the opponent down if they don't block it. Once he lands, the shockwave occurs: if the opponent is on the ground when it happens, they get knocked down. In both cases, the opponent is knocked down for considerably longer than usual, giving Potemkin plenty of time to close the distance, if applicable, and set up okizeme. Note, however, that if the first attack connects, even if it's blocked, the shockwave will not occur. | Potemkin rears back, then slams his massive body to the ground, creating a shockwave. This attack actually has two stages. The first is Potemkin's actual body, a standard attack that hits low and knocks the opponent down if they don't block it. Once he lands, the shockwave occurs: if the opponent is on the ground when it happens, they get knocked down. In both cases, the opponent is knocked down for considerably longer than usual, giving Potemkin plenty of time to close the distance, if applicable, and set up okizeme. Note, however, that if the first attack connects, even if it's blocked, the shockwave will not occur. | ||
| Line 876: | Line 292: | ||
There are some exceptions to the rules for Slide Head's shockwave. Some characters have dashes that are considered airborne, which allow them to avoid the shockwave simply by dashing forward (I-no, Ramlethal, Dizzy, Johnny, etc). Generally these dashes have obvious effects, like teleportation, or make a distinctive sound when starting up to indicate their unique status. | There are some exceptions to the rules for Slide Head's shockwave. Some characters have dashes that are considered airborne, which allow them to avoid the shockwave simply by dashing forward (I-no, Ramlethal, Dizzy, Johnny, etc). Generally these dashes have obvious effects, like teleportation, or make a distinctive sound when starting up to indicate their unique status. | ||
}} | |||
===<big>Hammer Fall</big>=== | ===<big>Hammer Fall</big>=== | ||
{{InputBadge|{{clr|4|[4]6H}}}} | |||
{{GGXRD-R2 Move Card|game=GGXRD-R2 | |||
|input=[4]6H,Hammer Fall > P | |||
|versioned=input | |||
|description= | |||
{{ | |||
| | |||
| | |||
Potemkin's go-to mobility and pressure tool. He lunges forward on the ground, arms spread, then smashes them together once he's in range of the opponent. He can travel about 3/4 of a screen length like this, and the attack only goes active if the opponent is in range to be hit by it (though, if they're moving at the time, the actual attack portion's startup may still cause it to miss). While traveling forward, Potemkin has a single hit of super armor, which will absorb any attack besides Overdrives for half damage and keep on truckin'. | Potemkin's go-to mobility and pressure tool. He lunges forward on the ground, arms spread, then smashes them together once he's in range of the opponent. He can travel about 3/4 of a screen length like this, and the attack only goes active if the opponent is in range to be hit by it (though, if they're moving at the time, the actual attack portion's startup may still cause it to miss). While traveling forward, Potemkin has a single hit of super armor, which will absorb any attack besides Overdrives for half damage and keep on truckin'. | ||
| Line 920: | Line 307: | ||
*Create combos by canceling attacks into Hammerfall, Braking, then following up. (Especially common after {{clr|4|2H}} or cornered {{clr|2|6K}}s!) | *Create combos by canceling attacks into Hammerfall, Braking, then following up. (Especially common after {{clr|4|2H}} or cornered {{clr|2|6K}}s!) | ||
}} | |||
===<big>F.D.B.</big>=== | ===<big>F.D.B.</big>=== | ||
{{InputBadge|{{clr|3|63214S}}}} | |||
{{GGXRD-R2 Move Card|game=GGXRD-R2 | |||
|input=63214S,63214[S],Reflect Projectile | |||
|versioned=input | |||
|description= | |||
{ | |||
{ | |||
| | |||
| | |||
| | |||
Flick Dat Back! Potemkin kneels down and props his arm up, storing up energy and unleashing it with a quick flick. The flick itself has a massive hitbox, much larger than its animation suggestions, and can stagger opponents on hit or keep you safe on block. Its faster startup compared to previous games creates new opportunities for combos on the ground, especially after {{clr|2|6K}}. | Flick Dat Back! Potemkin kneels down and props his arm up, storing up energy and unleashing it with a quick flick. The flick itself has a massive hitbox, much larger than its animation suggestions, and can stagger opponents on hit or keep you safe on block. Its faster startup compared to previous games creates new opportunities for combos on the ground, especially after {{clr|2|6K}}. | ||
| Line 966: | Line 322: | ||
*If Potemkin reflects a projectile, he becomes strike invuln until he recovers. | *If Potemkin reflects a projectile, he becomes strike invuln until he recovers. | ||
{ | {{{!}} class="mw-collapsible mw-collapsed wikitable" | ||
{{!}}- | |||
{{!}}+'''Reflectable Projectiles Table''' | |||
{{!}}- | |||
!Character | !Character | ||
!Move | !Move | ||
{{!}}- | |||
{{!}}{{Character Label|GGXRD-R2|Answer|label=Answer}} | |||
{{!}} | |||
*{{MiniMoveCard|game=GGXRDR2|chara=Answer|input=236S|label=Business Ninpo: Caltrops}} | *{{MiniMoveCard|game=GGXRDR2|chara=Answer|input=236S|label=Business Ninpo: Caltrops}} | ||
*{{MiniMoveCard|game=GGXRDR2|chara=Answer|input=421S/H|label=Business Ninpo: Under the Bus}} | *{{MiniMoveCard|game=GGXRDR2|chara=Answer|input=421S/H|label=Business Ninpo: Under the Bus}} | ||
{{!}}- | |||
{{!}}{{Character Label|GGXRD-R2|Axl Low|label=Axl Low}} | |||
{{!}} | |||
*{{MiniMoveCard|game=GGXRDR2|chara=Axl Low|input=[4]6S|label=Sickle Flash}} | *{{MiniMoveCard|game=GGXRDR2|chara=Axl Low|input=[4]6S|label=Sickle Flash}} | ||
*{{MiniMoveCard|game=GGXRDR2|chara=Axl Low|input=41236H|label=Spindle Spinner}} | *{{MiniMoveCard|game=GGXRDR2|chara=Axl Low|input=41236H|label=Spindle Spinner}} | ||
{{!}}- | |||
{{!}}{{Character Label|GGXRD-R2|Baiken|label=Baiken}} | |||
{{!}} | |||
*{{MiniMoveCard|game=GGXRDR2|chara=Baiken|input=236K|label=Tatami Gaeshi}} | *{{MiniMoveCard|game=GGXRDR2|chara=Baiken|input=236K|label=Tatami Gaeshi}} | ||
*{{MiniMoveCard|game=GGXRDR2|chara=Baiken|input=Ground Azami > D|label=Yashagatana}} | *{{MiniMoveCard|game=GGXRDR2|chara=Baiken|input=Ground Azami > D|label=Yashagatana}} | ||
{{!}}- | |||
{{!}}{{Character Label|GGXRD-R2|Bedman|label=Bedman}} | |||
{{!}} | |||
*{{MiniMoveCard|game=GGXRDR2|chara=Bedman|input=236P|label=Task A}} | *{{MiniMoveCard|game=GGXRDR2|chara=Bedman|input=236P|label=Task A}} | ||
*{{MiniMoveCard|game=GGXRDR2|chara=Bedman|input=236K|label=Task A'}} | *{{MiniMoveCard|game=GGXRDR2|chara=Bedman|input=236K|label=Task A'}} | ||
*{{MiniMoveCard|game=GGXRDR2|chara=Bedman|input=214X|label=Deja Vu}} (All versions.) | *{{MiniMoveCard|game=GGXRDR2|chara=Bedman|input=214X|label=Deja Vu}} (All versions.) | ||
{{!}}- | |||
{{!}}{{Character Label|GGXRD-R2|Chipp Zanuff|label=Chipp Zanuff}} | |||
{{!}} | |||
*{{MiniMoveCard|game=GGXRDR2|chara=Chipp Zanuff|input=41236H|label=Gamma Blade}} | *{{MiniMoveCard|game=GGXRDR2|chara=Chipp Zanuff|input=41236H|label=Gamma Blade}} | ||
*{{MiniMoveCard|game=GGXRDR2|chara=Chipp Zanuff|input=j.214P Slow|label=Shuriken}} | *{{MiniMoveCard|game=GGXRDR2|chara=Chipp Zanuff|input=j.214P Slow|label=Shuriken}} | ||
*{{MiniMoveCard|game=GGXRDR2|chara=Chipp Zanuff|input=Wall Cling > K|label=Kunai}} | *{{MiniMoveCard|game=GGXRDR2|chara=Chipp Zanuff|input=Wall Cling > K|label=Kunai}} | ||
{{!}}- | |||
{{!}}{{Character Label|GGXRD-R2|Dizzy|label=Dizzy}} | |||
{{!}} | |||
*{{MiniMoveCard|game=GGXRDR2|chara=Dizzy|input=236S|label=I used this to catch fish}} | *{{MiniMoveCard|game=GGXRDR2|chara=Dizzy|input=236S|label=I used this to catch fish}} | ||
*{{MiniMoveCard|game=GGXRDR2|chara=Dizzy|input=236H|label=For searing cod...}} | *{{MiniMoveCard|game=GGXRDR2|chara=Dizzy|input=236H|label=For searing cod...}} | ||
| Line 1,018: | Line 374: | ||
*{{MiniMoveCard|game=GGXRDR2|chara=Dizzy|input=j.236K|label=What happens when I'm TOO alone}} (The bubble's explosion.) | *{{MiniMoveCard|game=GGXRDR2|chara=Dizzy|input=j.236K|label=What happens when I'm TOO alone}} (The bubble's explosion.) | ||
{{!}}- | |||
{{!}}{{Character Label|GGXRD-R2|Elphelt Valentine|label=Elphelt Valentine}} | |||
{{!}} | |||
*{{MiniMoveCard|game=GGXRDR2|chara=Elphelt Valentine|input=236P|label=Pineberry}} (Both the toss and the explosion.) | *{{MiniMoveCard|game=GGXRDR2|chara=Elphelt Valentine|input=236P|label=Pineberry}} (Both the toss and the explosion.) | ||
*{{MiniMoveCard|game=GGXRDR2|chara=Elphelt Valentine|input=236S|label=Miss Confire}} | *{{MiniMoveCard|game=GGXRDR2|chara=Elphelt Valentine|input=236S|label=Miss Confire}} | ||
{{!}}- | |||
{{!}}{{Character Label|GGXRD-R2|Faust|label=Faust}} | |||
{{!}} | |||
*{{MiniMoveCard|game=GGXRDR2|chara=Faust|input=5D Reflect|label=5D Reflect}} (The resulting baseball from a successful reflect.) | *{{MiniMoveCard|game=GGXRDR2|chara=Faust|input=5D Reflect|label=5D Reflect}} (The resulting baseball from a successful reflect.) | ||
*{{MiniMoveCard|game=GGXRDR2|chara=Faust|input=j.236P|label=Love}} (Only the thrown bag, not the explosion itself.) | *{{MiniMoveCard|game=GGXRDR2|chara=Faust|input=j.236P|label=Love}} (Only the thrown bag, not the explosion itself.) | ||
| Line 1,039: | Line 395: | ||
**{{MiniMoveCard|game=GGXRDR2|chara=Faust|input=Jump Pad|label=Jump Pad}} (After it lands.) | **{{MiniMoveCard|game=GGXRDR2|chara=Faust|input=Jump Pad|label=Jump Pad}} (After it lands.) | ||
{{!}}- | |||
{{!}}{{Character Label|GGXRD-R2|I-No|label=I-No}} | |||
{{!}} | |||
*{{MiniMoveCard|game=GGXRDR2|chara=I-No|input=5D|label=5D}} (Only after being YRC'd.) | *{{MiniMoveCard|game=GGXRDR2|chara=I-No|input=5D|label=5D}} (Only after being YRC'd.) | ||
*{{MiniMoveCard|game=GGXRDR2|chara=I-No|input=214P|label=Antidepressant Scale}} | *{{MiniMoveCard|game=GGXRDR2|chara=I-No|input=214P|label=Antidepressant Scale}} | ||
| Line 1,047: | Line 403: | ||
*{{MiniMoveCard|game=GGXRDR2|chara=I-No|input=214S|label=Chemical Love (Vertical)}} | *{{MiniMoveCard|game=GGXRDR2|chara=I-No|input=214S|label=Chemical Love (Vertical)}} | ||
{{!}}- | |||
{{!}}{{Character Label|GGXRD-R2|Jack-O|label=Jack-O}} | |||
{{!}} | |||
*{{MiniMoveCard|game=GGXRDR2|chara=Jack-O|input=j.D|label=Remove the Chain of Chiron}} | *{{MiniMoveCard|game=GGXRDR2|chara=Jack-O|input=j.D|label=Remove the Chain of Chiron}} | ||
*{{MiniMoveCard|game=GGXRDR2|chara=Jack-O|input=Ghost 5P/K/S|label=Ghost Throw}} | *{{MiniMoveCard|game=GGXRDR2|chara=Jack-O|input=Ghost 5P/K/S|label=Ghost Throw}} | ||
| Line 1,055: | Line 411: | ||
*All Servant attacks. | *All Servant attacks. | ||
{{!}}- | |||
{{!}}{{Character Label|GGXRD-R2|Jam Kuradoberi|label=Jam Kuradoberi}} | |||
{{!}} | |||
*N/A | *N/A | ||
{{!}}- | |||
{{!}}{{Character Label|GGXRD-R2|Johnny|label=Johnny}} | |||
{{!}} | |||
*{{MiniMoveCard|game=GGXRDR2|chara=Johnny|input=236H|label=Glitter is Gold}} | *{{MiniMoveCard|game=GGXRDR2|chara=Johnny|input=236H|label=Glitter is Gold}} | ||
*{{MiniMoveCard|game=GGXRDR2|chara=Johnny|input=623K > K|label=Zweihander}} | *{{MiniMoveCard|game=GGXRDR2|chara=Johnny|input=623K > K|label=Zweihander}} | ||
{{!}}- | |||
{{!}}{{Character Label|GGXRD-R2|Kum Haehyun|label=Kum Haehyun}} | |||
{{!}} | |||
*{{MiniMoveCard|game=GGXRDR2|chara=Kum Haehyun|input=5D|label=5D}} (Only after being YRC'd.) | *{{MiniMoveCard|game=GGXRDR2|chara=Kum Haehyun|input=5D|label=5D}} (Only after being YRC'd.) | ||
*{{MiniMoveCard|game=GGXRDR2|chara=Kum Haehyun|input=236S|label=Tuning Ball}} | *{{MiniMoveCard|game=GGXRDR2|chara=Kum Haehyun|input=236S|label=Tuning Ball}} | ||
{{!}}- | |||
{{!}}{{Character Label|GGXRD-R2|Ky Kiske|label=Ky Kiske}} | |||
{{!}} | |||
*{{MiniMoveCard|game=GGXRDR2|chara=Ky Kiske|input=5D|label=5D}} | *{{MiniMoveCard|game=GGXRDR2|chara=Ky Kiske|input=5D|label=5D}} | ||
*{{MiniMoveCard|game=GGXRDR2|chara=Ky Kiske|input=j.D|label=j.D}} | *{{MiniMoveCard|game=GGXRDR2|chara=Ky Kiske|input=j.D|label=j.D}} | ||
| Line 1,081: | Line 437: | ||
*{{MiniMoveCard|game=GGXRDR2|chara=Ky Kiske|input=j.236S|label=Air Stun Edge}} | *{{MiniMoveCard|game=GGXRDR2|chara=Ky Kiske|input=j.236S|label=Air Stun Edge}} | ||
{{!}}- | |||
{{!}}{{Character Label|GGXRD-R2|Leo Whitefang|label=Leo Whitefang}} | |||
{{!}} | |||
*{{MiniMoveCard|game=GGXRDR2|chara=Leo Whitefang|input=[4]6S|label=Graviert Wurde}} | *{{MiniMoveCard|game=GGXRDR2|chara=Leo Whitefang|input=[4]6S|label=Graviert Wurde}} | ||
{{!}}- | |||
{{!}}{{Character Label|GGXRD-R2|May|label=May}} | |||
{{!}} | |||
*{{MiniMoveCard|game=GGXRDR2|chara=May|input=41236P|label=Applause for the Victim}} (As long as she's not riding it.) | *{{MiniMoveCard|game=GGXRDR2|chara=May|input=41236P|label=Applause for the Victim}} (As long as she's not riding it.) | ||
*{{MiniMoveCard|game=GGXRDR2|chara=May|input=214P|label=Don't Miss It!}} | *{{MiniMoveCard|game=GGXRDR2|chara=May|input=214P|label=Don't Miss It!}} | ||
{{!}}- | |||
{{!}}{{Character Label|GGXRD-R2|Millia Rage|label=Millia Rage}} | |||
{{!}} | |||
*{{MiniMoveCard|game=GGXRDR2|chara=Millia Rage|input=236S|label=Tandem Top}} | *{{MiniMoveCard|game=GGXRDR2|chara=Millia Rage|input=236S|label=Tandem Top}} | ||
*{{MiniMoveCard|game=GGXRDR2|chara=Millia Rage|input=j.214S|label=Silent Force}} | *{{MiniMoveCard|game=GGXRDR2|chara=Millia Rage|input=j.214S|label=Silent Force}} | ||
*{{MiniMoveCard|game=GGXRDR2|chara=Millia Rage|input=214H|label=Secret Garden}} | *{{MiniMoveCard|game=GGXRDR2|chara=Millia Rage|input=214H|label=Secret Garden}} | ||
{{!}}- | |||
{{!}}{{Character Label|GGXRD-R2|Potemkin|label=Potemkin}} | |||
{{!}} | |||
*{{MiniMoveCard|game=GGXRDR2|chara=Potemkin|input=236S|label=Slide Head}} | *{{MiniMoveCard|game=GGXRDR2|chara=Potemkin|input=236S|label=Slide Head}} | ||
*{{MiniMoveCard|game=GGXRDR2|chara=Potemkin|input=214K|label=Trishula}} | *{{MiniMoveCard|game=GGXRDR2|chara=Potemkin|input=214K|label=Trishula}} | ||
*{{MiniMoveCard|game=GGXRDR2|chara=Potemkin|input=Reflect Projectile|label=F.D.B. Projectile}} | *{{MiniMoveCard|game=GGXRDR2|chara=Potemkin|input=Reflect Projectile|label=F.D.B. Projectile}} | ||
{{!}}- | |||
{{!}}{{Character Label|GGXRD-R2|Ramlethal Valentine|label=Ramlethal Valentine}} | |||
{{!}} | |||
*{{MiniMoveCard|game=GGXRDR2|chara=Ramlethal Valentine|input=2S Deployed|label=Deploy Giant Sword}} (All versions.) | *{{MiniMoveCard|game=GGXRDR2|chara=Ramlethal Valentine|input=2S Deployed|label=Deploy Giant Sword}} (All versions.) | ||
*{{MiniMoveCard|game=GGXRDR2|chara=Ramlethal Valentine|input=214P|label=Cassius}} | *{{MiniMoveCard|game=GGXRDR2|chara=Ramlethal Valentine|input=214P|label=Cassius}} | ||
{{!}}- | |||
{{!}}{{Character Label|GGXRD-R2|Raven|label=Raven}} | |||
{{!}} | |||
*{{MiniMoveCard|game=GGXRDR2|chara=Raven|input=236P|label=Schmerz Berg}} | *{{MiniMoveCard|game=GGXRDR2|chara=Raven|input=236P|label=Schmerz Berg}} | ||
*{{MiniMoveCard|game=GGXRDR2|chara=Raven|input=j.236P/K|label=Gebrechlich Licht}} | *{{MiniMoveCard|game=GGXRDR2|chara=Raven|input=j.236P/K|label=Gebrechlich Licht}} | ||
*{{MiniMoveCard|game=GGXRDR2|chara=Raven|input=236H Level 0-2|label=Scharf Kugel}} | *{{MiniMoveCard|game=GGXRDR2|chara=Raven|input=236H Level 0-2|label=Scharf Kugel}} | ||
{{!}}- | |||
{{!}}{{Character Label|GGXRD-R2|Sin Kiske|label=Sin Kiske}} | |||
{{!}} | |||
*N/A | *N/A | ||
{{!}}- | |||
{{!}}{{Character Label|GGXRD-R2|Slayer|label=Slayer}} | |||
{{!}} | |||
*{{MiniMoveCard|game=GGXRDR2|chara=Slayer|input=Dandy > H|label=Helter Skelter}} | *{{MiniMoveCard|game=GGXRDR2|chara=Slayer|input=Dandy > H|label=Helter Skelter}} | ||
{{!}}- | |||
{{!}}{{Character Label|GGXRD-R2|Sol Badguy|label=Sol Badguy}} | |||
{{!}} | |||
*{{MiniMoveCard|game=GGXRDR2|chara=Sol Badguy|input=236P|label=Gun Flame}} | *{{MiniMoveCard|game=GGXRDR2|chara=Sol Badguy|input=236P|label=Gun Flame}} | ||
*{{MiniMoveCard|game=GGXRDR2|chara=Sol Badguy|input=j.214K|label=Break}} | *{{MiniMoveCard|game=GGXRDR2|chara=Sol Badguy|input=j.214K|label=Break}} | ||
{{!}}- | |||
{{!}}{{Character Label|GGXRD-R2|Venom|label=Venom}} | |||
{{!}} | |||
*{{MiniMoveCard|game=GGXRDR2|chara=Venom|input=Ball Hit|label=Ball Hit}} | *{{MiniMoveCard|game=GGXRDR2|chara=Venom|input=Ball Hit|label=Ball Hit}} | ||
*{{MiniMoveCard|game=GGXRDR2|chara=Venom|input=41236P/K/S/H|label=QV}} | *{{MiniMoveCard|game=GGXRDR2|chara=Venom|input=41236P/K/S/H|label=QV}} | ||
| Line 1,143: | Line 499: | ||
*{{MiniMoveCard|game=GGXRDR2|chara=Venom|input=[2]8S|label=Carcass Raid}} | *{{MiniMoveCard|game=GGXRDR2|chara=Venom|input=[2]8S|label=Carcass Raid}} | ||
{{!}}- | |||
{{!}}{{Character Label|GGXRD-R2|Zato-1|label=Zato-1}} | |||
{{!}} | |||
*{{MiniMoveCard|game=GGXRDR2|chara=Zato-1|input=22S|label=Invite Hell}} | *{{MiniMoveCard|game=GGXRDR2|chara=Zato-1|input=22S|label=Invite Hell}} | ||
*{{MiniMoveCard|game=GGXRDR2|chara=Zato-1|input=Eddie ]D[|label=Drill Special}} | *{{MiniMoveCard|game=GGXRDR2|chara=Zato-1|input=Eddie ]D[|label=Drill Special}} | ||
{{!}}} | |||
}} | |||
===<big>Potemkin Buster</big>=== | ===<big>Potemkin Buster</big>=== | ||
{{InputBadge|{{clr|1|632146P}}}} | |||
{{GGXRD-R2 Move Card|game=GGXRD-R2 | |||
|input=632146P | |||
|description= | |||
{{ | |||
|- | |||
| | |||
| | |||
Potemkin's signature attack, and one of the scariest command grabs in all of fighting games. He pulls the opponent up, hoists them over his head, then leaps into the air and slams them down before throwing them aside. Deals high damage, has deceptively long reach and incredibly fast startup. | Potemkin's signature attack, and one of the scariest command grabs in all of fighting games. He pulls the opponent up, hoists them over his head, then leaps into the air and slams them down before throwing them aside. Deals high damage, has deceptively long reach and incredibly fast startup. | ||
If you do have the meter to spend, RC as he throws the opponent away, jump forward and hit {{clr|4|j.H}} late, then follow up on the ground with something like {{clr|3|c.S}} > {{clr|3|f.S}} > Heat Knuckle, or a {{clr|2|6K}} loop if in the corner. | If you do have the meter to spend, RC as he throws the opponent away, jump forward and hit {{clr|4|j.H}} late, then follow up on the ground with something like {{clr|3|c.S}} > {{clr|3|f.S}} > Heat Knuckle, or a {{clr|2|6K}} loop if in the corner. | ||
}} | |||
===<big>Trishula</big>=== | ===<big>Trishula</big>=== | ||
{{InputBadge|{{clr|2|214K}}}} | |||
{{GGXRD-R2 Move Card|game=GGXRD-R2 | |||
|input=214K | |||
|description= | |||
{{ | |||
|- | |||
| | |||
| | |||
Potemkin hunkers down before exploding in a pillar of fire. Has high vertical reach - far past what the fire suggests - but almost none horizontally. Launches the opponent on hit and also pulls them slightly inward, with time to air combo (usually with superjump {{clr|1|j.P}} > {{clr|2|j.K}} > {{clr|3|j.S}} > ICPM). CH near corner grants {{clr|4|6H}} combos. | Potemkin hunkers down before exploding in a pillar of fire. Has high vertical reach - far past what the fire suggests - but almost none horizontally. Launches the opponent on hit and also pulls them slightly inward, with time to air combo (usually with superjump {{clr|1|j.P}} > {{clr|2|j.K}} > {{clr|3|j.S}} > ICPM). CH near corner grants {{clr|4|6H}} combos. | ||
Absorbs projectiles while starting up, and has upper body invulnerability to boot, but is mostly used as combo tool or to catch really obvious air approaches. Potemkin is in counter hit state during recovery. | Absorbs projectiles while starting up, and has upper body invulnerability to boot, but is mostly used as combo tool or to catch really obvious air approaches. Potemkin is in counter hit state during recovery. | ||
}} | |||
===<big>I.C.P.M</big>=== | ===<big>I.C.P.M</big>=== | ||
{{InputBadge|{{clr|4|j.41236H}}}} | |||
{{GGXRD-R2 Move Card|game=GGXRD-R2 | |||
|input=j.41236H | |||
|description= | |||
{ | |||
{ | |||
|- | |||
| | |||
| | |||
Potemkin propels himself through the air in an arc, leaving smoke in his wake. The move is active until Potemkin hits the ground. If he hits his opponent, they're pinned to his Pickelhaube and are dragged to the ground with him. If he misses, he sticks in the ground himself and is stuck there briefly before recovering, very unsafe on block/whiff. | Potemkin propels himself through the air in an arc, leaving smoke in his wake. The move is active until Potemkin hits the ground. If he hits his opponent, they're pinned to his Pickelhaube and are dragged to the ground with him. If he misses, he sticks in the ground himself and is stuck there briefly before recovering, very unsafe on block/whiff. | ||
| Line 1,266: | Line 548: | ||
*27F: Leo | *27F: Leo | ||
*29F: Chipp, Sin | *29F: Chipp, Sin | ||
}} | |||
<br style="clear:both;"/> | |||
==Overdrives== | ==Overdrives== | ||
===<big>Heavenly Potemkin Buster</big>=== | ===<big>Heavenly Potemkin Buster</big>=== | ||
{{InputBadge|{{clr|3|236236S}}}} {{InputBadge|({{clr|5|236236D}})}} | |||
{{GGXRD-R2 Move Card|game=GGXRD-R2 | |||
|input=236236S | |||
|description= | |||
{ | |||
{ | |||
|- | |||
| | |||
| | |||
'''The''' anti-air grab. Potemkin launches his entire body upward at about a 45-degree angle, although the hitbox is only on the inside of his hand and arm. | '''The''' anti-air grab. Potemkin launches his entire body upward at about a 45-degree angle, although the hitbox is only on the inside of his hand and arm. | ||
Does good damage, and is easy to connect after virtually any ground-to-air hit, making it a reliable ender. Can also be used to punish air techs or for a hard read on a jump. Corner HPB > RRC > {{clr|4|6H}} > xx leads to huge damage. Hellfire burst HPB is one of the highest damage attacks in the entire game (if you somehow manage to land it). | Does good damage, and is easy to connect after virtually any ground-to-air hit, making it a reliable ender. Can also be used to punish air techs or for a hard read on a jump. Corner HPB > RRC > {{clr|4|6H}} > xx leads to huge damage. Hellfire burst HPB is one of the highest damage attacks in the entire game (if you somehow manage to land it). | ||
}} | |||
===<big>Giganter Kai</big>=== | ===<big>Giganter Kai</big>=== | ||
{{InputBadge|{{clr|4|632146H}}}} | |||
{{GGXRD-R2 Move Card|game=GGXRD-R2 | |||
|input=632146H | |||
|description= | |||
{{ | |||
|- | |||
| | |||
| | |||
Potemkin rips the air apart like Hulk Hogan's tanktop, creating a field of energy that slowly floats forward. This wave of energy absorbs other projectiles that hit it, and if it hits the opponent it staggers them (if grounded) or puts them in a slow float with long untechable time (if airborne). In both instances, Potemkin is afforded plenty of time to follow up for big damage. Since it's a projectile, he isn't pushed back by the attack connecting, allowing him to make some interesting combos in the corner. In addition, the energy wave has a very high stun modifier, making it easier to dizzy the opponent. | Potemkin rips the air apart like Hulk Hogan's tanktop, creating a field of energy that slowly floats forward. This wave of energy absorbs other projectiles that hit it, and if it hits the opponent it staggers them (if grounded) or puts them in a slow float with long untechable time (if airborne). In both instances, Potemkin is afforded plenty of time to follow up for big damage. Since it's a projectile, he isn't pushed back by the attack connecting, allowing him to make some interesting combos in the corner. In addition, the energy wave has a very high stun modifier, making it easier to dizzy the opponent. | ||
Fully invuln frames 1-9. | Fully invuln frames 1-9. | ||
}} | |||
===<big>Gigantic Bullet Kai</big>=== | ===<big>Gigantic Bullet Kai</big>=== | ||
{{InputBadge|Giganter Kai > {{clr|1|4123641236P}}}} | |||
{{GGXRD-R2 Move Card|game=GGXRD-R2 | |||
|input=Giganter Kai > 4123641236P | |||
|description= | |||
{ | |||
{ | |||
|- | |||
| | |||
| | |||
The follow-up to Giganter. Holographic alerts fill the air around Potemkin as he bends forward, extending his body mechanically before launching himself forward. | The follow-up to Giganter. Holographic alerts fill the air around Potemkin as he bends forward, extending his body mechanically before launching himself forward. | ||
| Line 1,370: | Line 583: | ||
The core factor for deciding which to use is your opponent's current health bar - the more health they have, the more you'll want to favor going for dizzy. Positioning matters as well, since Bullet only offers the opportunity to follow up if you're in or very near the corner. | The core factor for deciding which to use is your opponent's current health bar - the more health they have, the more you'll want to favor going for dizzy. Positioning matters as well, since Bullet only offers the opportunity to follow up if you're in or very near the corner. | ||
}} | |||
<br style="clear:both;"/> | |||
==[[GGXRD-R2/Offense#Instant Kill|Instant Kill]]== | ==[[GGXRD-R2/Offense#Instant Kill|Instant Kill]]== | ||
===<big>Infernal Tour</big>=== | ===<big>Infernal Tour</big>=== | ||
{{InputBadge|in IK mode: {{clr|4|236236H}}}} | |||
{{GGXRD-R2 Move Card|game=GGXRD-R2 | |||
|input=236236H |type=instantkill | |||
|description= | |||
Cannot be re-blitzed like other IK's. Much cooler than Magnum Opera. | |||
{{ | |||
|- | |||
| | |||
| | |||
| | |||
}} | }} | ||
<br style="clear:both;"/> | |||
= | |||
==External References== | ==External References== | ||
Revision as of 15:21, 27 September 2022
This can be for a variety of reasons including but not limited to: spelling mistakes, unnecessary information, poor formatting, and other metrics per common sense reasoning.
Consider helping rewrite it.
Potemkin is Guilty Gear's mainstay grappler. Potemkin uses short blockstrings combined with approaching moves like Hammerfall to overwhelm and confuse his opponent into making a mistake, then punishes their reaction or lack thereof.
![]() Potemkin
Potemkin ![]() Potemkin uses short blockstrings combined with approaching moves like Hammerfall to overwhelm and confuse his opponent into making a mistake, then punishes their reaction or lack thereof.
Potemkin uses short blockstrings combined with approaching moves like Hammerfall to overwhelm and confuse his opponent into making a mistake, then punishes their reaction or lack thereof.
- Potemkin Buster: The command grab that defines Potemkin. Blazing fast with huge range and damage, it lends itself well for use on offense and on defence when combined with universal mechanics and his great backdash.
- Powerful Backdash: A contender for the best backdash. A very good tool to get out of pressure situations due to being fully invincible until its final frame.
- Obscene Corner Damage: Some of the highest damaging conversions in the game off corner hits or Potemkin Buster.
- High Stun Potential: A number of Potemkin's combos use normals with high stun modifiers, making a stun a big threat. His Giganter Kai super also has a huge stun modifier, giving him combos that stun from one touch.
- Massive Stamina: The highest effective health in the game. Potemkin has a defense modifier of 0.93. He also has the highest stun resistance in the entire game, making him borderline impossible to stun.
- Unique Antizoning Options: F.D.B and Slidehead allow Potemkin to deal with zoning.
- Corner Reliant: His midscreen pressure suffers from not having strong ways to discourage Fuzzy Jump A form of defence where the defender switches from blocking to jumping at a specific time in order to block a strike then jump when there's a gap. Typically used to defend against tick throws.s and he lacks damage without the corner.
- Slow: Potemkin cannot run or airdash, and has 5f jump startup. This makes approaching the opponent difficult and linear, and Hammerfall is not a suitable replacement for these shortcomings.
- Weak to Zoning: While he has F.D.B and Slidehead, Potemkin still struggles to deal with matchups where his opponent would rather stay out of his range.
- Large: Big hurtbox that makes him more susceptible to instant overheads, F-shiki Sometimes known as "Fuzzy Overhead". When you are in blockstun, you can switch high/low blocking, but your blocking animation and hurtbox does not change until you leave blockstun or block another attack. F-Shikis take advantage of this and use overheads that would miss on crouching characters, but not on standing characters.s, and character specific combos.
| Potemkin | |
|---|---|
 | |
| Defense | |
| x0.94 | |
| Guts Rating | |
| 3 | |
| Weight | |
| [94] Super Heavy | |
| Stun Resistance | |
| 80 | |
| Prejump | |
| 5F | |
| Backdash | |
| 21F (1~20F invuln) | |
| Wakeup Timing | |
| 24F (Face Up)/ 22F (Face Down) | |
| Unique Movement Options | |
| No Run Hammer Fall I.C.P.M | |
| Fastest Attack | |
| Reversals | |
Normal Moves
5P
Jab. While this is your fastest normal, the punching animation is very high, causing it to whiff on crouchers. Because of this, 5P is mostly reserved for anti airing rather than abare and other standard 5P things
Gatling Options: 5P, 2P, 6P, 5K, 2K, 6K, c.S, f.S, 2S, 5H, 2H, 6H, 5D, 2D
- can whiff cancel into 5P,2P,5K,2K from frame 8
5K
| Damage | GuardHow this attack can be blocked. | StartupThe number of frames between inputting an attack and when the attack becomes active. Includes first active frame. | ActiveThe number of frames for which a move has hitboxes. Occurs after Startup. | RecoveryThe number of frames after a move's active frames during which the character cannot act assuming the move is not canceled. | On-BlockThe difference between the attacker's recovery and the period that the opponent is in blockstun. This Frame Advantage value is based off the fact that the very first active frame touches the opponent. | Invuln |
|---|---|---|---|---|---|---|
| 22 | Low | 10 | 9 | 9 | -4 |
Low normal that works best as an oki tool due to its high number of active frames making it very easy to hit meaty. Also great for catching backdashes!
Gatling Options: 6K, c.S, f.S, 2S, 5H, 2H, 5D, 2D
| ProrationA percentage-based damage modifier applied to certain attacks independently of other forms of damage scaling. | Level
|
RISC+How much R.I.S.C. this move builds when normal or instant blocked. | RISC-How much R.I.S.C. this move removes on hit. | ||||||||||||||||||||||||||||||||||||
|---|---|---|---|---|---|---|---|---|---|---|---|---|---|---|---|---|---|---|---|---|---|---|---|---|---|---|---|---|---|---|---|---|---|---|---|---|---|---|---|
| 2 | 10 | 7 |
c.S
| Damage | GuardHow this attack can be blocked. | StartupThe number of frames between inputting an attack and when the attack becomes active. Includes first active frame. | ActiveThe number of frames for which a move has hitboxes. Occurs after Startup. | RecoveryThe number of frames after a move's active frames during which the character cannot act assuming the move is not canceled. | On-BlockThe difference between the attacker's recovery and the period that the opponent is in blockstun. This Frame Advantage value is based off the fact that the very first active frame touches the opponent. | Invuln |
|---|---|---|---|---|---|---|
| 40 | Mid | 8 | 3 | 11 | -1 |
A quick, close range jump cancellable normal that sees most use as combo or blockstring filler due to its good gatlings and jump cancel.
Gatling Options: 6K, f.S, 2S, 5H, 2H, 5D, 2D
| ProrationA percentage-based damage modifier applied to certain attacks independently of other forms of damage scaling. | Level
|
RISC+How much R.I.S.C. this move builds when normal or instant blocked. | RISC-How much R.I.S.C. this move removes on hit. | ||||||||||||||||||||||||||||||||||||
|---|---|---|---|---|---|---|---|---|---|---|---|---|---|---|---|---|---|---|---|---|---|---|---|---|---|---|---|---|---|---|---|---|---|---|---|---|---|---|---|
| 2 | 10 | 7 |
f.S
| Damage | GuardHow this attack can be blocked. | StartupThe number of frames between inputting an attack and when the attack becomes active. Includes first active frame. | ActiveThe number of frames for which a move has hitboxes. Occurs after Startup. | RecoveryThe number of frames after a move's active frames during which the character cannot act assuming the move is not canceled. | On-BlockThe difference between the attacker's recovery and the period that the opponent is in blockstun. This Frame Advantage value is based off the fact that the very first active frame touches the opponent. | Invuln |
|---|---|---|---|---|---|---|
| 36 | Mid | 11 | 7 | 18 | -11 |
5H's higher hitting brother, f.S is a long-range poke with a slight upward angle. Excellent at swatting IADs and distant air approaches as well as controlling the ground in front of you, even if the reward isn't always high on hit.
Beware low profile moves such as ![]() Sol's Grand Viper
Sol's Grand Viper![]() GuardLowx2~6,
GuardLowx2~6,
Midx3Startup17Recovery37+10 after landingAdvantage-56, which will zoom under f.S and punish you.
Gatling Options: 2S, 5H, 2H, 5D, 2D
| ProrationA percentage-based damage modifier applied to certain attacks independently of other forms of damage scaling. | Level
|
RISC+How much R.I.S.C. this move builds when normal or instant blocked. | RISC-How much R.I.S.C. this move removes on hit. | ||||||||||||||||||||||||||||||||||||
|---|---|---|---|---|---|---|---|---|---|---|---|---|---|---|---|---|---|---|---|---|---|---|---|---|---|---|---|---|---|---|---|---|---|---|---|---|---|---|---|
| 2 | 10 | 7 |
5H
| Damage | GuardHow this attack can be blocked. | StartupThe number of frames between inputting an attack and when the attack becomes active. Includes first active frame. | ActiveThe number of frames for which a move has hitboxes. Occurs after Startup. | RecoveryThe number of frames after a move's active frames during which the character cannot act assuming the move is not canceled. | On-BlockThe difference between the attacker's recovery and the period that the opponent is in blockstun. This Frame Advantage value is based off the fact that the very first active frame touches the opponent. | Invuln |
|---|---|---|---|---|---|---|
| 55 | Mid | 15 | 7 | 16 | -4 |
One of Potemkin's best pokes. It is huge, has solid and easy reward on counterhit at most ranges, and is mostly safe on block at -4. Has a lower hitbox than f.S, so it's not recommended to prevent air approaches in the same manner. Can be used to keep opponents honest at range, or to keep them blocking so you can approach with Hammerfall GuardMidStartup18[31]Recovery33Advantage-16.
Close hit combos into Hammerfall. On CH you can follow up with Hammerfall from any range, though if 5H catches an extended hurtbox it can fail to combo.
Similar to f.S, this move is susceptible to low profiles. Don't get too predictable!
Gatling Options: 5D, 2D
| ProrationA percentage-based damage modifier applied to certain attacks independently of other forms of damage scaling. | Level
|
RISC+How much R.I.S.C. this move builds when normal or instant blocked. | RISC-How much R.I.S.C. this move removes on hit. | ||||||||||||||||||||||||||||||||||||
|---|---|---|---|---|---|---|---|---|---|---|---|---|---|---|---|---|---|---|---|---|---|---|---|---|---|---|---|---|---|---|---|---|---|---|---|---|---|---|---|
| 4 | 20 | 6 |
6P
| Damage | GuardHow this attack can be blocked. | StartupThe number of frames between inputting an attack and when the attack becomes active. Includes first active frame. | ActiveThe number of frames for which a move has hitboxes. Occurs after Startup. | RecoveryThe number of frames after a move's active frames during which the character cannot act assuming the move is not canceled. | On-BlockThe difference between the attacker's recovery and the period that the opponent is in blockstun. This Frame Advantage value is based off the fact that the very first active frame touches the opponent. | Invuln |
|---|---|---|---|---|---|---|
| 42 | Mid | 11 | 7 | 19 | -9 | 1~4F Upper body 5~12F Above Knees |
The go-to anti-air. It has impressive upper-body invulnerability and a sizable hitbox, which is good because it's really only any good when it counter hits. A normal hit will lead to pretty much nothing, except for a very close hit where you can link 5P into Heat Knuckle GuardUnblockable Hit GrabStartup12Recovery21Advantage+14. On counter hit, you can combo into Heat knuckle at most ranges and an air series into I.C.P.M
 GuardMidStartup13Recovery29Advantage- at certain ranges
Upper body invuln frames 1~22.
| ProrationA percentage-based damage modifier applied to certain attacks independently of other forms of damage scaling. | Level
|
RISC+How much R.I.S.C. this move builds when normal or instant blocked. | RISC-How much R.I.S.C. this move removes on hit. | ||||||||||||||||||||||||||||||||||||
|---|---|---|---|---|---|---|---|---|---|---|---|---|---|---|---|---|---|---|---|---|---|---|---|---|---|---|---|---|---|---|---|---|---|---|---|---|---|---|---|
| 3 | 14 | 5 |
- float opponent on hit, normal hit untechable for 30f, counter hit untechable for 39f
6K
| Damage | GuardHow this attack can be blocked. | StartupThe number of frames between inputting an attack and when the attack becomes active. Includes first active frame. | ActiveThe number of frames for which a move has hitboxes. Occurs after Startup. | RecoveryThe number of frames after a move's active frames during which the character cannot act assuming the move is not canceled. | On-BlockThe difference between the attacker's recovery and the period that the opponent is in blockstun. This Frame Advantage value is based off the fact that the very first active frame touches the opponent. | Invuln |
|---|---|---|---|---|---|---|
| 40 | Mid | 16 | 8 | 20 | -9 |
An integral forward advancing normal, both in pressure and in corner combos.
Since it clears lot of space in a short amount of time, this can be used to stick to your opponent in blockstring. On normal block, cancelling to Flick GuardMidStartup19Recovery12Advantage+2 leaves a 1f gap, cancelling to Hammerfall
 GuardMidStartup18[31]Recovery33Advantage-16 true strings but a slight delay will leave a gap, and cancelling to Hammerfall Brake will leave you +2! When combining all these options, 6K becomes a formidable threat as a pressure tool as it becomes a prime point to tick throw, reset pressure, or do a devastating frametrap. A savvy defender will look to instant block this move, as it takes most of the sting out of it on block by making the special cancel gaps larger and making it minus if cancelled to Hammerfall Brake. They may also use FD to push you out to make 6K whiff if you're not careful with your blockstrings
In the corner, 6K works excellent as a frametrap to catch jumps as on air hit it causes a long enough wallsplat to loop into itself through [6K > Hammerfall Brake]xN. These loops are a staple combo filler in the corner due to dealing very high damage.
- On air hit, causes approximately 36f of wallsplat.
- Staggers on counterhit
| ProrationA percentage-based damage modifier applied to certain attacks independently of other forms of damage scaling. | Level
|
RISC+How much R.I.S.C. this move builds when normal or instant blocked. | RISC-How much R.I.S.C. this move removes on hit. | ||||||||||||||||||||||||||||||||||||
|---|---|---|---|---|---|---|---|---|---|---|---|---|---|---|---|---|---|---|---|---|---|---|---|---|---|---|---|---|---|---|---|---|---|---|---|---|---|---|---|
| 4 | 20 | 6 |
- Blows opponent away on airhit
- Wallstick(normal hit 36F/counter hit 72F)
- Ground counter hit staggers opponent. max: 29F
- Stagger recovery lv 1/2/3/max: 20/17/14/14F
6H
| Damage | GuardHow this attack can be blocked. | StartupThe number of frames between inputting an attack and when the attack becomes active. Includes first active frame. | ActiveThe number of frames for which a move has hitboxes. Occurs after Startup. | RecoveryThe number of frames after a move's active frames during which the character cannot act assuming the move is not canceled. | On-BlockThe difference between the attacker's recovery and the period that the opponent is in blockstun. This Frame Advantage value is based off the fact that the very first active frame touches the opponent. | Invuln |
|---|---|---|---|---|---|---|
| 80 | Mid | 23 | 5 | 30 | -16 |
His longest reaching normal, and his most damaging, but not suited to standard poking due to its slow startup. Instead, it can be seen as combo filler or as a situational combo starter
Midscreen, there is no meterless followup on normal hit, but they are launched a far distance towards the corner. On counterhit, the same applies. Closer to the corner, 6H's value as a combo starter drastically increases. In the corner, a slightly spaced normal hit 6H has meterless followups on a majority of the cast that leads to dealing 50%, and a counterhit 6H will lead to a practical, meterless TOD on half the cast from slightly closer than round start position. As a result, 6H is most commonly used to fish for counterhits or as a combo starter after a stun.
- On hit, blows the opponent backwards. Grounded hits float upward slightly in addition to this.
| ProrationA percentage-based damage modifier applied to certain attacks independently of other forms of damage scaling. | Level
|
RISC+How much R.I.S.C. this move builds when normal or instant blocked. | RISC-How much R.I.S.C. this move removes on hit. | ||||||||||||||||||||||||||||||||||||
|---|---|---|---|---|---|---|---|---|---|---|---|---|---|---|---|---|---|---|---|---|---|---|---|---|---|---|---|---|---|---|---|---|---|---|---|---|---|---|---|
| 4 | 20 | 6 |
- Blows opponent away on hit(knockdown)
- Counter hit roll for 82F
- Stun value: 120
5D
| Damage | GuardHow this attack can be blocked. | StartupThe number of frames between inputting an attack and when the attack becomes active. Includes first active frame. | ActiveThe number of frames for which a move has hitboxes. Occurs after Startup. | RecoveryThe number of frames after a move's active frames during which the character cannot act assuming the move is not canceled. | On-BlockThe difference between the attacker's recovery and the period that the opponent is in blockstun. This Frame Advantage value is based off the fact that the very first active frame touches the opponent. | Invuln |
|---|---|---|---|---|---|---|
| 30 | High | 27 | 2(2)2(2)2 | 8 | +1 |
Universal overhead. Punish tool, combo tool, and occasional surprise mixup tool.
5D has incredible reward when you can land it. A simple homing dash combo in the corner will deal extreme damage, and a homing jump that ends with I.C.P.M GuardMidStartup13Recovery29Advantage- has a great deal of corner carry.
Much like other 5Ds, it's fairly difficult to use in pressure due to its slow startup, obvious animation, and orange glow. However, its high reward on hit make it worth trying occasionally.
| ProrationA percentage-based damage modifier applied to certain attacks independently of other forms of damage scaling. | Level
|
RISC+How much R.I.S.C. this move builds when normal or instant blocked. | RISC-How much R.I.S.C. this move removes on hit. | ||||||||||||||||||||||||||||||||||||
|---|---|---|---|---|---|---|---|---|---|---|---|---|---|---|---|---|---|---|---|---|---|---|---|---|---|---|---|---|---|---|---|---|---|---|---|---|---|---|---|
| Initial: 80% | 4 | 20 | 20 |
- Maximum 1 Hit
2P
| Damage | GuardHow this attack can be blocked. | StartupThe number of frames between inputting an attack and when the attack becomes active. Includes first active frame. | ActiveThe number of frames for which a move has hitboxes. Occurs after Startup. | RecoveryThe number of frames after a move's active frames during which the character cannot act assuming the move is not canceled. | On-BlockThe difference between the attacker's recovery and the period that the opponent is in blockstun. This Frame Advantage value is based off the fact that the very first active frame touches the opponent. | Invuln |
|---|---|---|---|---|---|---|
| 12 | Mid | 6 | 4 | 6 | ±0 |
2P is a great normal that does just about everything you could ask of a P normal, except anti air.
It has amazing range that reaches at round start, and is only 6f Startup The time before an attack is active including the first active frame. For example, an attack with 10F startup means the attack will do nothing for 9 frames, then hit the opponent on the 10th frame., making it a great abare tool when Buster GuardGround Throw: 308000Startup3RecoveryTotal 40Advantage+62 doesn't work, and it has a short total duration and good active frames making it a good low-commitment poke. It also has great gatlings making it a good pressure starter as well as being able to combo into 5K and 2K at close range, but they can whiff at max range.
Gatling Options: 5P, 2P, 6P, 5K, 2K, 6K, c.S, f.S, 2S, 5H, 2H, 5D, 2D
| ProrationA percentage-based damage modifier applied to certain attacks independently of other forms of damage scaling. | Level
|
RISC+How much R.I.S.C. this move builds when normal or instant blocked. | RISC-How much R.I.S.C. this move removes on hit. | ||||||||||||||||||||||||||||||||||||
|---|---|---|---|---|---|---|---|---|---|---|---|---|---|---|---|---|---|---|---|---|---|---|---|---|---|---|---|---|---|---|---|---|---|---|---|---|---|---|---|
| 0 | 3 | 8 |
- can be self-canceled into 2P from frame 14
2K
| Damage | GuardHow this attack can be blocked. | StartupThe number of frames between inputting an attack and when the attack becomes active. Includes first active frame. | ActiveThe number of frames for which a move has hitboxes. Occurs after Startup. | RecoveryThe number of frames after a move's active frames during which the character cannot act assuming the move is not canceled. | On-BlockThe difference between the attacker's recovery and the period that the opponent is in blockstun. This Frame Advantage value is based off the fact that the very first active frame touches the opponent. | Invuln |
|---|---|---|---|---|---|---|
| 16 | Low | 7 | 4 | 14 | -6 |
2K is a simple normal. It is faster than 5K and better range, making it more desirable in neutral and pressure while 5K remains preferable for oki. It has good gatlings, but it only combos into c.S, f.S, and 2D.
Gatling Options: 6K, c.S, f.S, 2S, 2H, 5D, 2D
| ProrationA percentage-based damage modifier applied to certain attacks independently of other forms of damage scaling. | Level
|
RISC+How much R.I.S.C. this move builds when normal or instant blocked. | RISC-How much R.I.S.C. this move removes on hit. | ||||||||||||||||||||||||||||||||||||
|---|---|---|---|---|---|---|---|---|---|---|---|---|---|---|---|---|---|---|---|---|---|---|---|---|---|---|---|---|---|---|---|---|---|---|---|---|---|---|---|
| 1 | 6 | 7 |
2S
| Damage | GuardHow this attack can be blocked. | StartupThe number of frames between inputting an attack and when the attack becomes active. Includes first active frame. | ActiveThe number of frames for which a move has hitboxes. Occurs after Startup. | RecoveryThe number of frames after a move's active frames during which the character cannot act assuming the move is not canceled. | On-BlockThe difference between the attacker's recovery and the period that the opponent is in blockstun. This Frame Advantage value is based off the fact that the very first active frame touches the opponent. | Invuln |
|---|---|---|---|---|---|---|
| 36 | Mid | 14 | 3 | 20 | -6 |
2S is a fairly large button that sees use in pressure and in neutral as a poke.
Lots of normals gatling into this, and it staggers on counterhit, making it a good frametrap tool. When combined with its 6K gatling, 2S being 0 on block when cancelled to Hammerfall Brake turns it into a solid point to tick throw, reset pressure, and frametrap from. Though it has less range than f.S and 5H, it can also be used as a poke as it gatlings to 2D for a simple knockdown at all ranges
Gatling Options: 6K, 2H, 5D, 2D
| ProrationA percentage-based damage modifier applied to certain attacks independently of other forms of damage scaling. | Level
|
RISC+How much R.I.S.C. this move builds when normal or instant blocked. | RISC-How much R.I.S.C. this move removes on hit. | ||||||||||||||||||||||||||||||||||||
|---|---|---|---|---|---|---|---|---|---|---|---|---|---|---|---|---|---|---|---|---|---|---|---|---|---|---|---|---|---|---|---|---|---|---|---|---|---|---|---|
| 3 | 14 | 6 |
- stagger opponent on CH. Max Duration 29f
- Stagger recovery lv 1/2/3/max: 21/18/14/14F
2H
| Damage | GuardHow this attack can be blocked. | StartupThe number of frames between inputting an attack and when the attack becomes active. Includes first active frame. | ActiveThe number of frames for which a move has hitboxes. Occurs after Startup. | RecoveryThe number of frames after a move's active frames during which the character cannot act assuming the move is not canceled. | On-BlockThe difference between the attacker's recovery and the period that the opponent is in blockstun. This Frame Advantage value is based off the fact that the very first active frame touches the opponent. | Invuln |
|---|---|---|---|---|---|---|
| 60 | Mid | 13 | 5 | 35 | -21 |
2H is a slow but high reaching normal with short horizontal range. One of Potemkin's best counterhit starters, and decent at anti airing too.
As an anti-air, this normal is not recommended over 6P as it has no upper body invuln with similar startup, but is still usable on prediction. Its high vertical reach makes it best used on hard reading an air approach, or to hit someone high in the sky
On hit, 2H combos into an air series using Hammerfall GuardMidStartup18[31]Recovery33Advantage-16 Brake. On counter hit, the victim is unable to tech at all, leading to big damage and corner carry, or even a stun with Giganter Kai
 GuardMidStartup9+8RecoveryTotal 50Advantage±0. When combined with Hammerfall Brake making 2H +2 on block, this normal becomes a dangerous threat when applied properly.
Gatling Options: 5D, 2D
| ProrationA percentage-based damage modifier applied to certain attacks independently of other forms of damage scaling. | Level
|
RISC+How much R.I.S.C. this move builds when normal or instant blocked. | RISC-How much R.I.S.C. this move removes on hit. | ||||||||||||||||||||||||||||||||||||
|---|---|---|---|---|---|---|---|---|---|---|---|---|---|---|---|---|---|---|---|---|---|---|---|---|---|---|---|---|---|---|---|---|---|---|---|---|---|---|---|
| 4 | 20 | 6 |
- Floats opponent on hit
- Normal hit untechable for 30f, Counter hit knockdown.
- Stun value: 82
2D
| Damage | GuardHow this attack can be blocked. | StartupThe number of frames between inputting an attack and when the attack becomes active. Includes first active frame. | ActiveThe number of frames for which a move has hitboxes. Occurs after Startup. | RecoveryThe number of frames after a move's active frames during which the character cannot act assuming the move is not canceled. | On-BlockThe difference between the attacker's recovery and the period that the opponent is in blockstun. This Frame Advantage value is based off the fact that the very first active frame touches the opponent. | Invuln |
|---|---|---|---|---|---|---|
| 35 | Low | 12 | 5 | 14 | -2 |
Complimentary low poke to 2K and key grounded knockdown button.
Most grounded combos will end in this normal as it gives a safejump on hit, or just a normal meaty. In pressure, 2D's lack of cancel options means that it ends your pressure on block, but it's nigh unpunishable at only -2 with decent pushback. It can also be used on oki when you're too far away for 5K but it's better to use a normal with special cancels, like f.S, to continue pressure
| ProrationA percentage-based damage modifier applied to certain attacks independently of other forms of damage scaling. | Level
|
RISC+How much R.I.S.C. this move builds when normal or instant blocked. | RISC-How much R.I.S.C. this move removes on hit. | ||||||||||||||||||||||||||||||||||||
|---|---|---|---|---|---|---|---|---|---|---|---|---|---|---|---|---|---|---|---|---|---|---|---|---|---|---|---|---|---|---|---|---|---|---|---|---|---|---|---|
| 3 | 14 | 6 |
j.P
| Damage | GuardHow this attack can be blocked. | StartupThe number of frames between inputting an attack and when the attack becomes active. Includes first active frame. | ActiveThe number of frames for which a move has hitboxes. Occurs after Startup. | RecoveryThe number of frames after a move's active frames during which the character cannot act assuming the move is not canceled. | On-BlockThe difference between the attacker's recovery and the period that the opponent is in blockstun. This Frame Advantage value is based off the fact that the very first active frame touches the opponent. | Invuln |
|---|---|---|---|---|---|---|
| 18 | High / Air | 7 | 6 | 6 |
A quick elbow jab. Potemkin bunches up into a ball for this one, shrinking his hurtbox somewhat, but not enough to make a huge difference. Cancels into itself and all his other aerial attacks, and is a good choice for air-to-air combat. If the opponent blocks, keep pressing it until you both land and you can set up pressure or go straight for a grab. Additionally, since j.S gatlings back into j.P, you can use j.S as a jump-in, cancel into j.P if they block, then use the reduced blockstun to put them into a Buster (or bait their escape attempt!).
Gatling Options: j.P, j.K, j.S, j.H, j.D
| ProrationA percentage-based damage modifier applied to certain attacks independently of other forms of damage scaling. | Level
|
RISC+How much R.I.S.C. this move builds when normal or instant blocked. | RISC-How much R.I.S.C. this move removes on hit. | ||||||||||||||||||||||||||||||||||||
|---|---|---|---|---|---|---|---|---|---|---|---|---|---|---|---|---|---|---|---|---|---|---|---|---|---|---|---|---|---|---|---|---|---|---|---|---|---|---|---|
| 0 | 3 | 8 |
j.K
| Damage | GuardHow this attack can be blocked. | StartupThe number of frames between inputting an attack and when the attack becomes active. Includes first active frame. | ActiveThe number of frames for which a move has hitboxes. Occurs after Startup. | RecoveryThe number of frames after a move's active frames during which the character cannot act assuming the move is not canceled. | On-BlockThe difference between the attacker's recovery and the period that the opponent is in blockstun. This Frame Advantage value is based off the fact that the very first active frame touches the opponent. | Invuln |
|---|---|---|---|---|---|---|
| 24 | High / Air | 10 | 8 | 13 |
A Mario-esque jumping kick. Also like Mario, Potemkin can bounce off his opponents with this, since it's his only aerial attack that can be jump canceled.
Gatling Options: j.P, j.S
| ProrationA percentage-based damage modifier applied to certain attacks independently of other forms of damage scaling. | Level
|
RISC+How much R.I.S.C. this move builds when normal or instant blocked. | RISC-How much R.I.S.C. this move removes on hit. | ||||||||||||||||||||||||||||||||||||
|---|---|---|---|---|---|---|---|---|---|---|---|---|---|---|---|---|---|---|---|---|---|---|---|---|---|---|---|---|---|---|---|---|---|---|---|---|---|---|---|
| 2 | 10 | 7 |
j.S
| Damage | GuardHow this attack can be blocked. | StartupThe number of frames between inputting an attack and when the attack becomes active. Includes first active frame. | ActiveThe number of frames for which a move has hitboxes. Occurs after Startup. | RecoveryThe number of frames after a move's active frames during which the character cannot act assuming the move is not canceled. | On-BlockThe difference between the attacker's recovery and the period that the opponent is in blockstun. This Frame Advantage value is based off the fact that the very first active frame touches the opponent. | Invuln |
|---|---|---|---|---|---|---|
| 36 | High / Air | 13 | 6 | 23 |
An overhead hammer swing with both fists. Covers a good amount of space, going from slightly above to well below Potemkin as the active frames complete. Desirable as a jump-in for its hitbox, its ability to cancel into j.P for grab setups, and the fact that it staggers grounded opponents on counter hit, allowing combos directly into Potemkin Buster (or anything else you might want to try). Air counter hits provide pretty decent untechable time, allowing you to combo into Heat Knuckle after landing, depending on the height.
Gatling Options: j.P, j.H, j.D
| ProrationA percentage-based damage modifier applied to certain attacks independently of other forms of damage scaling. | Level
|
RISC+How much R.I.S.C. this move builds when normal or instant blocked. | RISC-How much R.I.S.C. this move removes on hit. | ||||||||||||||||||||||||||||||||||||
|---|---|---|---|---|---|---|---|---|---|---|---|---|---|---|---|---|---|---|---|---|---|---|---|---|---|---|---|---|---|---|---|---|---|---|---|---|---|---|---|
| 2 | 10 | 7 |
- Staggers opponent on ground counter hit. Max duration 29f
- Stagger recovery lv 1/2/3/max: 23/20/17/14F
j.H
| Damage | GuardHow this attack can be blocked. | StartupThe number of frames between inputting an attack and when the attack becomes active. Includes first active frame. | ActiveThe number of frames for which a move has hitboxes. Occurs after Startup. | RecoveryThe number of frames after a move's active frames during which the character cannot act assuming the move is not canceled. | On-BlockThe difference between the attacker's recovery and the period that the opponent is in blockstun. This Frame Advantage value is based off the fact that the very first active frame touches the opponent. | Invuln |
|---|---|---|---|---|---|---|
| 45 | High / Air | 12 | 6 | 16 |
Potemkin crosses his arms in front of him for a body splash. Massive horizontal hurtbox, hitting on both sides of his center line. The legs hit lower than the arms, making its usefulness as a jump-in dependent entirely on how ambiguous you can make it as a crossup. Can be canceled into ICPM, but only combos at certain heights.
| ProrationA percentage-based damage modifier applied to certain attacks independently of other forms of damage scaling. | Level
|
RISC+How much R.I.S.C. this move builds when normal or instant blocked. | RISC-How much R.I.S.C. this move removes on hit. | ||||||||||||||||||||||||||||||||||||
|---|---|---|---|---|---|---|---|---|---|---|---|---|---|---|---|---|---|---|---|---|---|---|---|---|---|---|---|---|---|---|---|---|---|---|---|---|---|---|---|
| 3 | 14 | 6 |
j.D
| Damage | GuardHow this attack can be blocked. | StartupThe number of frames between inputting an attack and when the attack becomes active. Includes first active frame. | ActiveThe number of frames for which a move has hitboxes. Occurs after Startup. | RecoveryThe number of frames after a move's active frames during which the character cannot act assuming the move is not canceled. | On-BlockThe difference between the attacker's recovery and the period that the opponent is in blockstun. This Frame Advantage value is based off the fact that the very first active frame touches the opponent. | Invuln |
|---|---|---|---|---|---|---|
| 50 | All | 13 | Until Grounded | 9 After Landing |
Potemkin thrusts his arms out, hovering in the air briefly, then drops to the ground butt-first. His extended arms drastically widen his hurtbox, but his butt isn't part of it, making it more likely to clash than be anti-aired cleanly. Knocks down on ground hit, slams down on air hit, ground bounce on counterhit that can be followed up if you hit it high up in the air or RRC it. Can be blocked while crouching.
| ProrationA percentage-based damage modifier applied to certain attacks independently of other forms of damage scaling. | Level
|
RISC+How much R.I.S.C. this move builds when normal or instant blocked. | RISC-How much R.I.S.C. this move removes on hit. | ||||||||||||||||||||||||||||||||||||
|---|---|---|---|---|---|---|---|---|---|---|---|---|---|---|---|---|---|---|---|---|---|---|---|---|---|---|---|---|---|---|---|---|---|---|---|---|---|---|---|
| 3 | 14 | 6 |
- in counter hit state on recovery
- Knocks down opponent on hit.
- Ground Bounce on counterhit
Universal Mechanics
Ground Throw
| Damage | GuardHow this attack can be blocked. | StartupThe number of frames between inputting an attack and when the attack becomes active. Includes first active frame. | ActiveThe number of frames for which a move has hitboxes. Occurs after Startup. | RecoveryThe number of frames after a move's active frames during which the character cannot act assuming the move is not canceled. | On-BlockThe difference between the attacker's recovery and the period that the opponent is in blockstun. This Frame Advantage value is based off the fact that the very first active frame touches the opponent. | Invuln |
|---|---|---|---|---|---|---|
| 0,60 | Ground Throw: 96250 | 1 | +37 |
Potemkin channels his former self, and scoops his opponent up over his head, then slams them down like a ragdoll in front of him. This replaces his old over-the-shoulder throw, and comes with a few advantages in comparison. First and foremost, it keeps them much closer, and Potemkin recovers in time to attempt oki. Secondly, he now throws the opponent in the same direction as the lever is pressed, meaning he can more easily throw the opponent into the corner while on defense. These benefits come at a cost, and that's virtually no combo options. Can be followed in midscreen with RC 2H>HFB>sj j.P>j.K>j.S>ICPM, and in corner RRC>6K>HFB 4x>trishula>6k>trishula>j.K JC j.H>ICPM
| ProrationA percentage-based damage modifier applied to certain attacks independently of other forms of damage scaling. | Level
|
RISC+How much R.I.S.C. this move builds when normal or instant blocked. | RISC-How much R.I.S.C. this move removes on hit. | ||||||||||||||||||||||||||||||||||||
|---|---|---|---|---|---|---|---|---|---|---|---|---|---|---|---|---|---|---|---|---|---|---|---|---|---|---|---|---|---|---|---|---|---|---|---|---|---|---|---|
| Forced: 65% | 0 | NA | 6,0 |
- Stun value: 30
Air Throw
| Damage | GuardHow this attack can be blocked. | StartupThe number of frames between inputting an attack and when the attack becomes active. Includes first active frame. | ActiveThe number of frames for which a move has hitboxes. Occurs after Startup. | RecoveryThe number of frames after a move's active frames during which the character cannot act assuming the move is not canceled. | On-BlockThe difference between the attacker's recovery and the period that the opponent is in blockstun. This Frame Advantage value is based off the fact that the very first active frame touches the opponent. | Invuln |
|---|---|---|---|---|---|---|
| 0,70 | Air Throw: 201250 | 1 |
Potemkin snatches up the opponent and plays whack-a-mole with their head, slamming them sharply to the ground. You can RC and follow up with a j.D for more damage and longer knockdown.
| ProrationA percentage-based damage modifier applied to certain attacks independently of other forms of damage scaling. | Level
|
RISC+How much R.I.S.C. this move builds when normal or instant blocked. | RISC-How much R.I.S.C. this move removes on hit. | ||||||||||||||||||||||||||||||||||||
|---|---|---|---|---|---|---|---|---|---|---|---|---|---|---|---|---|---|---|---|---|---|---|---|---|---|---|---|---|---|---|---|---|---|---|---|---|---|---|---|
| Forced: 65% | 0 | NA | 6,0 |
- Stun value: 35
Dead Angle Attack
| Damage | GuardHow this attack can be blocked. | StartupThe number of frames between inputting an attack and when the attack becomes active. Includes first active frame. | ActiveThe number of frames for which a move has hitboxes. Occurs after Startup. | RecoveryThe number of frames after a move's active frames during which the character cannot act assuming the move is not canceled. | On-BlockThe difference between the attacker's recovery and the period that the opponent is in blockstun. This Frame Advantage value is based off the fact that the very first active frame touches the opponent. | Invuln |
|---|---|---|---|---|---|---|
| 35 | All | 13 | 5 | 18 | -9 | 1~17 Full 18~32 Throw |
The same animation of 5D, it wall bounces but unlike #R you cannot combo off it. Pretty generic mid hitting DA, has a dead zone up close.
| ProrationA percentage-based damage modifier applied to certain attacks independently of other forms of damage scaling. | Level
|
RISC+How much R.I.S.C. this move builds when normal or instant blocked. | RISC-How much R.I.S.C. this move removes on hit. | ||||||||||||||||||||||||||||||||||||
|---|---|---|---|---|---|---|---|---|---|---|---|---|---|---|---|---|---|---|---|---|---|---|---|---|---|---|---|---|---|---|---|---|---|---|---|---|---|---|---|
| Initial: 50% | 2 | 10 | 7 |
- Blows opponent away on hit + wall bounce
- CH recovery state
Blitz Attack
| Version | Damage | GuardHow this attack can be blocked. | StartupThe number of frames between inputting an attack and when the attack becomes active. Includes first active frame. | ActiveThe number of frames for which a move has hitboxes. Occurs after Startup. | RecoveryThe number of frames after a move's active frames during which the character cannot act assuming the move is not canceled. | On-BlockThe difference between the attacker's recovery and the period that the opponent is in blockstun. This Frame Advantage value is based off the fact that the very first active frame touches the opponent. | Invuln |
|---|---|---|---|---|---|---|---|
| Blitz Attack | 50 | Mid | (15-48)+13 | 3 | 20 | -2 | 1~Button release: Blitz |
| Blitz Attack Max Charge | 50 | Mid | 50+13 | 3 | 20 | +5 | 1~50: Blitz |
Universal Blitz Attack.
| Version | ProrationA percentage-based damage modifier applied to certain attacks independently of other forms of damage scaling. | Level
|
RISC+How much R.I.S.C. this move builds when normal or instant blocked. | RISC-How much R.I.S.C. this move removes on hit. | ||||||||||||||||||||||||||||||||||||
|---|---|---|---|---|---|---|---|---|---|---|---|---|---|---|---|---|---|---|---|---|---|---|---|---|---|---|---|---|---|---|---|---|---|---|---|---|---|---|---|---|
| Blitz Attack | Initial: 55% | 1 | ||||||||||||||||||||||||||||||||||||||
| Blitz Attack Max Charge | 4 |
Blitz:
- Hitstop 30F
- Slighty refills own Burst and slightly drains opponent's Burst on hit
- Blows opponent away and wall sticks opponent on hit (untechable for 40F/ 80F on CH)
- Crumples opponent on ground CH (79F)
[Blitz]:
- Hitstop 30F
- Slighty refills own Burst and slightly drains opponent's Burst on hit
- Slightly blows opponent away on air hit (untechable for 50F/ 100F on CH)
- Crumples opponent on ground hit
Special Moves
Heat Knuckle
623H
| Damage | GuardHow this attack can be blocked. | StartupThe number of frames between inputting an attack and when the attack becomes active. Includes first active frame. | ActiveThe number of frames for which a move has hitboxes. Occurs after Startup. | RecoveryThe number of frames after a move's active frames during which the character cannot act assuming the move is not canceled. | On-BlockThe difference between the attacker's recovery and the period that the opponent is in blockstun. This Frame Advantage value is based off the fact that the very first active frame touches the opponent. | Invuln |
|---|---|---|---|---|---|---|
| 0,15×2,40 | Unblockable Hit Grab | 12 | 2 | 21 | +14 | |
| 90 | +53 |
Heat Knuckle is Potemkin's anti-air grab. He reaches his hand up at about a 45-degree angle, and if the opponent is caught, they're locked into his hand to be set on fire. After three hits, they get blown away. In the corner, Potemkin can actually grab them with another Heat Knuckle if he's still close enough.
Heat Extend is a follow-up to Heat Knuckle, in which Potemkin channels energy into his gauntlet, then blows the opponent away with a large explosion. This adds a big chunk of damage to Heat Extend, and sends the opponent farther away, though they can still tech before they hit the ground.
Since Heat Knuckle always sends the opponent away, there's no reason not to use Heat Extend except in rare instances where you can combo Heat Knuckle into itself.
| ProrationA percentage-based damage modifier applied to certain attacks independently of other forms of damage scaling. | Level
|
RISC+How much R.I.S.C. this move builds when normal or instant blocked. | RISC-How much R.I.S.C. this move removes on hit. | ||||||||||||||||||||||||||||||||||||
|---|---|---|---|---|---|---|---|---|---|---|---|---|---|---|---|---|---|---|---|---|---|---|---|---|---|---|---|---|---|---|---|---|---|---|---|---|---|---|---|
| 0,4×3 | NA | 8,6×3 | |||||||||||||||||||||||||||||||||||||
| 4 | NA | 6 |
623H:
- Frame Adv listed is on hit
Heat Knuckle > 63214H:
- Frame Adv listed is on hit
Megafist
236P or 214P
| Version | Damage | GuardHow this attack can be blocked. | StartupThe number of frames between inputting an attack and when the attack becomes active. Includes first active frame. | ActiveThe number of frames for which a move has hitboxes. Occurs after Startup. | RecoveryThe number of frames after a move's active frames during which the character cannot act assuming the move is not canceled. | On-BlockThe difference between the attacker's recovery and the period that the opponent is in blockstun. This Frame Advantage value is based off the fact that the very first active frame touches the opponent. | Invuln |
|---|---|---|---|---|---|---|---|
| 236P | 50 | High / Air | 24 | 8 | 8 | -4 | 1~39 Lower Body |
| 214P | 50 | High / Air | 25 | 9 | 6 | +4 | 1~39 Lower Body |
Potemkin leaps forward or backward with a heavy double-punch. Though he isn't airborne immediately, he does get some lower body invulnerability from frame 1 which persists all the way into Megafist's recovery.
Forward Mega Fist has some use as an approach, especially if YRC'd, but is very unsafe on block (guaranteed throw up close) and not even that useful on normal hit. Meanwhile, backwards Mega Fist is plus on block and staggers on counter hit. However, this doesn't mean you can't use Forward Mega Fist in pressure: properly spaced, it is good way to advance and stuff certain moves.
Megafist is a surprisingly good option during Danger Time, since it's relatively fast overhead and leads to 5D on hit.
- Forward: Lower body invuln frames 1~39, airborne from frame 3 onward.
- Backward: Lower body invuln frames 1~39, airborne from frame 5 onward.
| Version | ProrationA percentage-based damage modifier applied to certain attacks independently of other forms of damage scaling. | Level
|
RISC+How much R.I.S.C. this move builds when normal or instant blocked. | RISC-How much R.I.S.C. this move removes on hit. | ||||||||||||||||||||||||||||||||||||
|---|---|---|---|---|---|---|---|---|---|---|---|---|---|---|---|---|---|---|---|---|---|---|---|---|---|---|---|---|---|---|---|---|---|---|---|---|---|---|---|---|
| 236P | 2 | 10 | 7 | |||||||||||||||||||||||||||||||||||||
| 214P | 4 | 20 | 6 |
236P:
- 3F onwards Airborne
214P:
- 5F onwards Airborne
Slide Head
236S
| Damage | GuardHow this attack can be blocked. | StartupThe number of frames between inputting an attack and when the attack becomes active. Includes first active frame. | ActiveThe number of frames for which a move has hitboxes. Occurs after Startup. | RecoveryThe number of frames after a move's active frames during which the character cannot act assuming the move is not canceled. | On-BlockThe difference between the attacker's recovery and the period that the opponent is in blockstun. This Frame Advantage value is based off the fact that the very first active frame touches the opponent. | Invuln |
|---|---|---|---|---|---|---|
| 40[0] | Low[Unblockable] | 25[29] | 2[1] | Total 54 | -11 | 1-16 Above Knees |
Potemkin rears back, then slams his massive body to the ground, creating a shockwave. This attack actually has two stages. The first is Potemkin's actual body, a standard attack that hits low and knocks the opponent down if they don't block it. Once he lands, the shockwave occurs: if the opponent is on the ground when it happens, they get knocked down. In both cases, the opponent is knocked down for considerably longer than usual, giving Potemkin plenty of time to close the distance, if applicable, and set up okizeme. Note, however, that if the first attack connects, even if it's blocked, the shockwave will not occur.
Slide Head has some upper body invincibility as it starts up, which might be enough to get you out of a counter-poke, but don't rely on it too heavily.
There is also a window in which Potemkin can hit the ground and create the shockwave effects, but then YRC before the actual shockwave occurs. Great if you're trying to scare the opponent into jumping.
You can also time Slide Head so that the shockwave hits just as the opponent is getting up. Only a reversal backdash, blitz, or another move with frame-one invuln/airborne state, will save an opponent from this. You can then RC, slowing down time and extending their knockdown animation, giving you time to combo them while they're still airborne and do some big damage.
There are some exceptions to the rules for Slide Head's shockwave. Some characters have dashes that are considered airborne, which allow them to avoid the shockwave simply by dashing forward (I-no, Ramlethal, Dizzy, Johnny, etc). Generally these dashes have obvious effects, like teleportation, or make a distinctive sound when starting up to indicate their unique status.
| ProrationA percentage-based damage modifier applied to certain attacks independently of other forms of damage scaling. | Level
|
RISC+How much R.I.S.C. this move builds when normal or instant blocked. | RISC-How much R.I.S.C. this move removes on hit. | ||||||||||||||||||||||||||||||||||||
|---|---|---|---|---|---|---|---|---|---|---|---|---|---|---|---|---|---|---|---|---|---|---|---|---|---|---|---|---|---|---|---|---|---|---|---|---|---|---|---|
| 4[4] | 20 [NA] | 6 |
- [ ] Indicates when opponent is not near Potemkin. Slidehead shockwave is considered a projectile and can be blitzed and flicked back by potemkin
Hammer Fall
[4]6H
| Version | Damage | GuardHow this attack can be blocked. | StartupThe number of frames between inputting an attack and when the attack becomes active. Includes first active frame. | ActiveThe number of frames for which a move has hitboxes. Occurs after Startup. | RecoveryThe number of frames after a move's active frames during which the character cannot act assuming the move is not canceled. | On-BlockThe difference between the attacker's recovery and the period that the opponent is in blockstun. This Frame Advantage value is based off the fact that the very first active frame touches the opponent. | Invuln |
|---|---|---|---|---|---|---|---|
| [4]6H | 60 | Mid | 18[31] | 2 | 33 | -16 | 1~Super Armor |
| Hammer Fall > P | Total 15 |
Potemkin's go-to mobility and pressure tool. He lunges forward on the ground, arms spread, then smashes them together once he's in range of the opponent. He can travel about 3/4 of a screen length like this, and the attack only goes active if the opponent is in range to be hit by it (though, if they're moving at the time, the actual attack portion's startup may still cause it to miss). While traveling forward, Potemkin has a single hit of super armor, which will absorb any attack besides Overdrives for half damage and keep on truckin'.
Unsafe on block, you should be really careful to throw this move out without meter to yrc/rrc. Also has some utility in combos, as it causes float on hit, and has long untechable time in counter hit. Mostly, though, you'll be using it for Hammerfall Brake. By hitting P during a Hammerfall, you can make Potemkin come to a sudden stop, so long as the attack hasn't started. This allows you to, for example:
- Absorb the hit of an obvious attack with long recovery, Brake, and punish.
- Cancel into Hammerfall during a block string, stop early, and tick grab/punish escape/continue pressure.
- Create combos by canceling attacks into Hammerfall, Braking, then following up. (Especially common after 2H or cornered 6Ks!)
| Version | ProrationA percentage-based damage modifier applied to certain attacks independently of other forms of damage scaling. | Level
|
RISC+How much R.I.S.C. this move builds when normal or instant blocked. | RISC-How much R.I.S.C. this move removes on hit. | ||||||||||||||||||||||||||||||||||||
|---|---|---|---|---|---|---|---|---|---|---|---|---|---|---|---|---|---|---|---|---|---|---|---|---|---|---|---|---|---|---|---|---|---|---|---|---|---|---|---|---|
| [4]6H | 4 | 20 | 6 | |||||||||||||||||||||||||||||||||||||
| Hammer Fall > P |
[4]6H:
- [ ] Indicates slowest
- 30 frames charge required
- can be cancelled to Hammer Fall Brake after first frame
Hammer Fall > P:
F.D.B.
63214S
| Version | Damage | GuardHow this attack can be blocked. | StartupThe number of frames between inputting an attack and when the attack becomes active. Includes first active frame. | ActiveThe number of frames for which a move has hitboxes. Occurs after Startup. | RecoveryThe number of frames after a move's active frames during which the character cannot act assuming the move is not canceled. | On-BlockThe difference between the attacker's recovery and the period that the opponent is in blockstun. This Frame Advantage value is based off the fact that the very first active frame touches the opponent. | Invuln |
|---|---|---|---|---|---|---|---|
| 63214S | 40 | Mid | 19 | 3 | 12 | +2 | 4~18 Reflect |
| 63214[S] | 40 | Mid | 19~36 | 3 | 12 | +2 | 4~9 Reflect 1~9 after release Reflect |
| Reflect Projectile | 16 | All | 2 | 150 | Total 22 | 1~22 Strike |
Flick Dat Back! Potemkin kneels down and props his arm up, storing up energy and unleashing it with a quick flick. The flick itself has a massive hitbox, much larger than its animation suggestions, and can stagger opponents on hit or keep you safe on block. Its faster startup compared to previous games creates new opportunities for combos on the ground, especially after 6K.
- You can hold button to delay flick.
While F.D.B. is starting up (frames 4~18), if a projectile attack hits Potemkin, he'll reflect it back with the flick as a screen-filling wave of explosions. This wave eats up other projectiles it meets, and if it hits the opponent on the ground, will cause them to stagger (on air hit they just get floated a bit, but the untech time is still decent). This instant flick also makes Potemkin recovery significantly faster, allowing him to capitalize on this new pressure he's created.
- If Potemkin reflects a projectile, he becomes strike invuln until he recovers.
| Character | Move |
|---|---|
| |
| |
| |
| |
| |
| Version | ProrationA percentage-based damage modifier applied to certain attacks independently of other forms of damage scaling. | Level
|
RISC+How much R.I.S.C. this move builds when normal or instant blocked. | RISC-How much R.I.S.C. this move removes on hit. | ||||||||||||||||||||||||||||||||||||
|---|---|---|---|---|---|---|---|---|---|---|---|---|---|---|---|---|---|---|---|---|---|---|---|---|---|---|---|---|---|---|---|---|---|---|---|---|---|---|---|---|
| 63214S | 3 | 14 | 6 | |||||||||||||||||||||||||||||||||||||
| 63214[S] | 3 | 14 | 6 | |||||||||||||||||||||||||||||||||||||
| Reflect Projectile | 2 | 10 | 7 |
63214S:
- If hit with a projectile during reflect frames, a projectile will be created. Will not reflect any supers and parachuting chibi faust item.
63214[S]:
- If hit with a projectile during reflect frames, a projectile will be created. Will not reflect any supers and parachuting chibi faust item.
- Attack starts up 10F after button release
Reflect Projectile:
- Projectile will destroy other normal projectiles on contact
- Air hit is untechable
- Ground hit causes short stagger
Potemkin Buster
632146P
| Damage | GuardHow this attack can be blocked. | StartupThe number of frames between inputting an attack and when the attack becomes active. Includes first active frame. | ActiveThe number of frames for which a move has hitboxes. Occurs after Startup. | RecoveryThe number of frames after a move's active frames during which the character cannot act assuming the move is not canceled. | On-BlockThe difference between the attacker's recovery and the period that the opponent is in blockstun. This Frame Advantage value is based off the fact that the very first active frame touches the opponent. | Invuln |
|---|---|---|---|---|---|---|
| 0,150,0 | Ground Throw: 308000 | 3 | Total 40 | +62 | 1~2 Throw 3~5 All |
Potemkin's signature attack, and one of the scariest command grabs in all of fighting games. He pulls the opponent up, hoists them over his head, then leaps into the air and slams them down before throwing them aside. Deals high damage, has deceptively long reach and incredibly fast startup.
If you do have the meter to spend, RC as he throws the opponent away, jump forward and hit j.H late, then follow up on the ground with something like c.S > f.S > Heat Knuckle, or a 6K loop if in the corner.
| ProrationA percentage-based damage modifier applied to certain attacks independently of other forms of damage scaling. | Level
|
RISC+How much R.I.S.C. this move builds when normal or instant blocked. | RISC-How much R.I.S.C. this move removes on hit. | ||||||||||||||||||||||||||||||||||||
|---|---|---|---|---|---|---|---|---|---|---|---|---|---|---|---|---|---|---|---|---|---|---|---|---|---|---|---|---|---|---|---|---|---|---|---|---|---|---|---|
| Forced: 50% | 0 | NA | 6,0,15 |
- Stun value: 70
Trishula
214K
| Damage | GuardHow this attack can be blocked. | StartupThe number of frames between inputting an attack and when the attack becomes active. Includes first active frame. | ActiveThe number of frames for which a move has hitboxes. Occurs after Startup. | RecoveryThe number of frames after a move's active frames during which the character cannot act assuming the move is not canceled. | On-BlockThe difference between the attacker's recovery and the period that the opponent is in blockstun. This Frame Advantage value is based off the fact that the very first active frame touches the opponent. | Invuln |
|---|---|---|---|---|---|---|
| 48 | Mid | 25 | 15 | 18 | -6 | 1~39 Above Knees |
Potemkin hunkers down before exploding in a pillar of fire. Has high vertical reach - far past what the fire suggests - but almost none horizontally. Launches the opponent on hit and also pulls them slightly inward, with time to air combo (usually with superjump j.P > j.K > j.S > ICPM). CH near corner grants 6H combos.
Absorbs projectiles while starting up, and has upper body invulnerability to boot, but is mostly used as combo tool or to catch really obvious air approaches. Potemkin is in counter hit state during recovery.
| ProrationA percentage-based damage modifier applied to certain attacks independently of other forms of damage scaling. | Level
|
RISC+How much R.I.S.C. this move builds when normal or instant blocked. | RISC-How much R.I.S.C. this move removes on hit. | ||||||||||||||||||||||||||||||||||||
|---|---|---|---|---|---|---|---|---|---|---|---|---|---|---|---|---|---|---|---|---|---|---|---|---|---|---|---|---|---|---|---|---|---|---|---|---|---|---|---|
| Forced: 80% | 2 | 10 | 7 |
- In counter hit state for the recovery
I.C.P.M
j.41236H
| Damage | GuardHow this attack can be blocked. | StartupThe number of frames between inputting an attack and when the attack becomes active. Includes first active frame. | ActiveThe number of frames for which a move has hitboxes. Occurs after Startup. | RecoveryThe number of frames after a move's active frames during which the character cannot act assuming the move is not canceled. | On-BlockThe difference between the attacker's recovery and the period that the opponent is in blockstun. This Frame Advantage value is based off the fact that the very first active frame touches the opponent. | Invuln |
|---|---|---|---|---|---|---|
| 0,60 | Mid | 13 | Until Landing | 29 |
Potemkin propels himself through the air in an arc, leaving smoke in his wake. The move is active until Potemkin hits the ground. If he hits his opponent, they're pinned to his Pickelhaube and are dragged to the ground with him. If he misses, he sticks in the ground himself and is stuck there briefly before recovering, very unsafe on block/whiff.
- Potemkin can RRC when he has pinned his opponent and combo afterwards.
Potemkin gets significant advantage on wakeup against opponents hit by ICPM, which varies based on the opponent's wake-up timing.
- 20F: Venom
- 22F: Ky
- 23F: Potemkin, Bedman
- 24F: Sol, May, Millia, Zato, Faust, Axl, Ramlethal
- 25F: Slayer
- 26F: Elphelt
- 27F: Leo
- 29F: Chipp, Sin
| ProrationA percentage-based damage modifier applied to certain attacks independently of other forms of damage scaling. | Level
|
RISC+How much R.I.S.C. this move builds when normal or instant blocked. | RISC-How much R.I.S.C. this move removes on hit. | ||||||||||||||||||||||||||||||||||||
|---|---|---|---|---|---|---|---|---|---|---|---|---|---|---|---|---|---|---|---|---|---|---|---|---|---|---|---|---|---|---|---|---|---|---|---|---|---|---|---|
| 4 | 20 | 7,6 |
- Frame advantage on hit is +37F
- Frame advantage on OTG hit is +11F
Overdrives
Heavenly Potemkin Buster
236236S (236236D)
| Damage | GuardHow this attack can be blocked. | StartupThe number of frames between inputting an attack and when the attack becomes active. Includes first active frame. | ActiveThe number of frames for which a move has hitboxes. Occurs after Startup. | RecoveryThe number of frames after a move's active frames during which the character cannot act assuming the move is not canceled. | On-BlockThe difference between the attacker's recovery and the period that the opponent is in blockstun. This Frame Advantage value is based off the fact that the very first active frame touches the opponent. | Invuln |
|---|---|---|---|---|---|---|
| 0,170,0 [0,212,0] |
Unblockable | 10+1 | 15 | 10 | +56 | 1~12 Full 13~25 Throw & Upper Body |
The anti-air grab. Potemkin launches his entire body upward at about a 45-degree angle, although the hitbox is only on the inside of his hand and arm.
Does good damage, and is easy to connect after virtually any ground-to-air hit, making it a reliable ender. Can also be used to punish air techs or for a hard read on a jump. Corner HPB > RRC > 6H > xx leads to huge damage. Hellfire burst HPB is one of the highest damage attacks in the entire game (if you somehow manage to land it).
| ProrationA percentage-based damage modifier applied to certain attacks independently of other forms of damage scaling. | Level
|
RISC+How much R.I.S.C. this move builds when normal or instant blocked. | RISC-How much R.I.S.C. this move removes on hit. | ||||||||||||||||||||||||||||||||||||
|---|---|---|---|---|---|---|---|---|---|---|---|---|---|---|---|---|---|---|---|---|---|---|---|---|---|---|---|---|---|---|---|---|---|---|---|---|---|---|---|
| ― | 4 | NA | 6 |
- Values in [ ] are for Burst version
- Stun value: 85 [170]
- Minimum damage: 20% [50%]
Giganter Kai
632146H
| Damage | GuardHow this attack can be blocked. | StartupThe number of frames between inputting an attack and when the attack becomes active. Includes first active frame. | ActiveThe number of frames for which a move has hitboxes. Occurs after Startup. | RecoveryThe number of frames after a move's active frames during which the character cannot act assuming the move is not canceled. | On-BlockThe difference between the attacker's recovery and the period that the opponent is in blockstun. This Frame Advantage value is based off the fact that the very first active frame touches the opponent. | Invuln |
|---|---|---|---|---|---|---|
| 30 | Mid | 9+8 | 60 | Total 50 | ±0 | 1~9 Full |
Potemkin rips the air apart like Hulk Hogan's tanktop, creating a field of energy that slowly floats forward. This wave of energy absorbs other projectiles that hit it, and if it hits the opponent it staggers them (if grounded) or puts them in a slow float with long untechable time (if airborne). In both instances, Potemkin is afforded plenty of time to follow up for big damage. Since it's a projectile, he isn't pushed back by the attack connecting, allowing him to make some interesting combos in the corner. In addition, the energy wave has a very high stun modifier, making it easier to dizzy the opponent.
Fully invuln frames 1-9.
| ProrationA percentage-based damage modifier applied to certain attacks independently of other forms of damage scaling. | Level
|
RISC+How much R.I.S.C. this move builds when normal or instant blocked. | RISC-How much R.I.S.C. this move removes on hit. | ||||||||||||||||||||||||||||||||||||
|---|---|---|---|---|---|---|---|---|---|---|---|---|---|---|---|---|---|---|---|---|---|---|---|---|---|---|---|---|---|---|---|---|---|---|---|---|---|---|---|
| ― | 4 | 20 | 10 |
- Staggers opponent on hit. Max duration 69F, Frame Adv: +16 to +51
- Stun value: 135
- Minimum damage: 20%
Gigantic Bullet Kai
Giganter Kai > 4123641236P
| Damage | GuardHow this attack can be blocked. | StartupThe number of frames between inputting an attack and when the attack becomes active. Includes first active frame. | ActiveThe number of frames for which a move has hitboxes. Occurs after Startup. | RecoveryThe number of frames after a move's active frames during which the character cannot act assuming the move is not canceled. | On-BlockThe difference between the attacker's recovery and the period that the opponent is in blockstun. This Frame Advantage value is based off the fact that the very first active frame touches the opponent. | Invuln |
|---|---|---|---|---|---|---|
| 145 | Mid | 49 | 24 | 17 | -22 |
The follow-up to Giganter. Holographic alerts fill the air around Potemkin as he bends forward, extending his body mechanically before launching himself forward.
Does massive damage and blows the opponent away on hit with substantial untechable time. Unlike Giganter itself, however, it has a 0x stun modifier, so its damage isn't counted at all when determining dizzy state for the opponent. This makes the choice to use Bullet an interesting one: do you go for the upfront damage and potential follow-up damage, or go for the dizzy and reset into an even more damaging combo?
The core factor for deciding which to use is your opponent's current health bar - the more health they have, the more you'll want to favor going for dizzy. Positioning matters as well, since Bullet only offers the opportunity to follow up if you're in or very near the corner.
| ProrationA percentage-based damage modifier applied to certain attacks independently of other forms of damage scaling. | Level
|
RISC+How much R.I.S.C. this move builds when normal or instant blocked. | RISC-How much R.I.S.C. this move removes on hit. | ||||||||||||||||||||||||||||||||||||
|---|---|---|---|---|---|---|---|---|---|---|---|---|---|---|---|---|---|---|---|---|---|---|---|---|---|---|---|---|---|---|---|---|---|---|---|---|---|---|---|
| 4 | 20 | 10 |
- Stun value: 0
- Minimum damage: 20%
Instant Kill
Infernal Tour
in IK mode: 236236H
| Damage | GuardHow this attack can be blocked. | StartupThe number of frames between inputting an attack and when the attack becomes active. Includes first active frame. | ActiveThe number of frames for which a move has hitboxes. Occurs after Startup. | RecoveryThe number of frames after a move's active frames during which the character cannot act assuming the move is not canceled. | On-BlockThe difference between the attacker's recovery and the period that the opponent is in blockstun. This Frame Advantage value is based off the fact that the very first active frame touches the opponent. | Invuln |
|---|---|---|---|---|---|---|
| DESTROY | Throw: 230000 | 9+8 [5+6] |
3 | 62 |
Cannot be re-blitzed like other IK's. Much cooler than Magnum Opera.
| ProrationA percentage-based damage modifier applied to certain attacks independently of other forms of damage scaling. | Level
|
RISC+How much R.I.S.C. this move builds when normal or instant blocked. | RISC-How much R.I.S.C. this move removes on hit. | ||||||||||||||||||||||||||||||||||||
|---|---|---|---|---|---|---|---|---|---|---|---|---|---|---|---|---|---|---|---|---|---|---|---|---|---|---|---|---|---|---|---|---|---|---|---|---|---|---|---|
| 0 | NA | 6 |
- [ ] Indicates when match point for you, opponent in Hell Fire state, and you have 50% Tension
- IK Mode Activation: 98F [5F+5F]
- During [ ], can hit opponents in hitstun
External References


