(moving to move card templates) |
|||
| Line 34: | Line 34: | ||
===<big>{{clr|1|5P}}</big>=== | ===<big>{{clr|1|5P}}</big>=== | ||
{{GGXRD-R2 Move Card|game=GGXRD-R2 | |||
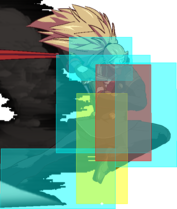
|input=5P | |||
|description= | |||
{ | |||
{ | |||
|- | |||
| | |||
| | |||
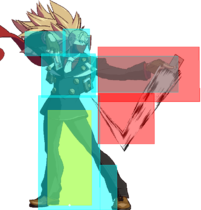
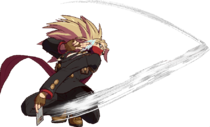
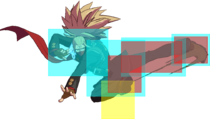
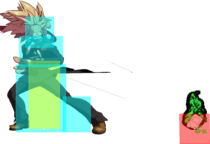
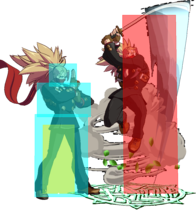
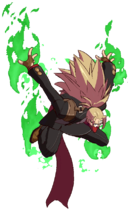
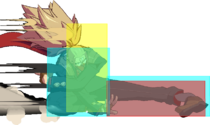
Your fastest poke at only 4 frames. It hits crouchers most of the time, but moves that low profile even a little bit can go under it, so be careful. Standard tool for poking after blocked Resshou or ticking into {{clr|2|623K}}. | Your fastest poke at only 4 frames. It hits crouchers most of the time, but moves that low profile even a little bit can go under it, so be careful. Standard tool for poking after blocked Resshou or ticking into {{clr|2|623K}}. | ||
[[{{PAGENAME}}/Frame_Data#Gatling_Table|Gatling Options]]: {{clr|1|5P}}. {{clr|1|2P}}, {{clr|1|6P}}, {{clr|2|5K}}, {{clr|2|2K}}, {{clr|2|6K}}, {{clr|3|cS}}, {{clr|3|fS}}, {{clr|3|2S}}, {{clr|4|5H}}, {{clr|4|2H}}, {{clr|4|6H}}, {{clr|5|5D}}, {{clr|5|2D}} | [[{{PAGENAME}}/Frame_Data#Gatling_Table|Gatling Options]]: {{clr|1|5P}}. {{clr|1|2P}}, {{clr|1|6P}}, {{clr|2|5K}}, {{clr|2|2K}}, {{clr|2|6K}}, {{clr|3|cS}}, {{clr|3|fS}}, {{clr|3|2S}}, {{clr|4|5H}}, {{clr|4|2H}}, {{clr|4|6H}}, {{clr|5|5D}}, {{clr|5|2D}} | ||
}} | |||
===<big>{{clr|2|5K}}</big>=== | ===<big>{{clr|2|5K}}</big>=== | ||
{{GGXRD-R2 Move Card|game=GGXRD-R2 | |||
|input=5K | |||
|description= | |||
{ | |||
{ | |||
|- | |||
| | |||
| | |||
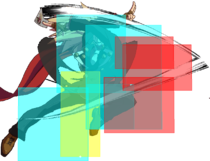
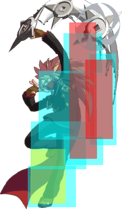
Somewhat unusual anti-air {{clr|2|5K}} that hits mostly above and in front of Answer. Somewhat redundant with the existence of {{clr|1|6P}}, but can be useful in a pinch, particularly to catch people jumping out of pressure. | Somewhat unusual anti-air {{clr|2|5K}} that hits mostly above and in front of Answer. Somewhat redundant with the existence of {{clr|1|6P}}, but can be useful in a pinch, particularly to catch people jumping out of pressure. | ||
[[{{PAGENAME}}/Frame_Data#Gatling_Table|Gatling Options]]: {{clr|1|5P}}. {{clr|1|2P}}, {{clr|1|6P}}, {{clr|2|5K}}, {{clr|2|2K}}, {{clr|2|6K}}, {{clr|3|cS}}, {{clr|3|fS}}, {{clr|3|2S}}, {{clr|4|5H}}, {{clr|4|2H}}, {{clr|4|6H}}, {{clr|5|2D}} | [[{{PAGENAME}}/Frame_Data#Gatling_Table|Gatling Options]]: {{clr|1|5P}}. {{clr|1|2P}}, {{clr|1|6P}}, {{clr|2|5K}}, {{clr|2|2K}}, {{clr|2|6K}}, {{clr|3|cS}}, {{clr|3|fS}}, {{clr|3|2S}}, {{clr|4|5H}}, {{clr|4|2H}}, {{clr|4|6H}}, {{clr|5|2D}} | ||
}} | |||
===<big>{{clr|3|c.S}}</big>=== | ===<big>{{clr|3|c.S}}</big>=== | ||
{{GGXRD-R2 Move Card|game=GGXRD-R2 | |||
|input=c.S | |||
|description= | |||
{{ | |||
|- | |||
| | |||
| | |||
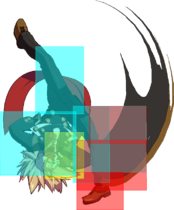
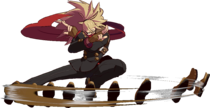
Multi-hitting card slash that's fast and combos into Answer's most damaging punishes. Also builds good RISC and each hit has very low pushback, making it useful for multiple purposes in blockstrings, particularly ones involving K scrolls or a preset card. {{clr|3|cS}} is only -1, and with a wide array of cancels that can be accessed at almost any point in the move, {{clr|3|cS}} is a very valuable move for pressure, namely for conditioning and such. Can combo into {{clr|2|6K}}, but it's a little tight, and since this combo is important to maximizing your offensive power, it's worth practicing. If you're ever unsure, just remember you can fall back on {{clr|5|2D}}. | Multi-hitting card slash that's fast and combos into Answer's most damaging punishes. Also builds good RISC and each hit has very low pushback, making it useful for multiple purposes in blockstrings, particularly ones involving K scrolls or a preset card. {{clr|3|cS}} is only -1, and with a wide array of cancels that can be accessed at almost any point in the move, {{clr|3|cS}} is a very valuable move for pressure, namely for conditioning and such. Can combo into {{clr|2|6K}}, but it's a little tight, and since this combo is important to maximizing your offensive power, it's worth practicing. If you're ever unsure, just remember you can fall back on {{clr|5|2D}}. | ||
[[{{PAGENAME}}/Frame_Data#Gatling_Table|Gatling Options]]: {{clr|1|6P}}, {{clr|2|6K}}, {{clr|3|fS}}, {{clr|3|2S}}, {{clr|4|5H}}, {{clr|4|2H}}, {{clr|5|5D}}, {{clr|5|2D}} | [[{{PAGENAME}}/Frame_Data#Gatling_Table|Gatling Options]]: {{clr|1|6P}}, {{clr|2|6K}}, {{clr|3|fS}}, {{clr|3|2S}}, {{clr|4|5H}}, {{clr|4|2H}}, {{clr|5|5D}}, {{clr|5|2D}} | ||
}} | |||
===<big>{{clr|3|f.S}}</big>=== | ===<big>{{clr|3|f.S}}</big>=== | ||
{{GGXRD-R2 Move Card|game=GGXRD-R2 | |||
|input=f.S | |||
|description= | |||
{{ | |||
|- | |||
| | |||
| | |||
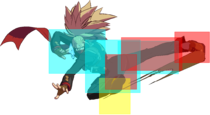
Great ranged poke that should be an essential part of your grounded footsie game. Cancels into {{clr|5|2D}} and {{clr|4|5H}} (though not at max range) for confirms, knockdowns, and continued pressure. Cancelling into a whiffed {{clr|3|2S}} is also a strong option to add an extra layer of frame trapping. If your move hits or is blocked at max range, sometimes {{clr|4|5H}} might whiff, so you can throw a card instead. | Great ranged poke that should be an essential part of your grounded footsie game. Cancels into {{clr|5|2D}} and {{clr|4|5H}} (though not at max range) for confirms, knockdowns, and continued pressure. Cancelling into a whiffed {{clr|3|2S}} is also a strong option to add an extra layer of frame trapping. If your move hits or is blocked at max range, sometimes {{clr|4|5H}} might whiff, so you can throw a card instead. | ||
[[{{PAGENAME}}/Frame_Data#Gatling_Table|Gatling Options]]: {{clr|3|2S}}, {{clr|4|5H}}, {{clr|4|2H}}, {{clr|5|2D}} | [[{{PAGENAME}}/Frame_Data#Gatling_Table|Gatling Options]]: {{clr|3|2S}}, {{clr|4|5H}}, {{clr|4|2H}}, {{clr|5|2D}} | ||
}} | |||
===<big>{{clr|4|5H}}</big>=== | ===<big>{{clr|4|5H}}</big>=== | ||
{{GGXRD-R2 Move Card|game=GGXRD-R2 | |||
|input=5H | |||
|description= | |||
{ | |||
{ | |||
|- | |||
| | |||
| | |||
Exceptional normal that, along with scrolls, forms the basis for Answer's tricky offense. Also special and jump cancelable. Using the jumpcancel qualities of the move is important to link a block string into more pressure using scrolls. Essential tool for your offensive gameplan. The recovery is high, so be wary about whiffing the move in neutral, and can also sometimes whiff in pressure because of FD. Stragetize your pressure in a way that {{clr|4|5H}} is not likely to whiff. | Exceptional normal that, along with scrolls, forms the basis for Answer's tricky offense. Also special and jump cancelable. Using the jumpcancel qualities of the move is important to link a block string into more pressure using scrolls. Essential tool for your offensive gameplan. The recovery is high, so be wary about whiffing the move in neutral, and can also sometimes whiff in pressure because of FD. Stragetize your pressure in a way that {{clr|4|5H}} is not likely to whiff. | ||
| Line 201: | Line 88: | ||
[[{{PAGENAME}}/Frame_Data#Gatling_Table|Gatling Options]]: {{clr|5|5D}} | [[{{PAGENAME}}/Frame_Data#Gatling_Table|Gatling Options]]: {{clr|5|5D}} | ||
}} | |||
===<big>{{clr|5|5D}}</big>=== | ===<big>{{clr|5|5D}}</big>=== | ||
{{GGXRD-R2 Move Card|game=GGXRD-R2 | |||
|input=5D | |||
|description= | |||
{ | |||
{ | |||
|- | |||
| | |||
| | |||
Standard overhead dust, although the puff of smoke and big frog make it a little more reactable than most. Leads to low reward midscreen and moderate reward in the corner. can be used after certain normals in combos using RRC, but that's only rewarding in the corner. | Standard overhead dust, although the puff of smoke and big frog make it a little more reactable than most. Leads to low reward midscreen and moderate reward in the corner. can be used after certain normals in combos using RRC, but that's only rewarding in the corner. | ||
[[{{PAGENAME}}/Frame_Data#Gatling_Table|Gatling Options]]: N/A | [[{{PAGENAME}}/Frame_Data#Gatling_Table|Gatling Options]]: N/A | ||
}} | |||
===<big>{{clr|1|6P}}</big>=== | ===<big>{{clr|1|6P}}</big>=== | ||
{{GGXRD-R2 Move Card|game=GGXRD-R2 | |||
|input=6P | |||
|description= | |||
{ | |||
{ | |||
|- | |||
| | |||
| | |||
Good anti-air for approaches coming directly in front of Answer that can also beat out some grounded pokes. Strong overall button that should be used frequently. | Good anti-air for approaches coming directly in front of Answer that can also beat out some grounded pokes. Strong overall button that should be used frequently. | ||
[[{{PAGENAME}}/Frame_Data#Gatling_Table|Gatling Options]]: {{clr|2|6K}}, {{clr|3|cS}}, {{clr|3|fS}}, {{clr|3|2S}}, {{clr|4|5H}}, {{clr|4|2H}}, {{clr|4|6H}}, {{clr|5|5D}}, {{clr|5|2D}} | [[{{PAGENAME}}/Frame_Data#Gatling_Table|Gatling Options]]: {{clr|2|6K}}, {{clr|3|cS}}, {{clr|3|fS}}, {{clr|3|2S}}, {{clr|4|5H}}, {{clr|4|2H}}, {{clr|4|6H}}, {{clr|5|5D}}, {{clr|5|2D}} | ||
}} | |||
===<big>{{clr|2|6K}}</big>=== | ===<big>{{clr|2|6K}}</big>=== | ||
{{GGXRD-R2 Move Card|game=GGXRD-R2 | |||
|input=6K | |||
|description= | |||
{ | |||
{ | |||
| | |||
| | |||
Answer's launcher with a very long amount of hitstun. This should almost always be canceled into a scroll set special move, as Answer has enough time to set a scroll, jump up, and continue comboing with the scrolls. Can be held to perform a feint that moves him forward. Only combos on standing hit, whiffs entirely against crouching opponents. | Answer's launcher with a very long amount of hitstun. This should almost always be canceled into a scroll set special move, as Answer has enough time to set a scroll, jump up, and continue comboing with the scrolls. Can be held to perform a feint that moves him forward. Only combos on standing hit, whiffs entirely against crouching opponents. | ||
[[{{PAGENAME}}/Frame_Data#Gatling_Table|Gatling Options]]: {{clr|4|6H}} | [[{{PAGENAME}}/Frame_Data#Gatling_Table|Gatling Options]]: {{clr|4|6H}} | ||
}} | |||
===<big>{{clr|4|6H}}</big>=== | ===<big>{{clr|4|6H}}</big>=== | ||
{{GGXRD-R2 Move Card|game=GGXRD-R2 | |||
|input=6H | |||
|description= | |||
{ | |||
{ | |||
|- | |||
| | |||
| | |||
Although this move is not an overhead, {{clr|4|6H}} is one of Answer's most important normal in pressure. It brings him airborne, which means he can use it to cling onto scrolls during pressure or for okizeme. Even without a scroll out, it's surprisingly neutral on block, moves Answer slightly forward, is invulnerable to ground throws, and goes over attacks with low hitboxes, while also providing a huge launch on Counter Hit. When air blocked by the opponent, gives enough blockstun for a chance at a pressure reset, especially at close range. Essential offensive tool. | Although this move is not an overhead, {{clr|4|6H}} is one of Answer's most important normal in pressure. It brings him airborne, which means he can use it to cling onto scrolls during pressure or for okizeme. Even without a scroll out, it's surprisingly neutral on block, moves Answer slightly forward, is invulnerable to ground throws, and goes over attacks with low hitboxes, while also providing a huge launch on Counter Hit. When air blocked by the opponent, gives enough blockstun for a chance at a pressure reset, especially at close range. Essential offensive tool. | ||
*Builds up the RISC gauge rapidly | *Builds up the RISC gauge rapidly | ||
| Line 332: | Line 128: | ||
[[{{PAGENAME}}/Frame_Data#Gatling_Table|Gatling Options]]: N/A | [[{{PAGENAME}}/Frame_Data#Gatling_Table|Gatling Options]]: N/A | ||
}} | |||
===<big>{{clr|1|2P}}</big>=== | ===<big>{{clr|1|2P}}</big>=== | ||
{{GGXRD-R2 Move Card|game=GGXRD-R2 | |||
|input=2P | |||
|description= | |||
{ | |||
{ | |||
|- | |||
| | |||
| | |||
A great jab that's plus on block and can't be low-profiled as easily as {{clr|1|5P}}. Essential poke and pressure tool. | A great jab that's plus on block and can't be low-profiled as easily as {{clr|1|5P}}. Essential poke and pressure tool. | ||
[[{{PAGENAME}}/Frame_Data#Gatling_Table|Gatling Options]]: {{clr|1|5P}}. {{clr|1|2P}}, {{clr|1|6P}}, {{clr|2|5K}}, {{clr|2|2K}}, {{clr|2|6K}}, {{clr|3|cS}}, {{clr|3|fS}}, {{clr|3|2S}}, {{clr|4|5H}}, {{clr|4|2H}}, {{clr|4|6H}}, {{clr|5|2D}} | [[{{PAGENAME}}/Frame_Data#Gatling_Table|Gatling Options]]: {{clr|1|5P}}. {{clr|1|2P}}, {{clr|1|6P}}, {{clr|2|5K}}, {{clr|2|2K}}, {{clr|2|6K}}, {{clr|3|cS}}, {{clr|3|fS}}, {{clr|3|2S}}, {{clr|4|5H}}, {{clr|4|2H}}, {{clr|4|6H}}, {{clr|5|2D}} | ||
}} | |||
===<big>{{clr|2|2K}}</big>=== | ===<big>{{clr|2|2K}}</big>=== | ||
{{GGXRD-R2 Move Card|game=GGXRD-R2 | |||
|input=2K | |||
|description= | |||
{ | |||
{ | |||
|- | |||
| | |||
| | |||
Your main low in your low/throw mixup that leads into the rest of your combo and pressure tools while not being too bad on block. Can delay gatling out of it. Also a relatively fast, highly active, low risk poke that operates in the range between {{clr|1|2P}} and {{clr|3|2S}}. Beware that it doesn't consistently combo into {{clr|5|2D}} at long range and sometimes not even {{clr|3|fS}}. | Your main low in your low/throw mixup that leads into the rest of your combo and pressure tools while not being too bad on block. Can delay gatling out of it. Also a relatively fast, highly active, low risk poke that operates in the range between {{clr|1|2P}} and {{clr|3|2S}}. Beware that it doesn't consistently combo into {{clr|5|2D}} at long range and sometimes not even {{clr|3|fS}}. | ||
[[{{PAGENAME}}/Frame_Data#Gatling_Table|Gatling Options]]: {{clr|1|6P}}, {{clr|2|5K}} {{clr|2|6K}}, {{clr|3|cS}}, {{clr|3|fS}}, {{clr|3|2S}}, {{clr|4|2H}}, {{clr|5|5D}}, {{clr|5|2D}} | [[{{PAGENAME}}/Frame_Data#Gatling_Table|Gatling Options]]: {{clr|1|6P}}, {{clr|2|5K}} {{clr|2|6K}}, {{clr|3|cS}}, {{clr|3|fS}}, {{clr|3|2S}}, {{clr|4|2H}}, {{clr|5|5D}}, {{clr|5|2D}} | ||
}} | |||
===<big>{{clr|3|2S}}</big>=== | ===<big>{{clr|3|2S}}</big>=== | ||
{{GGXRD-R2 Move Card|game=GGXRD-R2 | |||
|input=2S | |||
|description= | |||
{ | |||
{ | |||
|- | |||
| | |||
| | |||
A nice big card swipe that's positive on block and leads to {{clr|4|5H}}, though unfortunately not into {{clr|5|2D}}. Terrific normal with a surprisingly fat hitbox and low recovery. Very disjointed making it high priority in the ground game. Use this move a lot as a poke or blockstring ender/filler. | A nice big card swipe that's positive on block and leads to {{clr|4|5H}}, though unfortunately not into {{clr|5|2D}}. Terrific normal with a surprisingly fat hitbox and low recovery. Very disjointed making it high priority in the ground game. Use this move a lot as a poke or blockstring ender/filler. | ||
[[{{PAGENAME}}/Frame_Data#Gatling_Table|Gatling Options]]: {{clr|4|5H}}, {{clr|4|2H}}, {{clr|4|6H}}, {{clr|5|5D}} | [[{{PAGENAME}}/Frame_Data#Gatling_Table|Gatling Options]]: {{clr|4|5H}}, {{clr|4|2H}}, {{clr|4|6H}}, {{clr|5|5D}} | ||
}} | |||
===<big>{{clr|4|2H}}</big>=== | ===<big>{{clr|4|2H}}</big>=== | ||
{{GGXRD-R2 Move Card|game=GGXRD-R2 | |||
|input=2H | |||
|description= | |||
{ | |||
{ | |||
|- | |||
| | |||
| | |||
Big fat anti-air that covers the space above Answer's head quite well. Although it has to be done pre-emptively and it has a big hurtbox that makes it susceptible to trades, it has a ton of untech time on counterhit that means you usually get a combo anyway on trade. Also an important part of Answer's combos as it does good damage, leads to {{clr|2|6K}} launches by forcing the opponent to stand so that {{clr|2|6K}} doesn't whiff. It's the only normal that leads into the character specific SJIAD combos. | Big fat anti-air that covers the space above Answer's head quite well. Although it has to be done pre-emptively and it has a big hurtbox that makes it susceptible to trades, it has a ton of untech time on counterhit that means you usually get a combo anyway on trade. Also an important part of Answer's combos as it does good damage, leads to {{clr|2|6K}} launches by forcing the opponent to stand so that {{clr|2|6K}} doesn't whiff. It's the only normal that leads into the character specific SJIAD combos. | ||
[[{{PAGENAME}}/Frame_Data#Gatling_Table|Gatling Options]]: {{clr|2|6K}}, {{clr|5|5D}}, {{clr|5|2D}} | [[{{PAGENAME}}/Frame_Data#Gatling_Table|Gatling Options]]: {{clr|2|6K}}, {{clr|5|5D}}, {{clr|5|2D}} | ||
}} | |||
===<big>{{clr|5|2D}}</big>=== | ===<big>{{clr|5|2D}}</big>=== | ||
{{GGXRD-R2 Move Card|game=GGXRD-R2 | |||
|input=2D | |||
|description= | |||
{ | |||
{ | |||
|- | |||
| | |||
| | |||
Nice long-ranged sweep with a cool animation, and Answer's other low normal. Important tool for getting knockdowns off {{clr|3|cS}} and {{clr|3|fS}}, etc, so you can run resourceless okizeme. Can be used to stuff dashes or other approaches for higher meterless reward. Cancel it into Under the Bus when available for a combo or plus frames. | Nice long-ranged sweep with a cool animation, and Answer's other low normal. Important tool for getting knockdowns off {{clr|3|cS}} and {{clr|3|fS}}, etc, so you can run resourceless okizeme. Can be used to stuff dashes or other approaches for higher meterless reward. Cancel it into Under the Bus when available for a combo or plus frames. | ||
[[{{PAGENAME}}/Frame_Data#Gatling_Table|Gatling Options]]: N/A | [[{{PAGENAME}}/Frame_Data#Gatling_Table|Gatling Options]]: N/A | ||
}} | |||
===<big>{{clr|1|j.P}}</big>=== | ===<big>{{clr|1|j.P}}</big>=== | ||
{{GGXRD-R2 Move Card|game=GGXRD-R2 | |||
|input=j.P | |||
|description= | |||
Standard jumping jab. It's speed and hitbox allows for SJIAD combos on taller characters after a corner {{clr|4|5H}}. | |||
| | |||
{ | |||
{ | |||
| | |||
| | |||
}} | }} | ||
===<big>{{clr|2|j.K}}</big>=== | ===<big>{{clr|2|j.K}}</big>=== | ||
{{GGXRD-R2 Move Card|game=GGXRD-R2 | |||
|input=j.K | |||
|description= | |||
An upwards-angled kick that is primarily used for air to air, and has an OK crossup hitbox. Good normal. | |||
{ | |||
{ | |||
|- | |||
| | |||
| | |||
}} | }} | ||
===<big>{{clr|3|j.S}}</big>=== | ===<big>{{clr|3|j.S}}</big>=== | ||
{{GGXRD-R2 Move Card|game=GGXRD-R2 | |||
|input=j.S | |||
|description= | |||
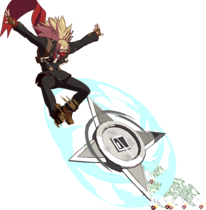
Shuriken surfboard that hits three times, useful for confirming stray aerial hits and sometimes as a jump-in where you can mix up the number of hits they have to block standing. Used in corner SJIAD repressure. Also primary combo filler in air combos not involving scrolls. | |||
{{ | |||
|- | |||
| | |||
| | |||
}} | }} | ||
===<big>{{clr|4|j.H}}</big>=== | ===<big>{{clr|4|j.H}}</big>=== | ||
{{GGXRD-R2 Move Card|game=GGXRD-R2 | |||
|input=j.H | |||
|description= | |||
Gigantic shuriken swipe with a big hitbox and a big hurtbox, similar to his {{clr|4|2H}}. It has a bad habit of trading with things or losing cleanly to good anti-airs, so don't rely on it too much, but this is a terrific air normal overall that your opponent must respect. Particularly good in retreating situations where your opponent is chasing after you. Air CH can often lead to a launcher combo. | |||
}} | }} | ||
===<big>{{clr|5|j.D}}</big>=== | ===<big>{{clr|5|j.D}}</big>=== | ||
{{GGXRD-R2 Move Card|game=GGXRD-R2 | |||
|input=j.D | |||
|description= | |||
Big frog lick that launches airborne opponents higher than {{clr|4|j.H}}, used similar to Dizzy's {{clr|5|j.D}} to end airborne combos by leaving the opponent high up in the air. Also a very strong upwards air to air with full untech on CH leading to {{clr|2|6K}} launcher combo opportunities. A uniquely defining normal for Answer. | |||
| | |||
{{ | |||
| | |||
| | |||
}} | }} | ||
<br style="clear:both;"/> | |||
= | |||
==Universal Mechanics== | ==Universal Mechanics== | ||
===<big>Throw</big>=== | ===<big>Throw</big>=== | ||
{{GGXRD-R2 Move Card|game=GGXRD-R2 | |||
|input=Ground Throw | |||
|description= | |||
Standard knockdown throw. Slightly shorter than an average ground throw. You are able to do K scroll set into meaty {{clr|2|2K}} or {{clr|4|6H}}. It's enough to start good K scroll pressure with scroll, giving you a way to safejump ({{clr|4|6H}} meaty > cling), or beat blitz (meaty {{clr|2|2K}}), so it covers your bases, but isn't as flexible as a {{clr|5|2D}} or {{clr|2|sK}} knockdown. Most often OSed with 6{{clr|3|S}}+{{clr|4|H}} | |||
{| | |||
{{ | |||
| | |||
{{ | |||
| | |||
| | |||
| | |||
}} | }} | ||
===<big>Air Throw</big>=== | ===<big>Air Throw</big>=== | ||
{{GGXRD-R2 Move Card|game=GGXRD-R2 | |||
|input=Air Throw | |||
|description= | |||
Standard airthrow; knocks opponent directly below him. Answer's jump and superjump arcs and air throw range make this a VERY powerful antiair option. Unfortunately has pretty poor frame advantage and consequently weak oki options if you don't already have scrolls ready to use. Probably worth learning some RRC combos for this one that you can use from time to time. | |||
{{ | |||
|- | |||
| | |||
| | |||
}} | }} | ||
===<big>Dead Angle Attack</big>=== | ===<big>Dead Angle Attack</big>=== | ||
{{GGXRD-R2 Move Card|game=GGXRD-R2 | |||
|input=DAA | |||
|description= | |||
Standard Dead Angle attack. More useful than most, because Answer doesn't have a DP, and even his metered defensive options are often worse than DAA. | |||
| | |||
| | |||
}} | }} | ||
===<big>Blitz Attack</big>=== | ===<big>Blitz Attack</big>=== | ||
{{InputBadge|{{clr|3|S}}+{{clr|4|H}}}} | |||
{{GGXRD-R2 Move Card|game=GGXRD-R2 | |||
|input=Blitz,[Blitz] | |||
|versioned=input | |||
|description= | |||
Standard Blitz Shield attack. | |||
{{ | |||
| | |||
| | |||
}} | }} | ||
<br style="clear:both;"/> | |||
==Special Moves== | ==Special Moves== | ||
===<big>Business Ninpo: Caltrops</big>=== | ===<big>Business Ninpo: Caltrops</big>=== | ||
{{InputBadge|{{clr|3|236S}}/{{clr|4|H}}}} | |||
{{GGXRD-R2 Move Card|game=GGXRD-R2 | |||
|input=236S,236H | |||
|versioned=input | |||
|description= | |||
{ | |||
{ | |||
| | |||
| | |||
| | |||
Good range card throw that leaves the card in the ground, which can then be used for other specials. H version goes further than S version. The card still comes out even if Roman Canceled instantly. The card does not have an animation before it hits when RC'ed, it just appears in the ground with an instant hitbox over the distance of the throw. Instant YRC'ing the card can be a good way to start close range ground combos from far away or reset pressure. Having cards set is also an essential way for converting random pokes into full scroll combos or maintain pressure by using the generously tracking clone summon special followup. Pre-set cards and K scrolls provide the basis for Answer's long and oppressive corner blockstrings. | Good range card throw that leaves the card in the ground, which can then be used for other specials. H version goes further than S version. The card still comes out even if Roman Canceled instantly. The card does not have an animation before it hits when RC'ed, it just appears in the ground with an instant hitbox over the distance of the throw. Instant YRC'ing the card can be a good way to start close range ground combos from far away or reset pressure. Having cards set is also an essential way for converting random pokes into full scroll combos or maintain pressure by using the generously tracking clone summon special followup. Pre-set cards and K scrolls provide the basis for Answer's long and oppressive corner blockstrings. | ||
Another thing to note about card is that if spaced well, it is barely -, especially if you use S card at max range rather than H card. This means if your opponent is cornered, depending on their character's options and their habits, you may be able to continue pressure in different ways by leveraging the threat of card throw > Clone Summon, such as if you are out of range of their pokes. | Another thing to note about card is that if spaced well, it is barely -, especially if you use S card at max range rather than H card. This means if your opponent is cornered, depending on their character's options and their habits, you may be able to continue pressure in different ways by leveraging the threat of card throw > Clone Summon, such as if you are out of range of their pokes. | ||
}} | |||
===<big>Business Ninpo: Under the Rug</big>=== | ===<big>Business Ninpo: Under the Rug</big>=== | ||
{{InputBadge|{{clr|3|22S}}/{{clr|4|H}}}} | |||
{{GGXRD-R2 Move Card|game=GGXRD-R2 | |||
|input=22S/H | |||
|description= | |||
Answer disapears behind a rug and reappears on top of the corresponding S or H card. If no card is on the ground, Answer reappears in place. Has a deceptively short recovery time compared to the animation (animation can be canceled). Primarily used for maintaining good screen position/evasion, or sometimes as a long range punish opportunity by YRC'ing the recovery, similar to Chipp's K teleport. Remember which card is which. | |||
{{ | |||
|- | |||
| | |||
| | |||
}} | }} | ||
===<big>Business Ninpo: Under the Bus</big>=== | ===<big>Business Ninpo: Under the Bus</big>=== | ||
{{InputBadge|{{clr|3|421S}}/{{clr|4|H}}}} | |||
{{GGXRD-R2 Move Card|game=GGXRD-R2 | |||
|input=421S/H | |||
|description= | |||
{ | |||
{ | |||
|- | |||
| | |||
| | |||
Answer summons a clone that attacks upwards out of the ground from the position of the corresponding S or H card. As mentioned previously, this is an essential combo, neutral, and pressure tool, and is one of the main incentives for using cards. Get used to remembering which card is which and get comfortable comboing into this from {{clr|4|5H}}. | Answer summons a clone that attacks upwards out of the ground from the position of the corresponding S or H card. As mentioned previously, this is an essential combo, neutral, and pressure tool, and is one of the main incentives for using cards. Get used to remembering which card is which and get comfortable comboing into this from {{clr|4|5H}}. | ||
*If the opponent is close enough to the card, the clone will track to them instead. | *If the opponent is close enough to the card, the clone will track to them instead. | ||
}} | |||
===<big>Savvy Ninpo: Request for Approval</big>=== | ===<big>Savvy Ninpo: Request for Approval</big>=== | ||
{{InputBadge|{{clr|1|214P}}/{{clr|2|K}}/{{clr|3|S}}/{{clr|4|H}} (air OK)}} | |||
{{GGXRD-R2 Move Card|game=GGXRD-R2 | |||
|input=214P/K/S/H,j.214P/K/S/H | |||
|versioned=input | |||
|description= | |||
{{ | |||
| | |||
| | |||
| | |||
Answer summons two scrolls in the positions indicated by the picture to the left. These scrolls are one of the core components of Answer's gameplay and are used in his best combos. | Answer summons two scrolls in the positions indicated by the picture to the left. These scrolls are one of the core components of Answer's gameplay and are used in his best combos. | ||
| Line 904: | Line 294: | ||
* H scroll set can be thought of as a more aggressive version of P scroll, as you lack some of P scroll's freedom of movement and follow-ups, but have a longer potential trajectory at a unique arc of movement. Beware, the active frames of {{clr|5|sD}} do not last for the entire stretch between both H scrolls, and can be crouched or antiaired easily. It gives the benefit of an air-to-ground {{clr|5|sD}} while providing the offensive benefits of the low scroll. Get creative with its use. Also used in situational optimal combos, and for some setups, often the same setups you could do with S scroll. | * H scroll set can be thought of as a more aggressive version of P scroll, as you lack some of P scroll's freedom of movement and follow-ups, but have a longer potential trajectory at a unique arc of movement. Beware, the active frames of {{clr|5|sD}} do not last for the entire stretch between both H scrolls, and can be crouched or antiaired easily. It gives the benefit of an air-to-ground {{clr|5|sD}} while providing the offensive benefits of the low scroll. Get creative with its use. Also used in situational optimal combos, and for some setups, often the same setups you could do with S scroll. | ||
}} | |||
===<big>Savvy Ninpo: Seal of Approval</big>=== | ===<big>Savvy Ninpo: Seal of Approval</big>=== | ||
{{InputBadge|Move to Request of Approval}} | |||
{{GGXRD-R2 Move Card|game=GGXRD-R2 | |||
|input=Near Seal > 5,Seal > 22 | |||
|versioned=input | |||
|description= | |||
Answer clings to a scroll letting him perform a variety of moves. ({{clr|1|sP}}, {{clr|2|sK}}, {{clr|3|sS}}, {{clr|4|sH}}, and {{clr|5|sD}}) Answer will not cling to a scroll if a direction is being held. Pressing down twice will cancel the scroll cling. Clinging to a scroll provides 9 frames of strike invulnerability. | |||
| | |||
{| | |||
{{ | |||
| | |||
}} | |||
{{ | |||
{{ | |||
| | |||
| | |||
}} | }} | ||
===<big>Savvy Ninpo: Data Logging</big>=== | ===<big>Savvy Ninpo: Data Logging</big>=== | ||
{{InputBadge|Seal > {{clr|1|P}}}} | |||
{{GGXRD-R2 Move Card|game=GGXRD-R2 | |||
|input=Seal > P | |||
|description= | |||
The same move as {{clr|1|22P}} (mentioned later) except it is peformed directly from the scroll or scroll D. It is different from the standard {{clr|1|22P}} in that Answer is very quickly moved directly above the opponent for the dropkick. Useful for closing the distance on projectile zoners or beating anti airs/ air to airs. | |||
{{ | |||
{{ | |||
| | |||
| | |||
}} | }} | ||
===<big>Savvy Ninpo: Down the Ladder</big>=== | ===<big>Savvy Ninpo: Down the Ladder</big>=== | ||
{{InputBadge|Seal > {{clr|2|K}}}} | |||
{{GGXRD-R2 Move Card|game=GGXRD-R2 | |||
|input=Seal > K | |||
|description= | |||
Answer kicks straight down from his position. Brings the opponent down to the ground on hit, allowing for oki at the end of an air combo. Also essential for movement and pressure, being the default option after a blocked {{clr|5|s6D}} to maintain a safe blockstring or frametrap. When done in such a situation during low scroll pressure, it leaves you +5 on normal block and recovers fast, the perfect conditions for a mixup, but when done from high up, is only +1 on block and often leaves you in throw range. | |||
| | |||
}} | }} | ||
===<big>Savvy Ninpo: Stepping Down</big>=== | ===<big>Savvy Ninpo: Stepping Down</big>=== | ||
{{InputBadge|Seal > {{clr|3|S}}}} | |||
{{GGXRD-R2 Move Card|game=GGXRD-R2 | |||
|input=Seal > S | |||
|description= | |||
{ | |||
{ | |||
|- | |||
| | |||
| | |||
Answer teleports directly to the ground below him and then slide kicks toward the oppenent. | Answer teleports directly to the ground below him and then slide kicks toward the oppenent. | ||
It's main usage is as a hard call out to blitz due to it being a launch on CH. It also has some very situational use as a high risk callout to beat certain moves (like going under fireballs). Otherwise it's your only direct low from scrolls. Though the reward on CH is high be careful using this option because it can easily be hit out of or blocked. It also has very long recovery. A niche move. | It's main usage is as a hard call out to blitz due to it being a launch on CH. It also has some very situational use as a high risk callout to beat certain moves (like going under fireballs). Otherwise it's your only direct low from scrolls. Though the reward on CH is high be careful using this option because it can easily be hit out of or blocked. It also has very long recovery. A niche move. | ||
}} | |||
===<big>Savvy Ninpo: Into My Office</big>=== | ===<big>Savvy Ninpo: Into My Office</big>=== | ||
{{InputBadge|Seal > {{clr|4|H}}}} | |||
{{GGXRD-R2 Move Card|game=GGXRD-R2 | |||
|input=Seal H | |||
|description= | |||
{{ | |||
|- | |||
| | |||
| | |||
Answer lunges a small distance forward and does a large swipe in front of him. | Answer lunges a small distance forward and does a large swipe in front of him. | ||
| Line 1,071: | Line 343: | ||
*A cool little trick to always allow the {{clr|1|5P}} link regardless of character or to make this move more advantageous is to cancel into it as low as possible out of {{clr|5|s3D}}. | *A cool little trick to always allow the {{clr|1|5P}} link regardless of character or to make this move more advantageous is to cancel into it as low as possible out of {{clr|5|s3D}}. | ||
*Good reward on counterhit, especially as an air to air. | *Good reward on counterhit, especially as an air to air. | ||
}} | |||
===<big>Savvy Ninpo: Safety Net</big>=== | ===<big>Savvy Ninpo: Safety Net</big>=== | ||
{{InputBadge|Seal > Direction + {{clr|5|D}}}} | |||
{{GGXRD-R2 Move Card|game=GGXRD-R2 | |||
|input=Seal D | |||
|description= | |||
Answer lunges a far distance in the direction being held. If no direction is held, Answer lunges to the nearest scroll. All other scroll specific moves can be performed out of this lunge. If Answer holds the D button down, he will not cling to a scroll he passes; otherwise, he will. This is the most essential and defining move in his kit, providing his excellent and hard to contest air-to-ground game, combos, pressure, and movement. | |||
| | |||
| | |||
}} | }} | ||
===<big>Savvy Ninpo: Tax Write-off</big>=== | ===<big>Savvy Ninpo: Tax Write-off</big>=== | ||
{{InputBadge|{{clr|2|623K}} (air OK)}} | |||
{{GGXRD-R2 Move Card|game=GGXRD-R2 | |||
|input=623K,j.623K | |||
|versioned=input | |||
|description= | |||
{{ | |||
| | |||
| | |||
| | |||
*Affected by dash momentum | *Affected by dash momentum | ||
A command grab. Answer grabs the opponent, kicks them into the air, and izuna drops back down with them. Very punishable on whiff. The distance you travel during the grab is based on your starting dash momentum. No momentum doesn’t travel very far, whilst high dashing speed can carry from corner to corner. Practically speaking, in common use it will usually give full corner carry. Being that Answer's pressure is strongest by far in the corner, and he doesn't have many other amazing mixups without specific scroll setups, this is the core part of his mixup game to compliment his variety of frametraps and resets. Answer's dash conveniently has rapid acceleration despite having a low top speed, making it easy to implement this move to its fullest potential. | A command grab. Answer grabs the opponent, kicks them into the air, and izuna drops back down with them. Very punishable on whiff. The distance you travel during the grab is based on your starting dash momentum. No momentum doesn’t travel very far, whilst high dashing speed can carry from corner to corner. Practically speaking, in common use it will usually give full corner carry. Being that Answer's pressure is strongest by far in the corner, and he doesn't have many other amazing mixups without specific scroll setups, this is the core part of his mixup game to compliment his variety of frametraps and resets. Answer's dash conveniently has rapid acceleration despite having a low top speed, making it easy to implement this move to its fullest potential. | ||
| Line 1,145: | Line 366: | ||
If you are really good, you can use this as a reactive antiair in different situations. It can be very valuable since the reward is much better than the normal airthrow or non CH normals, and it still has very good range and startup. One relatively easy example is Card Teleport > YRC > TK command grab, sort of like how Chipp can K teleport YRC to antiair from afar. | If you are really good, you can use this as a reactive antiair in different situations. It can be very valuable since the reward is much better than the normal airthrow or non CH normals, and it still has very good range and startup. One relatively easy example is Card Teleport > YRC > TK command grab, sort of like how Chipp can K teleport YRC to antiair from afar. | ||
}} | |||
===<big>Savvy Ninpo: Data Logging</big>=== | ===<big>Savvy Ninpo: Data Logging</big>=== | ||
{{InputBadge|{{clr|1|22P}} (air OK)}} | |||
{{GGXRD-R2 Move Card|game=GGXRD-R2 | |||
|input=22P,j.22P,22P (Attack),j.22P (Attack) | |||
|versioned=input | |||
|description= | |||
{ | |||
{ | |||
| | |||
| | |||
| | |||
A frame 1 counter. When succesful, Answer falls down from the sky similar to his {{clr|2|sK}}. Makes Answer airborne allowing him to cling to low scrolls or dodge low attacks. Answer kicks down in the same place as where he countered, meaning he will often miss the opponent when used against moves with good range. | A frame 1 counter. When succesful, Answer falls down from the sky similar to his {{clr|2|sK}}. Makes Answer airborne allowing him to cling to low scrolls or dodge low attacks. Answer kicks down in the same place as where he countered, meaning he will often miss the opponent when used against moves with good range. | ||
| Line 1,201: | Line 379: | ||
Can be YRC'ed during the counterattack. Can also be super jump installed by inputting it as {{clr|1|228P}}, which allows you to airdash after having YRC'ed it. | Can be YRC'ed during the counterattack. Can also be super jump installed by inputting it as {{clr|1|228P}}, which allows you to airdash after having YRC'ed it. | ||
}} | |||
===<big>Resshou</big>=== | ===<big>Resshou</big>=== | ||
{{InputBadge|{{clr|1|46P}}}} | |||
{{GGXRD-R2 Move Card|game=GGXRD-R2 | |||
|input=46P | |||
|description= | |||
{{ | |||
|- | |||
| | |||
| | |||
Answer quickly lunges forward and performs a strike if he contacts the opponent (the hitbox only comes out if he runs into the opponent; otherwise, he recovers very quickly). It's a very strong option simply for movement, as Answer's dash is not good, to be used at a range where the palm strike won't connect. This is one of its main uses outside of combos. | Answer quickly lunges forward and performs a strike if he contacts the opponent (the hitbox only comes out if he runs into the opponent; otherwise, he recovers very quickly). It's a very strong option simply for movement, as Answer's dash is not good, to be used at a range where the palm strike won't connect. This is one of its main uses outside of combos. | ||
| Line 1,235: | Line 391: | ||
On a {{clr|4|5H}} hit confirm, it can be decent to use to re-establish close range pressure against characters that don't have great close range options, esp. on crouch confirm (crouching adds 1F of hitstun to all attacks), or to RRC into a full combo. Keep in mind that at +/-0 frames, many characters have strong options for counterplay, and most can guess correctly to beat any of your follow-ups, so use it with care and be attentive of your opponent's habits. | On a {{clr|4|5H}} hit confirm, it can be decent to use to re-establish close range pressure against characters that don't have great close range options, esp. on crouch confirm (crouching adds 1F of hitstun to all attacks), or to RRC into a full combo. Keep in mind that at +/-0 frames, many characters have strong options for counterplay, and most can guess correctly to beat any of your follow-ups, so use it with care and be attentive of your opponent's habits. | ||
}} | |||
<br style="clear:both;"/> | |||
==Overdrives== | ==Overdrives== | ||
===<big>Dead Stock Ninpo: Firesale</big>=== | ===<big>Dead Stock Ninpo: Firesale</big>=== | ||
{{InputBadge|{{clr|3|632146S}}/{{clr|5|D}} (air OK)}} | |||
{{GGXRD-R2 Move Card|game=GGXRD-R2 | |||
|input=632146S,j.632146S | |||
|versioned=input | |||
|description= | |||
{{ | |||
| | |||
| | |||
| | |||
Grounded: Answer throws a card up into the air; if it hits the enemy, it brings them down into the line of fire for the rest of the super. After the card throw, Answer does a short animation, and then sends out a barrage of shurikens forward. Has some different uses in scroll or launcher combos, especially in the corner, but is not a massive optimization most of the time unless you are going for the kill. Benefits considerably from high RISC. The Burst version is passable as a reversal. <br /> | Grounded: Answer throws a card up into the air; if it hits the enemy, it brings them down into the line of fire for the rest of the super. After the card throw, Answer does a short animation, and then sends out a barrage of shurikens forward. Has some different uses in scroll or launcher combos, especially in the corner, but is not a massive optimization most of the time unless you are going for the kill. Benefits considerably from high RISC. The Burst version is passable as a reversal. <br /> | ||
| Line 1,284: | Line 407: | ||
In theory it could be used as an air-to-ground punish to finish a round; otherwise not worth the meter. | In theory it could be used as an air-to-ground punish to finish a round; otherwise not worth the meter. | ||
}} | |||
===<big>Business Ultimate Ninpo: All Hands</big>=== | ===<big>Business Ultimate Ninpo: All Hands</big>=== | ||
{{InputBadge|{{clr|2|236236K}}}} | |||
{{GGXRD-R2 Move Card|game=GGXRD-R2 | |||
|input=236236K | |||
|description= | |||
Answer does a move similar to Resshou; if it hits, answer summons a large shuriken with a clone of him at each side and rushes forward. Unfortunately, it's essentially useless outside of very specific confirms to get a burst-safe kill, as it does very low damage and has no other unique properties. Maybe the worst super in Xrd. | |||
| | |||
| | |||
}} | }} | ||
<br style="clear:both;"/> | |||
= | |||
==[[GGXRD-R/Offense#Instant Kill|Instant Kill]]== | ==[[GGXRD-R/Offense#Instant Kill|Instant Kill]]== | ||
===<big>Summoner: The Basilisk</big>=== | ===<big>Summoner: The Basilisk</big>=== | ||
{{InputBadge|During IK Mode: {{clr|4|236236H}}}} | |||
{{GGXRD-R2 Move Card|game=GGXRD-R2 | |||
|input=236236H | |||
|description= | |||
{{ | |||
|- | |||
| | |||
| | |||
= | |||
*Same animation as {{clr|5|5D}} | *Same animation as {{clr|5|5D}} | ||
*Tax Write-off ({{clr|2|623K}}) combos into this if Answer has 100 tension and Conclusion Conditions are met. | *Tax Write-off ({{clr|2|623K}}) combos into this if Answer has 100 tension and Conclusion Conditions are met. | ||
*Surprisingly safe on block by IK standards. | *Surprisingly safe on block by IK standards. | ||
*Answer does not have many opportunities to combo into this and as such it's mostly for style, as most IK's are, but if you wanted to use it optimally, several counterhits allow you to combo into this without using RRC. For example, CH {{clr|4|6H}}, CH {{clr|5|jD}}, CH {{clr|5|sD}}, CH 421{{clr|3|S}}/{{clr|4|H}} | *Answer does not have many opportunities to combo into this and as such it's mostly for style, as most IK's are, but if you wanted to use it optimally, several counterhits allow you to combo into this without using RRC. For example, CH {{clr|4|6H}}, CH {{clr|5|jD}}, CH {{clr|5|sD}}, CH 421{{clr|3|S}}/{{clr|4|H}} | ||
}} | |||
<br style="clear:both;"/> | |||
==External References== | ==External References== | ||
<br style="clear:both;"/> | |||
==Navigation== | ==Navigation== | ||
<center>{{Character Label|GGXRD-R2|Answer|42px}}</center> | <center>{{Character Label|GGXRD-R2|Answer|42px}}</center> | ||
Revision as of 01:25, 26 September 2022
Answer is a flexible offense-focused character that uses tricky movement, great normals, and unique setups to overwhelm his opponent. Though he has a great normal moveset and set of movement options for most neutral situations, where Answer really shines is on the attack, where he can frustrate his opponent with great frame traps, safe pressure, and a command grab. After knocking the opponent down or finding some breathing room in neutral, he can set his unique ninja scrolls that he can cling to for tricky mixups and even greater mobility. With a tool for almost every situation, the business ninja is a great choice for players looking for strong footsies and relentless rushdown!
![]() Answer
Answer ![]() Answer is a flexible offense-focused character that uses tricky movement, great normals, and unique setups to overwhelm his opponent.
Answer is a flexible offense-focused character that uses tricky movement, great normals, and unique setups to overwhelm his opponent.
- Effective Neutral: Strong neutral game with great pokes and movement options. Business Caltrop YRC (card throw) is very abusable for neutral and pressure.
- Super Jump: Unique super jump that can evade bad situations.
- Great Pressure Game: Safe, long and varied pressure using cards, meter, and scrolls. Excellent options to this end in the corner.
- Throws into Corner Carry: Great hit/throw game through the use of command grab (623K) that can fully corner carry.
- Air Presence: Solid anti-air normals and a fantastic airthrow range for his speed.
- Solid Oki: Can force difficult guessing situations on knockdown; lots of flexibility in his okizeme. Can set up DP-safe meaties in a number of ways.
- Reversal: Unique reversal that can be difficult for some characters to deal with.
- Meter Dependent: Very meter hungry, and often struggles to maintain meter. Needs meter for YRC, damage, and Oki
- Sometimes Struggles Against Defensive Neutral: Has many risky approaches combined with overall poor reward from many attacks
- Blitz Shield Difficulties: Has significant trouble fighting blitz. Often has to hard bait blitz, especially vs. characters with good meterless reversals.
- Character Specific Combos: His access to combos and setups varies wildly depending on the matchup, making him somewhat inconsistent.
- Low Reward from Normal Airthrow: Poor frame advantage and no other unique benefits from his normal airthrow make it hard to apply scroll pressure after this essential antiair.
- Tough to Learn: Relatively high execution barrier in combination with an awkward control scheme that requires you to learn a few counter-intuitive workarounds.
| Answer | |
|---|---|
 | |
| Defense | |
| x1.03 | |
| Guts Rating | |
| 0 | |
| Weight | |
| [100] Medium | |
| Stun Resistance | |
| 55 | |
| Prejump | |
| 3F | |
| Backdash | |
| 21F (1~12F invuln) | |
| Wakeup Timing | |
| 25F (Face Up)/ 25F (Face Down) | |
| Unique Movement Options | |
| Savvy Ninpo: Safety Net | |
| Fastest Attack | |
| Reversals | |
Answer can set scrolls on the screen which he can jump onto, and then perform one of a number of follow ups from. This is where most of his ability to create mixups and scary frame traps come from. You have different configurations that scrolls can appear in (by doing 214P/K/S/H). Once they are on the screen, they stay until they are jumped onto or after a certain amount of time.
Scrolls also give Answer some invulnerability, so you can get out of some Oki with a well-timed 22P on wakeup when you are resting under a scroll. 6H can also be used to cling to a scroll in the same way as 22P. Scrolldash (sD) allows you to do every other scroll option other than another sD for a short duration after sD, so from a scroll cling you can do for example s9D > sK which allows for mixups and pressure after doing sD. The raw mobility of scrolls should also not be ignored; it gives Answer more range than you would otherwise think.Normal Moves
5P
Your fastest poke at only 4 frames. It hits crouchers most of the time, but moves that low profile even a little bit can go under it, so be careful. Standard tool for poking after blocked Resshou or ticking into 623K.
Gatling Options: 5P. 2P, 6P, 5K, 2K, 6K, cS, fS, 2S, 5H, 2H, 6H, 5D, 2D
5K
| Damage | GuardHow this attack can be blocked. | StartupThe number of frames between inputting an attack and when the attack becomes active. Includes first active frame. | ActiveThe number of frames for which a move has hitboxes. Occurs after Startup. | RecoveryThe number of frames after a move's active frames during which the character cannot act assuming the move is not canceled. | On-BlockThe difference between the attacker's recovery and the period that the opponent is in blockstun. This Frame Advantage value is based off the fact that the very first active frame touches the opponent. | Invuln |
|---|---|---|---|---|---|---|
| 18 | Mid | 7 | 5 | 11 | -4 |
Somewhat unusual anti-air 5K that hits mostly above and in front of Answer. Somewhat redundant with the existence of 6P, but can be useful in a pinch, particularly to catch people jumping out of pressure.
Gatling Options: 5P. 2P, 6P, 5K, 2K, 6K, cS, fS, 2S, 5H, 2H, 6H, 2D
| ProrationA percentage-based damage modifier applied to certain attacks independently of other forms of damage scaling. | Level
|
RISC+How much R.I.S.C. this move builds when normal or instant blocked. | RISC-How much R.I.S.C. this move removes on hit. | ||||||||||||||||||||||||||||||||||||
|---|---|---|---|---|---|---|---|---|---|---|---|---|---|---|---|---|---|---|---|---|---|---|---|---|---|---|---|---|---|---|---|---|---|---|---|---|---|---|---|
| 1 | 6 | u |
c.S
| Damage | GuardHow this attack can be blocked. | StartupThe number of frames between inputting an attack and when the attack becomes active. Includes first active frame. | ActiveThe number of frames for which a move has hitboxes. Occurs after Startup. | RecoveryThe number of frames after a move's active frames during which the character cannot act assuming the move is not canceled. | On-BlockThe difference between the attacker's recovery and the period that the opponent is in blockstun. This Frame Advantage value is based off the fact that the very first active frame touches the opponent. | Invuln |
|---|---|---|---|---|---|---|
| 10×2, 20 | Mid | 6 | 3(2)4(2)6 | 9 | -1 |
Multi-hitting card slash that's fast and combos into Answer's most damaging punishes. Also builds good RISC and each hit has very low pushback, making it useful for multiple purposes in blockstrings, particularly ones involving K scrolls or a preset card. cS is only -1, and with a wide array of cancels that can be accessed at almost any point in the move, cS is a very valuable move for pressure, namely for conditioning and such. Can combo into 6K, but it's a little tight, and since this combo is important to maximizing your offensive power, it's worth practicing. If you're ever unsure, just remember you can fall back on 2D.
Gatling Options: 6P, 6K, fS, 2S, 5H, 2H, 5D, 2D
| ProrationA percentage-based damage modifier applied to certain attacks independently of other forms of damage scaling. | Level
|
RISC+How much R.I.S.C. this move builds when normal or instant blocked. | RISC-How much R.I.S.C. this move removes on hit. | ||||||||||||||||||||||||||||||||||||
|---|---|---|---|---|---|---|---|---|---|---|---|---|---|---|---|---|---|---|---|---|---|---|---|---|---|---|---|---|---|---|---|---|---|---|---|---|---|---|---|
| 2 | 7 | 6 |
- 1st and 2nd hit has hitstop 6F
f.S
| Damage | GuardHow this attack can be blocked. | StartupThe number of frames between inputting an attack and when the attack becomes active. Includes first active frame. | ActiveThe number of frames for which a move has hitboxes. Occurs after Startup. | RecoveryThe number of frames after a move's active frames during which the character cannot act assuming the move is not canceled. | On-BlockThe difference between the attacker's recovery and the period that the opponent is in blockstun. This Frame Advantage value is based off the fact that the very first active frame touches the opponent. | Invuln |
|---|---|---|---|---|---|---|
| 30 | Mid | 9 | 6 | 18 | -10 |
Great ranged poke that should be an essential part of your grounded footsie game. Cancels into 2D and 5H (though not at max range) for confirms, knockdowns, and continued pressure. Cancelling into a whiffed 2S is also a strong option to add an extra layer of frame trapping. If your move hits or is blocked at max range, sometimes 5H might whiff, so you can throw a card instead.
Gatling Options: 2S, 5H, 2H, 2D
| ProrationA percentage-based damage modifier applied to certain attacks independently of other forms of damage scaling. | Level
|
RISC+How much R.I.S.C. this move builds when normal or instant blocked. | RISC-How much R.I.S.C. this move removes on hit. | ||||||||||||||||||||||||||||||||||||
|---|---|---|---|---|---|---|---|---|---|---|---|---|---|---|---|---|---|---|---|---|---|---|---|---|---|---|---|---|---|---|---|---|---|---|---|---|---|---|---|
| 2 | 10 | 7 |
5H
| Damage | GuardHow this attack can be blocked. | StartupThe number of frames between inputting an attack and when the attack becomes active. Includes first active frame. | ActiveThe number of frames for which a move has hitboxes. Occurs after Startup. | RecoveryThe number of frames after a move's active frames during which the character cannot act assuming the move is not canceled. | On-BlockThe difference between the attacker's recovery and the period that the opponent is in blockstun. This Frame Advantage value is based off the fact that the very first active frame touches the opponent. | Invuln |
|---|---|---|---|---|---|---|
| 36 | Mid | 9 | 6 | 23 | -10 |
Exceptional normal that, along with scrolls, forms the basis for Answer's tricky offense. Also special and jump cancelable. Using the jumpcancel qualities of the move is important to link a block string into more pressure using scrolls. Essential tool for your offensive gameplan. The recovery is high, so be wary about whiffing the move in neutral, and can also sometimes whiff in pressure because of FD. Stragetize your pressure in a way that 5H is not likely to whiff.
- Very good range and reaches even further than fS
- Staggers on Counter Hit, the move has good reward for proper frame traps. on CH, the move is used for SJIAD combos.
- 5H SJIAD is also used for corner pressure.
- Useful for AA combos, such as after 6K or other launcers.
- At close range you can cancel this into 22P > scroll cling > sD and it will combo/frametrap + reset pressure. Very important K scroll pressure concept, particularly in the corner.
- Has a mostly insignificant low crush property.
- Because the move is jump cancelable, you can jump cancel cancel specials such as Resshou or Card (YRC). The jump cancel window is longer than the special cancel window, so you'll have a longer delay after 5H. The inputs are 469P or 2369S/H for delayed 5H cancel.
Gatling Options: 5D
| ProrationA percentage-based damage modifier applied to certain attacks independently of other forms of damage scaling. | Level
|
RISC+How much R.I.S.C. this move builds when normal or instant blocked. | RISC-How much R.I.S.C. this move removes on hit. | ||||||||||||||||||||||||||||||||||||
|---|---|---|---|---|---|---|---|---|---|---|---|---|---|---|---|---|---|---|---|---|---|---|---|---|---|---|---|---|---|---|---|---|---|---|---|---|---|---|---|
| 3 | 20 | 6 |
5D
| Damage | GuardHow this attack can be blocked. | StartupThe number of frames between inputting an attack and when the attack becomes active. Includes first active frame. | ActiveThe number of frames for which a move has hitboxes. Occurs after Startup. | RecoveryThe number of frames after a move's active frames during which the character cannot act assuming the move is not canceled. | On-BlockThe difference between the attacker's recovery and the period that the opponent is in blockstun. This Frame Advantage value is based off the fact that the very first active frame touches the opponent. | Invuln |
|---|---|---|---|---|---|---|
| 22 | High | 25 | 3 | 19 | -8 |
Standard overhead dust, although the puff of smoke and big frog make it a little more reactable than most. Leads to low reward midscreen and moderate reward in the corner. can be used after certain normals in combos using RRC, but that's only rewarding in the corner.
Gatling Options: N/A
| ProrationA percentage-based damage modifier applied to certain attacks independently of other forms of damage scaling. | Level
|
RISC+How much R.I.S.C. this move builds when normal or instant blocked. | RISC-How much R.I.S.C. this move removes on hit. | ||||||||||||||||||||||||||||||||||||
|---|---|---|---|---|---|---|---|---|---|---|---|---|---|---|---|---|---|---|---|---|---|---|---|---|---|---|---|---|---|---|---|---|---|---|---|---|---|---|---|
| Initial: 80% | 2 | 10 | 20 |
6P
| Damage | GuardHow this attack can be blocked. | StartupThe number of frames between inputting an attack and when the attack becomes active. Includes first active frame. | ActiveThe number of frames for which a move has hitboxes. Occurs after Startup. | RecoveryThe number of frames after a move's active frames during which the character cannot act assuming the move is not canceled. | On-BlockThe difference between the attacker's recovery and the period that the opponent is in blockstun. This Frame Advantage value is based off the fact that the very first active frame touches the opponent. | Invuln |
|---|---|---|---|---|---|---|
| 26 | Mid | 9 | 5 | 16 | -7 | 1-8 Upper Body 9-13 Above Knees |
Good anti-air for approaches coming directly in front of Answer that can also beat out some grounded pokes. Strong overall button that should be used frequently.
Gatling Options: 6K, cS, fS, 2S, 5H, 2H, 6H, 5D, 2D
| ProrationA percentage-based damage modifier applied to certain attacks independently of other forms of damage scaling. | Level
|
RISC+How much R.I.S.C. this move builds when normal or instant blocked. | RISC-How much R.I.S.C. this move removes on hit. | ||||||||||||||||||||||||||||||||||||
|---|---|---|---|---|---|---|---|---|---|---|---|---|---|---|---|---|---|---|---|---|---|---|---|---|---|---|---|---|---|---|---|---|---|---|---|---|---|---|---|
| 2 | 10 | 7 |
6K
| Damage | GuardHow this attack can be blocked. | StartupThe number of frames between inputting an attack and when the attack becomes active. Includes first active frame. | ActiveThe number of frames for which a move has hitboxes. Occurs after Startup. | RecoveryThe number of frames after a move's active frames during which the character cannot act assuming the move is not canceled. | On-BlockThe difference between the attacker's recovery and the period that the opponent is in blockstun. This Frame Advantage value is based off the fact that the very first active frame touches the opponent. | Invuln |
|---|---|---|---|---|---|---|
| 26 | Mid | 14 | 8 | 9 | +2 |
Answer's launcher with a very long amount of hitstun. This should almost always be canceled into a scroll set special move, as Answer has enough time to set a scroll, jump up, and continue comboing with the scrolls. Can be held to perform a feint that moves him forward. Only combos on standing hit, whiffs entirely against crouching opponents.
Gatling Options: 6H
| ProrationA percentage-based damage modifier applied to certain attacks independently of other forms of damage scaling. | Level
|
RISC+How much R.I.S.C. this move builds when normal or instant blocked. | RISC-How much R.I.S.C. this move removes on hit. | ||||||||||||||||||||||||||||||||||||
|---|---|---|---|---|---|---|---|---|---|---|---|---|---|---|---|---|---|---|---|---|---|---|---|---|---|---|---|---|---|---|---|---|---|---|---|---|---|---|---|
| 4 | 20 | 6 |
6H
| Damage | GuardHow this attack can be blocked. | StartupThe number of frames between inputting an attack and when the attack becomes active. Includes first active frame. | ActiveThe number of frames for which a move has hitboxes. Occurs after Startup. | RecoveryThe number of frames after a move's active frames during which the character cannot act assuming the move is not canceled. | On-BlockThe difference between the attacker's recovery and the period that the opponent is in blockstun. This Frame Advantage value is based off the fact that the very first active frame touches the opponent. | Invuln |
|---|---|---|---|---|---|---|
| 45 | Mid | 17 | 5 | 2+12 L | 0 | 5-7 Foot 8-19 Lower Body 20 onwards Foot 8 onwards Airborne |
Although this move is not an overhead, 6H is one of Answer's most important normal in pressure. It brings him airborne, which means he can use it to cling onto scrolls during pressure or for okizeme. Even without a scroll out, it's surprisingly neutral on block, moves Answer slightly forward, is invulnerable to ground throws, and goes over attacks with low hitboxes, while also providing a huge launch on Counter Hit. When air blocked by the opponent, gives enough blockstun for a chance at a pressure reset, especially at close range. Essential offensive tool.
- Builds up the RISC gauge rapidly
- Steals tons of meter on FD
- Has a special cancel window both in the air, and upon landing, for grounded specials. Can frametrap and reset with card YRC for example.
Gatling Options: N/A
| ProrationA percentage-based damage modifier applied to certain attacks independently of other forms of damage scaling. | Level
|
RISC+How much R.I.S.C. this move builds when normal or instant blocked. | RISC-How much R.I.S.C. this move removes on hit. | ||||||||||||||||||||||||||||||||||||
|---|---|---|---|---|---|---|---|---|---|---|---|---|---|---|---|---|---|---|---|---|---|---|---|---|---|---|---|---|---|---|---|---|---|---|---|---|---|---|---|
| 4 | 20 | 6 |
2P
| Damage | GuardHow this attack can be blocked. | StartupThe number of frames between inputting an attack and when the attack becomes active. Includes first active frame. | ActiveThe number of frames for which a move has hitboxes. Occurs after Startup. | RecoveryThe number of frames after a move's active frames during which the character cannot act assuming the move is not canceled. | On-BlockThe difference between the attacker's recovery and the period that the opponent is in blockstun. This Frame Advantage value is based off the fact that the very first active frame touches the opponent. | Invuln |
|---|---|---|---|---|---|---|
| 8 | Mid | 5 | 3 | 5 | +2 |
A great jab that's plus on block and can't be low-profiled as easily as 5P. Essential poke and pressure tool.
Gatling Options: 5P. 2P, 6P, 5K, 2K, 6K, cS, fS, 2S, 5H, 2H, 6H, 2D
| ProrationA percentage-based damage modifier applied to certain attacks independently of other forms of damage scaling. | Level
|
RISC+How much R.I.S.C. this move builds when normal or instant blocked. | RISC-How much R.I.S.C. this move removes on hit. | ||||||||||||||||||||||||||||||||||||
|---|---|---|---|---|---|---|---|---|---|---|---|---|---|---|---|---|---|---|---|---|---|---|---|---|---|---|---|---|---|---|---|---|---|---|---|---|---|---|---|
| Initial: 80% | 0 | 3 | 8 |
2K
| Damage | GuardHow this attack can be blocked. | StartupThe number of frames between inputting an attack and when the attack becomes active. Includes first active frame. | ActiveThe number of frames for which a move has hitboxes. Occurs after Startup. | RecoveryThe number of frames after a move's active frames during which the character cannot act assuming the move is not canceled. | On-BlockThe difference between the attacker's recovery and the period that the opponent is in blockstun. This Frame Advantage value is based off the fact that the very first active frame touches the opponent. | Invuln |
|---|---|---|---|---|---|---|
| 14 | Low | 7 | 6 | 6 | -2 | 3-18 Upper Body |
Your main low in your low/throw mixup that leads into the rest of your combo and pressure tools while not being too bad on block. Can delay gatling out of it. Also a relatively fast, highly active, low risk poke that operates in the range between 2P and 2S. Beware that it doesn't consistently combo into 2D at long range and sometimes not even fS.
Gatling Options: 6P, 5K 6K, cS, fS, 2S, 2H, 5D, 2D
| ProrationA percentage-based damage modifier applied to certain attacks independently of other forms of damage scaling. | Level
|
RISC+How much R.I.S.C. this move builds when normal or instant blocked. | RISC-How much R.I.S.C. this move removes on hit. | ||||||||||||||||||||||||||||||||||||
|---|---|---|---|---|---|---|---|---|---|---|---|---|---|---|---|---|---|---|---|---|---|---|---|---|---|---|---|---|---|---|---|---|---|---|---|---|---|---|---|
| Initial: 70% | 0 | 3 | 8 |
2S
| Damage | GuardHow this attack can be blocked. | StartupThe number of frames between inputting an attack and when the attack becomes active. Includes first active frame. | ActiveThe number of frames for which a move has hitboxes. Occurs after Startup. | RecoveryThe number of frames after a move's active frames during which the character cannot act assuming the move is not canceled. | On-BlockThe difference between the attacker's recovery and the period that the opponent is in blockstun. This Frame Advantage value is based off the fact that the very first active frame touches the opponent. | Invuln |
|---|---|---|---|---|---|---|
| 28 | Mid | 10 | 3 | 9 | +2 | 1-9 Upper Body |
A nice big card swipe that's positive on block and leads to 5H, though unfortunately not into 2D. Terrific normal with a surprisingly fat hitbox and low recovery. Very disjointed making it high priority in the ground game. Use this move a lot as a poke or blockstring ender/filler.
Gatling Options: 5H, 2H, 6H, 5D
| ProrationA percentage-based damage modifier applied to certain attacks independently of other forms of damage scaling. | Level
|
RISC+How much R.I.S.C. this move builds when normal or instant blocked. | RISC-How much R.I.S.C. this move removes on hit. | ||||||||||||||||||||||||||||||||||||
|---|---|---|---|---|---|---|---|---|---|---|---|---|---|---|---|---|---|---|---|---|---|---|---|---|---|---|---|---|---|---|---|---|---|---|---|---|---|---|---|
| 2 | 10 | 7 |
2H
| Damage | GuardHow this attack can be blocked. | StartupThe number of frames between inputting an attack and when the attack becomes active. Includes first active frame. | ActiveThe number of frames for which a move has hitboxes. Occurs after Startup. | RecoveryThe number of frames after a move's active frames during which the character cannot act assuming the move is not canceled. | On-BlockThe difference between the attacker's recovery and the period that the opponent is in blockstun. This Frame Advantage value is based off the fact that the very first active frame touches the opponent. | Invuln |
|---|---|---|---|---|---|---|
| 34 | Mid | 11 | 6 | 21 | -8 |
Big fat anti-air that covers the space above Answer's head quite well. Although it has to be done pre-emptively and it has a big hurtbox that makes it susceptible to trades, it has a ton of untech time on counterhit that means you usually get a combo anyway on trade. Also an important part of Answer's combos as it does good damage, leads to 6K launches by forcing the opponent to stand so that 6K doesn't whiff. It's the only normal that leads into the character specific SJIAD combos.
Gatling Options: 6K, 5D, 2D
| ProrationA percentage-based damage modifier applied to certain attacks independently of other forms of damage scaling. | Level
|
RISC+How much R.I.S.C. this move builds when normal or instant blocked. | RISC-How much R.I.S.C. this move removes on hit. | ||||||||||||||||||||||||||||||||||||
|---|---|---|---|---|---|---|---|---|---|---|---|---|---|---|---|---|---|---|---|---|---|---|---|---|---|---|---|---|---|---|---|---|---|---|---|---|---|---|---|
| 4 | -20 | 6 |
- Forces standing on ground hit
2D
| Damage | GuardHow this attack can be blocked. | StartupThe number of frames between inputting an attack and when the attack becomes active. Includes first active frame. | ActiveThe number of frames for which a move has hitboxes. Occurs after Startup. | RecoveryThe number of frames after a move's active frames during which the character cannot act assuming the move is not canceled. | On-BlockThe difference between the attacker's recovery and the period that the opponent is in blockstun. This Frame Advantage value is based off the fact that the very first active frame touches the opponent. | Invuln |
|---|---|---|---|---|---|---|
| 28 | Low | 9 | 6 | 15 | -7 |
Nice long-ranged sweep with a cool animation, and Answer's other low normal. Important tool for getting knockdowns off cS and fS, etc, so you can run resourceless okizeme. Can be used to stuff dashes or other approaches for higher meterless reward. Cancel it into Under the Bus when available for a combo or plus frames.
Gatling Options: N/A
| ProrationA percentage-based damage modifier applied to certain attacks independently of other forms of damage scaling. | Level
|
RISC+How much R.I.S.C. this move builds when normal or instant blocked. | RISC-How much R.I.S.C. this move removes on hit. | ||||||||||||||||||||||||||||||||||||
|---|---|---|---|---|---|---|---|---|---|---|---|---|---|---|---|---|---|---|---|---|---|---|---|---|---|---|---|---|---|---|---|---|---|---|---|---|---|---|---|
| 2 | 10 | 7 |
j.P
| Damage | GuardHow this attack can be blocked. | StartupThe number of frames between inputting an attack and when the attack becomes active. Includes first active frame. | ActiveThe number of frames for which a move has hitboxes. Occurs after Startup. | RecoveryThe number of frames after a move's active frames during which the character cannot act assuming the move is not canceled. | On-BlockThe difference between the attacker's recovery and the period that the opponent is in blockstun. This Frame Advantage value is based off the fact that the very first active frame touches the opponent. | Invuln |
|---|---|---|---|---|---|---|
| 12 | High/Air | 6 | 3 | 9 |
Standard jumping jab. It's speed and hitbox allows for SJIAD combos on taller characters after a corner 5H.
| ProrationA percentage-based damage modifier applied to certain attacks independently of other forms of damage scaling. | Level
|
RISC+How much R.I.S.C. this move builds when normal or instant blocked. | RISC-How much R.I.S.C. this move removes on hit. | ||||||||||||||||||||||||||||||||||||
|---|---|---|---|---|---|---|---|---|---|---|---|---|---|---|---|---|---|---|---|---|---|---|---|---|---|---|---|---|---|---|---|---|---|---|---|---|---|---|---|
| 0 | 3 | 8 |
j.K
| Damage | GuardHow this attack can be blocked. | StartupThe number of frames between inputting an attack and when the attack becomes active. Includes first active frame. | ActiveThe number of frames for which a move has hitboxes. Occurs after Startup. | RecoveryThe number of frames after a move's active frames during which the character cannot act assuming the move is not canceled. | On-BlockThe difference between the attacker's recovery and the period that the opponent is in blockstun. This Frame Advantage value is based off the fact that the very first active frame touches the opponent. | Invuln |
|---|---|---|---|---|---|---|
| 18 | High/Air | 7 | 6 | 15 |
An upwards-angled kick that is primarily used for air to air, and has an OK crossup hitbox. Good normal.
| ProrationA percentage-based damage modifier applied to certain attacks independently of other forms of damage scaling. | Level
|
RISC+How much R.I.S.C. this move builds when normal or instant blocked. | RISC-How much R.I.S.C. this move removes on hit. | ||||||||||||||||||||||||||||||||||||
|---|---|---|---|---|---|---|---|---|---|---|---|---|---|---|---|---|---|---|---|---|---|---|---|---|---|---|---|---|---|---|---|---|---|---|---|---|---|---|---|
| 1 | 6 | 7 |
j.S
| Damage | GuardHow this attack can be blocked. | StartupThe number of frames between inputting an attack and when the attack becomes active. Includes first active frame. | ActiveThe number of frames for which a move has hitboxes. Occurs after Startup. | RecoveryThe number of frames after a move's active frames during which the character cannot act assuming the move is not canceled. | On-BlockThe difference between the attacker's recovery and the period that the opponent is in blockstun. This Frame Advantage value is based off the fact that the very first active frame touches the opponent. | Invuln |
|---|---|---|---|---|---|---|
| 12×3 | High/Air | 9 | 2,2,8 | 21 |
Shuriken surfboard that hits three times, useful for confirming stray aerial hits and sometimes as a jump-in where you can mix up the number of hits they have to block standing. Used in corner SJIAD repressure. Also primary combo filler in air combos not involving scrolls.
| ProrationA percentage-based damage modifier applied to certain attacks independently of other forms of damage scaling. | Level
|
RISC+How much R.I.S.C. this move builds when normal or instant blocked. | RISC-How much R.I.S.C. this move removes on hit. | ||||||||||||||||||||||||||||||||||||
|---|---|---|---|---|---|---|---|---|---|---|---|---|---|---|---|---|---|---|---|---|---|---|---|---|---|---|---|---|---|---|---|---|---|---|---|---|---|---|---|
| 2 | 10 | 5 |
j.H
| Damage | GuardHow this attack can be blocked. | StartupThe number of frames between inputting an attack and when the attack becomes active. Includes first active frame. | ActiveThe number of frames for which a move has hitboxes. Occurs after Startup. | RecoveryThe number of frames after a move's active frames during which the character cannot act assuming the move is not canceled. | On-BlockThe difference between the attacker's recovery and the period that the opponent is in blockstun. This Frame Advantage value is based off the fact that the very first active frame touches the opponent. | Invuln |
|---|---|---|---|---|---|---|
| 32 | High/Air | 9 | 6 | 24 |
Gigantic shuriken swipe with a big hitbox and a big hurtbox, similar to his 2H. It has a bad habit of trading with things or losing cleanly to good anti-airs, so don't rely on it too much, but this is a terrific air normal overall that your opponent must respect. Particularly good in retreating situations where your opponent is chasing after you. Air CH can often lead to a launcher combo.
| ProrationA percentage-based damage modifier applied to certain attacks independently of other forms of damage scaling. | Level
|
RISC+How much R.I.S.C. this move builds when normal or instant blocked. | RISC-How much R.I.S.C. this move removes on hit. | ||||||||||||||||||||||||||||||||||||
|---|---|---|---|---|---|---|---|---|---|---|---|---|---|---|---|---|---|---|---|---|---|---|---|---|---|---|---|---|---|---|---|---|---|---|---|---|---|---|---|
| 3 | 14 | 6 |
- Each hit has hitstop 6F
j.D
| Damage | GuardHow this attack can be blocked. | StartupThe number of frames between inputting an attack and when the attack becomes active. Includes first active frame. | ActiveThe number of frames for which a move has hitboxes. Occurs after Startup. | RecoveryThe number of frames after a move's active frames during which the character cannot act assuming the move is not canceled. | On-BlockThe difference between the attacker's recovery and the period that the opponent is in blockstun. This Frame Advantage value is based off the fact that the very first active frame touches the opponent. | Invuln |
|---|---|---|---|---|---|---|
| 44 | High/Air | 10 | 10 | 15+5L |
Big frog lick that launches airborne opponents higher than j.H, used similar to Dizzy's j.D to end airborne combos by leaving the opponent high up in the air. Also a very strong upwards air to air with full untech on CH leading to 6K launcher combo opportunities. A uniquely defining normal for Answer.
| ProrationA percentage-based damage modifier applied to certain attacks independently of other forms of damage scaling. | Level
|
RISC+How much R.I.S.C. this move builds when normal or instant blocked. | RISC-How much R.I.S.C. this move removes on hit. | ||||||||||||||||||||||||||||||||||||
|---|---|---|---|---|---|---|---|---|---|---|---|---|---|---|---|---|---|---|---|---|---|---|---|---|---|---|---|---|---|---|---|---|---|---|---|---|---|---|---|
| 2 | 10 | 7 |
Universal Mechanics
Throw
| Damage | GuardHow this attack can be blocked. | StartupThe number of frames between inputting an attack and when the attack becomes active. Includes first active frame. | ActiveThe number of frames for which a move has hitboxes. Occurs after Startup. | RecoveryThe number of frames after a move's active frames during which the character cannot act assuming the move is not canceled. | On-BlockThe difference between the attacker's recovery and the period that the opponent is in blockstun. This Frame Advantage value is based off the fact that the very first active frame touches the opponent. | Invuln |
|---|---|---|---|---|---|---|
| 0, 60 | Ground Throw: 63000 | 1 | +51 |
Standard knockdown throw. Slightly shorter than an average ground throw. You are able to do K scroll set into meaty 2K or 6H. It's enough to start good K scroll pressure with scroll, giving you a way to safejump (6H meaty > cling), or beat blitz (meaty 2K), so it covers your bases, but isn't as flexible as a 2D or sK knockdown. Most often OSed with 6S+H
| ProrationA percentage-based damage modifier applied to certain attacks independently of other forms of damage scaling. | Level
|
RISC+How much R.I.S.C. this move builds when normal or instant blocked. | RISC-How much R.I.S.C. this move removes on hit. | ||||||||||||||||||||||||||||||||||||
|---|---|---|---|---|---|---|---|---|---|---|---|---|---|---|---|---|---|---|---|---|---|---|---|---|---|---|---|---|---|---|---|---|---|---|---|---|---|---|---|
| Forced: 65% | 0 | NA | 6, 0 |
- Stun value 30
Air Throw
| Damage | GuardHow this attack can be blocked. | StartupThe number of frames between inputting an attack and when the attack becomes active. Includes first active frame. | ActiveThe number of frames for which a move has hitboxes. Occurs after Startup. | RecoveryThe number of frames after a move's active frames during which the character cannot act assuming the move is not canceled. | On-BlockThe difference between the attacker's recovery and the period that the opponent is in blockstun. This Frame Advantage value is based off the fact that the very first active frame touches the opponent. | Invuln |
|---|---|---|---|---|---|---|
| 0, 60 | Air Throw: 192500 | 1 |
Standard airthrow; knocks opponent directly below him. Answer's jump and superjump arcs and air throw range make this a VERY powerful antiair option. Unfortunately has pretty poor frame advantage and consequently weak oki options if you don't already have scrolls ready to use. Probably worth learning some RRC combos for this one that you can use from time to time.
| ProrationA percentage-based damage modifier applied to certain attacks independently of other forms of damage scaling. | Level
|
RISC+How much R.I.S.C. this move builds when normal or instant blocked. | RISC-How much R.I.S.C. this move removes on hit. | ||||||||||||||||||||||||||||||||||||
|---|---|---|---|---|---|---|---|---|---|---|---|---|---|---|---|---|---|---|---|---|---|---|---|---|---|---|---|---|---|---|---|---|---|---|---|---|---|---|---|
| Forced: 65% | 0 | NA | 6,0 |
- Stun value 30
Dead Angle Attack
| Damage | GuardHow this attack can be blocked. | StartupThe number of frames between inputting an attack and when the attack becomes active. Includes first active frame. | ActiveThe number of frames for which a move has hitboxes. Occurs after Startup. | RecoveryThe number of frames after a move's active frames during which the character cannot act assuming the move is not canceled. | On-BlockThe difference between the attacker's recovery and the period that the opponent is in blockstun. This Frame Advantage value is based off the fact that the very first active frame touches the opponent. | Invuln |
|---|---|---|---|---|---|---|
| 25 | All | 10 | 5 | 16 | -7 | 1-14 All |
Standard Dead Angle attack. More useful than most, because Answer doesn't have a DP, and even his metered defensive options are often worse than DAA.
| ProrationA percentage-based damage modifier applied to certain attacks independently of other forms of damage scaling. | Level
|
RISC+How much R.I.S.C. this move builds when normal or instant blocked. | RISC-How much R.I.S.C. this move removes on hit. | ||||||||||||||||||||||||||||||||||||
|---|---|---|---|---|---|---|---|---|---|---|---|---|---|---|---|---|---|---|---|---|---|---|---|---|---|---|---|---|---|---|---|---|---|---|---|---|---|---|---|
| Initial: 50% | 2 | 10 | 7 |
Blitz Attack
S+H
| Version | Damage | GuardHow this attack can be blocked. | StartupThe number of frames between inputting an attack and when the attack becomes active. Includes first active frame. | ActiveThe number of frames for which a move has hitboxes. Occurs after Startup. | RecoveryThe number of frames after a move's active frames during which the character cannot act assuming the move is not canceled. | On-BlockThe difference between the attacker's recovery and the period that the opponent is in blockstun. This Frame Advantage value is based off the fact that the very first active frame touches the opponent. | Invuln |
|---|---|---|---|---|---|---|---|
| Blitz | 50 | Mid | (15-48)+13 | 3 | 20 | -2 | 1~Button release: Blitz |
| [Blitz] | 50 | Mid | 50+13 | 3 | 20 | +5 | 1~50: Blitz |
Standard Blitz Shield attack.
| Version | ProrationA percentage-based damage modifier applied to certain attacks independently of other forms of damage scaling. | Level
|
RISC+How much R.I.S.C. this move builds when normal or instant blocked. | RISC-How much R.I.S.C. this move removes on hit. | ||||||||||||||||||||||||||||||||||||
|---|---|---|---|---|---|---|---|---|---|---|---|---|---|---|---|---|---|---|---|---|---|---|---|---|---|---|---|---|---|---|---|---|---|---|---|---|---|---|---|---|
| Blitz | Initial: 55% | 1 | ||||||||||||||||||||||||||||||||||||||
| [Blitz] | 4 |
Blitz:
- Hitstop 30F
- Slighty refills own Burst and slightly drains opponent's Burst on hit
- Blows opponent away and wall sticks opponent on hit (untechable for 40F/ 80F on CH)
- Crumples opponent on ground CH (79F)
[Blitz]:
- Hitstop 30F
- Slighty refills own Burst and slightly drains opponent's Burst on hit
- Slightly blows opponent away on air hit (untechable for 50F/ 100F on CH)
- Crumples opponent on ground hit
Special Moves
Business Ninpo: Caltrops
236S/H
| Version | Damage | GuardHow this attack can be blocked. | StartupThe number of frames between inputting an attack and when the attack becomes active. Includes first active frame. | ActiveThe number of frames for which a move has hitboxes. Occurs after Startup. | RecoveryThe number of frames after a move's active frames during which the character cannot act assuming the move is not canceled. | On-BlockThe difference between the attacker's recovery and the period that the opponent is in blockstun. This Frame Advantage value is based off the fact that the very first active frame touches the opponent. | Invuln |
|---|---|---|---|---|---|---|---|
| 236S | 20 | All | 12 | 12 | Total 42 | -7 | |
| 236H | 20 | All | 14 | 12 | Total 44 | -7 |
Good range card throw that leaves the card in the ground, which can then be used for other specials. H version goes further than S version. The card still comes out even if Roman Canceled instantly. The card does not have an animation before it hits when RC'ed, it just appears in the ground with an instant hitbox over the distance of the throw. Instant YRC'ing the card can be a good way to start close range ground combos from far away or reset pressure. Having cards set is also an essential way for converting random pokes into full scroll combos or maintain pressure by using the generously tracking clone summon special followup. Pre-set cards and K scrolls provide the basis for Answer's long and oppressive corner blockstrings. Another thing to note about card is that if spaced well, it is barely -, especially if you use S card at max range rather than H card. This means if your opponent is cornered, depending on their character's options and their habits, you may be able to continue pressure in different ways by leveraging the threat of card throw > Clone Summon, such as if you are out of range of their pokes.
| Version | ProrationA percentage-based damage modifier applied to certain attacks independently of other forms of damage scaling. | Level
|
RISC+How much R.I.S.C. this move builds when normal or instant blocked. | RISC-How much R.I.S.C. this move removes on hit. | ||||||||||||||||||||||||||||||||||||
|---|---|---|---|---|---|---|---|---|---|---|---|---|---|---|---|---|---|---|---|---|---|---|---|---|---|---|---|---|---|---|---|---|---|---|---|---|---|---|---|---|
| 236S | 1 | 2 | 7 | |||||||||||||||||||||||||||||||||||||
| 236H | 1 | 2 | 7 |
236S:
- Card appears on 19F
236H:
- Card appears on 21F
Business Ninpo: Under the Rug
22S/H
| Damage | GuardHow this attack can be blocked. | StartupThe number of frames between inputting an attack and when the attack becomes active. Includes first active frame. | ActiveThe number of frames for which a move has hitboxes. Occurs after Startup. | RecoveryThe number of frames after a move's active frames during which the character cannot act assuming the move is not canceled. | On-BlockThe difference between the attacker's recovery and the period that the opponent is in blockstun. This Frame Advantage value is based off the fact that the very first active frame touches the opponent. | Invuln |
|---|---|---|---|---|---|---|
| Total 36 | 7-12 All |
Answer disapears behind a rug and reappears on top of the corresponding S or H card. If no card is on the ground, Answer reappears in place. Has a deceptively short recovery time compared to the animation (animation can be canceled). Primarily used for maintaining good screen position/evasion, or sometimes as a long range punish opportunity by YRC'ing the recovery, similar to Chipp's K teleport. Remember which card is which.
| ProrationA percentage-based damage modifier applied to certain attacks independently of other forms of damage scaling. | Level
|
RISC+How much R.I.S.C. this move builds when normal or instant blocked. | RISC-How much R.I.S.C. this move removes on hit. | ||||||||||||||||||||||||||||||||||||
|---|---|---|---|---|---|---|---|---|---|---|---|---|---|---|---|---|---|---|---|---|---|---|---|---|---|---|---|---|---|---|---|---|---|---|---|---|---|---|---|
- Reappears on 13F?
Business Ninpo: Under the Bus
421S/H
| Damage | GuardHow this attack can be blocked. | StartupThe number of frames between inputting an attack and when the attack becomes active. Includes first active frame. | ActiveThe number of frames for which a move has hitboxes. Occurs after Startup. | RecoveryThe number of frames after a move's active frames during which the character cannot act assuming the move is not canceled. | On-BlockThe difference between the attacker's recovery and the period that the opponent is in blockstun. This Frame Advantage value is based off the fact that the very first active frame touches the opponent. | Invuln |
|---|---|---|---|---|---|---|
| 38 | All | 15 | 14 | Total 40 | +4 |
Answer summons a clone that attacks upwards out of the ground from the position of the corresponding S or H card. As mentioned previously, this is an essential combo, neutral, and pressure tool, and is one of the main incentives for using cards. Get used to remembering which card is which and get comfortable comboing into this from 5H.
- If the opponent is close enough to the card, the clone will track to them instead.
| ProrationA percentage-based damage modifier applied to certain attacks independently of other forms of damage scaling. | Level
|
RISC+How much R.I.S.C. this move builds when normal or instant blocked. | RISC-How much R.I.S.C. this move removes on hit. | ||||||||||||||||||||||||||||||||||||
|---|---|---|---|---|---|---|---|---|---|---|---|---|---|---|---|---|---|---|---|---|---|---|---|---|---|---|---|---|---|---|---|---|---|---|---|---|---|---|---|
| 2 | 2 | 7 |
- Attack only appears if the corresponding Business Card is deployed
Savvy Ninpo: Request for Approval
214P/K/S/H (air OK)
| Version | Damage | GuardHow this attack can be blocked. | StartupThe number of frames between inputting an attack and when the attack becomes active. Includes first active frame. | ActiveThe number of frames for which a move has hitboxes. Occurs after Startup. | RecoveryThe number of frames after a move's active frames during which the character cannot act assuming the move is not canceled. | On-BlockThe difference between the attacker's recovery and the period that the opponent is in blockstun. This Frame Advantage value is based off the fact that the very first active frame touches the opponent. | Invuln |
|---|---|---|---|---|---|---|---|
| 214P/K/S/H | Total 28 | ||||||
| j.214P/K/S/H | Total 46 |
Answer summons two scrolls in the positions indicated by the picture to the left. These scrolls are one of the core components of Answer's gameplay and are used in his best combos.
- P scrolls (high scrolls) give Answer a plethora of movement options, air control and amazing air to ground attacks, and are the basis of his 6K launcher combos. They also give him the ability to convert any antiairs into a full combo easily. As such, this is the most versatile scroll set in neutral.
- K scrolls (low scrolls) give Answer his oppressive pressure options and are the core of his offense.
- S scroll set formation is primarily used in the corner for risky mixup setups such as left/right and high/low mixups, and to this end can be used in combination with a leftover scroll from a combo for 3 scroll oki (gives a shot at a unique mixup while still giving good pressure options on block. Examples of setup would be P scroll combo using only one P scroll > set K scroll, or end combo with corner side K scroll remaining, set S scroll). Has other use in niche setups and is used occasionally in character specific or otherwise situational optimal combos. It has relatively little use otherwise and is the least useful scroll set overall.
- H scroll set can be thought of as a more aggressive version of P scroll, as you lack some of P scroll's freedom of movement and follow-ups, but have a longer potential trajectory at a unique arc of movement. Beware, the active frames of sD do not last for the entire stretch between both H scrolls, and can be crouched or antiaired easily. It gives the benefit of an air-to-ground sD while providing the offensive benefits of the low scroll. Get creative with its use. Also used in situational optimal combos, and for some setups, often the same setups you could do with S scroll.
| Version | ProrationA percentage-based damage modifier applied to certain attacks independently of other forms of damage scaling. | Level
|
RISC+How much R.I.S.C. this move builds when normal or instant blocked. | RISC-How much R.I.S.C. this move removes on hit. | ||||||||||||||||||||||||||||||||||||
|---|---|---|---|---|---|---|---|---|---|---|---|---|---|---|---|---|---|---|---|---|---|---|---|---|---|---|---|---|---|---|---|---|---|---|---|---|---|---|---|---|
| 214P/K/S/H | ||||||||||||||||||||||||||||||||||||||||
| j.214P/K/S/H |
214P/K/S/H: j.214P/K/S/H:
Savvy Ninpo: Seal of Approval
Move to Request of Approval
| Version | Damage | GuardHow this attack can be blocked. | StartupThe number of frames between inputting an attack and when the attack becomes active. Includes first active frame. | ActiveThe number of frames for which a move has hitboxes. Occurs after Startup. | RecoveryThe number of frames after a move's active frames during which the character cannot act assuming the move is not canceled. | On-BlockThe difference between the attacker's recovery and the period that the opponent is in blockstun. This Frame Advantage value is based off the fact that the very first active frame touches the opponent. | Invuln |
|---|---|---|---|---|---|---|---|
| Near Seal > 5 | Total 126 | 1~9 Strike | |||||
| Seal > 22 | Total 6 |
Answer clings to a scroll letting him perform a variety of moves. (sP, sK, sS, sH, and sD) Answer will not cling to a scroll if a direction is being held. Pressing down twice will cancel the scroll cling. Clinging to a scroll provides 9 frames of strike invulnerability.
| Version | ProrationA percentage-based damage modifier applied to certain attacks independently of other forms of damage scaling. | Level
|
RISC+How much R.I.S.C. this move builds when normal or instant blocked. | RISC-How much R.I.S.C. this move removes on hit. | ||||||||||||||||||||||||||||||||||||
|---|---|---|---|---|---|---|---|---|---|---|---|---|---|---|---|---|---|---|---|---|---|---|---|---|---|---|---|---|---|---|---|---|---|---|---|---|---|---|---|---|
| Near Seal > 5 | ||||||||||||||||||||||||||||||||||||||||
| Seal > 22 |
Near Seal > 5: Seal > 22:
Savvy Ninpo: Data Logging
Seal > P
| Damage | GuardHow this attack can be blocked. | StartupThe number of frames between inputting an attack and when the attack becomes active. Includes first active frame. | ActiveThe number of frames for which a move has hitboxes. Occurs after Startup. | RecoveryThe number of frames after a move's active frames during which the character cannot act assuming the move is not canceled. | On-BlockThe difference between the attacker's recovery and the period that the opponent is in blockstun. This Frame Advantage value is based off the fact that the very first active frame touches the opponent. | Invuln |
|---|---|---|---|---|---|---|
| 30+15 L [17+15L] |
1~12F Guard |
The same move as 22P (mentioned later) except it is peformed directly from the scroll or scroll D. It is different from the standard 22P in that Answer is very quickly moved directly above the opponent for the dropkick. Useful for closing the distance on projectile zoners or beating anti airs/ air to airs.
| ProrationA percentage-based damage modifier applied to certain attacks independently of other forms of damage scaling. | Level
|
RISC+How much R.I.S.C. this move builds when normal or instant blocked. | RISC-How much R.I.S.C. this move removes on hit. | ||||||||||||||||||||||||||||||||||||
|---|---|---|---|---|---|---|---|---|---|---|---|---|---|---|---|---|---|---|---|---|---|---|---|---|---|---|---|---|---|---|---|---|---|---|---|---|---|---|---|
- Automatically cancels into Down the Ladder if this guards an attack
- Values in [ ] mean when this attack is performed from low height
Savvy Ninpo: Down the Ladder
Seal > K
| Damage | GuardHow this attack can be blocked. | StartupThe number of frames between inputting an attack and when the attack becomes active. Includes first active frame. | ActiveThe number of frames for which a move has hitboxes. Occurs after Startup. | RecoveryThe number of frames after a move's active frames during which the character cannot act assuming the move is not canceled. | On-BlockThe difference between the attacker's recovery and the period that the opponent is in blockstun. This Frame Advantage value is based off the fact that the very first active frame touches the opponent. | Invuln |
|---|---|---|---|---|---|---|
| 30 | All | 9 | 5 [1] | 6 | +1 [+5] |
Answer kicks straight down from his position. Brings the opponent down to the ground on hit, allowing for oki at the end of an air combo. Also essential for movement and pressure, being the default option after a blocked s6D to maintain a safe blockstring or frametrap. When done in such a situation during low scroll pressure, it leaves you +5 on normal block and recovers fast, the perfect conditions for a mixup, but when done from high up, is only +1 on block and often leaves you in throw range.
| ProrationA percentage-based damage modifier applied to certain attacks independently of other forms of damage scaling. | Level
|
RISC+How much R.I.S.C. this move builds when normal or instant blocked. | RISC-How much R.I.S.C. this move removes on hit. | ||||||||||||||||||||||||||||||||||||
|---|---|---|---|---|---|---|---|---|---|---|---|---|---|---|---|---|---|---|---|---|---|---|---|---|---|---|---|---|---|---|---|---|---|---|---|---|---|---|---|
| 1 | 6 | 7 |
- Values in [ ] mean when this attack is performed from low height
Savvy Ninpo: Stepping Down
Seal > S
| Damage | GuardHow this attack can be blocked. | StartupThe number of frames between inputting an attack and when the attack becomes active. Includes first active frame. | ActiveThe number of frames for which a move has hitboxes. Occurs after Startup. | RecoveryThe number of frames after a move's active frames during which the character cannot act assuming the move is not canceled. | On-BlockThe difference between the attacker's recovery and the period that the opponent is in blockstun. This Frame Advantage value is based off the fact that the very first active frame touches the opponent. | Invuln |
|---|---|---|---|---|---|---|
| 38 | Low/Air | 27 | 7 | 25 | -13 | 9-18 Full 19-20 Upper Body 21-45 Above Knees |
Answer teleports directly to the ground below him and then slide kicks toward the oppenent.
It's main usage is as a hard call out to blitz due to it being a launch on CH. It also has some very situational use as a high risk callout to beat certain moves (like going under fireballs). Otherwise it's your only direct low from scrolls. Though the reward on CH is high be careful using this option because it can easily be hit out of or blocked. It also has very long recovery. A niche move.
| ProrationA percentage-based damage modifier applied to certain attacks independently of other forms of damage scaling. | Level
|
RISC+How much R.I.S.C. this move builds when normal or instant blocked. | RISC-How much R.I.S.C. this move removes on hit. | ||||||||||||||||||||||||||||||||||||
|---|---|---|---|---|---|---|---|---|---|---|---|---|---|---|---|---|---|---|---|---|---|---|---|---|---|---|---|---|---|---|---|---|---|---|---|---|---|---|---|
| 4 | 20 | 6 |
Savvy Ninpo: Into My Office
Seal > H
| Damage | GuardHow this attack can be blocked. | StartupThe number of frames between inputting an attack and when the attack becomes active. Includes first active frame. | ActiveThe number of frames for which a move has hitboxes. Occurs after Startup. | RecoveryThe number of frames after a move's active frames during which the character cannot act assuming the move is not canceled. | On-BlockThe difference between the attacker's recovery and the period that the opponent is in blockstun. This Frame Advantage value is based off the fact that the very first active frame touches the opponent. | Invuln |
|---|
Answer lunges a small distance forward and does a large swipe in front of him.
This is one of your main knockdown tools when in the air. During block strings this is your high option from scroll to try to open up the opponent. It is a bit slow but still is an important tool to help Answer's high/low game during scroll pressure, and can be used as an OK mixup from a high scroll after s3D, since you could also land and do 2K. It's easily reactable in K scroll strings, though, so spamming it leads into either a jab out or a blitz.
- On ground hit it can combo into 5P on crouch hit depending on spacing/character.
- A cool little trick to always allow the 5P link regardless of character or to make this move more advantageous is to cancel into it as low as possible out of s3D.
- Good reward on counterhit, especially as an air to air.
| ProrationA percentage-based damage modifier applied to certain attacks independently of other forms of damage scaling. | Level
|
RISC+How much R.I.S.C. this move builds when normal or instant blocked. | RISC-How much R.I.S.C. this move removes on hit. |
|---|
Savvy Ninpo: Safety Net
Seal > Direction + D
| Damage | GuardHow this attack can be blocked. | StartupThe number of frames between inputting an attack and when the attack becomes active. Includes first active frame. | ActiveThe number of frames for which a move has hitboxes. Occurs after Startup. | RecoveryThe number of frames after a move's active frames during which the character cannot act assuming the move is not canceled. | On-BlockThe difference between the attacker's recovery and the period that the opponent is in blockstun. This Frame Advantage value is based off the fact that the very first active frame touches the opponent. | Invuln |
|---|
Answer lunges a far distance in the direction being held. If no direction is held, Answer lunges to the nearest scroll. All other scroll specific moves can be performed out of this lunge. If Answer holds the D button down, he will not cling to a scroll he passes; otherwise, he will. This is the most essential and defining move in his kit, providing his excellent and hard to contest air-to-ground game, combos, pressure, and movement.
| ProrationA percentage-based damage modifier applied to certain attacks independently of other forms of damage scaling. | Level
|
RISC+How much R.I.S.C. this move builds when normal or instant blocked. | RISC-How much R.I.S.C. this move removes on hit. |
|---|
Savvy Ninpo: Tax Write-off
623K (air OK)
| Version | Damage | GuardHow this attack can be blocked. | StartupThe number of frames between inputting an attack and when the attack becomes active. Includes first active frame. | ActiveThe number of frames for which a move has hitboxes. Occurs after Startup. | RecoveryThe number of frames after a move's active frames during which the character cannot act assuming the move is not canceled. | On-BlockThe difference between the attacker's recovery and the period that the opponent is in blockstun. This Frame Advantage value is based off the fact that the very first active frame touches the opponent. | Invuln |
|---|---|---|---|---|---|---|---|
| 623K | 0, 30, 0, 125, 0 | Throw: 90000 | 5 | 1 | 34 | +54 | |
| j.623K | 0, 125, 0 | Air Throw: 110000 | 5 | 1 | Total Until L+12 | +54 |
- Affected by dash momentum
A command grab. Answer grabs the opponent, kicks them into the air, and izuna drops back down with them. Very punishable on whiff. The distance you travel during the grab is based on your starting dash momentum. No momentum doesn’t travel very far, whilst high dashing speed can carry from corner to corner. Practically speaking, in common use it will usually give full corner carry. Being that Answer's pressure is strongest by far in the corner, and he doesn't have many other amazing mixups without specific scroll setups, this is the core part of his mixup game to compliment his variety of frametraps and resets. Answer's dash conveniently has rapid acceleration despite having a low top speed, making it easy to implement this move to its fullest potential.
One use for the air version is for cheeky but arguably gimmicky tech traps in tons of different situations, and the resulting mind-games might make it hard for your opponent to decide how to approach teching situations. It may even allow you to work in grey-beat combos vs opponents who are afraid to tech or choose to delay tech. Since you can use it out of sD, IAD, etc. it has lots of potential but high-risk uses. Get creative.
If you are really good, you can use this as a reactive antiair in different situations. It can be very valuable since the reward is much better than the normal airthrow or non CH normals, and it still has very good range and startup. One relatively easy example is Card Teleport > YRC > TK command grab, sort of like how Chipp can K teleport YRC to antiair from afar.
| Version | ProrationA percentage-based damage modifier applied to certain attacks independently of other forms of damage scaling. | Level
|
RISC+How much R.I.S.C. this move builds when normal or instant blocked. | RISC-How much R.I.S.C. this move removes on hit. | ||||||||||||||||||||||||||||||||||||
|---|---|---|---|---|---|---|---|---|---|---|---|---|---|---|---|---|---|---|---|---|---|---|---|---|---|---|---|---|---|---|---|---|---|---|---|---|---|---|---|---|
| 623K | Forced: 65% | 0 | - | 6, 0×3, 8 | ||||||||||||||||||||||||||||||||||||
| j.623K | Forced: 65% | 0 | - | 6, 0×3, 8 |
623K:
- Stun value 15, 62
j.623K:
- Stun value 62
Savvy Ninpo: Data Logging
22P (air OK)
| Version | Damage | GuardHow this attack can be blocked. | StartupThe number of frames between inputting an attack and when the attack becomes active. Includes first active frame. | ActiveThe number of frames for which a move has hitboxes. Occurs after Startup. | RecoveryThe number of frames after a move's active frames during which the character cannot act assuming the move is not canceled. | On-BlockThe difference between the attacker's recovery and the period that the opponent is in blockstun. This Frame Advantage value is based off the fact that the very first active frame touches the opponent. | Invuln |
|---|---|---|---|---|---|---|---|
| 22P | 20 + 14L | 1~12F Guard, Airborne | |||||
| j.22P | Until L + 14 | 1~12F Guard | |||||
| 22P (Attack) | 30 | All | 33 | 7 | 6 after L | -1 | 1-24 All |
| j.22P (Attack) | 30 | All | 33 | Till L | 6 after L | 1-24 All |
A frame 1 counter. When succesful, Answer falls down from the sky similar to his sK. Makes Answer airborne allowing him to cling to low scrolls or dodge low attacks. Answer kicks down in the same place as where he countered, meaning he will often miss the opponent when used against moves with good range.
In general, if you don't have access to scrolls, this is a risky move with multiple chances for counterplay and low reward. Overall only worth it in a pinch to keep people honest. However, as mentioned before, the scroll version has some more uses, particularly against zoning. It also gives a few characters a really hard time at applying their ideal oki, but is still high risk against knowledgeable players.
Can be YRC'ed during the counterattack. Can also be super jump installed by inputting it as 228P, which allows you to airdash after having YRC'ed it.
| Version | ProrationA percentage-based damage modifier applied to certain attacks independently of other forms of damage scaling. | Level
|
RISC+How much R.I.S.C. this move builds when normal or instant blocked. | RISC-How much R.I.S.C. this move removes on hit. | ||||||||||||||||||||||||||||||||||||
|---|---|---|---|---|---|---|---|---|---|---|---|---|---|---|---|---|---|---|---|---|---|---|---|---|---|---|---|---|---|---|---|---|---|---|---|---|---|---|---|---|
| 22P | ||||||||||||||||||||||||||||||||||||||||
| j.22P | ||||||||||||||||||||||||||||||||||||||||
| 22P (Attack) | 1 | 6 | 7 | |||||||||||||||||||||||||||||||||||||
| j.22P (Attack) | 1 | 6 | 7 |
22P: j.22P: 22P (Attack):
- Attack begins during opponent's Hitstop?
j.22P (Attack):
- Attack begins during opponent's Hitstop?
Resshou
46P
| Damage | GuardHow this attack can be blocked. | StartupThe number of frames between inputting an attack and when the attack becomes active. Includes first active frame. | ActiveThe number of frames for which a move has hitboxes. Occurs after Startup. | RecoveryThe number of frames after a move's active frames during which the character cannot act assuming the move is not canceled. | On-BlockThe difference between the attacker's recovery and the period that the opponent is in blockstun. This Frame Advantage value is based off the fact that the very first active frame touches the opponent. | Invuln |
|---|---|---|---|---|---|---|
| 38 | Mid | 9 | 10 | 8 [14] | -1 |
Answer quickly lunges forward and performs a strike if he contacts the opponent (the hitbox only comes out if he runs into the opponent; otherwise, he recovers very quickly). It's a very strong option simply for movement, as Answer's dash is not good, to be used at a range where the palm strike won't connect. This is one of its main uses outside of combos.
Risky to pressure after in blockstrings, and essentially invalid against the majority of characters, as you are -1 on normal block (-4 and thus punishable on IB), and at close range with no real RPS involved. In blockstrings, only use it as a last-resort frametrap in cases where you want higher potential reward than non-YRC card frametrap (remember, you can link 5P on counterhit). If Resshou is blocked, you should probably just backdash and take it from there.
On a 5H hit confirm, it can be decent to use to re-establish close range pressure against characters that don't have great close range options, esp. on crouch confirm (crouching adds 1F of hitstun to all attacks), or to RRC into a full combo. Keep in mind that at +/-0 frames, many characters have strong options for counterplay, and most can guess correctly to beat any of your follow-ups, so use it with care and be attentive of your opponent's habits.
| ProrationA percentage-based damage modifier applied to certain attacks independently of other forms of damage scaling. | Level
|
RISC+How much R.I.S.C. this move builds when normal or instant blocked. | RISC-How much R.I.S.C. this move removes on hit. | ||||||||||||||||||||||||||||||||||||
|---|---|---|---|---|---|---|---|---|---|---|---|---|---|---|---|---|---|---|---|---|---|---|---|---|---|---|---|---|---|---|---|---|---|---|---|---|---|---|---|
| 2 | 10 | 7 |
- Only attacks if opponent is in range.
- When not in range, recovery is 8F
- When in range, recovery is 14F
Overdrives
Dead Stock Ninpo: Firesale
632146S/D (air OK)
| Version | Damage | GuardHow this attack can be blocked. | StartupThe number of frames between inputting an attack and when the attack becomes active. Includes first active frame. | ActiveThe number of frames for which a move has hitboxes. Occurs after Startup. | RecoveryThe number of frames after a move's active frames during which the character cannot act assuming the move is not canceled. | On-BlockThe difference between the attacker's recovery and the period that the opponent is in blockstun. This Frame Advantage value is based off the fact that the very first active frame touches the opponent. | Invuln |
|---|---|---|---|---|---|---|---|
| 632146S | 18×10,75 [22×10,100] |
Mid/Air | 18+3 | Total: 71 | +11 [+6] | [18F All] | |
| j.632146S | 13×9,70 | All | 10+4 | Total: Until L | -4 |
Grounded: Answer throws a card up into the air; if it hits the enemy, it brings them down into the line of fire for the rest of the super. After the card throw, Answer does a short animation, and then sends out a barrage of shurikens forward. Has some different uses in scroll or launcher combos, especially in the corner, but is not a massive optimization most of the time unless you are going for the kill. Benefits considerably from high RISC. The Burst version is passable as a reversal.
Airborne: Answer does not throw a card up and has a much shorter starting animation. The barrage is also directed diagonally downward at about a 45-degree angle. Unfortunately, not very useful; it does low damage for a super, and gives an absolutely pitiful knockdown, while having no other truly unique properties (Might be worth it if you've already got low scrolls set and are in the corner, yet don't have a high scroll to convert your antiair or air to air into, but jD > RRC > P scroll set > sD > sH basically does this better. It does however benefit from high RISC. After using it, dash back in with Resshou.
In theory it could be used as an air-to-ground punish to finish a round; otherwise not worth the meter.
| Version | ProrationA percentage-based damage modifier applied to certain attacks independently of other forms of damage scaling. | Level
|
RISC+How much R.I.S.C. this move builds when normal or instant blocked. | RISC-How much R.I.S.C. this move removes on hit. | ||||||||||||||||||||||||||||||||||||
|---|---|---|---|---|---|---|---|---|---|---|---|---|---|---|---|---|---|---|---|---|---|---|---|---|---|---|---|---|---|---|---|---|---|---|---|---|---|---|---|---|
| 632146S | 2 | -7/+2 | ||||||||||||||||||||||||||||||||||||||
| j.632146S | 4 | 2 | 4×9, 6 |
632146S:
- [ ] values are for Burst version
- Hits 1-10 have 0F hitstop
- Startup of hit above Answer has startup 10F, damage 20 [25]
- Minimum damage: 20% [20%]
j.632146S:
- Hits 1-10 have 0F hitstop
- Frame Adv listed is when performed from lowest possible height
- Minimum damage: 20%
Business Ultimate Ninpo: All Hands
236236K
| Damage | GuardHow this attack can be blocked. | StartupThe number of frames between inputting an attack and when the attack becomes active. Includes first active frame. | ActiveThe number of frames for which a move has hitboxes. Occurs after Startup. | RecoveryThe number of frames after a move's active frames during which the character cannot act assuming the move is not canceled. | On-BlockThe difference between the attacker's recovery and the period that the opponent is in blockstun. This Frame Advantage value is based off the fact that the very first active frame touches the opponent. | Invuln |
|---|---|---|---|---|---|---|
| 40,15×9,50 | All | 7+0 | 6 | 46 | -38 |
Answer does a move similar to Resshou; if it hits, answer summons a large shuriken with a clone of him at each side and rushes forward. Unfortunately, it's essentially useless outside of very specific confirms to get a burst-safe kill, as it does very low damage and has no other unique properties. Maybe the worst super in Xrd.
| ProrationA percentage-based damage modifier applied to certain attacks independently of other forms of damage scaling. | Level
|
RISC+How much R.I.S.C. this move builds when normal or instant blocked. | RISC-How much R.I.S.C. this move removes on hit. | ||||||||||||||||||||||||||||||||||||
|---|---|---|---|---|---|---|---|---|---|---|---|---|---|---|---|---|---|---|---|---|---|---|---|---|---|---|---|---|---|---|---|---|---|---|---|---|---|---|---|
| 2 | 10 | 7 |
- 0F hitstop for all followup hits
- Stun value 40,7×9,25
- Minimum damage: 20%
Instant Kill
Summoner: The Basilisk
During IK Mode: 236236H
| Damage | GuardHow this attack can be blocked. | StartupThe number of frames between inputting an attack and when the attack becomes active. Includes first active frame. | ActiveThe number of frames for which a move has hitboxes. Occurs after Startup. | RecoveryThe number of frames after a move's active frames during which the character cannot act assuming the move is not canceled. | On-BlockThe difference between the attacker's recovery and the period that the opponent is in blockstun. This Frame Advantage value is based off the fact that the very first active frame touches the opponent. | Invuln |
|---|---|---|---|---|---|---|
| DESTROY | All | 9+16 [5+10] |
5 | 17 | -5 | 9-29 Full [5-20 Full] |
- Same animation as 5D
- Tax Write-off (623K) combos into this if Answer has 100 tension and Conclusion Conditions are met.
- Surprisingly safe on block by IK standards.
- Answer does not have many opportunities to combo into this and as such it's mostly for style, as most IK's are, but if you wanted to use it optimally, several counterhits allow you to combo into this without using RRC. For example, CH 6H, CH jD, CH sD, CH 421S/H
| ProrationA percentage-based damage modifier applied to certain attacks independently of other forms of damage scaling. | Level
|
RISC+How much R.I.S.C. this move builds when normal or instant blocked. | RISC-How much R.I.S.C. this move removes on hit. | ||||||||||||||||||||||||||||||||||||
|---|---|---|---|---|---|---|---|---|---|---|---|---|---|---|---|---|---|---|---|---|---|---|---|---|---|---|---|---|---|---|---|---|---|---|---|---|---|---|---|
| 3 | 14 | 6 |
- [ ] Indicates when match point for you, opponent in Hell Fire state, and you have 50% Tension
- IK Mode Activation 90F [5F+5F]
External References


