No edit summary |
|||
| (101 intermediate revisions by 18 users not shown) | |||
| Line 1: | Line 1: | ||
{{ | {{GGST/CharacterLinks}} | ||
<br style="clear:both;"/> | <br style="clear:both;"/> | ||
==General Strategies== | ==General Strategies== | ||
Sol does best at close range, so focus on staying on top of opponents with his powerful {{Prompt|GGST|S}} buttons. To get close, run and use {{clr| | Sol does best at close range, so focus on staying on top of opponents with his powerful {{Prompt|GGST|S}} buttons. To get close, run and use {{clr|S|f.S}} or '''Fafnir''' (input: {{clr|H|41236H}}), then use your plus frames to start your offense. If you're at mid range, use {{clr|S|2S}}, {{clr|S|6S}}, {{clr|H|6H}}, and '''Gun Flame''' (input: {{clr|P|236P}}) to poke and fish for a hit. At long range, Sol's only option is to use '''Night Raid Vortex''' (input: {{clr|S|214S}}) which, while a powerful option, is punishable on whiff or block. Try to only use it when you have 50% Tension for a Roman Cancel. | ||
After knocking down an opponent, alternate between using a meaty normal like {{clr|S|c.S}} or {{clr|S|f.S}} (force opponents to respect your {{keyword|okizeme}} by stuffing wake-up jumps or throws) or a throw like a ground throw or '''Wild Throw''' (input: {{clr|K|623K}}) (once they wake-up block to avoid being meatied, throws will punish their passivity). Once opponents begin attempting to mash out of pressure, frame trap using {{clr|S|f.S}}, {{clr|S|6S}} or {{clr|H|5H}} for big damage on Counter Hit. If the opponent jumps out, either anti-air them with {{clr|K|5K}}, which can be jump canceled for a damaging combo on hit or dash canceled to reset pressure on block, or meet them in the air with an air throw. Sol's reward for landing an anti-air is significantly higher than most of the cast and showing that to the opponent will discourage them from jumping, allowing him to return to hit/throw mix-ups. This is the cycle of pain that is the key to winning with Sol. | |||
''' | Should Sol ever end up on the back foot, make use of his various defensive tools to turn the tide. '''Volcanic Viper''' (input: {{clr|S|623S}} or {{clr|H|623H}}) can punch a hole through gaps in pressure or sloppy okizeme. {{clr|D|2D}} and Night Raid Vortex can {{keyword|low profile}} most pokes and projectiles; however, when using Night Raid Vortex to low profile certain moves (e.g {{Character Label|GGST|Potemkin|label=Potemkin's}} {{MiniMoveCard|game=GGST|chara=Potemkin|input=632146H|label=Giganter Kai}}) you must be aware of lingering hitboxes near the opponent that will catch you after you hit them with Night Raid Vortex. Getting caught by these will subject you to being knocked down or losing your ability to follow up on the Night Raid Vortex. {{clr|P|6P}}, {{clr|K|5K}}, {{clr|H|2H}}, and Volcanic Viper can all be used to anti-air opponents who make predictable jump-ins. If all else fails, use a super to take your turn back by force. | ||
===<big>Kara-Cancels</big>=== | |||
Kara Heavy Volcanic Viper (Kara HVV) is a technique used to move Sol forward in combos and connect his Heavy Volcanic Viper as a "clean-hit". This give's a special knock down and deals extra damage so it is extremely important for Sol's best routes. Sol can achieve this with the following methods. | |||
:<code>{{clr|S|6S}}~{{clr|4|23H}} </code> | |||
By tapping {{clr|S|6S}} and very quickly doing the rest of the input for HVV, Sol will perform a kara that moves forward fairly significantly before the HVV activates. This is Sol's primary way to kara-cancel into HVV and achieve a clean hit. | |||
:<code>({{clr|S|c.S}}/{{clr|K|5K}}) > DC~{{clr|H|623H}}<br>({{clr|S|c.S}}/{{clr|K|5K}}) > {{clr|H|62}}DC~{{clr|H|3H}}</code> | |||
Since the Dash cancel can act as something Sol can kara out of, He can achieve the same effect as {{clr|S|6S}} from dash-cancellable (DC) moves such as {{clr|S|c.S}} and {{clr|K|5K}}. This method is generally more lenient than using {{clr|S|6S}}, but cannot accessed as often. | |||
Sol | |||
Sources: [https://www.evernote.com/shard/s387/client/snv?isnewsnv=true¬eGuid=18195cbd-c8ae-8fae-61fe-f16bb23a5dff¬eKey=9a74d62619c732ec502eaa71b8bfae78&sn=https%3A%2F%2Fwww.evernote.com%2Fshard%2Fs387%2Fsh%2F18195cbd-c8ae-8fae-61fe-f16bb23a5dff%2F9a74d62619c732ec502eaa71b8bfae78&title=0.%2BSol%2BPrimer%2BTable%2Bof%2BContents| Ref1] | |||
===<big>Tension Usage</big>=== | |||
All characters get good mileage off of spending Tension on universal mechanics, such as '''Faultless Defense''' and '''Roman Cancel'''. As for character specifics, Sol can choose from '''Tyrant Rave''' (input: {{clr|H|632146H}}) and '''Heavy Mob Cemetery''' (input: {{clr|H|214214H}}). Heavy Mob Cemetery is a bit slow to start up, but has full guardpoint after super freeze, long range and is a throw. It can be used as a long-ranged punish in certain situations. Tyrant Rave is a more traditional Overdrive, primarily used as a powerful combo ender or as a {{keyword|reversal}}. | |||
====<big>Advanced Roman Cancel Mix-Ups</big>==== | |||
One common usage of Roman Cancel is to use them during pressure to create stronger mix-ups than usual. Sol has access to particularly powerful Roman Cancel mix-ups, such as {{Keyword|F-Shiki}} mix-ups. After landing '''Fafnir''' (input: {{clr|H|41236H}}) on block, wait for Sol to recover, then use a forward dash input Blue Roman Cancel to lock the opponent in place. With the opponent stuck in Guard Crush, apply an instant high/low mix-up by mixing up {{clr|P|j.P}} and {{clr|D|2D}}.<ref>https://twitter.com/uki_0916/status/1405140349358546945?s=20</ref> | |||
It's also possible to use Roman Cancels to create left/right mix-ups. After certain knockdowns, use kara cancel '''Gun Flame''' (input: {{clr|P|236P}}) into a forward dash input Blue Roman Cancel, and then jump toward the opponent. By jumping over them, Sol will side switch, which forces the opponent to block the incoming Gun Flame in the other direction. Mix this up by occasionally going for an air backdash before side switching. Doing so will cause Sol to retain his side, which forces the opponent to block normally. By timing Sol’s air backdash right before Gun Flame makes contact with the opponent, the opponent won’t have enough time to react to whether or not you used air backdash, resulting in a true 50/50.<ref>https://twitter.com/SonicFox/status/1413049044524470279?s=20</ref> | |||
</ | |||
As powerful as these Roman Cancel mix-ups are, it is worth noting that they have higher technical execution than Sol’s standard mix-ups. Beginners might need to rely entirely on basic mix-ups, such as strike/throw. However, it is only by incorporating advanced Roman Cancel mix-ups that a player can behold Sol's true strength. | |||
=== | ==Neutral== | ||
===<big>Round Start Options</big>=== | |||
Rounds start in the mid range, where Sol has several good tools. {{clr|S|f.S}} is a strong, aggressive option. It enforces frame advantage on hit and block, and is very rewarding on Counter Hit. The low recovery frames of the move means that even if the opponent jumps, it will be difficult for them to whiff punish. {{clr|S|6S}} is another useful tool due to having longer range than {{clr|S|f.S}}. If the opponent moves backwards to evade {{clr|S|f.S}}, use {{clr|S|6S}} to catch them. {{clr|S|6S}} also benefits from having a disjointed hitbox, making it likely to win in trades. However, this option is fairly slow. If your opponent has a button that is faster than {{clr|S|6S}} and has enough range to connect from round start distance, they can use it to beat {{clr|S|6S}} reliably. | |||
Your opponent might start going for {{clr|P|6P}} to utilize its upper-body invulnerability to beat out your aggressive options. In this situation, you can go for a move that hits low, such as microdash into {{clr|D|2D}}, to beat them. Backwards movement into {{clr|S|6S}} will give you an opportunity to punish not just a whiffed {{clr|P|6P}}, but also many other buttons. Moving back is also relatively safe, making it a strong option in many scenarios. It’s not fool-proof, however. If your opponent has a button with good speed and range, such as {{Character Label|GGST|Ramlethal Valentine|label=Ramlethal's}} {{MiniMoveCard|game=GGST|chara=Ramlethal Valentine|input=f.S|label={{clr|S|f.S}}}}, they can punish a backdash or initiate a blockstring against walking back. Using the occasional jump is a good way to throw your opponent off. Mix up all of your options to avoid becoming predictable. If you notice your opponent is very agressive round start, you can put all your eggs in one basket and round start {{keyword|DP}} | |||
===<big>Close Range / Brawling</big>=== | |||
Sol is an aggressive character, being up close and personal is his preferred range. At close range, Sol’s {{clr|S|c.S}} is an amazing button. It has a +3 frame advantage on block and leads to strong combos on normal hit and Counter Hit. It’s very versatile during blockstrings, as it can gatling into {{Prompt|GGST|S}}, {{Prompt|GGST|H}}, {{Prompt|GGST|D}} and command normals and it's both jump and dash cancelable. {{clr|S|f.S}} is similar to {{clr|S|c.S}}, it has less flexible gatling routes but works at longer ranges. Sol also takes a step forward when using {{clr|S|f.S}}, which means that if it's blocked, Sol is always in range for another one. Faultless Defense can push him out, though. Delay the follow-ups of the aforementioned moves to create oppressive frame traps. When your opponent is conditioned to block, mix in ground throws or '''Wild Throw''' (input: {{clr|K|623K}}) for a deadly strike/throw mix-up. | |||
<gallery widths=" | <gallery widths="280px" heights="180px" mode="nolines"> | ||
GGST Sol | GGST Sol cS Hitbox.png | '''{{clr|S|c.S}}''' Hitbox | ||
GGST Sol fS Hitbox.png | '''{{clr| | GGST Sol fS Hitbox.png | '''{{clr|S|f.S}}''' Hitbox | ||
GGST Sol | GGST Sol 623K Hitbox.png | '''Wild Throw''' (input: {{clr|K|623K}}) Hitbox | ||
</gallery> | </gallery> | ||
Sol's lightning fast {{clr|K|5K}} further improves his strike/throw game and potential when brawling. At point-blank range, {{clr|K|5K}} hits at frame 3, which makes it excellent for contesting opponents. Sol can win many scramble situations with it, and it's also very rewarding for its speed. If your opponent reacts to your dash-in throws by jumping, you can use a dash-in {{clr|K|5K}} to punish them. This makes {{clr|K|5K}} a strong mix-up option for '''Wild Throw''' (input: {{clr|K|623K}}), especially so when used after landing {{clr|S|c.S}} or {{clr|S|f.S}} on block. {{clr|K|5K}} is one of the most versatile attacks in the game, it's impossible to overstate how good it is. | |||
Sol’s {{clr|P|5P}} and {{clr|P|2P}} are also speedy options. They are not quite as fast or rewarding as {{clr|K|5K}}, but are much safer on whiff. It's a good idea to stagger Sol’s {{Prompt|GGST|P}} buttons and mix in throws for a strike/throw mix-up. Lastly, Sol's fastest low is {{clr|K|2K}}. It's not particularly important as Sol is primarily a strike/throw character. However, if you notice that your opponent has a tendency to stand block, this move will allow you to open them up. | |||
<gallery widths=" | <gallery widths="280px" heights="180px" mode="nolines"> | ||
GGST Sol | GGST Sol 5K Hitbox.png | '''{{clr|K|5K}}''' Hitbox | ||
GGST Sol | GGST Sol 5P Hitbox.png | '''{{clr|P|5P}}''' Hitbox | ||
GGST Sol 2P Hitbox.png | '''{{clr|P|2P}}''' Hitbox | |||
GGST Sol 2K Hitbox.png | '''{{clr|K|2K}}''' Hitbox | |||
</gallery> | </gallery> | ||
If you need | If your opponent manages to block one of your blockstrings and you need to safely disengage, special cancel into '''Gun Flame''' (input: {{clr|P|236P}}), which can catch them trying to mash. If they start respecting Gun Flame, throw them off with '''Gun Flame (Feint)''' (input: {{clr|P|214P}}). It fakes the animation of Gun Flame without actually shooting a projectile. This allows it to recover quickly, making it useful for resetting pressure against passive opponents or baiting jump-ins from an opponent who was expecting Gun Flame. Lastly, if you're feeling bold, {{clr|D|5D}} is a risky but very rewarding mix-up option. It is reactable, but if you condition your opponent to fear other options {{clr|D|5D}} can catch them by surprise. | ||
<gallery widths=" | <gallery widths="280px" heights="180px" mode="nolines"> | ||
GGST Sol 236P.png | '''Gun Flame''' ({{clr| | GGST Sol 5D Hitbox.png | '''{{clr|D|5D}}''' Hitbox | ||
GGST Sol | GGST Sol 236P Hitbox.png | '''Gun Flame''' (input: {{clr|P|236P}}) Early Hitbox | ||
GGST Sol 236P 2 Hitbox.png | '''Gun Flame''' (input: {{clr|P|236P}}) Late Hitbox | |||
GGST Sol 214P Hitbox.png | '''Gun Flame (Feint)''' (input: {{clr|P|214P}}) Hurtbox | |||
</gallery> | </gallery> | ||
If | Pressuring with frame traps and strike/throw mix-ups is what defines Sol. Master mixing up your options and timing and you’ll quickly gain the upper hand thanks to Sol’s tremendous damage output. If your opponent struggles to deal with your offense, they might try to challenge you with invincible reversals. Be ready to bait them out and punish them. | ||
=== | ===<big>Mid Range / Footsies</big>=== | ||
Sol is | Sol prefers fighting close, but he is strong at mid range as well. The goal here is to use Sol’s larger attacks to create an opportunity to safely close the gap. {{clr|S|6S}} is his strongest mid-ranged poke. It has a large, disjointed hitbox and many effective cancel options. It's likely to score a Counter Hit or interrupt an approach when used in footsies range. If characters like {{Character Label|GGST|Ky Kiske|label=Ky}} or {{Character Label|GGST|Leo Whitefang|label=Leo}} give you trouble in mid range with their space control moves, use {{clr|S|6S}} to contest them. It’s a powerful tool, but don't over rely on it. | ||
Sol | Sol's {{clr|S|f.S}} is another excellent move. It has a +2 frame advantage on block and recovers quite quickly. Its range is better than the animation implies due to Sol taking a big step forward when using the move. In fact, the step forward is actually even larger than the pushback of {{clr|S|f.S}} on block, causing Sol to close space. Due to its frame advantage and forward movement, connecting {{clr|S|f.S}} on hit or block means that you have successfully moved into close range and can transition to Sol's ferocious pressure. {{clr|S|f.S}} is also highly rewarding on both normal hit and Counter Hit. A more reserved option for when you want to poke without advancing forward is {{clr|S|2S}}. It starts up just as quickly as {{clr|S|f.S}}, and while it doesn't have as much range, it still hits from a moderate distance relative to Sol's position. Furthermore, it has a disjointed hitbox, making it harder to counter poke. Both {{clr|S|f.S}} and {{clr|S|2S}} can gatling into {{clr|H|5H}} for a frame trap. | ||
Speaking of {{clr|H|5H}}, it can also be used as a powerful option in mid range. While more committal than {{clr|S|f.S}} and {{clr|S|2S}}, it boasts an exceedingly disjointed hitbox and the highest reward out of all of Sol's mid range normals on Counter Hit thanks to its long slowdown duration. | |||
<gallery widths="260px" heights="180px" mode="nolines"> | |||
GGST Sol 6S Hitbox.png | '''{{clr|S|6S}}''' Hitbox | |||
GGST Sol fS Hitbox.png | '''{{clr|S|f.S}}''' Hitbox | |||
GGST Sol 2S 1 Hitbox.png | '''{{clr|S|2S}}''' Early Hitbox | |||
GGST Sol 2S 2 Hitbox.png | '''{{clr|S|2S}}''' Late Hitbox | |||
GGST Sol 5H Hitbox.png | '''{{clr|H|5H}}''' Hitbox | |||
</gallery> | </gallery> | ||
A counter strategy against mid-ranged pokes is to position oneself to make them whiff before approaching or contesting them with {{clr|P|6P}}. If your opponent attempts this, vary your timing and positioning more to throw them off. Stay sharp! | |||
Sol has an excellent sweep in his {{clr|D|2D}}. It has good speed and range, and leads to strong {{keyword|okizeme}}. Its {{keyword|low profile}} properties gives it lots of flexibility. A risky but very rewarding option is {{clr|H|6H}}. It has the longest horizontal range of his normals, very fast start-up, and massive reward on Counter Hit. However, it has poor vertical range, long recovery on whiff, is unsafe on block, and it cannot be special canceled. Thus, it is a very committal attack that should be used carefully. | |||
''' | If you need a projectile, '''Gun Flame''' (input: {{clr|P|236P}}) is a solid one for mid range. It moves forward slowly, which causes it to leave Sol at an advantage if it is blocked at tip range, giving you an opportunity to close the gap. Its hitbox also hits fairly high, allowing it to snuff out opponents who recklessly use Instant Air Dash. | ||
<gallery widths="280px" heights="180px" mode="nolines"> | |||
GGST Sol 2D Hitbox.png | '''{{clr|D|2D}}''' Hitbox | |||
<gallery widths="280px" heights=" | GGST Sol 6H Hitbox.png | '''{{clr|H|6H}}''' Hitbox | ||
GGST Sol | GGST Sol 236P Hitbox.png | '''Gun Flame''' (input: {{clr|P|236P}}) Early Hitbox | ||
GGST Sol | GGST Sol 236P 2 Hitbox.png | '''Gun Flame''' (input: {{clr|P|236P}}) Late Hitbox | ||
GGST Sol | |||
</gallery> | </gallery> | ||
Sol's '''Bandit Revolver''' (input: {{clr|K|236K}}) is a flying knee kick which can be followed up with a spin kick by pressing {{Prompt|GGST|K}} a second time. The first hit moves Sol forward a decent amount and can lead to powerful counter hit combos. If the enemy tries to punish it, the second hit can be used to counter hit them and initiate a combo. This will dissuade them from challenging you, providing opportunities to mix up your options after the first hit. | |||
'''{{clr| | |||
'''{{clr| | Lastly, Sol can transition from mid range to close range by using '''Fafnir''' (input: {{clr|H|41236H}}), a forward-lunging Guard Crush. It leaves Sol at a massive +11 frame advantage on block, and is also very rewarding on Counter Hit. Fafnir’s range can be extended by combining it with a dash or kara canceling with {{clr|S|6S}}. However, Fafnir is vulnerable during its start-up. Characters with strong space controlling normals, such as {{Character Label|GGST|Leo Whitefang|label=Leo}} or {{Character Label|GGST|Nagoriyuki}}, can intercept the move quite easily. Don’t use it recklessly. | ||
<gallery widths=" | <gallery widths="300px" heights="180px" mode="nolines"> | ||
GGST Sol | GGST Sol 236K Hitbox.png | '''Bandit Revolver''' (input: {{clr|K|236K}}) Hitbox | ||
GGST Sol | GGST Sol 236KK Hitbox.png | '''Bandit Revolver''' (input: {{clr|K|236KK}}) Hitbox | ||
GGST Sol 41236H Hitbox.png | '''Fafnir''' (input: {{clr|H|41236H}}) Hitbox | |||
</gallery> | </gallery> | ||
If you cycle Sol's mid-ranged moves well, your opponent might start approaching from the air to avoid having to contest with Sol at mid or close range. Sol is armed with many solid anti-airs, be ready to whip them out at a moment’s notice. | |||
' | ===<big>Long Range / Closing Space</big>=== | ||
Sol is lacking in meaningful options that reach full screen. Therefore, your goal at longer ranges is to find a way to close enough space to transition to mid range or close range tools. Understanding how to use basic movement options is key. Don’t make the mistake of running from full screen all the way to your opponent's face, as that makes your approach predictable and punishable with large attacks. You need to mix up your approach by dashing shorter distances and then blocking. You can also do a short dash into a long-ranged attack, such as {{clr|S|6S}}, but don’t get predictable. Air dashing is also a good tool for closing space. Mix air dash into aerial attacks with air dash to block. | |||
'''{{clr| | Sol has several special moves that move him forward a fair bit. '''Night Raid Vortex''' (input: {{clr|S|214S}}) is a {{keyword|low profile}} attack that slides forward across the ground. The range can be extended to reach full screen by holding the {{Prompt|GGST|S}} button. It’s useful for slipping under many pokes and projectiles, but be careful of attacks that hit low to the ground, such as sweeps and {{clr|S|2S}}. It leads to powerful combos on normal hit and Counter Hit, but is punishable on block. The move is best used when you have 50% Tension, as you can take advantage of its strengths and Roman Cancel it for safety on block. | ||
<gallery widths=" | <gallery widths="300px" heights="180px" mode="nolines"> | ||
GGST Sol | GGST Sol 214S 1 Hitbox.png | '''Night Raid Vortex''' (input: {{clr|S|214S}}) - Low profile | ||
GGST Sol | GGST Sol 214S 2 Hitbox.png | '''Night Raid Vortex''' (input: {{clr|S|214S}}) - Active frames | ||
</gallery> | </gallery> | ||
Sol can also close space by using '''Fafnir''' (input: {{clr|H|41236H}}), a forward-lunging Guard Crush. It leaves Sol at a massive +11 frame advantage on block, and is also very rewarding on Counter Hit. Fafnir can carry dash momentum to increase its range. It can also be kara canceled from {{clr|S|6S}} for a range increase. Combining both together allows Fafnir to travel nearly fullscreen. However, Fafnir is vulnerable during its start-up. Exercise caution, especially if your opponent has strong space control tools. | |||
'''{{clr| | '''Bandit Bringer''' (input: {{clr|K|214K}}) is a diving punch attack. It hits overhead, but is reactable. It moves Sol forward a decent amount and leads to an RPS situation on block. It can be used as a risky approach option and can be initiated either from the ground or the air. Dashing forward into {{clr|K|214K}} can be used to add to the opponent's mental burden. If used in the air, the {{Prompt|GGST|K}} button can be held down to delay the timing of the attack. If the opponent tries to challenge {{clr|K|214K}} with anti-airs, delaying the attack can throw off their timing. It also grants strong {{keyword|okizeme}} on hit. | ||
<gallery widths="300px" heights="180px" mode="nolines"> | |||
<gallery widths=" | GGST Sol 41236H Hitbox.png | '''Fafnir''' (input: {{clr|H|41236H}}) Hitbox | ||
GGST Sol | GGST Sol 214K Hitbox.png | '''Bandit Bringer''' (input: {{clr|K|214K}}) Hitbox | ||
GGST Sol | |||
</gallery> | </gallery> | ||
''' | ===<big>Air-to-Air</big>=== | ||
'''<big>{{clr|P|j.P}}</big>''' - Sol's fastest aerial attack. Its speed and short recovery makes it effective as an air-to-air. It can combo into '''Bandit Revolver''' (input: {{clr|K|236KK}}) for a knockdown. | |||
''' | '''<big>{{clr|K|j.K}}</big>''' - Has a larger hitbox than {{clr|P|j.P}} but also more recovery on whiff. It can lead to combos due to being air dash cancelable. If your opponent has their back to the wall, it can chain into {{clr|D|j.D}}. | ||
<gallery widths=" | |||
GGST Sol | '''<big>{{clr|D|j.D}}</big>''' - Has less recovery than {{clr|K|j.K}} but is also a tad slower. The hitbox is chunky, and damage is good. Useful when your opponent is cornered as the wall bounce can result in big conversions. | ||
<gallery widths="280px" heights="180px" mode="nolines"> | |||
GGST Sol jP Hitbox.png | '''{{clr|P|j.P}}''' Hitbox | |||
GGST Sol jK Hitbox.png | '''{{clr|K|j.K}}''' Hitbox | |||
GGST Sol jD Hitbox.png | '''{{clr|D|j.D}}''' Hitbox | |||
</gallery> | </gallery> | ||
=== | ===<big>Jump-In</big>=== | ||
'''<big>{{clr|S|j.S}}</big>''' - A premier jump-in option due to having a good hitbox below Sol. It’s also jump and air dash cancelable, which can come in handy. | |||
'''{{clr| | |||
'''{{clr| | '''<big>{{clr|H|j.H}}</big>''' - Has two hits. When done from an Instant Air Dash, the second hit will connect just before Sol hits the ground, allowing it to combo into {{clr|K|5K}} confirms. Very useful from an air dash as a result. | ||
<gallery widths=" | <gallery widths="280px" heights="180px" mode="nolines"> | ||
GGST Sol | GGST Sol jS Hitbox.png | '''{{clr|S|j.S}}''' Hitbox | ||
GGST Sol | GGST Sol jH 1 Hitbox.png | '''{{clr|H|j.H}}''' Early Hitbox | ||
GGST Sol | GGST Sol jH 2 Hitbox.png | '''{{clr|H|j.H}}''' Middle Hitbox | ||
GGST Sol jH 3 Hitbox.png | '''{{clr|H|j.H}}''' Late Hitbox | |||
</gallery> | </gallery> | ||
==Defense== | |||
===<big>Defensive System Mechanics</big>=== | |||
'''Faultless Defense''', '''Psych Burst''' and '''Yellow Roman Cancel''' are cornerstones of defense in Guilty Gear, as they are quite handy for breaking out of pressure. Utilizing them well is essential for mastering any character. They all cost a resource though, so think about how you use them. | |||
* [[GGST/Mechanics#Faultless Defense]] | |||
* [[GGST/Mechanics#Psych Burst]] | |||
* [[GGST/Mechanics#Yellow Roman Cancel]] | |||
* [[GGST/Mechanics#Deflect Shield]] | |||
''' | ====<big>Instant Block</big>==== | ||
<div class="mw-collapsible mw-collapsed" data-expandtext="Explanation" data-collapsetext="Close"> | |||
While not as essential as the above three, '''Instant Block''' is a powerful tool that Sol can use even better than most of the cast. Though difficult to apply, there are setups to make it easier, and practise can go a long way in making it more consistent to use. | |||
The main reason Sol is great at using Instant Block lies in one of his strongest options, his {{MiniMoveCard|chara=Sol Badguy|input=5K|label={{clr|K|5K}}}}; its blazing fast startup is balanced by the short horizontal range of both hits, but as Instant Blocking negates all pushback, it allows Sol to use {{clr|K|5K}} to punish conventionally safe attacks (such as {{Character Label|GGST|Giovanna|label=Giovanna}}'s {{MiniMoveCard|chara=Giovanna|input=214K|label={{clr|K|214K}}}}) and convert into a knockdown, giving him fantastic reward from proper defensive play if it is mastered. | |||
</div> | |||
=== | ===<big>Counter Pokes</big>=== | ||
Counter poking is the act of attacking preemptively for the purpose of interrupting the opponent’s actions. By placing hitboxes in front of your character, the opponent runs the risk of being hit out of their forward movement or being counter hit out of their attacks. Counter pokes are key for playing a preventive playstyle, which is useful against aggression. The best counter pokes are typically long-ranged, highly active, quick to recover, protected by invulnerability of some kind, or a combination of these traits. | |||
'''<big>{{clr|P|6P}}</big>''' - A useful anti-air and couter-poke. See [[GGST/Mechanics#6P|here]] for more basic information about 6P. | |||
'''<big>{{clr|S|6S}}</big>''' - An excellent button because of its long horizontal range. It also has a wide range of cancel options. Use it from ranges where {{clr|P|6P}} won't reach. | |||
'''<big>{{clr|S|2S}}</big>''' - A speedy option with decent range and a disjointed hitbox. It also hits low and is relatively safe on whiff. A great option when you need a non-committal poke to keep the opponent on their toes. | |||
'''<big>{{clr|H|5H}}</big>''' - A powerful normal with a very disjointed hitbox. On Counter Hit, the long slowdown duration enables a wide variety of potential combo follow-ups. | |||
'''<big>{{clr|D|2D}}</big>''' - A low sweep with very good {{keyword|low profile}} properties. It leads into strong {{keyword|okizeme}} on normal hit or powerful combos on Counter Hit. A classic option due to its versatility and effectiveness. | |||
<gallery widths="280px" heights="165px" mode="nolines"> | |||
GGST Sol 6P Hitbox.png | '''{{clr|P|6P}}''' Hitbox | |||
GGST Sol 6S Hitbox.png | '''{{clr|S|6S}}''' Hitbox | |||
GGST Sol 2S 2 Hitbox.png | '''{{clr|S|2S}}''' Late Hitbox | |||
GGST Sol 5H Hitbox.png | '''{{clr|H|5H}}''' Hitbox | |||
GGST Sol 2D Hitbox.png | '''{{clr|D|2D}}''' Hitbox | |||
</gallery> | |||
===<big>Anti-Airs</big>=== | |||
Anti-airs, as the name suggests, are moves that are useful against aerial opponents. They are typically either fast, high-reaching, protected by invulnerability of some kind, or a combination of these traits. Sol has five effective anti-airs: '''{{clr|P|6P}}''', '''{{clr|K|5K}}''', '''Air Throw''', {{Prompt|GGST|S}} '''Volcanic Viper''' (input: {{clr|S|623S}}) and {{Prompt|GGST|H}} '''Volcanic Viper''' (input: {{clr|H|623H}}). | |||
'''<big>{{clr|P|6P}}</big>''' - A safe and reliable option due to its upper body invulnerability. Easily confirms into '''Bandit Revolver''' (input: {{clr|K|236KK}}) on Counter Hit. A useful option in many instances. | |||
'''<big>{{clr|K|5K}}</big>''' - Faster than {{clr|P|6P}} but lacks upper body invulnerability. It can catch opponents trying to jump during close range brawling. It's also quite rewarding on hit. | |||
'''<big>Air Throw</big>''' - A useful anti-air for all characters, especially against opponents that like to jump into block. | |||
== | '''<big>Volcanic Viper (input: {{clr|S|623S}} or {{clr|H|623H}})</big>''' - Has high reach and full strike invulnerability. Both versions are safe on air block, making them very useful anti-airs. The {{Prompt|GGST|H}} version deals more damage, especially so on a Clean Hit, but the {{Prompt|GGST|S}} version is much harder to punish on whiff. Choose carefully. The move is very handy in certain match-ups, such as against {{Character Label|GGST|Chipp Zanuff|label=Chipp's}} {{MiniMoveCard|game=GGST|chara=Chipp Zanuff|input=j.2K|label={{clr|K|j.2K}}}}. | ||
<gallery widths="240px" heights="180px" mode="nolines"> | |||
GGST Sol 6P Hitbox.png | '''{{clr|P|6P}}''' Hitbox | |||
GGST Sol 5K Hitbox.png | '''{{clr|K|5K}}''' Hitbox | |||
GGST Sol 623S 2 Hitbox.png | {{Prompt|GGST|S}} '''Volcanic Viper''' (input: {{clr|S|623S}}) Late Hitbox | |||
GGST Sol 623H 2 Hitbox.png | {{Prompt|GGST|H}} '''Volcanic Viper''' (input: {{clr|H|623H}}) Late Hitbox | |||
</gallery> | |||
===<big>[[Abare]]</big>=== | |||
Abare means to attack during an opponents frame advantage with the intention of interrupting their pressure. Naturally, fast moves work best for this task. | |||
'''<big>{{clr|K|5K}}</big>''' - At close range, this move hits at frame 3, making it Sol's fastest move. It's tied for the fastest attack in the game with {{Character Label|GGST|Chipp Zanuff|label=Chipp's}} {{MiniMoveCard|game=GGST|chara=Chipp Zanuff|input=5P|label={{clr|P|5P}}}}, and is Sol's best abare option by extension. It combos into {{clr|D|2D}} > '''Bandit Revolver''' (input: {{clr|K|236KK}}) for a meterless knockdown, an amazing feat considering its lightning-fast speed. Get used to using this and your opponent will be more scared of pressuring you. | |||
'''<big>{{clr|D|2D}}</big>''' - Much slower at 10 frames, but it has very good {{keyword|low profile}} properties. It's quite rewarding on Counter Hit, use it if you predict that your opponent will use a move with a high hitbox. | |||
<gallery widths="220px" heights="180px" mode="nolines"> | |||
GGST Sol 5K Hitbox.png | '''{{clr|K|5K}}''' Hitbox | |||
GGST Sol 2D Hitbox.png | '''{{clr|D|2D}}''' Hitbox | |||
</gallery> | |||
Sol's {{keyword|reversal}} can also be used for abare due to their invulnerability. Do note that {{Prompt|GGST|S}} '''Volcanic Viper''' (input: {{clr|S|623S}}) loses to throws in some situations where attacking will not. | |||
===<big>[[Reversal|Reversals]]</big>=== | |||
Invincible reversals are moves used to steal your turn back by force. They can be used during holes in an opponent's blockstrings or during your wake-up to punish sloppy okizeme. Sol has two reversals to choose from: {{Prompt|GGST|S}} '''Volcanic Viper''' (input: {{clr|S|623S}}) and '''Tyrant Rave''' (input: {{clr|H|632146H}}) | |||
'''<big>{{Prompt|GGST|S}} Volcanic Viper (input: {{clr|S|623S}})</big>''' - Functions as an invincible {{keyword|reversal}} due to its frame 1 strike invulnerability. Volcanic Viper does have some exploitable weaknesses that need to be taken into consideration. The first is that it's vulnerable to throws during the start-up. The second is that it's punishable on block. If your opponent is alert enough to predict Volcanic Viper, you should use it more sparingly. Feel free to go nuts with it if they don't know how to deal with it, or if they attack into your wake-up in a predictable manner. | |||
'''<big>Tyrant Rave (input: {{clr|H|632146H}})</big>''' - An Overdrive with frame 1 invulnerability against both strikes and throws. It is punishable on block, but can be Roman Canceled for safety. This would end up costing 100% Tension though. The hefty Tension cost means that {{clr|H|623H}} is a much more economic high-risk high-reward option. {{clr|H|623H}} can be Roman Canceled on hit to make up for the damage discrepancy, and can also be Roman Canceled for safety on block. Tyrant Rave does have throw invulnerability though. If all else fails, it can be used as an expensive cover-all option to take your turn back by force. | |||
<gallery widths="220px" heights="220px" mode="nolines"> | <gallery widths="220px" heights="220px" mode="nolines"> | ||
GGST Sol 623S Hitbox.png| {{Prompt|GGST|S}} '''Volcanic Viper''' (input: {{clr|S|623S}}) Early Hitbox | |||
GGST Sol TyrantRave1 Hitbox.png| '''Tyrant Rave''' (input: {{clr|H|632146H}}) Early Hitbox | |||
</gallery> | </gallery> | ||
==Pressure== | |||
Among Sol's many strengths, his pressure stands out as being truly exceptional. Clever use of his pressure tools will allow you to obliterate opponents thanks to Sol's tremendous damage output. Mastering Sol's pressure is essential for a Sol player who strives to make the most of the character. | |||
===<big>Strike / Throw Mix-Up</big>=== | |||
Sol's offensive is relatively freeform, focused primarily on using his powerful strike/throw mix-ups to make the opponent commit to jumps or mashing out of blockstrings. After initiating any blockstring, you have the options of either continuing the string or mixing in a throw. Your opponent has three main options: continuing to block, jumping or attacking. Choosing to finish the string with strikes will interrupt jumps or attacks, but gives up your turn against blocking opponents. Throwing will open them up if they block, but loses to jumping and attacking. | |||
There are several ways to initiate strike / throw mix-ups. Connecting Sol's {{clr|S|f.S}} on hit or block is one of the simplest ways of doing it. You can also meaty their wake-up with either {{clr|S|c.S}} or a ground throw. If you connect a move and knock them down, meaty them again. They will be forced to block at some point, which allows you to transition to Sol’s various blockstrings to frame trap them. | |||
===<big>Ground Throw vs Wild Throw - which is better?</big>=== | |||
Sol’s mix-ups are primarily strike/throw based. For throws, Sol has two options: a normal ground throw and '''Wild Throw''' (input: {{clr|K|623K}}). How do we know which option to go for? Let’s examine their advantages. | |||
'''Advantages of Ground Throw''' | |||
*Faster to come out (2 frame start-up instead of 6 frames) | |||
*Provides the ability to choose between switching sides or keeping sides (Wild Throw forces side switch) | |||
*Leads to stronger okizeme | |||
'''Advantages of Wild Throw ''' | |||
*More range (120 range vs 90 range) | |||
*Throw invulnerable during start-up | |||
*Untechable | |||
*Much more powerful (100 damage vs 80 damage) | |||
These advantages can make it seem like Wild Throw is the superior option, as it is more powerful and more likely to hit due to its longer range and throw invulnerability. Its advantages are certainly easier to understand. However, the advantages of normal throws are quite impactful in many situations. Its faster start-up makes it a better option for escaping pressure. Stronger okizeme means that you are more likely to keep momentum after landing it. The ability to choose whether or not to switch sides without spending Tension gives Sol the ability to keep a cornered opponent in the corner. | |||
There are also situations where Wild Throw is superior. For example, if your opponent’s life is in the range where Wild Throw can K.O. but a normal throw can not, the former is clearly the better option. In addition, Wild Throw is better against certain player habits. If you notice that your opponent prefers blocking and throwing over other options on their wake-up, Wild Throw will allow you to cover both options, whereas normal throws will be teched if they throw. | |||
To summarize, both throws have their own uses. Wild Throw is more immediately rewarding and there are situations where it covers more options. However, certain circumstances make normal ground throws more beneficial in the long run, either by maintaining momentum, utilizing resources, or keeping stage positioning. Choose wisely! | |||
===<big>Pressure Resets</big>=== | |||
When pressuring with blockstrings, varying your offense is key to opening up your opponent. If you employ frame traps in a predictable manner, your opponent can simply block until you reach the end of the blockstring. Throws are vital for opening them up, but the timing of throws must be varied, lest a skilled opponent catches on to your timing and employs counter-play. It is with the help of pressure resets that throws can be made more ambiguous. | |||
After {{clr|S|c.S}} or {{clr|S|f.S}}, try using the plus frames to go for another {{clr|S|f.S}} or a dash into another {{clr|S|c.S}}. This will reset pressure, extending the blockstring and increasing the amount of opportunities you have for mixing in throws. The more ambiguous your mix-up becomes, the greater the chance that your opponent will make a mistake. Resetting pressure also increases the mental burden on your opponent due to the R.I.S.C. Level increasing and the ever-looming threat of throws. They have to try to escape eventually, which provides you with opportunities to punish if you have the right read. | |||
Another way to reset pressure is with '''Gun Flame (Feint)''' (input: {{clr|P|214P}}). Sol’s blockstrings are typically ended with '''Gun Flame''' (input: {{clr|P|236P}}), if you notice that your opponent respects Gun Flame, Gun Flame (Feint) can be used instead, as it fakes the animation of Gun Flame without actually shooting a projectile. This allows it to recover quickly, giving Sol an opportunity to reset pressure with {{clr|S|f.S}}. Gun Flame (Feint) is also useful for baiting and punishing jump-ins from an opponent who was expecting Gun Flame. | |||
===<big>Sample Blockstrings</big>=== | |||
The following are some basic, useful blockstrings. If you're new to Sol, these will help you get your gameplan started. | |||
*'''{{clr|K|5K}} > {{clr|S|6S}} > (dl) {{clr|P|236P}}''' | |||
Natural frame trap into {{clr|S|6S}}. If {{clr|S|6S}} hits at close range or on Counter Hit, it naturally combos into '''Gun Flame''' (input: {{clr|P|236P}}), although landing a ground hit Gun Flame typically doesn't lead into a full combo extension outside of the corner, so try to confirm into '''Bandit Revolver''' (input: {{clr|K|236K}}) instead. Gun Flame can end your blockstring safely but it can also be delayed to frame trap as well. | |||
*'''{{clr|S|c.S}} > (dl) {{clr|S|f.S}} > (dl) {{clr|H|5H}} > (dl) {{clr|P|236P}}''' | |||
This string is a true blockstring if done as fast as possible or it can have several frame traps in it if manual delays are used. Note that {{clr|H|5H}} has a lot of pushback so it won't true blockstring into Gun Flame if {{clr|S|c.S}} wasn't done at point blank range or if they use Faultless Defense. If either {{clr|S|c.S}} or {{clr|S|f.S}} are Counter Hits, microdash into a {{clr|S|c.S}} for a devastating combo. If {{clr|H|5H}} Counter Hits, cancel into Bandit Revolver and link it into {{clr|S|c.S}} for a even more devastating combo. | |||
{| | |||
| | |||
{{ | |||
| | |||
| | |||
| | |||
}} | |||
|} | |||
*'''{{clr|S|c.S}} > (dl) {{clr|S|f.S}}, {{clr|K|5K(2)}} > {{clr|S|6S}} > (dl) {{clr|P|236P}}''' | |||
Combines both previous strings for an even longer one with even more frame trap potential. Same logic as each prior one, however {{clr|K|5K}} will only hit once without a microdash and at that range it will whiff against crouching opponents. You can microdash to avoid this but it's normally a 3 frame gap so the dash will widen the gap enough for most characters to contest it with a jab. If you go for {{clr|K|5K}} after a dash momentum {{clr|S|f.S}}, Sol should be close enough that no microdash is needed to connect with the first hit of {{clr|K|5K}}. Note that if {{clr|K|5K}} catches them jumping you get a juggle combo with lots of corner carry and high damage. | |||
* ''' | *'''{{clr|S|6S}} > (dl) {{clr|P|236P}}''' | ||
A variant of the first blockstring but modified to work in the mid range. {{clr|S|6S}} is a natural combo into Gun Flame on Counter Hit at most ranges, but you won't get anything else from it, so try to confirm into Bandit Revolver instead. Gun Flame can end your blockstring safely but it can also be delayed to frame trap as well. The Gun Flame frame trap is especially dangerous when the opponent is cornered, as it can combo into '''Fafnir''' (input: {{clr|H|41236H}}) for an extended juggle. | |||
* ''' | *'''{{clr|K|2K}} > {{clr|D|2D}} > (dl) {{clr|P|236P}} | ||
A string that starts from a low. Hitting your opponents with more niche strings like this one is important to avoid becoming predictable. You can also delay {{clr|D|2D}} for a frame trap or replace it with {{clr|D|5D}} for a mix-up. | |||
* ''' | *'''{{clr|H|41236H}}, {{clr|S|6S}} > (dl) {{clr|P|236P}}''' | ||
'''Fafnir''' (input: {{clr|H|41236H}}) is a Guard Crush, which comes with many good properties. Guard Crushes disable enemy Yellow Roman Cancels, deal lots of chip damage, crank up the foe's R.I.S.C Level like crazy and cause massive amounts of blockstun. Fafnir's frame advantage is a whopping +11, enabling powerful mix-ups. {{clr|S|6S}} is a great frame trap due to being a 15 frame move, leaving only a 4 frame gap. This is too short for any move with enough range to reach. If the opponent respects your frame advantage, mix them up with a throw. | |||
===<big>Corner Pressure</big>=== | |||
{{clr|S|f.S}}'s weakness to Faultless Defense is accentuated in the corner, which forces Sol to mix up his strings more. Most often, Sol will find himself about half the screen away on an opponent actively defending themselves, which puts him in a great position to stop escapes. Using pre-emptive ground buttons can stop ground escapes and his air throw is excellent for stopping air escapes. Once your opponent has been conditioned to sit still, he can run back in and restart his pressure or disrespect with a ground throw. Sol can also force respect with {{clr|S|6S}} > '''Gun Flame''' (input: {{clr|P|236P}}), which leads to its own guessing game. Gun Flame is vulnerable to Instant Air Dash, so mixing it up with '''Gun Flame (Feint)''' (input: {{clr|P|214P}}) can help trick someone into taking their turn at the wrong time. Max range Gun Flame is usually followed by {{clr|S|f.S}} or {{clr|S|6S}} to force respect. Once respect is established, Sol can regain his turn with '''Fafnir''' (input: {{clr|H|41236H}}). | |||
A very important thing to discourage when doing corner pressure and ''especially'' when using {{clr|S|f.S}} is mashing. Due to the gap between {{clr|S|f.S}} > {{clr|S|f.S}}, as well as the move's weakness to low profile, many players will opt to mash {{clr|K|2K}} or {{clr|P|6P}} against it early in your pressure. While these options can be punished heavily using {{clr|H|5H}} frame traps, there's no guarantee that the opponent will press; as a result, a strong option is to let them block your attack of choice (with {{clr|S|c.S}} and {{clr|S|f.S}} being prominent examples) and simply hold down-back for a little bit. If they mash, their attack will either whiff entirely due to pushback, or you'll be safe and block, which isn't as threatening without meter to enforce their turn, especially since Faultless Defense is so appealing against Sol when in the corner. If they ''don't'' mash, you can take your turn by pressing again; this also lets you gain information on their defensive habits (such as backdash, up-back, continuing to block), which will allow for stronger punishes once you know to look for them. | |||
==Okizeme== | |||
Sol's mix-ups are very powerful, and {{keyword|okizeme}} is no exception. He can apply his basic strike / throw mix-up or go for okizeme specific options. Different moves result in different types of knockdowns and leave Sol at varying amounts of plus frames. In addition, stage positioning can also have an impact on the okizeme situation. It’s important to learn what Sol’s options are off of every move. | |||
===<big>Key Knockdown Moves</big>=== | |||
'''<big>{{clr|D|2D}}</big>''' - Can be canceled into '''Gun Flame (Feint)''' (input: {{clr|P|214P}}), which if followed up with an immediate '''Gun Flame''' (input: {{clr|P|236P}}) will meaty the opponent's wake-up with the second fire column, leaving Sol plus on block. | |||
'''<big>{{clr|D|5D}}</big>''' - Leads into a powerful combo and knockdown if charged, but it's punishable on block. Use it with discretion. | |||
< | |||
'''<big>Throws</big>''' - Grants knockdowns, the okizeme is especially powerful if the opponent is thrown into the corner. Mid screen, you can IAD Back > {{clr|H|j.H|}} for an easy safejump. '''Wild Throw''' (input: {{clr|K|623K}}) deals more damage, but leads to significantly weaker okizeme. | |||
{{Prompt|GGST|H}} '''<big>Volcanic Viper (input: {{clr|H|623H}})</big>''' - On Clean Hit, it will launch opponents through the air. After landing, you can safejump using {{ComboText|{{clr|P|2P}} (Whiff), IAD {{clr|H|j.H}}}}. | |||
'''<big>Bandit Revolver (input: {{clr|K|236KK}})</big>''' - Grants a unique knockdown that causes the opponent to tumble backwards. It creates a lot of space between Sol and the opponent, but it also provides enough plus frames for Sol to dash back up and resume offense. | |||
'''<big>Bandit Bringer (input: {{clr|K|214K}})</big>''' - A bit tricky to land mid-combo, but it's just as rewarding as {{clr|D|2D}} on hit. Slightly delay Gun Flame after it connects to meaty them with the second flame column for plus frames. | |||
'''<big>Tyrant Rave (input: {{clr|H|632146H}})</big>''' - Only grants okizeme in the corner where it forces a Wall Break, though the high damage and Positive Bonus makes it worth it most of the time. While you're not at a big enough advantage to get a safejump here, an instant {{clr|K|236K}} will put you right in their face and at frame advantage (+4), or you can just dash up to them and meaty with {{clr|S|c.S}}. | |||
< | |||
{| | |||
| | |||
| | |||
}} | |||
'''<big>Heavy Mob Cemetery (input: {{clr|H|214214H}})</big>''' - Has weaker okizeme compared to most of Sol's other options, but still grants Sol enough advantage to perform a meaty {{clr|S|f.S}}. | |||
Note that {{clr|H|6H}} also causes hard knockdown, but isn't plus enough to do much with, so continue pressure at your own peril. | |||
===<big>Key Okizeme Options</big>=== | |||
'''<big>{{clr|S|c.S}}</big>''' - A fast, plus on block meaty. It has a long active duration and is highly rewarding on normal hit and Counter Hit. It can be dash canceled for throw mix-ups or pressure reset. It’s a key option for Sol’s okizeme due to its risk/reward ratio being skewed so heavily in favour of Sol. At best, you’ll get a combo and at worst, you’ll get plus frames. The exception is invincible reversals, which can power through strikes. You have to be ready to bait them and punish them. | |||
'''<big>Throws</big>''' - This is your option for opening up an opponent that blocks on wake up. Keep in mind that throws will lose to attacks or jumps on wake up, so you will need to condition the opponent to block by using strikes. Ground throw provides stronger okizeme than '''Wild Throw''' (input: {{clr|K|623K}}), but deals less damage. Throws have the added bonus of beating DPs, but they do not beat {{keyword|reversal}} Overdrives. | |||
'''<big>Gun Flame (input: {{clr|P|236P}})</big>''' - Meaty set-ups will allow Gun Flame to hit late, causing it to become plus on block. Gun Flame is useful because it allows Sol to enforce plus frames without needing to put himself at risk of reversals. The reward on hit is smaller than strikes, though. | |||
< | |||
'''<big>Fafnir (input: {{clr|H|41236H}})</big>''' - Certain knockdown situations leave Sol with enough advantage to go for a meaty Fafnir. If they strike, Fafnir will Counter Hit them for high damage conversions. In addition, Fafnir is a Guard Crush. This allows it to deal lots of chip damage, disable enemy Yellow Roman Cancels and crank up the opponent’s R.I.S.C. Level, should they block. It also provides +11 frame advantage, granting Sol a strong mix-up. Keep in mind that the opponent can interrupt Fafnir with a frame 1 invincible option or a throw, depending on distance. However, both of these options are heavily whiff punishable. Stay alert, and go for a bait and punish when you can. | |||
==External Resources== | ==External Resources== | ||
Check the [[../Resources|Resources]] page for other guides on how to use Sol. | |||
==Navigation== | ==Navigation== | ||
{{ | {{GGST/Navigation}} | ||
Latest revision as of 08:02, 14 April 2024
General Strategies
Sol does best at close range, so focus on staying on top of opponents with his powerful ![]() buttons. To get close, run and use f.S or Fafnir (input: 41236H), then use your plus frames to start your offense. If you're at mid range, use 2S, 6S, 6H, and Gun Flame (input: 236P) to poke and fish for a hit. At long range, Sol's only option is to use Night Raid Vortex (input: 214S) which, while a powerful option, is punishable on whiff or block. Try to only use it when you have 50% Tension for a Roman Cancel.
buttons. To get close, run and use f.S or Fafnir (input: 41236H), then use your plus frames to start your offense. If you're at mid range, use 2S, 6S, 6H, and Gun Flame (input: 236P) to poke and fish for a hit. At long range, Sol's only option is to use Night Raid Vortex (input: 214S) which, while a powerful option, is punishable on whiff or block. Try to only use it when you have 50% Tension for a Roman Cancel.
After knocking down an opponent, alternate between using a meaty normal like c.S or f.S (force opponents to respect your okizeme From Japanese "起き攻め". Attacking an opponent about to wake up after they were knocked down, usually with meaty attacks or mix-ups. by stuffing wake-up jumps or throws) or a throw like a ground throw or Wild Throw (input: 623K) (once they wake-up block to avoid being meatied, throws will punish their passivity). Once opponents begin attempting to mash out of pressure, frame trap using f.S, 6S or 5H for big damage on Counter Hit. If the opponent jumps out, either anti-air them with 5K, which can be jump canceled for a damaging combo on hit or dash canceled to reset pressure on block, or meet them in the air with an air throw. Sol's reward for landing an anti-air is significantly higher than most of the cast and showing that to the opponent will discourage them from jumping, allowing him to return to hit/throw mix-ups. This is the cycle of pain that is the key to winning with Sol.
Should Sol ever end up on the back foot, make use of his various defensive tools to turn the tide. Volcanic Viper (input: 623S or 623H) can punch a hole through gaps in pressure or sloppy okizeme. 2D and Night Raid Vortex can low profile When a character's hurtbox is entirely beneath an opponent's attack. This can be caused by crouching, certain moves, and being short. most pokes and projectiles; however, when using Night Raid Vortex to low profile certain moves (e.g ![]() Potemkin's Giganter Kai
Potemkin's Giganter Kai GuardAllStartup10+1Recovery17Advantage+100) you must be aware of lingering hitboxes near the opponent that will catch you after you hit them with Night Raid Vortex. Getting caught by these will subject you to being knocked down or losing your ability to follow up on the Night Raid Vortex. 6P, 5K, 2H, and Volcanic Viper can all be used to anti-air opponents who make predictable jump-ins. If all else fails, use a super to take your turn back by force.
Kara-Cancels
Kara Heavy Volcanic Viper (Kara HVV) is a technique used to move Sol forward in combos and connect his Heavy Volcanic Viper as a "clean-hit". This give's a special knock down and deals extra damage so it is extremely important for Sol's best routes. Sol can achieve this with the following methods.
6S~23H
By tapping 6S and very quickly doing the rest of the input for HVV, Sol will perform a kara that moves forward fairly significantly before the HVV activates. This is Sol's primary way to kara-cancel into HVV and achieve a clean hit.
(c.S/5K) > DC~623H
(c.S/5K) > 62DC~3H
Since the Dash cancel can act as something Sol can kara out of, He can achieve the same effect as 6S from dash-cancellable (DC) moves such as c.S and 5K. This method is generally more lenient than using 6S, but cannot accessed as often.
Sources: Ref1
Tension Usage
All characters get good mileage off of spending Tension on universal mechanics, such as Faultless Defense and Roman Cancel. As for character specifics, Sol can choose from Tyrant Rave (input: 632146H) and Heavy Mob Cemetery (input: 214214H). Heavy Mob Cemetery is a bit slow to start up, but has full guardpoint after super freeze, long range and is a throw. It can be used as a long-ranged punish in certain situations. Tyrant Rave is a more traditional Overdrive, primarily used as a powerful combo ender or as a reversal To perform an attack as soon as possible after getting knocked down or leaving hitstun/blockstun..
Advanced Roman Cancel Mix-Ups
One common usage of Roman Cancel is to use them during pressure to create stronger mix-ups than usual. Sol has access to particularly powerful Roman Cancel mix-ups, such as F-Shiki Sometimes known as "Fuzzy Overhead". When you are in blockstun, you can switch high/low blocking, but your blocking animation and hurtbox does not change until you leave blockstun or block another attack. F-Shikis take advantage of this and use overheads that would miss on crouching characters, but not on standing characters. mix-ups. After landing Fafnir (input: 41236H) on block, wait for Sol to recover, then use a forward dash input Blue Roman Cancel to lock the opponent in place. With the opponent stuck in Guard Crush, apply an instant high/low mix-up by mixing up j.P and 2D.[1]
It's also possible to use Roman Cancels to create left/right mix-ups. After certain knockdowns, use kara cancel Gun Flame (input: 236P) into a forward dash input Blue Roman Cancel, and then jump toward the opponent. By jumping over them, Sol will side switch, which forces the opponent to block the incoming Gun Flame in the other direction. Mix this up by occasionally going for an air backdash before side switching. Doing so will cause Sol to retain his side, which forces the opponent to block normally. By timing Sol’s air backdash right before Gun Flame makes contact with the opponent, the opponent won’t have enough time to react to whether or not you used air backdash, resulting in a true 50/50.[2]
As powerful as these Roman Cancel mix-ups are, it is worth noting that they have higher technical execution than Sol’s standard mix-ups. Beginners might need to rely entirely on basic mix-ups, such as strike/throw. However, it is only by incorporating advanced Roman Cancel mix-ups that a player can behold Sol's true strength.
Neutral
Round Start Options
Rounds start in the mid range, where Sol has several good tools. f.S is a strong, aggressive option. It enforces frame advantage on hit and block, and is very rewarding on Counter Hit. The low recovery frames of the move means that even if the opponent jumps, it will be difficult for them to whiff punish. 6S is another useful tool due to having longer range than f.S. If the opponent moves backwards to evade f.S, use 6S to catch them. 6S also benefits from having a disjointed hitbox, making it likely to win in trades. However, this option is fairly slow. If your opponent has a button that is faster than 6S and has enough range to connect from round start distance, they can use it to beat 6S reliably.
Your opponent might start going for 6P to utilize its upper-body invulnerability to beat out your aggressive options. In this situation, you can go for a move that hits low, such as microdash into 2D, to beat them. Backwards movement into 6S will give you an opportunity to punish not just a whiffed 6P, but also many other buttons. Moving back is also relatively safe, making it a strong option in many scenarios. It’s not fool-proof, however. If your opponent has a button with good speed and range, such as ![]() Ramlethal's f.S
Ramlethal's f.S GuardAllStartup11Recovery21Advantage-10 [-13], they can punish a backdash or initiate a blockstring against walking back. Using the occasional jump is a good way to throw your opponent off. Mix up all of your options to avoid becoming predictable. If you notice your opponent is very agressive round start, you can put all your eggs in one basket and round start DP Dragon Punch A move that has invulnerability during its startup, long recovery, and a rising motion.
Close Range / Brawling
Sol is an aggressive character, being up close and personal is his preferred range. At close range, Sol’s c.S is an amazing button. It has a +3 frame advantage on block and leads to strong combos on normal hit and Counter Hit. It’s very versatile during blockstrings, as it can gatling into ![]() ,
, ![]() ,
, ![]() and command normals and it's both jump and dash cancelable. f.S is similar to c.S, it has less flexible gatling routes but works at longer ranges. Sol also takes a step forward when using f.S, which means that if it's blocked, Sol is always in range for another one. Faultless Defense can push him out, though. Delay the follow-ups of the aforementioned moves to create oppressive frame traps. When your opponent is conditioned to block, mix in ground throws or Wild Throw (input: 623K) for a deadly strike/throw mix-up.
and command normals and it's both jump and dash cancelable. f.S is similar to c.S, it has less flexible gatling routes but works at longer ranges. Sol also takes a step forward when using f.S, which means that if it's blocked, Sol is always in range for another one. Faultless Defense can push him out, though. Delay the follow-ups of the aforementioned moves to create oppressive frame traps. When your opponent is conditioned to block, mix in ground throws or Wild Throw (input: 623K) for a deadly strike/throw mix-up.

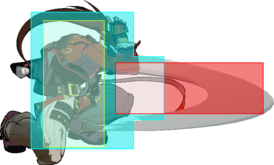
c.S Hitbox

f.S Hitbox

Wild Throw (input: 623K) Hitbox


Sol's lightning fast 5K further improves his strike/throw game and potential when brawling. At point-blank range, 5K hits at frame 3, which makes it excellent for contesting opponents. Sol can win many scramble situations with it, and it's also very rewarding for its speed. If your opponent reacts to your dash-in throws by jumping, you can use a dash-in 5K to punish them. This makes 5K a strong mix-up option for Wild Throw (input: 623K), especially so when used after landing c.S or f.S on block. 5K is one of the most versatile attacks in the game, it's impossible to overstate how good it is.
Sol’s 5P and 2P are also speedy options. They are not quite as fast or rewarding as 5K, but are much safer on whiff. It's a good idea to stagger Sol’s ![]() buttons and mix in throws for a strike/throw mix-up. Lastly, Sol's fastest low is 2K. It's not particularly important as Sol is primarily a strike/throw character. However, if you notice that your opponent has a tendency to stand block, this move will allow you to open them up.
buttons and mix in throws for a strike/throw mix-up. Lastly, Sol's fastest low is 2K. It's not particularly important as Sol is primarily a strike/throw character. However, if you notice that your opponent has a tendency to stand block, this move will allow you to open them up.

5K Hitbox

5P Hitbox

2P Hitbox

2K Hitbox


If your opponent manages to block one of your blockstrings and you need to safely disengage, special cancel into Gun Flame (input: 236P), which can catch them trying to mash. If they start respecting Gun Flame, throw them off with Gun Flame (Feint) (input: 214P). It fakes the animation of Gun Flame without actually shooting a projectile. This allows it to recover quickly, making it useful for resetting pressure against passive opponents or baiting jump-ins from an opponent who was expecting Gun Flame. Lastly, if you're feeling bold, 5D is a risky but very rewarding mix-up option. It is reactable, but if you condition your opponent to fear other options 5D can catch them by surprise.

5D Hitbox

Gun Flame (input: 236P) Early Hitbox

Gun Flame (input: 236P) Late Hitbox

Gun Flame (Feint) (input: 214P) Hurtbox


Pressuring with frame traps and strike/throw mix-ups is what defines Sol. Master mixing up your options and timing and you’ll quickly gain the upper hand thanks to Sol’s tremendous damage output. If your opponent struggles to deal with your offense, they might try to challenge you with invincible reversals. Be ready to bait them out and punish them.
Mid Range / Footsies
Sol prefers fighting close, but he is strong at mid range as well. The goal here is to use Sol’s larger attacks to create an opportunity to safely close the gap. 6S is his strongest mid-ranged poke. It has a large, disjointed hitbox and many effective cancel options. It's likely to score a Counter Hit or interrupt an approach when used in footsies range. If characters like ![]() Ky or
Ky or ![]() Leo give you trouble in mid range with their space control moves, use 6S to contest them. It’s a powerful tool, but don't over rely on it.
Leo give you trouble in mid range with their space control moves, use 6S to contest them. It’s a powerful tool, but don't over rely on it.
Sol's f.S is another excellent move. It has a +2 frame advantage on block and recovers quite quickly. Its range is better than the animation implies due to Sol taking a big step forward when using the move. In fact, the step forward is actually even larger than the pushback of f.S on block, causing Sol to close space. Due to its frame advantage and forward movement, connecting f.S on hit or block means that you have successfully moved into close range and can transition to Sol's ferocious pressure. f.S is also highly rewarding on both normal hit and Counter Hit. A more reserved option for when you want to poke without advancing forward is 2S. It starts up just as quickly as f.S, and while it doesn't have as much range, it still hits from a moderate distance relative to Sol's position. Furthermore, it has a disjointed hitbox, making it harder to counter poke. Both f.S and 2S can gatling into 5H for a frame trap.
Speaking of 5H, it can also be used as a powerful option in mid range. While more committal than f.S and 2S, it boasts an exceedingly disjointed hitbox and the highest reward out of all of Sol's mid range normals on Counter Hit thanks to its long slowdown duration.

6S Hitbox
f.S Hitbox

2S Early Hitbox

2S Late Hitbox

5H Hitbox


A counter strategy against mid-ranged pokes is to position oneself to make them whiff before approaching or contesting them with 6P. If your opponent attempts this, vary your timing and positioning more to throw them off. Stay sharp!
Sol has an excellent sweep in his 2D. It has good speed and range, and leads to strong okizeme From Japanese "起き攻め". Attacking an opponent about to wake up after they were knocked down, usually with meaty attacks or mix-ups.. Its low profile When a character's hurtbox is entirely beneath an opponent's attack. This can be caused by crouching, certain moves, and being short. properties gives it lots of flexibility. A risky but very rewarding option is 6H. It has the longest horizontal range of his normals, very fast start-up, and massive reward on Counter Hit. However, it has poor vertical range, long recovery on whiff, is unsafe on block, and it cannot be special canceled. Thus, it is a very committal attack that should be used carefully.
If you need a projectile, Gun Flame (input: 236P) is a solid one for mid range. It moves forward slowly, which causes it to leave Sol at an advantage if it is blocked at tip range, giving you an opportunity to close the gap. Its hitbox also hits fairly high, allowing it to snuff out opponents who recklessly use Instant Air Dash.

2D Hitbox

6H Hitbox
Gun Flame (input: 236P) Early Hitbox
Gun Flame (input: 236P) Late Hitbox


Sol's Bandit Revolver (input: 236K) is a flying knee kick which can be followed up with a spin kick by pressing ![]() a second time. The first hit moves Sol forward a decent amount and can lead to powerful counter hit combos. If the enemy tries to punish it, the second hit can be used to counter hit them and initiate a combo. This will dissuade them from challenging you, providing opportunities to mix up your options after the first hit.
a second time. The first hit moves Sol forward a decent amount and can lead to powerful counter hit combos. If the enemy tries to punish it, the second hit can be used to counter hit them and initiate a combo. This will dissuade them from challenging you, providing opportunities to mix up your options after the first hit.
Lastly, Sol can transition from mid range to close range by using Fafnir (input: 41236H), a forward-lunging Guard Crush. It leaves Sol at a massive +11 frame advantage on block, and is also very rewarding on Counter Hit. Fafnir’s range can be extended by combining it with a dash or kara canceling with 6S. However, Fafnir is vulnerable during its start-up. Characters with strong space controlling normals, such as ![]() Leo or
Leo or ![]() Nagoriyuki, can intercept the move quite easily. Don’t use it recklessly.
Nagoriyuki, can intercept the move quite easily. Don’t use it recklessly.

Bandit Revolver (input: 236K) Hitbox

Bandit Revolver (input: 236KK) Hitbox

Fafnir (input: 41236H) Hitbox


If you cycle Sol's mid-ranged moves well, your opponent might start approaching from the air to avoid having to contest with Sol at mid or close range. Sol is armed with many solid anti-airs, be ready to whip them out at a moment’s notice.
Long Range / Closing Space
Sol is lacking in meaningful options that reach full screen. Therefore, your goal at longer ranges is to find a way to close enough space to transition to mid range or close range tools. Understanding how to use basic movement options is key. Don’t make the mistake of running from full screen all the way to your opponent's face, as that makes your approach predictable and punishable with large attacks. You need to mix up your approach by dashing shorter distances and then blocking. You can also do a short dash into a long-ranged attack, such as 6S, but don’t get predictable. Air dashing is also a good tool for closing space. Mix air dash into aerial attacks with air dash to block.
Sol has several special moves that move him forward a fair bit. Night Raid Vortex (input: 214S) is a low profile When a character's hurtbox is entirely beneath an opponent's attack. This can be caused by crouching, certain moves, and being short. attack that slides forward across the ground. The range can be extended to reach full screen by holding the ![]() button. It’s useful for slipping under many pokes and projectiles, but be careful of attacks that hit low to the ground, such as sweeps and 2S. It leads to powerful combos on normal hit and Counter Hit, but is punishable on block. The move is best used when you have 50% Tension, as you can take advantage of its strengths and Roman Cancel it for safety on block.
button. It’s useful for slipping under many pokes and projectiles, but be careful of attacks that hit low to the ground, such as sweeps and 2S. It leads to powerful combos on normal hit and Counter Hit, but is punishable on block. The move is best used when you have 50% Tension, as you can take advantage of its strengths and Roman Cancel it for safety on block.

Night Raid Vortex (input: 214S) - Low profile

Night Raid Vortex (input: 214S) - Active frames


Sol can also close space by using Fafnir (input: 41236H), a forward-lunging Guard Crush. It leaves Sol at a massive +11 frame advantage on block, and is also very rewarding on Counter Hit. Fafnir can carry dash momentum to increase its range. It can also be kara canceled from 6S for a range increase. Combining both together allows Fafnir to travel nearly fullscreen. However, Fafnir is vulnerable during its start-up. Exercise caution, especially if your opponent has strong space control tools.
Bandit Bringer (input: 214K) is a diving punch attack. It hits overhead, but is reactable. It moves Sol forward a decent amount and leads to an RPS situation on block. It can be used as a risky approach option and can be initiated either from the ground or the air. Dashing forward into 214K can be used to add to the opponent's mental burden. If used in the air, the ![]() button can be held down to delay the timing of the attack. If the opponent tries to challenge 214K with anti-airs, delaying the attack can throw off their timing. It also grants strong okizeme From Japanese "起き攻め". Attacking an opponent about to wake up after they were knocked down, usually with meaty attacks or mix-ups. on hit.
button can be held down to delay the timing of the attack. If the opponent tries to challenge 214K with anti-airs, delaying the attack can throw off their timing. It also grants strong okizeme From Japanese "起き攻め". Attacking an opponent about to wake up after they were knocked down, usually with meaty attacks or mix-ups. on hit.
Fafnir (input: 41236H) Hitbox

Bandit Bringer (input: 214K) Hitbox

Air-to-Air
j.P - Sol's fastest aerial attack. Its speed and short recovery makes it effective as an air-to-air. It can combo into Bandit Revolver (input: 236KK) for a knockdown.
j.K - Has a larger hitbox than j.P but also more recovery on whiff. It can lead to combos due to being air dash cancelable. If your opponent has their back to the wall, it can chain into j.D.
j.D - Has less recovery than j.K but is also a tad slower. The hitbox is chunky, and damage is good. Useful when your opponent is cornered as the wall bounce can result in big conversions.

j.P Hitbox

j.K Hitbox

j.D Hitbox


Jump-In
j.S - A premier jump-in option due to having a good hitbox below Sol. It’s also jump and air dash cancelable, which can come in handy.
j.H - Has two hits. When done from an Instant Air Dash, the second hit will connect just before Sol hits the ground, allowing it to combo into 5K confirms. Very useful from an air dash as a result.

j.S Hitbox

j.H Early Hitbox

j.H Middle Hitbox

j.H Late Hitbox


Defense
Defensive System Mechanics
Faultless Defense, Psych Burst and Yellow Roman Cancel are cornerstones of defense in Guilty Gear, as they are quite handy for breaking out of pressure. Utilizing them well is essential for mastering any character. They all cost a resource though, so think about how you use them.
- GGST/Mechanics#Faultless Defense
- GGST/Mechanics#Psych Burst
- GGST/Mechanics#Yellow Roman Cancel
- GGST/Mechanics#Deflect Shield
Instant Block
While not as essential as the above three, Instant Block is a powerful tool that Sol can use even better than most of the cast. Though difficult to apply, there are setups to make it easier, and practise can go a long way in making it more consistent to use.
The main reason Sol is great at using Instant Block lies in one of his strongest options, his 5K GuardAllStartup3Recovery25Advantage-16; its blazing fast startup is balanced by the short horizontal range of both hits, but as Instant Blocking negates all pushback, it allows Sol to use 5K to punish conventionally safe attacks (such as
 ![]() Giovanna's 214K
Giovanna's 214K GuardAllStartup13Recovery20Advantage-4) and convert into a knockdown, giving him fantastic reward from proper defensive play if it is mastered.
Counter Pokes
Counter poking is the act of attacking preemptively for the purpose of interrupting the opponent’s actions. By placing hitboxes in front of your character, the opponent runs the risk of being hit out of their forward movement or being counter hit out of their attacks. Counter pokes are key for playing a preventive playstyle, which is useful against aggression. The best counter pokes are typically long-ranged, highly active, quick to recover, protected by invulnerability of some kind, or a combination of these traits.
6P - A useful anti-air and couter-poke. See here for more basic information about 6P.
6S - An excellent button because of its long horizontal range. It also has a wide range of cancel options. Use it from ranges where 6P won't reach.
2S - A speedy option with decent range and a disjointed hitbox. It also hits low and is relatively safe on whiff. A great option when you need a non-committal poke to keep the opponent on their toes.
5H - A powerful normal with a very disjointed hitbox. On Counter Hit, the long slowdown duration enables a wide variety of potential combo follow-ups.
2D - A low sweep with very good low profile When a character's hurtbox is entirely beneath an opponent's attack. This can be caused by crouching, certain moves, and being short. properties. It leads into strong okizeme From Japanese "起き攻め". Attacking an opponent about to wake up after they were knocked down, usually with meaty attacks or mix-ups. on normal hit or powerful combos on Counter Hit. A classic option due to its versatility and effectiveness.

6P Hitbox

6S Hitbox
2S Late Hitbox

5H Hitbox
2D Hitbox

Anti-Airs
Anti-airs, as the name suggests, are moves that are useful against aerial opponents. They are typically either fast, high-reaching, protected by invulnerability of some kind, or a combination of these traits. Sol has five effective anti-airs: 6P, 5K, Air Throw, ![]() Volcanic Viper (input: 623S) and
Volcanic Viper (input: 623S) and ![]() Volcanic Viper (input: 623H).
Volcanic Viper (input: 623H).
6P - A safe and reliable option due to its upper body invulnerability. Easily confirms into Bandit Revolver (input: 236KK) on Counter Hit. A useful option in many instances.
5K - Faster than 6P but lacks upper body invulnerability. It can catch opponents trying to jump during close range brawling. It's also quite rewarding on hit.
Air Throw - A useful anti-air for all characters, especially against opponents that like to jump into block.
Volcanic Viper (input: 623S or 623H) - Has high reach and full strike invulnerability. Both versions are safe on air block, making them very useful anti-airs. The ![]() version deals more damage, especially so on a Clean Hit, but the
version deals more damage, especially so on a Clean Hit, but the ![]() version is much harder to punish on whiff. Choose carefully. The move is very handy in certain match-ups, such as against
version is much harder to punish on whiff. Choose carefully. The move is very handy in certain match-ups, such as against ![]() Chipp's j.2K
Chipp's j.2K GuardHighStartup16RecoveryUntil Landing+8Advantage+3 (IAD).

6P Hitbox
5K Hitbox

 Volcanic Viper (input: 623S) Late Hitbox

 Volcanic Viper (input: 623H) Late Hitbox


Abare
Abare means to attack during an opponents frame advantage with the intention of interrupting their pressure. Naturally, fast moves work best for this task.
5K - At close range, this move hits at frame 3, making it Sol's fastest move. It's tied for the fastest attack in the game with ![]() Chipp's 5P
Chipp's 5P GuardAllStartup3Recovery10Advantage-2, and is Sol's best abare option by extension. It combos into 2D > Bandit Revolver (input: 236KK) for a meterless knockdown, an amazing feat considering its lightning-fast speed. Get used to using this and your opponent will be more scared of pressuring you.
2D - Much slower at 10 frames, but it has very good low profile When a character's hurtbox is entirely beneath an opponent's attack. This can be caused by crouching, certain moves, and being short. properties. It's quite rewarding on Counter Hit, use it if you predict that your opponent will use a move with a high hitbox.
5K Hitbox

2D Hitbox
Sol's reversal To perform an attack as soon as possible after getting knocked down or leaving hitstun/blockstun. can also be used for abare due to their invulnerability. Do note that ![]() Volcanic Viper (input: 623S) loses to throws in some situations where attacking will not.
Volcanic Viper (input: 623S) loses to throws in some situations where attacking will not.
Reversals
Invincible reversals are moves used to steal your turn back by force. They can be used during holes in an opponent's blockstrings or during your wake-up to punish sloppy okizeme. Sol has two reversals to choose from: ![]() Volcanic Viper (input: 623S) and Tyrant Rave (input: 632146H)
Volcanic Viper (input: 623S) and Tyrant Rave (input: 632146H)
![]() Volcanic Viper (input: 623S) - Functions as an invincible reversal To perform an attack as soon as possible after getting knocked down or leaving hitstun/blockstun. due to its frame 1 strike invulnerability. Volcanic Viper does have some exploitable weaknesses that need to be taken into consideration. The first is that it's vulnerable to throws during the start-up. The second is that it's punishable on block. If your opponent is alert enough to predict Volcanic Viper, you should use it more sparingly. Feel free to go nuts with it if they don't know how to deal with it, or if they attack into your wake-up in a predictable manner.
Volcanic Viper (input: 623S) - Functions as an invincible reversal To perform an attack as soon as possible after getting knocked down or leaving hitstun/blockstun. due to its frame 1 strike invulnerability. Volcanic Viper does have some exploitable weaknesses that need to be taken into consideration. The first is that it's vulnerable to throws during the start-up. The second is that it's punishable on block. If your opponent is alert enough to predict Volcanic Viper, you should use it more sparingly. Feel free to go nuts with it if they don't know how to deal with it, or if they attack into your wake-up in a predictable manner.
Tyrant Rave (input: 632146H) - An Overdrive with frame 1 invulnerability against both strikes and throws. It is punishable on block, but can be Roman Canceled for safety. This would end up costing 100% Tension though. The hefty Tension cost means that 623H is a much more economic high-risk high-reward option. 623H can be Roman Canceled on hit to make up for the damage discrepancy, and can also be Roman Canceled for safety on block. Tyrant Rave does have throw invulnerability though. If all else fails, it can be used as an expensive cover-all option to take your turn back by force.
 Volcanic Viper (input: 623S) Early Hitbox

Tyrant Rave (input: 632146H) Early Hitbox


Pressure
Among Sol's many strengths, his pressure stands out as being truly exceptional. Clever use of his pressure tools will allow you to obliterate opponents thanks to Sol's tremendous damage output. Mastering Sol's pressure is essential for a Sol player who strives to make the most of the character.
Strike / Throw Mix-Up
Sol's offensive is relatively freeform, focused primarily on using his powerful strike/throw mix-ups to make the opponent commit to jumps or mashing out of blockstrings. After initiating any blockstring, you have the options of either continuing the string or mixing in a throw. Your opponent has three main options: continuing to block, jumping or attacking. Choosing to finish the string with strikes will interrupt jumps or attacks, but gives up your turn against blocking opponents. Throwing will open them up if they block, but loses to jumping and attacking.
There are several ways to initiate strike / throw mix-ups. Connecting Sol's f.S on hit or block is one of the simplest ways of doing it. You can also meaty their wake-up with either c.S or a ground throw. If you connect a move and knock them down, meaty them again. They will be forced to block at some point, which allows you to transition to Sol’s various blockstrings to frame trap them.
Ground Throw vs Wild Throw - which is better?
Sol’s mix-ups are primarily strike/throw based. For throws, Sol has two options: a normal ground throw and Wild Throw (input: 623K). How do we know which option to go for? Let’s examine their advantages.
Advantages of Ground Throw
- Faster to come out (2 frame start-up instead of 6 frames)
- Provides the ability to choose between switching sides or keeping sides (Wild Throw forces side switch)
- Leads to stronger okizeme
Advantages of Wild Throw
- More range (120 range vs 90 range)
- Throw invulnerable during start-up
- Untechable
- Much more powerful (100 damage vs 80 damage)
These advantages can make it seem like Wild Throw is the superior option, as it is more powerful and more likely to hit due to its longer range and throw invulnerability. Its advantages are certainly easier to understand. However, the advantages of normal throws are quite impactful in many situations. Its faster start-up makes it a better option for escaping pressure. Stronger okizeme means that you are more likely to keep momentum after landing it. The ability to choose whether or not to switch sides without spending Tension gives Sol the ability to keep a cornered opponent in the corner.
There are also situations where Wild Throw is superior. For example, if your opponent’s life is in the range where Wild Throw can K.O. but a normal throw can not, the former is clearly the better option. In addition, Wild Throw is better against certain player habits. If you notice that your opponent prefers blocking and throwing over other options on their wake-up, Wild Throw will allow you to cover both options, whereas normal throws will be teched if they throw.
To summarize, both throws have their own uses. Wild Throw is more immediately rewarding and there are situations where it covers more options. However, certain circumstances make normal ground throws more beneficial in the long run, either by maintaining momentum, utilizing resources, or keeping stage positioning. Choose wisely!
Pressure Resets
When pressuring with blockstrings, varying your offense is key to opening up your opponent. If you employ frame traps in a predictable manner, your opponent can simply block until you reach the end of the blockstring. Throws are vital for opening them up, but the timing of throws must be varied, lest a skilled opponent catches on to your timing and employs counter-play. It is with the help of pressure resets that throws can be made more ambiguous.
After c.S or f.S, try using the plus frames to go for another f.S or a dash into another c.S. This will reset pressure, extending the blockstring and increasing the amount of opportunities you have for mixing in throws. The more ambiguous your mix-up becomes, the greater the chance that your opponent will make a mistake. Resetting pressure also increases the mental burden on your opponent due to the R.I.S.C. Level increasing and the ever-looming threat of throws. They have to try to escape eventually, which provides you with opportunities to punish if you have the right read.
Another way to reset pressure is with Gun Flame (Feint) (input: 214P). Sol’s blockstrings are typically ended with Gun Flame (input: 236P), if you notice that your opponent respects Gun Flame, Gun Flame (Feint) can be used instead, as it fakes the animation of Gun Flame without actually shooting a projectile. This allows it to recover quickly, giving Sol an opportunity to reset pressure with f.S. Gun Flame (Feint) is also useful for baiting and punishing jump-ins from an opponent who was expecting Gun Flame.
Sample Blockstrings
The following are some basic, useful blockstrings. If you're new to Sol, these will help you get your gameplan started.
- 5K > 6S > (dl) 236P
Natural frame trap into 6S. If 6S hits at close range or on Counter Hit, it naturally combos into Gun Flame (input: 236P), although landing a ground hit Gun Flame typically doesn't lead into a full combo extension outside of the corner, so try to confirm into Bandit Revolver (input: 236K) instead. Gun Flame can end your blockstring safely but it can also be delayed to frame trap as well.
- c.S > (dl) f.S > (dl) 5H > (dl) 236P
This string is a true blockstring if done as fast as possible or it can have several frame traps in it if manual delays are used. Note that 5H has a lot of pushback so it won't true blockstring into Gun Flame if c.S wasn't done at point blank range or if they use Faultless Defense. If either c.S or f.S are Counter Hits, microdash into a c.S for a devastating combo. If 5H Counter Hits, cancel into Bandit Revolver and link it into c.S for a even more devastating combo.
- c.S > (dl) f.S, 5K(2) > 6S > (dl) 236P
Combines both previous strings for an even longer one with even more frame trap potential. Same logic as each prior one, however 5K will only hit once without a microdash and at that range it will whiff against crouching opponents. You can microdash to avoid this but it's normally a 3 frame gap so the dash will widen the gap enough for most characters to contest it with a jab. If you go for 5K after a dash momentum f.S, Sol should be close enough that no microdash is needed to connect with the first hit of 5K. Note that if 5K catches them jumping you get a juggle combo with lots of corner carry and high damage.
- 6S > (dl) 236P
A variant of the first blockstring but modified to work in the mid range. 6S is a natural combo into Gun Flame on Counter Hit at most ranges, but you won't get anything else from it, so try to confirm into Bandit Revolver instead. Gun Flame can end your blockstring safely but it can also be delayed to frame trap as well. The Gun Flame frame trap is especially dangerous when the opponent is cornered, as it can combo into Fafnir (input: 41236H) for an extended juggle.
- 2K > 2D > (dl) 236P
A string that starts from a low. Hitting your opponents with more niche strings like this one is important to avoid becoming predictable. You can also delay 2D for a frame trap or replace it with 5D for a mix-up.
- 41236H, 6S > (dl) 236P
Fafnir (input: 41236H) is a Guard Crush, which comes with many good properties. Guard Crushes disable enemy Yellow Roman Cancels, deal lots of chip damage, crank up the foe's R.I.S.C Level like crazy and cause massive amounts of blockstun. Fafnir's frame advantage is a whopping +11, enabling powerful mix-ups. 6S is a great frame trap due to being a 15 frame move, leaving only a 4 frame gap. This is too short for any move with enough range to reach. If the opponent respects your frame advantage, mix them up with a throw.
Corner Pressure
f.S's weakness to Faultless Defense is accentuated in the corner, which forces Sol to mix up his strings more. Most often, Sol will find himself about half the screen away on an opponent actively defending themselves, which puts him in a great position to stop escapes. Using pre-emptive ground buttons can stop ground escapes and his air throw is excellent for stopping air escapes. Once your opponent has been conditioned to sit still, he can run back in and restart his pressure or disrespect with a ground throw. Sol can also force respect with 6S > Gun Flame (input: 236P), which leads to its own guessing game. Gun Flame is vulnerable to Instant Air Dash, so mixing it up with Gun Flame (Feint) (input: 214P) can help trick someone into taking their turn at the wrong time. Max range Gun Flame is usually followed by f.S or 6S to force respect. Once respect is established, Sol can regain his turn with Fafnir (input: 41236H).
A very important thing to discourage when doing corner pressure and especially when using f.S is mashing. Due to the gap between f.S > f.S, as well as the move's weakness to low profile, many players will opt to mash 2K or 6P against it early in your pressure. While these options can be punished heavily using 5H frame traps, there's no guarantee that the opponent will press; as a result, a strong option is to let them block your attack of choice (with c.S and f.S being prominent examples) and simply hold down-back for a little bit. If they mash, their attack will either whiff entirely due to pushback, or you'll be safe and block, which isn't as threatening without meter to enforce their turn, especially since Faultless Defense is so appealing against Sol when in the corner. If they don't mash, you can take your turn by pressing again; this also lets you gain information on their defensive habits (such as backdash, up-back, continuing to block), which will allow for stronger punishes once you know to look for them.
Okizeme
Sol's mix-ups are very powerful, and okizeme From Japanese "起き攻め". Attacking an opponent about to wake up after they were knocked down, usually with meaty attacks or mix-ups. is no exception. He can apply his basic strike / throw mix-up or go for okizeme specific options. Different moves result in different types of knockdowns and leave Sol at varying amounts of plus frames. In addition, stage positioning can also have an impact on the okizeme situation. It’s important to learn what Sol’s options are off of every move.
Key Knockdown Moves
2D - Can be canceled into Gun Flame (Feint) (input: 214P), which if followed up with an immediate Gun Flame (input: 236P) will meaty the opponent's wake-up with the second fire column, leaving Sol plus on block.
5D - Leads into a powerful combo and knockdown if charged, but it's punishable on block. Use it with discretion.
Throws - Grants knockdowns, the okizeme is especially powerful if the opponent is thrown into the corner. Mid screen, you can IAD Back > j.H for an easy safejump. Wild Throw (input: 623K) deals more damage, but leads to significantly weaker okizeme.
![]() Volcanic Viper (input: 623H) - On Clean Hit, it will launch opponents through the air. After landing, you can safejump using
Volcanic Viper (input: 623H) - On Clean Hit, it will launch opponents through the air. After landing, you can safejump using 2P (Whiff), IAD j.H.
Bandit Revolver (input: 236KK) - Grants a unique knockdown that causes the opponent to tumble backwards. It creates a lot of space between Sol and the opponent, but it also provides enough plus frames for Sol to dash back up and resume offense.
Bandit Bringer (input: 214K) - A bit tricky to land mid-combo, but it's just as rewarding as 2D on hit. Slightly delay Gun Flame after it connects to meaty them with the second flame column for plus frames.
Tyrant Rave (input: 632146H) - Only grants okizeme in the corner where it forces a Wall Break, though the high damage and Positive Bonus makes it worth it most of the time. While you're not at a big enough advantage to get a safejump here, an instant 236K will put you right in their face and at frame advantage (+4), or you can just dash up to them and meaty with c.S.
Heavy Mob Cemetery (input: 214214H) - Has weaker okizeme compared to most of Sol's other options, but still grants Sol enough advantage to perform a meaty f.S.
Note that 6H also causes hard knockdown, but isn't plus enough to do much with, so continue pressure at your own peril.
Key Okizeme Options
c.S - A fast, plus on block meaty. It has a long active duration and is highly rewarding on normal hit and Counter Hit. It can be dash canceled for throw mix-ups or pressure reset. It’s a key option for Sol’s okizeme due to its risk/reward ratio being skewed so heavily in favour of Sol. At best, you’ll get a combo and at worst, you’ll get plus frames. The exception is invincible reversals, which can power through strikes. You have to be ready to bait them and punish them.
Throws - This is your option for opening up an opponent that blocks on wake up. Keep in mind that throws will lose to attacks or jumps on wake up, so you will need to condition the opponent to block by using strikes. Ground throw provides stronger okizeme than Wild Throw (input: 623K), but deals less damage. Throws have the added bonus of beating DPs, but they do not beat reversal To perform an attack as soon as possible after getting knocked down or leaving hitstun/blockstun. Overdrives.
Gun Flame (input: 236P) - Meaty set-ups will allow Gun Flame to hit late, causing it to become plus on block. Gun Flame is useful because it allows Sol to enforce plus frames without needing to put himself at risk of reversals. The reward on hit is smaller than strikes, though.
Fafnir (input: 41236H) - Certain knockdown situations leave Sol with enough advantage to go for a meaty Fafnir. If they strike, Fafnir will Counter Hit them for high damage conversions. In addition, Fafnir is a Guard Crush. This allows it to deal lots of chip damage, disable enemy Yellow Roman Cancels and crank up the opponent’s R.I.S.C. Level, should they block. It also provides +11 frame advantage, granting Sol a strong mix-up. Keep in mind that the opponent can interrupt Fafnir with a frame 1 invincible option or a throw, depending on distance. However, both of these options are heavily whiff punishable. Stay alert, and go for a bait and punish when you can.
External Resources
Check the Resources page for other guides on how to use Sol.